Create your own Code Editor with React


Microsoft created Monaco Editor, a browser-based code editor that works with many of their products, including VS Code, Azure DevOps, and Visual Studio Online. The Monaco Editor is designed to provide a quick and efficient coding experience, including auto-completion and syntax highlighting. It also supports a variety of programming languages and technologies, such as JavaScript, TypeScript, HTML, and CSS. This article will show how to use it to create your own editor page.

Discover how at OpenReplay.com.
Building a code editor application with React and the React-Monaco-Editor library allows developers to craft advanced code editing environments within their web apps. React, a widely-used JavaScript library for crafting user interfaces, offers a strong basis for developing dynamic and interactive components. Leveraging the React-Monaco-Editor library, built on the powerful Monaco Editor from Microsoft, provides a feature-rich editing experience, including syntax highlighting, code completion, and more. This combination allows developers to create professional-grade code editors that are highly customizable and optimized for performance. This tutorial will explore how to set up a project, create a code editor component, and enhance it with various features using React and the React-Monaco-Editor library.
The React Monaco Editor is a powerful code editor component based on the Monaco Editor by Microsoft. Here are several key aspects that underscore its importance:
-
Rich Feature Set: It provides a wide range of essential coding features, such as syntax highlighting, code completion, and code folding, making it easier and more efficient for developers to write code.
-
Customization: React Monaco Editor can be easily customized to fit specific requirements, including theme customization and adding custom languages and features.
-
Performance: It is highly optimized for performance, providing smooth editing even for large files and complex codebases.
-
Integration: It integrates seamlessly with React applications, offering a React component that can be easily added to any React project.
-
Compatibility: Since it is based on the Monaco Editor, which powers Visual Studio Code, it provides a familiar editing experience for many developers.
-
Community and Support: Being a popular library, React Monaco Editor has a strong community and is well-maintained, ensuring ongoing support and updates.
Setting up the Development Environment
First of all, we have to create a React project app by running the command:
npx create-react-app react-monaco-appNext, we’ll install dependencies and libraries that we’ll use later on, such as react-monaco-editor. For styling, we’ll install Chakra UI to build beautiful and accessible user interfaces.
npm i @monaco-editor/react
npm i @chakra-ui/react @emotion/react @emotion/styled framer-motion
Creating the Code Editor Component
Before building our code components, let’s configure our file structure by clearing the excess boilerplate and some other unwanted files in our React app. In our index.js, we’ll wrap our App.js component with ChakraProvider, just as we have below:
//index.js//
import { ChakraProvider } from "@chakra-ui/react";
const root = ReactDOM.createRoot(document.getElementById("root"));
root.render(
  <React.StrictMode>
    <ChakraProvider>
      <App />
    </ChakraProvider>
  </React.StrictMode>,
);
The <ChakraProvider> component helps in setting up Chakra UI in our React application. It provides theme configuration, styled-components, global styles, and accessibility features, enabling us to build the code editor interface.
Build The Code Editor Component
To begin developing the code editor in React, we’re going to create a components folder that will house our code editor component, so we’ll create an EditorWindow.jsx file and paste the following code:
//EditorWindow.jsx//
import { Box } from "@chakra-ui/react";
import { Editor } from "@monaco-editor/react";
function EditorWindow() {
  return (
    <Box>
      <Editor
        height="90vh"
        defaultLanguage="javascript"
        defaultValue="// some comment"
      />
      ;
    </Box>
  );
}
export default EditorWindow;
We create a simple code editor window using the Monaco editor library and wrap it in a layout container from Chakra UI.
After which, we update our App.js file by importing EditorWindow to the App as follows:
//App.js//
import { Box } from "@chakra-ui/react";
import EditorWindow from "./components/EditorWindow";
function App() {
return (
<Box minH="100vh" bg="#daf5ed" color="gray.500" px={6} py={8}>
<EditorWindow />
</Box>
);
}
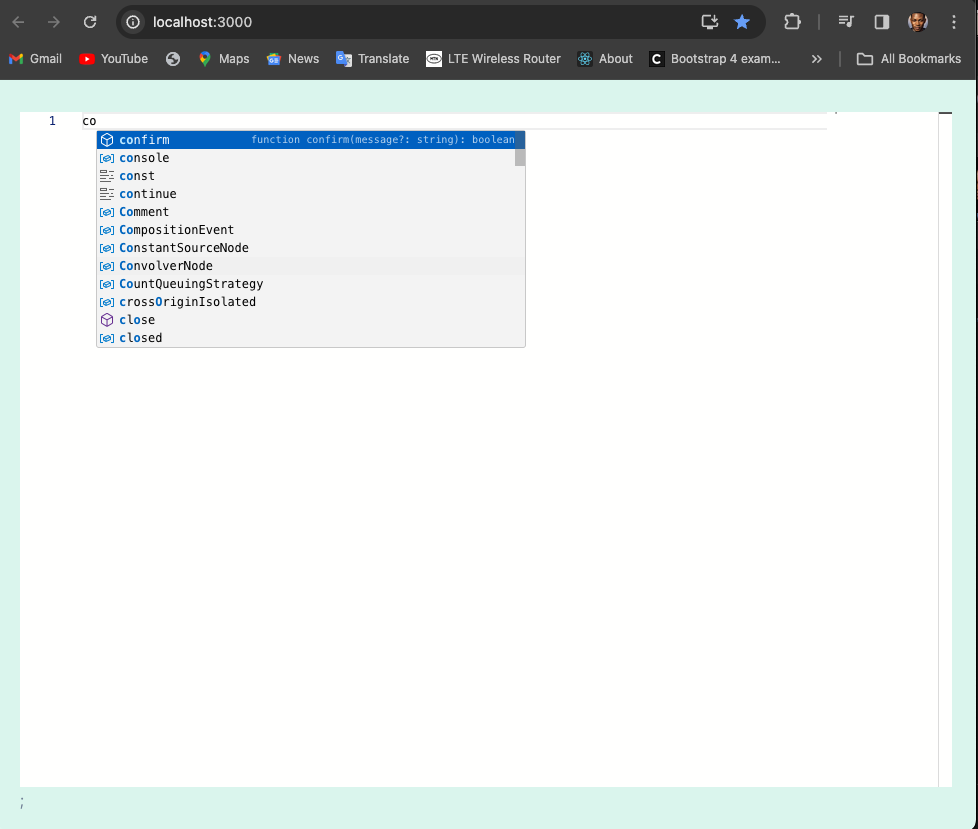
export default App;In our App.js above, we define the main layout and render the EditorWindow component within it, so when we go to our browser, our code editor is set, and we can start writing some scripts.
Manage State to Store Our Value
State management is key to effectively storing and manipulating data within our application. We’ll add some state to our editor to store any value of code we’re writing.
//EditorWindow.jsx//
import React, { useRef, useState } from "react";
import { Box } from "@chakra-ui/react";
import { Editor } from "@monaco-editor/react";

const INITIAL_VALUE = "// some comment";
const DEFAULT_LANGUAGE = "javascript";

function EditorWindow() {
  const editorRef = useRef(null);
  const [value, setValue] = useState(INITIAL_VALUE);

  const handleMount = (editor) => {
    editorRef.current = editor;
    editor.focus();
  };

  const handleChange = (newValue) => {
    setValue(newValue);
  };

  return (
    <Box>
      <Editor
        height="90vh"
        defaultLanguage={DEFAULT_LANGUAGE}
        defaultValue={INITIAL_VALUE}
        onMount={handleMount}
        value={value}
        onChange={handleChange}
      />
    </Box>
  );
}

export default EditorWindow;
We manage the state of the code editor by using the useState hook to store the editor’s content and the useRef hook to store a reference to the editor instance. The code also handles mounting the editor and updating its values when the user types.
Multiple Language Support
We must provide language selection capabilities to make our code editor more adaptable and support numerous programming languages. To this end, we’re going to build a menu button that functions more like a language selector.
Under our root directory, we’ll create a file called constants, and from there, we’ll export languages and their versions. These languages and their versions are specific to our API request, which we’ll come across in this tutorial. We’ll create a constants.js file and input the following code:
//constants.js//
export const LANG_VERSIONS = {
  javascript: "18.15.0",
  typescript: "5.0.3",
  python: "3.10.0",
};
We’ll create LangSwitch.jsx in our components folder and import the following code:
//LangSwitch.jsx//
import React from "react";
import {
  Box,
  Button,
  Menu,
  MenuButton,
  MenuItem,
  MenuList,
  Text,
} from "@chakra-ui/react";
import { LANG_VERSIONS } from "../constants";
const LangSwitch = ({ language, onSelect }) => {
  const languages = Object.entries(LANG_VERSIONS);
  return (
    <Box ml={2} mb={4}>
      <Text mb={2} fontSize="lg">
        Language:
      </Text>
      <Menu>
        <MenuButton as={Button}>{language}</MenuButton>
        <MenuList>
          {languages.map(([language, version]) => (
            <MenuItem key={language} onClick={() => onSelect(language)}>
              {language}
              <Text as="span" color="gray.600" fontSize="sm">
                ({version})
              </Text>
            </MenuItem>
          ))}
        </MenuList>
      </Menu>
    </Box>
  );
};
export default LangSwitch;
We created a language switcher component using Chakra UI components. It allows users to select a programming language from a drop-down menu and displays the corresponding version information.
We’ll also make an update to our EditorWindow.jsx file with a state to update the code editor when a particular language is selected below:
//EditorWindow.jsx//
import React, { useRef, useState } from "react";
import { Box } from "@chakra-ui/react";
import { Editor } from "@monaco-editor/react";
import LangSwitch from "./LangSwitch";

function EditorWindow() {
  const [language, setLanguage] = useState("javascript");
  const editorRef = useRef(null);

  const handleLanguageChange = (newLanguage) => {
    setLanguage(newLanguage);
  };

  return (
    <Box>
      <LangSwitch language={language} onSelect={handleLanguageChange} />
      <Editor
        height="90vh"
        defaultLanguage={language} // Update editor language based on state
        // ... other editor props
        ref={editorRef} // Assign editor reference
      />
    </Box>
  );
}

export default EditorWindow;
This code manages the state of which programming language is being used. When you click on a language switcher and select a new language, the window then updates to show the code in the new language you picked.
We’ll also update our LangSwitch.jsx by passing the onSelect function to the component.
//LangSwitch.jsx//
import React from "react";
import {
  Box,
  Menu,
  Button,
  MenuButton,
  MenuList,
  MenuItem,
  Text,
} from "@chakra-ui/react";
import { LANG_VERSIONS } from "../constants";
const LangSwitch = ({ language, onSelect }) => {
  const languages = Object.entries(LANG_VERSIONS);
  return (
    <Box ml={2} mb={4}>
      <Text mb={2} fontSize="lg">
        Language:
      </Text>
      <Menu>
        <MenuButton as={Button}>{language}</MenuButton>
        <MenuList>
          {languages.map(([language, version]) => (
            <MenuItem key={language} onClick={() => onSelect(language)}>
              {language}
              <Text as="span" color="gray.600" fontSize="sm">
                ({version})
              </Text>
            </MenuItem>
          ))}
        </MenuList>
      </Menu>
    </Box>
  );
};
export default LangSwitch;
When you click on a language in the menu, it triggers a function called onSelect that tells the parent component which language you picked. This allows the parent component to update the display to show code in the selected language.
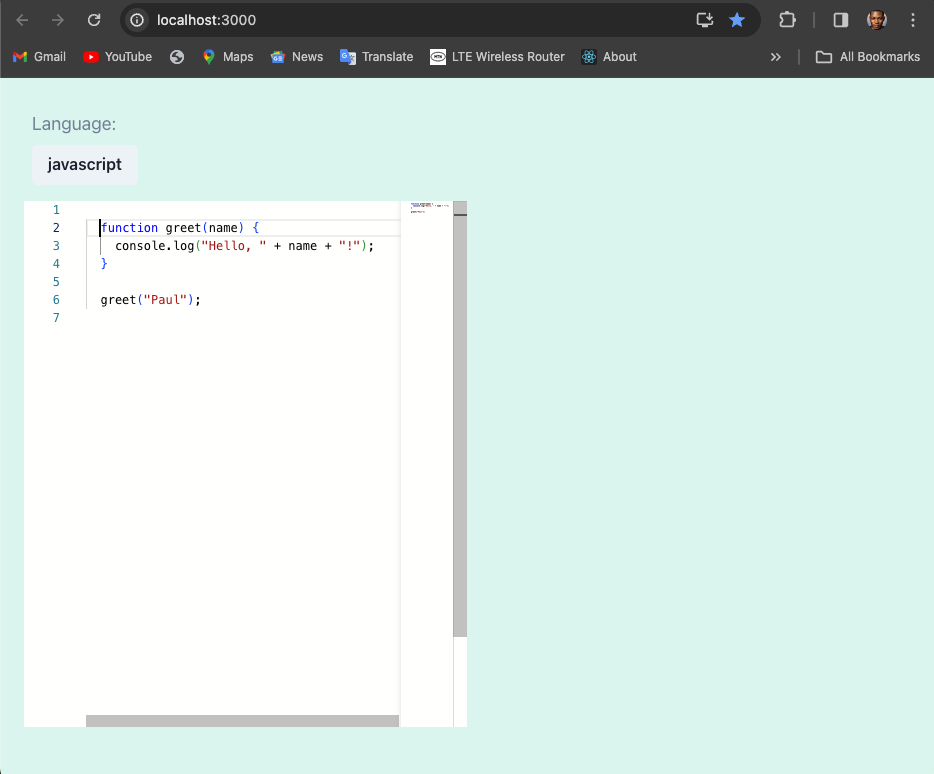
Back to our EditorWindow.jsx, we’ll get rid of the defaultLanguage="javascript" and pass in language, and the value for the language is our listed language.
//EditorWindow.jsx//
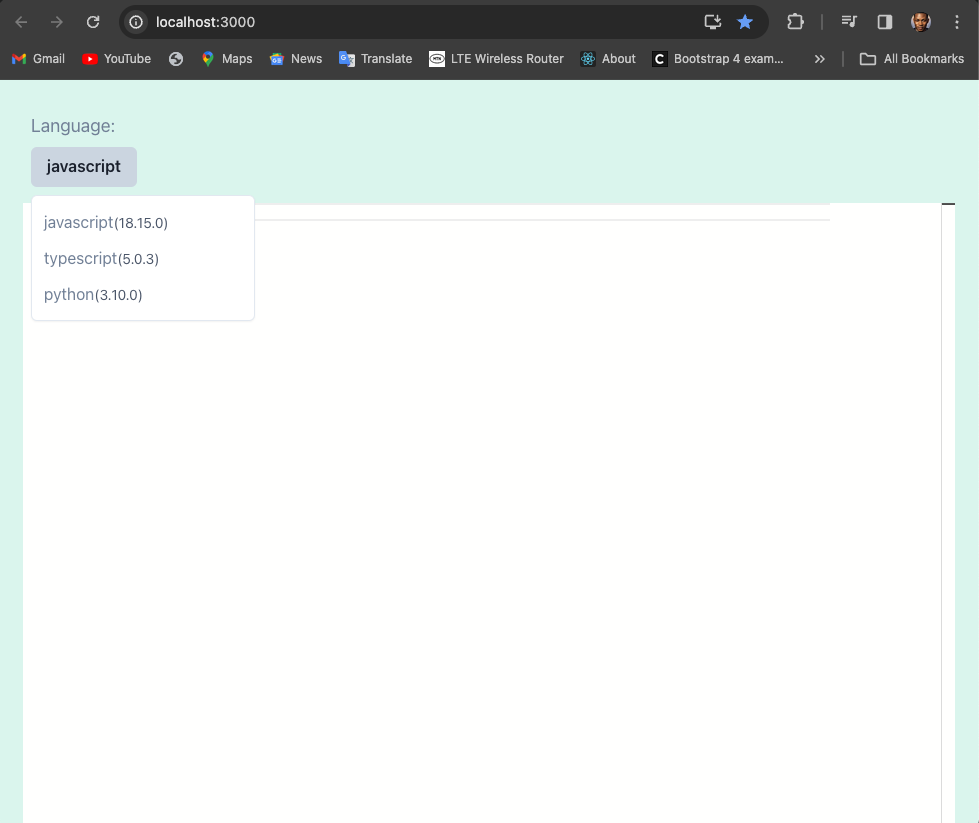
<Editor height="75vh" language={language} ref={editorRef} />;If we go to the browser, we’ll find that our menu dropdown is now responsive, and when we select a language, it gets updated so we can write our code.
Update Starter Template
We want a situation whereby when we select a new language, it should update to that language’s starter code or boilerplate per se. If it’s Javascript, we’ll have a Javascript boilerplate. If it’s Python, we’ll have a Python boilerplate.
Back to our constants.js, we’ll update our code below:
//constants.js//
export const CODE_TEMPLATES = {
  javascript: `
      function greet(name) {
        console.log("Hello, " + name + "!");
      }

      greet("Paul");
      `,
  typescript: `
      type Params = {
        name: string;
      };

      function greet(data: Params) {
        console.log("Hello, " + data.name + "!");
      }

      greet({ name: "Paul" });
      `,
  python: `
    def greet(name):
        print("Hello, " + name + "!")

    greet("Paul")
      `,
};
Inside constants.js we define a JavaScript object called CODE_TEMPLATES that stores code templates for different programming languages. Each template is a string representing a simple function that greets a person by name.
Inside our EditorWindow.jsx, we’ll set the value of our code editor to CODE_TEMPLATES imported from constansts.js.
//EditorWindow.jsx//
import { CODE_TEMPLATES } from "../constants";

function EditorWindow() {
  const [code, setCode] = useState(CODE_TEMPLATES.javascript);

  const handleLanguageChange = (newLanguage) => {
    setLanguage(newLanguage);
    setCode(CODE_TEMPLATES[newLanguage]);
  };

  return (
    <Box>
      <LangSwitch language={language} onSelect={handleLanguageChange} />
      <Editor height="90vh" language={language} value={code} ref={editorRef} />
    </Box>
  );
}

export default EditorWindow;
The CODE_TEMPLATES provide initial code in the code editor component when a new language is selected in the drop-down menu.
That’s it for the code editor. Next, create an output display box on the other side of the screen. This output component will take in the code, send it to the API as a request, return it, and display the result.
Compilation and Output with Piston API
Piston API is a powerful tool for programmatically compiling and executing code in various programming languages. By leveraging the capabilities of the Piston API, developers can seamlessly integrate compilation processes into their applications, enabling dynamic code execution and rapid prototyping.
We will create an output section on our code editor, whereby whenever we write code, we can run the code and get an output with the help of Piston API.
Now, we’ll have to go back to EditorWindow.jsx and wrap everything within our component with a <Box w="50%"> and <HStack>.
//EditorWindow.jsx//
return (
  <Box>
    <HStack spacing={4}>
      <Box w="50%">
        <LanguageSelector language={language} onSelect={handleLanguageChange} />
        <Editor />
      </Box>
    </HStack>
  </Box>
);
export default CodeEditor;
These help to split the screen in half, just as we have below:
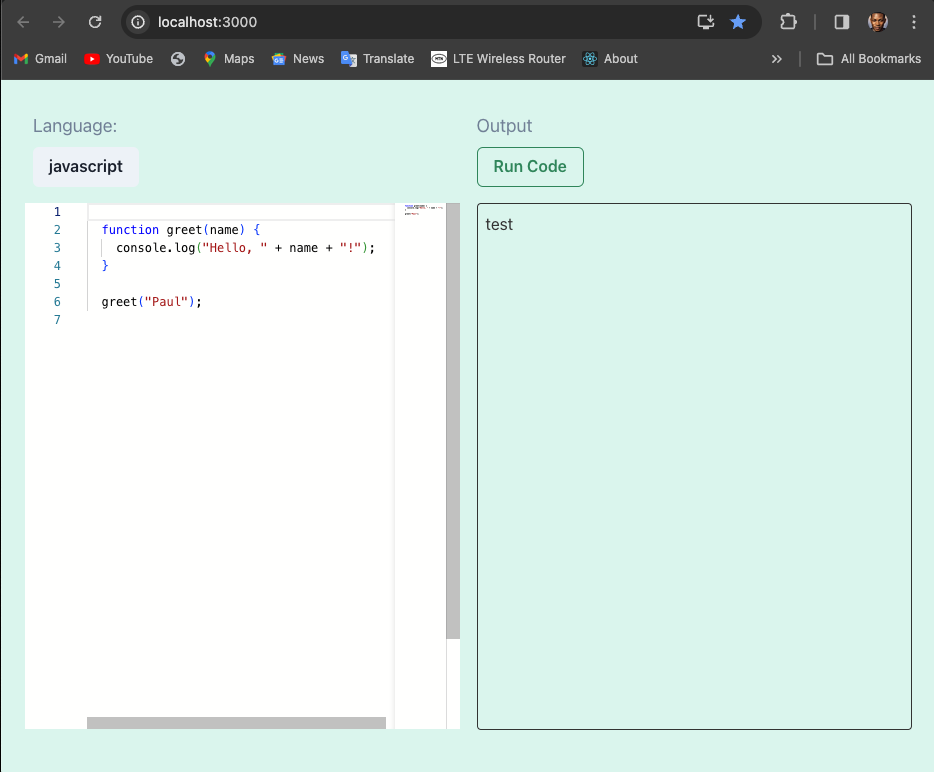
Create an Output Component
The space provided is where we’ll build our output component and have an output for whatever code we run. Under the components folder, we’re going to create an Output.jsx file and input the following code:
//Output.jsx//
import { Box, Button, Text } from "@chakra-ui/react";
const Output = () => {
  return (
    <Box w="50%">
      <Text mb={2} fontSize="lg">
        Output
      </Text>
      <Button variant="outline" colorScheme="green" mb={4}>
        Run Code
      </Button>
      <Box
        height="75vh"
        p={2}
        border="1px solid"
        borderRadius={4}
        borderColor="#333"
      >
        test
      </Box>
    </Box>
  );
};
export default Output;
This code creates a box that shows the output of the code we’ve written. It also includes a button labeled “Run Code” that you can click to execute the code and see its result in the box.
After which, we’ll move to our EditorWindow.jsx and Import and return the Output.jsx, if we check our browser below:
Compilation with the Piston API
We want a situation whereby when we hit the “Run Code” button, we’ll make an API request from Piston, which will compile our code and display an output (result). So we need to create an api.js. Inside the api.js, we’ll execute the API call.
//api.js//
import { LANG_VERSIONS } from "./constants";
const API_URL = "https://emkc.org/api/v2/piston/execute";
export const executeCode = async (language, sourceCode) => {
  const data = {
    language: language,
    version: LANG_VERSIONS[language],
    files: [
      {
        content: sourceCode,
      },
    ],
  };
  const response = await fetch(API_URL, {
    method: "POST",
    headers: { "Content-Type": "application/json" },
    body: JSON.stringify(data),
  });
  return await response.json();
};
This code defines a function executeCode that sends a request to an API to execute code in a specified programming language. It uses the fetch function to request a POST API endpoint https://emkc.org/api/v2/piston/execute with the provided language and sourceCode.
Then, we’ll head back to Output.jsx and create functionality for our output.
//Output.jsx//
import { Box, Button, Text } from "@chakra-ui/react";
import { useState } from "react";
import { executeCode } from "../api";
const Output = ({ editorRef, language }) => {
  const [output, setOutput] = useState(null);
  const [isLoading, setIsLoading] = useState(false);
  const [error, setError] = useState(null);
  const runCode = async () => {
    setIsLoading(true);
    setError(null);
    try {
      const sourceCode = editorRef.current.getValue();
      if (!sourceCode) return;
      const { run: result } = await executeCode(language, sourceCode);
      setOutput(result.output);
    } catch (error) {
      setError(error);
      console.error(error);
    } finally {
      setIsLoading(false);
    }
  };
  return (
    <Box w="50%">
      <Text mb={2} fontSize="lg">
        Output
      </Text>
      <Button
        variant="outline"
        colorScheme="green"
        mb={4}
        isLoading={isLoading}
        onClick={runCode}
      >
        Run Code
      </Button>
      <Box
        height="75vh"
        p={2}
        border="1px solid"
        borderRadius={4}
        borderColor="#333"
        color="#333"
      >
        test
      </Box>
    </Box>
  );
};
export default Output;
In the code above, we define three pieces of state for managing the output: the loading state, and any errors that occur during code execution. Also, we define a function runCode, which is called when the “Run Code” button is clicked. It sets the loading state to true, clears any previous error message, gets the code from the editor using editorRef.current.getValue(), and then calls the executeCode function (which sends the code to an API for execution) with the selected language and the code.
Back to EditorWindow.jsx, we’ll create a ref (editorRef) to hold a reference to the editor component. Defines a function handleEditorMount that receives the editor instance when the editor is mounted. This ensures the editor is focused when mounted, improving the user experience. The rendered output receives the editorRef and the current language as props.
//EditorWindow.jsx//

import { CODE_TEMPLATES } from "../constants";
import Output from "./Output";
function EditorWindow() {
  const [language, setLanguage] = useState("javascript");
  const [code, setCode] = useState(CODE_TEMPLATES.javascript);
  const editorRef = useRef(null);
  const handleEditorMount = (editor) => {
    editorRef.current = editor;
    editor.focus();
  };

  return (
    <Box>
      <HStack spacing={4}>
        <Box w="50%">
          <LangSwitch language={language} onSelect={handleLanguageChange} />
          <Editor onMount={handleEditorMount} />
        </Box>
        {<Output editorRef={editorRef} language={language} />}
      </HStack>
    </Box>
  );
}
export default EditorWindow;
Now, if we go to our browser and check our console, when we click on run code, we’ll get a response, which is the output of our code block.
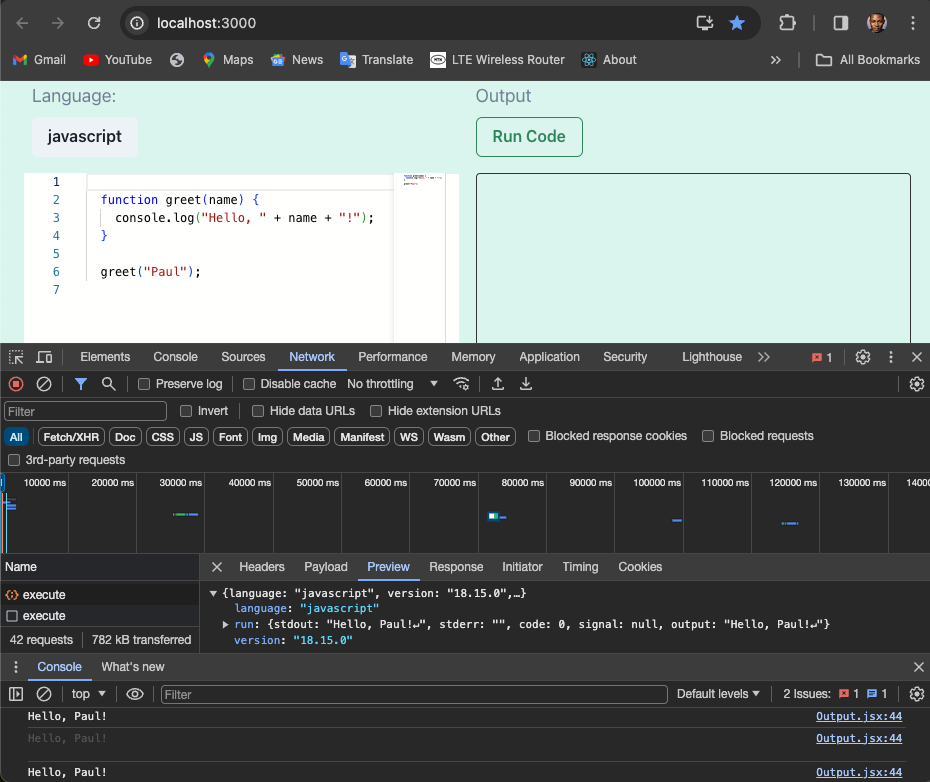
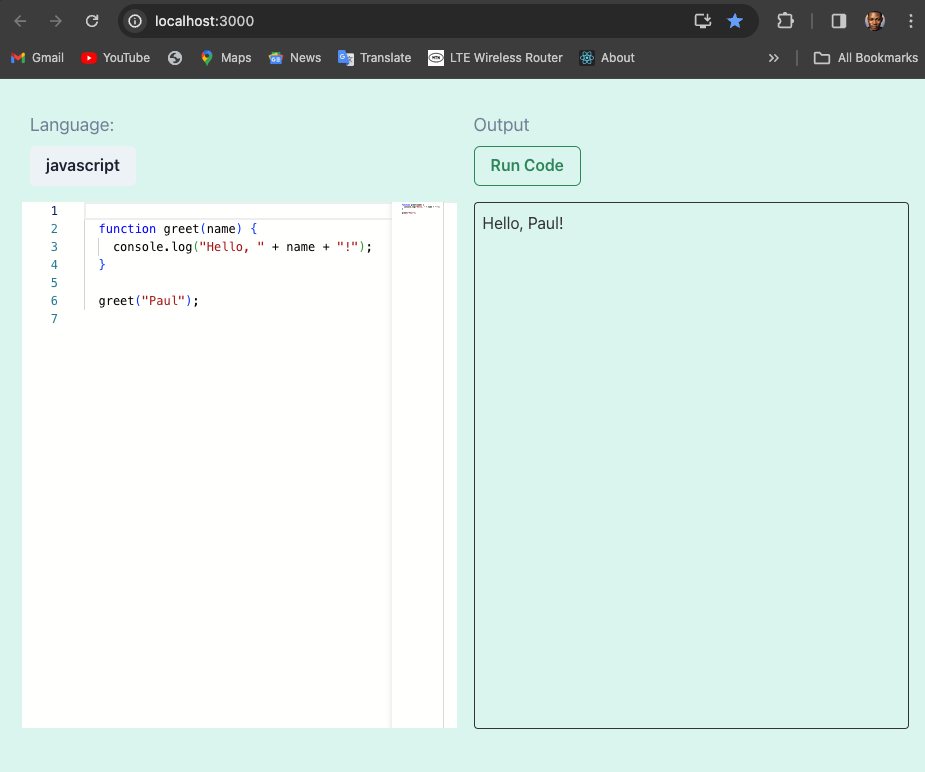
So let’s restructure our code to display the output in the output box, so back in our Output.jsx instead of displaying in the console, we’ll display in the output component.
//Output.jsx//
import { Box, Button, Text } from "@chakra-ui/react";
import { useState } from "react";
import { executeCode } from "../api";
const Output = ({ editorRef, language }) => {
  return (
    <Box w="50%">
      ....
      <Box
        height="75vh"
        p={2}
        border="1px solid"
        borderRadius={4}
        borderColor="#333"
        color="#333"
      >
        {output}
      </Box>
    </Box>
  );
};
export default Output;
There you have it, our web-based code editor. Whenever you pick a language, the code window updates with a starter template for that language. Once you’re done writing your code, you can run it and get an output.
The full code is on GitHub, and it is also fully hosted on Vercel.
Support and Limitations of React Monaco Editor
The React Monaco Editor offers extensive code editing and customization functionality, but it also has some limitations. Here’s a breakdown.
Support
- Languages and Technologies: React Monaco Editor supports a wide range of programming languages and technologies thanks to its foundation on the Monaco Editor from VS Code. This includes popular languages like JavaScript, TypeScript, Python, Java, C++, and many more. You can also extend it for custom languages.
- Features: It inherits many features from the Monaco Editor, including code folding, syntax highlighting, automated indentation, code completion (IntelliSense), key shortcuts (highlight, search, undo, etc.), error checking, and code navigation. These features enhance the code editing experience within your React application.
- Customization: The editor offers a good degree of customization through props and options. You can control the editor’s appearance, behavior, and functionality to fit your specific needs.
Limitations
- Focus on Code Editing: While powerful, React Monaco Editor primarily focuses on code editing functionalities. It might not be ideal for complex scenarios requiring a full-fledged IDE with features like debugging, extensions or marketplaces, terminal integration, version control integration, project management, and AI-assisted integration.
- Learning Curve: Setting up and configuring React Monaco Editor can have a learning curve, especially for those unfamiliar with the Monaco Editor or React development.
- Potential Bundle Size: Including the Monaco Editor library can increase your React application’s bundle size. This might be a concern for performance-critical applications.
- Browser Compatibility: While Monaco Editor generally works well across modern browsers, there may be some compatibility issues with older browsers.
Conclusion
In conclusion, by leveraging the capabilities of React and React-Monaco-Editor, you can construct a powerful and versatile code editor application. This application will empower users with a rich editing experience, syntax highlighting, and code completion, all within a familiar React-based framework. With its modular design and extensive customization options, this code editor can cater to a wide range of development needs and preferences. Whether you’re a seasoned programmer or a budding web developer, this React-Monaco-Editor combination provides a robust foundation for building your next-generation code editing application.
Resources
Scale Seamlessly with OpenReplay Cloud
Maximize front-end efficiency with OpenReplay Cloud: Session replay, performance monitoring and issue resolution, all with the simplicity of a cloud-based service.