Add Interactive Maps to your App with Leaflet
Use Leaflet.js to add dynamic, interactive maps


Including static maps in web applications appears simple, but has its issues. Static maps confine users to passive viewing, lacking the ability for app users to explore data or interact meaningfully with the geographical context. As a result, user comprehension and overall app experience may suffer. This article will show you how to go further, and include fully interactive maps in your page.

Discover how at OpenReplay.com.
Leaflet.js, a lightweight JavaScript library, allows you to utilize tools to quickly create interactive maps in your web applications. Leaflet allows you to customize your map to plot user locations with markers, showcase geographic information, and visualize real-time data.
Setting Up Leaflet in Your Web Application
When setting up Leaflet.js in your project, you have two options. You can download the library as a npm package or use a CDN link in your HTML file.
To implement Leaflet in your application’s back end, download and manage Leaflet by running the following npm code in your project’s terminal:
npm install leafletThis will download and install the Leaflet package into your project’s node_modules directory. Alternatively, you can opt for the use of a CDN by pasting Leaflet CSS and JavaScript CDN links directly in your HTML file:
<html lang="en">
  <head>
    <title>Interactive Map with Leaflet.js</title>
    <!-- ADDING THE LEAFLET CDN -->
    <link
      rel="stylesheet"
      href="https://unpkg.com/leaflet@1.9.4/dist/leaflet.css"
      integrity="sha256-p4NxAoJBhIIN+hmNHrzRCf9tD/miZyoHS5obTRR9BMY="
      crossorigin=""
    />
    <script
      src="https://unpkg.com/leaflet@1.9.4/dist/leaflet.js"
      integrity="sha256-20nQCchB9co0qIjJZRGuk2/Z9VM+kNiyxNV1lvTlZBo="
      crossorigin=""
    ></script>
  </head>
</html>
After adding the CDN link, proceed to initialize a leaflet map within your HTML file to render the map in the browser:
<html lang="en">
<head>
<!-- Previous Code -->
<title>Leaflet Map</title>
<style>
#map {
height: 700px;
width: 700px;
}
</style>
</head>
<body>
<div id="map"></div>
</body>
<script>
const map = L.map("map");
map.setView([6.18278, 6.9556], 7);
L.tileLayer("https://tile.openstreetmap.org/{z}/{x}/{y}.png", {
attribution:
'© <a href="https://www.openstreetmap.org/copyright">OpenStreetMap</a>',
}).addTo(map);
</script>
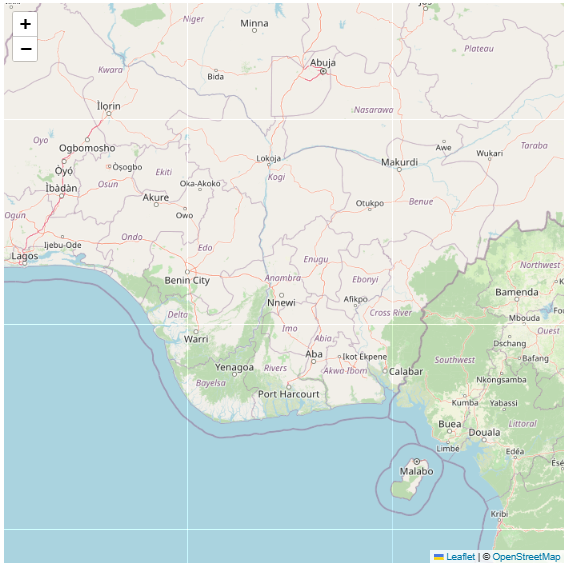
</html>The code block above creates a new Leaflet map instance with the L.map() method in the script block. The code block binds this newly created map instance to the div with the id of map, which serves as the container. The map’s initial view is set with the setView() method.
The setView() method takes in an array of two numbers and a number, respectively, as parameters. The array represents specific latitudinal and longitudinal geographical coordinates, while the number represents the zoom level.
The L.tileLayer() method in the code block above creates a tile layer for the map with a specified URL "https://tile.openstreetmap.org/{z}/{x}/{y}.png", pointing to OpenStreetMap’s tile server, which is then added to the map instance created earlier with the addTo(map) method.
You will get a map you can zoom in and out by running the above HTML file in your web browser. You will see a similar screen to the image below.
Adding Markers to Display Data on the Map
Adding markers to the map allows you to pinpoint specific locations and provide additional information to users. Let’s see how to add markers using Leaflet.
In your script block of your HTML file, paste the JavaScript code below into the script block of your HTML file:
const data = {
murtalaMohammed: {
coordinates: [6.5774, 3.321],
title: "Murtala Muhammed International Airport",
address: "International Airport Rd, Ikeja, Lagos",
website: "https://www.lagosairport.net/",
phone: "+234 806 493 3385",
},
nnamdiAzikiwe: {
coordinates: [9.0061, 7.2636],
title: "Nnamdi Azikiwe International Airport",
address: "Airport Rd, Abuja",
website: "https://www.abujaairport.com.ng/",
phone: "+234 807 462 1500",
},
portHarcourt: {
coordinates: [5.0151, 6.9496],
title: "Port Harcourt International Airport",
address: "Omaja Rd, Port Harcourt",
website: "https://www.port-harcourtairport.com/",
phone: "+234 818 461 1005",
},
};
for (const airport in data) {
// Extract airport information
const { coordinates, title, address, website, phone } = data[airport];
const marker = L.marker(coordinates).addTo(map);
const popupContent = `
<h3>${title}</h3>
<p><strong>Address:</strong> ${address}</p>
<p><strong>Website:</strong> <a href="${website}" target="_blank">${website}</a></p>
<p><strong>Phone:</strong> ${phone}</p>
`;
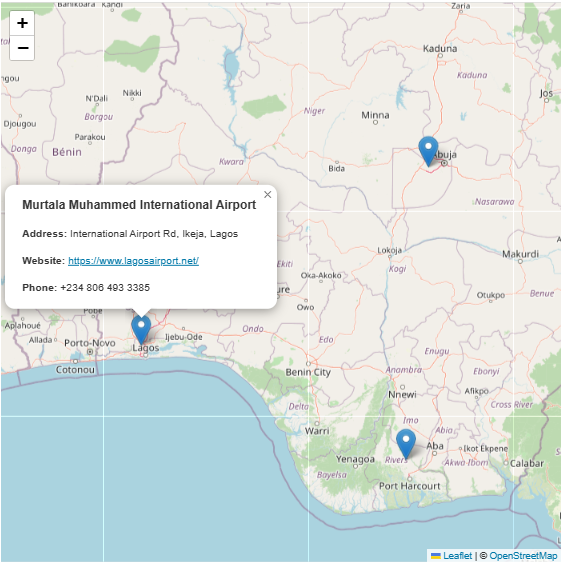
marker.bindPopup(popupContent);The code block above initializes a JavaScript object named data to store information about three different airports in Nigeria. Each airport is represented as a nested object within the data object, containing properties such as actual coordinates and then dummy data for testing.
To mark each of these airports with markers, the code block uses a for loop to create a leaflet marker with the L.marker() method at the coordinates of each airport. The addTo() method is concatenated with the L.marker() to display the marker on the map.
The marker is further customized to display the data related to each airport upon clicking its corresponding marker. The code block creates a string with relevant data of each airport, which is then bound to the marker with the marker.bindPopup() method. Clicking a marker will result in a popup with the airport details appearing, as seen in the image below.
Mapping User Live Location With Leaflet and HTML5 Geolocation API
You can also combine Leaflet with the HTML5 Geolocation API to get the user’s real-time location. To get an app user’s location, paste the following JavaScript code into your HTML file script block:
<script>
  const map = L.map("map").setView([6.1978, 7.046], 13);

  L.tileLayer("https://tile.openstreetmap.org/{z}/{x}/{y}.png", {
    maxZoom: 20,
    attribution: "© OpenStreetMap",
  }).addTo(map);

  let marker = null;
  let circle = null;
  let zoomed = false;

  function handleSuccess(position) {
    const { latitude, longitude, accuracy } = position.coords;

    if (marker) {
      map.removeLayer(marker);
      map.removeLayer(circle);
    }

    marker = L.marker([latitude, longitude]).addTo(map);
    circle = L.circle([latitude, longitude], { radius: accuracy }).addTo(map);

    if (!zoomed) {
      map.fitBounds(circle.getBounds());
      zoomed = true;
    }

    map.setView([latitude, longitude]);
  }

  function handleError(error) {
    const errorMessage =
      error.code === 1
        ? "Please allow geolocation access"
        : "Cannot get current location";
    alert(errorMessage);
  }

  if ("geolocation" in navigator) {
    navigator.geolocation.watchPosition(handleSuccess, handleError);
  } else {
    alert("Geolocation is not supported by this browser.");
  }
</script>
The provided code block demonstrates integrating the user’s live location into a map interface using Leaflet.js and the Geolocation API. It begins by initializing variables such as marker, circle, and zoomed to manage the user’s marker, accuracy circle, and zoom status. These variables facilitate the dynamic updating of the map interface as the user’s location changes.
The code block defines two functions, namely handleSuccess, and handleError, to manage the success and error states of the watchPosition method. Upon successfully retrieving the user’s location, handleSuccess extracts latitude, longitude, and accuracy information from the position.coords object. It then updates the map display by adding a new marker and circle to represent the user’s current position and accuracy.
The code block defines the handleError function to handle any error during geolocation, such as errors due to poor connectivity or no browser support. It displays an alert message tailored to the specific error code the user encountered.
Running the HTML in your web browser, you should see a similar screen to the image below.
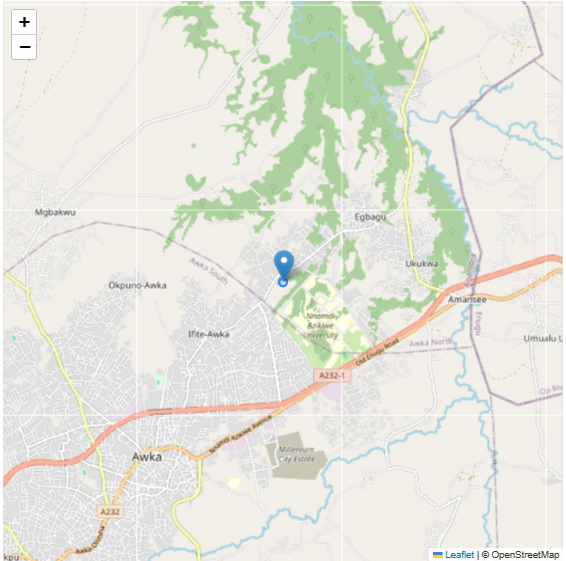
After loading the web page, you should notice the map component trying to load up information. The script uses this period to load up the user’s location. Zooming in on the map, you will also notice the accuracy circle increasing.
Conclusion
Leaflet offers developers a seamless option to integrate responsive maps into their web applications. Its lightweight nature and extensive customization options make it popular for diverse mapping needs.
In this article, you explored setting up Leaflet in your applications, adding informative markers to your maps, and mapping an application user’s real-time location using Leaflet and the HTML5 Geolocation API. Leaflet offers many more methods to customize your application, which you can find on their official documentation.