Adding Shimmer Effects to React Native apps
Boost the user experience when loading a page

Preloaders are instrumental elements that boost the user experience of our apps and websites. The shimmer effect is much like a skeleton effect used in most recent apps and websites. This effect unlike other preloaders, take the shape of the loading page just like a skeleton of the page. Here’s an example of the Shimmer Effect:
This article will cover how to implement this feature in an Android and iOS App using the Skeleton Placeholder in React Native. Since I will be delving straight into the implementation, you will be required to clone an existing project I set up for this tutorial. You will find the project here on Github. Also, you will find the source code of the completed tutorial here on Github.
To follow along with this tutorial, basic knowledge of React Native is important and you should have React Native set up on your computer. An Android and an iOS simulator should also be set up for testing the application. You can learn more about React Native and how to set up your emulators here.
Creating a React Native Project
First, to initialize this project, you should clone the demo project from Github. I will be demonstrating the Shimmer Effect on that project and implementing alongside will help you get the trick faster.
After the clone is successful, open up the folder in your code editor, and in your terminal, run npm install to install the node modules and necessary files for the project. After running that command, the next command you should run cd ios && pod install to download the corresponding files for iOS. After this download is complete, you should run the app on your Android and iOS Emulators to preview the base project. Use the commands below to run the application on your emulators.
#For Android
$npx react-native run-android

#for iOS
$ npx react-native run-ios
At this juncture, you should allow it some time to build. When it’s done, you should have your Apps display as such:
Setting up Shimmer Effect
To set up Shimmer Effect, we will be using the Skeleton Placeholder library. This library makes it easy or simpler to implement the Shimmer Effect in your Application although, there’s always the option to create it from scratch but this tutorial isn’t covering that.
As stated in the Skeleton Placeholder documentation, the first step is to install the React Native Masked View as it is required to have this Shimmer Effect implemented in your application.
To do that, you will need to run the following commands.
npm install @react-native-masked-view/masked-view react-native-linear-gradient --save
cd ios && pod install
Now, that you have installed the React Native Masked View, the next step is to install the main Skeleton Placeholder library. Run the commands below to do that.
npm install react-native-skeleton-placeholder --saveWhen that is completed, you need to run the command to build your application on your Android and iOS emulator.
#For Android
$npx react-native run-android

#for iOS
$ npx react-native run-ios
Note that rebuilding the App is very important because the new libraries you have just installed are not yet usable on your App and while building your app, they will sync and become functional.
After the successful build, you will still have the same screen as we had after the first build.
Open Source Session Replay
OpenReplay is an open-source, session replay suite that lets you see what users do on your web app, helping you troubleshoot issues faster. OpenReplay is self-hosted for full control over your data.

Start enjoying your debugging experience - start using OpenReplay for free.
Implementing Shimmer Effect
The libraries are now installed, the next thing to do is to have the Shimmer Effect implemented in the App. To achieve that, you should first style the effect to take the shape of your App contents.
From App so far, you notice the overhead image then the header text, and finally the body text. This is the same structure you should have the effect display as it simulates the app content while it’s being loaded up.
To style the effect, you will first have to import the Shimmer Effect using the code below.
import SkeletonPlaceholder from "react-native-skeleton-placeholder";This import statement should be added alongside the import statements at the top of your App.js file.
Next, add the code below into the render block, just before the other view. What you should have is the Shimmer Effect showing up at the top of the page. Now, using the margin and other properties, I will adjust it to the app content.
<SkeletonPlaceholder>
        <View style={{ marginLeft: 20, marginTop: 20 }}>
          <View style={{ width: 350, height: 200 }} />
          <View style={{ marginTop: 6, width: 260, height: 20, borderRadius: 5 }} />
          <View style={{ marginTop: 6, width: 350, height: 70, borderRadius: 10 }} />
        </View>
        <View style={{ marginLeft: 20, marginTop: 20 }}>
          <View style={{ width: 350, height: 200 }} />
          <View style={{ marginTop: 6, width: 260, height: 20, borderRadius: 5 }} />
          <View style={{ marginTop: 6, width: 350, height: 70, borderRadius: 10 }} />
        </View>
</SkeletonPlaceholder>
The Shimmer Effect now has a similar structure to the App contents but it’s only supposed to show up just before the contents are loaded and disappear after the contents are loaded. To achieve this, we will use the useState and useEffect hooks to set the Shimmer Effect to be true before the app contents are loaded and false after 2 seconds by which the app contents should have loaded.
const[onLoad, setOnLoad] = useState(true);

useEffect(() => {
  setInterval(() => {
    setOnLoad(false);
  }, 2000);
},[]);
This statement declares the Shimmer Effect true as soon as the app is loaded. We will add the “onLoad” variable to the code as done below and it will basically initialize the loaded app contents as soon as the Shimmer Effect is false.
<ScrollView>
{onLoad ?
<SkeletonPlaceholder>
....
</SkeletonPlaceholder>
:
<View>
....
</View>
}
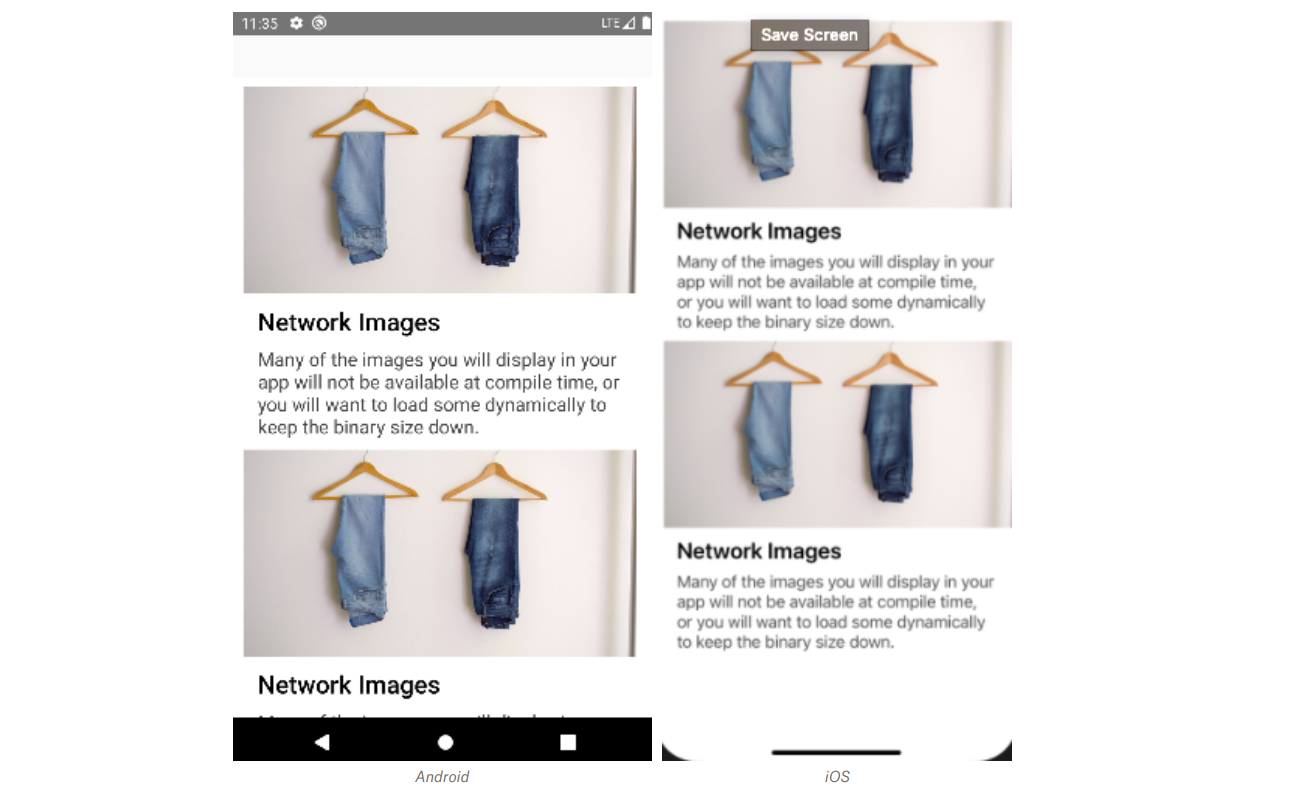
</ScrollView>After adding the code, save and you should have your App showing up like this, on Android:
On iOS this would be the look:
This is simply how you can implement the Shimmer Effect in your Application. I am sure this will help you boost your user experience without you having to code from scratch.
Conclusion
As we have just gone through, the Shimmer Effect gives your app a nicer user experience than the regular preloaders and you don’t have to go through the hassle of coding it from scratch as you can leverage the available and efficient library which is straightforward, saves you some time and it’s easier to implement. If you need some guidance, do well to let me know in the comments and I hope you have this helpful.
A TIP FROM THE EDITOR: For another way to enhance React Native apps, take a look at our Working with SVGs in React Native article.