
Airtable: a low-code solution for building modern apps

In building applications, developers consider the hassle of setting up the server and database of an application, as well as constructing and documenting the API that enables the transfer of data between the client-side and the server-side of the application. This hassle led to the advent of low-code database applications. These applications enable developers to easily set up a database. They also provide intuitive and visual tools that make the setup process and database management easier and require little code for their usage. Also, one unique advantage of utilizing them is the provision of the created database as an API that can easily be used on a client.
In this tutorial, we will look into the concept of “low-code database” applications, particularly Airtable, an easy-to-use low-code database application for creating and sharing relational databases, and the React framework to build a simple blog application.
Low-code Database Applications
Low-code databases can be seen as tools designed with simple user interfaces that can be used successfully by users with little or no knowledge of code/programming. With a low-code database, a user can easily create databases and tables and store records. Most of the time, it only requires simple controls like dragging and dropping some icons, filling out a few forms, or clicking some items on the interface to initiate an action. This isn’t new as many users are very familiar with these types of applications and use them all the time. Microsoft Access, Google sheets, Drupal, and Joomla, are examples of low-code solutions.
The advantages of using low-code solutions include:
- Ease of Operation — Users can easily operate these applications without needing developers.
- Ease of Record keeping — Users can create databases and tables to store records with little or no assistance from developers.
- Integration to third-party services — Developers could easily integrate these solutions into many third-party cloud services and applications.
In this article, our focus will be on Airtable, a low-code database application.
Airtable
Airtable is a simple cloud database platform with features of a database implemented as spreadsheets. It is a low-code application that provides a simple user interface to create and share relational databases. It helps users manage and portray their data with an aesthetically pleasing user interface. It also provides a simple-to-use dashboard for users to effectively manage these created databases.
Airtable provides many features as follows:
-
Airtable provides pre-made templates that enable users to easily create a database.
-
Airtable provides Document Storage, meaning users can attach files as records to the database.
-
On Airtable, a user can integrate third-party applications, i.e., project management applications like Slack, Asana, Basecamp, Box, and file storage applications like Dropbox, Google Drive, and many more. To see the list of third-party applications supported by Airtable, visit here.
-
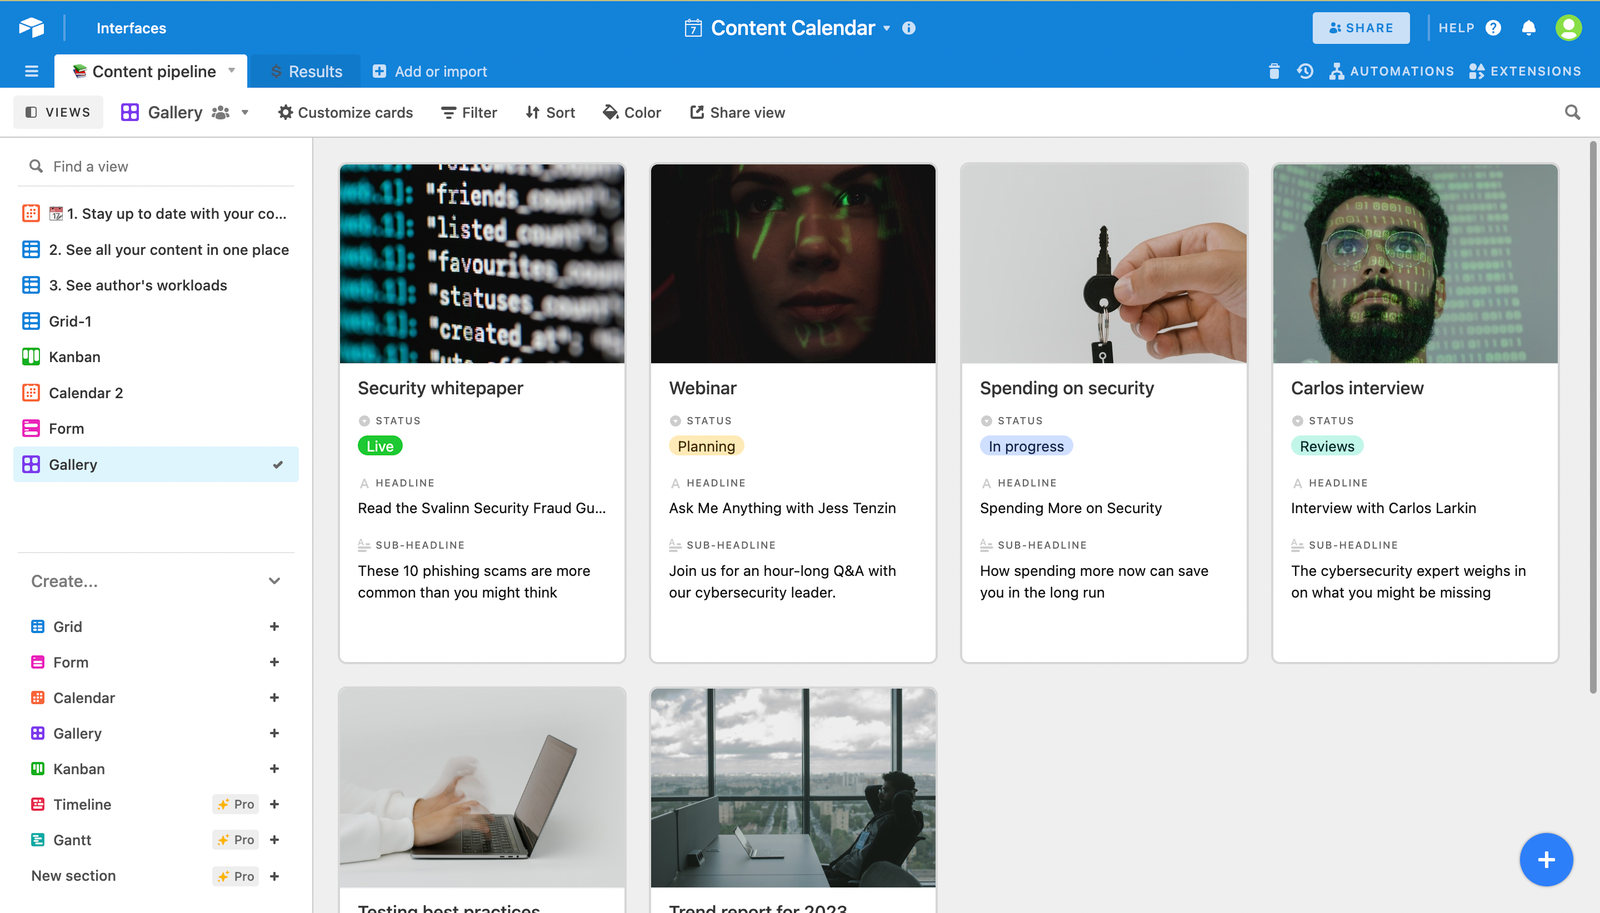
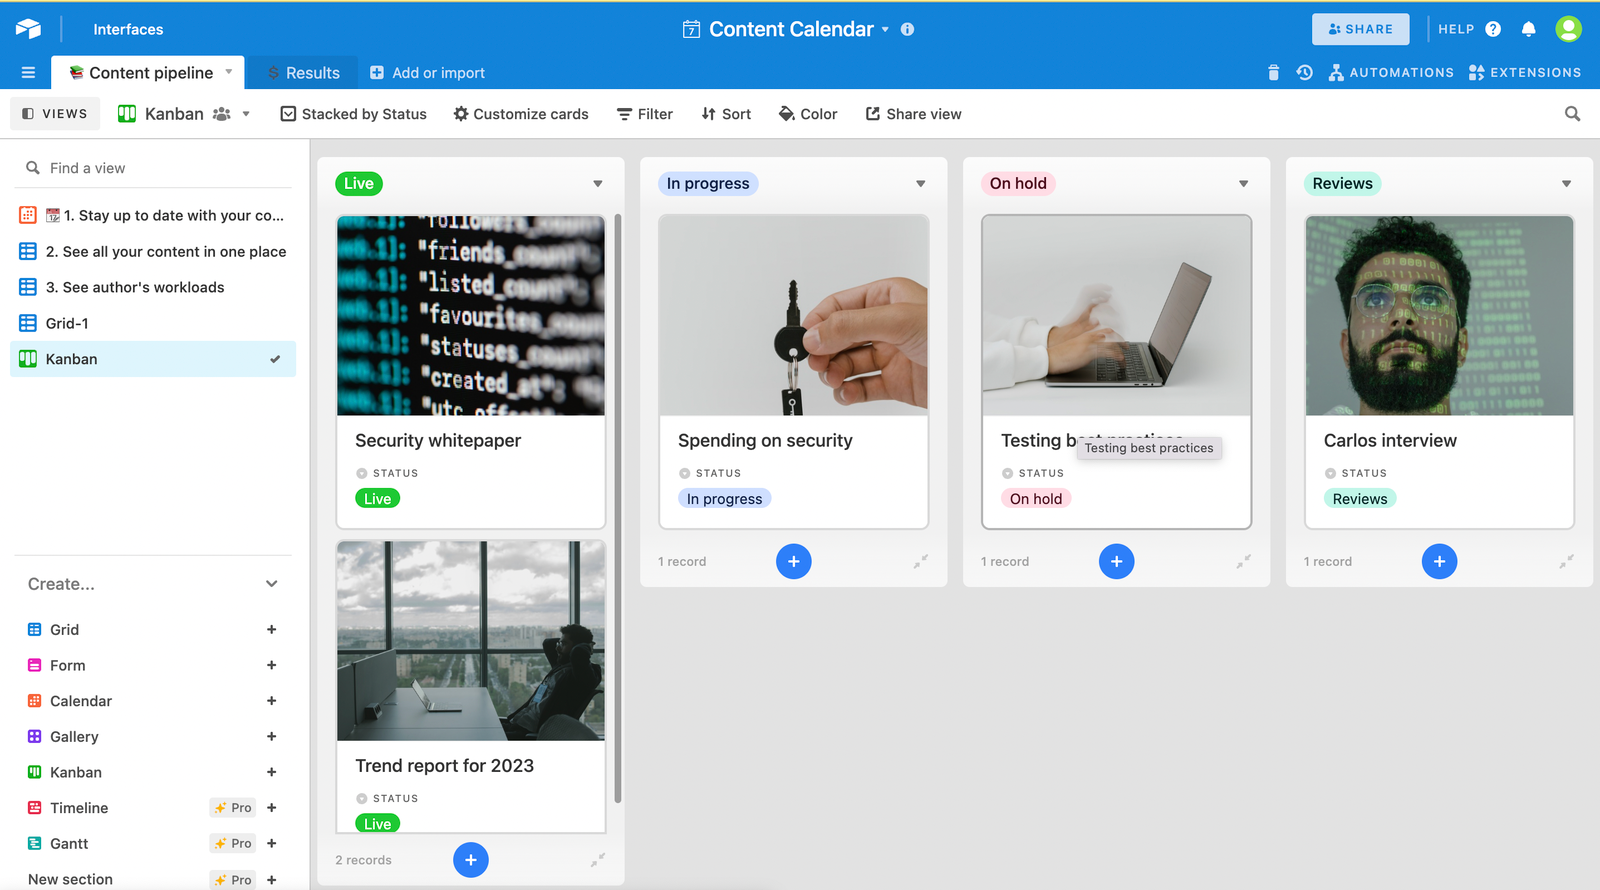
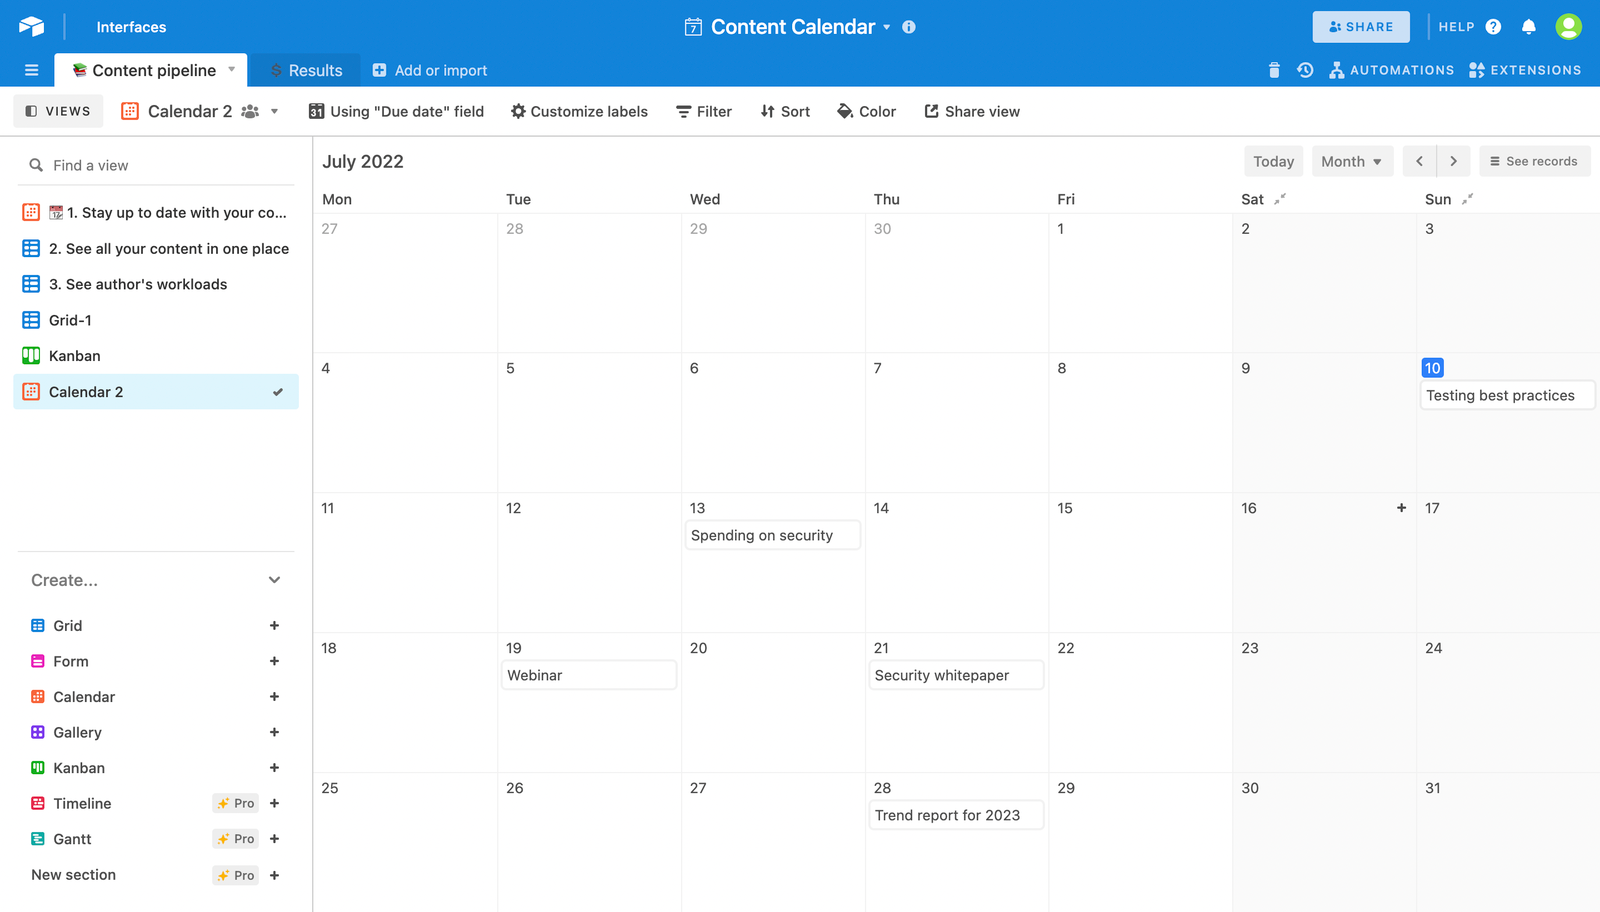
With Airtable, there are provisions for custom views. a user can view his database in various view types: grid view, gallery view, Kanban view, and Calendar view.
Components of Airtable
There are five basic components of an Airtable database:
- A base is a singular database containing a project’s essentials. A base contains the records that a project needs. You can start with a blank base and give it a naming convention you desire. Airtable offers a robust library of templates pre-populated with relevant sample data, which you can view and modify if you are experiencing difficulty creating a blank base or knowing how a base is structured internally. There are templates for creating various bases, which can be accessed here.
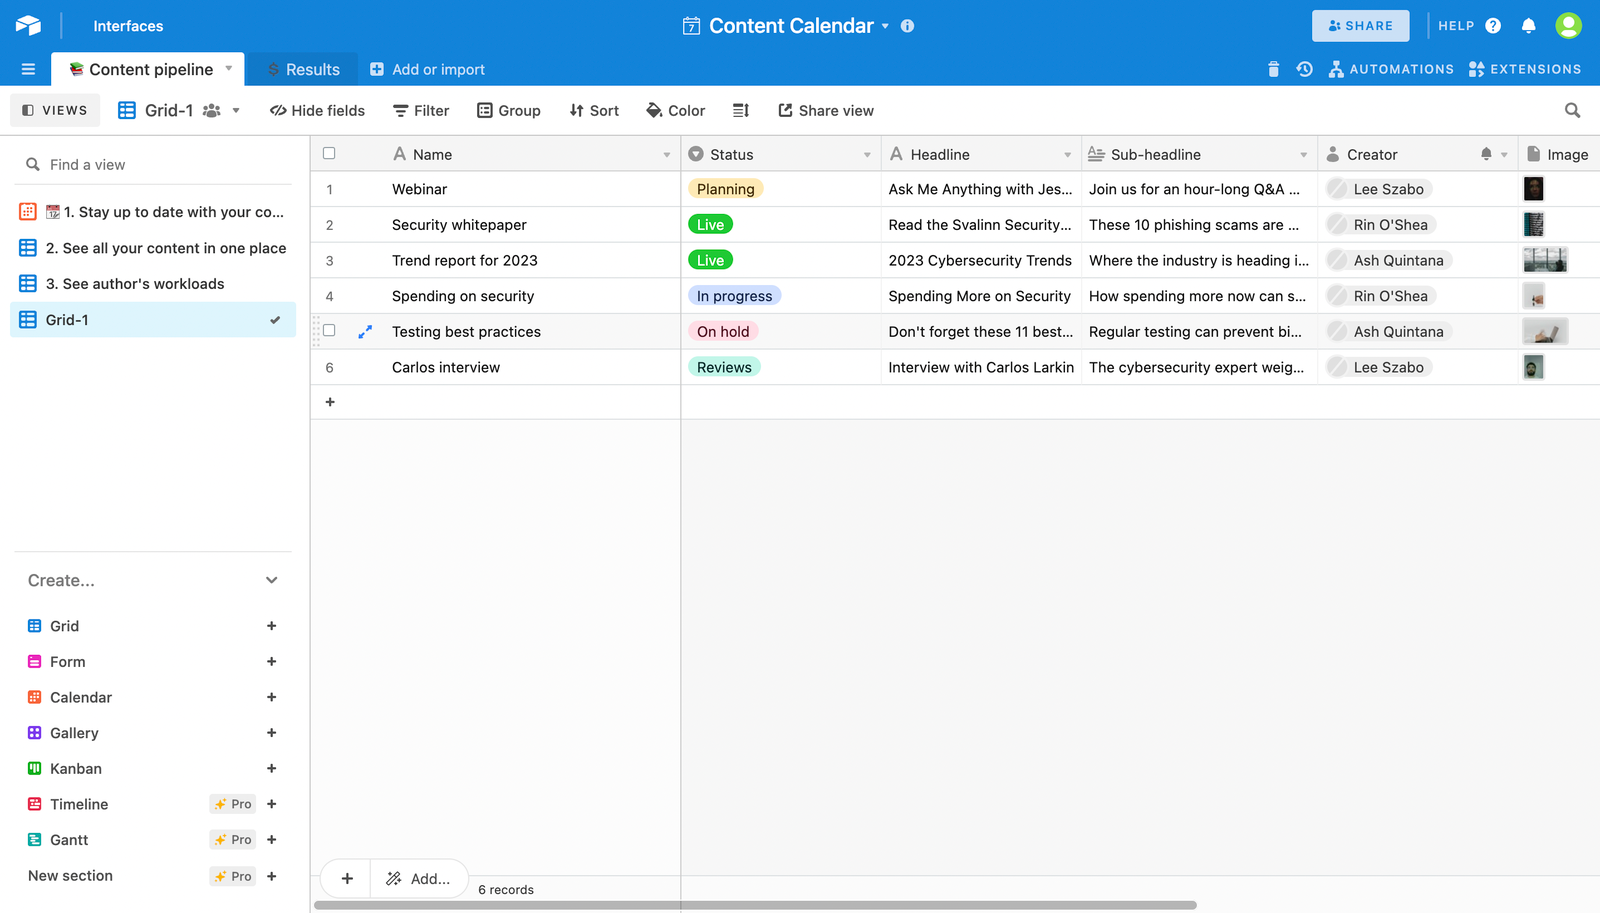
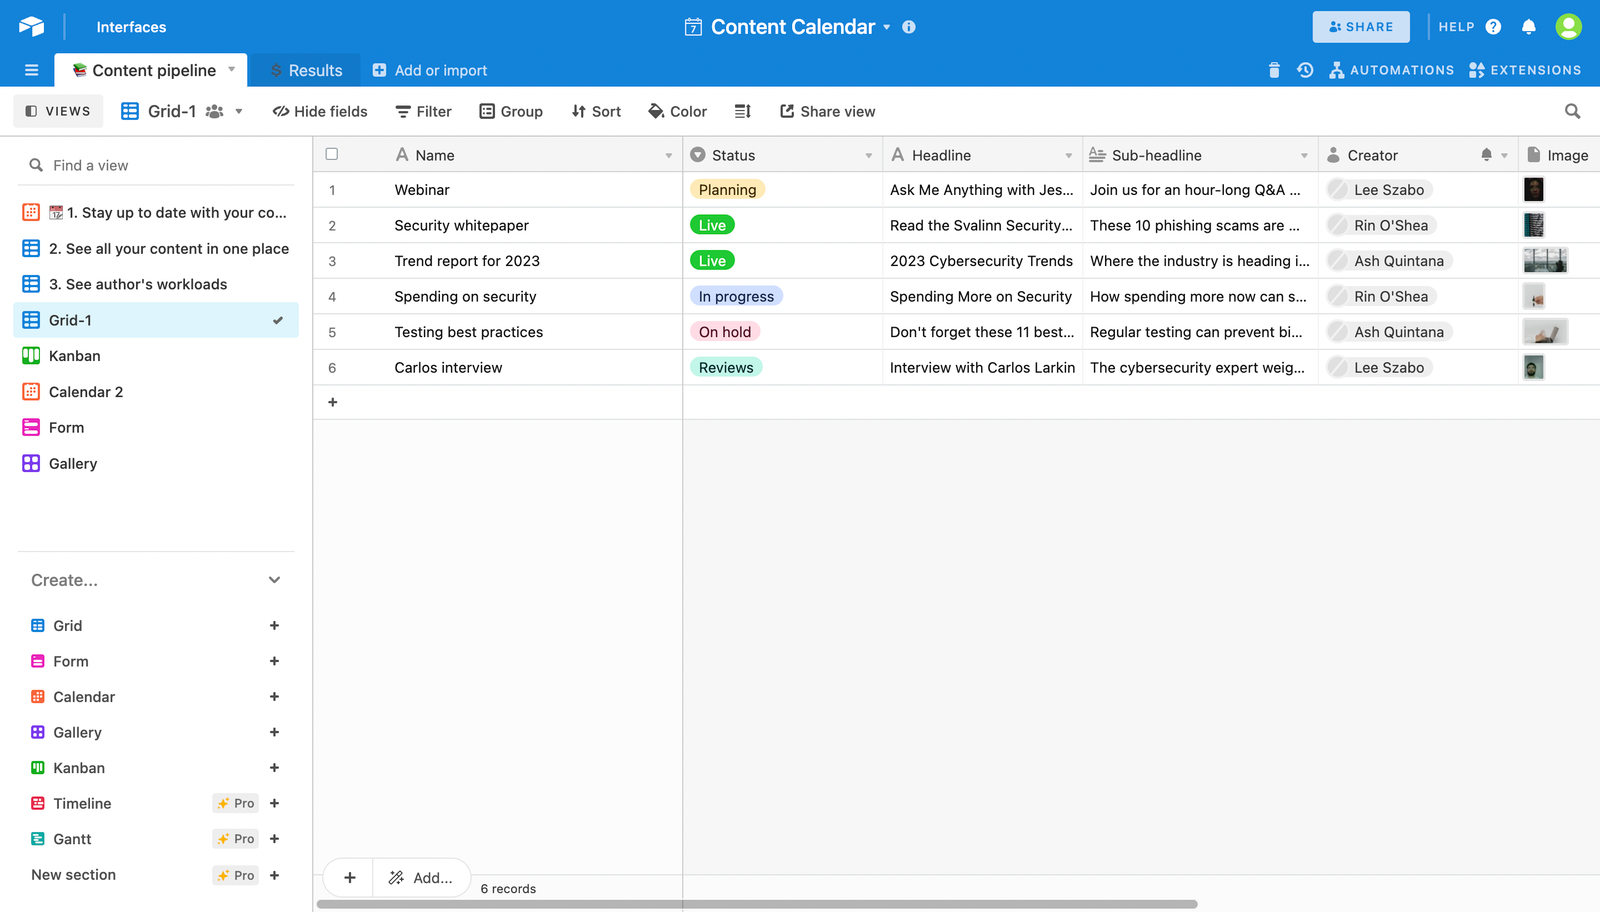
- A table contains data about a particular type of item. A base can possess one or more tables, and a table could hold a specific type of information. For example, if we build a simple content calendar, the table will hold data like name, status, headline, sub-headline, creator, and image. The table shows the data in a spreadsheet format.
- A field is a column in a table. A field has a name and can be customized to contain an array of content, like photos, phone numbers, attachments, dates, checkboxes, and more.
- A record is the database equivalent of spreadsheet rows and cells. Each record is an item on your list. In a table of content, each record is content, with data in each field to detail their name, status, headline, and more.

- A view enables a user to see all of the records at once in a specific format specified by Airtable. You can create multiple views for each table in a base. A view is helpful when you only want to view records that fit certain criteria.
Airtable setup
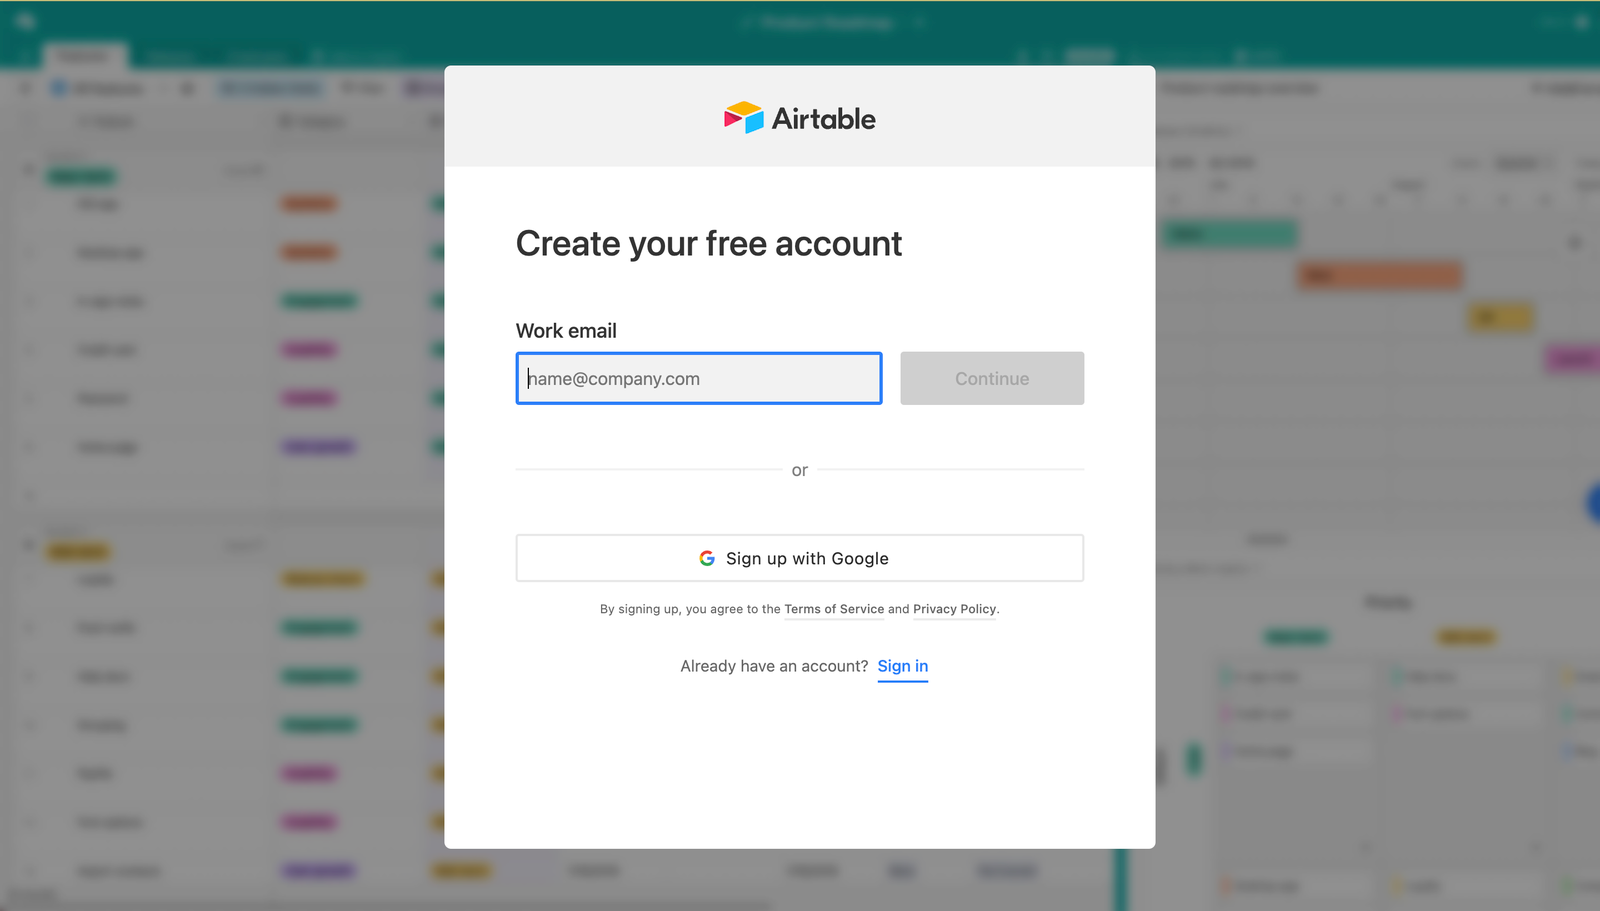
To get started, we have to signup to Airtable. to signup to Airtable, visit here.
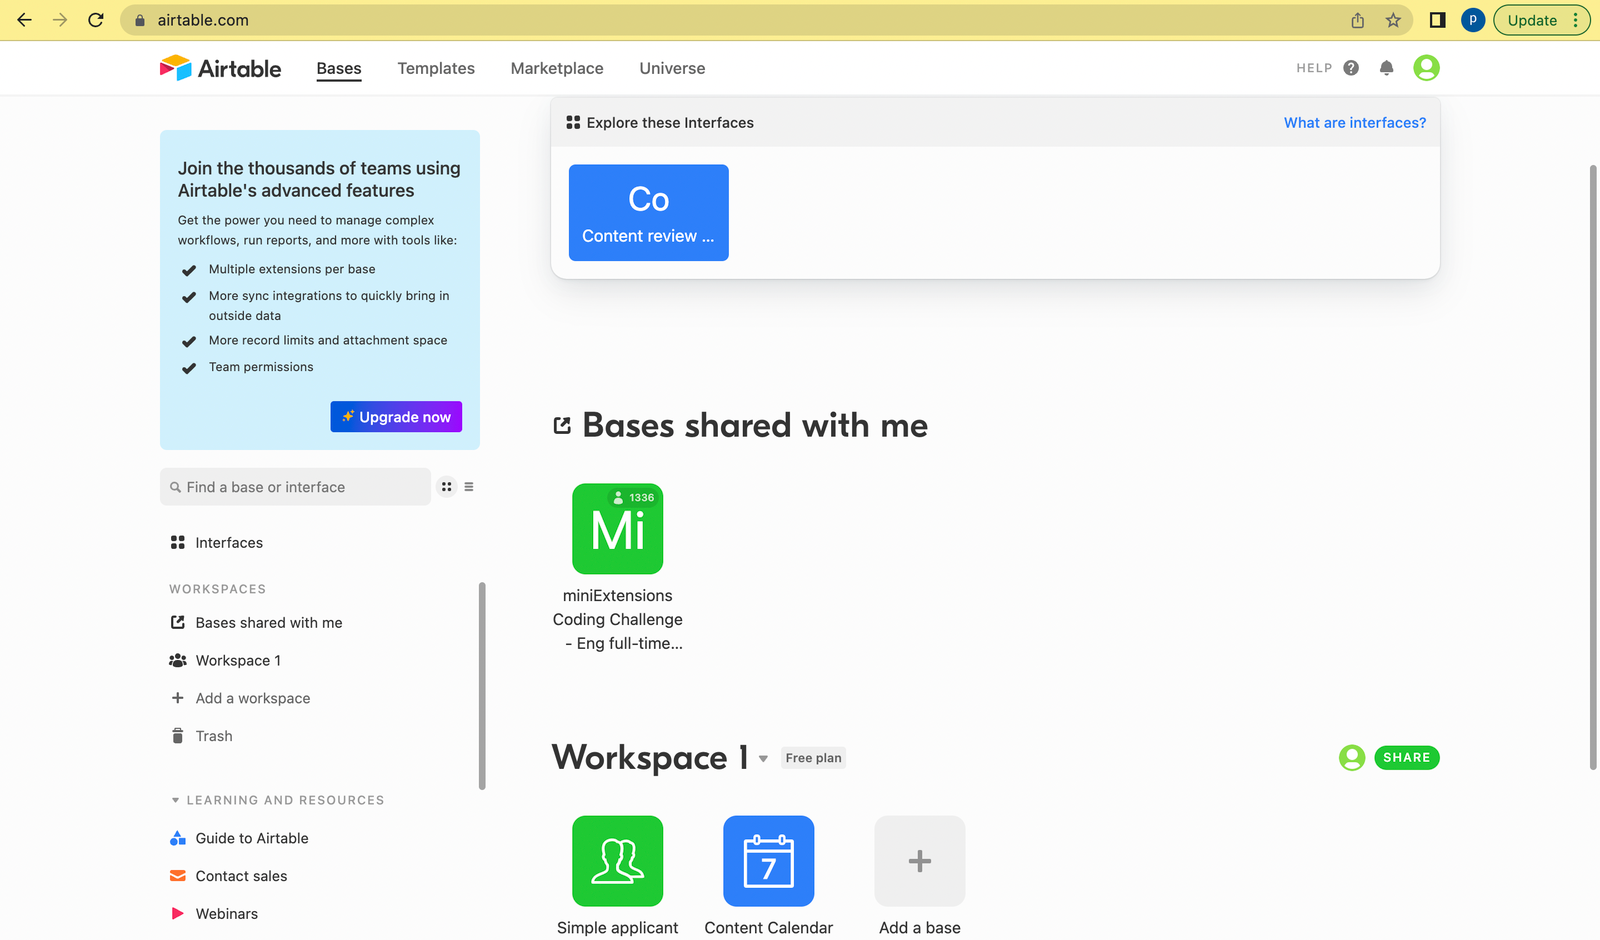
On signup, you will be directed to the dashboard. On the dashboard, you can create a base.
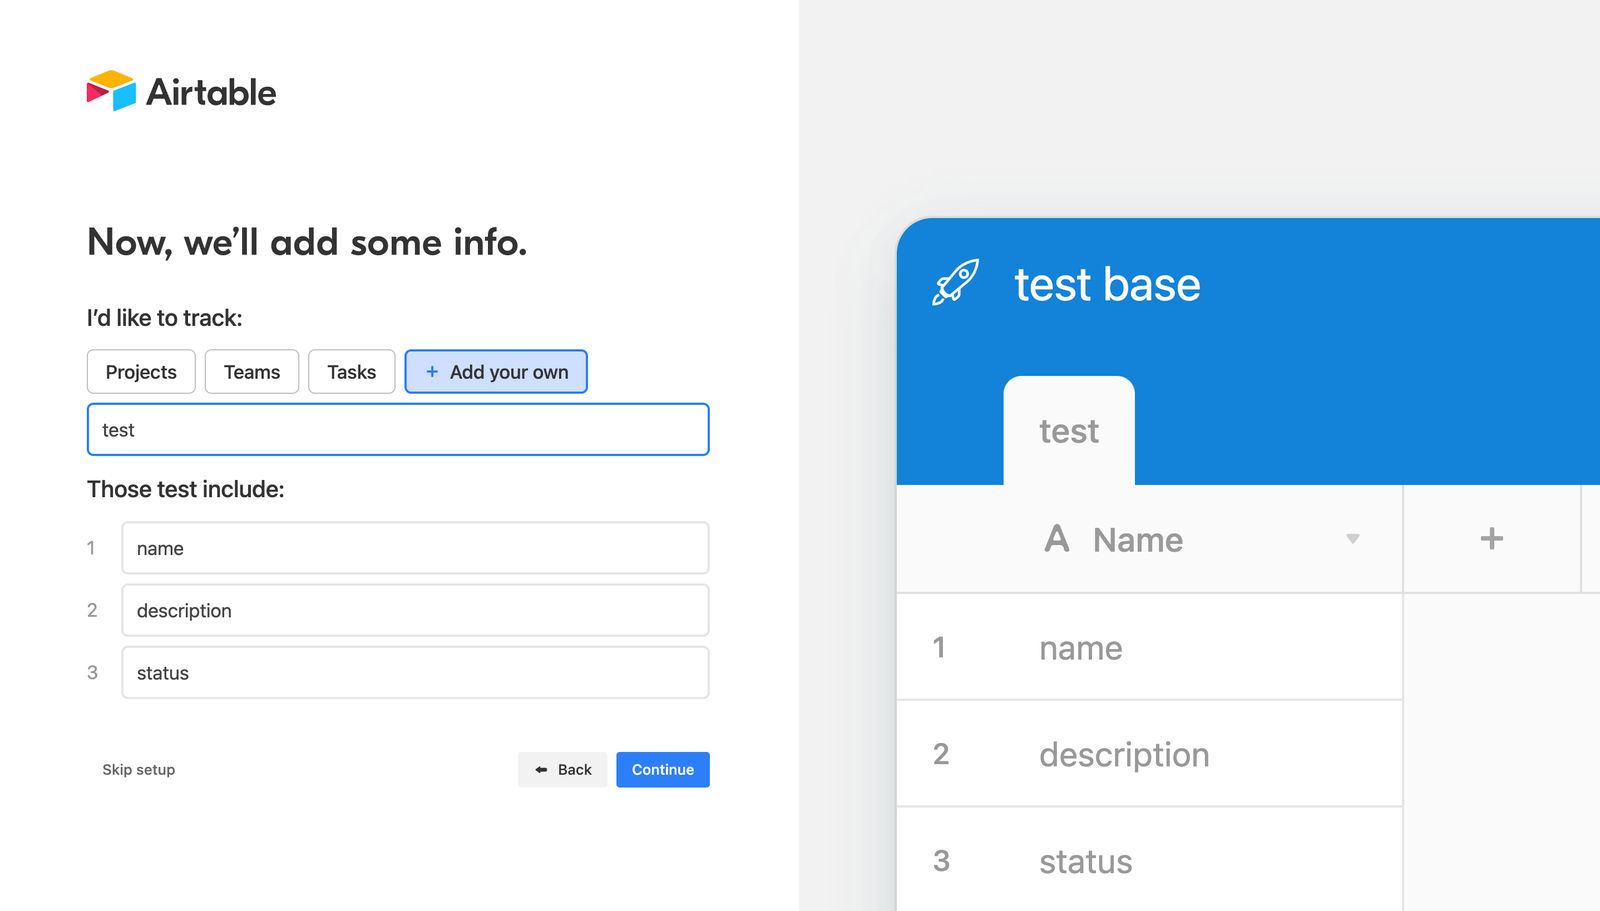
On clicking “Add a base”, you will be directed to screens that enable you to create a base, a table, create sample data to add to the table in the base.
You have to name the base.
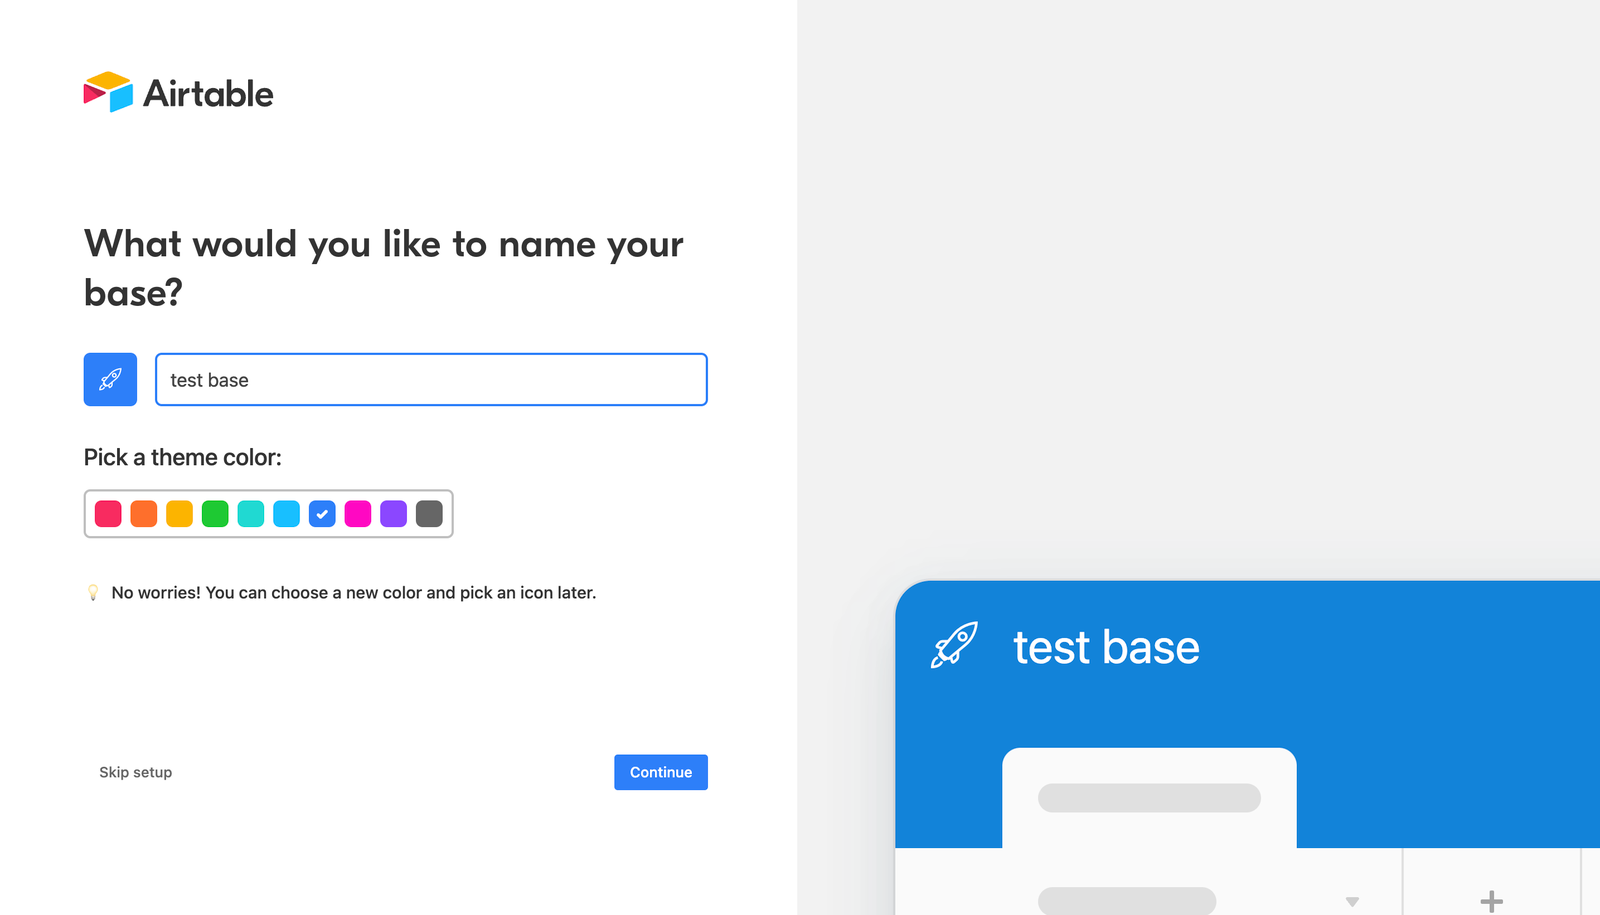
You can populate the base with test data.
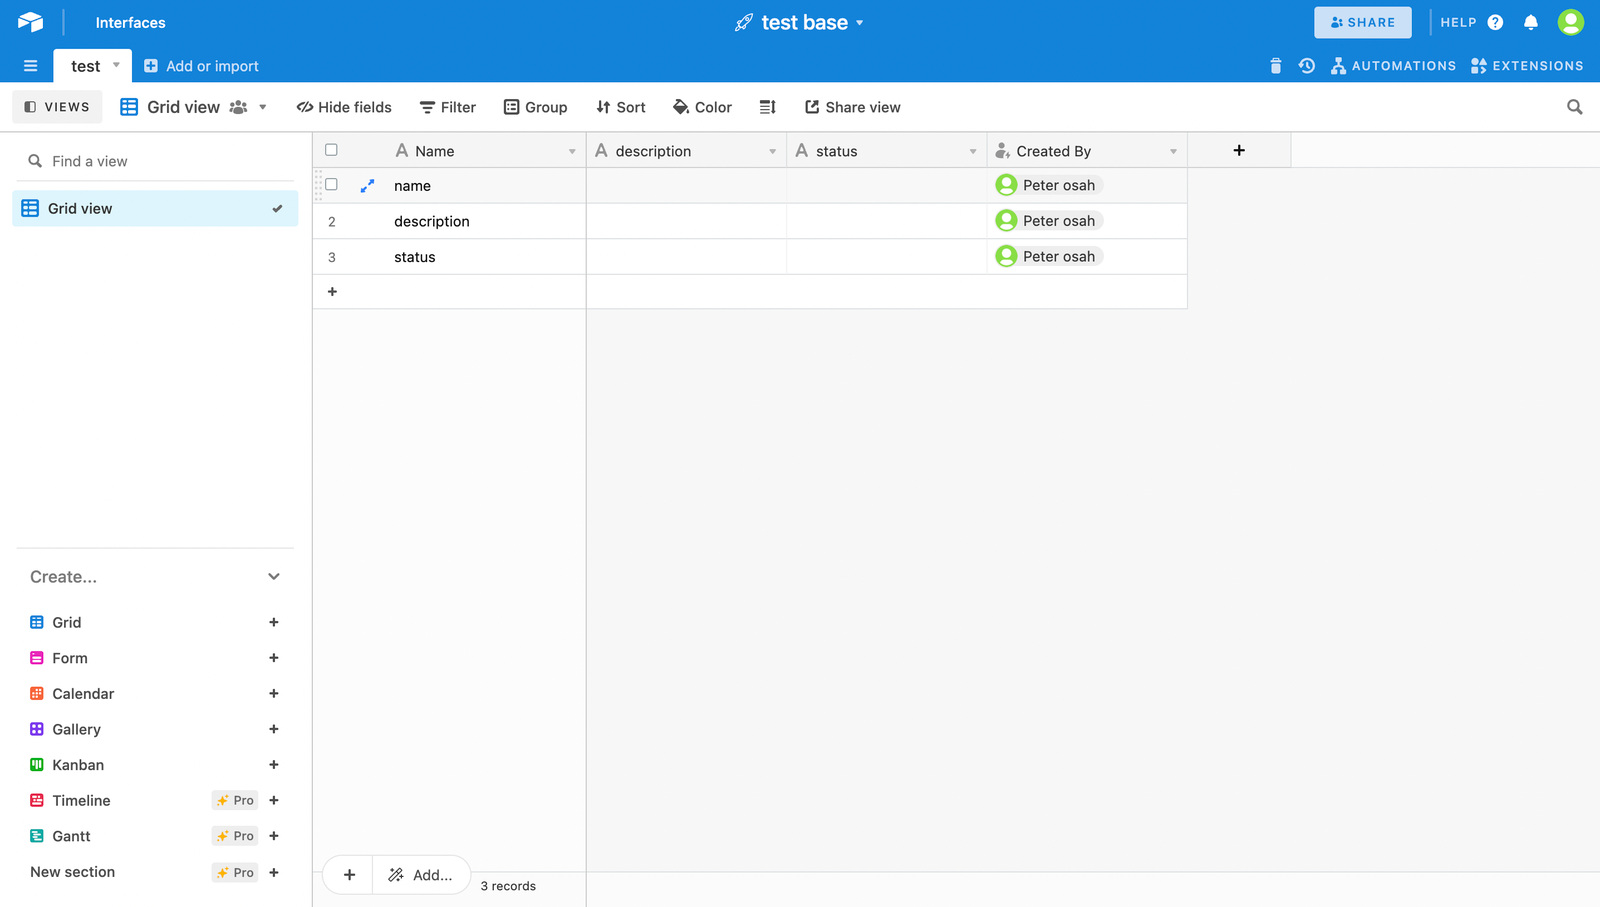
A sample of a created and populated base.
Base as an API feature
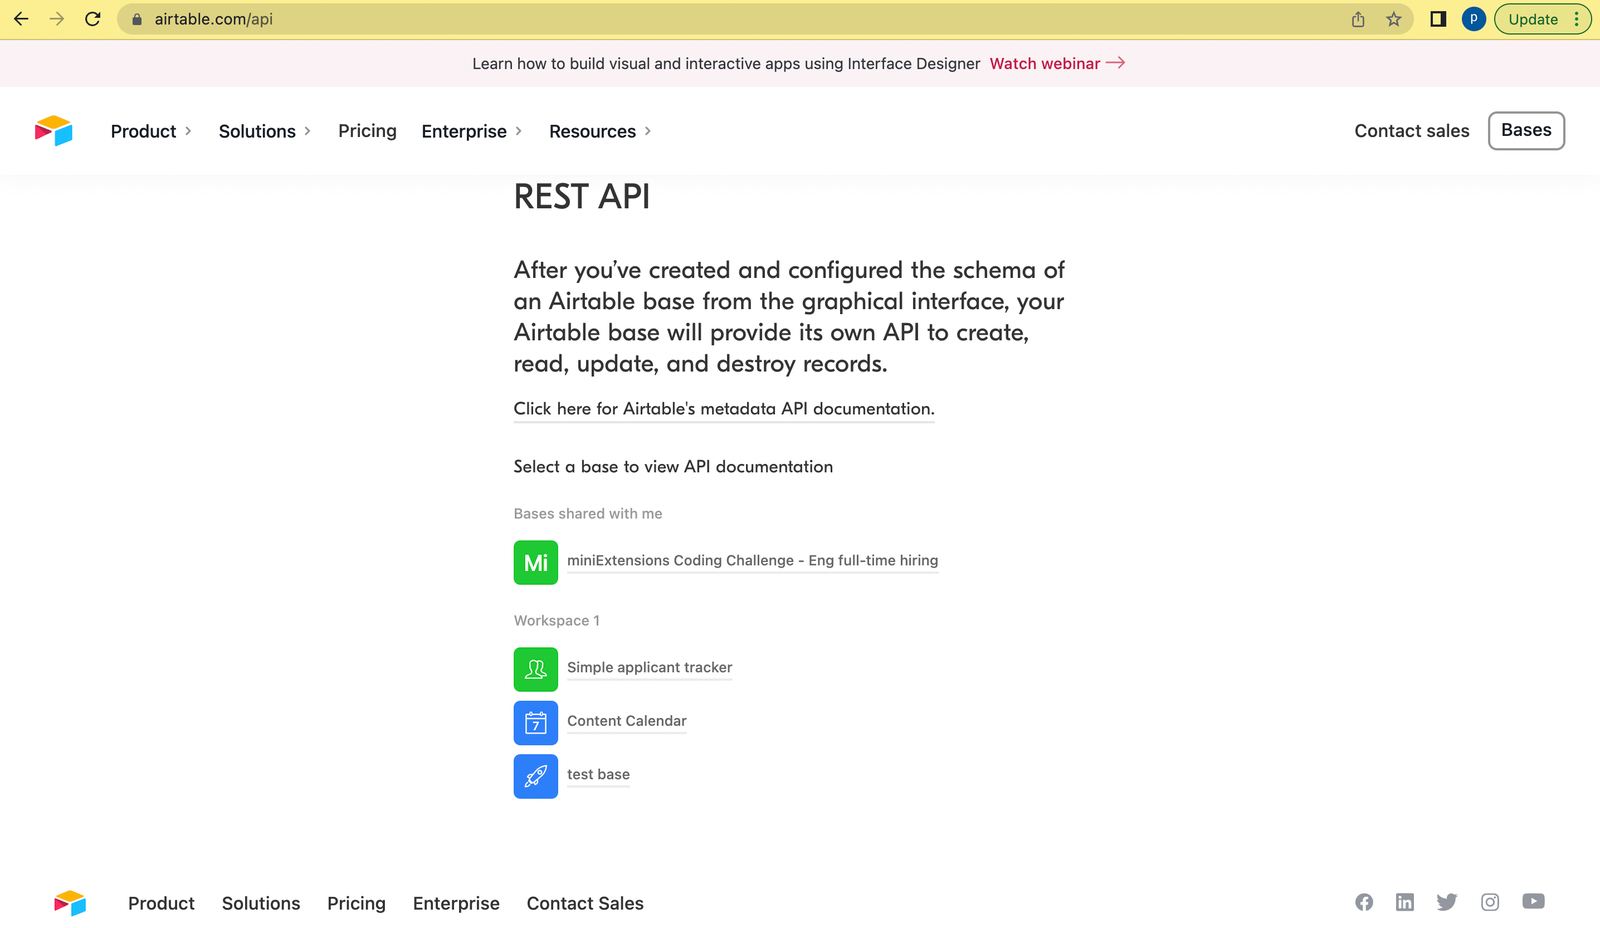
A spectacular feature of Airtable makes every created Base on Airtable available as an API that can be integrated into a client application. After you’ve created and configured the tables and schema of an Airtable base from the user interface, your Airtable base will provide its API to create, read, update, and destroy records in it. To access this API, you must be logged in and visit here. After accessing the link, you will see the bases. You can select a base to view its API documentation.
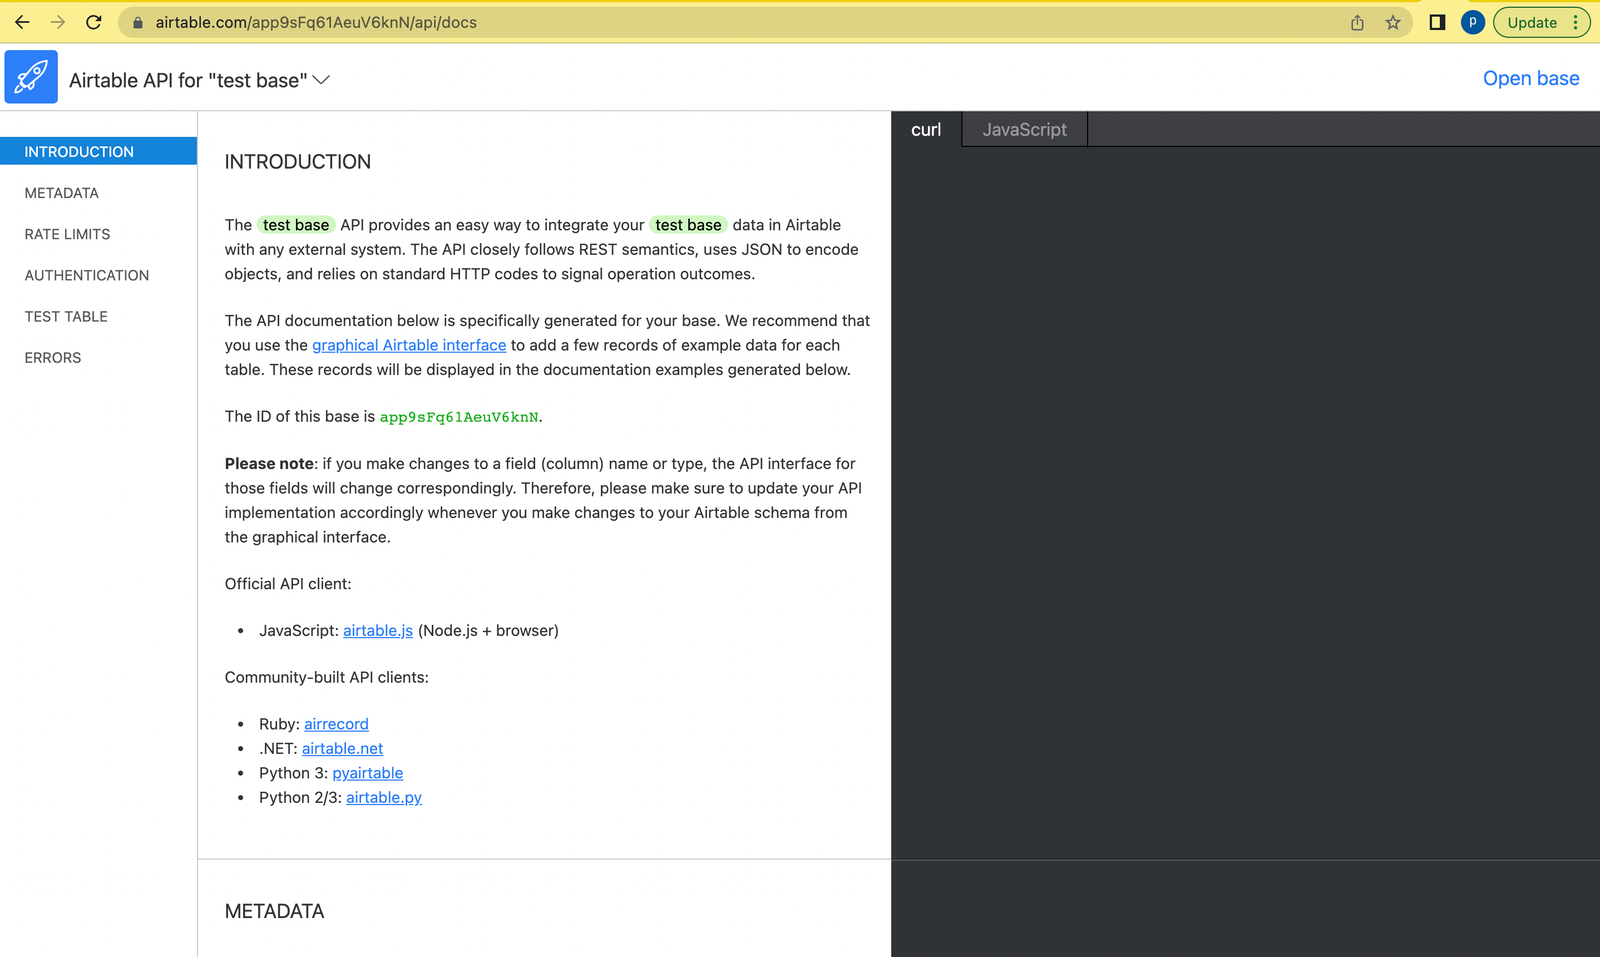
This is a sample API documentation.
Open Source Session Replay
OpenReplay is an open-source, session replay suite that lets you see what users do on your web app, helping you troubleshoot issues faster. OpenReplay is self-hosted for full control over your data.

Start enjoying your debugging experience - start using OpenReplay for free.
A case study
For this tutorial, we will use a sample blog application to illustrate how to use an Airtable base as an API.
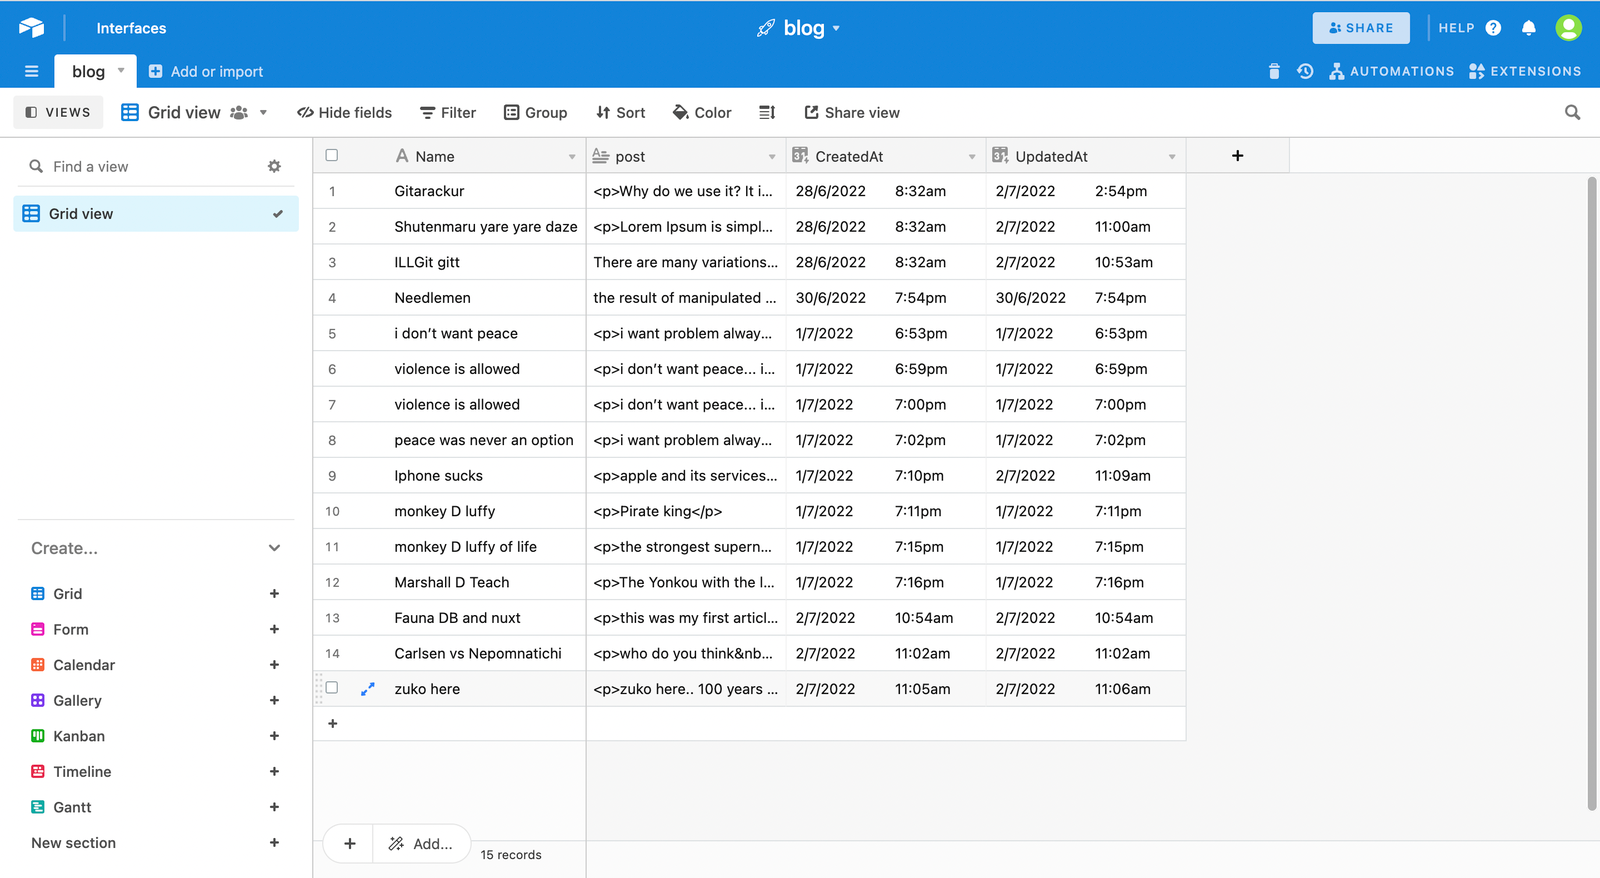
As shown, the blog base will hold fields like the Name of the blog post, the post itself, createdAt, and updatedAt fields, respectively.
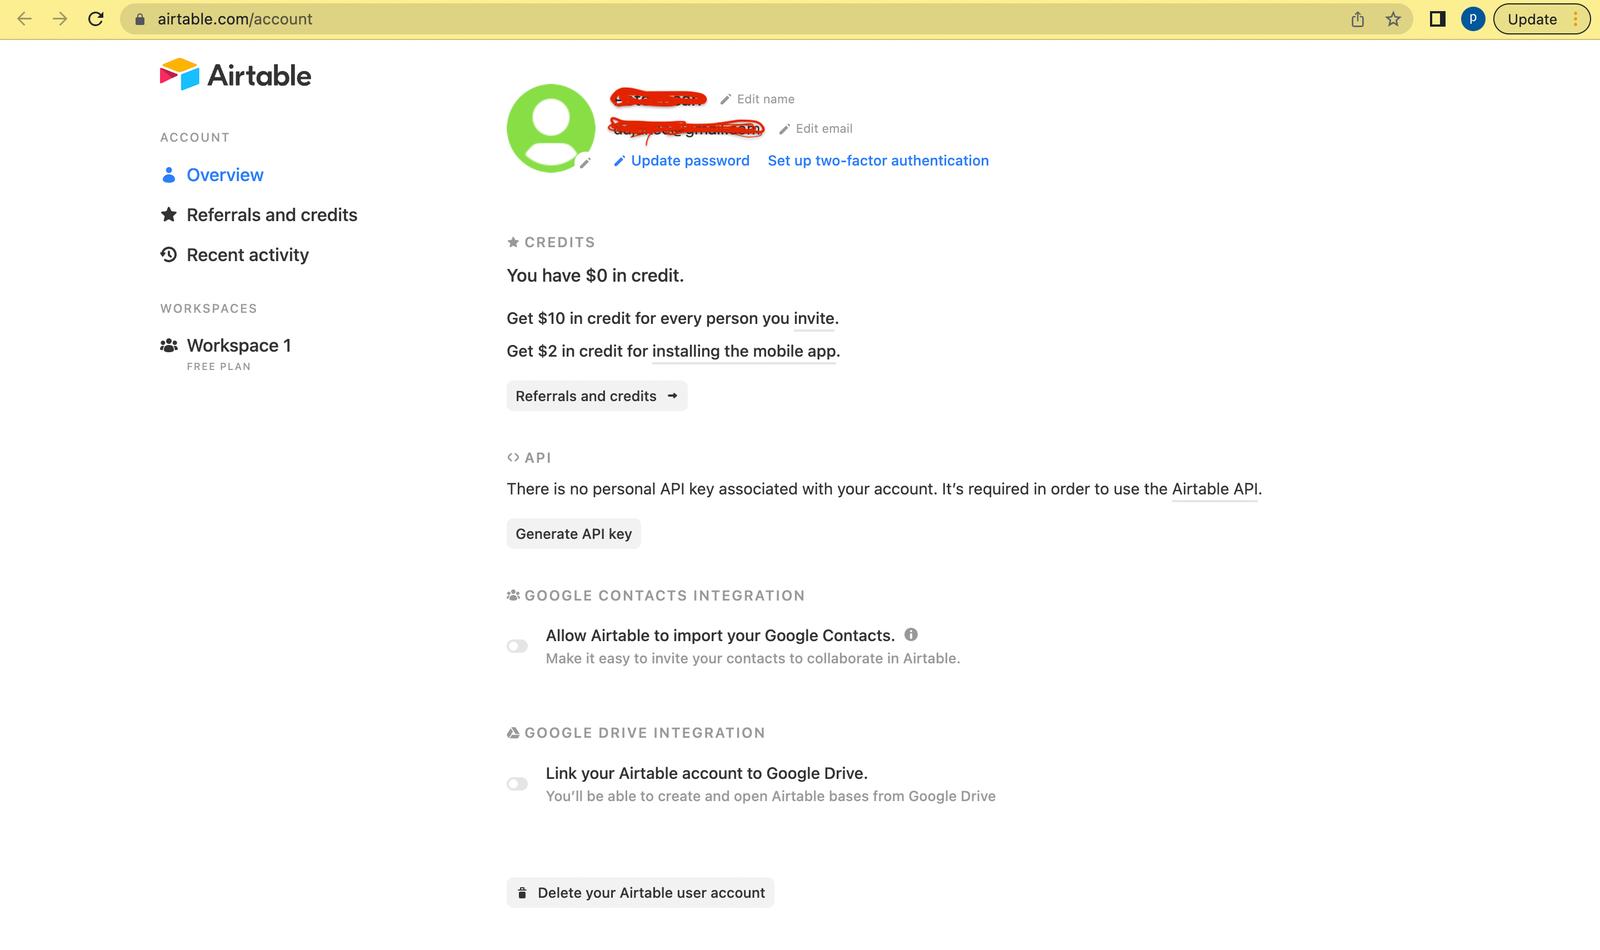
We will need the API key and base id to connect to the base API. To get it, navigate to your account page. On your account overview page, under the API heading, click a button that says “Generate API key.” to generate an API key if there is none already.
To obtain the ID of your Airtable base, open the Airtable API page and select the Airtable base that you want to use. This will open the API page of the base. The base ID is located at the URL of the API page of the base. In the URL, the base ID is immediately after https://airtable.com/ and starts with the app.

You can also get the base ID from the URL of the base on viewing a base.
Connect Our Application To An Airtable Base
We will be using the React framework for the blog application. After creating the blog base, we need to connect the React application to the base. We can do this using the Airtable JavaScript library. You can install the Airtable library using NPM or Yarn:
npm install airtable
# or
yarn add airtable
Create And Retrieve Data From An Airtable Base
As expected from a blog application, it should be able to create, retrieve/get, update, and delete posts from the blog base. The Airtable documentation provides sample queries on implementing the creation, retrieval, and deletion of data from the base.
On the React app, we will create an airtable.ts file and add the block of code shown below:
import Airtable from "airtable";

class AirtableClass {
  base: any;
  constructor(apiKey: string, base: string) {
    this.base = new Airtable({ apiKey }).base(base);
  }
  async getAllBlogPosts(callback: Function, error: Function) {
    try {
      let eachPageRecords = await this.base("blog")
        .select({ view: "Grid view" })
        .eachPage(
          callback && typeof callback === "function" ? callback : () => {}
        );
      return eachPageRecords;
    } catch (err) {
      error && typeof error === "function" && error(err);
      throw new Error("unable to get all records");
    }
  }
  async getSingleBlogPost(id: string, callback: Function) {
    try {
      const record = await this.base("blog").find(id);
      console.log("single record", record);
      callback(record, null);
    } catch (err) {
      callback(null, err);
      throw new Error("error getting a single blog");
    }
  }
  async createBlog(post: any, callback: Function) {
    try {
      let record = await this.base("blog").create(post);
      console.log("created blog");
      callback(record, null);
    } catch (err) {
      callback(null, err);
      throw new Error("error creating blog");
    }
  }
  async updateBlog(post: any, callback: Function) {
    try {
      let record = await this.base("blog").update(post);
      console.log("successfully updated blog");
      callback(record, null);
    } catch (err) {
      callback(null, err);
      throw new Error("error creating blog");
    }
  }
  async deleteBlog(postId: any, callback: Function) {
    try {
      let record = await this.base("blog").destroy(postId);
      callback(record, null);
    } catch (err) {
      callback(null, err);
      throw new Error("error deleting a blog");
    }
  }
}

export default new AirtableClass(
  process.env.REACT_APP_AIRTABLE_KEY,
  process.env.REACT_APP_BASE_KEY
);
The code above is simply an Airtable class with the methods to implement these queries.
- the class contains a base constructor. This constructor instantiates a new Airtable Object from the library using the API key and the base id.
this.base = new Airtable({apiKey}).base(base);-
the method below gets all blog posts from the base. This method contains a success callback(callback) function and an error callback function.
-
on the success of fetching the blog posts from the base, the callback function returns two(2) parameters: records, the fetched blog records, and fetchNextPage - a function that lets us fetch more contents from Airtable if there is any. Airtable, by default, supports pagination. Therefore, this is a function to call the next page of the paginated records from Airtable.
-
if an error is encountered on fetching the blog posts, it is passed to the error callback function, which can show on the UI that an error occurred.
async getAllBlogPosts(callback: Function, error: Function) {
  try {
    let eachPageRecords = await this.base("blog")
      .select({ view: "Grid view" })
      .eachPage(
        callback && typeof callback === "function" ? callback : () => {}
      );
    return eachPageRecords;
  } catch (err) {
    error && typeof error === "function" && error(err);
    throw new Error("unable to get all records");
  }
}- the method below fetches a blog post. this method also contains a callback function that returns two(2) parameters: records, the fetched blog record, and error, the error value in case the blog record was not obtained.
async getSingleBlogPost(id: string, callback: Function) {
  try {
    const record = await this.base("blog").find(id);
    console.log("single record", record);
    callback(record, null);
  } catch (err) {
    callback(null, err);
    throw new Error("error getting a single blog");
  }
}- the method below adds a blog post.
async createBlog(post: any, callback: Function) {
  try {
    let record = await this.base("blog").create(post);
    console.log("created blog");
    callback(record, null);
  } catch (err) {
    callback(null, err);
    throw new Error("error creating blog");
  }
}- the method below updates a blog post.
async updateBlog(post:any, callback:Function){
  try {
    let record = await this.base('blog').update(post)
    console.log('successfully updated blog')
    callback(record, null)
  } catch (err) {
    callback(null, err)
    throw new Error('error creating blog')
  }
}- the method below deletes a single blog post.
async deleteBlog(postId:any, callback:Function){
  try {
    let record = await this.base('blog').destroy(postId)
    callback(record, null)
  } catch (err) {
    callback(null, err)
    throw new Error('error deleting a blog')
  }
}
Display Blog posts
On the app, we will create a component for listing all blog posts and add the block of code shown below:
import React, { useEffect, useState } from "react";
import airtable from "../../airtable";
const Home = () => {
const nextPage = (): void => {
setPageNumber(pageNumber + 1);
};
useEffect(() => {
setLoading(true);
airtable.getAllBlogPosts(
function page(records: any, fetchNextPage: any) {
let recordsArray: Array<any> = [];
recordsArray = [...recordsArray, ...records];
setAllPosts(recordsArray);
fetchNextPage();
setLoading(false);
},
(error: any) => {
error && setLoading(false);
}
);
}, []);
return <div>The UI goes in here....</div>;
};
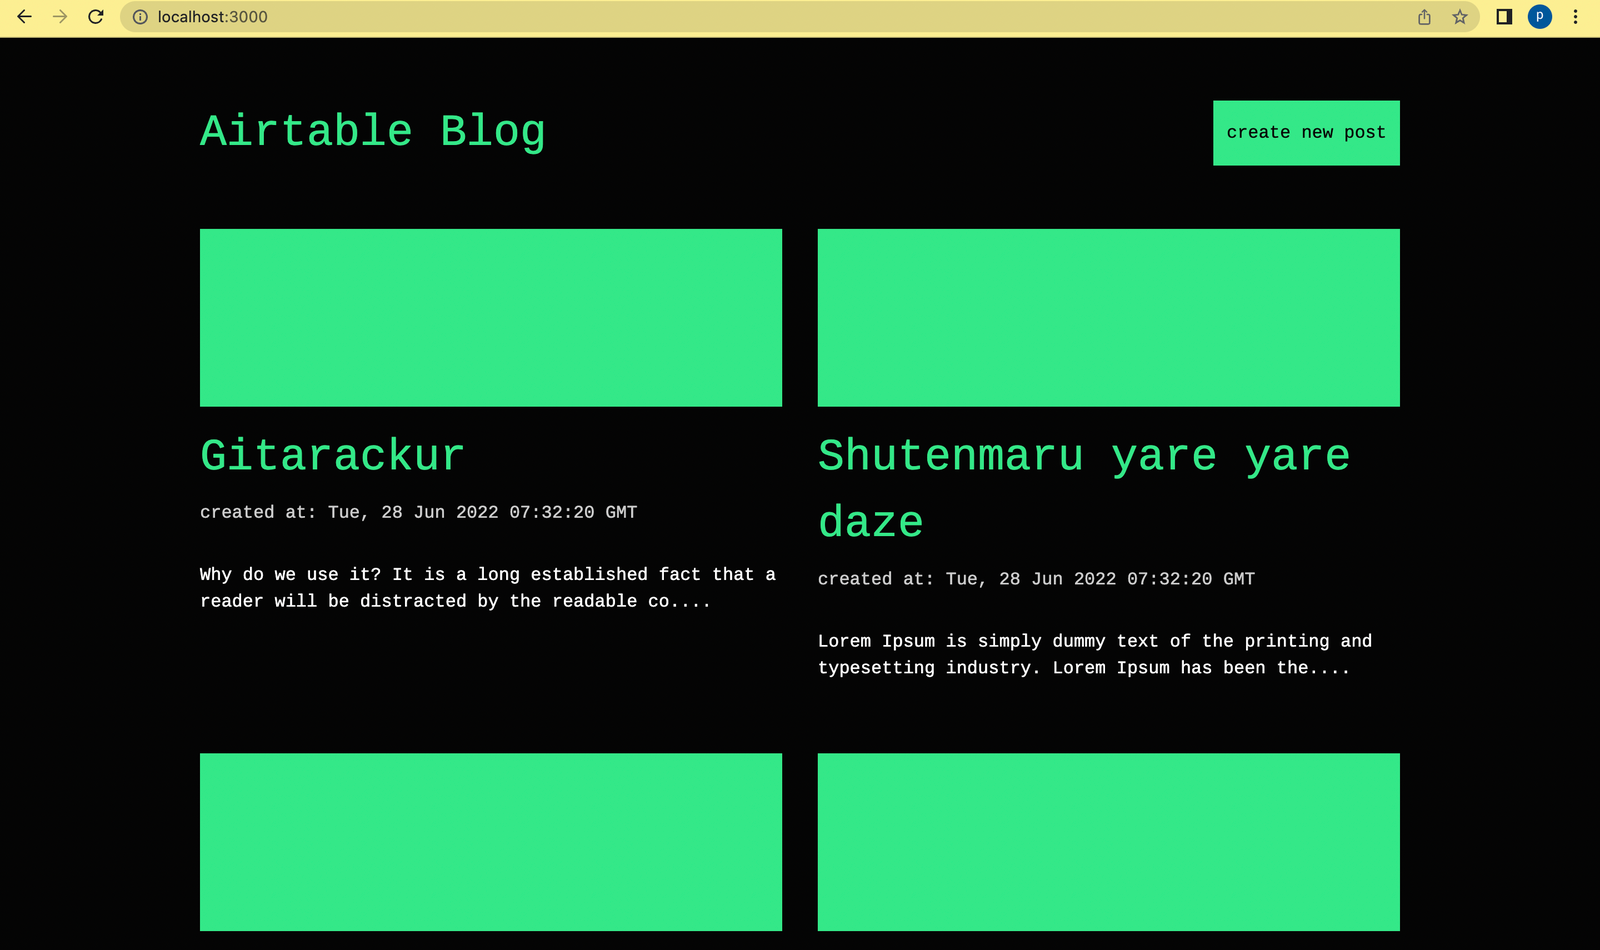
export default Home;In the code above, the method for fetching all blog post records is called on the component, after which the results of the fetched records are then mapped into the component’s view. The picture below shows the records rendered on the component view.
Create posts
We will also create a component for creating a blog post and add the block of code shown below:
import React, { useState } from "react";
import airtable from "../../airtable";
const CreatePost = () => {
const [loading, setLoading] = useState < boolean > false;
const [placeholder, setPlaceholder] = useState("type your text");
const [form, setForm] =
React.useState <
any >
{
Name: null,
post: null,
};
const { id } = useParams();
let navigate = useNavigate();
const createPost = async () => {
setLoading(true);
airtable.createBlog(form, (records: any, error: any) => {
if (records) {
navigate("/");
}
if (error) {
alert("unable to create post");
}
setLoading(false);
});
};
return <div>The UI goes in here.....</div>;
};
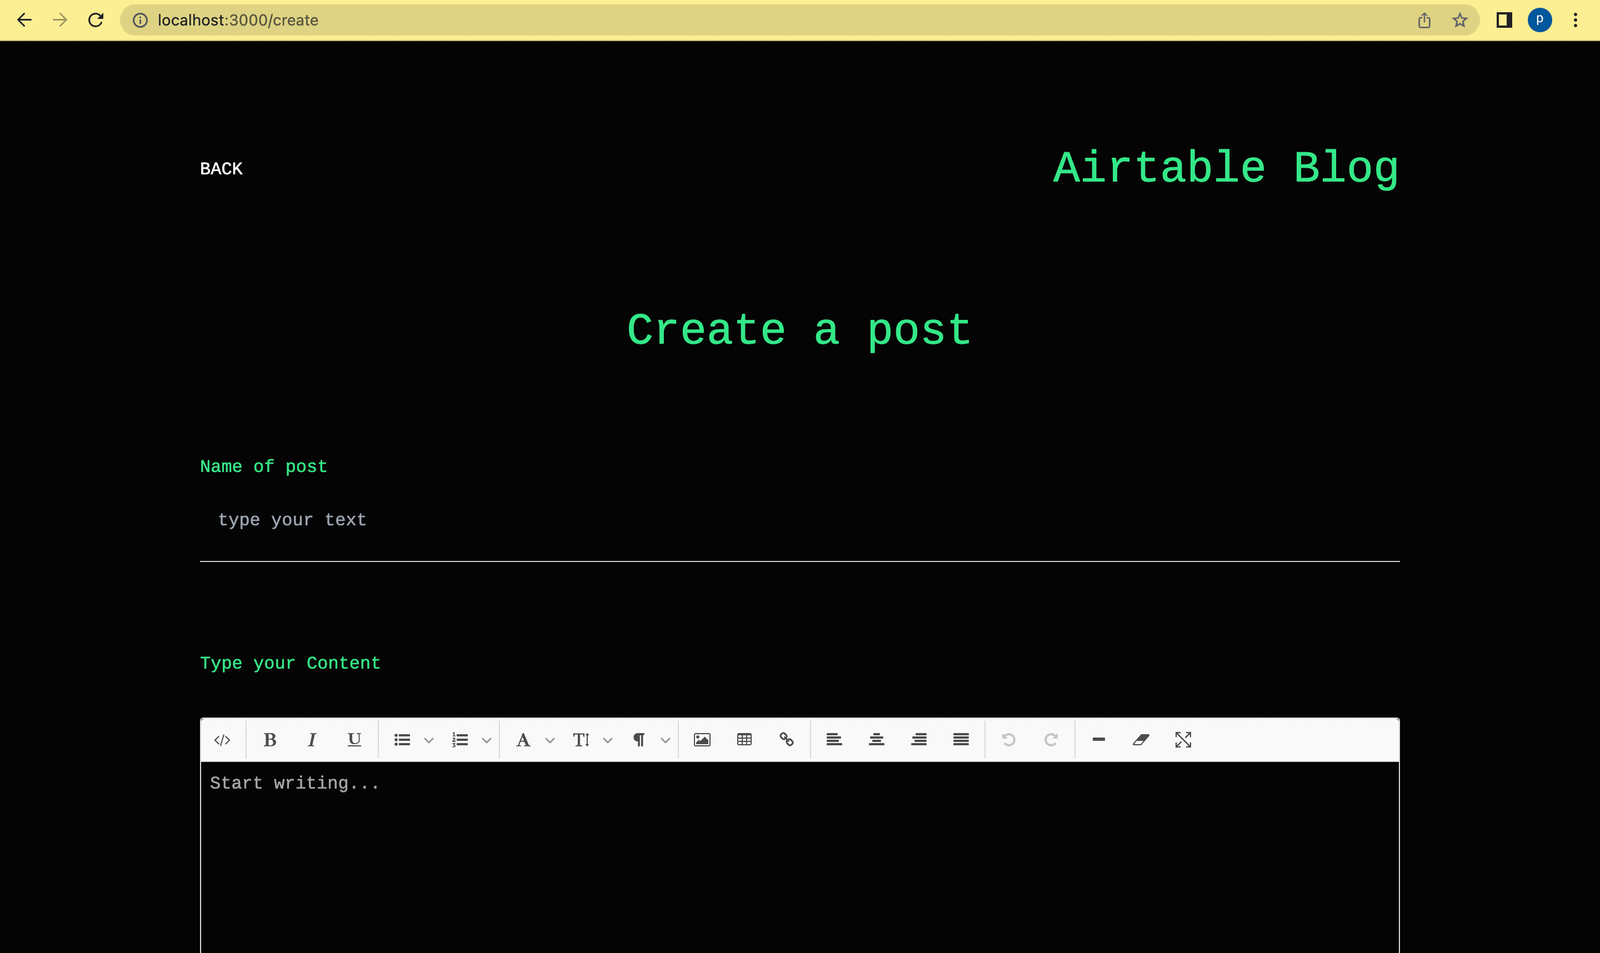
export default CreatePost;In the code above, the method for creating a blog post is called when a user inputs the details required to create a blog post, like the name of the post and the content, respectively. The picture below shows the component with the inputs.
Updating posts
We will also create a component for updating a blog post and add the block of code shown below:
import React, { useEffect, useState } from "react";
import { Link, useNavigate, useParams } from "react-router-dom";
import airtable from "../../airtable";
const UpdatePost = () => {
const [loading, setLoading] = useState < boolean > false;
const [loadingApiState, setloadingApiState] = useState < boolean > false;
const [singlePost, setSinglePost] =
useState <
any >
{
id: null,
fields: {
Name: "",
post: "",
},
};
const { id } = useParams();
let navigate = useNavigate();
const updatePost = async () => {
const post = [];
post.push(singlePost);
setloadingApiState(true);
airtable.updateBlog(post, () => {
setloadingApiState(false);
navigate(`/posts/${id}/view`);
});
setLoading(false);
};
useEffect(() => {
setLoading(true);
airtable.getSingleBlogPost(id, (records: any, error: any) => {
if (records) {
setSinglePost({
id: records.id,
fields: {
Name: records.fields.Name,
post: records.fields.post,
},
});
}
if (error) {
}
setLoading(false);
});
}, []);
return <div>The UI goes in here.....</div>;
};
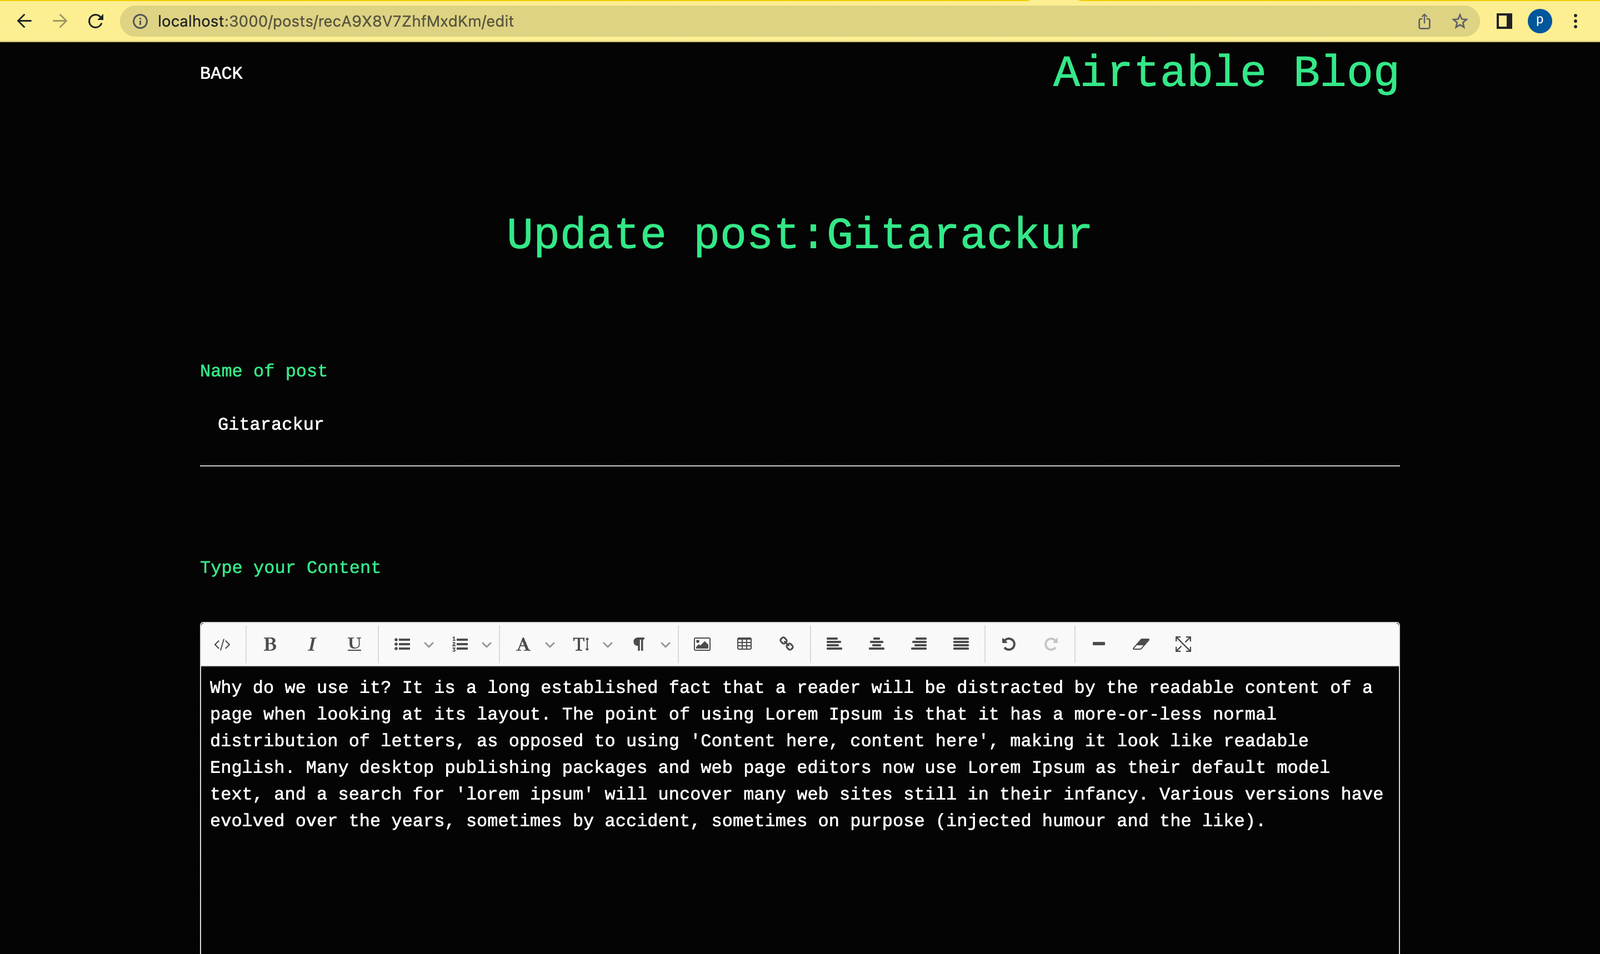
export default UpdatePost;In the code above, we render the blog post after the method for fetching the blog post is called. The component also provides inputs so that we can update a blog post. On submission of the updates, it calls the method that updates the blog record on Airtable.
Viewing a post
We will also create a component for viewing a blog post and add the block of code shown below:
import React, { useEffect, useState } from "react";
import { Link, useNavigate, useParams } from "react-router-dom";
import airtable from "../../airtable";

const PostView = () => {
  const [loading, setLoading] = useState < boolean > false;
  const [singlePost, setSinglePost] = useState < any > null;
  const [loadingApiState, setloadingApiState] = useState < boolean > false;
  const { id } = useParams();
  let navigate = useNavigate();
  const deletePost = async () => {
    const postId = [];
    postId.push(id);
    setloadingApiState(true);
    airtable.deleteBlog(postId, (record: any, error: any) => {
      if (record) {
        navigate(`/`);
      }
      if (error) {
      }
      setloadingApiState(false);
    });
    setLoading(false);
  };
  useEffect(() => {
    setLoading(true);
    airtable.getSingleBlogPost(id, (records: any, error: any) => {
      if (records) {
        setSinglePost(records);
      }
      if (error) {
      }
      setLoading(false);
    });
  }, []);
  return <div>The UI goes in here .....</div>;
};
export default PostView;
In the code above, we render the blog post after the method for fetching the blog post is called.
Deleting posts
The code also contains the method to delete a blog post, which is fired on clicking the “Delete Post” button on the component.

To see more of the translated user interface code on the respective components, you can check the Github repository here.
Conclusion
In this tutorial, we looked into the concept of “low-code database” applications and their advantages. We also talked about our low-code database of interest— “Airtable,” and its features. Lastly, we built a simple blog application with react and used Airtable as the database thanks to the Airtable base API.