Async Data Fetching with React-Select
Build customized components with dynamic data fetching using React Select


Handling selectable inputs on websites is one thing most developers don’t like getting into. Some user websites require a user to pick from a list of options applicable to them, could require multi-selection, or may require the user to create a unique entry to the field. When building these complicated selectable input components, we tend to use component libraries. In my case, I use react-select.
React-select is a React package for quickly creating flexible Input containers. It was developed as an alternative to React’s <select> element. That element is used to create a drop-down list of items for a user to pick from. React-select takes things a little further than the features provided by the <select> element by providing easily customizable features for creating drop-down options. The features provided by this package include input fields with auto-complete features, a list of selectable options which can be customized for multiple selections, asynchronous calls, and a feature to create new entries. React-Select is simple to use and can be customized to meet various requirements. Below is a GIF showing React-Select features:

In this tutorial, we will build a customized input component in a project using React-Select. With it, we will demonstrate different select options such as singe, multi-search, and creatable search in which users can create non-existing items. We will also demonstrate how we can use a data source such as an API to populate the select items.
Creating a sample project
For this article, we will use the React.js framework, Axios and React-select. We can install this via CLI with the following commands, which set up a React project folder called react-select with the needed dependency.
npx create-react-app react-select
cd react-select
npm install axios react-select --save
Once the installation is complete, open the project folder in your code editor. In the App.js file, we will add an import for the react-select package and define an array of selectable list items:
import './App.css';
import Select from 'react-select';
const selectableOptions = [
  { value: 'Adam', label: 'Adam Geoffrey' },
  { value: 'Jane', label: 'Jane Hibbard' },
  { value: 'Anabelle', label: 'Anabelle Einstein' },
  { value: 'Zeus', label: 'Zeus McQueen' }
]
function App() {
  return (
    <div className="App">
      <Select
        className="input-cont"
        placeholder= "Select an individual"
        options={selectableOptions}
      />
    </div>
  );
}
export default App;
To better style the application, add the following lines to index.css:
.App{
  display: flex;
  justify-content: center;
  align-items: center;
  height: 100vh;
}
.input-cont{
  width: 700px;
}
button{
  padding: 8px 15px;
  border: none;
  color: #fff;
  background-color: rgb(79, 79, 237);
  border-radius: 8px;
  margin-top: 5px;
}
To run the application, enter npm start in CLI and open your browser on the localhost URL. Here, we get a result similar to the image below:
Above, we have the react-select field with a drop-down of list items. We can also filter the list items using the input field. Add isMulti to the Select attributes to allow multiple selections.
<Select
  placeholder= "Select an individual"
  options={selectableOptions}
  isMulti
/>
When this is done, we can add multiple options from the list using the multi-select feature.

We can also add a message to be displayed when the user’s entry does not match pre-existing options using the noOptionsMessage attribute:
noOptionsMessage={()=>"name not found"}To allow users to create a new entry through the input field, add the following:
import Creatable from 'react-select/creatable';In place of Select, we use Creatable instead:
  <Creatable
  placeholder= "Select an individual"
  options={selectableOptions}
  isMulti
  noOptionsMessage={()=>"name not found"}
/>
Now, there’s an option to add names that did not exist to the options:

Alternatively, for longer strings such as names of countries, we can use a contracted form in the values property while displaying the country’s full name with the label property:
const selectableCountries = [
  { value: "USA", label: "United States of America" },
  { value: "JPN", label: "Japan" },
  { value: "ZAF", label: "South Africa" },
  { value: "CHN", label: "China" },
];
Then we pass this to the Creatable component instead:
<Creatable
  placeholder="Choose your nationality"
  options={selectableCountries}
  isMulti
  noOptionsMessage={()=>"Country not found"}
/>
In the browser, we will get the following result:

Here, the value remains the three-letter abbreviations, making it easier to use on the server-side while still making it easier for users to know which countries they select by presenting the full name in the label attribute.
Open Source Session Replay
OpenReplay is an open-source, session replay suite that lets you see what users do on your web app, helping you troubleshoot issues faster. OpenReplay is self-hosted for full control over your data.

Start enjoying your debugging experience - start using OpenReplay for free.
Asynchronous data fetching
Suppose we were to select data from a list of items, which is being populated by a data source. This data source could be a database, CMS, or an API. Below is an example of how we can achieve this using an API:
import { useEffect, useState } from "react";
import axios from "axios";
const url = "https://api.github.com/search/users?q=John&per_page=5";

function App() {
  const [options, setOptions] = useState([""]);

  useEffect(() => {
    const getData = async () => {
      const arr = [];
      await axios.get(url).then((res) => {
        let result = res.data.items;
        result.map((user) => {
          return arr.push({value: user.login, label: user.login});
        });
        setOptions(arr)
      });
    };
    getData();
  }, []);
}
In the code above, we are fetching five user names similar to “John” from a list of users on GitHub. We then stored this data in a state, and we can add this data as options in the Select component:
  <Creatable
  placeholder= "Select an individual"
  options={options}
  isMulti
  noOptionsMessage={() => "name not found"}
></Creatable>
Rather than displaying a long list of endless names, we will add a button to add new names. When this button is clicked, the fetch request runs, and another set of names will be added to the options list.
import { components } from 'react-select';
//...

const addnewOption =()=>{}
const SelectMenuButton = (props) => {
  return (
      <components.MenuList  {...props}>
          {props.children}
          <button onClick={()=> addnewOption()}>Add new element</button>
      </components.MenuList >
  ) }
Here, we have a function to add new options. We also defined a button that we will add as a component to React-select.
<Creatable
placeholder= "Select an individual"
options={options}
isMulti
noOptionsMessage={() => "name not found"}
components={{ MenuList: SelectMenuButton }}
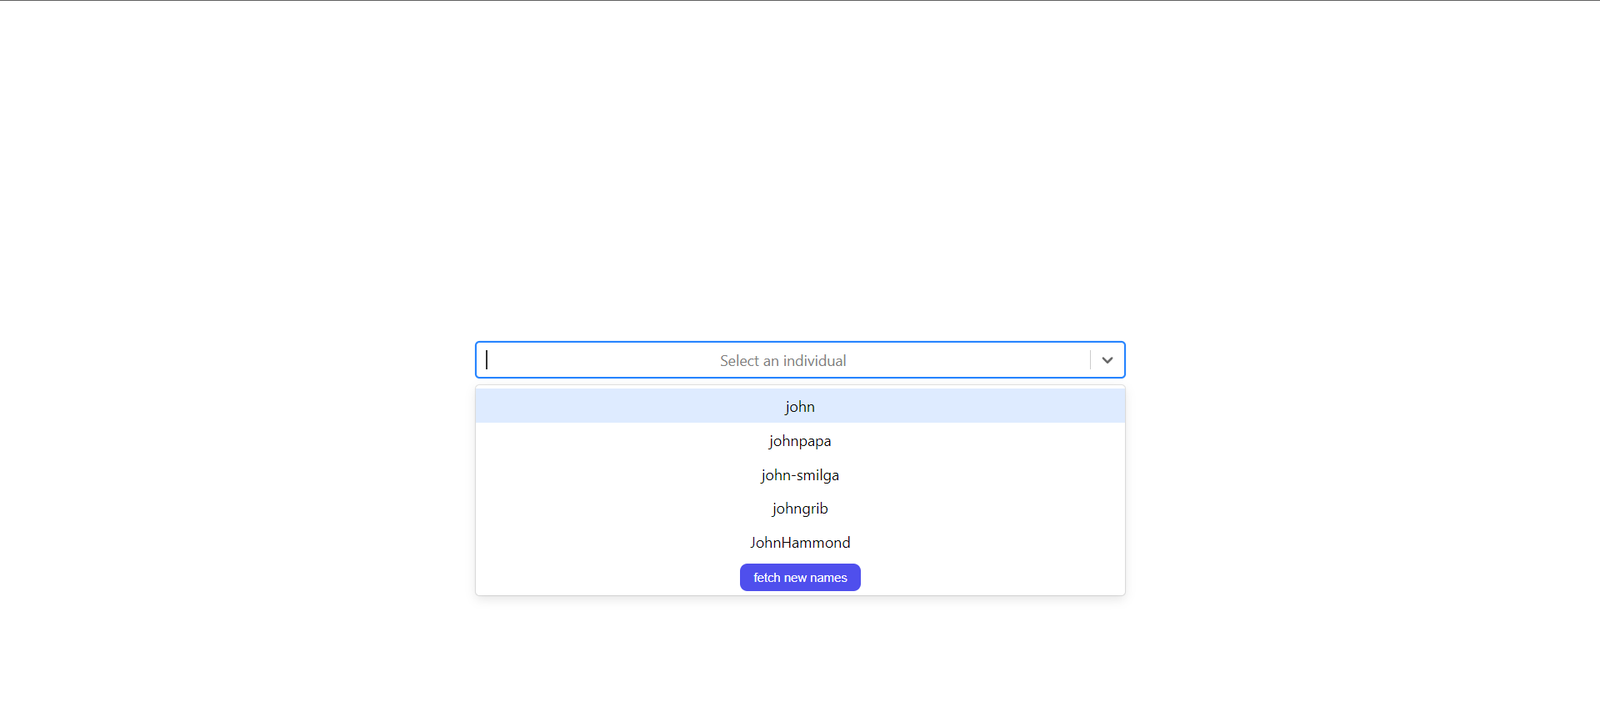
></Creatable>With this custom button added, we have a fetch new names button at the bottom of our options list, as shown in the image below.
Since we already have a function getData in our useEffect hook, we need to add a callback to rerun the fetch request and fetch the next set of names. We will use modify the url to take a page property to achieve this:
const [options, setOptions] = useState([]);
const [page, setPage] = useState(1);
const url = `https://api.github.com/search/users?q=John&per_page=5&page=${page}`;
Then we increment the value of the state page with the button using the addnewOptions function:
const addnewOption = () => {
    setPage(page + 1)
  }
Finally, for the useEffect block, we set the callback to be page so that whenever the value of page changes, the useEffect re-renders, and a fetch will be made.
  useEffect(() => {
  const getData = async () => {
    var arr = [...options];
    await axios.get(url).then((res) => {
      let result = res.data.items;
      result.map((user) => {
        return arr.push({ value: user.login, label: user.login });
      });
      setOptions(arr);
      console.log(options);
    });
  };
  getData();
}, [page]);
With this in place, when we click on the fetch new names button, we get an extra five user names added to the list of options.

Conclusion
In this tutorial, we have learned how to add a custom button component to our react-select component and perform asynchronous data fetching. You can take this further and create your own custom component that you can use with react-select.
A TIP FROM THE EDITOR: If you are just interested in easy data fetching, give a look at our Fetching and Updating data with React-Query and Fetch vs Axios: Which Is the Best Library for Making HTTP Requests? articles.