Authentication in React with Supabase
How to authenticate users with Supabase, an alternative to Firebase.


User authentication is a crucial aspect of many web applications. It allows users to securely create accounts, log in, and access protected resources. Implementing user authentication can be complex and time-consuming, especially when developing an application from scratch. In this article, we will implement user authentication in React applications with the help of Supabase.
Supabase is an open-source alternative to Firebase that provides many features, such as authentication, database, storage, edge functions, and real-time APIs, which can be used to build real-time applications. Supabase eliminates the need for having a dedicated backend for the React applications. So, React developers can develop a FullStack web app just with React and Supabase.
In this article, you will learn how to implement User Authentication in a React Application using Supabase’s Email Auth feature.
React Project Setup with Supabase
If you haven’t created an account in Supabase already, head over to its official website and create an account by clicking here
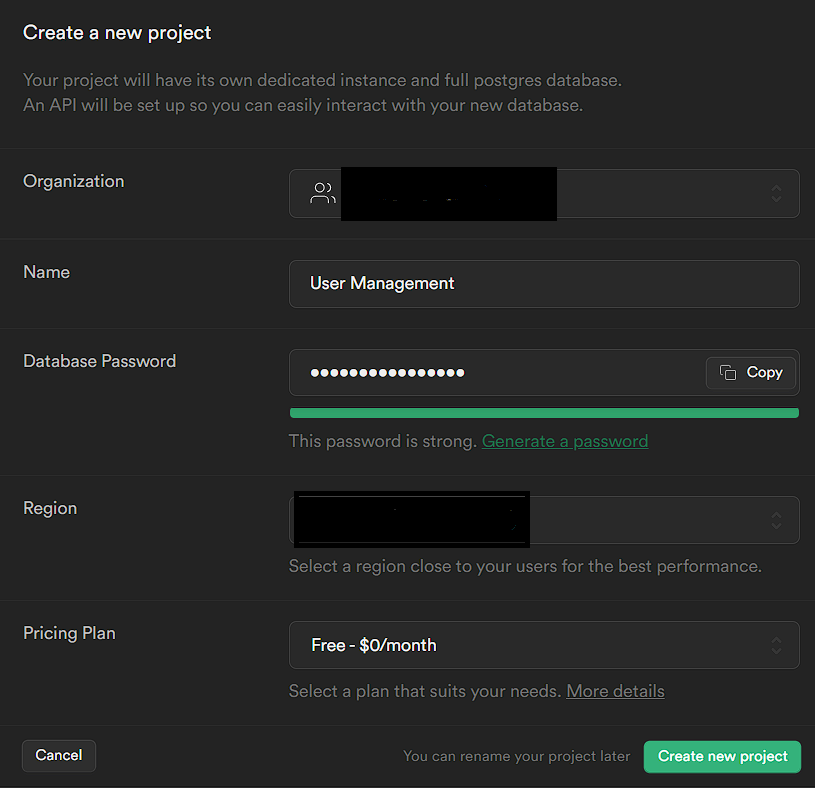
After creating the account, create a project in Supabase by clicking on New Project and entering the required details. You can select the data server closest to your region so that the app will be faster. You can refer to the image below for creating the project.
Once the project is created, you will get a screen with API keys, shown in the screenshot below.
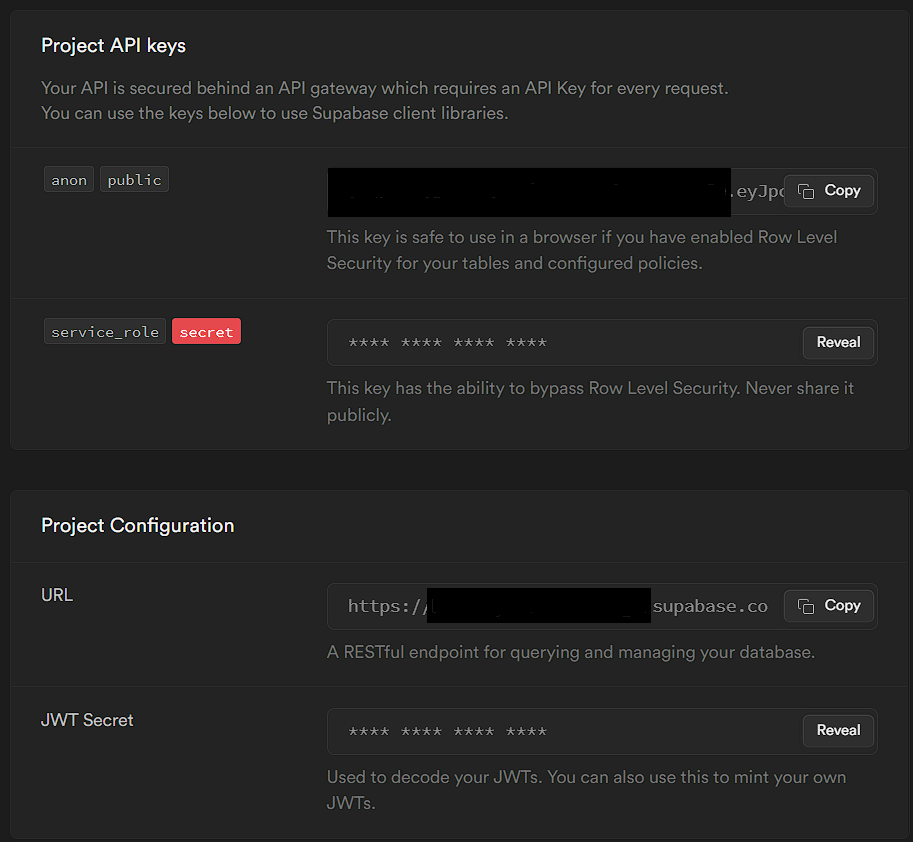
Copy the anon|public and URL keys, which we will use later in our React Project.
Now, Let’s set up a React project. We will use vite to set it up. Run the below command to set up the project in the react-supabase-auth directory.
# npm
npm create vite@latest react-supabase-auth -- --template react

# Yarn
yarn create vite react-supabase-auth -- --template react
Once the above step is done, Run the below commands to start the local dev server.
# npm
npm install
npm run dev

# yarn
yarn
yarn dev
It will open the local dev server.
Optional: You can remove all the unnecessary files (icons, CSS files) generated in the above step.
Next, Let’s install the required dependencies by running the below command.
# npm
npm install @supabase/supabase-js bootstrap react-bootstrap react-router-dom

# yarn
yarn add @supabase/supabase-js bootstrap react-bootstrap react-router-dom
The dependencies are explained below.
@supabase/supabase-js: Client library that provides necessary API to interact with Supabase.bootstrap: Used for Styling.react-bootstrap: This library provides react wrapper components for implementing bootstrap elements.react-router-dom: This is used for implementing client-side routing in React Applications
Let’s add Bootstrap to our project. Open main.jsx and add the below import statement at the top.
import "bootstrap/dist/css/bootstrap.min.css";Next, create a .env.local file and paste the keys we copied when we created the Supabase project in the above step.
VITE_SUPABASE_PROJECT_URL=<YOUR_PROJECT_URL_HERE>
VITE_SUPABASE_PROJECT_KEY=<YOUR_PROJECT_KEY_HERE>
It is perfectly fine to expose the URL and KEY in the project because they are only used to identify the project. Postgres’ Row-Level-Security (RLS) is used to implement the security level checks. We can use RLS to set rules and restrict access to our Project keys.
Now let’s initialize the Supabase client in our React app. Create a client.js file in the src/supabase directory.
import { createClient } from "@supabase/supabase-js";

const projectURL = import.meta.env.VITE_SUPABASE_PROJECT_URL;
const projectKey = import.meta.env.VITE_SUPABASE_PROJECT_KEY;

export const supabase = createClient(projectURL, projectKey);
Here, we are creating the Supabase client by passing our Project URL and the Project key and exporting the client instance that can be used elsewhere in the project.
Setting up React Context for User Management
Before implementing user Registration and Login, let’s use React’s Context API to handle state management throughout the App. Create a context folder inside src and add the AuthProvider.jsx file inside the context folder with the following content.
import { createContext, useContext, useState } from "react";

const AuthContext = createContext({});

export const useAuth = () => useContext(AuthContext);

const AuthProvider = ({ children }) => {
  const [user, setUser] = useState(null);

  return (
    <AuthContext.Provider value={{ user }}>{children}</AuthContext.Provider>
  );
};

export default AuthProvider;
Here, we are just creating the boilerplate of the context API for state management and not adding any functionality. We will implement it later on in the course of this article. Also, we are creating and exporting the useAuth hook to use it later in our project.
Now open main.jsx and wrap the App component inside the AuthProvider.
import "bootstrap/dist/css/bootstrap.min.css";
import React from "react";
import ReactDOM from "react-dom/client";
import App from "./App";
import "./index.css";
import AuthProvider from "./context/AuthProvider";

ReactDOM.createRoot(document.getElementById("root")).render(
  <React.StrictMode>
    <AuthProvider>
      <App />
    </AuthProvider>
  </React.StrictMode>
);
By wrapping the entire App component inside the AuthProvider, we tell React to apply the Context to the whole of our App, so that React’s Context API can manage all our App’s state.
User Registration
NOTE
We will not explain the styling of our app as it’s not in the scope of this article. We have added some basic styling using Bootstrap. It’s up to you to style the components as you wish.
Now, let’s move on to implementing the Registration functionality. Supabase provides many auth providers like Email, Phone, Google, GitHub, etc. By default, Email Auth is enabled, and you can check it by navigating Project -> Authentication -> Providers.
Supabase uses GoTrue as the underlying Auth mechanism and stores the user details in the users table in the auth schema. Create the Register.jsx file inside the src/pages directory and add the following code.
import { useRef, useState } from "react";
import { Alert, Button, Card, Form } from "react-bootstrap";
import { Link } from "react-router-dom";
import { supabase } from "../supabase/client";
const Register = () => {
const emailRef = useRef(null);
const passwordRef = useRef(null);
const confirmPasswordRef = useRef(null);
const [errorMsg, setErrorMsg] = useState("");
const [msg, setMsg] = useState("");
const [loading, setLoading] = useState(false);
const register = (email, password) =>
supabase.auth.signUp({ email, password });
const handleSubmit = async (e) => {
e.preventDefault();
if (
!passwordRef.current?.value ||
!emailRef.current?.value ||
!confirmPasswordRef.current?.value
) {
setErrorMsg("Please fill all the fields");
return;
}
if (passwordRef.current.value !== confirmPasswordRef.current.value) {
setErrorMsg("Passwords doesn't match");
return;
}
try {
setErrorMsg("");
setLoading(true);
const { data, error } = await register(
emailRef.current.value,
passwordRef.current.value
);
if (!error && data) {
setMsg(
"Registration Successful. Check your email to confirm your account"
);
}
} catch (error) {
setErrorMsg("Error in Creating Account");
}
setLoading(false);
};
return (
<>
<Card>
<Card.Body>
<h2 className="text-center mb-4">Register</h2>
<Form onSubmit={handleSubmit}>
<Form.Group id="email">
<Form.Label>Email</Form.Label>
<Form.Control type="email" ref={emailRef} required />
</Form.Group>
<Form.Group id="password">
<Form.Label>Password</Form.Label>
<Form.Control type="password" ref={passwordRef} required />
</Form.Group>
<Form.Group id="confirm-password">
<Form.Label>Confirm Password</Form.Label>
<Form.Control type="password" ref={confirmPasswordRef} required />
</Form.Group>
{errorMsg && (
<Alert
variant="danger"
onClose={() => setErrorMsg("")}
dismissible>
{errorMsg}
</Alert>
)}
{msg && (
<Alert variant="success" onClose={() => setMsg("")} dismissible>
{msg}
</Alert>
)}
<div className="text-center mt-2">
<Button disabled={loading} type="submit" className="w-50">
Register
</Button>
</div>
</Form>
</Card.Body>
</Card>
<div className="w-100 text-center mt-2">
Already a User? <Link to={"/login"}>Login</Link>
</div>
</>
);
};
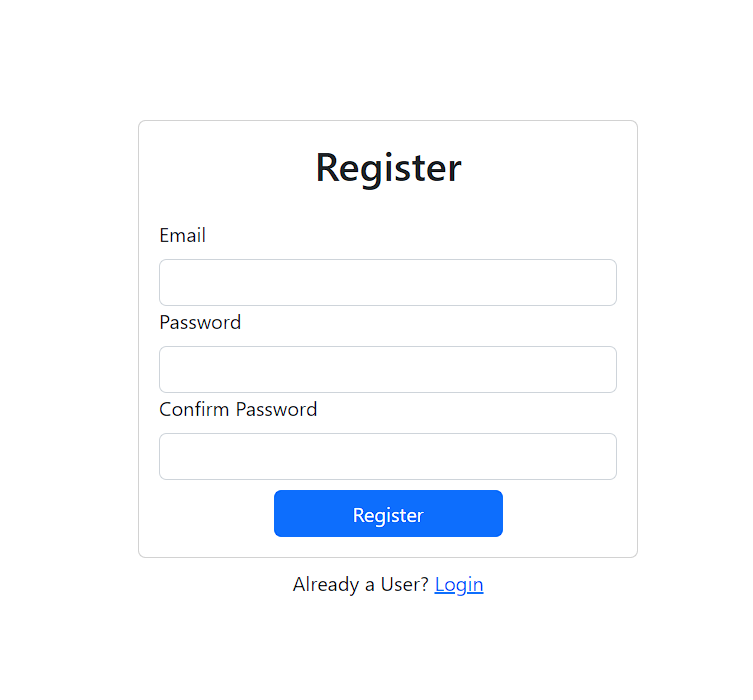
export default Register;supabase.auth provides various APIs for different providers to implement signUp functionality. Here we are creating a form using react-bootstrap’s Card component to make our form look like a card. We are getting an email and password from the user. We are using React’s useRef hook to store the input values instead of the useState hook, as using refs avoids unnecessary re-renders whenever we enter the input. Whenever the user clicks the Register button, we disable the button using the loading state so multiple clicks can be avoided. When the user submits the form, the handleSubmit function is called, and we do some basic validations like checking whether the passwords match. Then we will call the supabase.auth’s signUp function and pass the email and password. If the registration is successful, we will display the success message and ask the user to log in. If there is any error in the process, we will display the error message using the react-bootstrap’s Alert component.
The UI would look like this,
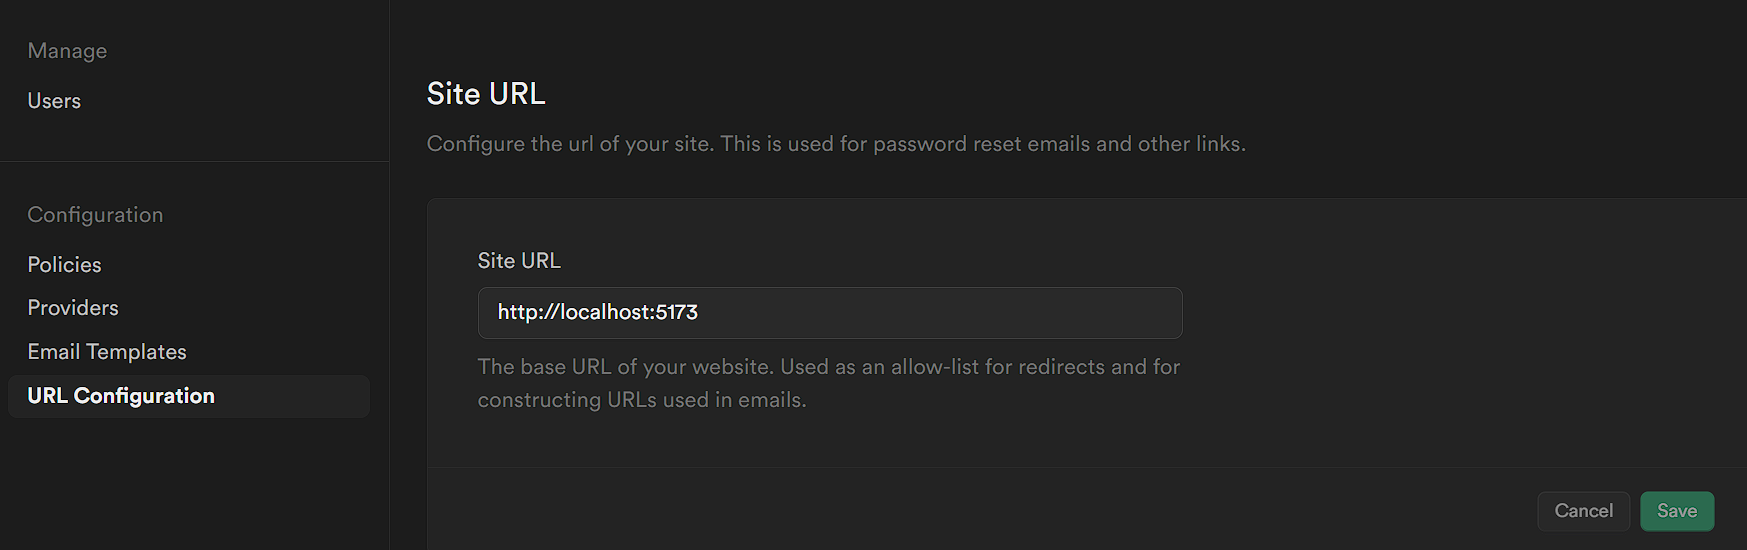
Once the registration process is successful, you will receive a mail to confirm your account. We need to configure the redirect URL to redirect the users to our site when they click on the link in the confirmation mail.
Go to the Supabase project Dashboard. Project -> Authentication -> URL Configuration. In that, set the site URL to http://localhost:5173. We redirect the user to the base URL once they confirm their account, and you may need to change the URL based on your configuration.
Now, Open the email and confirm it. Only the confirmed users can log in. You can view the user’s detail in the Supabase dashboard as well. Navigate to Supabase -> Your Project -> Authentication
User Login
Supabase provides signInWithPassword function to sign in the user with email and password. Before implementing the UI for the Login page, let’s implement the login functionalities in AuthProvider.jsx. Also, supabase.auth has a function named onAuthStateChange, which is a listener and receives a notification every time an auth event occurs. Let’s incorporate these functionalities into our Context Provider (AuthProvider). The updated AuthProvider.jsx will be as follows.
import { createContext, useContext, useEffect, useState } from "react";
import { supabase } from "../supabase/client";

const AuthContext = createContext({});

export const useAuth = () => useContext(AuthContext);

const login = (email, password) =>
  supabase.auth.signInWithPassword({ email, password });

const AuthProvider = ({ children }) => {
  const [user, setUser] = useState(null);
  const [auth, setAuth] = useState(false);

  useEffect(() => {
    const { data } = supabase.auth.onAuthStateChange((event, session) => {
      if (event === "SIGNED_IN") {
        setUser(session.user);
        setAuth(true);
      }
    });
    return () => {
      data.subscription.unsubscribe();
    };
  }, []);

  return (
    <AuthContext.Provider value={{ user, login }}>
      {children}
    </AuthContext.Provider>
  );
};

export default AuthProvider;
The onAuthStateChange has a callback function that takes in two parameters, event and session. The event parameter can be any of the following values SIGNED_IN, SIGNED_OUT, TOKEN_REFRESHED, USER_UPDATED, PASSWORD_RECOVERY. The session parameter contains details about the current session. For the login functionality, if the event is SIGNED_IN, we will update the user state and set the auth state to true. In the return block (cleanup block) of the useEffect hook, we unsubscribe from the auth listener. We will add all the auth functionalities in AUthProvider.jsx instead of adding them in various files.
Now, let’s implement the login UI. Create Login.jsx inside src/pages and add the following content.
import { useRef, useState } from "react";
import { Alert, Button, Card, Form } from "react-bootstrap";
import { Link, useNavigate } from "react-router-dom";
import { useAuth } from "../context/AuthProvider";
const Login = () => {
const emailRef = useRef(null);
const passwordRef = useRef(null);
const [errorMsg, setErrorMsg] = useState("");
const [loading, setLoading] = useState(false);
const navigate = useNavigate();
const { login } = useAuth();
const handleSubmit = async (e) => {
e.preventDefault();
try {
setErrorMsg("");
setLoading(true);
if (!passwordRef.current?.value || !emailRef.current?.value) {
setErrorMsg("Please fill in the fields");
return;
}
const {
data: { user, session },
error
} = await login(emailRef.current.value, passwordRef.current.value);
if (error) setErrorMsg(error.message);
if (user && session) navigate("/");
} catch (error) {
setErrorMsg("Email or Password Incorrect");
}
setLoading(false);
};
return (
<>
<Card>
<Card.Body>
<h2 className="text-center mb-4">Login</h2>
<Form onSubmit={handleSubmit}>
<Form.Group id="email">
<Form.Label>Email</Form.Label>
<Form.Control type="email" ref={emailRef} required />
</Form.Group>
<Form.Group id="password">
<Form.Label>Password</Form.Label>
<Form.Control type="password" ref={passwordRef} required />
</Form.Group>
{errorMsg && (
<Alert
variant="danger"
onClose={() => setErrorMsg("")}
dismissible>
{errorMsg}
</Alert>
)}
<div className="text-center mt-2">
<Button disabled={loading} type="submit" className="w-50">
Login
</Button>
</div>
</Form>
</Card.Body>
<div className="w-100 text-center mt-2">
New User? <Link to={"/register"}>Register</Link>
</div>
</Card>
</>
);
};
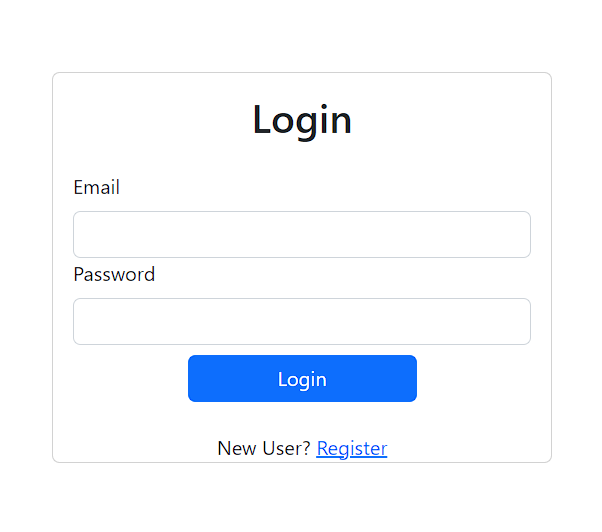
export default Login;Just like the Register component, we display a bootstrap form to get the email and password from the user. Once the user submits the form, we will make the login API call to Supabase. The signInWithPassword method returns a promise that we will resolve using async/await. The data attribute contains user and session, and the error attribute contains the error object. If the login is successful, the data object will contain the user and session details. If the session is null, the user hasn’t confirmed their account. So we will check both the user and session objects and then redirect the user to the Home page. Else we will display the error message using the react-bootstrap’s Alert component.
The Login page would look like this,
Authenticated Routes
As we have implemented the Login route, let’s create the Home page that can be accessed only when a user is logged in. In other words, an Authenticated Route. Let’s create a Home.jsx page in the src/pages directory.
import React from "react";
import { useAuth } from "../context/AuthProvider";

const Home = () => {
  const { user } = useAuth();

  return <div>You are logged in and your email address is {user.email}</div>;
};

export default Home;
In this Home component, we get the user details from the Context using the useAuth hook and display the email address in the body.
Now, let’s create a separate component to protect specific routes that can only be accessed by authenticated users. Create AuthRoute.jsx inside the src/components directory.
import { useAuth } from "../context/AuthProvider";
import { Navigate, Outlet, useLocation } from "react-router-dom";

const AuthRoute = () => {
  const { user } = useAuth();
  const location = useLocation();

  return user ? (
    <Outlet />
  ) : (
    <Navigate to={"/login"} replace state={{ path: location.pathname }} />
  );
};

export default AuthRoute;
In the above code, we are fetching the user from the Auth Context using the useAuth hook and checking if the user exists. If the user exists, we will direct the user to the protected component or redirect the user to the /login route using the <Navigate/> component. Here the <Outlet/> component acts as a placeholder where the component that matches the current route will be rendered.
Now, let’s add all these routes in our App.jsx file.
import { Container } from "react-bootstrap";
import { Route, Routes } from "react-router-dom";
import Register from "./pages/Register";
import Login from "./pages/Login";
import AuthRoute from "./components/AuthRoute";
import Home from "./pages/Home";

const App = () => {
  return (
    <>
      <Container
        className="d-flex align-items-center justify-content-center"
        style={{ minHeight: "100vh" }}>
        <div className="w-100" style={{ maxWidth: "400px" }}>
          <Routes>
            <Route element={<AuthRoute />}>
              <Route path="/" element={<Home />} />
              <Route path="/home" element={<Home />} />
            </Route>
            <Route path="/register" element={<Register />} />
            <Route path="/login" element={<Login />} />
          </Routes>
        </div>
      </Container>
    </>
  );
};

export default App;
Here, we are wrapping our App inside react-bootstrap’s Container, and using React router v6, we are setting up our routes. We are protecting the / and /home endpoints with the AuthRoute component ensuring only the authenticated users can use it. /login and /register routes are unprotected.
To enable client-side routing, we need to make one more change in main.jsx. Open main.jsx and update it like below
import "bootstrap/dist/css/bootstrap.min.css";
import React from "react";
import ReactDOM from "react-dom/client";
import App from "./App";
import "./index.css";
import { BrowserRouter } from "react-router-dom";
import AuthProvider from "./context/AuthProvider";

ReactDOM.createRoot(document.getElementById("root")).render(
  <React.StrictMode>
    <BrowserRouter>
      <AuthProvider>
        <App />
      </AuthProvider>
    </BrowserRouter>
  </React.StrictMode>
);
Here, we are wrapping our App component inside the BrowserRouter component of the react-router-dom. The BrowserRouter component provides the client-side routing functionalities in React.
Session Replay for Developers
Uncover frustrations, understand bugs and fix slowdowns like never before with OpenReplay — an open-source session replay tool for developers. Self-host it in minutes, and have complete control over your customer data. Check our GitHub repo and join the thousands of developers in our community.
Handling User Logout
Now, let’s move on to implementing the logout functionality. Supabase provides a very simple method to sign out the user.
Open AuthProvider.jsx and add the following line.
const signOut = () => supabase.auth.signOut();supabase.auth.signOut() method will remove the currently logged-in user from the browser.
Let’s export this function in our context as well.
<AuthContext.Provider value={{ user, login, signOut }}>
  {children}
</AuthContext.Provider>
Also, as we have already seen, onAuthStateChange fires events when an auth event occurs. So, when the user logs out, the SIGNED_OUT event will be fired. Let’s handle that as well inside the useEffect.
const { data } = supabase.auth.onAuthStateChange(async (event, session) => {
  if (event === "SIGNED_IN") {
    setUser(session.user);
    setAuth(true);
  } else if (event === "SIGNED_OUT") {
    setUser(null);
    setAuth(false);
  }
Here, we set the user state as null when the user signs out. So the context will become null and prevents the user from accessing protected routes once signed out.
The updated AuthProvider.jsx will be as follows.
import { createContext, useContext, useEffect, useState } from "react";
import { supabase } from "../supabase/client";

const AuthContext = createContext({});

export const useAuth = () => useContext(AuthContext);

const login = (email, password) =>
  supabase.auth.signInWithPassword({ email, password });

const signOut = () => supabase.auth.signOut();

const AuthProvider = ({ children }) => {
  const [user, setUser] = useState(null);
  const [auth, setAuth] = useState(false);

  useEffect(() => {
    const { data } = supabase.auth.onAuthStateChange((event, session) => {
      if (event === "SIGNED_IN") {
        setUser(session.user);
        setAuth(true);
      } else if (event === "SIGNED_OUT") {
        setUser(null);
        setAuth(false);
      }
    });
    return () => {
      data.subscription.unsubscribe();
    };
  }, []);

  return (
    <AuthContext.Provider value={{ user, login, signOut }}>
      {children}
    </AuthContext.Provider>
  );
};

export default AuthProvider;
To make our app look more appealing, let’s create a NavBar component and add the LogOut Button and other options.
import { Button } from "react-bootstrap";
import Container from "react-bootstrap/Container";
import Nav from "react-bootstrap/Nav";
import Navbar from "react-bootstrap/Navbar";
import { Link } from "react-router-dom";
import { useAuth } from "../context/AuthProvider";

const NavBar = () => {
  const { auth, signOut } = useAuth();

  const handleLogout = async (e) => {
    e.preventDefault();
    try {
      const { error } = await signOut();
      console.log(error);
    } catch (error) {
      console.log(error);
    }
  };

  return (
    <Navbar collapseOnSelect expand="lg" bg="dark" variant="dark">
      <Container>
        <Navbar.Brand>UserAuth</Navbar.Brand>
        <Navbar.Toggle aria-controls="responsive-navbar-nav" />
        <Navbar.Collapse id="responsive-navbar-nav">
          <Nav className="me-auto">
            {!auth && (
              <Nav.Link as={Link} to="/login">
                Login
              </Nav.Link>
            )}
            {!auth && (
              <Nav.Link as={Link} to="/register">
                Register
              </Nav.Link>
            )}
            {auth && (
              <Nav.Link as={Link} to="/">
                Home
              </Nav.Link>
            )}
          </Nav>
          <Nav>
            {auth && (
              <Nav.Link as={Button} onClick={handleLogout}>
                LogOut
              </Nav.Link>
            )}
          </Nav>
        </Navbar.Collapse>
      </Container>
    </Navbar>
  );
};

export default NavBar;
We are using React bootstrap’s Navbar component to create our NavBar component. We use the auth and signOut from the useAuth hook. We will display the options to the user based on the auth state. When the user clicks the Logout button, handleLogout will be called, and we will signOut the user.
Add the NavBar component in App.jsx above the routes because we need the NavBar to display across all the components. The Navbar will be displayed based on the user’s auth status.
The Home page, along with the Navbar, would look like this,
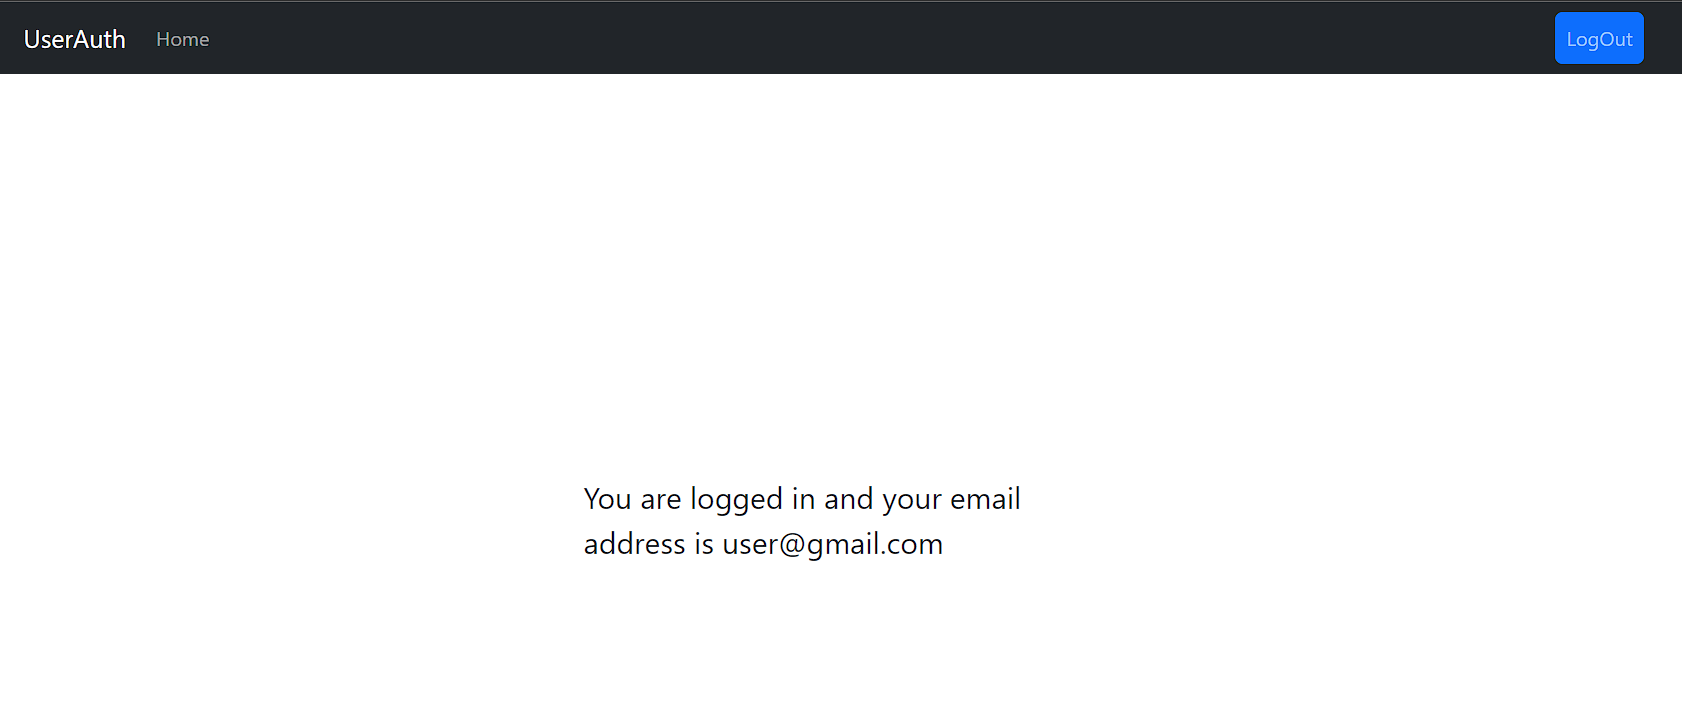
NavBar is displayed along with the LogOut button on the top right.
Handling Password Reset
Now, let’s move on to implementing the Password Reset functionality. This will be useful if the user forgets their password and wants to reset it. The supabase.auth provides a resetPasswordForEmail function which can be used for resetting the password. Open AuthProvider.jsx and add the following code.
const passwordReset = (email) =>
  supabase.auth.resetPasswordForEmail(email, {
    redirectTo: "http://localhost:5173/update-password"
  });

// Add the passwordReset method to the context
<AuthContext.Provider value={{ auth, user, login, signOut, passwordReset }}>
  {children}
</AuthContext.Provider>;
Here, the redirectTo attribute lets Supabase redirect the user to the specified URL once they click on the password reset link sent in the mail. We are redirecting the user to the update-password route once they click on the link sent in the email.
Now let’s design the UI for this. Create the PasswordReset component inside the src/pages directory and add the following code.
import { useRef, useState } from "react";
import { useAuth } from "../context/AuthProvider";
import { Alert, Button, Card, Form } from "react-bootstrap";
import { Link } from "react-router-dom";
const PasswordReset = () => {
const { passwordReset } = useAuth();
const emailRef = useRef(null);
const [loading, setLoading] = useState(false);
const [msg, setMsg] = useState("");
const handleSubmit = async (e) => {
e.preventDefault();
try {
setLoading(true);
const { data, error } = await passwordReset(emailRef.current.value);
console.log(error);
console.log(data);
setMsg("Password reset has been sent to your email");
} catch (e) {
console.log(e);
}
setLoading(false);
};
return (
<>
<Card>
<Card.Body>
<h2 className="text-center mb-4">Login</h2>
<Form onSubmit={handleSubmit}>
<Form.Group id="email">
<Form.Label>Email</Form.Label>
<Form.Control type="email" ref={emailRef} required />
</Form.Group>
{msg && (
<Alert variant="success" onClose={() => setMsg("")} dismissible>
{msg}
</Alert>
)}
<div className="text-center mt-2">
<Button disabled={loading} type="submit" className="w-50">
Send Reset Link
</Button>
</div>
</Form>
</Card.Body>
<div className="w-100 text-center mt-2">
Back to Login? <Link to={"/login"}>Login</Link>
</div>
</Card>
</>
);
};
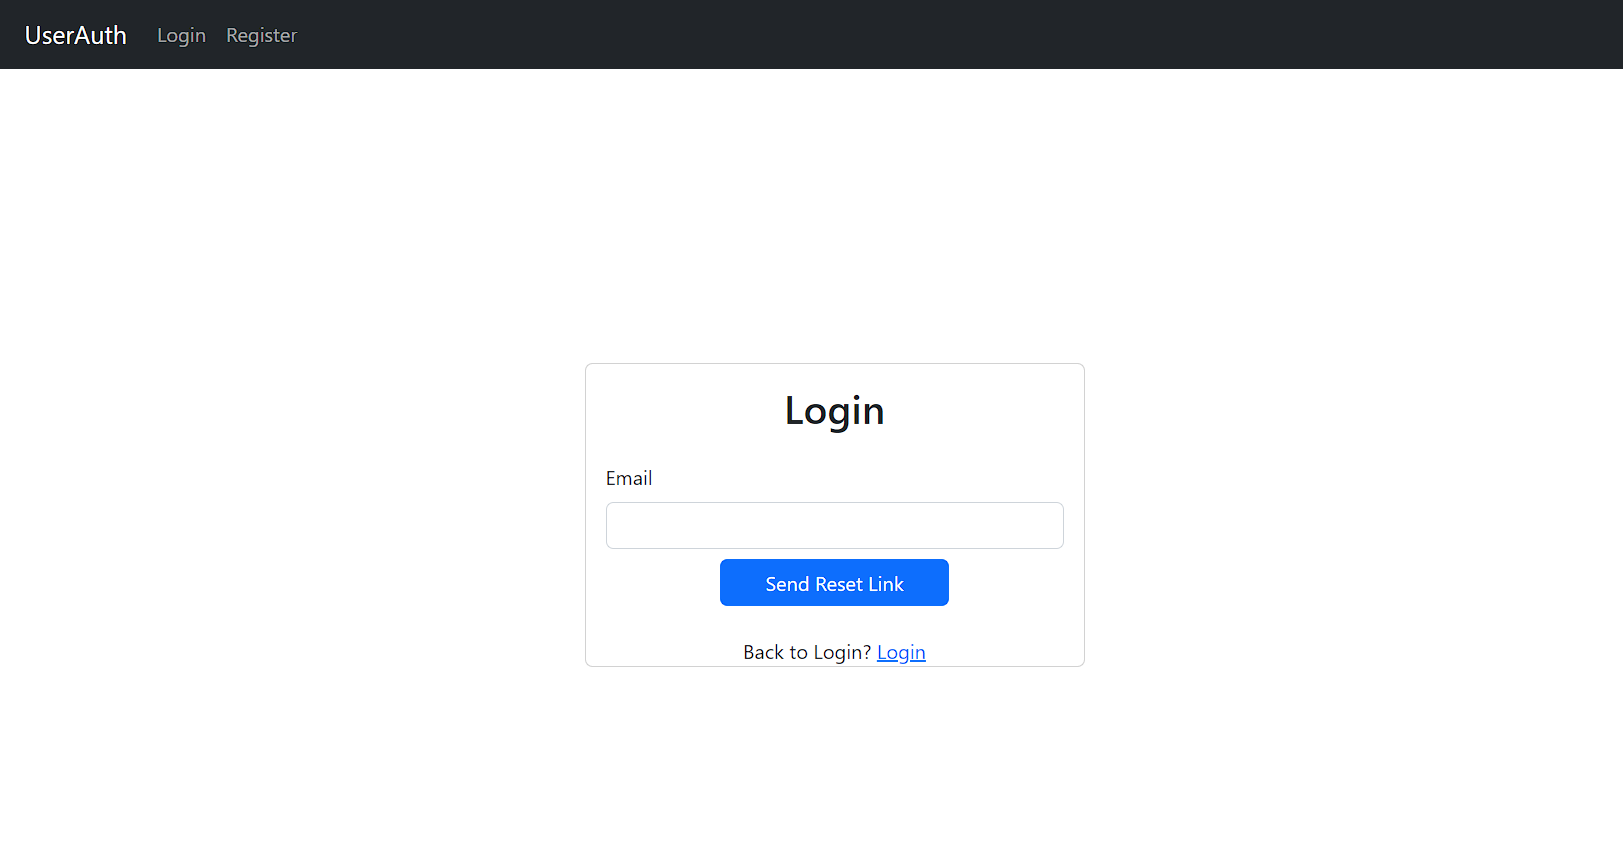
export default PasswordReset;Here we are rendering a simple form asking the user to enter their mail to send the password reset link. Once the user clicks on the button, the handleSubmit function will be invoked, and the password reset link will be sent to the email.
The UI would look like this,
Let’s add the route for this in App.jsx.
<Route path="/passwordreset" element={<PasswordReset />} />And add the below line in Login.jsx at the end.
<div className="w-100 text-center mt-2">
  Forgot Password? <Link to={"/passwordreset"}>Click Here</Link>
</div>
When the user clicks on the link in the email, the SIGNED_IN and PASSWORD_RECOVERY auth events will be triggered. As we have already handled the SIGNED_IN event, let’s listen to the PASSWORD_RECOVERY event in our AuthProvider component. When the PASSWORD_RECOVERY event is received, we will set the auth state to false.
import { createContext, useContext, useEffect, useState } from "react";
import { supabase } from "../supabase/client";

const AuthContext = createContext({});

export const useAuth = () => useContext(AuthContext);

const login = (email, password) =>
  supabase.auth.signInWithPassword({ email, password });

const signOut = () => supabase.auth.signOut();

const passwordReset = (email) =>
  supabase.auth.resetPasswordForEmail(email, {
    redirectTo: "http://localhost:5173/update-password"
  });

const AuthProvider = ({ children }) => {
  const [auth, setAuth] = useState(false);
  const [user, setUser] = useState(null);

  useEffect(() => {
    const { data } = supabase.auth.onAuthStateChange(async (event, session) => {
      if (event == "PASSWORD_RECOVERY") {
        setAuth(false);
      } else if (event === "SIGNED_IN") {
        setUser(session.user);
        setAuth(true);
      } else if (event === "SIGNED_OUT") {
        setAuth(false);
        setUser(null);
      }
    });
    return () => {
      data.subscription.unsubscribe();
    };
  }, []);

  return (
    <AuthContext.Provider value={{ auth, user, login, signOut, passwordReset }}>
      {children}
    </AuthContext.Provider>
  );
};

export default AuthProvider;
Supabase provides a updateUser function where we can update the user details, including their password. Let’s create the function to implement this.
const updatePassword = (updatedPassword) =>
  supabase.auth.updateUser({ password: updatedPassword });
Here we are updating the user’s details with their new password. As simple as that. Let’s export this function in our context as well.
<AuthContext.Provider
  value={{
    auth,
    user,
    login,
    signOut,
    passwordReset,
    updatePassword
  }}>
  {children}
</AuthContext.Provider>
Now, let’s create the UpdatePassword component to let the user enter their new password and update it.
import React, { useRef, useState } from "react";
import { Alert, Button, Card, Form } from "react-bootstrap";
import { useAuth } from "../context/AuthProvider";
import { useNavigate } from "react-router-dom";

const UpdatePassword = () => {
  const { updatePassword } = useAuth();
  const passwordRef = useRef(null);
  const confirmPasswordRef = useRef(null);
  const [errorMsg, setErrorMsg] = useState("");
  const [loading, setLoading] = useState(false);
  const navigate = useNavigate();

  const handleSubmit = async (e) => {
    e.preventDefault();
    if (!passwordRef.current?.value || !confirmPasswordRef.current?.value) {
      setErrorMsg("Please fill all the fields");
      return;
    }
    if (passwordRef.current.value !== confirmPasswordRef.current.value) {
      setErrorMsg("Passwords doesn't match. Try again");
      return;
    }
    try {
      setErrorMsg("");
      setLoading(true);
      const { data, error } = await updatePassword(passwordRef.current.value);
      if (!error) {
        navigate("/");
      }
    } catch (error) {
      setErrorMsg("Error in Updating Password. Please try again");
    }
    setLoading(false);
  };

  return (
    <>
      <Card>
        <Card.Body>
          <h2 className="text-center mb-4">Update Password</h2>
          <Form onSubmit={handleSubmit}>
            <Form.Group id="password">
              <Form.Label>Password</Form.Label>
              <Form.Control type="password" ref={passwordRef} required />
            </Form.Group>
            <Form.Group id="confirm-password">
              <Form.Label>Confirm Password</Form.Label>
              <Form.Control type="password" ref={confirmPasswordRef} required />
            </Form.Group>
            {errorMsg && (
              <Alert
                variant="danger"
                onClose={() => setErrorMsg("")}
                dismissible>
                {errorMsg}
              </Alert>
            )}
            <div className="text-center mt-2">
              <Button disabled={loading} type="submit" className="w-50">
                Update
              </Button>
            </div>
          </Form>
        </Card.Body>
      </Card>
    </>
  );
};

export default UpdatePassword;
Here we are rendering a form, getting the password and confirming password inputs from the user, and validating it. Then when the user clicks on the Update button, we call the updatePassword function and update the user’s password. Once that’s done, we redirect the user to the home page using the useNavigate method of react-router-dom.
The UI would look like this,

Handling Page Reload
Our app is almost complete except for one part. In the app we have created, once the user refreshes the page after logging in, it will ask the user to log in again. When the page reloads, the context gets reset, and the user state is not retained. One way to solve this is by saving the user info in localStorage and loading it when the page reloads. But Supabase provides an easy way to achieve this without using localStorage. The supabase.auth has a getUser method, which can retrieve the user from the session. We can make use of this method in our Context. In this way, we don’t need to save our user info anywhere in our browser like localStorage, cookies, etc.,
In the AuthProvider component, add a new state called loading, which indicates the loading state of our app when we reload the page.
const [loading, setLoading] = useState(null);And add the below code in the useEffect block, just above the onAuthStateChanged listener, and add the loading state check in the Context Provider.
useEffect(() => {
  setLoading(true);
  const getUser = async () => {
    const { data } = await supabase.auth.getUser();
    const { user: currentUser } = data;
    setUser(currentUser ?? null);
    setLoading(false);
  };
  getUser();
  // onAuthStateChange code below
}, []);

return (
  <AuthContext.Provider
    value={{
      auth,
      user,
      login,
      signOut,
      passwordReset,
      updatePassword
    }}>
    {!loading && children}
  </AuthContext.Provider>
);
So, whenever the user reloads the page or opens the page after re-opening the browser, the useEffect hook will be invoked, and the getUser method will be called and fetches the user details from the supabase session using the supabase.auth.getUser() method and updates the user state. If the user is present, we will set the auth state to true; otherwise, false. Hence, we don’t need to explicitly save the user’s state in localStorage or cookies or anywhere in the browser.
That’s it; the app is complete.
Conclusion
In this article, we have discussed how to implement user Authentication in React Applications using Supabase. We covered how to set up Supabase and implement its auth functionalities like registering, logging in, and resetting passwords. For further development, you can implement additional functionalities to rate-limit the number of password reset requests a user can make or build a new app on top of it. Overall, Supabase provides a simple and secure solution for adding user authentication to React Applications. With Supabase, developers can quickly implement user authentication and other backend functionalities without needing to manage servers or infrastructure.
The complete source code of this article can be found on my GitHub. If you find the code useful, please star the repo.
Gain Debugging Superpowers
Unleash the power of session replay to reproduce bugs and track user frustrations. Get complete visibility into your frontend with OpenReplay, the most advanced open-source session replay tool for developers.