
Build a Movie Search App with Petite-Vue: A lightweight alternative to VueJS


As a developer, you might want to create a little project and not want to burden yourself with installing any library/framework.
Petite-vue is a new library which acts as a lightweight alternative to Vue. This light-weight library has syntax just like Vue with the same template and the way the reactivity model is designed. It’s a plug and play library as you can progressively add it to your HTML site to provide little interactions on your site.
Petite-vue was created so you can add those little interactions in your HTML site by just loading it from a CDN and adding the needed interactivity. It’s a very light library of only 6kb and it is driven by @vue/reactivity.
Let’s take a look at how this library works with a practical example!
How petite-vue works
Take a look at the following example:
<!DOCTYPE html>
<html lang="en">
<head>
    <script src="https://unpkg.com/petite-vue" defer init></script>
</head>
<body>
    <div v-scope="{ count: 0 }">
        {{ count }}
        <button @click="count++">inc</button>
      </div>
</body>
</html>
We can import the library using a CDN and use it in our body by marking it’s boundry with a v-scope. In the v-scope, we set a reactive count and we can see how it uses vue curly brace template syntax.
The code above doesn’t look clean so let’s see how we can use petite-vue with the ES module build.
<!DOCTYPE html>
<html lang="en">
<head>
    <title>Petite-vue Example</title>
</head>
<body>
    <div id="countapp">
        {{count}}
        <button @click="incrementCount">Increment</button>
    </div>
    <script type="module">
        import { createApp } from "https://unpkg.com/petite-vue?module";
        function countFunction() {
            return {
                count: 0,
                incrementCount() {
                    this.count++
                }
            }
        }
        createApp(countFunction()).mount("#countapp");
    </script>
</body>
</html>
We created a script tag for the type module and imported createApp from petite-vue. In the createApp function, we accept a countFunction that returns a object where all our reactivity takes place and we mount the div with the id we want to make reactive. Now we can carry out reactive operations just like we can in VueJS
Creating Components
In petite-vue, we can use templates as a way to create components. In the return statement of our function, we use the $template syntax and we set it to the id of our app we will want interactivity to take place. Now we can remove it from where we mounted it and have the template do the job of specifying the id we want to work on.
<body>
    <template id="countapp">
      {{count}}
      <button @click="incrementCount(2)">Increment</button>
    </template>
    <div v-scope="countFunction()"></div>
    <div v-scope="countFunction()"></div>
    <div v-scope="countFunction()"></div>
    <script type="module">
      import { createApp } from "https://unpkg.com/petite-vue?module";
      function countFunction() {
        return {
          $template: "#countapp",
          count: 20,
          incrementCount(prop) {
            this.count = this.count + prop;
          }
        };
      }
      createApp({ countFunction }).mount();
    </script>
  </body>
Above we see that we changed the div we want to turn a component into a template tag, now we can reference that particulat template again and again by using petite-vue v-scope to an passing the countFunction() to it.
Setting Up our App
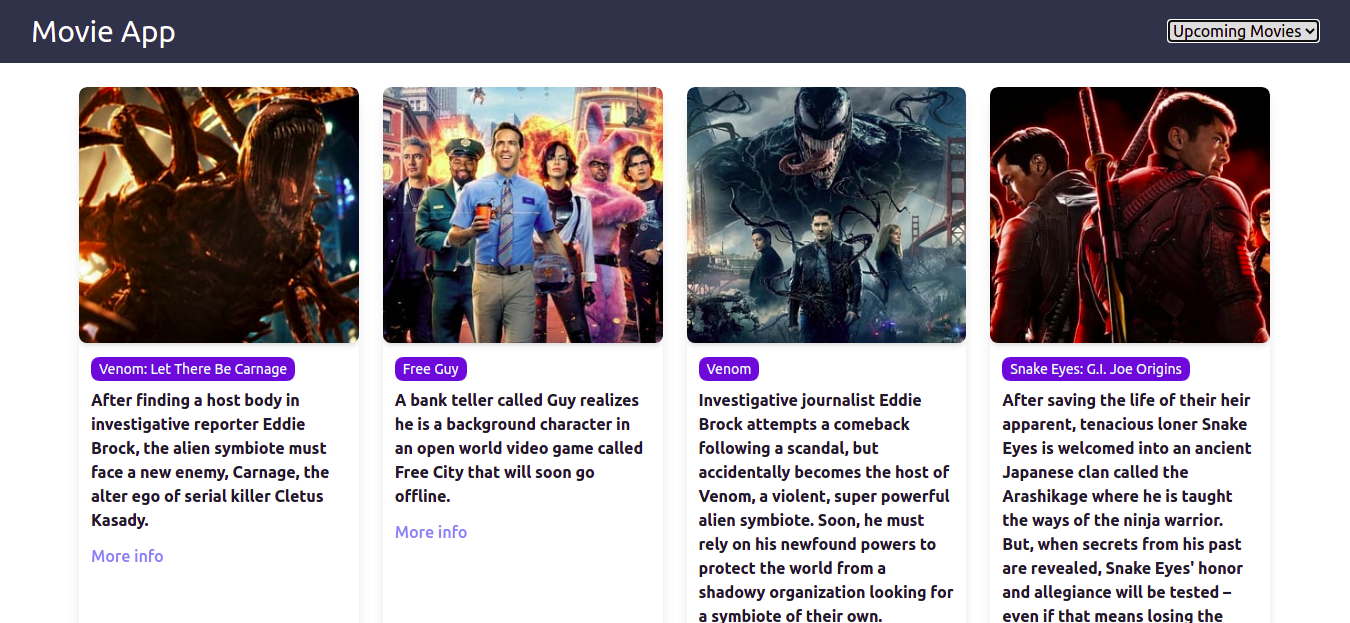
Let’s explore what we can use petite-vue to do by building a movie app. Here is what we will be building:
For the UI, we will be using TailwindCSS, which we will install using a CDN in our head.
<link href="https://unpkg.com/tailwindcss@^1.0/dist/tailwind.min.css" rel="stylesheet">Another thing we will be needing is our movie API. For this we will use the TMDB movie API. You can create an account and get your API key to make a request. Since this is a tutorial I will not be hiding my API key.
How our App works
We want to be able to select the movie type we want from our header and then we make a request for that movie type and display all of the movies under that type. The type of movie we want will be stored in the store we create and dynamically bind with our request.
In order to write cleaner code, we will move all the app logic to an script.js file, so our file structure looks like this
PETITE-VUE-MOVIEAPP -index.html -script.js
In the script.js file, we import createApp and reactive from petite-vue and in the app reactive object, we have two data points in our app i.e the movieType and results that stores the array of objects we get from our API request.
//script.js
import { createApp, reactive } from "https://unpkg.com/petite-vue?module";
const app = reactive({
    movieType: "popular",
    results: "",
    async search(){
        const movieSearch = await fetch(`https://api.themoviedb.org/3/movie/${this.movieType}?api_key=fbb0c92eb459272c7afd323360fb1146`)
        this.results = await movieSearch.json()

        console.log(results);
    }
})
createApp({app}).mount("#movieapp");
We have set the default movie type to popular and as we can see in our fetch request, we dynamically bind the movie type to the URL. Now in our index.html this is what the code looks like:
<!DOCTYPE html>
<html lang="en">
<head>
  <meta charset="UTF-8">
  <meta http-equiv="X-UA-Compatible" content="IE=edge">
  <meta name="viewport" content="width=device-width, initial-scale=1.0">
  <script type="module" src="script.js"></script>
  <link href="https://unpkg.com/tailwindcss@^1.0/dist/tailwind.min.css" rel="stylesheet">
  <title>Petite-vue Example</title>
</head>
<body>
  <div id="movieapp">
    <nav class="bg-gray-800">
      <div class="max-w-7xl mx-auto px-2 sm:px-6 lg:px-8">
        <div class="relative flex items-center justify-between h-16">
          <div>
            <h1 class="text-white text-3xl">Movie App</h1>
          </div>
          <div>
            <select v-model="app.movieType" v-on:input="app.search"
              className="ml-auto my-2 py-2 px-4 shadow-md rounded-md font-medium bg-blue-400 text-gray-700">
              <option value="">Filter by movie</option>
              <option value="popular">Most Popular</option>
              <option value="top_rated">Top Rated</option>
              <option value="upcoming">Upcoming Movies</option>
            </select>
          </div>
        </div>
      </div>
    </nav>
    <!-- display our movies -->
    <div class="mt-6 mx-20 grid md:grid-cols-2 lg:grid-cols-4 gap-x-6 gap-y-8">
      <article v-for="(result, id) in app.results.results" :key="id"
        class="bg-white group relative rounded-lg overflow-hidden shadow-lg hover:shadow-2xl transform duration-200">
        <div class="relative w-full h-80 md:h-64 lg:h-44">
          <div :style="{
                      backgroundImage: `url(https://image.tmdb.org/t/p/w500${result.backdrop_path})`
                    }" class="bg-gray-300 h-64 w-full rounded-lg shadow-md bg-cover bg-center"></div>
        </div>
        <div class="px-3 py-4">
          <h3 class="text-sm text-gray-500 pb-2">
            <a class="bg-indigo-600 py-1 px-2 text-white rounded-lg" href="#">
              <span class="absolute inset-0"></span>
              {{result.original_title}}
            </a>
          </h3>
          <p class="text-base font-semibold text-gray-900">
            {{result.overview}}</p>
          <p class="text-indigo-400 mt-3 font-medium">More info</p>
        </div>
      </article>
    </div>
  </div>
</body>
</html>
There are quite a few things going on above. You can see the nav tag that contains our header/navigation. In the header we have the app name then we have a select input tag with options, so that we can create a dropdown list of the movie type to select. Any movie type we select from the dropdown is modeled to the movieType store value in our script, using Vue’s v-model.
At the same time we have a *v-on:input* directive that calls the search function in our script each time the value of movieType changes.
Displaying the Movies
When we make a request to the movie API, the data we get back is stored in our results array in our script. To display the movies, we loop over the results array and add the information we want to display.
Open Source Session Replay
OpenReplay is an open-source, session replay suite that lets you see what users do on your web app, helping you troubleshoot issues faster. OpenReplay is self-hosted for full control over your data.

Start enjoying your debugging experience - start using OpenReplay for free.
Conclusion
In this tutorial, we looked at the new light-weight library, how it works and how we can incrementally adopt it in a project. In the process we built an example movie app. I hope you give petite-vue a try after following this tutorial. To learn more about this library, you can check out their GitHub repo. You can also reach out to me on twitter.