

Content Management Systems can serve lots of purposes in different applications, making it easier for users/developers to monitor and manage an application’s content. This article will demonstrate StrapiCMS in action by building a Twitter clone application.
Strapi is a headless CMS capable of being integrated into web and mobile applications. The content can easily be accessed using simple API requests. With Strapi, the developer can easily build flexible user interfaces and append content from the CMS. Strapi provides a dashboard where users can view all content pertaining to applications built with Strapi, making it easy for non-developers to manage content.
Getting started
To get started, we will clone the starter repo which contains the front-end code of our application, built with the React.js framework. Our Twitter clone will have a newsfeed and tweet creation section. We will also be able to create and view tweets from our application. All content displayed in our application will be managed using the Strapi CMS.
To clone the repository from GitHub, enter the following command in the CLI:
git clone https://github.com/marvelken/Twitter-Starter-Code.gitOur project directory has the App.js file and different components that make up our application. The application components are: Feed.css, Feed.js, Post.css, Post.js, serviceWorker.js, Sidebar.css, Sidebar.js, SidebarOption.css, SidebarOption.js, TweetBox.css, TweetBox.js, Widget.css, Widget.js.
The components will perform the following tasks:
Feed.jswill contain the structure for tweets to be displayed on the webpage and will also house theTweetBox.jscomponent, which contains the input fields for creating new tweets. Each individual tweet to be displayed in our application will be rendered using thePost.jscomponent.Sidebar.jsandSidebarOption.jsare the components responsible for our Twitter sidebar on the website.- The
Widget.jscomponent contains a few tweets received from Twitter and embedded into our application.
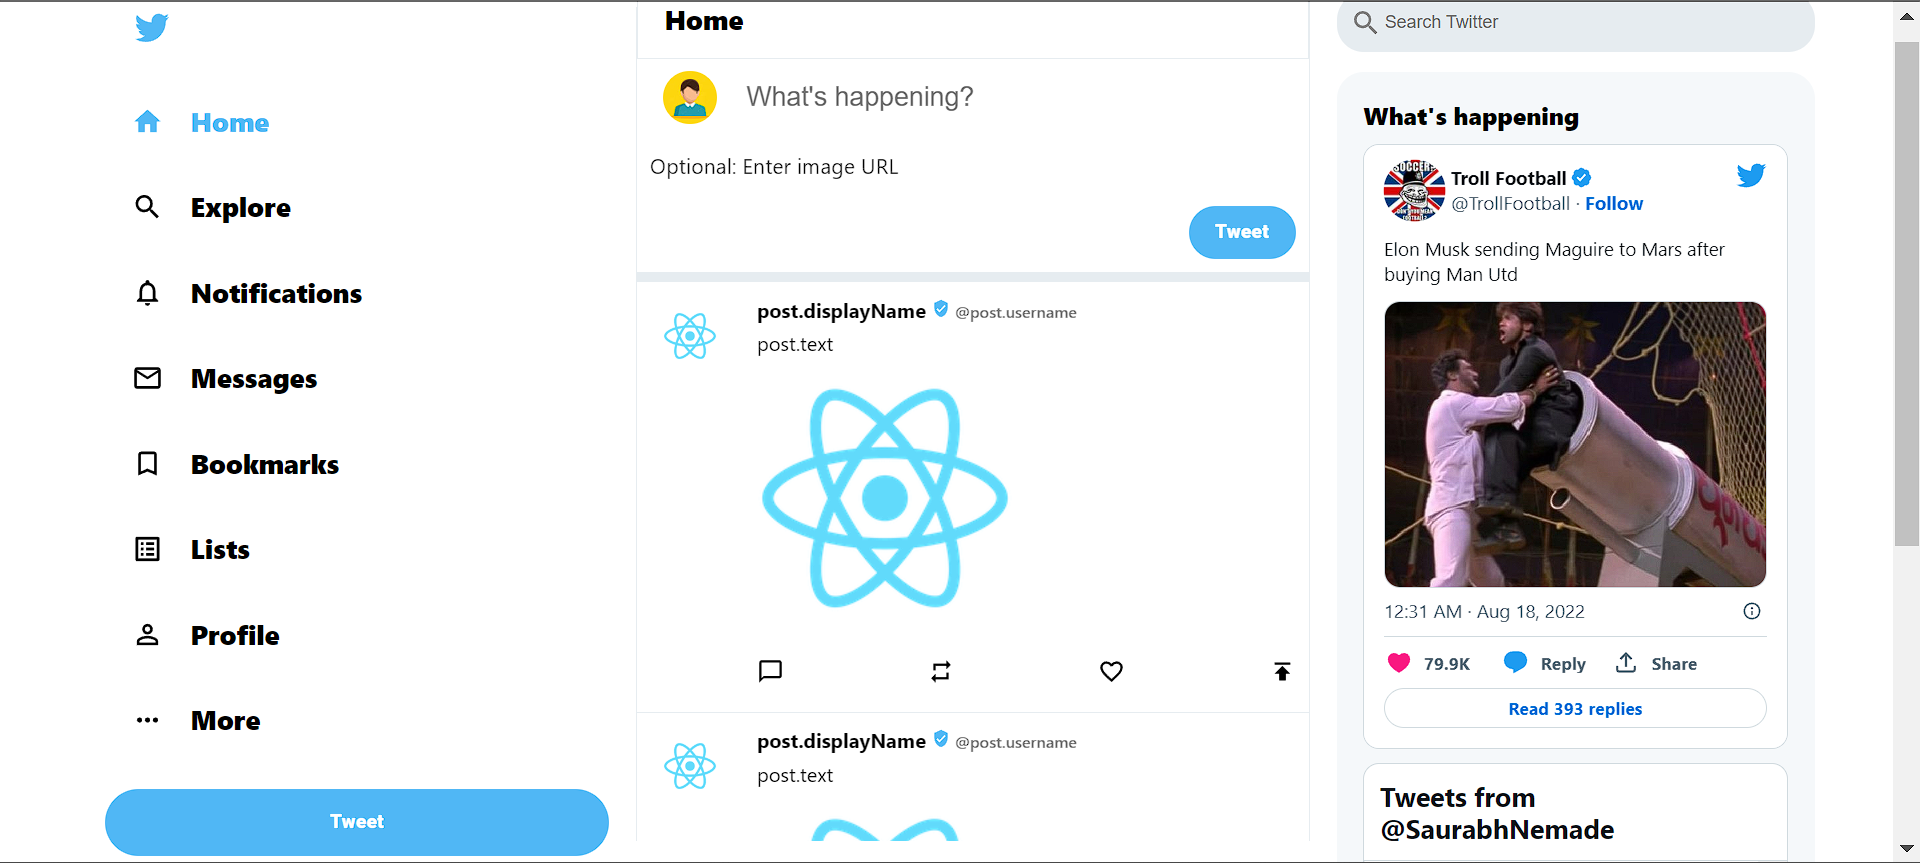
If you run the application with the npm start command and open the result in your browser, you will get a result similar to the below image:
Setting up Strapi
To manage our Twitter content for our application, we will use Strapi. To get started, we will first need to install an instance of Strapi with the following commands in CLI:
npx create-strapi-app@latest twitter-content --quickstartThis command creates a project directory, twitter-content, with Strapi installed. Once the installation is completed, an instance of Strapi is automatically opened for us in our browser, and we will see a page similar to the image below:
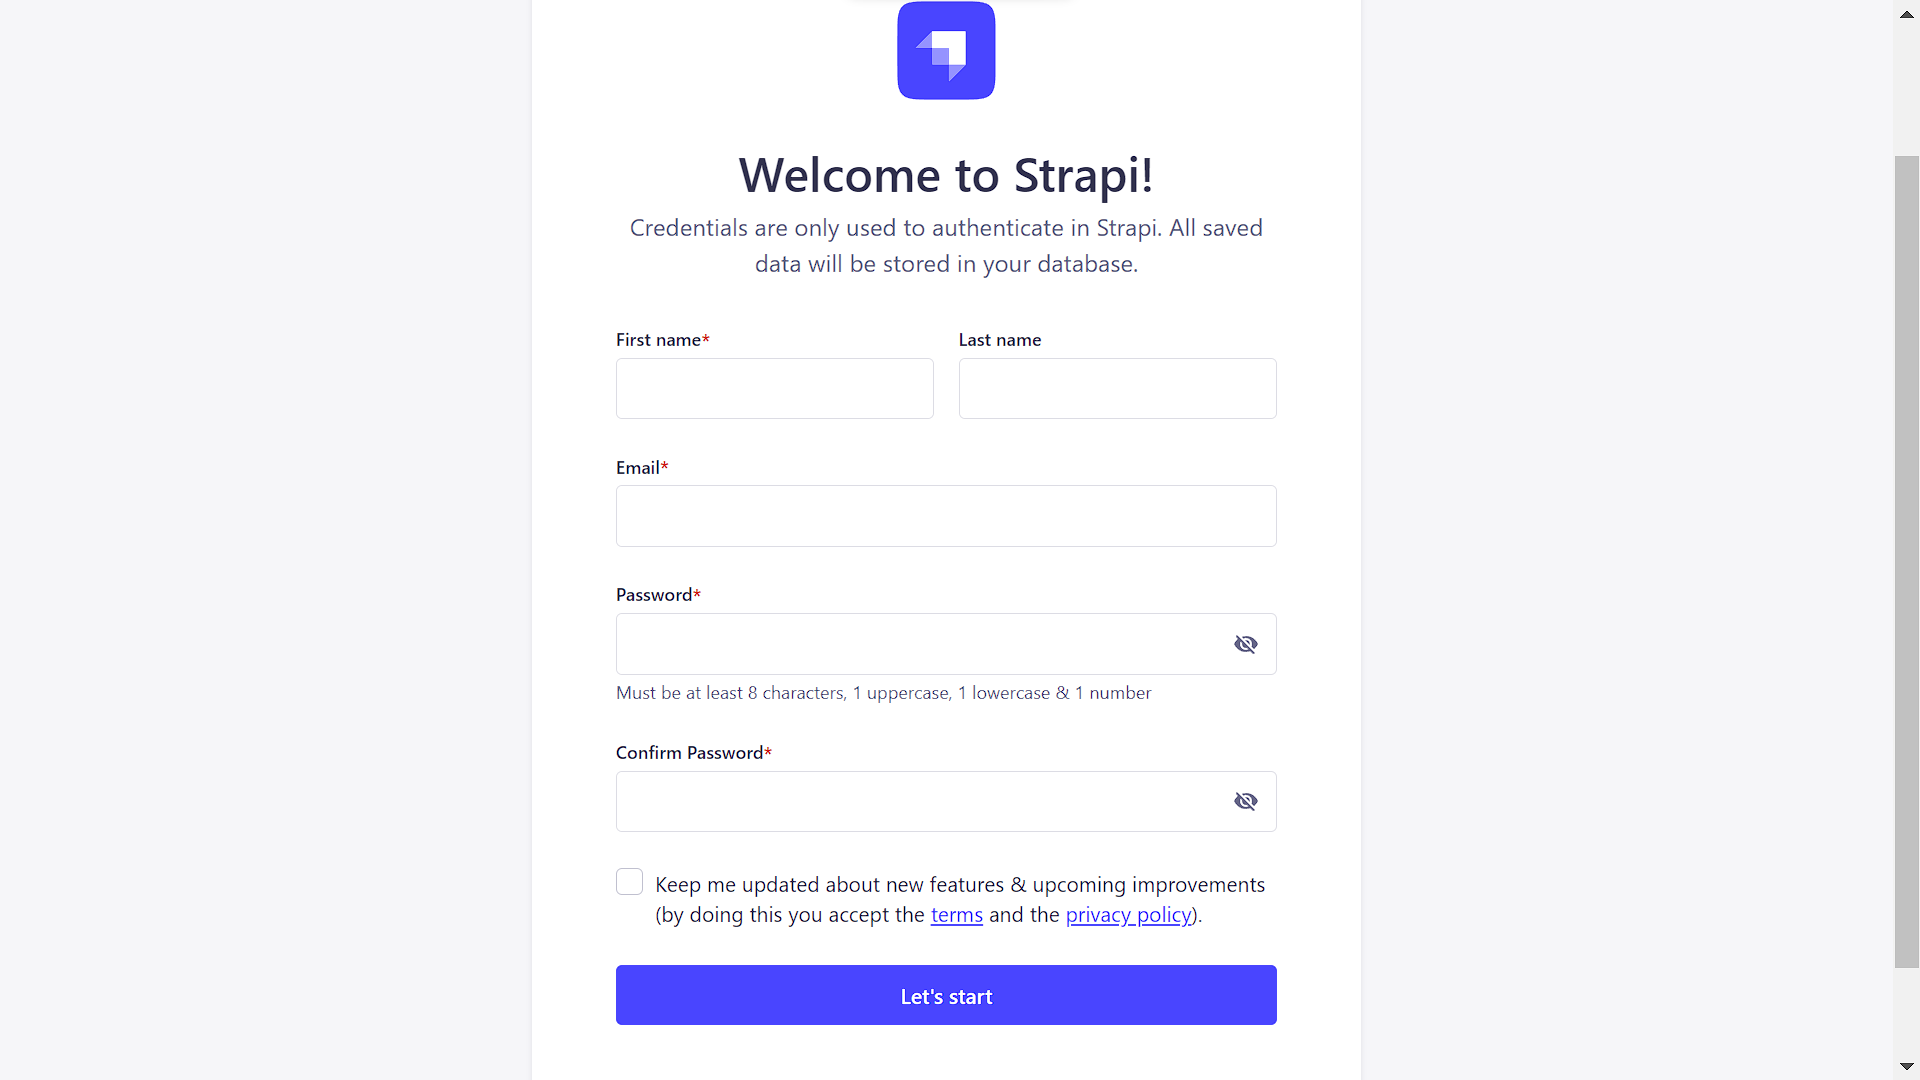
Here, we are required to get authenticated to access our CMS. After logging in, we are navigated to the user dashboard:
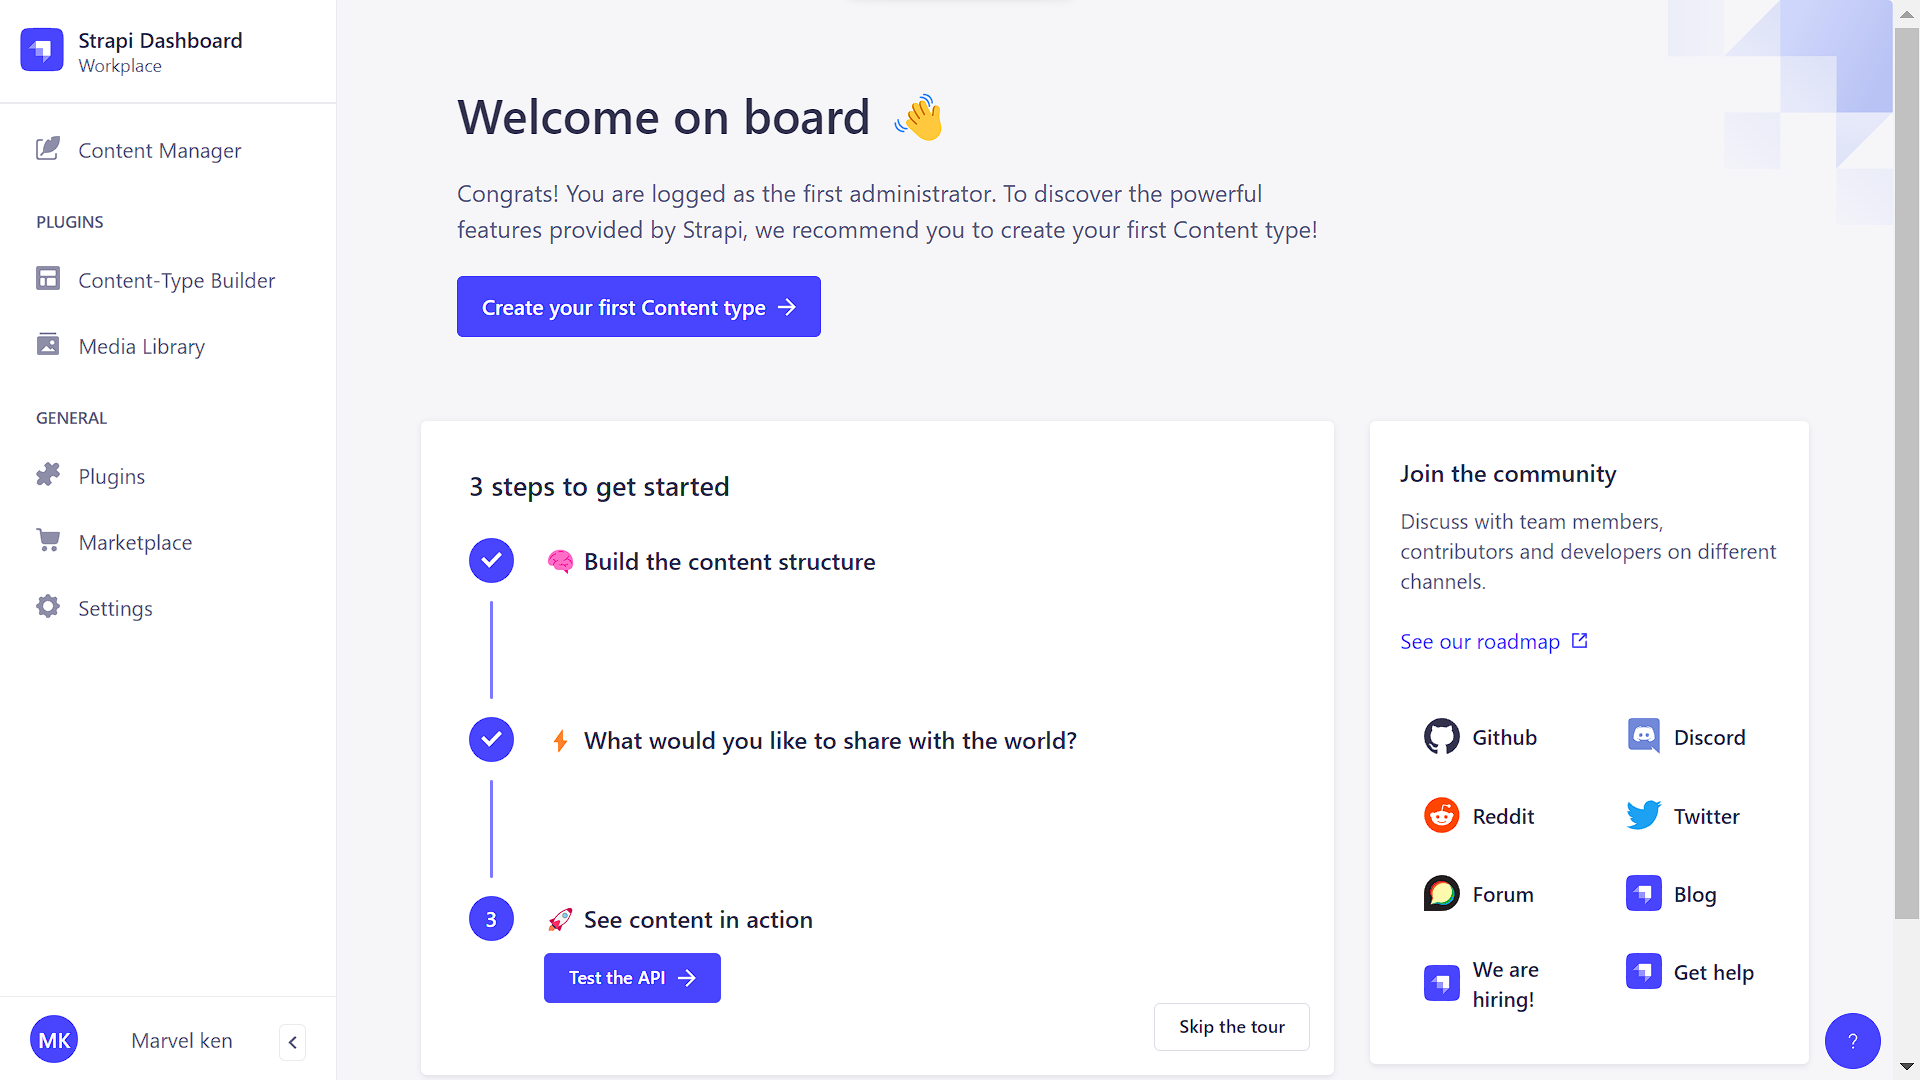
Here, we can set up our Twitter content structure. Click on Create your first Content type. The name of our collection type is “twitter content”. This collection will have the following fields, with all text fields being set as required:
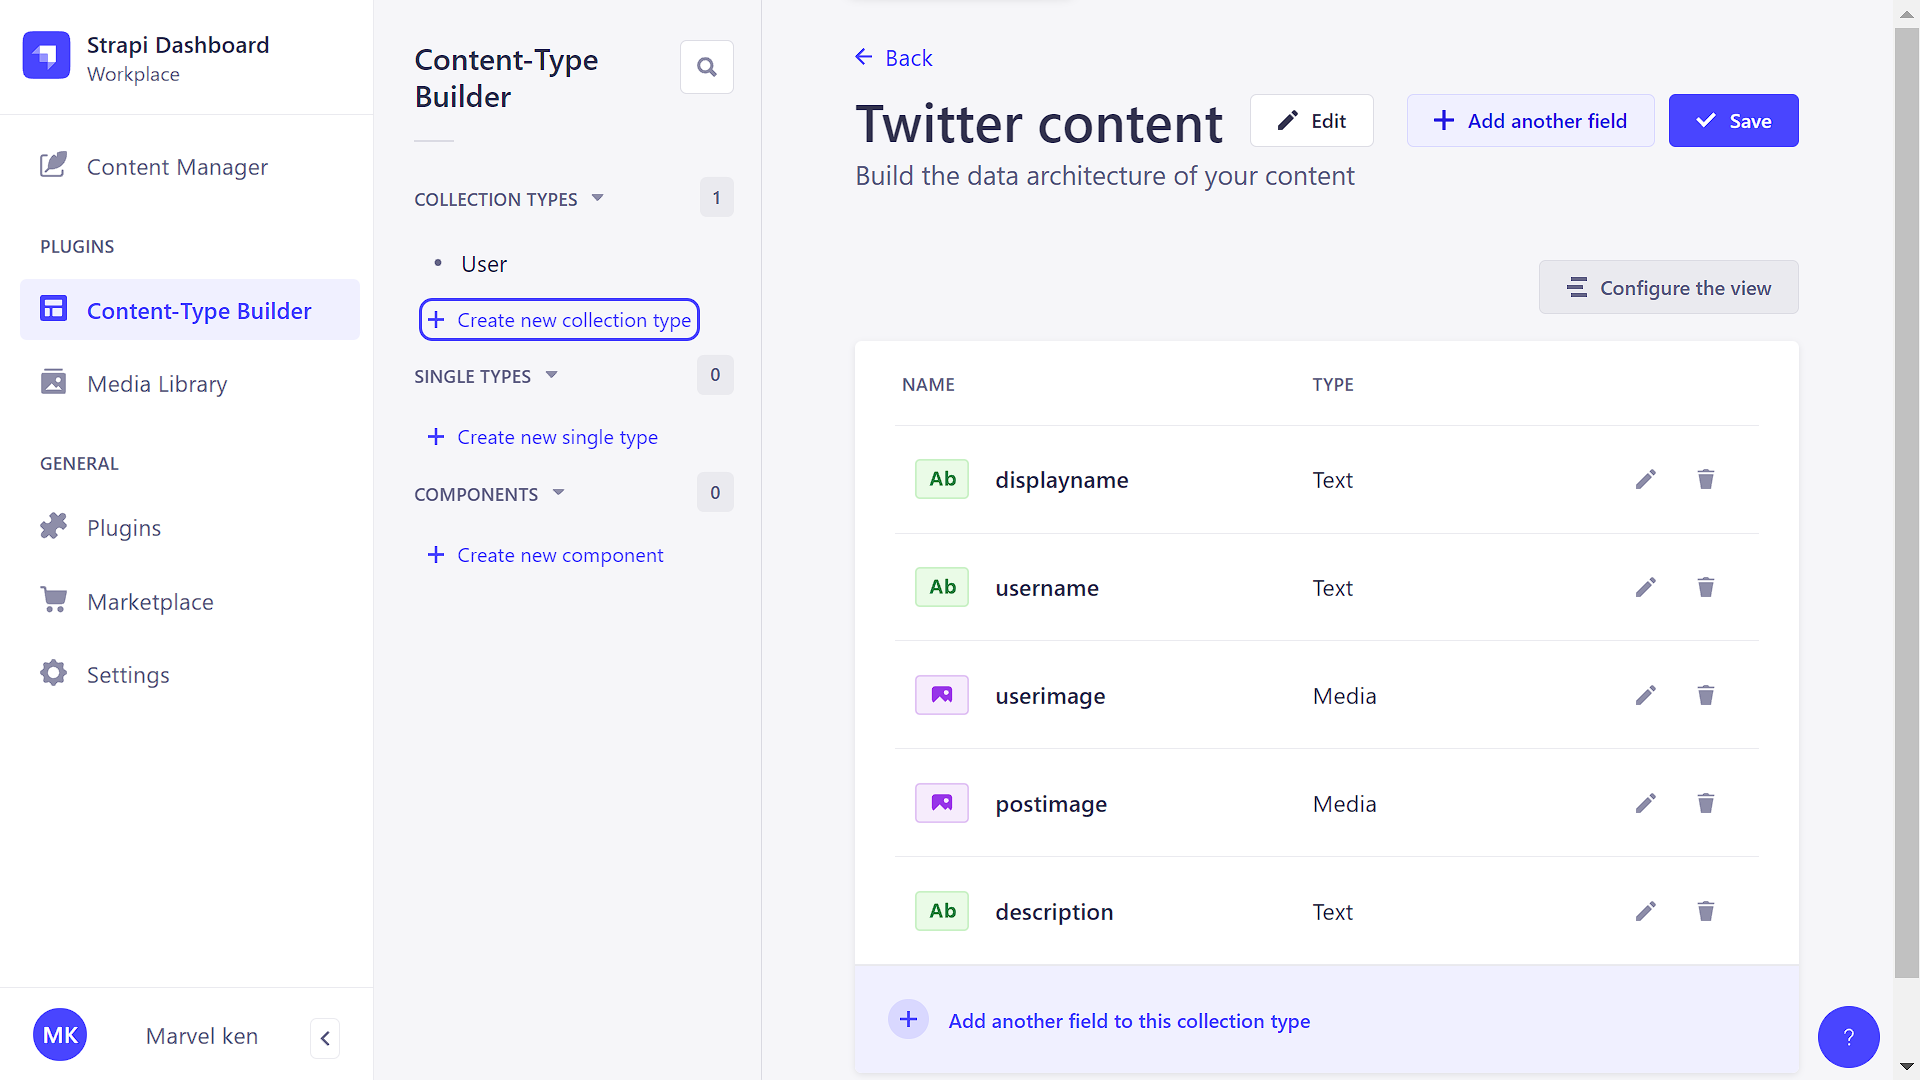
Click on the Save button to create the collection.
Populating the Created Collection
Before linking our application to our CMS, we will add some content to the collection, which we will then fetch and display in our application. To add content to the collection, click Content Manager from the left sidebar. A new page where we can create new content opens up. Add whatever content you desire using the fields defined earlier for our collection type.
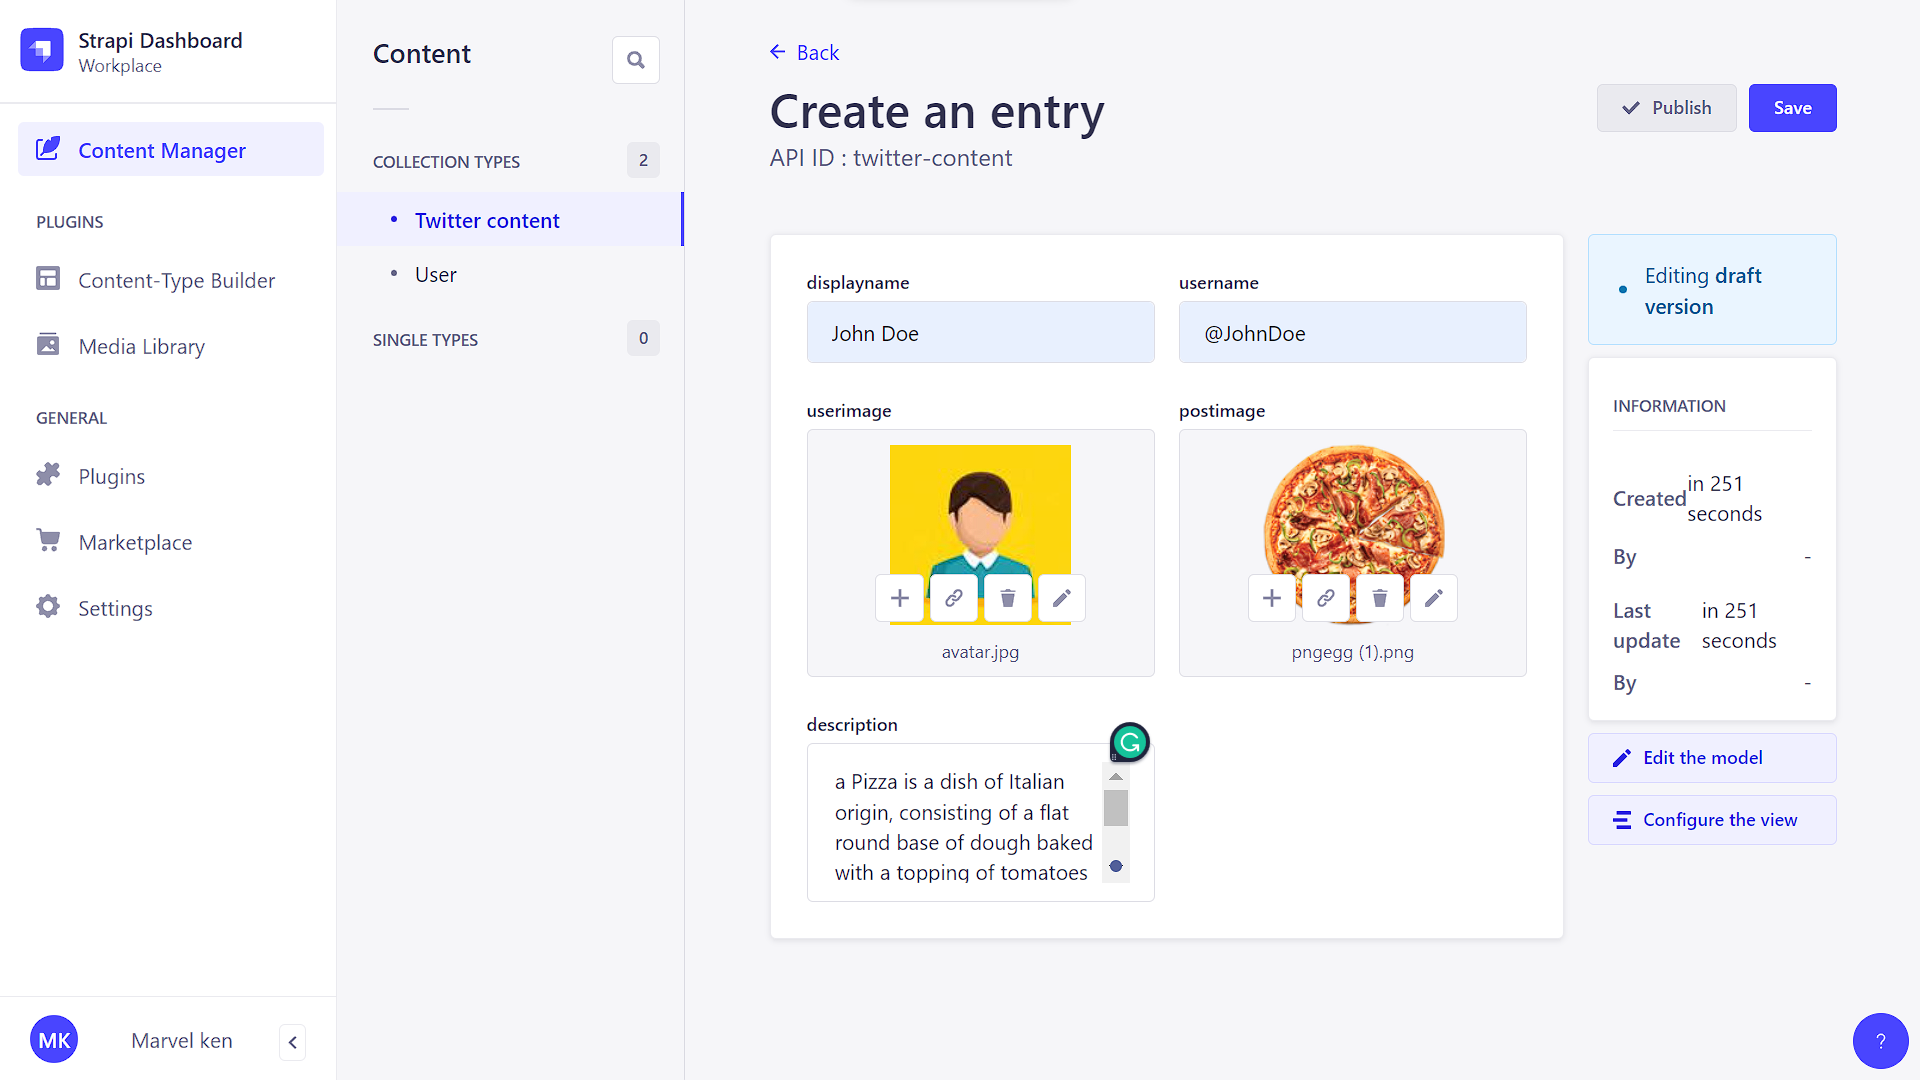
You can add as much tweet content as you want by clicking on the Save and Publish buttons after every entry.
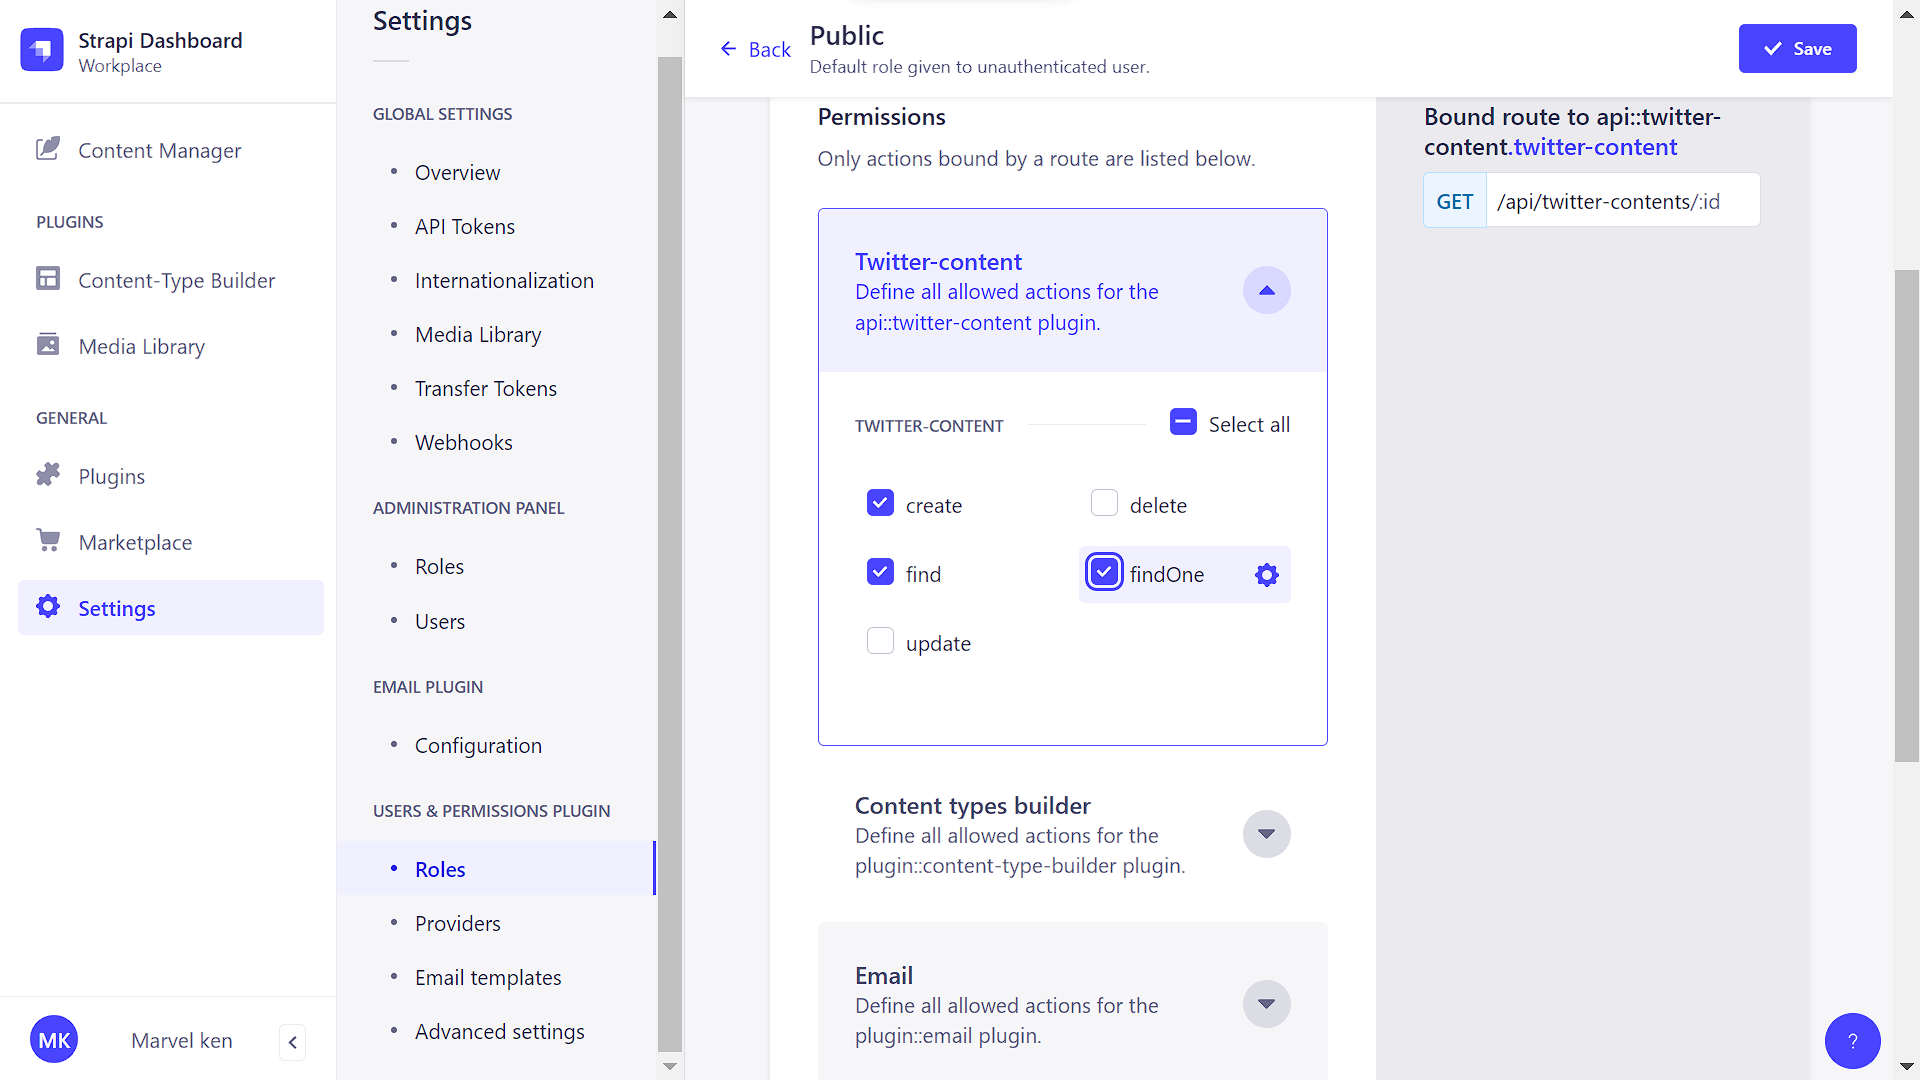
To make CMS content available to our React.js front-end, we will need to make the following changes to the public role in the users and permissions section of our StrapiCMS settings:
Session Replay for Developers
Uncover frustrations, understand bugs and fix slowdowns like never before with OpenReplay — an open-source session replay tool for developers. Self-host it in minutes, and have complete control over your customer data. Check our GitHub repo and join the thousands of developers in our community.
Fetching Tweets from the CMS
We will create an API fetch request using Axios in our Feed.js file to fetch tweets from our CMS. We will map through the returned API response and display the tweets with the post component.
import axios from "axios";
//...
const [posts, setPosts] = useState([]);
useEffect(() => {
//fetch data from the CMS and set the value of the posts state to the response
const getTweets = async () => {
await axios.get("http://localhost:1337/api/twitter-contents?populate=*").then((res) => {
setPosts(res.data.data);
})
}
getTweets();
}, []);
// we can return the response in our component when we map through the posts state
{posts && posts.map((post) => (
<Post
key={post.attributes.ic}
displayName={post.attributes.displayname}
username={post.attributes.username}
verified={true}
text={post.attributes.description}
avatar={`http://localhost:1337${post.attributes.userimage.data.attributes.url}`}
image={`http://localhost:1337${post.attributes.postimage.data.attributes.url}`}
/>
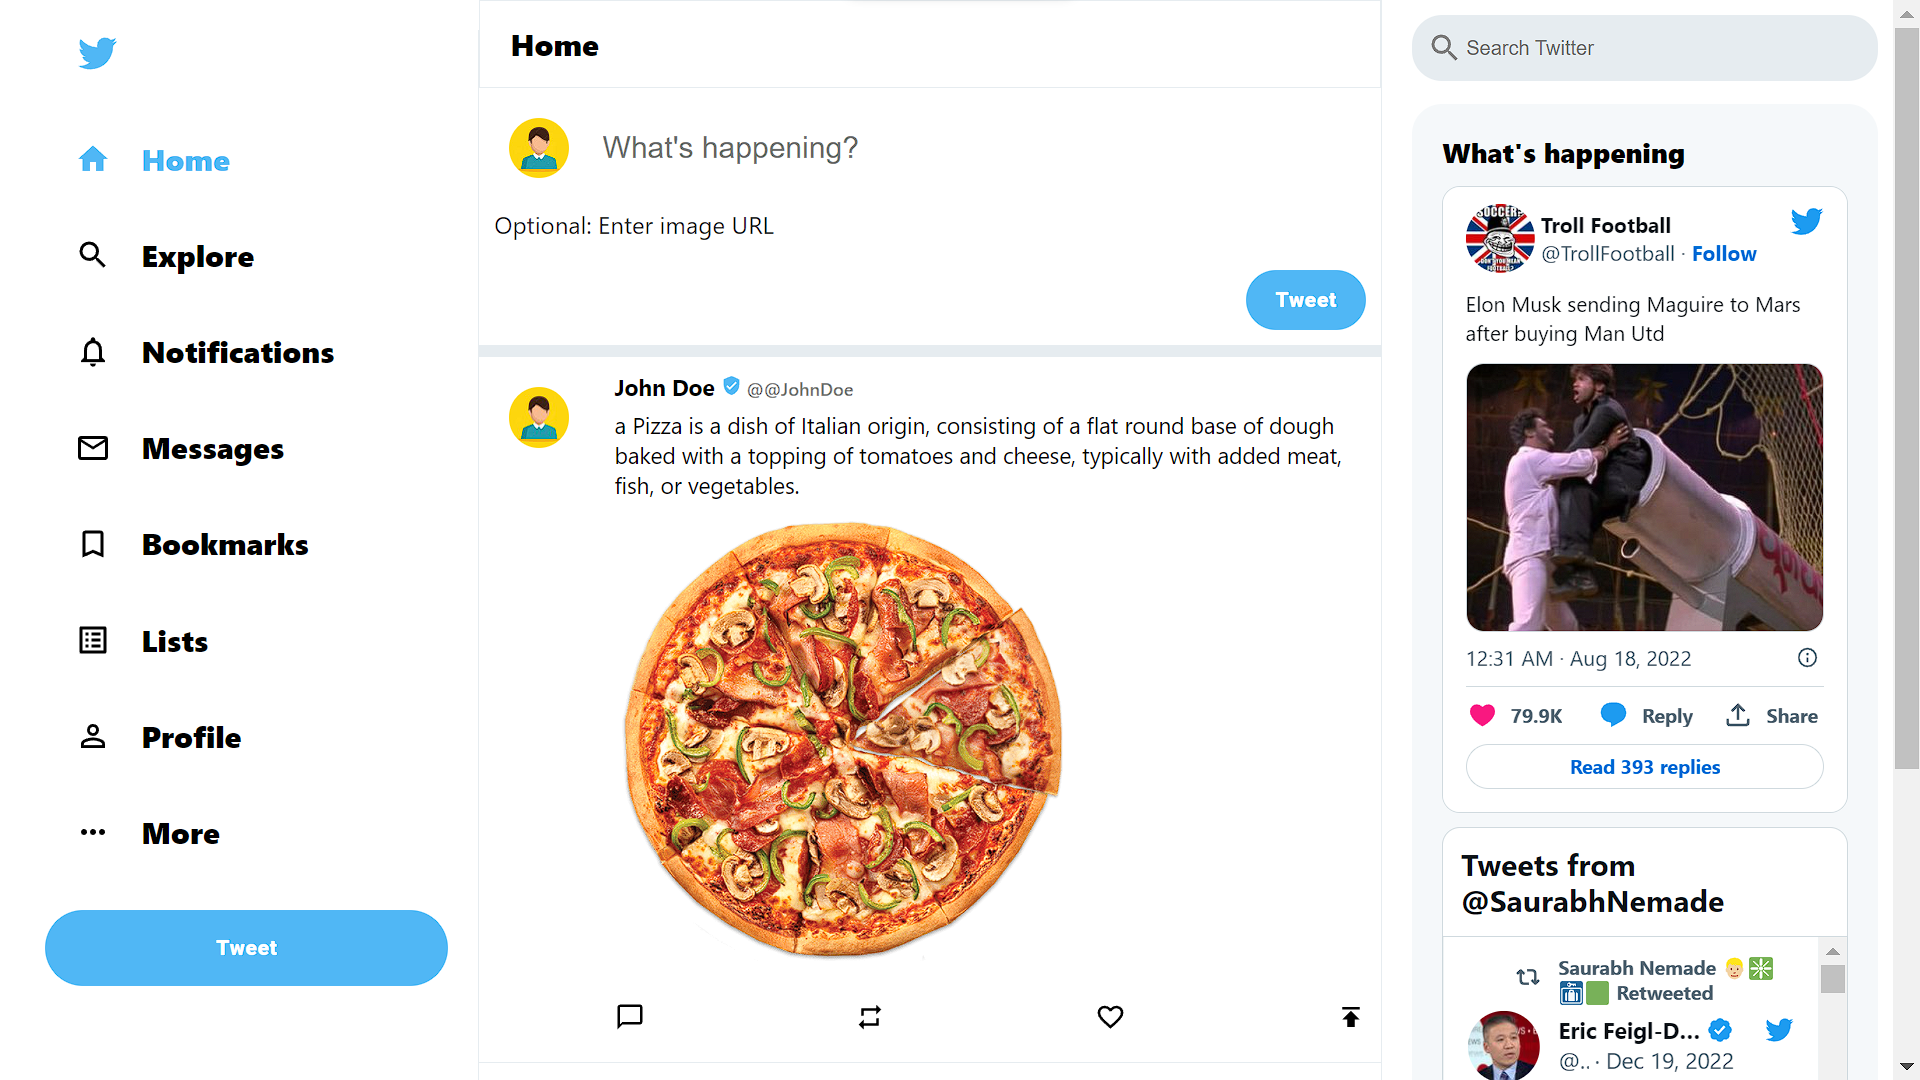
))}With this, we get the content from our CMS displayed in the browser when we run our application:
Creating New Tweets
To create new tweets, in our TweetBox.js file, we will create a request to take in the value of our input fields and post it to our Strapi collection.
const handleFileChange = (e) => {
console.log(e.target.files);
setTweetImage(e.target.files[0]);
};
const uploadImage = async (e) => {
try {
  const formData = new FormData(e.target);
  formData.append("files", tweetImage);
  console.log({ image: formData.get("files") });
  const res = await axios({
    url: "http://localhost:1337/api/upload",
    method: "POST",
    data: formData,
  });
  console.log({ res });
  return res.data;
} catch (error) {
  console.log({ error });
  return null;
}
};
const sendTweet = async (event) => {
event.preventDefault();
if (tweetMessage !== "") {
  const fileData = await uploadImage(event);
  if (!fileData) throw Error("image upload failed");
  try {
    const [{ id }] = fileData;
    console.log({ id });
    const res = await axios({
      method: "POST",
      url: "http://localhost:1337/api/twitter-contents",
      data: {
        data: {
          displayname: "Marvel Ken",
          username: "captainmarvel",
          userimage: "3",
          description: tweetMessage,
          postimage: id,
        },
      },
    });
    console.log({ res });
    window.location.reload();
  } catch (error) {
    console.log({ error });
  }
} else {
  alert("Enter tweet caption")
}
};
We captured the user text and image from the input fields in the code above. We uploaded the image using the upload route, then we made a post request to Strapi, adding the image id in the postimage field. With this, we can now add new tweets to our Strapi collection. Below is the final output of the program:
For the login:
Adding new tweet:

Conclusion
We have come to the end of this tutorial. In this tutorial, we built a Twitter clone using React.js and StrapiCMS, with features to create and view tweets.
Gain Debugging Superpowers
Unleash the power of session replay to reproduce bugs and track user frustrations. Get complete visibility into your frontend with OpenReplay, the most advanced open-source session replay tool for developers.


