Build and deploy JAMstack applications with Cloudflare pages
Deploy your JAMStack applications in less than 10 minutes with this step-by-step tutorial


Self-hosting web applications is an exciting process but can quickly get time-consuming, costly and tedious as you aim to pay, manage and maintain the servers by yourself. This process isn’t optimal for hosting static sites like your personal portfolio or a blog platform. With several free static hosting web services available, self-hosting has never been easier.
This article will discuss Cloudflare pages - A JAMstack web hosting platform by Cloudflare for deploying static sites. Cloudflare has, over the years, invested in user-facing web infrastructures that secure HTTP/HTTPS requests and CDN firewalls, increasing web securities across different protocol connections.
Cloudflare Pages, as one of the solutions at Cloudflare, is a JAMstack platform designed for frontend developers to foster collaboration amongst themselves and deploy websites seamlessly.
This tutorial will introduce frontend developers with React experience to build, collaborate and deploy using Cloudflare pages. Nevertheless, the concepts shared here can be extended to other frontend frameworks that are not React.
What is Cloudflare pages?
Cloudflare pages is a static web hosting platform for collaborating, building and deploying JAMstack websites using frameworks like Gatsby, Jekyll, React.js, Next.js and several others. It is effortless and super fast to set up; it takes approximately three minutes to deploy. All you have to do is give it access to your repository and do a little bit of configuration, and automatically it will set up a domain with HTTPS for you.
PS: If your framework isn’t listed amongst the framework guide, or you manage your site without using a static site generator or any framework, you can still deploy your site. Refer to this guide.
How Cloudflare pages differ from other JAMstack hosting platforms
One of the unique differences Cloudflare pages offers is its dynamic functionality through its integration with Cloudflare workers. Unlike in Netlify, serverless functions are called workers in Cloudflare. The Cloudflare Workers are separate from the pages, which allows you to write or edit your functions with the Cloudflare dashboard. Although functions in Cloudfare is in beta at the time of writing, they allow you run server-side code without running a dedicated server. With the help of the workers, you can build full-stack applications.
Cloudflare pages also provide git integration, which is essential for any website. Instead of manually updating your webpage, unlike in some other JAMstack hosting platforms, you push your code to Github or Gitlab, and your site is automatically updated.
Cloudflare pages also provide domains that acts as register and have no markup pricing. This means that there is no additional cost to the regular price of domains compared to some other hosting platforms where you pay approximately double the price for the domain.
Deploying React app with Cloudflare pages
This project is a SPA bootstrapped with React, and just for the sole purpose of this tutorial, so it doesn’t contain any real information. However, to follow along with this tutorial step-by-step, you can clone the project repository. Here’s a link to the repo https://github.com/Dalu46/Cloudflare-pages

Visit the above URL, then copy and paste the URL alongside the below git clone command on the terminal.
git clone https://github.com/Dalu46/Cloudflare-pages.gitAfter cloning the site, we install dependencies with this line of code
npm installNow you have the codebase locally on your machine, you can edit the source code as you choose. Next, we set up a Github repo and push the project to it. This Github repo is what we’d use for deployment on Cloudflare pages. If you don’t have a Github account, you can create one here.
Now we have our Github repo ready, let’s create a Cloudflare pages account. Follow the instructions here to create one. After a successful set up of a Cloudflare pages account, the dashboard should look like this:
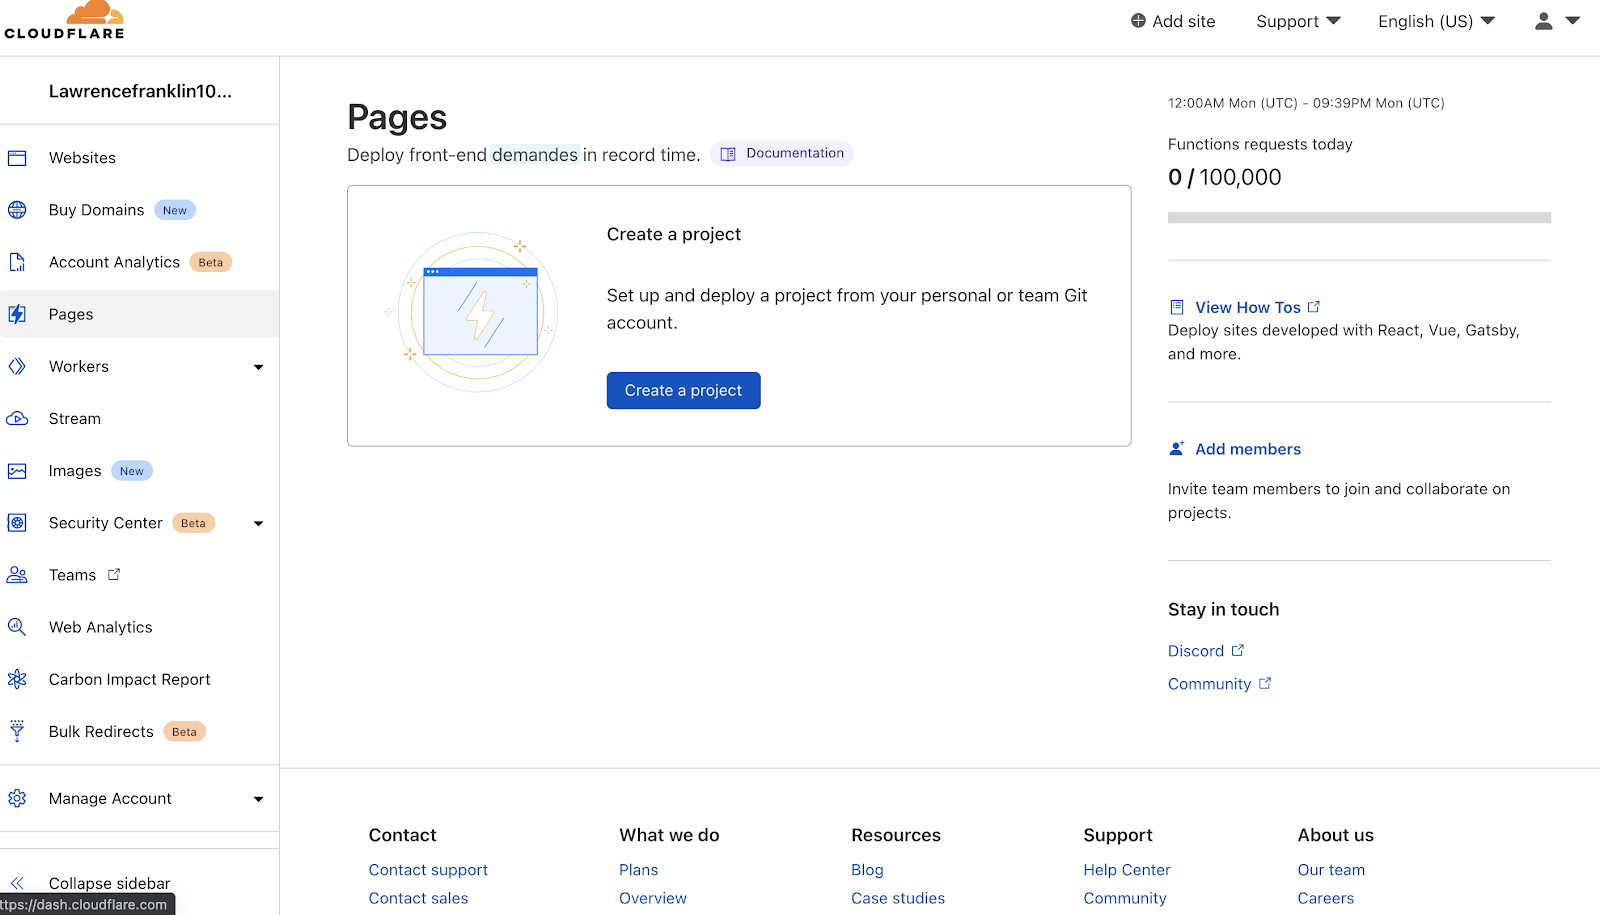
The next step is to click on the Create a project button, which will take us to the page to connect our preferred git provider account to Cloudflare pages. And for this tutorial, that’d be Github.
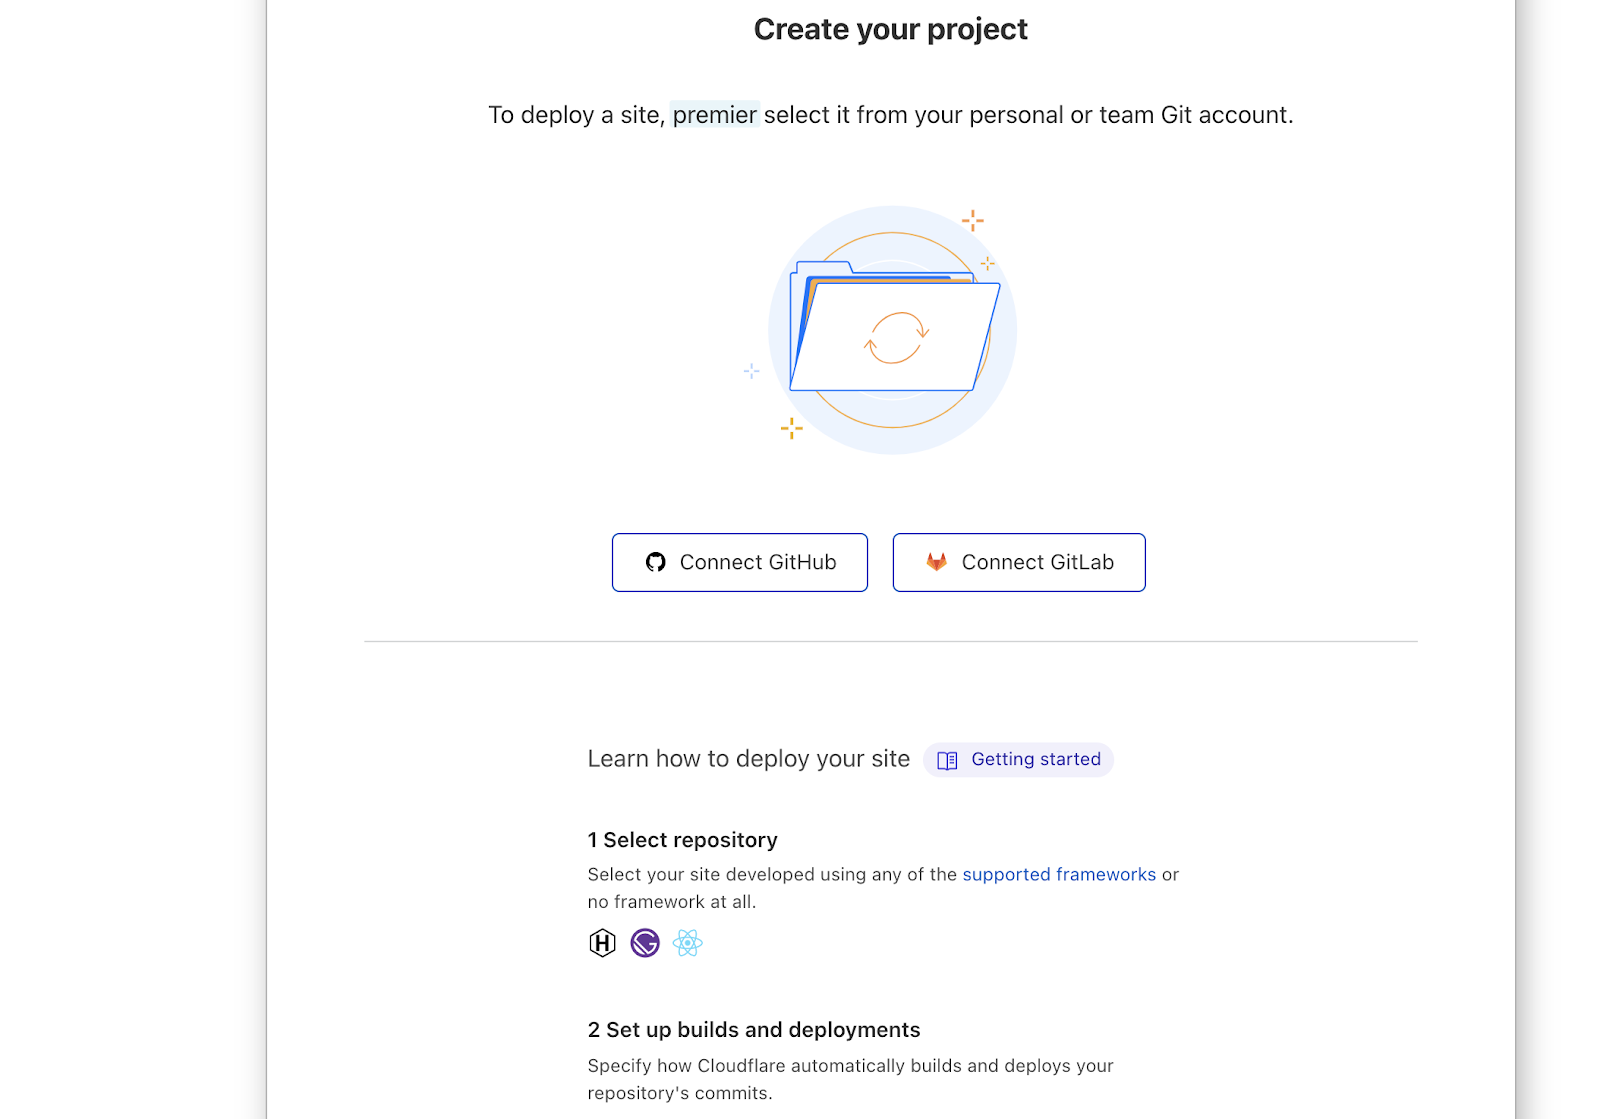
Next, click on the connect Github button, requiring you to log in to your Github account. Then select the All repository and click install and authorise. After which we would be directed to this page:
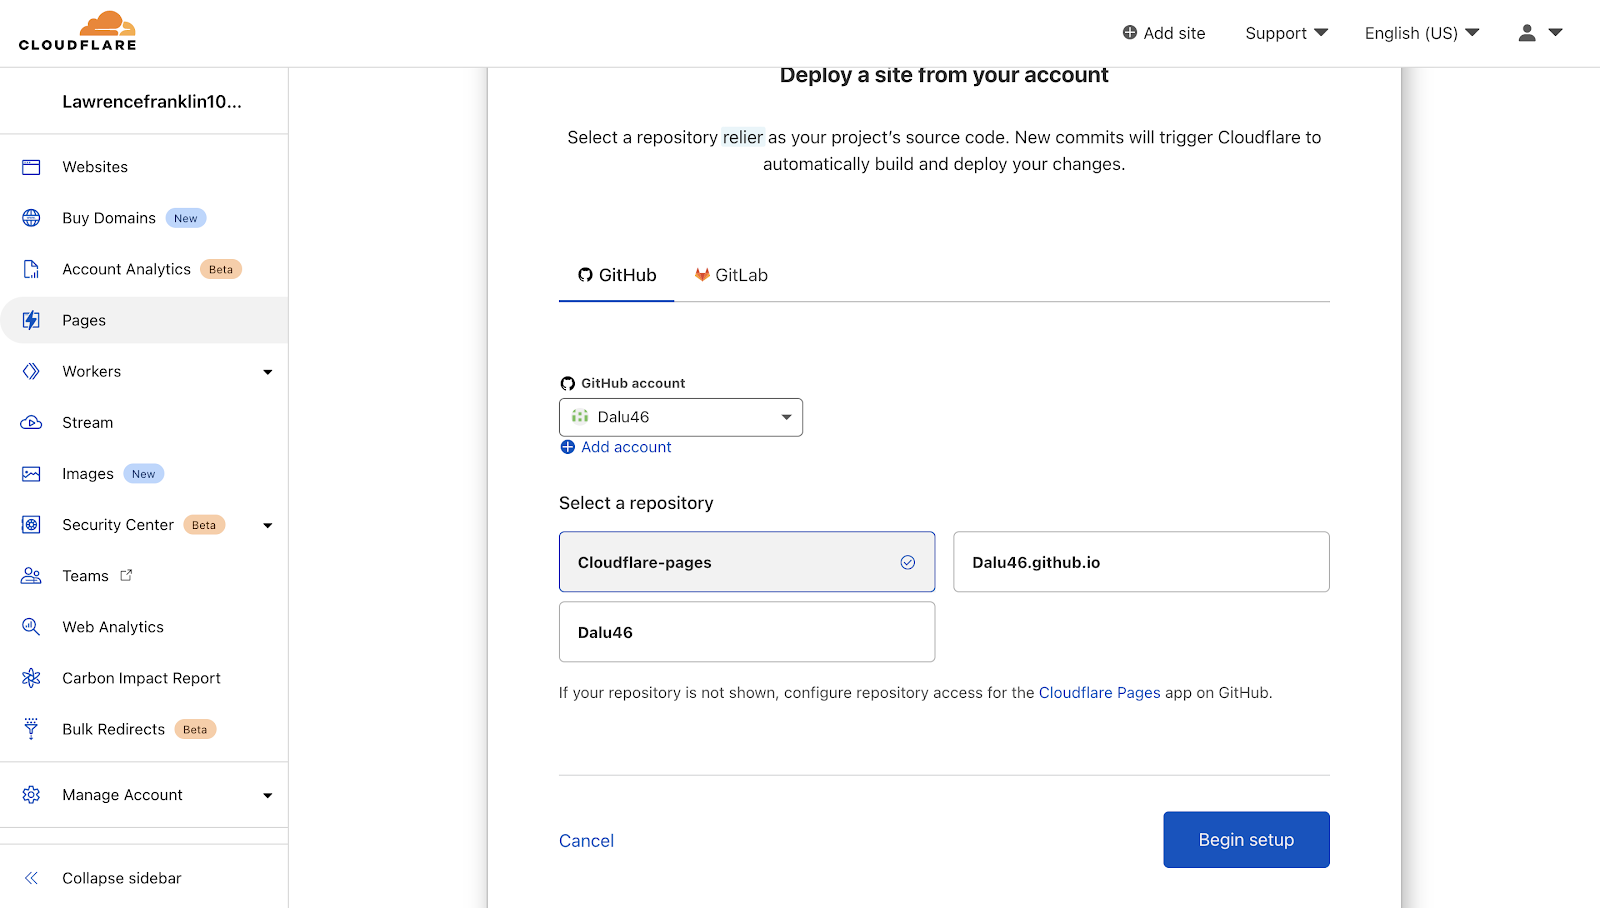
Now that we have successfully connected our Github account, we need to select the repo we created. You can see the Cloudflare-pages repository was sorted here by the most recently updated. Then we click on Begin setup button, which will take us to the configuration page:
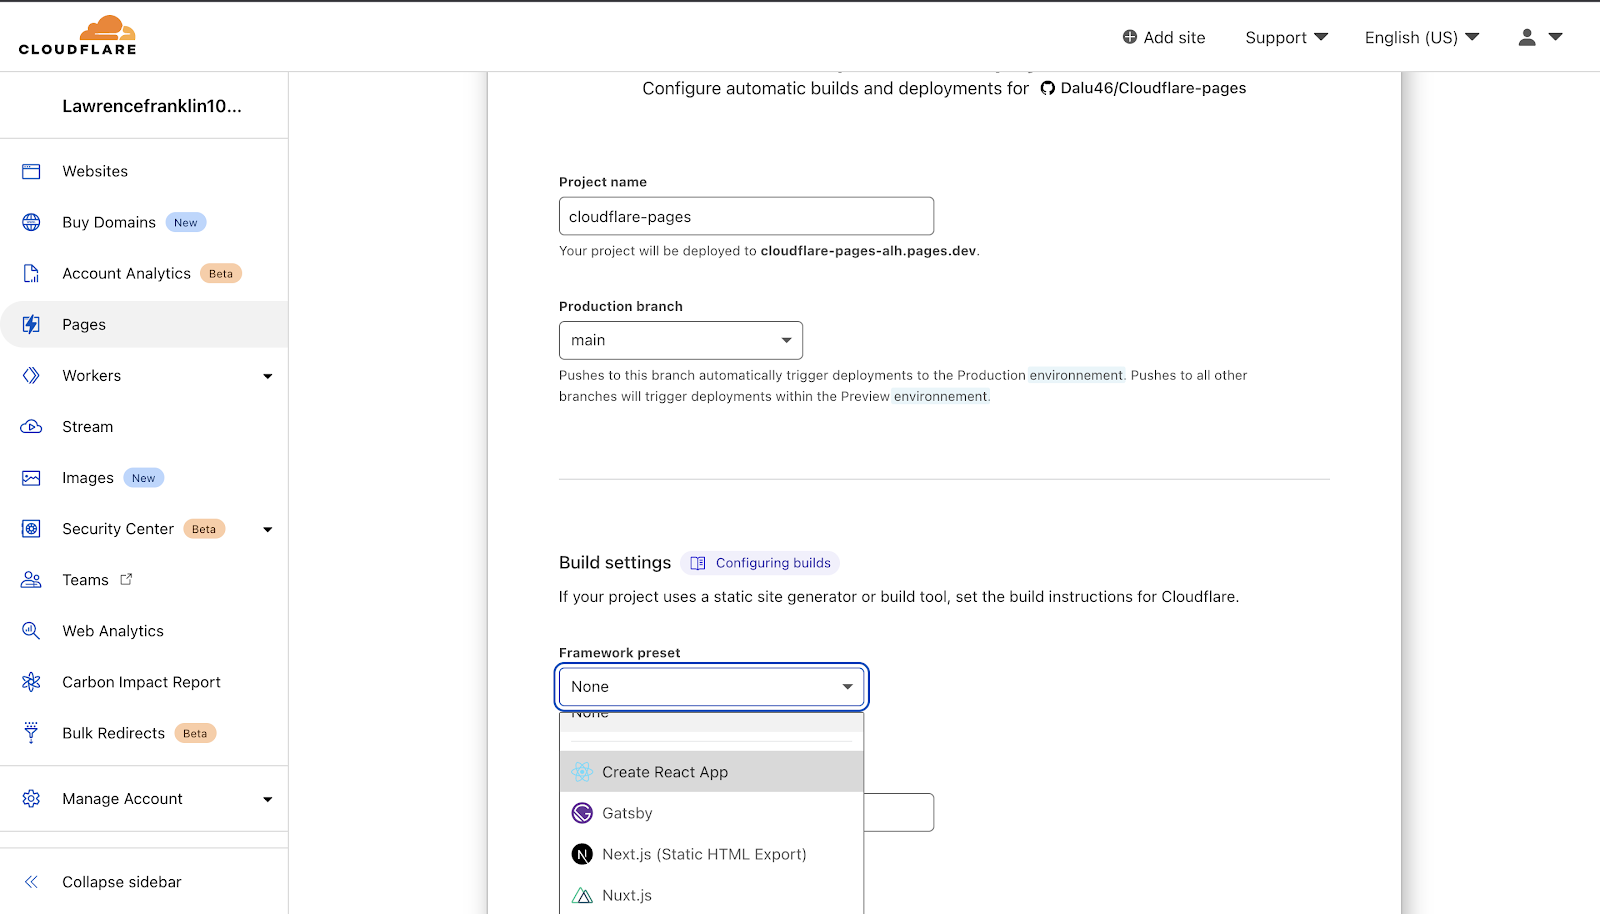
The project name will be used to generate a subdomain name from the Cloudflare’s pages.dev domain name, which means we are going to have a host name like cloudflare-pages-alh.pages.dev. You can change the project name to anything of your choice.
The production branch by default is set to the main branch of our repository from Github.
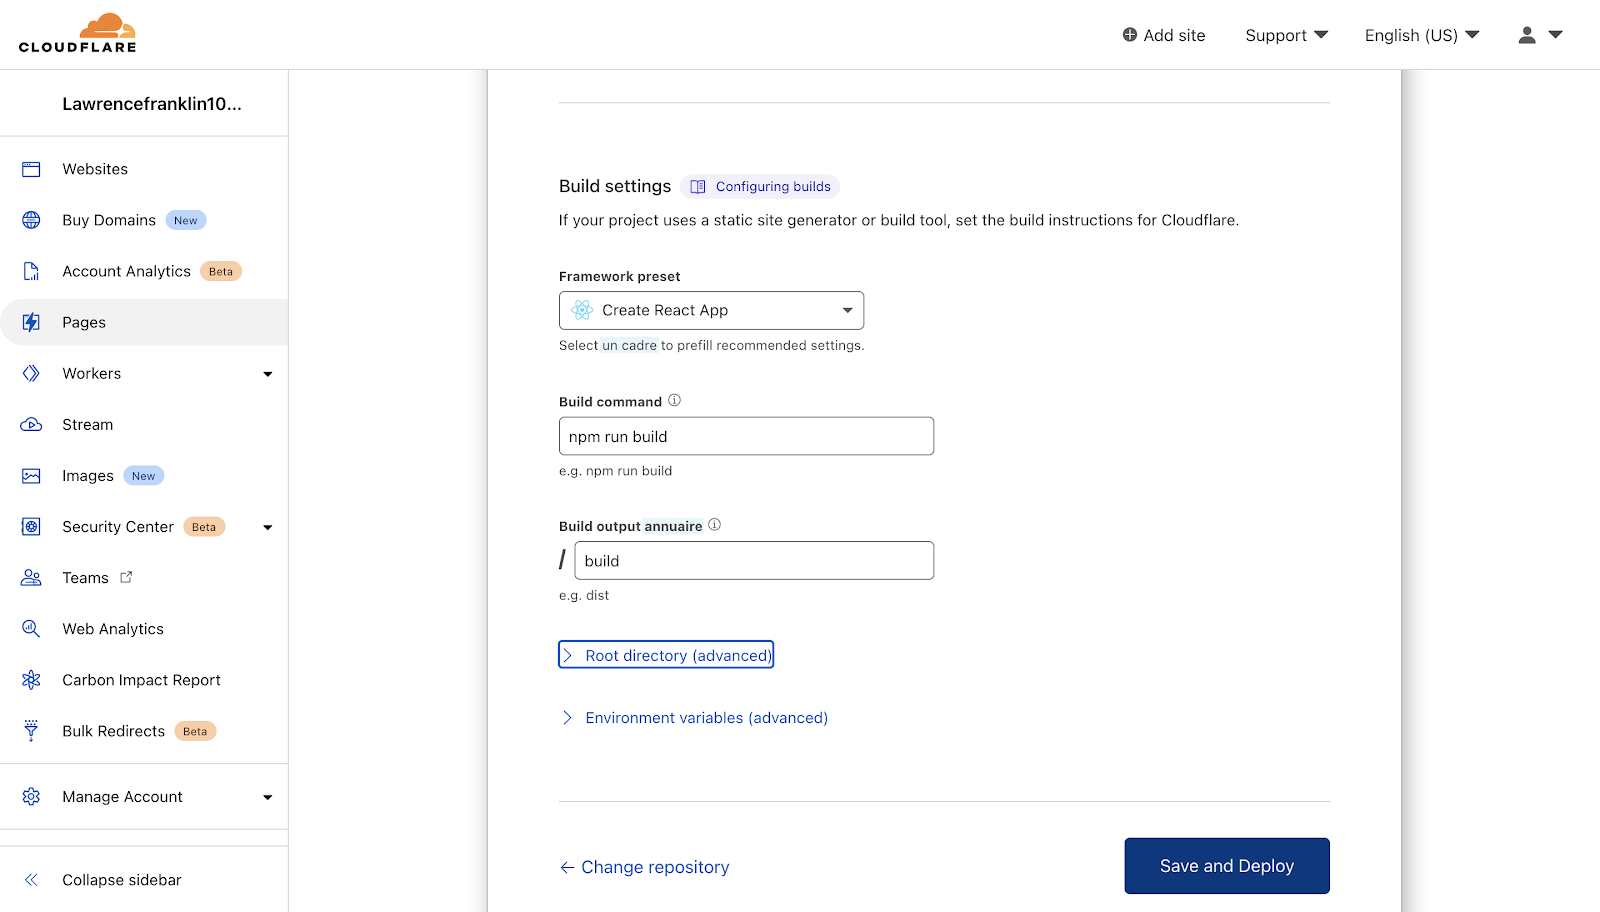
Now, for the build settings which we’ll select create react app because this is a React application, ****and automatically the build command is set to npm run build ****and the build output directory is set to build. Once we have these in place, click on the save and deploy button.
Basically what Cloudflare pages is doing behind the hood is; it would setup a build environment for us and clone our Github repository and then run npm install to install all of our packages, run the build command to build our application and then publish it in approximately three minutes.

We have successfully deployed our React app, and Cloudflare pages have also automatically generated a URL for our React app. The main branch is always set to production, so whenever we push or merge changes to our code into the main branch, it will get rebuilt and deployed the changes to our application.
To see the recent builds of our project, click the cloudflare-pages button at the top of the page, and it will direct us to our builds. Refresh the page to see the recent updates as below:
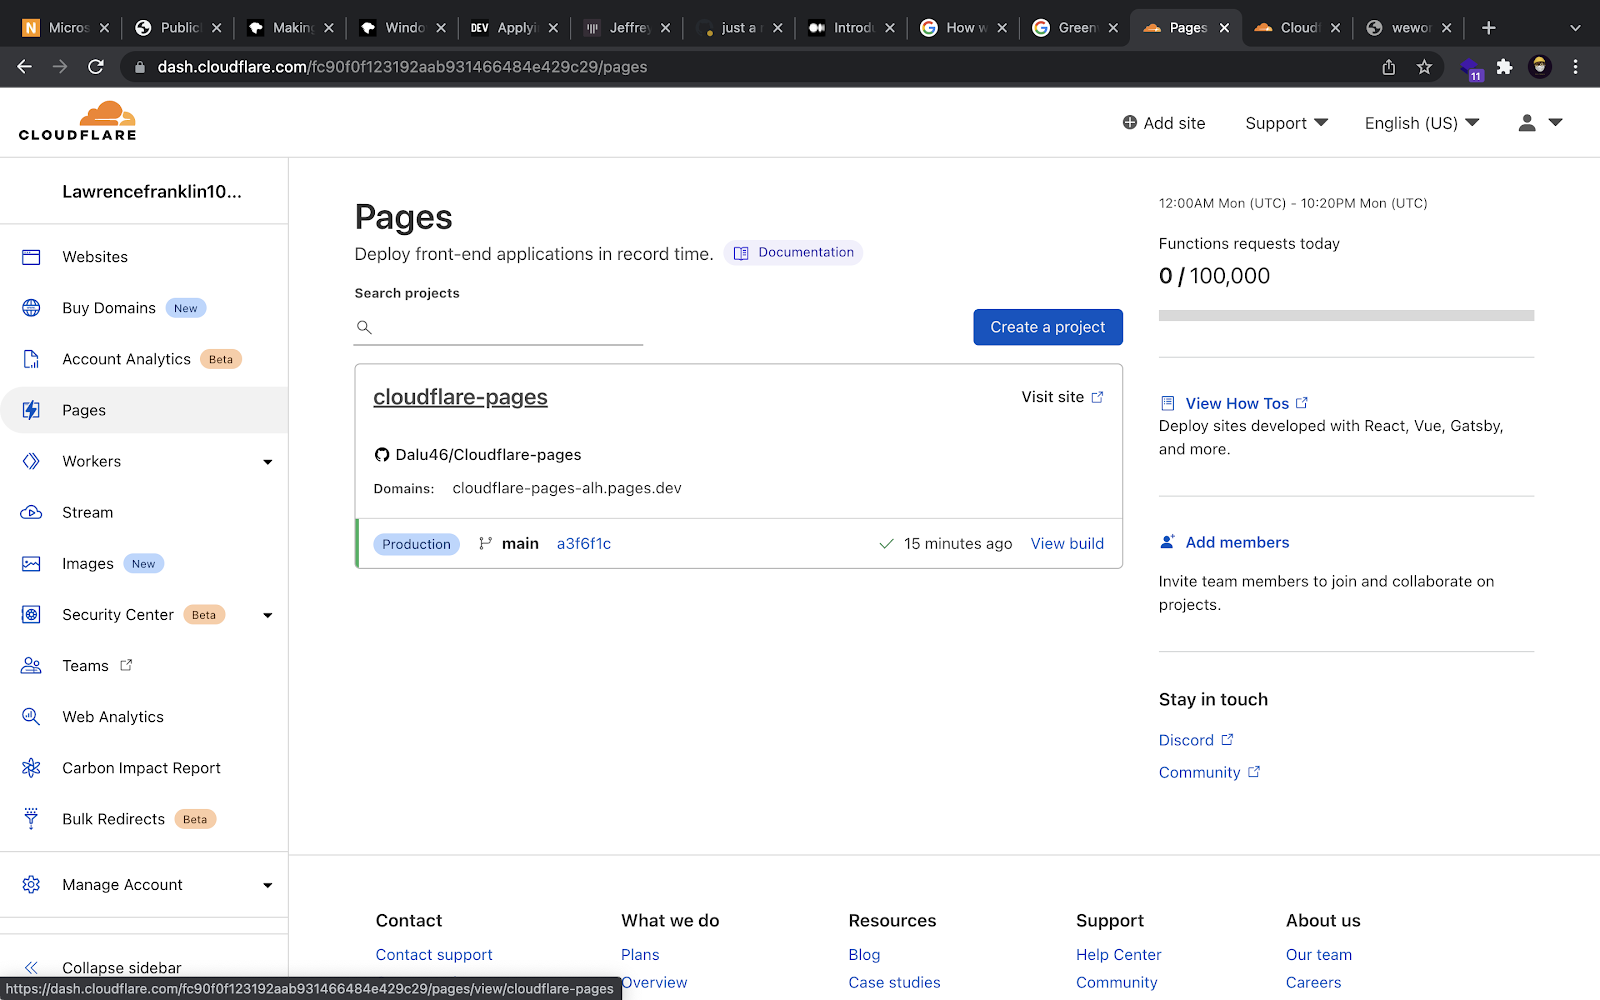
Here we see that our production code is built from our default branch, and we also get a new build per a new commit to our repository. This is an automatic deployment, meaning we don’t manually manage it ourselves. Cloudflare pages automatically manage it by listening to changes on our Github repository, automatically making these changes reflect on the deployed site.
Now, let’s visit the new URL generated by Cloudflare pages. We should see our React SPA app as below:
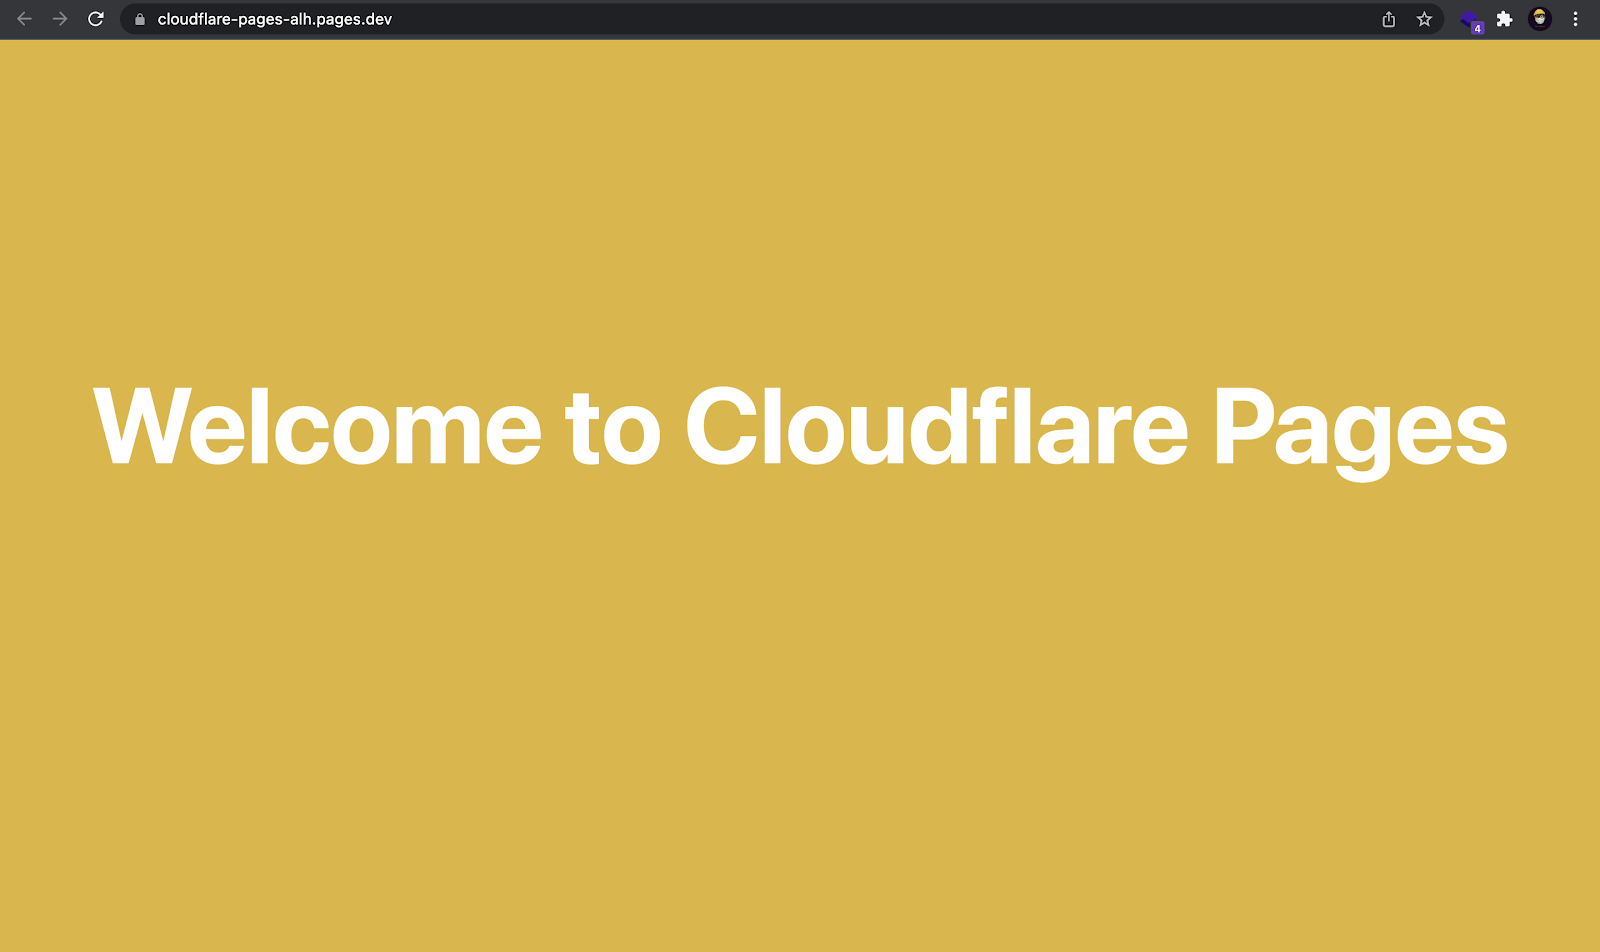
And that’s it, our React app has been deployed successfully.
Open Source Session Replay
OpenReplay is an open-source, session replay suite that lets you see what users do on your web app, helping you troubleshoot issues faster. OpenReplay is self-hosted for full control over your data.

Start enjoying your debugging experience - start using OpenReplay for free.
Adding custom domain
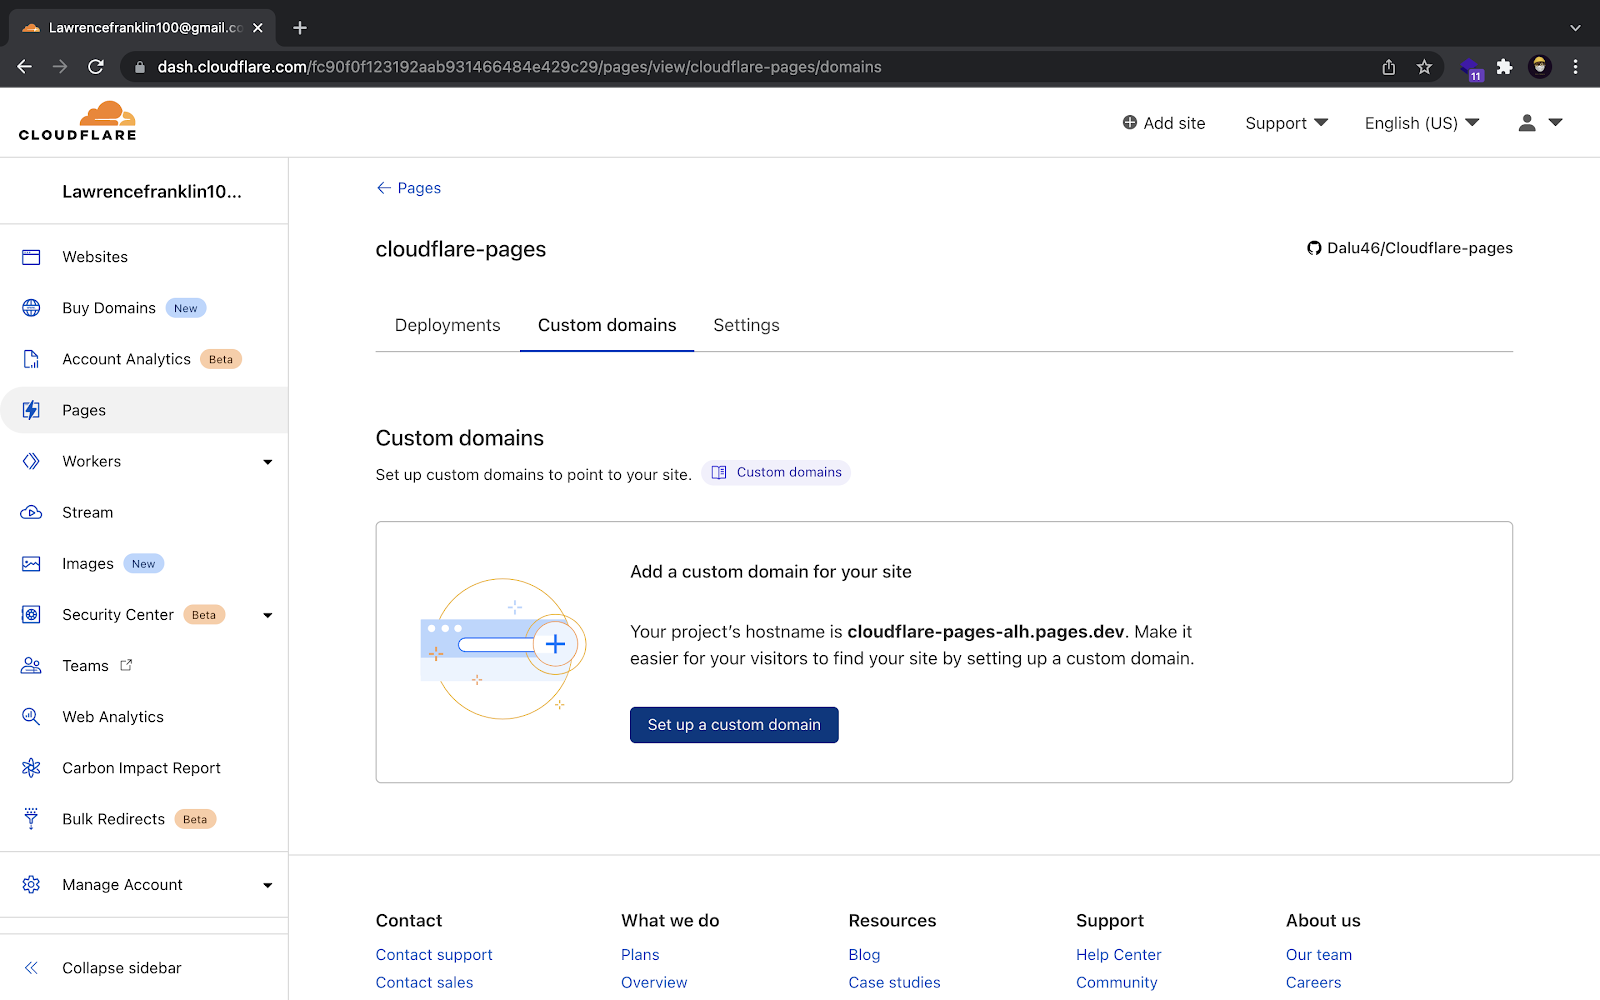
Having a custom domain instead of the generated URL is always good. To add a custom domain, we’ll need to navigate to our project dashboard, click on the custom domain link and click on setup the custom domain button.
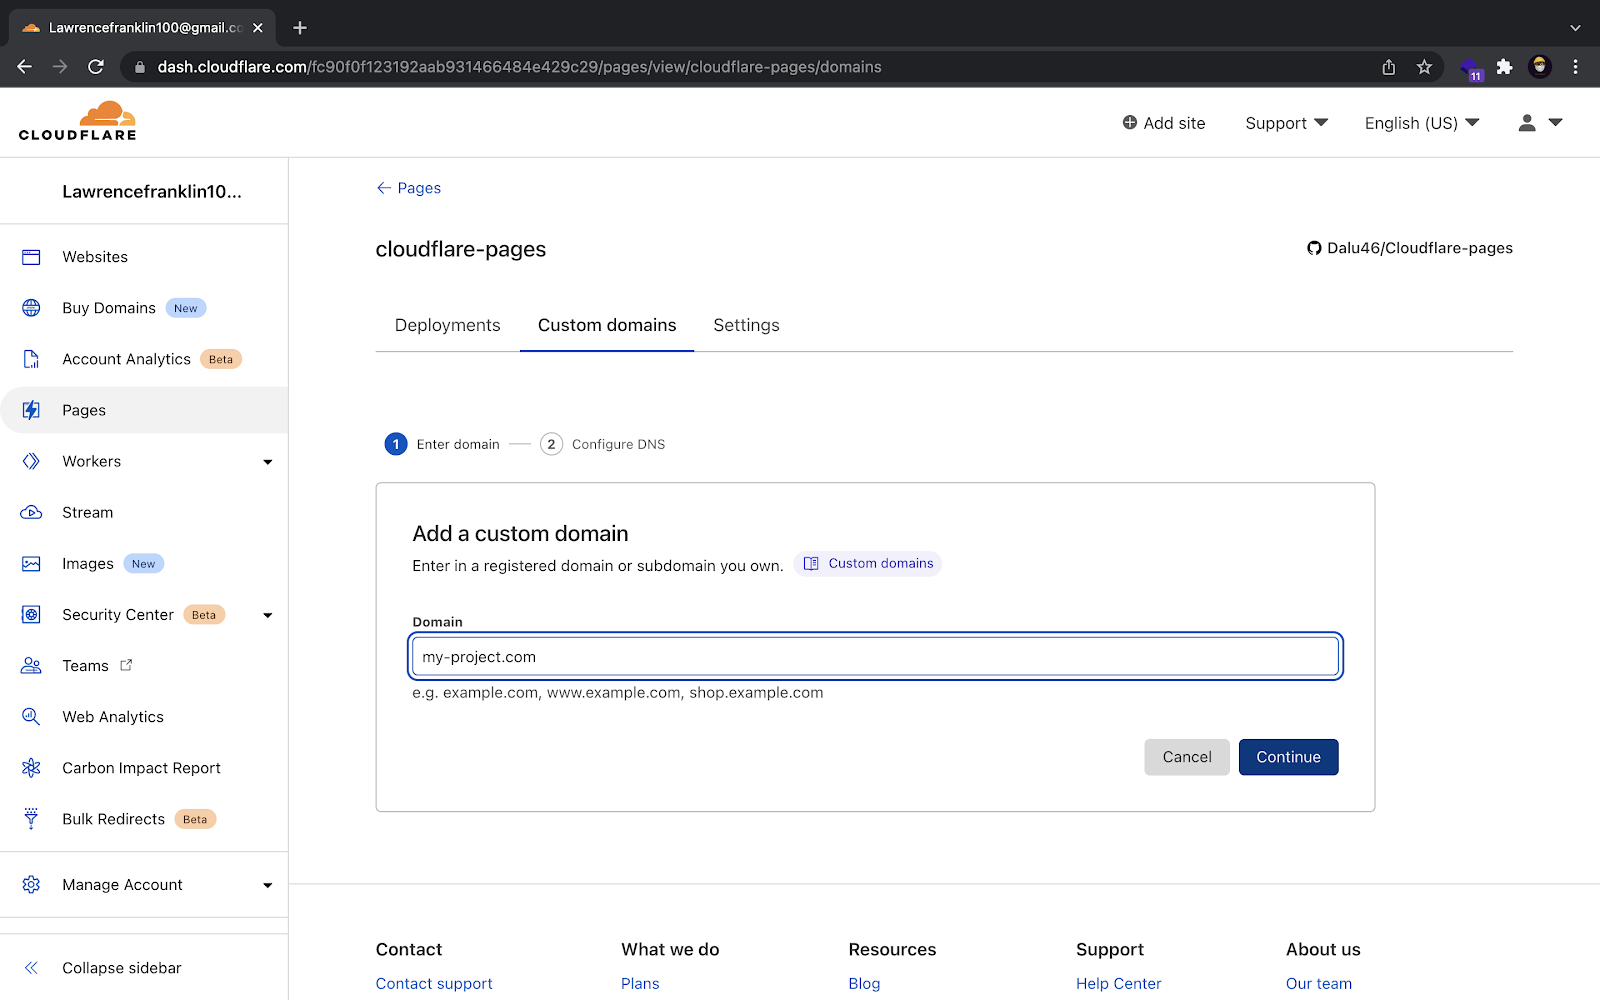
Now enter the domain or sub-domain you want to use for the project in the input field provided. You’d have to get a domain name if you do not have one. I’d recommend getting one from Namecheap.
While registering your domain name to Cloudflare, you must update name servers. Cloudflare will show you the current nameservers for your domain. You’ll need to log in to your registrar and change your domain name’s nameservers to the ones from Cloudflare, then click on check nameservers. It can take a few hours for your nameservers to propagate. However, if you have already registered your domain to Cloudflare, type the domain name and click Continue.
Now you have to preview the changes, and if you haven’t already, you can configure your DNS to enable HTTPS in your site and then click activate domain. Once this is successful, you’ll see the status reflected on the custom domain tab. This can take up to 48 hours, but most times, it takes lesser time to activate.
Conclusion
Cloudflare-pages is an awesome platform for self-hosting static sites, which allows you to host static websites from different locations globally without a traditional hosting server. In this article, we deployed a React app using Cloudflare pages. However, as stated earlier: the concepts shared here are applicable to other frameworks that are not React and even other projects that are not frameworks-based like a static HTML page.