Building a photo gallery app with Gatsby and GraphCMS
Use a headless CMS and Gatsby to quickly produce a modern website


Most modern websites and apps now make use of backend-only content management systems. With GraphCMS being one of the most popular to use in developing our web applications. With the help of a content management system, we won’t have to spend much time setting up a server and database, writing APIs with which the front end can send and receive data to and from the backend. GraphCMS helps us deal with these hassles so that we can focus on building our application.
Architecture for the Project
In this tutorial, we will look at connecting the GraphCMS to Gatsby and fetch some data using Graphql. We will look at getting started with GraphCMS and setting it up. Since we are building a photo gallery app, we will make all image data available in our GraphCMS API and attach Gatsby.js to the front end. We will create a model and update the content in our GraphCMS admin dashboard. We will then be able to request to get each of the photos displayed on our front end.
Before we dive into building our project, let’s first understand what a Headless CMS is and its need.
What’s a Headless CMS, and why do we need one?
Headless CMS is a content management system that provides a way to manage content. Instead of having your content together in a particular output, it provides your content as data over an API, making it very easy to share your data across multiple devices.
Earlier, Traditional CMS gave us the idea of having all our content, templates, and assets (images, videos) in a single environment. However, this method of serving the content is insufficient concerning how data can be distributed. Having a Headless CMS system is a developmental advance that prompts an even better way of managing content. The structure is flexible, content is treated as data and provided over an API to be served across multiple devices, and content editors work in tailored real-time collaboration environments.
Why use Gatsby?
Gatsby is an open-source framework that enables developers to make blazing fast, search engine-friendly, secure, and powerful websites. It uses a React-based framework and innovative data layer that makes integrating different content, APIs, and services into one web experience effortless. Gatsby builds websites and apps with modern front-end technologies such as ReactJS, Webpack, GraphQL, ES6+ JavaScript, and CSS.
Gatsby provides a way for us to source data from various headless CMSs such as WordPress, GraphCMS, Strapi, Contentful, etc., through plugins.
Why use GraphCMS?
GraphQL offers many advantages such as predictability, performance, development speed, stability, and flexibility. GraphCMS adopts that strategy and does it admirably. GraphCMS makes it easy to integrate with Netlify, Vercel, and Gatsby Cloud for a quick preview. It has remote fields which allow you to pull multiple sources of information into a single API. It automatically generates GraphQL queries from content. It also has built-in localization and locale-based publishing, allowing editors to localize and translate content into any language. You can check out the other notable features GraphCMS offers here.
Now that you have a little grasp of what a headless CMS means, the need for it, why we choose Gatsby for our front end and GraphCMS to handle our backend. Let’s dive into building our jam stack project.
Prerequisites
To follow this tutorial, you need:
Prepare GraphCMS
First, you need to sign up for a GraphCMS account so that you can access our admin panel. You will be given the option to either sign up with Facebook, Google, or Github or fill out some information. It’s up to you.
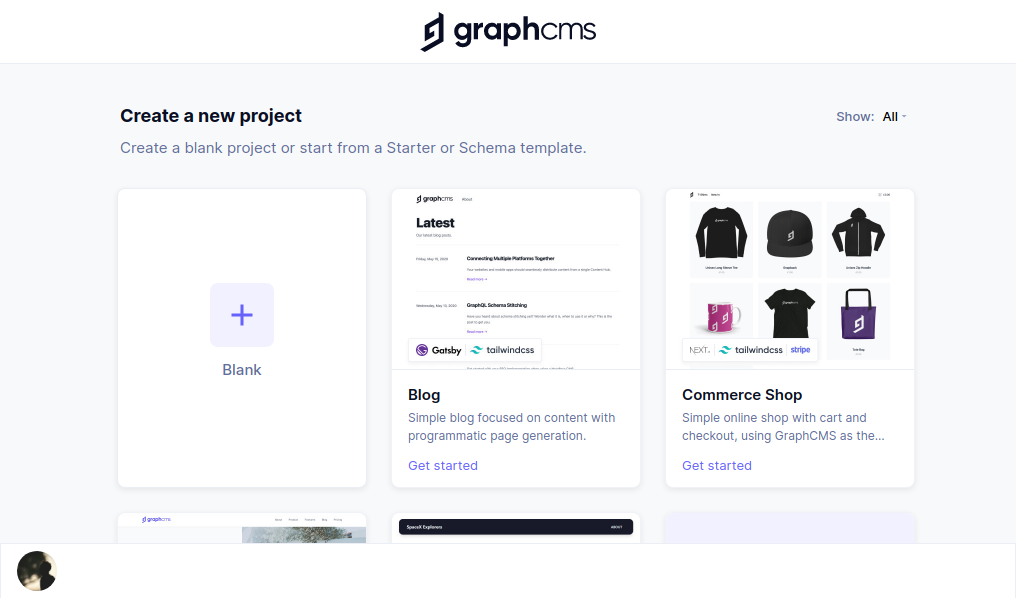
After signing up, you’ll be directed to this page. Click on the plus icon that says blank for a new project.
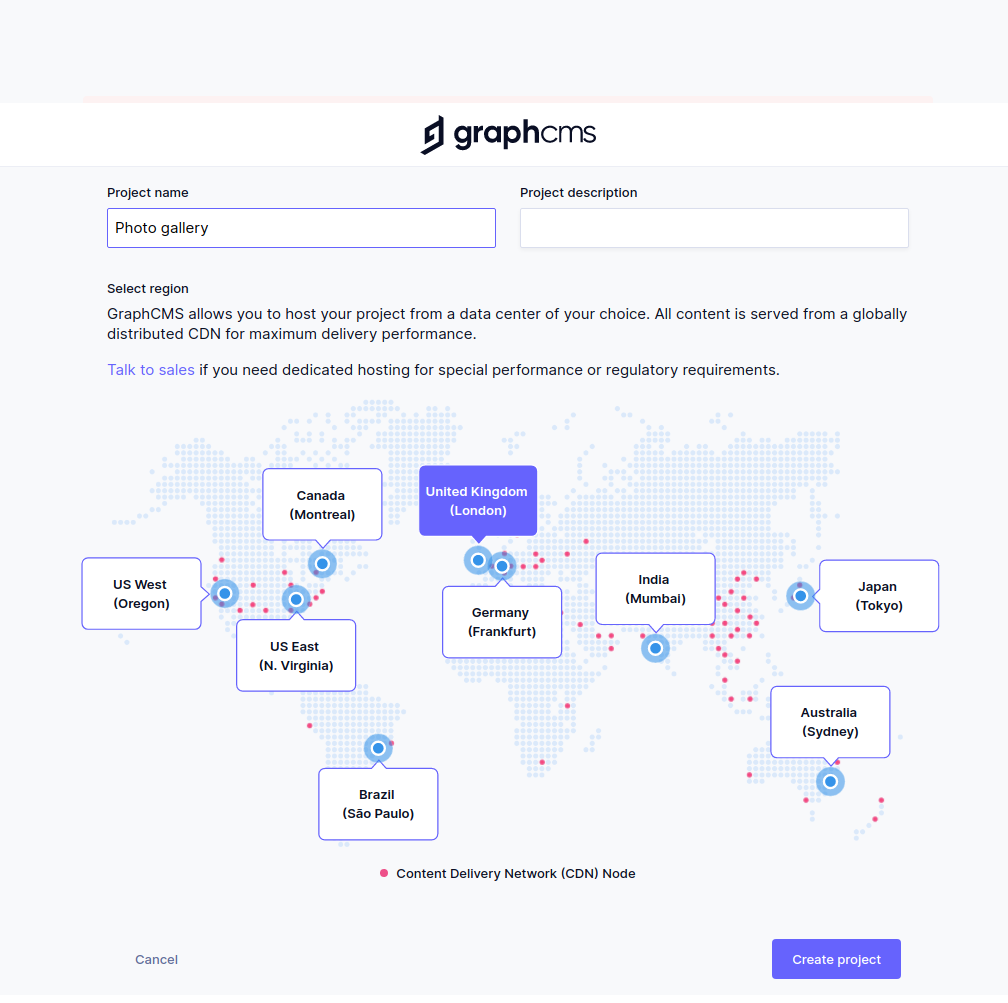
Here you can give your project a name. In our case, we’re naming the project Photo gallery. You will be required to choose a server where your data will be stored. Then we will create the project.
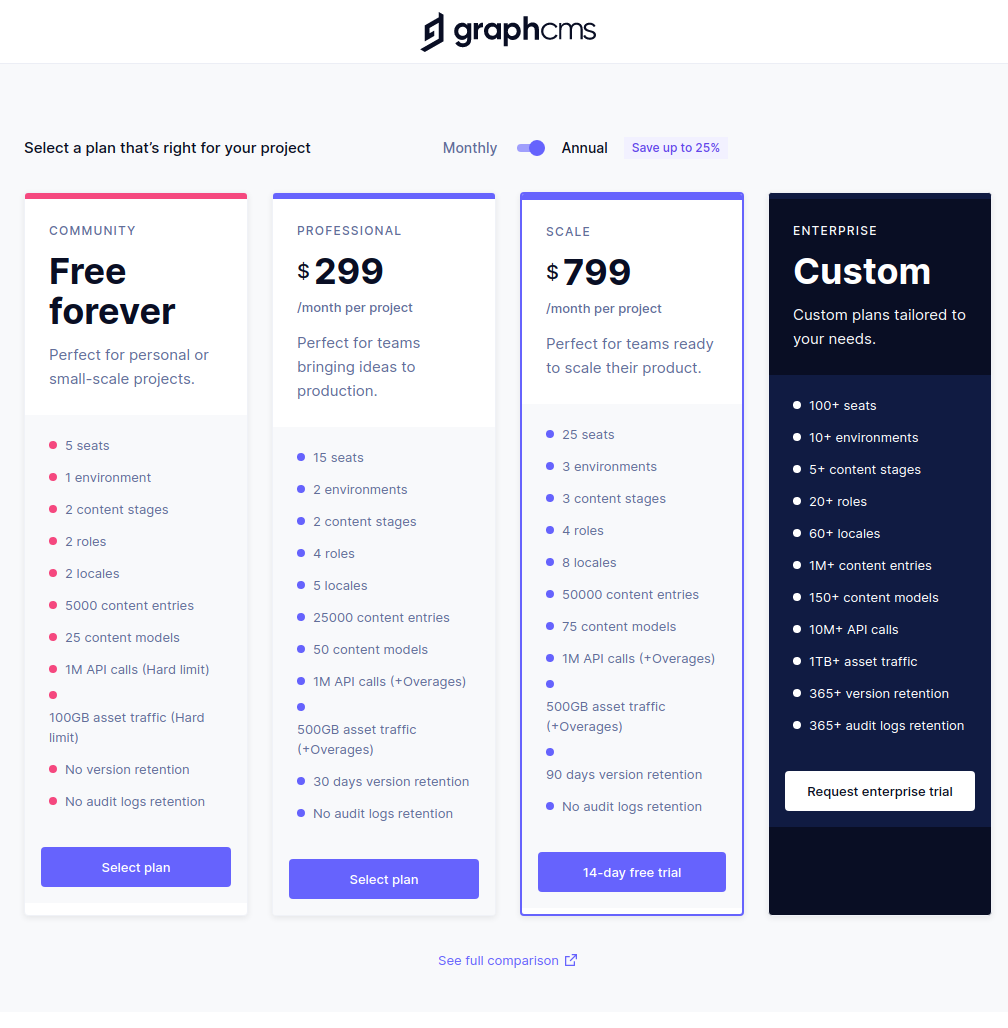
Another cool feature GraphCMS provides is its generous free plan where you have access to all the basic functions: 5 project users, localization, content stages, etc. In our case, we are making use of a free plan.
Creating Schemas
On our admin dashboard, on the left, below environments, click on Schemas, and we will create a model.
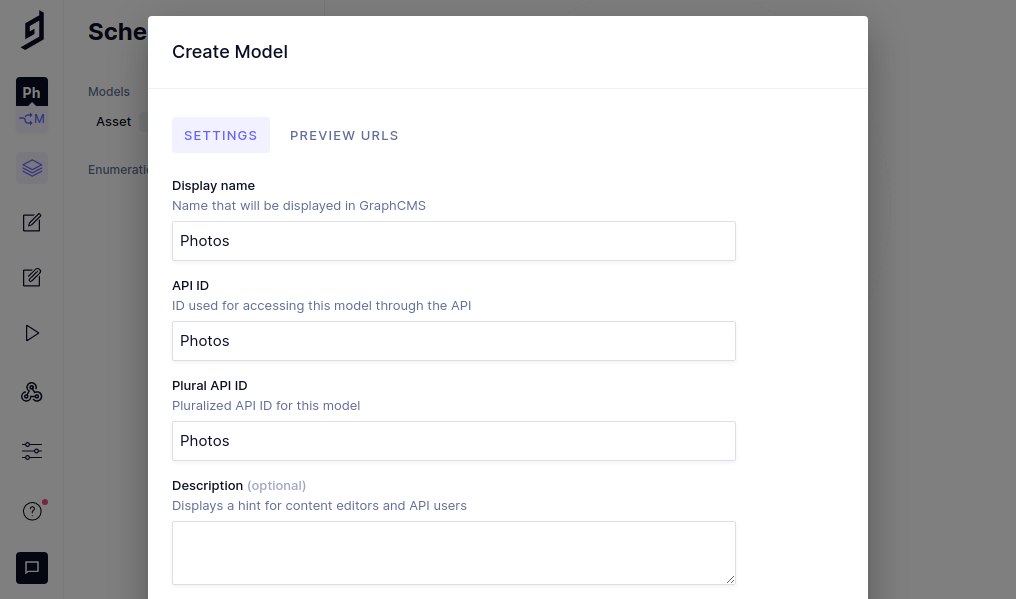
When we click add model, a modal opens up where we can create our photo content type and name it Photos. We clicked on continue, and now we can add fields to our content.
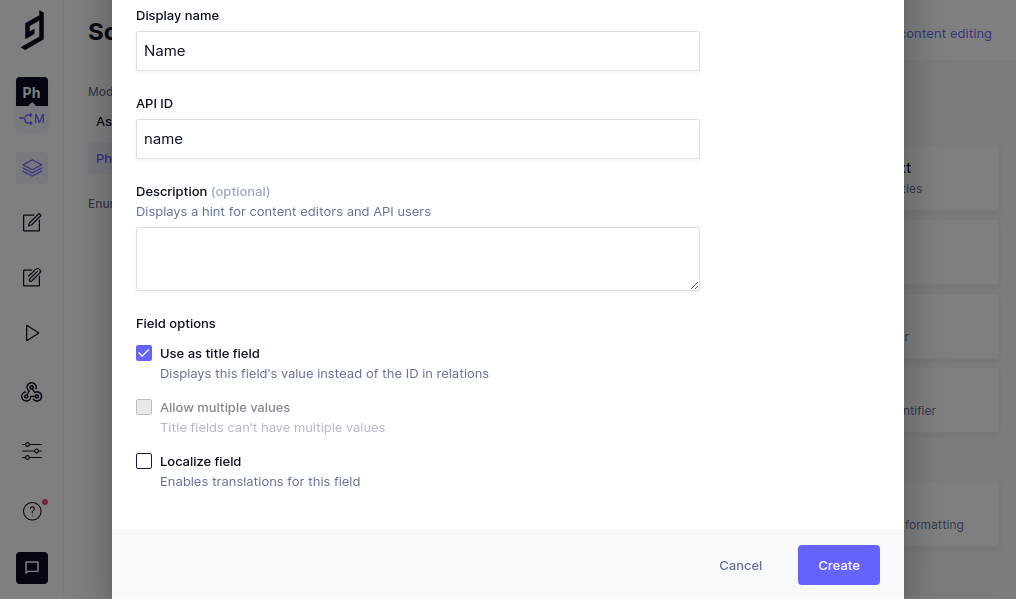
Click on the single line text on the right-hand side, and a modal will pop up, as shown in the image above. We will be creating three text fields: the photo gallery app’s title, the photo’s name, and the photo’s source. We will check the use as the title field because we will use it as the project’s title.
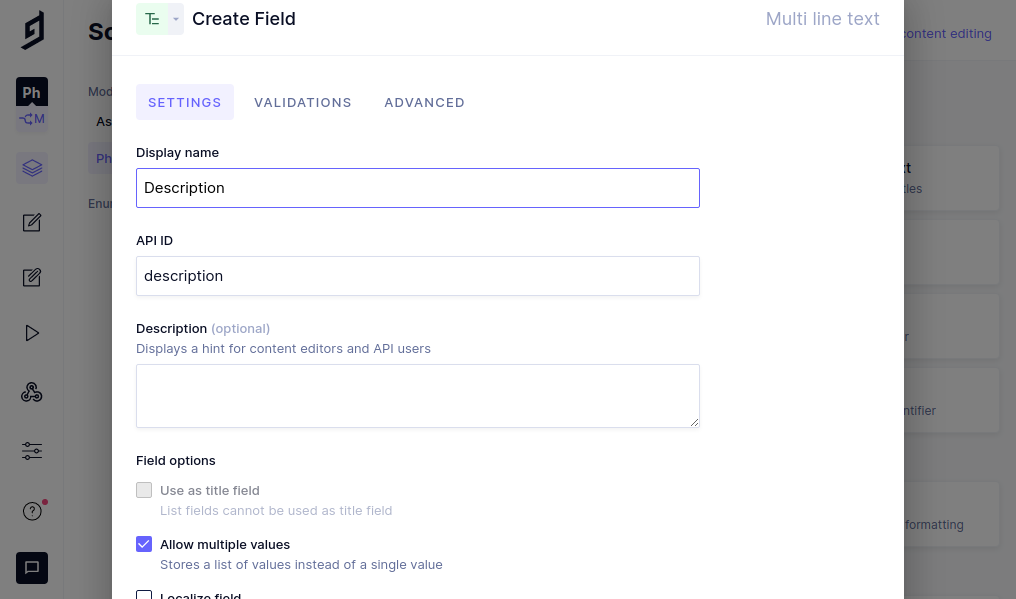
We will click on another field and select multi-line text, but this time we name its description as it will be the name and the source of the photo. As shown in the image above, we also checked the allow multiple values option.
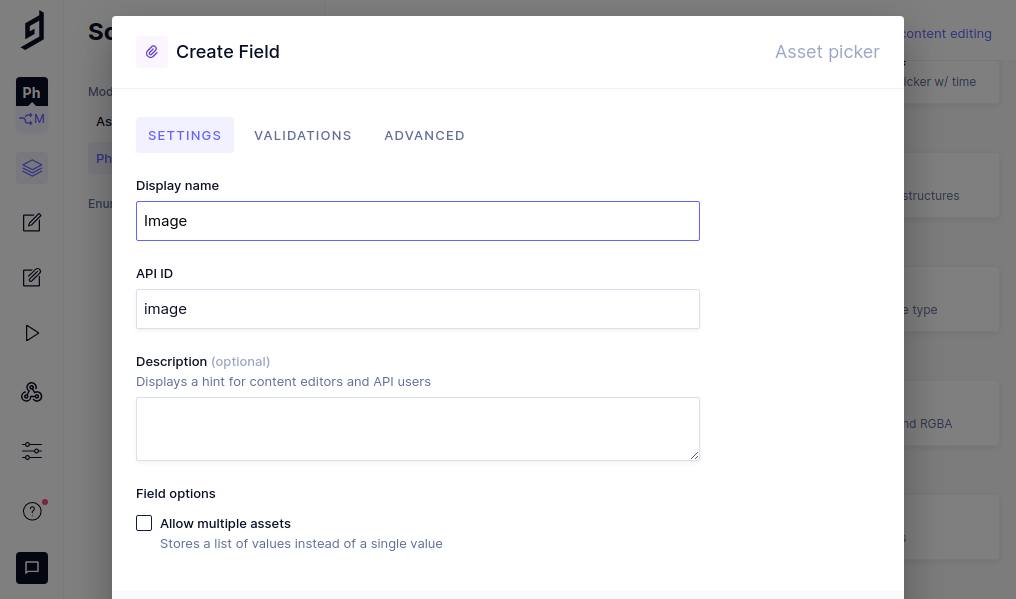
Lastly, we created an asset picker field. You can find it by scrolling down to the field options. We named it image, and this will be the image that will be displayed.

Adding our Photos
We go to content editing below the schema and click on the create item button at the top right side.
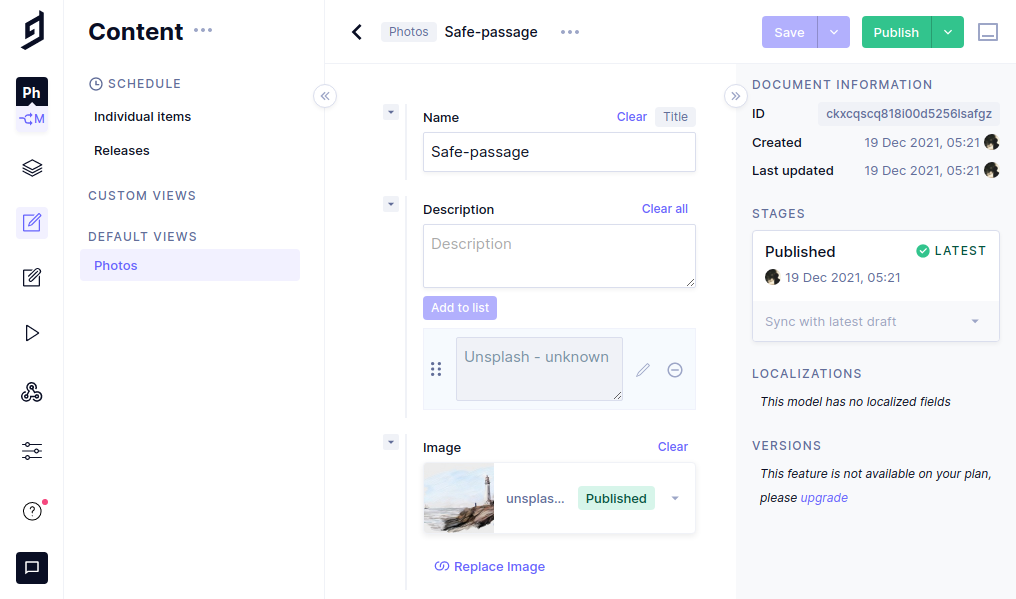
Here you can see the first photo created in the image above with the fields we created earlier. We fill within the input fields with the specified information.
- The
namefield is for the name of each photo. - The
descriptionfield is for the photo description. - The
imagefield is for the image that will be displayed on our photo gallery app.
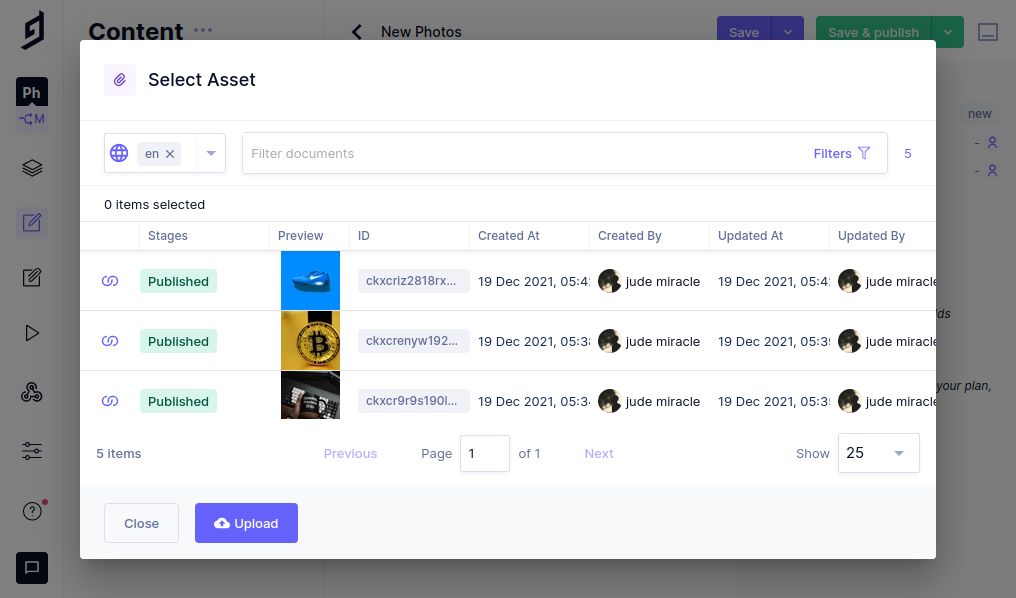
To add an image to the app, click on add an existing image, a modal will appear, and you will see the upload button; click on it. You will see the options provided to you, so it’s uploaded to you to select your choice. Then click on upload.
After filling out the information and adding the image, click on the save and publish button. Then you can go back and create more items. In our case, we are creating nine items.
Setting up Roles and Permissions
Before we begin to query this data inside Gatsby, we need to first get our API endpoint and set public permission to open or query any published content.
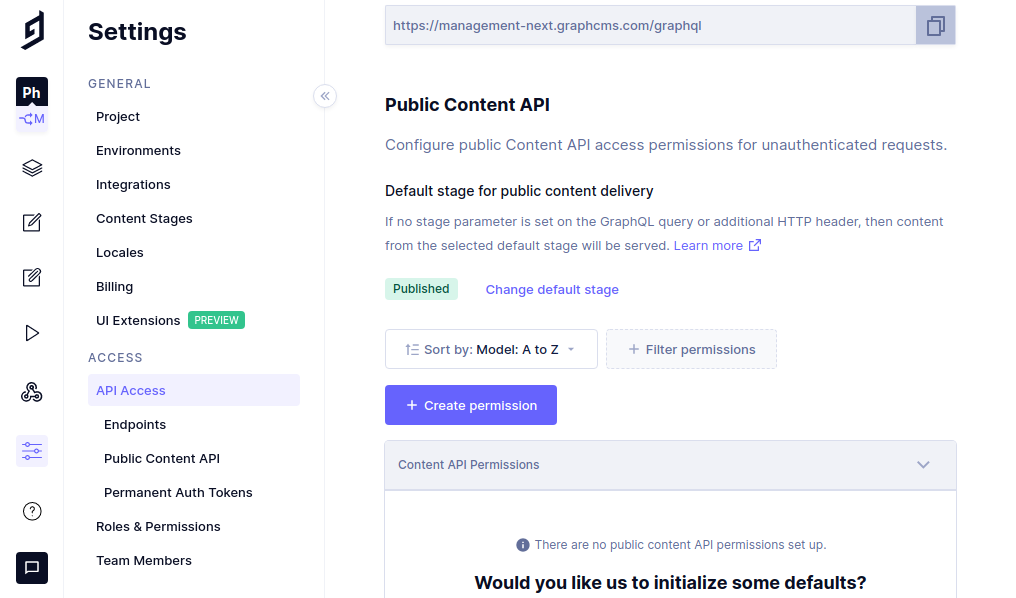
Now head to settings, and inside the API access, you will see the endpoints. By default, it’s on content from stage publishing and hit create permission. This means anybody accessing this URL can make a public API request without any authentication required.
Setting up our Gatsby Front end
In this section, we will set up Gatsby and build the photo gallery app UI. so let’s start installing Gatsby CLI. Gatsby command-line interface (CLI) is a tool that allows you to snappily create new Gatsby-powered sites and run commands for developing Gatsby sites. On your terminal, run the subsequent command:
npm install -g gatsby-cli
// to check if it is installed
gatsby --version
With the command line interface installed, we can now create our Gatsby project.
gatsby newYou will be asked a few questions.
What would you like to call your site?
· Photo Gallery App
✔ What would you like to name the folder where your site will be created?
.Desktop/ photo-gallery-app
✔ Will you be using a CMS?
· No (or I'll add it later)
✔ Would you like to install a styling system?
· No (or I'll add it later)
✔ Would you like to install additional features with other plugins?
· Done
Thanks! Here's what we'll now do:

    🛠  Create a new Gatsby site in the folder my-first-gatsby-site

? Shall we do this? (Y/n) › Yes
🎉  Your new Gatsby site Photo Gallery App has been successfully created
Once it is done installing, let’s first cd into our project and install some plugins and dependencies.
cd photo-gallery-appWhat we are going to install:
- Tailwind CSS as our UI framework
- Gatsby plugins -
gatsby-source-graphql: It is used to source data for our GraphCMS projects.
Configuring our dependencies
Let’s start by installing Tailwind CSS. In our project folder, let’s run the following commands:
npm install -D tailwindcss postcss autoprefixer gatsby-plugin-postcss
npx tailwindcss init -p
We have installed tailwind CSS, postcss, autoprefixer, and gatsby-plugin-postcss.
// gatsby.config.js
module.exports = {
  plugins: [
    'gatsby-plugin-postcss',
    // ...
  ],
}
On your gatsby-config.js file, enable the gatsby-plugin-postcss.
// tailwind.config.js

module.exports = {
  content: [
    "./src/**/*.{js,jsx,ts,tsx}",
  ],
  theme: {
    extend: {},
  },
  plugins: [],
}
Add paths to all of your template files in your tailwind.config.js file.
@tailwind base;
@tailwind components;
@tailwind utilities;
Create a ./src/styles/global.css file and add the @tailwind directives for each of the Tailwind layers.
// gatsby-browser.js

import './src/styles/global.css';
Create a gatsby-browser.js file at the root of your project if it doesn’t already exist, and import your newly-created ./src/styles/global.css file.
Install the GraphCMS plugin
We will be using CLI to install the plugin by running this command on your terminal:
npm install gatsby-source-graphqlWith gatsby-source-graphql, you can integrate third-party APIs, like GitHub’s, APIs of services like GraphCMS, and your custom GraphQL API.
Configuring the GraphCMS plugin
Add the following code to the gatsby-config.js file.
module.exports = {
  siteMetadata: {
    siteUrl: "https://www.yourdomain.tld",
    title: "PhotoGallery",
  },
  plugins: [
    'gatsby-plugin-postcss',
    {
      resolve: 'gatsby-source-graphql',
      options: {
        typeName: 'GraphCMS',
        fieldName: 'gcms',
        url: 'https://api-eu-west-2.graphcms.com/v2/ckxcnz96d3srk01xi0skjbq9g/master',
      }
    },
  ],
};
Here we are configuring the graphCMS `graphql“ plugin to be able to query our data through graphCMS API.
- Line 11: we specify the arbitrary name for the remote schema query type.
- Line 12: field under which the remote schema will be accessible. You can use this in your Gatsby query
- Line 13: URL to query from
Query the data in Gatsby GraphiQL
Now that the API endpoint is set up, we will be able to query the data with Gatsby’s GraphiQL playground, and we can shape the query we want to use to display the data here.
First of all, we need to start our server before accessing the Gatsby GraphiQL UI.
gatsby developWe used this command to start our server. Now that our server has started, we run our site and the Graphql playground on the link provided to us.

By clicking on the links provided, it will bring up the Gatsby GraphQl UI, where we can shape the data we want to query.
query myQuery {
  gcms {
    photo {
      id
      name
      description
    }
  }
}
You’ll see the available fields where we can select the gcms field we defined in the gatsby-source-graphql plugin.
Choosing the fields we created in GraphCMS and then running the query will show our defined data.
Using Asset Transformation API
We will also need to grab the images that we want to display. We do this by making use of asset transformation API. We will be able to grab our image URLs, and we can extend them by passing arguments on to them. You can read more about the asset transformation API.
image {
  url(transformation: {image: {resize: {width: 500, height: 500, fit: clip}}})
}
Here we pass on arguments to our image URL by grabbing the width and height. We’ve also passed an argument of fit and given it a value of clip to resize the image to fit within the specified parameters without distorting, cropping, or changing the aspect ratio.
Display GraphCMS Data to our Gatsby Client
Use the graphql gatsby export to query the data from the GraphCMS endpoint. On the pages/index.js add the graphql export the gatsby imports.
import { useStaticQuery, graphql } from "gatsby";At the very bottom define the query:
export default function Gallery() {
  const data = useStaticQuery(graphql`
  query PhotoPage{
    gcms{
        photo{
            id
            name
            description
            image{
                url(transformation: {image: {resize: {width: 500, height: 500, fit: clip}}})
            }
        }
    }
}

const photos = data.gcms.photo;
Open Source Session Replay
OpenReplay is an open-source, session replay suite that lets you see what users do on your web app, helping you troubleshoot issues faster. OpenReplay is self-hosted for full control over your data.

Start enjoying your debugging experience - start using OpenReplay for free.
Building out the application UI
As I stated earlier, we will be using Tailwind CSS for the styling of this application
inside the Gallery function code block, add the following code:
return (
<div className="min-h-screen w-full flex justify-center items-center my-20 mx-0">
<div className="text-xl bg-white w-5/6 my-0 mx-auto max-w-4xl shadow-lg py-11 px-5 rounded-2xl lg:max-w-6xl lg:p-24">
<header className="flex items-center justify-center flex-col lg:flex-row lg:justify-between">
<h1 className="text-4xl font-black tracking-tighter">PhotoGallery</h1>
<form className="mt-2 w-4/5 max-w-xs relative">
<input
type="text"
placeholder="search images"
className="border-b-2 mb-2 text-xl outline-none text-gray-400 bg-transparent w-full"
/>
<img
src={search}
alt="search btn"
height="20px"
width="20px"
className="absolute right-0 top-0 opacity-50 text-gray-400"
/>
</form>
</header>
<div className="md:grid grid-cols-4 mt-12 gap-5">
{photos.map(photo => (
<div key={photo.id} className="w-full h-80 relative overflow-hidden rounded-lg transition-shadow duration-35 ease hover:shadow-lg">
<img
src={photo.image.url}
alt={photo.name}
className="h-full w-full object-cover"
/>
<div className="w-full p-7 absolute bg-white bottom-0 text-xs">
<h3 className="font-bold">{photo.name}</h3>
<p>{photo.description}</p>
</div>
</div>
))}
</div>
</div>
</div>
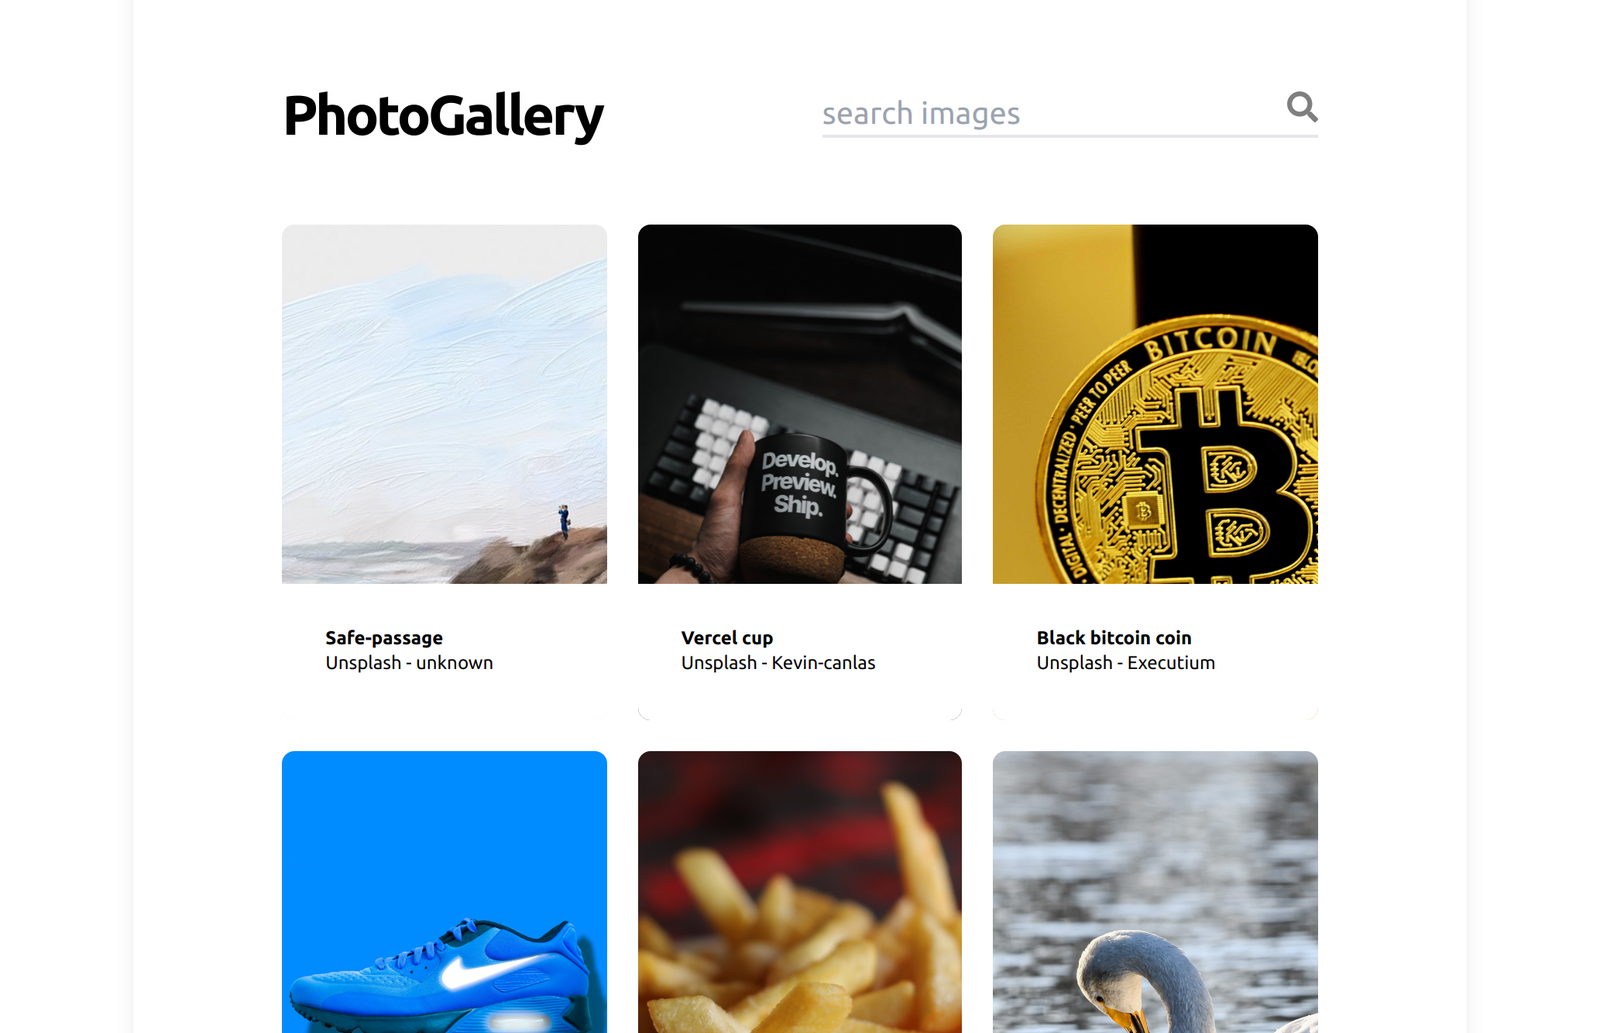
)The output should be equivalent because of the results of the Gatsby GraphQL query we created:
{
  "data": {
    "gcms": {
      "photo": [
        {
          "id": "ckxcqscq818i00d5256lsafgz",
          "name": "Safe-passage",
          "description": [
            "Unsplash - unknown"
          ]
        },
        {
          "id": "ckxcrasb418oh0d524cldkhz1",
          "name": "Vercel cup",
          "description": [
            "Unsplash - Kevin-canlas"
          ]
        },
        {
          "id": "ckxcrg4fs193k0b61yu121wp4",
          "name": "Black bitcoin coin",
          "description": [
            "Unsplash - Executium"
          ]
        },
        {
          "id": "ckxcrjqu819510d57tu4a2dsb",
          "name": "Blue Nike Shoe",
          "description": [
            "Unsplash -  Alexander-rotker"
          ]
        },
        {
          "id": "ckxcs7fgo19cz0d57ozjdlio1",
          "name": "Fried Potatoes",
          "description": [
            "Pexels - Dzenina Lukac"
          ]
        },
        {
          "id": "ckxcsbsvc19g60j58db5j4m5v",
          "name": "Bird Swiming",
          "description": [
            "Pixabay - Johnny B. Goode"
          ]
        },
        {
          "id": "ckxcsi8co19iq0j58uxb4c6xw",
          "name": "Pink Flower",
          "description": [
            "Pexel - Lisa"
          ]
        },
        {
          "id": "ckxcsneb419jx0d57puw2ikwh",
          "name": "Dog Hunting",
          "description": [
            "Pikwizard- Retriever"
          ]
        },
        {
          "id": "ckxcsr3so19me0j589rbjcf6v",
          "name": "Sea Lion",
          "description": [
            "Pixabay - Kev"
          ]
        }
      ],
      "assets": [
        {
          "imagePhotos": [
            {
              "image": {
                "url": "https://media.graphcms.com/resize=fit:clip/2GPaCYMvRI2j6lByh6p0"
              }
            }
          ]
        },
        {
          "imagePhotos": [
            {
              "image": {
                "url": "https://media.graphcms.com/resize=fit:clip/llrUKVLgRKyt9Q4ygcyd"
              }
            }
          ]
        },
        {
          "imagePhotos": [
            {
              "image": {
                "url": "https://media.graphcms.com/resize=fit:clip/EvbB0oHpQMGYeVkGk0yO"
              }
            }
          ]
        },
        {
          "imagePhotos": [
            {
              "image": {
                "url": "https://media.graphcms.com/resize=fit:clip/RxufeLgNRCmiyZ93xzeu"
              }
            }
          ]
        },
        {
          "imagePhotos": [
            {
              "image": {
                "url": "https://media.graphcms.com/resize=fit:clip/ZdUwUZ5bQGuQmaKnmUUP"
              }
            }
          ]
        },
        {
          "imagePhotos": [
            {
              "image": {
                "url": "https://media.graphcms.com/resize=fit:clip/vfOeohQWSLKzJqveSP4C"
              }
            }
          ]
        },
        {
          "imagePhotos": [
            {
              "image": {
                "url": "https://media.graphcms.com/resize=fit:clip/nXtEvGxjQwiPWamYYSno"
              }
            }
          ]
        },
        {
          "imagePhotos": [
            {
              "image": {
                "url": "https://media.graphcms.com/resize=fit:clip/VN0vYJGQkafa4AnIcFB8"
              }
            }
          ]
        },
        {
          "imagePhotos": [
            {
              "image": {
                "url": "https://media.graphcms.com/resize=fit:clip/sIXBYDLHQJq5IOYP9hI7"
              }
            }
          ]
        }
      ]
    }
  },
}
This is what our app looks like:
Conclusion
At the end of this tutorial, we looked at how we can connect the GraphCMS backend to our Gatsby front end and fetch some data using GraphQL. In the process, we created a photo gallery app and model type to build the application. We also changed the roles and permissions that allow us to perform CRUD operations like reading and updating. We created a page that displays the information queried from our GraphCMS endpoint. If you’d like to learn more about what GraphCMS can do, check out its outstanding features on its website.
All code for this article can be found in Github.