Building a React Application with Vite
Vite - the next-generation front-end build tool that you'll use


Vite is the next-generation front-end build tool that provides a faster and leaner development experience for current web projects. It consists of two major parts:
-
A development server that provides rich feature enhancements over native ES modules, for example, extremely fast Hot Module Replacement (HMR).
-
A build command that bundles your code with Rollup, preconfigured to output highly optimized static assets for production.
It also supports preconfigured Rollup builds with multi-page and library mode support, a Rollup-superset plugin interface shared between dev and build flexible programmatic APIs with TypeScript typing, and on-demand file serving over native ESM. Vite is opinionated and comes with sensible defaults out of the box, but is also highly extensible via its Plugin API and JavaScript API with full typing support.
In this tutorial, you’ll learn how to build a React application with Vite. We’ll create a blog application for the demonstrations. You need to have Node.js version > = 12.2.0 is installed. However, some templates require a higher Node.js version to work. Please upgrade if your package manager warns you about it. The code for this tutorial is available here on Github. Feel free to clone and follow along. Without more ado, let’s get started!
Scaffold a Vite Application
To get started, you need to scaffold a Vite project with the command below:
npm create vite@latestThe above command will prompt you to select your project name and framework. We’ll use the default name for demonstration by pressing the enter key, selecting “react” as the framework, and “react-ts” as the variable to enable Typescript support. Your selection should look like the screenshot below:

Now let’s look at the project structure for our application. After running the create command, Vite will generate the following folder structure as shown below:
vite-project
┣ src
┃ ┣ App.css
┃ ┣ App.tsx
┃ ┣ favicon.svg
┃ ┣ index.css
┃ ┣ logo.svg
┃ ┣ main.tsx
┃ ┗ vite-env.d.ts
┣ .gitignore
┣ index.html
┣ package.json
┣ tsconfig.json
┣ tsconfig.node.json
┗ vite.config.ts
Let’s look at the essential files that may look strange to you.
index.htm: This is the central file, usually located in apublicfolder in a typical reacted application.main.tsx:This is where the code responsible for the browser output is rendered. A React application is usually namedindex.tsorindex.js.vite.config.json: This is the configuration file for every Vite project. If you open the file, you’ll discover that React has been added as a plugin in the plugins array.
Create our Blog Component
Now let’s start building our blog application by creating a blog component. Create a component folder in the src folder and create aBlog.tsx then add the code snippet below:
import BlogList from "./BlogList";
export default function Blog() {
  return (
    <div className="container">
      <div className="content">
        <ul>
          <BlogList />
        </ul>
      </div>
    </div>
  );
}
In the above code snippet, we’ve created the blog and imported the BlogList component, which we’ll create in the next section to display the list of all the blogs in our application. Now update the code in the App.tsx file with code snippets below:
import "./App.css";
import Blog from "./components/Blog";

function App() {
  return (
    <div className="App">
      <header className="App-header">
        <div className="main">
          <div className="search">
            <input type="text" placeholder="Search a blog"></input>
          </div>
          <button>Add New</button>
        </div>
      </header>
      <Blog />
    </div>
  );
}

export default App;
In the code snippet, we imported our Blog component and the App.css file, then rendered the Blog component. Copy the styles for the application here and replace the CSS styles in the App.css file.
Create the BlogList component
To display the list of all the blogs created by the users, let’s create a BlogList.tsx file in the component folder and add the code snippets below:
export default function BlogList() {
return (
<li>
<div className="info">
<h6>John Doe</h6>
<small>May 3 2022</small>
</div>
<p>Build a REST API with Typescript and Node.js</p>
</li>
);
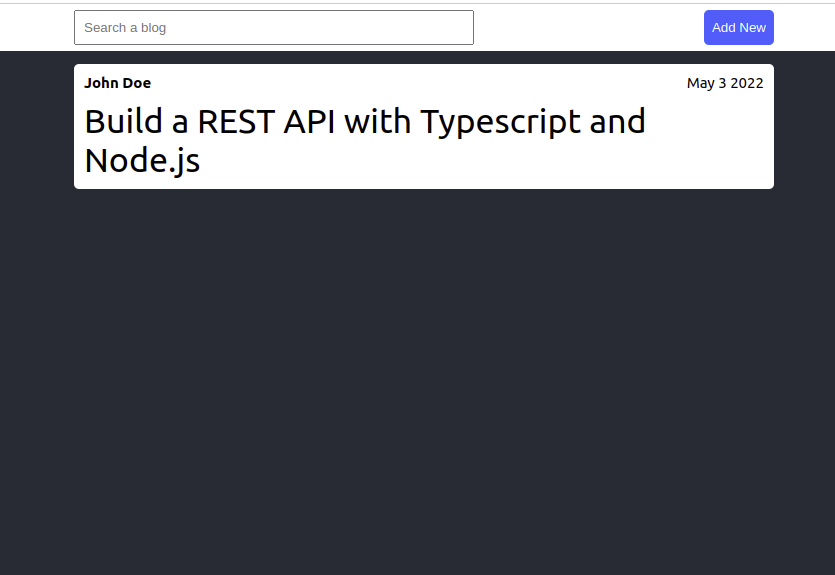
}Now start the server with the command below:
npm run devThen open your browser and navigate to http://localhost:3000/; you should see an output like the one on the screenshot below:
Create Todo Service
So far our application is only displaying a hardcoded blog. Now let’s create a BlogData service to add blogs and display blogs dynamically in our application. Create a service folder in the component directory, create a BlogData.ts file and add the code snippets below:
import IBlog from "./interface";
export const genBlogId = (): string => Math.random().toString(36).slice(-6);

export const BlogData: IBlog[] = [
  {
    id: genBlogId(),
    title: "Build a REST API with Typescript and Node.js",
    cover:
      "https://www.freecodecamp.org/news/content/images/size/w2000/2020/02/typescript.png",
    body: "Lorem ipsum dolor sit amet consectetur adipisicing elit. Odio esse nesciunt ab nulla facere adipisci magnam quos provident! Nam, dolor aut sunt ab expedita minus quae repellendus iure fuga perspiciatis? Lorem ipsum dolor sit amet consectetur adipisicing elit. Neque voluptates, obcaecati quod officiis a fuga, alias laborum quisquam eius, ullam et iure corporis assumenda dolores porro! Molestiae, magnam fuga! Voluptatum?",
    description:
      "This is a comprehensive tutorial on how to build a REST backend with Typescript and Node.js",
    dateCreated: new Date(Date.now()).toString().substr(4, 11),
    createdBy: "John Doe",
  },
];
In the above code snippet, we imported the IBlog interface, which we’ll be creating shortly to define an interface for our blogs. Then we created a genBlogId function to generate a random id for all the blogs created. Finally, we made a BlogData array with some blog data.
Now let’s go ahead and create the IBlog interface. create an interface folder in the service directory, create an index.ts file and add the code snippet below:
export default interface IBlog {
  id: string;
  title: string;
  cover: string;
  body: string;
  description: string;
  createdBy: string;
  dateCreated: string;
}
Create Blog Details component
With the Blog and BlogList component created, let’s create another component to view the details our every blog in our application. Create a BlogDetails.tsx file in the component folder and add the code snippet below:
import { useParams } from "react-router-dom";
import { BlogData } from "./service/BlogData";

export default function BlogDetails() {
  const { id } = useParams();
  const data = BlogData.filter((data) => data.id === id);
  console.log(data);
  return (
    <div className="container">
      <div className="content">
        <ul>
          <li>
            <div className="info">
              <h6>{data[0].createdBy}</h6>
              <small>{data[0].dateCreated}</small>
            </div>

            <p>{data[0].title}</p>
            <img src={data[0].cover} />
            <p className="body">{data[0].body}</p>
          </li>
        </ul>
      </div>
    </div>
  );
}
In the above code snippet, we imported the BlogData array and useParams hook from react-router-dom, which we’ll set up in the next section to get the blog’s id from the URL.
Then we used the Javascript filter to get the blog the given from our URL and display the details.
Open Source Session Replay
OpenReplay is an open-source, session replay suite that lets you see what users do on your web app, helping you troubleshoot issues faster. OpenReplay is self-hosted for full control over your data.

Start enjoying your debugging experience - start using OpenReplay for free.
Setup Routes and Display Blogs
Now let’s add routing to our application using react-router-dom and display our blog data. But, first, we need to install react-router-dom with the command below:
npm install react-router-domThen update the App.tsx file with the code snippet below to add our routes.
// ...
import {
  BrowserRouter as Router,
  Routes,
  Route
} from "react-router-dom";
// ...
return (
   ...
   </header>
     <Router>
        <Routes>
          <Route path="/" element={<Blog />} />
          <Route path="/:id" element={<BlogDetails />} />
        </Routes>
      </Router>
    ...
  )
In the above code snippet, we created the routes for our application. The Blog component will be routed when a user visits our application, and then we can use the pass in the blog’s id as props to the URL to view the details of that blog. Update the code in the BlogList component with the code snippet below:
import IBlog from "./service/interface";
import { Link } from "react-router-dom";
export default function BlogList(props: { data: IBlog }) {
const { data } = props;
return (
<li>
<div className="info">
<h6>{data.createdBy}</h6>
<small>{data.dateCreated}</small>
</div>
<Link to={`/${data.id}`}>
<p>{data.title}</p>
</Link>
</li>
);
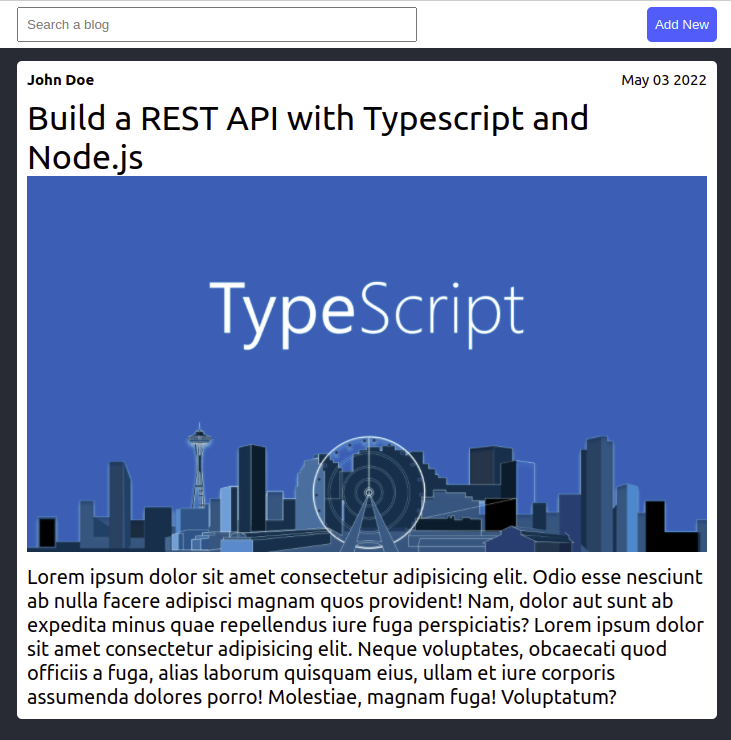
}We have displayed our blog data here, which we’ll accept as props from the Blog component. Also, to make the data showing the BlogDetails component dynamic, we created a link and passed the id of each blog to the request parameter.
Finally, import and then display the data from our BlogData service in the Blog component with the code snippet below:
import IBlog from "./service/interface";
import { BlogData } from "./service/BlogData";

return (
...
    <ul>
          {BlogData.map((data: IBlog) => (
            <BlogList key={data.id} data={data} />
          ))}
    </ul>
...
)
If you go back to your browser, things should look slightly different. You can now view the details of the blogs by clicking the link.
Create the Modal component
At this point, we can view our blog details. Let’s add a modal to enable the user to add new blogs. Create a Model.tsx file in the component folder and add the code snippet below:
import { useState } from "react";
import { BlogData, genBlogId } from "./service/BlogData";
export default function Modal(props: { showModal: any, setShowModal: any }) {
const { showModal, setShowModal } = props;
const [title, setTitle] = useState("");
const [coverUrl, setCoverURL] = useState("");
const [body, setBody] = useState("");
const [description, setDescription] = useState("");
const [createdBy, setCreatedBy] = useState("");
return (
<div>
<div className="Modal" style={{ display: showModal ? "block" : "none" }}>
<span className="close" onClick={handleCloseModal}>
X
</span>
<div className="form-container">
<form onSubmit={handleSubmit}>
<input
type="text"
placeholder="Title"
name="name"
onChange={(e) => setTitle(e.target.value)}
></input>
<input
type="text"
placeholder="Cover URL"
name="coverUrl"
onChange={(e) => setCoverURL(e.target.value)}
></input>
<textarea
name="body"
id=""
placeholder="Write something ..."
rows={20}
onChange={(e) => setBody(e.target.value)}
></textarea>
<input
type="text"
placeholder="description"
name="description"
onChange={(e) => setDescription(e.target.value)}
></input>
<input
type="text"
placeholder="createdBy"
name="createdBy"
onChange={(e) => setCreatedBy(e.target.value)}
></input>
<button>Save</button>
</form>
</div>
</div>
</div>
);
}
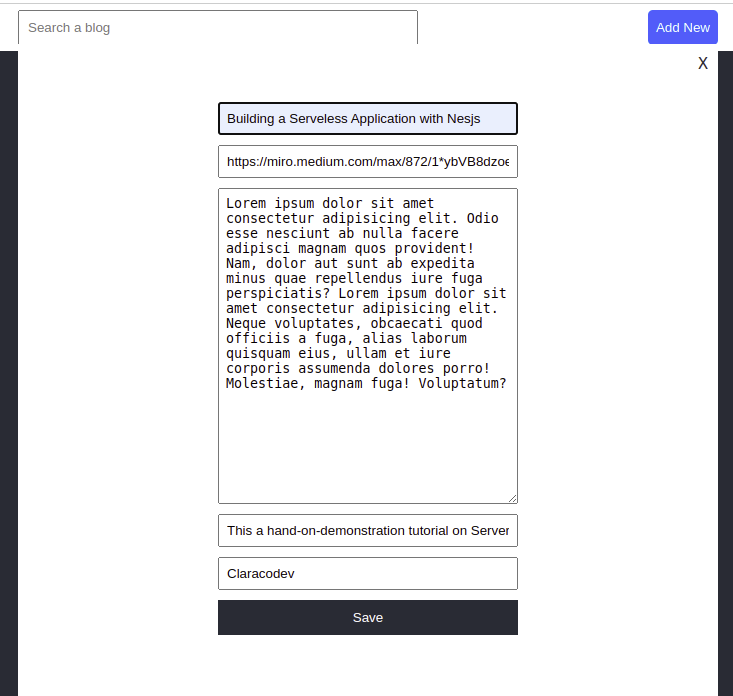
}We import the BlogData array and the genBlodId function in the code snippet. We created a form to allow users to post blogs, and we defined the state variables for the fields in our form to get the user’s inputs.
Now let’s add methods to submit the blog and display the modal with the code snippets below:
...
async function handleSubmit(event: {
  [x: string]: any;
  preventDefault: () => void;
}) {
  event.preventDefault();
  BlogData.push({
    id: genBlogId(),
    title,
    cover: coverUrl,
    body,
    description,
    createdBy,
    dateCreated: new Date(Date.now()).toString().substr(4, 11),
  });
  event.target.reset();
}

function handleCloseModal() {
  setShowModal(false);
}
...
Now import the Modal into our App component, add the state variables, and the method to close the modal. Your app component should look like the code snippets below:
import { useState } from "react";
import "./App.css";
import Blog from "./components/Blog";
import BlogDetails from "./components/BlogDetails";
import Modal from "./components/Modal";
import { BrowserRouter as Router, Routes, Route } from "react-router-dom";
function App() {
const [showModal, setShowModal] = useState(false);
function handleOpenModal() {
setShowModal(true);
}
return (
<div className="App">
<header className="App-header">
<div className="main">
<div className="search">
<input type="text" placeholder="Search a blog"></input>
</div>
<button onClick={handleOpenModal}>Add New</button>
</div>
</header>
<Router>
<Routes>
<Route path="/" element={<Blog />} />
<Route path="/:id" element={<BlogDetails />} />
</Routes>
</Router>
<Modal showModal={showModal} setShowModal={setShowModal} />
</div>
);
}
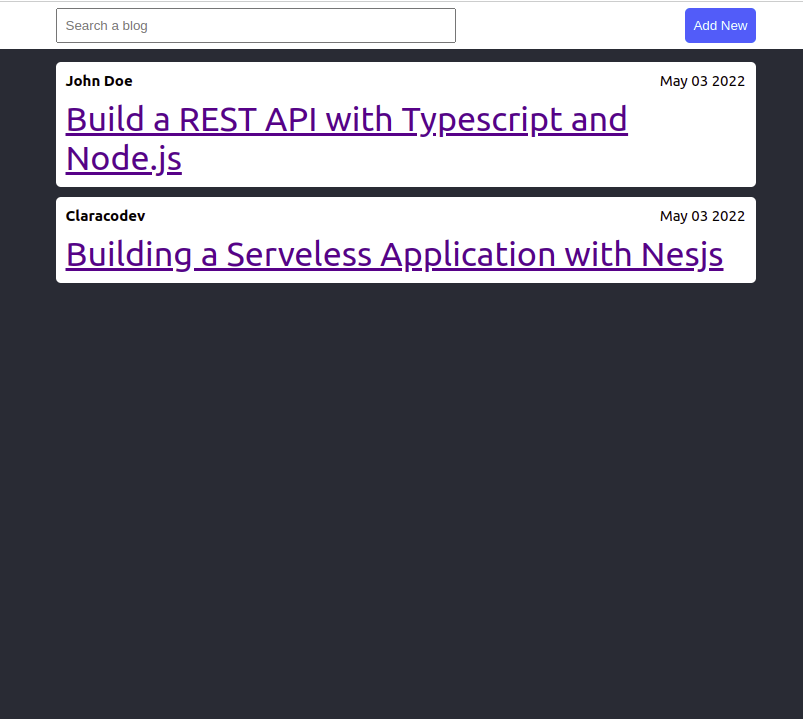
export default App;Now you can click the Add New button to show the modal and post a new blog, as shown in the screenshot below:
We should have two blogs in our application; everything works!
Conclusion
Throughout this tutorial, you’ve learned how to build a React application with Vite. We started with a quick introduction to Vite and created a blog application for the demonstration. How would you use Vite in your next project after learning about Vite? Perhaps you can know more about Vite and extend the features of this application.