Building Command-Line Apps Using React Ink
Use React Ink and go beyond the usual in command line apps.

Command-Line Apps (CLI: Command Line Interface) are programs you can interact with through your terminal, without graphics or visual interface that do not go beyond what you see in your terminal. Recent command-line apps accept user input, provide attractive command-line user interfaces, and can handle even the most complex jobs, such as leading the user through various process phases. As the usefulness of command-line interfaces improves, they become available for an increasing number of tasks. Modern CLIs are already replacing some GUIs (graphical user interfaces).
React Ink is a framework that provides the same component-based UI building experience that React offers in the browser but for command-line apps. It uses Yoga to build Flexbox layouts in the terminal. In this article, you will learn how to build and implement command-line apps using React Ink. You should have Node.Js installed on your device to follow this article.
Creating an Ink Project
Creating or scaffolding a new Ink project is pretty straightforward. The first thing you need to do is go to your terminal and create a new project folder using the following command.
mkdir react-ink & cd react-inkYou then need to run the script using the npx command, which is already installed together with node.js.
npx create-ink-appOnce everything is finished installing, it should look like this when you open the project on your code editor.
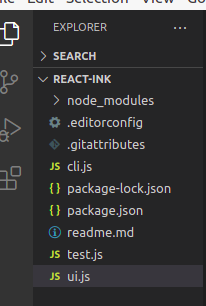
Let us look at one of the JavaScript files, the ui.js file that is the main entry point for the implementation of the command line user interface:
"use strict";
const React = require("react");
const { Text } = require("ink");

const App = ({ name = "Stranger" }) => (
  <Text>
    Hello, <Text color="green">{name}</Text>
  </Text>
);

module.exports = App;
Note: Once you install React Ink and open the ui.js file, you will automatically see the exact code above. In React Ink, imports are made using require, while exports are made using module.exports.
The file above will look familiar if you already have some experience with React. This is the default implementation of the default CLI, which appears when scaffolding a new project with React Ink. Now, let us try things out and see what happens in the terminal. To run the code, you will have to type in node cli.js on your terminal, and you will get this.

This command also provides help when you type in the command node cli.js --"help. After running this command, you should be able to get this.
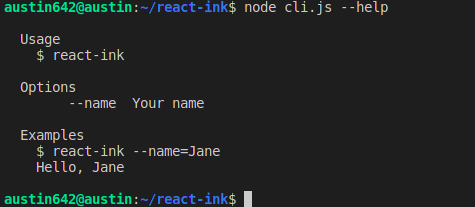
The output, as seen above, gives us instructions on the usage of the CLI. Now, let’s try out the command as seen above, but we will supply a value for the name parameter and change the output this time. Ignore the react-ink command shown above. You can still try the app out by replacing node cli.js with react-ink and use it from the beginning of this article. If it does not work, use node cli.js as I am using in this article.

Now, let’s say we want to add another command line parameter which can be used as another option to supply another value to our command-line interface, we can do that as shown in the example below:
"use strict";
const React = require("react");
const { Text } = require("ink");

const App = ({ name = "Stranger", from = "London" }) => (
  <Text>
    Hello,{""}
    <Text color="green">
      {name} from {from}
    </Text>
  </Text>
);

module.exports = App;
Now, go to your terminal again and try out the node cli.js command without any parameters because we have already set a default value.

Let’s say we want to use the name attribute and add in a value using from. You can do it like this.

Pretty simple, right?
This next example is an implementation of a command-line interface, which uses another Ink layout component (the box component). We will see how we can change the output by using some other Ink components, and how easy it is for us to structure our output by using those components:
"use strict";
const React = require("react");
const { Text, Box } = require("ink");

const App = ({ name = "Stranger", from = "London" }) => (
  <Box borderStyle="round" borderColor="yellow">
    <Text>
      Hello,{""}
      <Text color="green">
        {name} from {from}
      </Text>
    </Text>
  </Box>
);

module.exports = App;
Now, you get something like this when you move over to your terminal and input the command node cli.js --name Chisom --from France again.

We surrounded the text element with the Box component, and we added a borderStyle and borderColor.
Open Source Session Replay
OpenReplay is an open-source, session replay suite that lets you see what users do on your web app, helping you troubleshoot issues faster. OpenReplay is self-hosted for full control over your data.

Start enjoying your debugging experience - start using OpenReplay for free.
Building a Country Command-Line App
Now that you have an idea of how command-line apps can be built and displayed on your terminal, let us build a more complex project. We’ll create a Country CLI that allows a user to input a country and get the country’s capital and currency in a table. This project will help you understand React Ink’s elements and project structure, so, let’s get started.
First, your ui.js file should be in the default form, as it is when React Ink is installed using the npx command, as i already showed you at the beginning of this article. So, it should look like this:
"use strict";
const React = require("react");
const { Text } = require("ink");

const App = ({ name = "Stranger" }) => (
  <Text>
    Hello, <Text color="green">{name}</Text>
  </Text>
);

module.exports = App;
To build this project, we need to install an npm package known as world-countries-capitals. But first, let us get the user input by running this command in the terminal.
npm install ink-text-inputWe import and use the text input in the terminal, in our ui.js. To store our country value and handle changes to the country name, we’ll utilize the useState hooks. UseState hooks can be seen as a mechanism to work with variables in React. Check out the React documentation to learn more about React hooks.
The code on your ui.js file should now look like this:
"use strict";
const React = require("react");
const { Box } = require("ink");
const TextInput = require("ink-text-input").default;

const App = () => {
  const [country, setCountry] = React.useState("");

  return (
    <Box>
      <TextInput
        placeholder="Enter country..."
        value={country}
        onChange={setCountry}
      />
    </Box>
  );
};

module.exports = App;
Now, we need to be able to search for the country in real-time and display the results in a table. To do this, we need to install the world-countries-capitals npm package. We will also use the useEffect hook to fetch our required data and update the component as it renders. Go to your terminal and install the package:
npm install world-countries-capitalsAt the top of our ui.js file, we import the package:
const wcc = require("world-countries-capitals");Next, we need to create some variables that will hold the data we get from the useEffect hook, using useState.
const [capital, setCapital] = React.useState("");
const [currency, setCurrency] = React.useState("");
const [phone, setPhone] = React.useState("");
We need to update our variables with the information from the npm package. The complete useEffect hook should look like the code below.
React.useEffect(() => {
  const getCountry = wcc.getCountryDetailsByName(country);
  setCapital(getCountry[0].capital);
  setCurrency(getCountry[0].currency);
  setPhone(getCountry[0].phone_code);
});
At this point, our code will now look exactly like this, including the useEffect hook:
"use strict";
const React = require("react");
const { Text, Box } = require("ink");
const TextInput = require("ink-text-input").default;
const wcc = require("world-countries-capitals");

const App = () => {
  const [country, setCountry] = React.useState("");
  const [capital, setCapital] = React.useState("");
  const [currency, setCurrency] = React.useState("");
  const [phone, setPhone] = React.useState("");

  React.useEffect(() => {
    const getCountry = wcc.getCountryDetailsByName(country);
    setCapital(getCountry[0].capital);
    setCurrency(getCountry[0].currency);
    setPhone(getCountry[0].phone_code);
  });

  return (
    <Box>
      <TextInput
        placeholder="Enter country..."
        value={country}
        onChange={setCountry}
      />
    </Box>
  );
};

module.exports = App;
Let us now render our information in a table. We have to nest several boxes with specific attributes. The most common attributes we will be using are flex-direction and borderStyle. Since we are using React, we will need a parent attribute. We’ll place our table beneath the TextBox element in the Box element.
<Box flexDirection="column" width={80} borderStyle="single">
  <Box>
    <Box width="40%">
      <Text>Country Code</Text>
    </Box>
    <Box width="40%">
      <Text>Capital City</Text>
    </Box>
    <Box width="40%">
      <Text>Currency</Text>
    </Box>
  </Box>
  <Box>
    <Box width="40%">
      <Text>{phone}</Text>
    </Box>
    <Box width="40%">
      <Text>{capital}</Text>
    </Box>
    <Box width="40%">
      <Text>{currency}</Text>
    </Box>
  </Box>
</Box>;
We will now add a banner to our application. We will add the banner within our root Box element on top of the text input.
<Box borderStyle="round" borderColor="green">
  <Text>Welcome to Country CLI App</Text>
</Box>;
We are now done building our command-line app. The full code should look like this:
"use strict";
const React = require("react");
const { Text, Box } = require("ink");
const TextInput = require("ink-text-input").default;
const wcc = require("world-countries-capitals");

const App = () => {
  const [country, setCountry] = React.useState("");
  const [capital, setCapital] = React.useState("");
  const [currency, setCurrency] = React.useState("");
  const [phone, setPhone] = React.useState("");

  React.useEffect(() => {
    const getCountry = wcc.getCountryDetailsByName(country);
    setCapital(getCountry[0].capital);
    setCurrency(getCountry[0].currency);
    setPhone(getCountry[0].phone_code);
  });

  return (
    <Box flexDirection="column">
      <Box borderStyle="round" borderColor="green">
        <Text>Welcome to Country CLI App</Text>
      </Box>
      <TextInput
        placeholder="Enter Country"
        value={country}
        onChange={setCountry}
      />
      <Box flexDirection="column" width={80} borderStyle="single">
        <Box>
          <Box width="40%">
            <Text>Country Code</Text>
          </Box>
          <Box width="40%">
            <Text>Capital</Text>
          </Box>
          <Box width="40%">
            <Text>Currency</Text>
          </Box>
        </Box>
        <Box>
          <Box width="40%">
            <Text>{phone}</Text>
          </Box>
          <Box width="40%">
            <Text>{capital}</Text>
          </Box>
          <Box width="40%">
            <Text>{currency}</Text>
          </Box>
        </Box>
      </Box>
    </Box>
  );
};

module.exports = App;
To run this code on your terminal, type node cli.js on your terminal, and you should get this:
When you input your country, you get your capital and currency.
Conclusion
You can structure the terminal output in components using Ink in the same manner that you would, building a React app for the browser. You can quickly construct modern and interactive command-line interfaces with the Ink layout components. Ink supports Hooks, making it straightforward to access user input and add interactivity to your CLI.


