Building Desktop Apps with Electron
Use Electron to create a desktop application with HTML and JS

Electron is a powerful and popular open-source framework that revolutionizes how desktop applications are built. By combining the strengths of web technologies such as HTML, CSS, and JavaScript with the versatility of Node.js, Electron empowers developers to easily create cross-platform desktop applications. Its robust capabilities have attracted hundreds of tech companies, making it the go-to choice for crafting modern and feature-rich desktop experiences. This article will delve into the world of Electron, exploring its architecture, benefits, and how it has transformed the landscape of desktop app development.

Discover how at OpenReplay.com.
Electron, an immensely popular open-source library, enjoys extensive usage, boasting more than 650k weekly downloads on npm and an impressive 100k stars on GitHub. It is a robust tool for constructing versatile desktop applications that seamlessly operate across multiple platforms, including Windows, Mac, and Linux. The framework employs Chromium for UI rendering and harnesses the power of Node.js in the backend to facilitate seamless integration with other libraries. An advantage of Electron is its flexibility in allowing developers to utilize their preferred front-end libraries to construct the UI of desktop apps. It supports an array of front-end technologies, including HTML, CSS, JavaScript, TypeScript, React, Bootstrap, Angular, Webpack, and many others. Furthermore, Electron provides an array of functionalities that streamline the desktop app development process efficiently. Its credibility is well-established, as it finds application in renowned companies for building their products, such as Slack, Microsoft Teams, VS Code, WordPress desktop, and Twitch, among others.
Prerequisites
Before delving into this tutorial, it’s essential to familiarize yourself with a set of technologies, which includes:
- JavaScript - A basic understanding of JavaScript is necessary since this language will be utilized for building your desktop app.
- Node.js and npm - Having Node.js and npm installed on your computer is crucial, as they are required for Electron and its library installations. Additionally, you should be acquainted with common operations in Node.js, such as require(), callback functions, events, and modules. If you don’t have Node.js installed, you can get it from the official Node.js website.
- Git and GitHub - While not mandatory, Git and GitHub are invaluable tools for code management and version tracking. They enable collaboration and code sharing with others. You can read more about Git and GitHub from their respective websites.
- Front-end libraries - Proficiency in using HTML, CSS, JavaScript, and other front-end libraries is necessary for crafting your desktop user interfaces.
- Knowledge of desktop software terminologies - Understanding common desktop terms like menu bar, tray, window, icon, title bar, and taskbar is crucial. You can find resources to learn some of these terminologies at this website: https://courses.lumenlearning.com/wm-compapp/chapter/terminology/.
Setting up your project
First, create a folder in your directory(electron-project). Next, you’ll use your CLI to navigate to your newly created folder and initialize your project as an npm package. Without this, you won’t be able to install Electron.
cd electron-project
npm init -y
After this is done, you’ll use the command below to install the electron library:
npm install –save-dev electronOnce installed, you’ll go to your package.json file and change the entry-point field to main.js. Also, you’ll add a start command with a value of electron within your script field. In the end, your package.json file will look like this:
{
 "name": "electron-project",
 "version": "1.0.0",
 "description": "",
 "main": "main.js",
 "scripts": {
   "test": "echo \"Error: no test specified\"&& exit 1",
   "start": "electron ."
 },
 "author": "",
 "license": "ISC",
 "devDependencies": {
   "electron": "^25.3.2"
 }
}
Once the main.js file has been created, you can run Electron with the command below:
npm startAlthough this won’t do anything because there isn’t any code in the main.js script, if it doesn’t return any error, it means you’ve properly installed Electron.
Creating a browser window
In desktop apps, a browser window is a GUI(Graphical User Interface) that displays the content of an application. Every desktop app has Windows because, with it, the user can’t interact with their software. A typical window comprises a title bar, a close, minimize, and maximize button, and the application content.
In electron, Each window is made from HTML files. The files can be stored locally or from a URL.
To create a browser window in Electron, we’ll be using two modules: app and BrowserWindow. The app module is responsible for controlling the application life cycle of your application, while the BrowserWindow module is used for creating and managing the application windows.
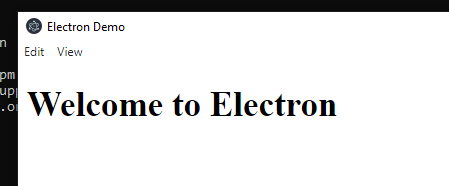
Before writing any code in your main.js file, create an index.html file in the root folder of your project and add some code to it:
<!DOCTYPE HTML>
<html>
<head>
<title>Electron Demo</title>
<meta charset='utf-8'>
</head>
<body>
<h1>Welcome to Electron</h1>
</body>
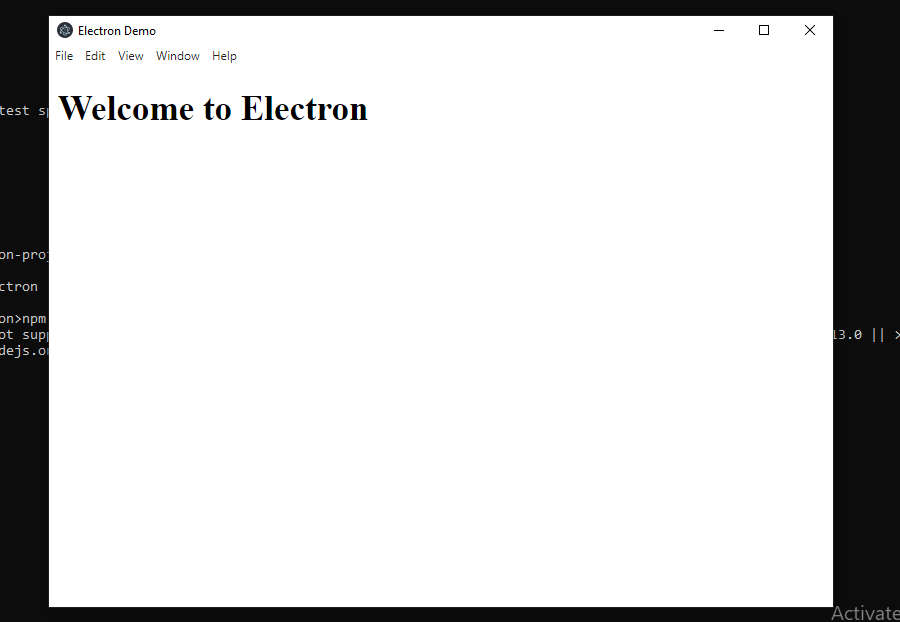
</html>Also, add the code below to your main.js file.
const {app, BrowserWindow} = require('electron');

app.whenReady().then( () => {
 let window = new BrowserWindow({width: 800, height: 600})

 window.loadFile('index.html')
}}
When you run npm start on your CLI, This will be the result:
Main process
All Electron modules are divided into two processes. They include the Main process and renderer process. In this section, I’ll be explaining what the main process is and the functionality its modules have.
The main process runs a Node.js instance and can access Node.js modules and any package on npm. Also, people call it the backend of desktop development because it comprises Electron modules that have access to the operating system’s native API.
The app and BrowserWindow modules in our example above are also part of the main process.
Here’s a description of some of the common modules in the Main process:
-
appmodule - The app module controls the application event lifecycle. It contains methods that listen to different events in the application. It also has methods that allow you to get and set information about the application. -
BrowserWindowmodule controls and manages the browser windows. It includes functionalities that allow you to listen to events affecting the browser window and control it. -
processmodule: Originally, the processing module belonged to Node.js. But Electron has also added additional functionalities to it. Within this module, you can get information and control over the Electron and Node process.
In subsequent sections, we’ll be looking at the code examples of some of these modules.
Renderer process
The Renderer process is the other process used in Electron. It acts as the front end of desktop development. Without it, you won’t be able to use HTML, CSS, JavaScript, and any of your favorite front-end libraries to design the user interface of your desktop app. Unlike the main process, the Renderer process doesn’t have access to Node.js modules and native functionalities for security reasons. It only renders the web page and allows you to use any front-end library and web APIs you like.
In addition to using any front-end developer tools you like, the Renderer process also has access to its modules. A popular example is the webFrame module.
webFrame module is used for customizing the current web application. It contains methods that perform different functions, including controlling, customizing the zoom level, and inserting CSS into the web page.
In subsequent sections, we’ll be looking at the code examples of some of these modules.
Interprocess communication
Due to security reasons, using the Renderer and Main process to communicate with each other is impossible. For example, when the app module is available for use in the renderer process, it is susceptible to hacking. Also, Renderer process modules like webFrame can’t be used in the main process. To solve this problem, Electron uses preload script and a set of modules for solving this problem. With these modules, you can access a limited set of functionality from the Renderer process. They include ContextBridge, ipcMain, and ipcRenderer.
-
The
ContextBridgemodule – has anexposeInMainWorld()method that allows you to safely pass a message from the renderer process to the main process. It’s a module in the renderer process. -
ipcMainmodule: This module in the main process handles the messages you send from a renderer process. Its method includesipcMain.handle()and so on.ipcMain.handle()– this method sends a response for every call made by the renderer through theipcRenderer.invoke()method.
-
ipcRenderermodule- This is a module in the renderer process that contains methods that send and listen to messages from the Main process. Its method includes theipcRenderer.invoke()method.ipcRenderer.invoke()– This method sends a message to the main process through a channel and expects results asynchronously. After the main process listens for it through theipcMain.handle()method, it returns a promise that resolves when a response comes from the main process
Creating trays and menu
One of the distinctive features of a desktop app is the presence of a menu bar and system trays. The menu bar is a navigation mechanism that gives you access to all the features in an app. It’s always placed at the top of the screen. System trays provide access to some of the commonly used functions in your app. It’s an icon placed outside your software on the right side of the taskbar (in Windows). You can easily add menus and trays to your project with a library like Electron.
Here’s the code to add trays to your desktop app:
const {app, BrowserWindow, Menu, MenuItem, Tray} = require("electron");

const trayTemplate = [
 {role: "undo"},
 {role: "cut"},
 {role: "copy"}
]

app.whenReady().then( () => {
 let tray = new Tray("tlogo.png");

 let contextMenu = Menu.buildFromTemplate(trayTemplate);

 tray.setToolTip("Tray Options");
 tray.setContextMenu(contextMenu);

 let window = new BrowserWindow({width: 800, height: 600})

 window.loadFile("index.html");
})
The result will be an icon on the right side of the taskbar:

Here’s the code to add a menu to your desktop app:
const {app, BrowserWindow, Menu, MenuItem} = require('electron');

const template = [
 {
   label: "Edit",
   submenu: [{ role: "undo" }, { role: "redo" }, { role: "forceReload" }],
 },
 {
   label: "View",
   submenu: [{ role: "reload" }, { role: "zoomIn" }, { role: "zoomOut" }],
 },
];

app.whenReady().then(() => {
 const menu = Menu.buildFromTemplate(template);

 Menu.setApplicationMenu(menu);

 let window = new BrowserWindow({ width: 1000, height: 800 });

 window.loadFile("index.html");
});
Result:
Modules in the Main process
In the preceding sections, I explained some of the main process’s modules and their main function. In this section, we’ll look at some code implementation of these modules.
app module
The app module controls the application event lifecycle. Some of the methods in the app module are:
app.on()- This method is called when certain events are emitted. Some events are:window-all-closed,browser-window-created, and so on.
//this will execute when all the windows are closed
app.on("window-all-closed", function () {
 console.log("all windows closed");
});

//is emitted when a new BrowserWindow is created
app.on("browser-window-created", function () {
 console.log("browser window created");
});app.quit()– This method tries to close all windows
app.whenReady().then( () => {
 app.quit()
})app.whenReady()– is a promise function that is fulfilled when Electron is initialized.
app.whenReady().then( () => {
 //Quits the app
 app.quit()
})app.getVersion()– returns the version of your app as found in your package.json file.
app.whenReady().then( () => {
 //returns the value of your app version
 app.getVersion()
}) app.getName()– returns the current application name as found in the package.json.
app.whenReady().then( () => {
 //returns the name of your application
 app.getName()
}) app.getLocale()– returns the current application locale. Its value can been-US,en-IN, and so on.
app.whenReady().then( () => {
 //returns the current application locale
 app.getLocale ()
})
BrowserWindow module
This module controls and manages the browser windows. Here are the functionalities:
new Browserwindow([options])– This creates a new browser window with an options argument that sets the Windows native properties. Some of its properties includeheight(specifies the height of the window),width(specifies the width of the window), center(whether the window should be in the center of the screen),xandy(specifies the left and top offset),movable(specifies whether the window is movable or not),closable(specifies whether the window is closable or not),fullscreenable(whether the window can be put into fullscreen mode).
app.whenReady().then( () => {
 //creates a browser window with a defined size
 let window = new BrowserWindow({width: 800, height: 600})

 //attaches a web page to the browser window
 window.loadFile("index.html")
})window.on()method: This method is called when certain events are emitted by the browser window. Some of them areminimize,maximize, andmove.
app.whenReady().then(() => {
 //emitted when the window is minimized
 window.on("minimize", function () {
   console.log("Browser window minimized");
 });

 //emitted when the window is maximized
 window.on("maximize", function () {
   console.log("Browser window maximized");
 });

 //emitted when the window is moved to a new position
 window.on("move", function () {
   console.log("Browser window moved");
 });
});window.fullScreen– is a Boolean property that returns true if the windows are in fullscreen modewindow.minimizable– is a Boolean property that returns true if the window can be manually minimized by the userwindow.maximize()– maximizes the windowwindow.getBounds()– returns an object containing the x, y, width, and height of the windowswindow.center()– moves windows to the center of the screen
Process module
Originally, the process module belongs to Node.js. But Electron has also added additional functionalities to it. Some of them include:
process.type– returns a string representing the current process type. Its value can bebrowser,renderer,worker, orutility.process.versions.chrome– returns a string representing Google Chrome’s version stringprocess.versions.electron– returns Electron’s version in a stringprocess.getSystemVersion()– returns the version of the host operating system.
Modules in the Renderer process
In addition to being able to use your front-end libraries and web APIs, the renderer process also has multiple modules of its own. A popular one is the webFrame module.
webFrame module – This module is used for customizing the current web page. It contains methods that include:
webFrame.setZoomFactor()– This method sets the zoom percent of a webpage. 2 means 200%.
const {webFrame} = require("electron");

webFrame.setZoomFactor(3)webFrame.setZoomLevel()– zooms the webpage 20% larger or smaller. A default of 0 means 100%.
const {webFrame} = require("electron");

webFrame.setZoomLevel(2)
Packaging your Electron app
After writing all the code logic for the desktop app and spending hundreds of hours optimizing your work, the final thing to do is packaging.
TO package your electron app, you’ll need to install another library called electron-forge. Electron forge is a library that allows you to build and publish your app for use on various platforms.
To package your app, here are the things you need to do:
First, install the electron-forge CLI library:
npm install –save-dev @electron-forge/cliNext, you’ll import your existing electron project with the script below:
npx electron-forge importFinally, you run this command to create a distributable for your configured maker and platform.
npm run makeWhen the script finishes running, a newly created out folder will be in your project. It’ll contain both the distributable and your packaged application code. Your distributable will be in the out/make folder. Check the electron-forge website for more information on how to configure for different makers and add icons for your app.
Performance and security considerations
To keep your electron app performant, here are some of the things you need to do:
- Before adding a Node.js library to your app, always check the size of its dependencies(the smaller, the better) and the time it takes to perform the function you need(the faster, the better)
- Avoid making unnecessary network requirements. If there are resources(images, font, and so on) your app needs, it’s better to include them in your app’s bundle.
- Don’t block the main process. If you have any CPU-intensive task, you should make use of worker threads.
- Don’t immediately run all your code when your application starts. Instead, consider a strategy that executes your code at the right time.
To keep your app secure, here are some of the things you need to do:
- Don’t install 3rd-party libraries with known vulnerabilities
- Always perform security testing and adopt secure software development practices when building
- Use local files (not remote code ) to execute your Node.js code because your app might be vulnerable to cross-site scripting (XSS).
- Always use a current version of Electron and Node.js.
Conclusion
Throughout this tutorial, among the numerous things explained, we’ve learned how to install and package Electron. We’ve also learned about the capabilities of the Main and Renderer process. We’ve also learned how to keep your app secure. I hope you found this article useful. You can visit the official Electron documentation to learn more.
Gain Debugging Superpowers
Unleash the power of session replay to reproduce bugs, track slowdowns and uncover frustrations in your app. Get complete visibility into your frontend with OpenReplay — the most advanced open-source session replay tool for developers.
Star on GitHub12k