
Have you ever created a form in React and tried to extract the data from it, but it seems frustrating? Or have you ever wanted to create a sophisticated form with just a little code from your end? If so, you are in luck; this article introduces a powerful solution that leverages the strengths of
Yup, a popular validation library, andReact-hook-form, streamlining the form development process and empowering you to build bulletproof forms quickly.

Discover how at OpenReplay.com.
What shall we do here? We’ll delve into the intricacies of using Yup for robust validation, exploring data types, custom validation schemes, and error handling. Furthermore, we’ll shed light on React-hook-form, a powerful tool that seamlessly integrates Yup validation with React components, enabling efficient form handling and state management.
Yup is a JavaScript library designed specifically for schema-based validation. It allows developers to define rules and constraints that user input must adhere to. These rules are encapsulated in a schema and written concisely. Yup offers a rich set of built-in validation methods, such as:
- Required fields: Enforce that a field must not be empty.
- Type checking: Ensure fields contain specific data types like numbers, strings, or emails.
- Minimum and maximum lengths: Define a field’s allowed character or value range.
- Custom validation logic: Create custom validation rules tailored to specific requirements.
While Yup excels in schema-based validation, integrating it directly into React applications can involve boilerplate code. The React-hook-form library simplifies this process. It bridges Yup and React, enabling developers to integrate Yup schemas into their forms.
Setting Up Your React Project
Now that we know what Yup and React-hook-form are, let us learn how to set them up in a React project.
We will use Vite to create our React project for this article. If you do not have Vite installed on your system and will want to do so to follow up this tutorial, you can easily do that by going to your command prompt or terminal, navigating to where you would like to create the React project, and run this command:
npm create vite@latestWhen the command runs, you can easily navigate through the rest, which will be the project’s name, whether a JavaScript or Typescript project, etc.
Installing Yup and React Hook Form
Now that we have our React project up and running, let us explore how to add Yup to your React project.
The next thing to do, and I am sure you can guess it already, is to install Yup using either npm or yarn.
npm install yup I am using npm for this article, but you can use yarn if that is what you usually use.
Now that we have Yup installed, we will need to install a Yup resolver using this command:
npm @hookform/resolvers yupCreating a Simple React Form
Since we have everything installed, let us create a simple form in a component to which we will link our Yup and React-hook-form. Here is the code for the form:
const YupForm = () => {
return (
<form>
<div>
<label htmlFor="">Username</label>
<input type="text" />
</div>
<div>
<label htmlFor="">Email</label>
<input type="text" />
</div>
<div>
<label htmlFor="">Password</label>
<input type="password" />
</div>
<button>Submit</button>
</form>
);
};
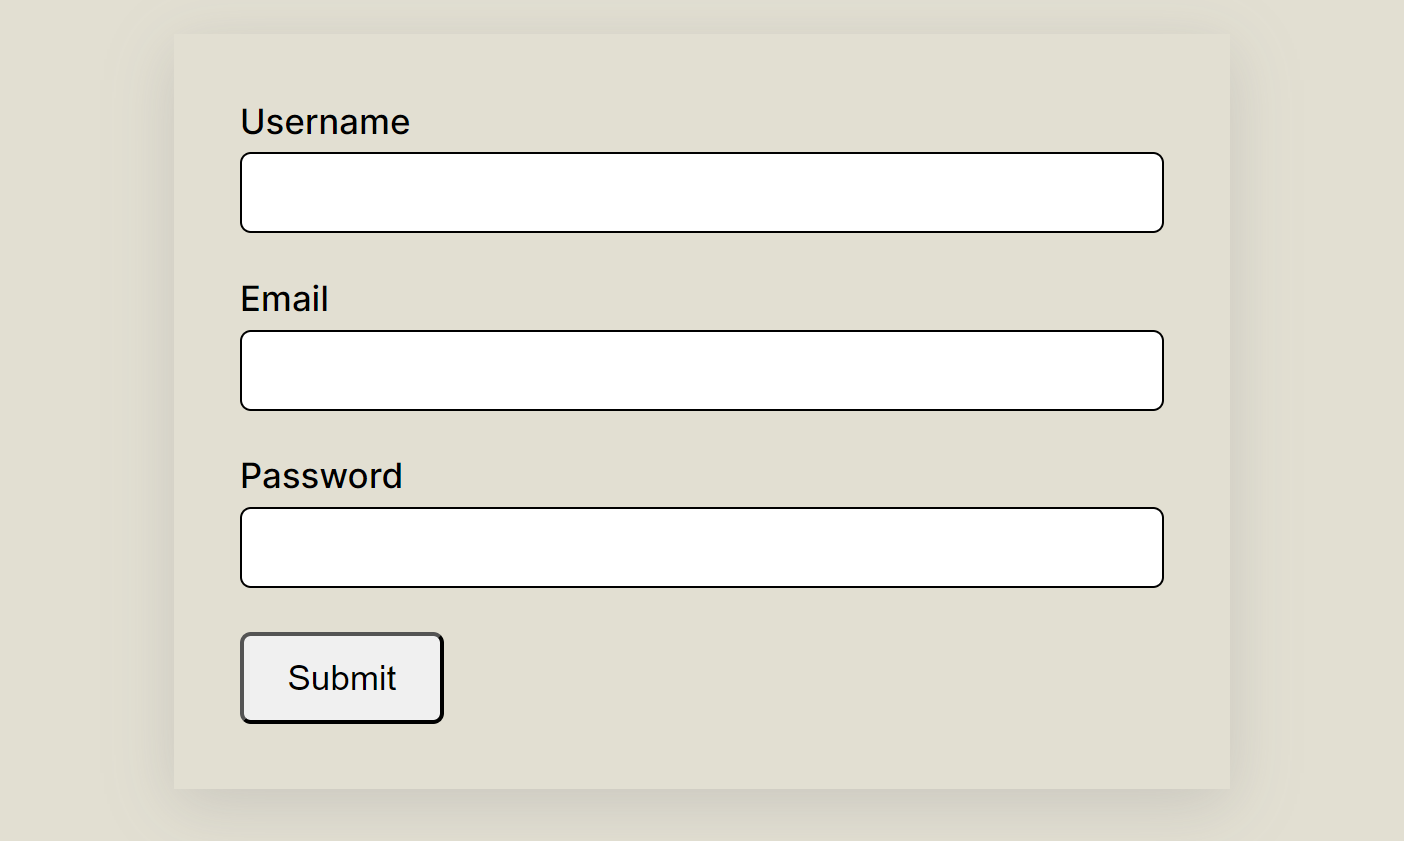
export default YupForm;The code above shows a form containing three user inputs: Username, Email, and Password. When we run the code, this should be our output:
At this point, the form will not be able to validate a user’s input, and that is precisely where Yup comes in. Yup is going to validate the form based on a schema that we are going to define.
Defining a Yup Validation Schema
Before we define our form’s schema, we need to understand what a schema is. A schema is a formal definition of the rules and constraints that user input must adhere to. It is a blueprint for validating user-submitted data in your React forms.
Now, let us define the schema for our form. To do so, we must first run the command:
import * as yup from "yup";This command imports everything regarding Yup into our component, and this is what we want.
Now, let’s set up our form schema. To create our schema, we have to define our object using the object() function:
const userSchema = yup.object();Now that we have defined our object, we will give the object a shape. We will specify what each property of the form should contain. It specifies the expected structure of the data. To do this, we will use the shape({}) function:
const userSchema = yup.object().shape({
  username: yup.string().required(),
  email: yup.string().email().required(),
  password: yup.string().min(4).max(10).required(),
});
From the code above, the schema has three properties: username, email, and password, which correspond with the input of our form. Here is a breakdown of what each property is validating based on:
username: yup.string().required(): Requires a non-empty string value for the username property, meaning thatusernameinput cannot be empty on submission. If it is, thenYupwill reject the submission.email: yup.string().email().required(): Requires a non-empty string value that matches a valid email format for theemailproperty.password: yup.string().min(4).max(10).required(): Requires a non-empty string value for the password property. This property enforces a minimum length of 4 characters and a maximum length of 10 characters for the password.
Integrating Yup with React Hook Form
Now that we have our schema set, we need to connect the React-hook-form library to our schema, userSchema, which validates our form. Before doing that, we must create a form using React-hook-form. To achieve this, we will import the useForm function from React-hook-form. Here is the code snippet:
import { useForm } from "react-hook-form";The code above will give us access to the already-made functionalities in the React-hook-form library, such as error handling, validation, form submission, registration, etc.
The next step is to import yupResolver from @hookform/resolvers/yup to the package. This package will bridge the Yup validation schemas and the React-hook-form useForm hook. It translates the validation rules in your Yup schema into a React-hook-form format for form state management and error handling. Here is a code snippet on how to import yupResolver into our component:
import { yupResolver } from "@hookform/resolvers/yup";Now, we have our yupResolver imported into our component; we can connect Yup and React-hook-form to the fields of our form.
Connecting Yup to Our Form Fields
To connect Yup to our form to use its features, we need to state which features we need and connect them to our useForm while using yupResolver. Here is a code snippet on how it is done:
const {
  register,
  handleSubmit,
  formState: { errors },
} = useForm({
  resolver: yupResolver(userSchema),
});
This code snippet above utilizes the useForm hook from the React-hook-form to manage a form with validation powered by Yup. Let’s break it down step by step:
register: feature registers form fields withReact-hook-form. You’ll pass it the name of the field and any additional options for configuration.handleSubmit: feature handles form submissions. You can pass it a callback function that will be executed when the form is submitted successfully.formState: { errors }: This nested destructuring extracts theerrorsproperty from theformStateobject within the returned object fromuseForm. Theerrorsproperty is an object that holds validation errors associated with each registered form field.useFormis a function imported fromReact-hook-form. It’s a powerful hook that helps manage form states, handle submissions, and integrate validation libraries likeYup.resolver: yupResolver(userSchema): passed touseFormconfigures the validation mechanism.yupResolver: imported from@hookform/resolvers yupacts as an integration layer betweenYupandReact-hook-form.userSchema: This is where the schema we created earlier in this tutorial is stored.
Now, we will need to register each field in our form while referencing the name of that field in our schema. For example, our username input tag should look like this when the register has been added to it:
<input type="text" name="username" {...register("username")} />;When we add a register to all the fields of our form, this is what the form should look like:
<form>
  <div>
    <label htmlFor="">Username</label>
    <input type="text" name="username" {...register("username")} />
  </div>
  <div>
    <label htmlFor="">Email</label>
    <input type="text" name="email" {...register("email")} />
  </div>
  <div>
    <label htmlFor="">Password</label>
    <input type="password" name="password" {...register("password")} />
  </div>
  <button>Submit</button>
</form>
By adding ...register to each form field, like in the code snippet above, Yup will be able to listen and validate our form, but we also want to submit our forms. That is where handleSubmit comes in.
Handling Form Submission
To submit the data from our form, we must define a function to handle the successful form submission and then pass handleSubmit() to our form’s onSubmit handler. This is what I mean; let us create a function that handles the form submission; the function’s name is handleFormSubmission. Now let’s have a look at what it contains:
const handleFormSubmission = async (data) => {};The code above is a function that sends the data from our form to the server. Let us pass this function into our form’s handleSubmit() function. To do that, add the code below to the <form> tag:
<form onSubmit={handleSubmit(handleFormSubmission)}>The code above connects our handleFormSubmission function to yup’s handleSubmit.
Let’s submit our form and see what happens. To ensure our form is submitted, I will create a state that renders the value Successfully submitted when submitted. Here is the code:
import { useForm } from "react-hook-form";
import * as yup from "yup";
import { yupResolver } from "@hookform/resolvers/yup";
import { useState } from "react";

const App = () => {
  const [submitted, setSubmitted] = useState(false);
  const userSchema = yup.object().shape({
    username: yup.string().required(),
    email: yup.string().email().required(),
    password: yup.string().min(4).max(10).required(),
  });

  const {
    register,
    handleSubmit,
    formState: { errors },
  } = useForm({
    resolver: yupResolver(userSchema),
  });

  const handleFormSubmission = async (data) => {
    setSubmitted(true);
  };
  return (
    <>
      <form onSubmit={handleSubmit(handleFormSubmission)}>
        <div>
          <label htmlFor="">Username</label>
          <input type="text" name="username" {...register("username")} />
          <p>{errors.username?.message}</p>
        </div>
        <div>
          <label htmlFor="">Email</label>
          <input type="text" name="email" {...register("email")} />
          <p>{errors.email?.message}</p>
        </div>
        <div>
          <label htmlFor="">Password</label>
          <input type="password" name="password" {...register("password")} />
          <p>{errors.password?.message}</p>
        </div>
        <button>Submit</button>
      </form>
      {submitted ? "Successfully submitted" : null}
    </>
  );
};
export default App;
When we submit our form, this should be our output:
 Our form was submitted successfully, as all the requirements from our schema were met.
Displaying Validation Errors
To improve our work’s user experience, we want to display validation errors whenever they occur. To display validation errors, we will need to create a placeholder for the error of each field as they might be unique and also get the errors from formState: { errors }.
Using ternary operators, we can extract the error from formState: { errors }. Here is a snippet:
<p>{errors.username?.message}</p>The code snippet above means the error message should render if there is an error in the username field. This is how we will place it in our form:
<form onSubmit={handleSubmit(handleFormSubmission)}>
  <div>
    <label htmlFor="">Username</label>
    <input type="text" name="username" {...register("username")} />
    <p>{errors.username?.message}</p>
  </div>
  <div>
    <label htmlFor="">Email</label>
    <input type="text" name="email" {...register("email")} />
    <p>{errors.email?.message}</p>
  </div>
  <div>
    <label htmlFor="">Password</label>
    <input type="password" name="password" {...register("password")} />
    <p>{errors.password?.message}</p>
  </div>
  <button>Submit</button>
</form>
Let’s test it by trying to submit it without filling in any data:
 When we try to submit, the various errors relating to each field are rendered.
Values and Controls Provided By Yup
Yup provides various features, values, and controls to facilitate validation. Here are some:
- Schema Definition:
Yupallows you to define a schema that describes the shape and constraints of the data you expect to receive. You can define schemas for objects, arrays, strings, numbers, dates, and more. - Validation Rules: You can specify validation rules for each field in your schema.
Yupsupports various validation rules, such as required fields, minimum and maximum values, string length limits, regular expressions, custom validation functions, and more. - Nested Schemas:
Yupallows you to define nested schemas for complex data structures. This is useful when you have nested objects or arrays that need to be validated. - Error Messages:
Yupallows you to customize error messages for each validation rule. You can provide custom error messages or use default messages fromYup.
Conclusion
This article discussed Yup and React-hook-form, a powerful combination for building robust and user-friendly forms in React. We also looked into how forms can be submitted and how errors can be rendered, all using Yup. With the help of this tutorial, I hope you will be willing to try Yup on your next project.
Gain control over your UX
See how users are using your site as if you were sitting next to them, learn and iterate faster with OpenReplay — the open-source session replay tool for developers. Self-host it in minutes, and have complete control over your customer data.
Star on GitHub12k