Building a Code Snippet Highlighter in Next.js
Integrate syntax highlighting in your web app


If code were to be written in all black and white like native text in text editors, readers would have difficulty looking through and understanding code blocks. Debugging errors will be time-consuming and not feasible. To resolve this, graphical changes were made to code blocks, granting unique styles to make certain parts of the code stand out, making it easier to understand. Today, this is still used in articles written in blog publications, documentation, and code editors. Code blocks in tutorials have particular visual preferences applied to code blocks to make them easily identifiable and provide a feature to copy the code with the click of a button, eliminating the need to highlight entire code areas.
In this article, we will learn what syntax highlighting is, what its benefits are, and how it can be integrated into a web application.
What is syntax highlighting?
Have you ever been on a blog or in a text editor and noticed special formatting behaviors on code blocks? This nifty feature is done by a process called syntax highlighting. Syntax highlighting is a feature that gives unique design characteristics to text, especially source codes, which affects changes in the graphical property of the code based on the syntax of the programming language. These changes could be variations in the color or font of code, making it easier for developers to recognize different aspects of that code, such as variable names, functions, and reserved words.
Syntax highlighting offers the following benefits:
-
In code editors, as syntax highlighting is carried out in real-time, it is easy for developers to identify errors in their code, as these lines will be formatted to indicate they are wrong. When reserved words, such as
functionorimport, are misspelled, they are easily identified as they are not formatted as they would be if correct. -
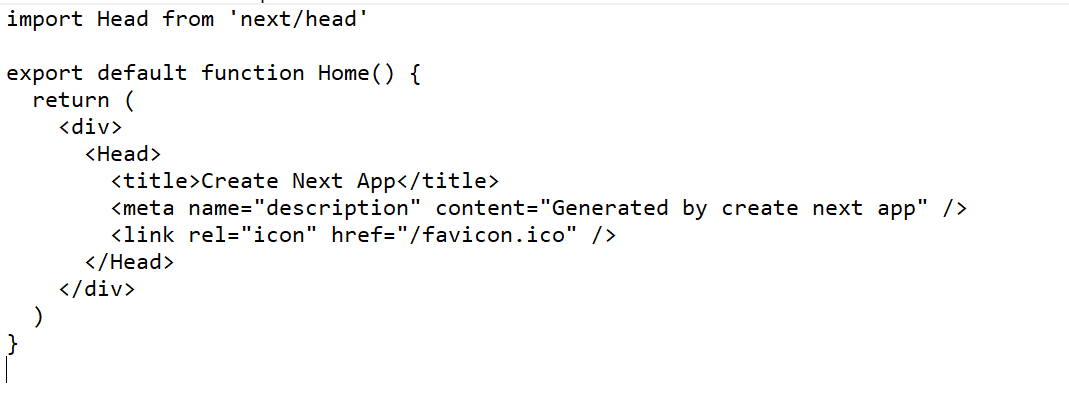
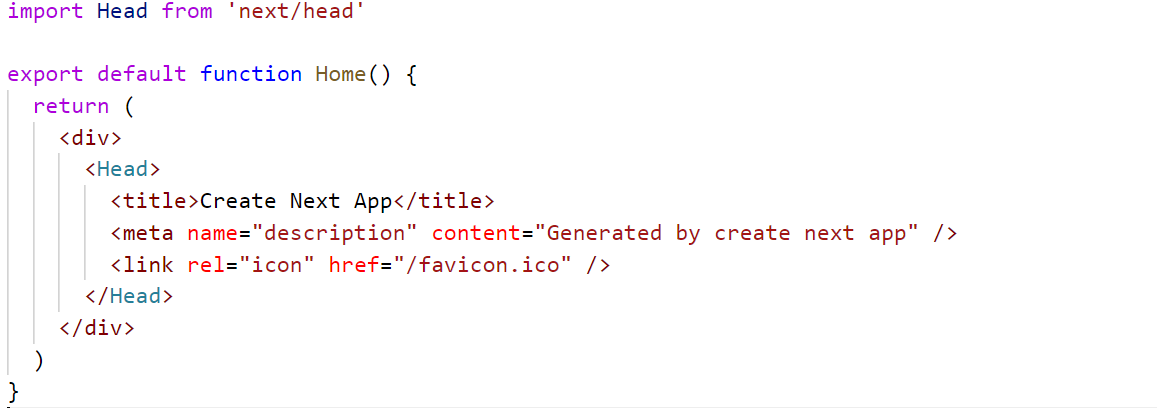
It makes code easier to read and understand. Syntax highlighting does not affect the code; instead, it helps draw the user’s attention to different aspects of the code, detailing what they are via different color formatting. Now imagine a block of code written in all black and white? In the pictures below, we can notice a clear distinction in presentation. In the image with syntax highlighting, we can easily recognize strings and reserved keywords in the language. Imagine a code block containing 50 lines of code without syntax highlighting. That would be time-consuming to understand.
Open Source Session Replay
OpenReplay is an open-source, session replay suite that lets you see what users do on your web app, helping you troubleshoot issues faster. OpenReplay is self-hosted for full control over your data.

Start enjoying your debugging experience - start using OpenReplay for free.
Installing dependencies
In this tutorial, we will learn how to build a syntax highlighter for the web. The syntax highlighter will offer code highlighting for various languages and a pop-up that shows when code has been copied. This is useful for rendering codes in documentation and blog posts. We will use NextJS and TailwindCSS to develop our web application.
To install dev dependencies, navigate to your project directory and enter the following lines in CLI:
npx create-next-app syntaxhighlighter
The above command creates a project directory called syntaxhighlighter, with Nextjs installed. Next, we move into this directory with the cd syntaxhighlighter command and install TailwindCSS with the following line:
npm install -D tailwindcss postcss autoprefixernpx tailwindcss init -p
Once this is done, add jsx support in the tailwind.config.js file:
module.exports = {
  content: [
    "./pages/**/*.{js,ts,jsx,tsx}",
    "./components/**/*.{js,ts,jsx,tsx}",
  ],
  theme: {
    extend: {},
  },
  plugins: [],
}
Finally, add the stylesheet rules to the globals.css file
@tailwind base;
@tailwind components;
@tailwind utilities;
With this, we have all dependencies installed and can proceed to develop our application.
Building our code snippet highlighter
For our application, we will create a folder named components in the root directory of our project folder. In this directory, create a file called Highlighter.js. This file will house a form where we can enter code blocks and the programming language, alongside a display area where syntax highlighting based on the form’s input values occurs.
To create a form, enter the following code in Highlighter.js:
import React from "react";
const Highlighter = () => {
  return (
    <div className=" container flex h-screen flex-row">
      <div className=" h-full w-1/2 flex pt-14 items-center flex-col px-6 text-center">
        <h1 className=" text-xl font-medium text-blue-600 mb-12">Enter Code for syntax Highlighting</h1>
        {/* form container here */}
        <select
        // input field for language name
          className=" px-2 py-3 text-black outline-none textinput w-full mb-20"
          placeholder="Enter Language">
            <option>Javascript</option>
            <option>CSS</option>
            <option>HTML</option>
            <option>TypeScript</option>
            <option>C++</option>
          </select>
        <textarea
        // text field for code
          className=" px-4 py-5 textinput w-full relative h-1/2 outline-none"
          placeholder="Write some code"
        />
      </div>
      {/* code syntax highlighter window here */}
    </div>
  );
};
export default Highlighter;
Above, we have a select field to choose a programming language, and there’s also a textarea to enter lines of code. In the select field, we have five languages listed. There is support for a wide range of programming languages when using the syntax highlighter.
Next, we will add a display window for syntax highlighting. We will install two packages, one to highlight the code and the other to copy code blocks. We will do this in CLI with the following command:
npm install react-syntax-highlighter react-copy-to-clipboard —save
Once the installation is completed, we add imports for these packages:
import CopyToClipboard from "react-copy-to-clipboard";
import SyntaxHighlighter from "react-syntax-highlighter";
import { docco } from "react-syntax-highlighter/dist/esm/styles/hljs";
The first import is for the code copy functionality, the second is the syntax highlighter package, and the third is the theme to be used for the syntax highlighting. Docco gives a slate-colored background for the highlighted code. There are other themes to choose from, including dark mode themes. With the imports made, we will proceed to create a display area for the code to be highlighted.
{/* code syntax highlighter window here */}
<div className="h-full w-1/2 flex flex-col justify-center items-center">
  {/* copy to clipboard here */}
  <SyntaxHighlighter language="" style={docco}>
      {/* pass in code here */}
  </SyntaxHighlighter>
</div>
The SyntaxHighlighter component would take in a language property, which would be the programming language of the code to be highlighted. And then, the code to be rendered is then passed within the component.
With the syntax highlighter in place, the next step is to take the input from the user and display it using the syntax highlighter. We will use the React useState() hook and create state values that will contain our textarea input and the input from the select field. We will also need a function to automatically update the state when there’s a change in the value of the input fields.
const [selectvalue, setSelectValue] = React.useState("");
const [textfield, setTextField] = React.useState("");
const handleInputChange = (e) => {
  setTextField(e.target.value);
};
const handleSelect = (e) => {
  setSelectValue(e.target.value);
};
We can assign this to the input fields by setting their value attributes to the defined variable and adding the defined functions to the onChange event handler. For the select field we have:
<select
  // input field for language name
  className=" px-2 py-3 text-black outline-none textinput w-full mb-20"
  placeholder="Enter Language"
  value={selectvalue}
  onChange={handleSelect}
>
And for the textarea, we have:
  <textarea
      // text field for code
      className=" px-4 py-5 textinput w-full relative h-1/2 outline-none"
      placeholder="Write some code"
      value={textfield}
      onChange={handleInputChange}
  />
We can pass the selectvalue as the language of our syntax highlighter, and render the textfield as follows:
<SyntaxHighlighter language={selectvalue} style={docco}>
{/* pass in code here */}
{textfield}
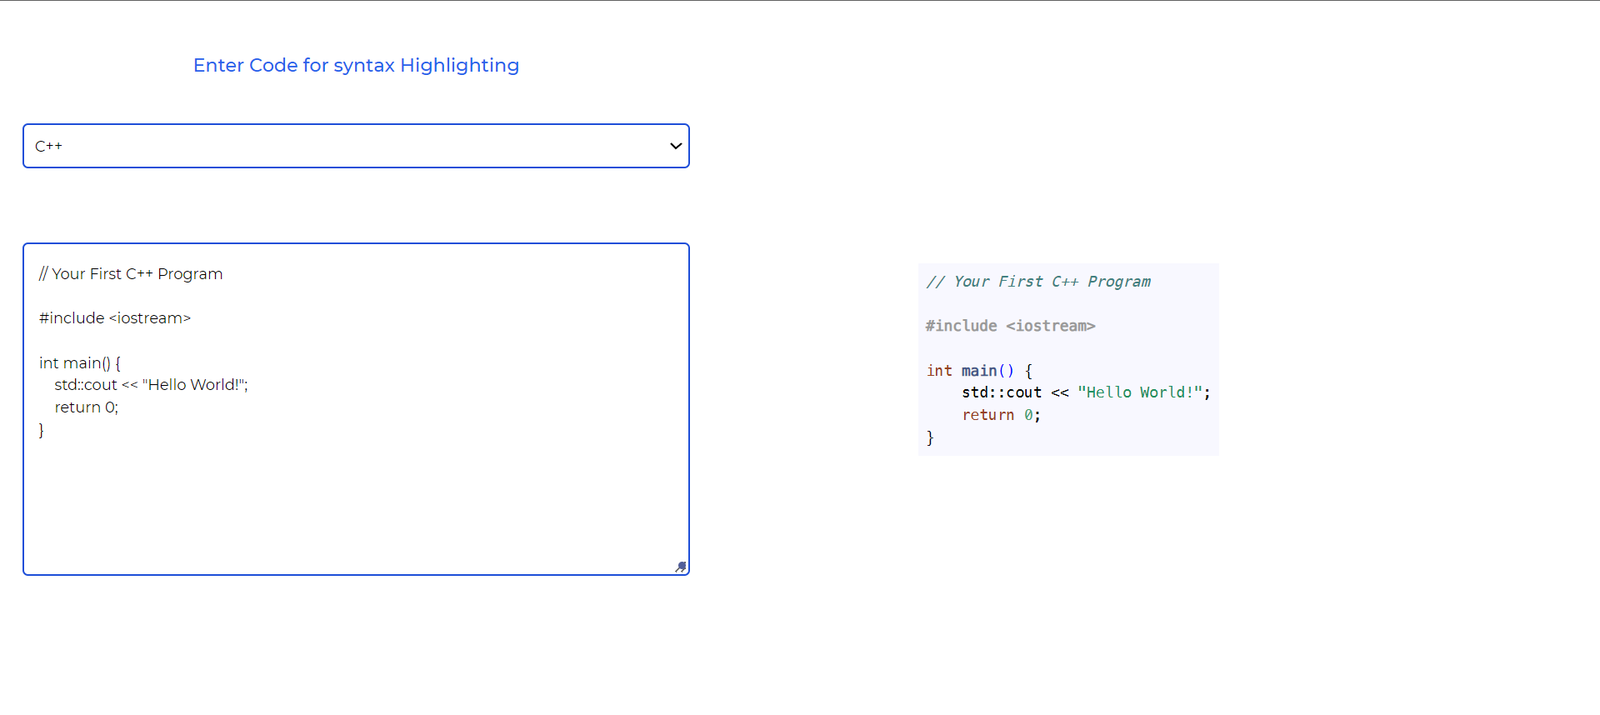
</SyntaxHighlighter>The language property takes in the value from the select field, and the input from the textarea is rendered using the selected language.
if we run our app with the npm run dev command, we get the following result:
Adding copy to clipboard functionality
This functionality enables us to instantly copy code from the syntax highlighter at the click of a button.
{/* copy to clipboard here */}
<CopyToClipboard text={textfield} className=" px-4 py-2 textinput mb-2">
<button>Copy Code</button>
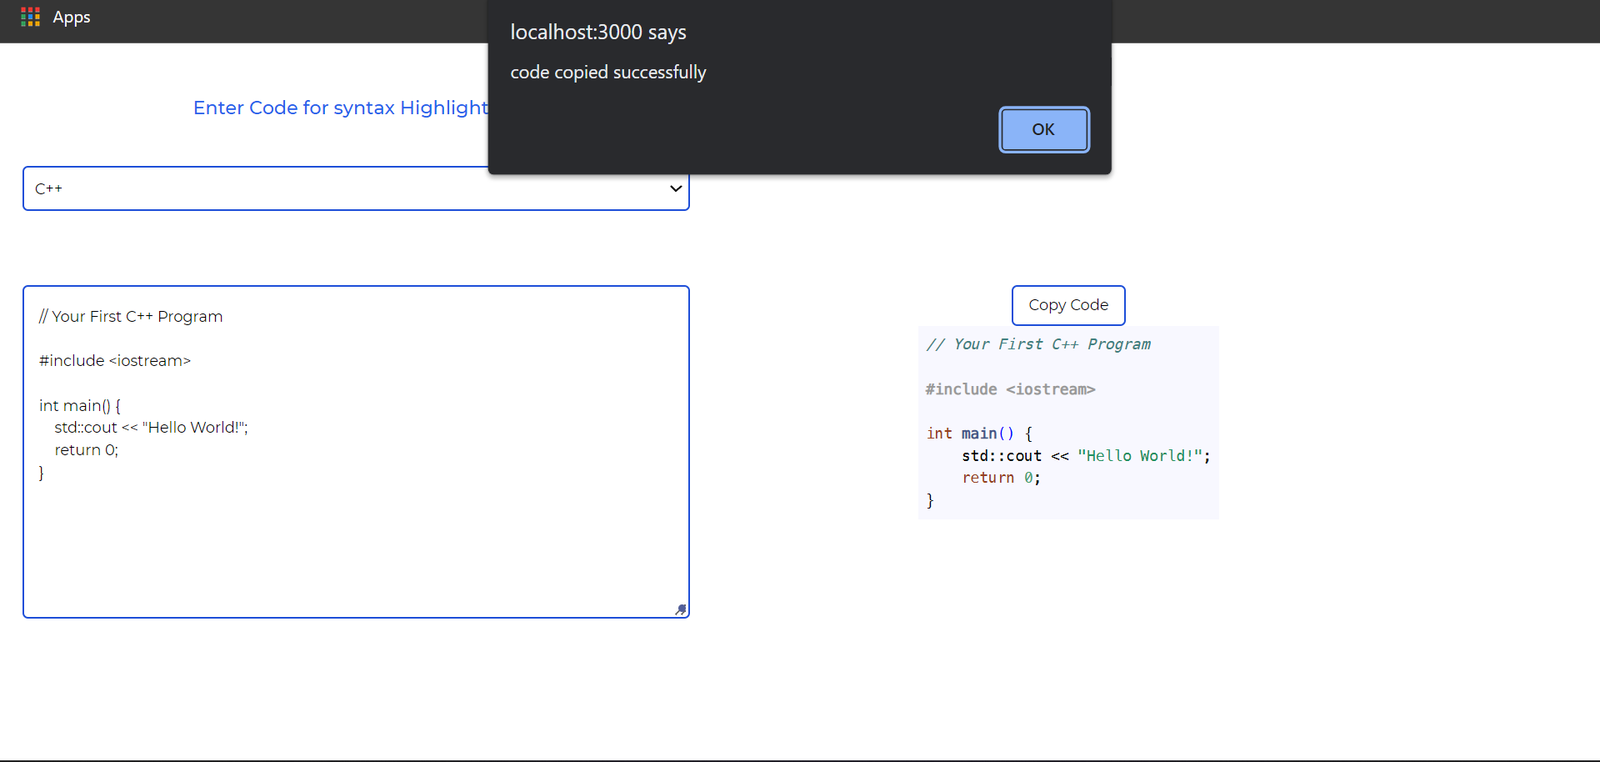
</CopyToClipboard>With this, the code is copied upon clicking on the button. Although the code is copied, there is no prompt to inform the user when this happens. We can do this using an alert.
<button onClick={()=>{alert("code copied successfully")}}>Copy Code</button>Now, when we click on our button, we get an alert:
For a more presentable option, we will use a package called SweetAlerts. This can be installed via CLI:
npm install sweetalert —save
After installation, add an import for this module:
import swal from ‘sweetalert’;
In place of the alert we will use swal instead:
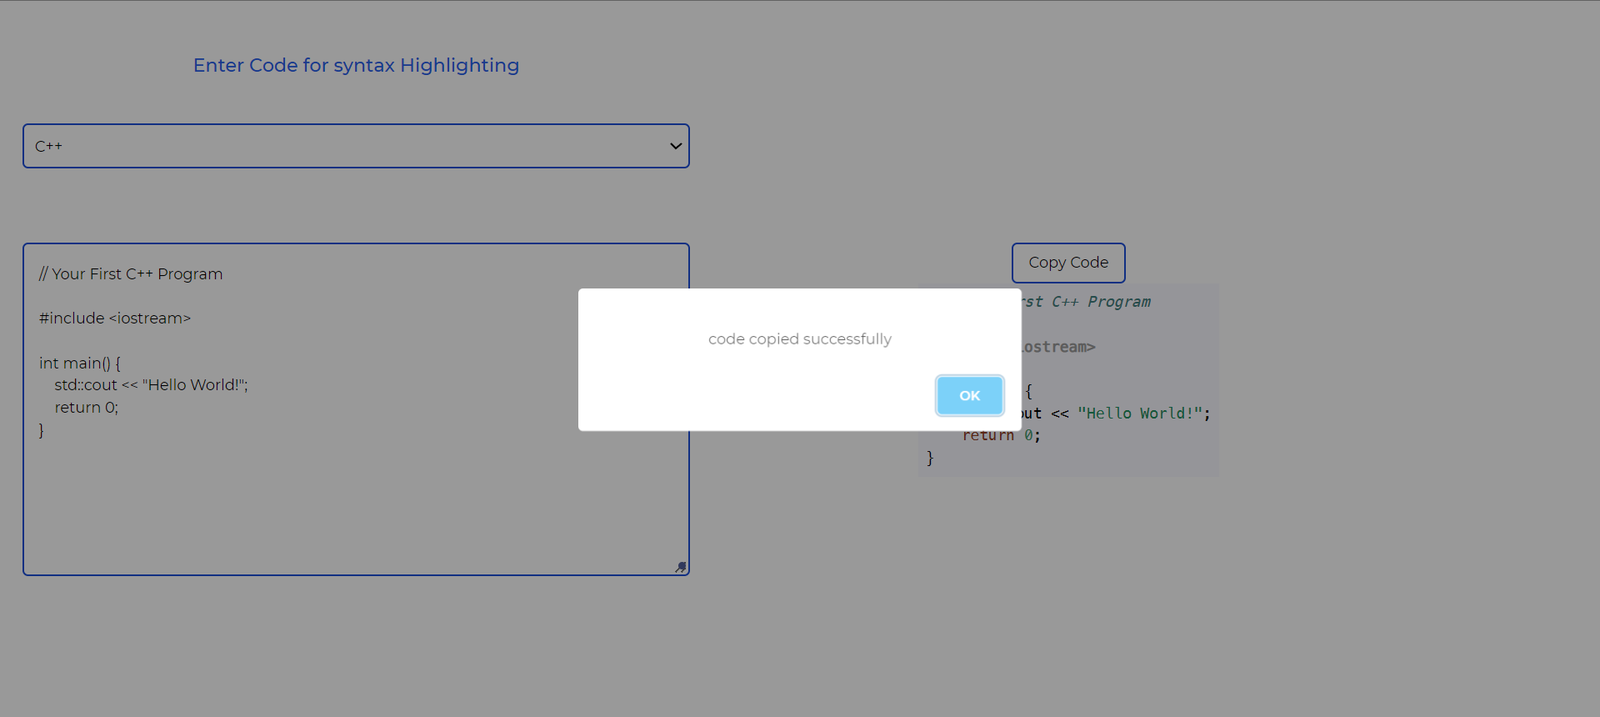
Below is the final output of our application:
Conclusion
We have come to the end of this tutorial. In this tutorial, readers learned about syntax highlighting, its benefits, and how they can easily set up a syntax highlighter for use in an application.
Resources
The entire source code used in the tutorial can be found here.