Flutter is a popular open-source framework for developing mobile, desktop, and web applications, and your Flutter apps will need to consume data from a server. This article will teach you how to approach this problem with GraphQL APIs.
You have your Flutter SDK ready for building Flutter apps. To consume GraphQL APIs using Flutter, you need a GraphQL API to query and retrieve data from. This can be either a public API or an API you build yourself. Along this guide, you will use data from this GraphQL API.
Additionally, Flutter cannot directly understand data from a GraphQL API. You need a graphql_flutter package. It provides a set of high-level widgets for using GraphQL in your Flutter app. You need to install it using the pub package manager. But first, proceed to your preferred working directory and run the following command to initialize the project:
flutter create flutter_graphqlAccess the newly created directory:
cd flutter_graphqlInstall graphql_flutter for interacting with the GraphQL API using the Flutter pub package manager:
flutter pub get provider graphql_flutterFlutter is the client application. It needs a connection to the server that serves the GraphQL API. With that, create a utils directory in the lib directory to hold an url.dart that will host the server endpoint that the client will call:
const String endpointUrl =
"https://graphqltodosapi-production.up.railway.app/";
Still, on the same, add an Endpoint.dart to host the definition of the GraphQL client instance.
import 'package:flutter/foundation.dart';
import 'package:graphql_app/Utils/url.dart';
import 'package:graphql_flutter/graphql_flutter.dart';

class EndPoint {
    ValueNotifier<GraphQLClient> getClient() {
        ValueNotifier<GraphQLClient> _client = ValueNotifier(GraphQLClient(
        link: HttpLink(endpointUrl, defaultHeaders: {
        }),
        cache: GraphQLCache(store: HiveStore()),
        ));

        return _client;
    }
}
The defined Endpoint class holds an instance of GraphQLClient that links your Flutter app and a GraphQL API. Note that the GraphQLClient is wrapped in a ValueNotifier and returned by the getClient() method. The ValueNotifier will notify listeners of changes to the GraphQLClient instance. This way, it can be used by the Flutter widgets throughout your Flutter app and updated dynamically based on every request to the API.
Setting up the schemas
For Flutter to understand the GraphQL API, you need to create a schema. A schema is a blueprint of data types that can be queried from GraphQL API operations. To create one, you use the GraphQL schema language. It allows you to validate client queries before executing them on the API. This reduces data errors between the client and the server. The client can only request data that is defined in the schema.
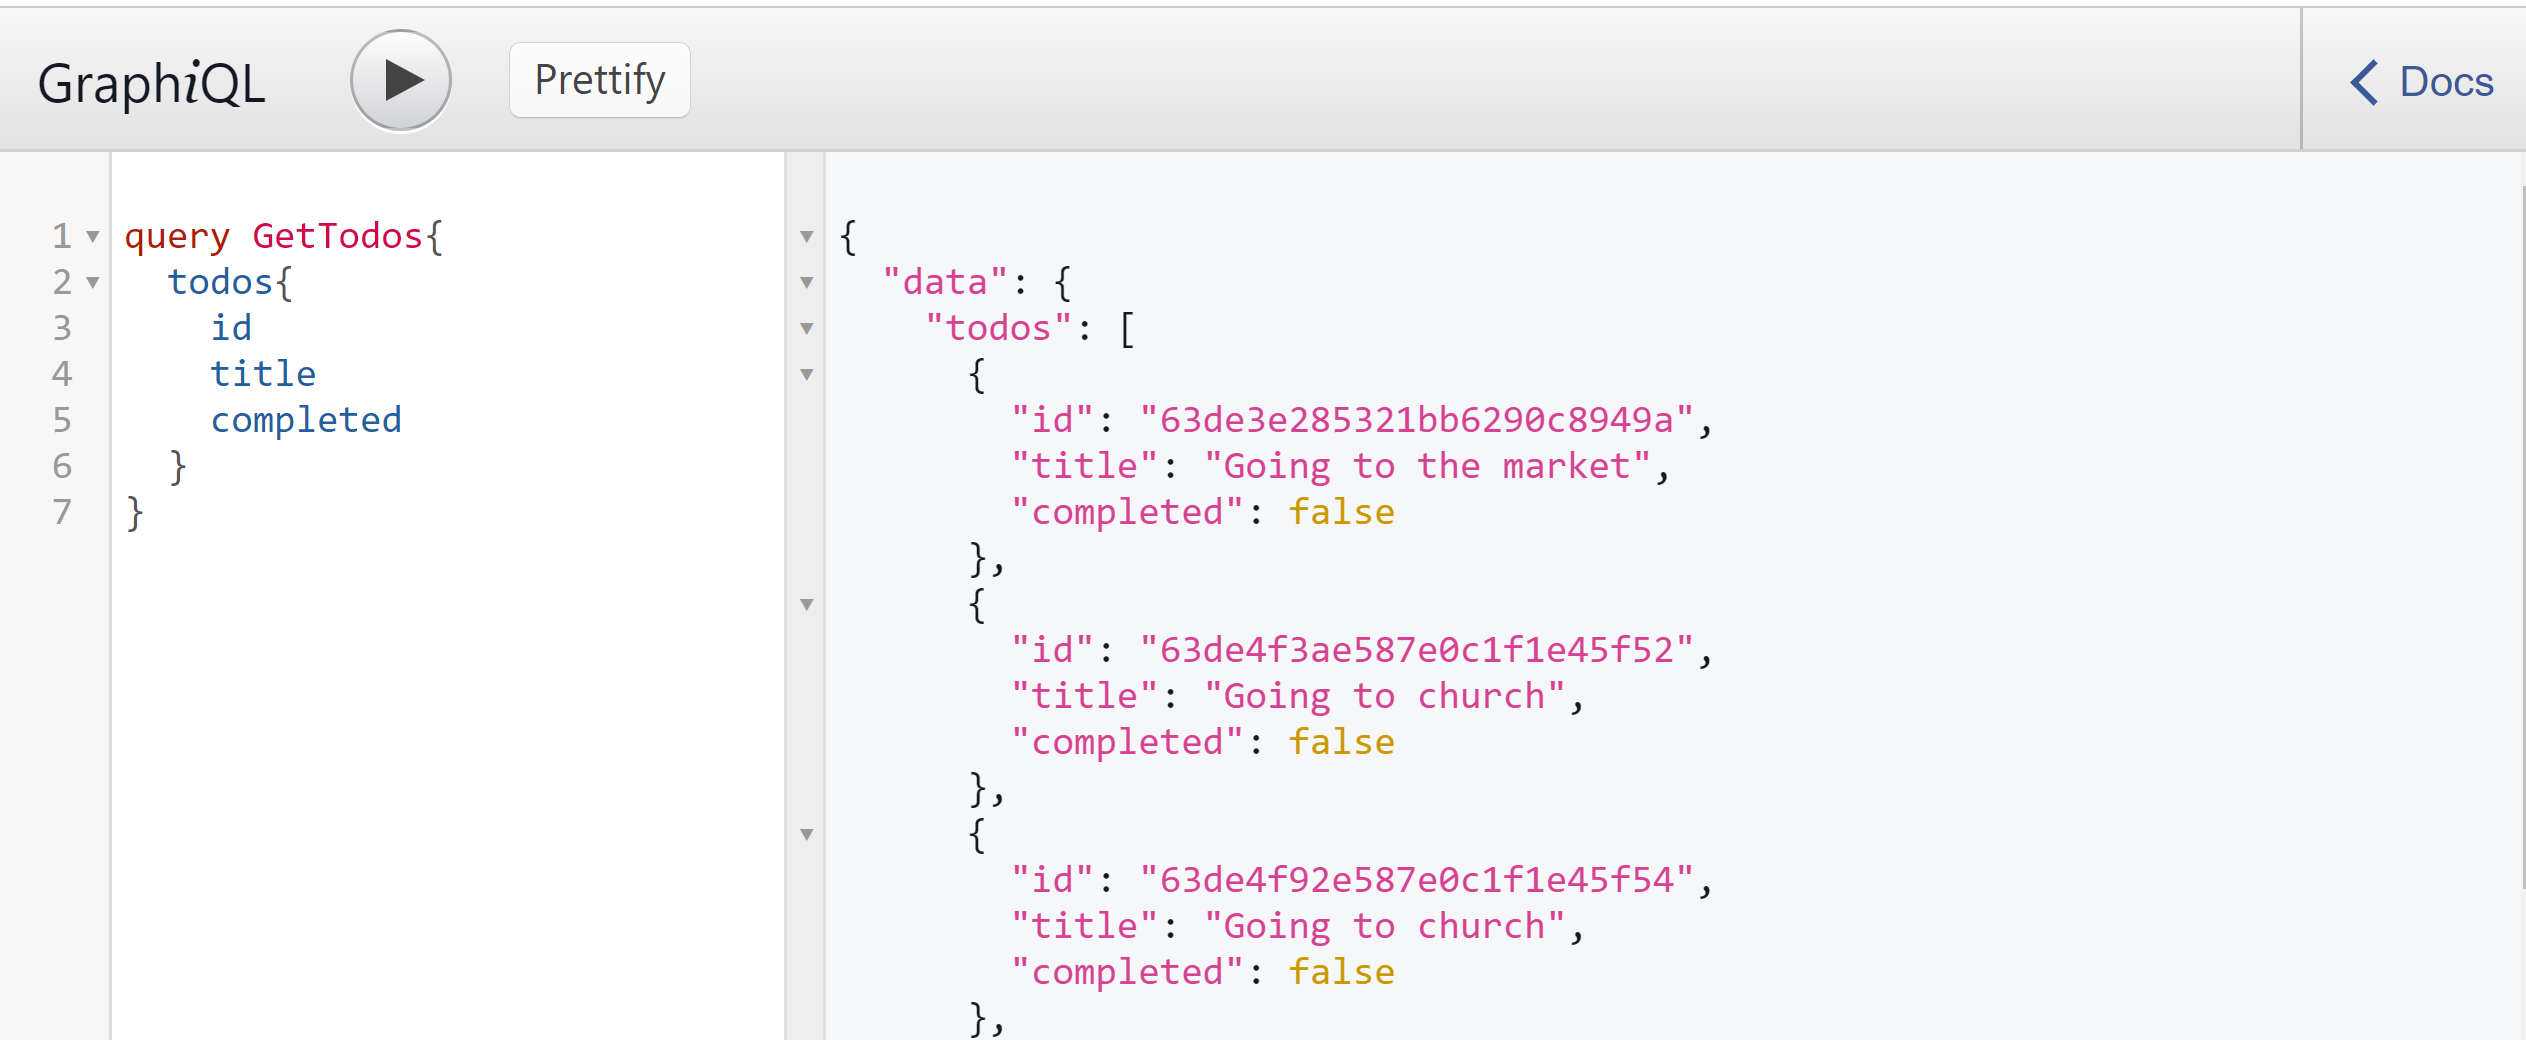
The example GraphQL API uses a todos data as it can be tested from the GraphQL Playground.
Therefore, a schema is needed to define the data structure, data types, and the fields available for each type. To do exactly that, create the Schemas directory in the lib folder of your Flutter project. This will be used to host the schema files to perform the GraphQL operations.
The first operation this guide will demonstrate is performing the GraphQL queries. This operation allows you to fetch data from a GraphQL API, an equivalent of GET from REST APIs. Add a get_todo_schema.dart file in the Schemas directory and create a GetTodoSchema() schema as a blueprint for fetching data using the query type as follows:
class GetTodoSchema {
    static String getTodoJson = """
    query getTodos{
        todos{
        id
        title
        completed
        }
    }
    """;
}
Adding data involves sending POST requites in REST APIs. Nevertheless, in GraphQL, you create mutations. Mutations are executed on the server to allow clients to make changes to the data stored on the server. You modify data on a server using mutations. Mutations are defined in the GraphQL schema as fields using a Mutation type. To create data, add a new add_todo_schema.dart file with a mutation that will be called while creating todo.
class AddTodoSchema {
    static String addTodoJson = """
    mutation addTodo(\$title:String!){
        add(title:\$title){
        id
        title
        completed
        }
    }
    """;
}
You can create unlimited mutations. They modify data. Thus they keep track of create, update, and delete. Below is an additional mutation that updated data in a GraphQL API. It changes the completed field of a todo from true to false and vice versa. Add a toggle_todo_schema.dart file with the following ToggleTodoSchema mutation.
class ToggleTodoSchema {
    static String toggleTodoJson = """
    mutation updateTodo(\$id:String!){
    toggle(id:\$id){
        id
        title
        completed
    }
    }
    """;
}
Creating GraphQL queries with Flutter
To perform this operation, it’s good to use a state management approach to manage data, as it will be shared between multiple widgets in your app. In this demonstration, you will use a provider. It’s a Flutter package for managing your app’s state and dependencies.
flutter pub add providerProvider provides a simple and efficient way to access and manage data that need to be passed down the widget tree in a Flutter app.
Provider will return the GraphQLClient instance from the EndPoint class. This makes the GraphQLClient instance available to all widgets in the widget tree.
To create a provider for consuming the GraphQL queries, create a Providers directory in the lib folder. A get_todos_provider.dart file will hold the providers for getting data here. It will define a GetTodoProvider that will contain the following instance variables:
import 'package:flutter/foundation.dart';
import 'package:graphql_app/Schemas/get_todo_schema.dart';
import 'package:graphql_app/Utils/Endpoint.dart';
import 'package:graphql_flutter/graphql_flutter.dart';

class GetTodoProvider extends ChangeNotifier {
    bool _status = false;
    String _response = '';
    dynamic _list = [];
    bool get getStatus => _status;
    String get getResponse => _response;
    final EndPoint _point = EndPoint();
}
The GetTodoProvider class will define a getTodo function for fetching the todos as defined in the GraphQLClient notifier:
void getTodo(bool isLocal) async {
    ValueNotifier<GraphQLClient> _client = _point.getClient();

    QueryResult result = await _client.value.query(
        QueryOptions(
            document: gql(GetTodoSchema.getTodoJson),
            fetchPolicy: isLocal == true ? null : FetchPolicy.networkOnly,
        ),
    );

    if (result.hasException) {
        // check if we have any exception
        _status = false;
        if (result.exception!.graphqlErrors.isEmpty) {
            _response = "Internet is not found";
        } else {
            _response = result.exception!.graphqlErrors[0].message.toString();
        }
        notifyListeners();
    } else {
        // no exception, set the todos (list)
        _status = false;
        _list = result.data;
        notifyListeners();
    }
}
GetTodoProvider should then return the todos data list:
 dynamic getTodosData() {
    if (_list.isNotEmpty) {
        final data = _list;
        return data['todos'] ?? {};
    } else {
        return {};
    }
}
Since you will display the stored responses to the user using the Flutter client, the initial sent response can be cleared. Create a method for clearing the response:
void clearResponse() {
    _response = '';
    notifyListeners();
}
Session Replay for Developers
Uncover frustrations, understand bugs and fix slowdowns like never before with OpenReplay — an open-source session replay tool for developers. Self-host it in minutes, and have complete control over your customer data. Check our GitHub repo and join the thousands of developers in our community.
Consuming mutations with Flutter
To the consumer, the mutations create a provider, using GetTodoProvider as the example. For adding data, mutation creates an add_todo_provider.dart file that defines a method for adding a todo using AddTodoProvider as follows:
import 'package:flutter/foundation.dart';
import 'package:graphql_app/Schemas/add_todo_schema.dart';
import 'package:graphql_app/Utils/Endpoint.dart';
import 'package:graphql_flutter/graphql_flutter.dart';

class AddTodoProvider extends ChangeNotifier {
    bool _status = false;
    String _response = '';
    bool get getStatus => _status;
    String get getResponse => _response;
    final EndPoint _point = EndPoint();
}
Inside the AddTodoProvider class, define a method for adding a todo, addTodo() as follows:
void addTodo({String? todo}) async {
    _status = true;
    _response = "Please wait...";
    notifyListeners();

    ValueNotifier<GraphQLClient> _client = _point.getClient();

    QueryResult result = await _client.value.mutate(
        MutationOptions(document: gql(AddTodoSchema.addTodoJson), variables: {
            'title': todo,
    }));

    if (result.hasException) {
        // Check if there is any exception raised.
        _status = false;
        if (result.exception!.graphqlErrors.isEmpty) {
            _response = "Internet is not found";
        } else {
            _response = result.exception!.graphqlErrors[0].message.toString();
        }
        notifyListeners();
    } else {
        _status = false;
        _response = "Todo was successfully added";
        notifyListeners();
    }
}
Inside the AddTodoProvider class, add a function for clearing the response:
void clearResponse() {
    _response = '';
    notifyListeners();
}
Correspondingly, for toggle mutation, add a toggle_todo_provider.dart file and create ToggleTodoProvider to execute a toggleTodo method.
import 'package:flutter/foundation.dart';
import 'package:graphql_app/Schemas/toggle_todo_schema.dart';
import 'package:graphql_app/Utils/Endpoint.dart';
import 'package:graphql_flutter/graphql_flutter.dart';

class ToggleTodoProvider extends ChangeNotifier {
    bool _status = false;
    String _response = '';
    bool get getStatus => _status;
    String get getResponse => _response;
    final EndPoint _point = EndPoint();
}
The toggleTodo method will execute the provider as follows:
void toggleTodo({ String? todoId,}) async {
    _status = true;
    _response = "Please wait...";
    notifyListeners();

    ValueNotifier<GraphQLClient> _client = _point.getClient();

    QueryResult result = await _client.value.mutate(
        MutationOptions(document: gql(ToggleTodoSchema.toggleTodoJson), variables: {
        'id': todoId,
    }));

    if (result.hasException) {
        // Check if there is an exception
        _status = false;
        if (result.exception!.graphqlErrors.isEmpty) {
            _response = "Internet is not found";
        } else {
            _response = result.exception!.graphqlErrors[0].message.toString();
        }
        notifyListeners();
    } else {
        _status = false;
        _response = "Todo was successfully Toggled";
        notifyListeners();
    }
}
Create a method for clearing its response:
void clearResponse() {
    _response = '';
    notifyListeners();
}
Fetching and displaying data
You have the GraphQL data ready. Using Flutter widgets, pass the data to the widgets tree so Flutter can interact with the API.
The following widget will display the GraphQL data query request. Create the Screens directory in the lib directory. A home_page.dart file will execute the stateful widget HomePage for displaying the todos.
First, we will import the packages needed to fetch data to the home_page.dart file:
import 'package:flutter/material.dart';
import 'package:graphql_app/Providers/toggle_todo_provider.dart';
import 'package:graphql_app/Providers/get_todo_provider.dart';
import 'package:graphql_app/Screens/add_todo.dart';
import 'package:provider/provider.dart';
Add the following HomePage StatefulWidget and a build method for executing a Scaffold that defines the Flutter widgets:
class HomePage extends StatefulWidget {
    const HomePage({Key? key}) : super(key: key);

    @override
    _HomePageState createState() => _HomePageState();
}

class _HomePageState extends State<HomePage> {
    bool isFetched = false;

    @override
    Widget build(BuildContext context) {
      return Scaffold(
        // We will add the Scaffold code here
      );
    }
}
In the above Scaffold, we will create an AppBar, a body containing a CustomScrollView, a floatingActionButton for adding new Todos, and a widget for executing the GetTodoProvider as follows:
return Scaffold(
    appBar: AppBar(
        title: const Text('Todos'),
    ),
    body: Consumer<GetTodoProvider>(builder: (context, todo, child) {
        // Fetch todos inside the CustomScrollView
    }),
    floatingActionButton: FloatingActionButton.extended(
        onPressed: () {
        Navigator.push(context,
            MaterialPageRoute(builder: (context) => const AddTodo()));
        },
        label: Icon(
        Icons.add,
        ),
    ),
);
GetTodoProvider will fetch and map the todos to the CustomScrollView. This will be executed by the body. Therefore, we will implement the code for fetching todos inside the CustomScrollView as follows:
if (isFetched == false) {
    // fetch the data
    todo.getTodo(true);
    Future.delayed(const Duration(seconds: 3), () => isFetched = true);
}

return RefreshIndicator(
    onRefresh: () {
        todo.getTodo(false);
        return Future.delayed(const Duration(seconds: 3));
    },
    child: CustomScrollView(
        slivers: [
        SliverToBoxAdapter(
            child: Container(
            // Container
            ),
        )
        ],
    ),
);
The above Container will hold a ListView for displaying the data. The Container will check if getTodoData has any data response (getResponseData) and display it. The ListTile will show the data to the screen containing a title and toggle todo between completed and in progress as follows:
height: MediaQuery.of(context).size.height,
padding: const EdgeInsets.all(20),
child: Column(
    children: [
    Container(
        margin: const EdgeInsets.all(20),
        child: const Text("Added Todos"),
    ),
    if (todo.getTodoData().isEmpty)
        const Text('No Todo found'),
    Expanded(
        child: ListView(
        children: List.generate(todo.getResponseData().length,
            (index) {
        final data = todo.getResponseData()[index];
        return ListTile(
            contentPadding: const EdgeInsets.all(0),
            title: Text(data['title']),
            subtitle: data['completed'] ? Text("Completed") : Text("Not Completed"),
            leading: CircleAvatar(
            backgroundColor: Colors.grey,
            child: Text((index + 1).toString()),
            ),
            trailing: Consumer<ToggleTodoProvider>(
                builder: (context, toggle, child) {
            WidgetsBinding.instance!
                .addPostFrameCallback((_) {
                if (toggle.getResponse != '') {
                ScaffoldMessenger.of(context).showSnackBar(
                    SnackBar(
                        content: Text(toggle.getResponse)));
                toggle.clear();
                }
            });
            return Row(
                mainAxisSize:MainAxisSize.min,
                children:[
                IconButton(
                onPressed: () {
                    //Toggle todo
                    ScaffoldMessenger.of(context)
                        .showSnackBar(SnackBar(
                    content: const Text(
                        "Are you sure you want to toggle todo?"),
                    action: SnackBarAction(
                        label: "Toggle",
                        onPressed: () {
                            toggle.toggleTodo(
                                todoId: data['id']);
                        }),
                    ));
                },
                icon: const Icon(Icons.edit)),
                ]
                );
            }),
        );
        }),
    )),
    const SizedBox(height: 150),
    ],
),
Equivalently, create an add_todo.dart file for hosting the functionality of adding a todo by defining an AddTodo stateful widget to handle adding a todo. First, we will add import statements needed to add data to the add_todo.dart file:
Import statements:
import 'package:flutter/material.dart';
import 'package:graphql_app/Providers/add_todo_provider.dart';
import 'package:provider/provider.dart';
Create a AddTodo for _AddTodoState definition:
class AddTodo extends StatefulWidget {
    const AddTodo({Key? key}) : super(key: key);

    @override
    _AddTodoState createState() => _AddTodoState();
}
Proceed and create the _AddTodoState class as follows:
class _AddTodoState extends State<AddTodo> {
    final TextEditingController _todo = TextEditingController();
    // Build context
In the above _AddTodoState class, create its build and a Scaffold as follows:
@override
Widget build(BuildContext context) {
    return Scaffold(
        // We will create the Scaffold here
    )
)
With the Scaffold ready, we can add its AppBar, and body containing the CustomScrollView as follows:
appBar: AppBar(
    title: const Text('Add New Todo'),
),
body: CustomScrollView(
    slivers: [
    SliverToBoxAdapter(
        child: Container(
        padding: const EdgeInsets.all(10),
        child: Column(
            children: [
            // Add the Container Columns
            ],
        ),
        ),
    )
    ],
),
The body will contain the following children that we will use for adding data.
- First, add the title for the Add Todos screen:
Container(
    margin: const EdgeInsets.all(20),
    child: const Text('Add your first todo'),
),- Add the fields for text inputs:
//Add todo input field
TextFormField(
    controller: _todo,
    decoration: const InputDecoration(
    labelText: 'Todo',
    ),
),- Create a
Save Todobutton that will take the text input payload and execute theaddTodo()method to save the added todo data:
//Add todo button
Consumer<AddTodoProvider>(builder: (context, todo, child){
    WidgetsBinding.instance!.addPostFrameCallback((_) {
    if (todo.getResponse != '') {
        ScaffoldMessenger.of(context).showSnackBar(
            SnackBar(content: Text(todo.getResponse)));
        todo.clear();
    }
    });

    return GestureDetector(
    onTap: todo.getStatus == true
        ? null
        : () {
            //Add todo button
            if (_todo.text.isNotEmpty) {
                todo.addTodo(
                    todo: _todo.text.trim());
            }
            },
    child: Container(
        padding: const EdgeInsets.all(15),
        margin: const EdgeInsets.all(30),
        decoration: BoxDecoration(
            color: todo.getStatus == true
                ? Colors.grey
                : Colors.green,
            borderRadius: BorderRadius.circular(10)),
        child: Text(todo.getStatus == true
            ? 'Loading...'
            : 'Save Todo')),
    );
})
Wrapping up
On your lib/main.dart, perform the following updates to ensure the providers, screens, and GraphQL Flutter has been executed.
import 'package:flutter/material.dart';
import 'package:graphql_app/Providers/toggle_todo_provider.dart';
import 'package:graphql_app/Providers/get_todo_provider.dart';
import 'package:graphql_app/Providers/add_todo_provider.dart';
import 'package:graphql_flutter/graphql_flutter.dart';
import 'package:provider/provider.dart';
import 'Screens/home_page.dart';

void main() async {
    await initHiveForFlutter();

    runApp(const MyApp());
}

class MyApp extends StatelessWidget {
    const MyApp({Key? key}) : super(key: key);

    @override
    Widget build(BuildContext context) {
        return MultiProvider(
            providers: [
            ChangeNotifierProvider(create: (_) => AddTodoProvider()),
            ChangeNotifierProvider(create: (_) => GetTodoProvider()),
            ChangeNotifierProvider(create: (_) => ToggleTodoProvider())
            ],
            child: MaterialApp(
            home: HomePage(),
            theme: ThemeData(
                primaryColor: Colors.green,
                primarySwatch: Colors.green
            )
            ));
    }
}
Your application is ready. You can test it using the following command that should be executed in your project directory:
flutter runOnce the application start, the fetched GraphQL data will be displayed on the home screen.
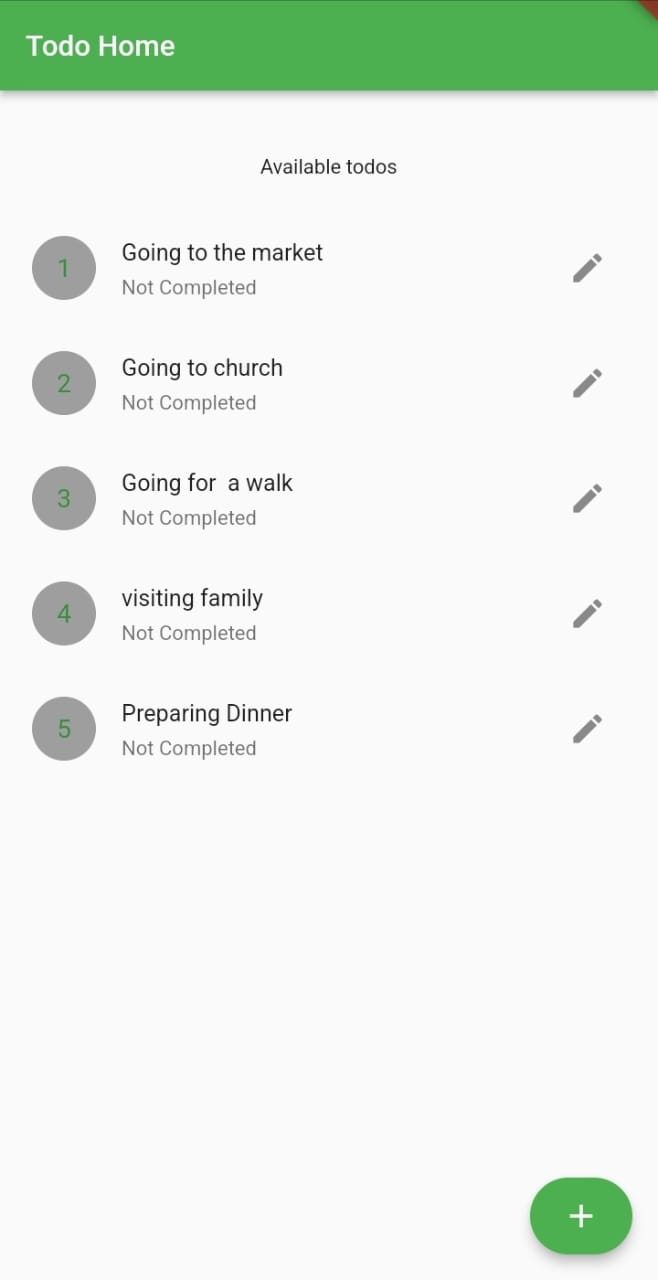
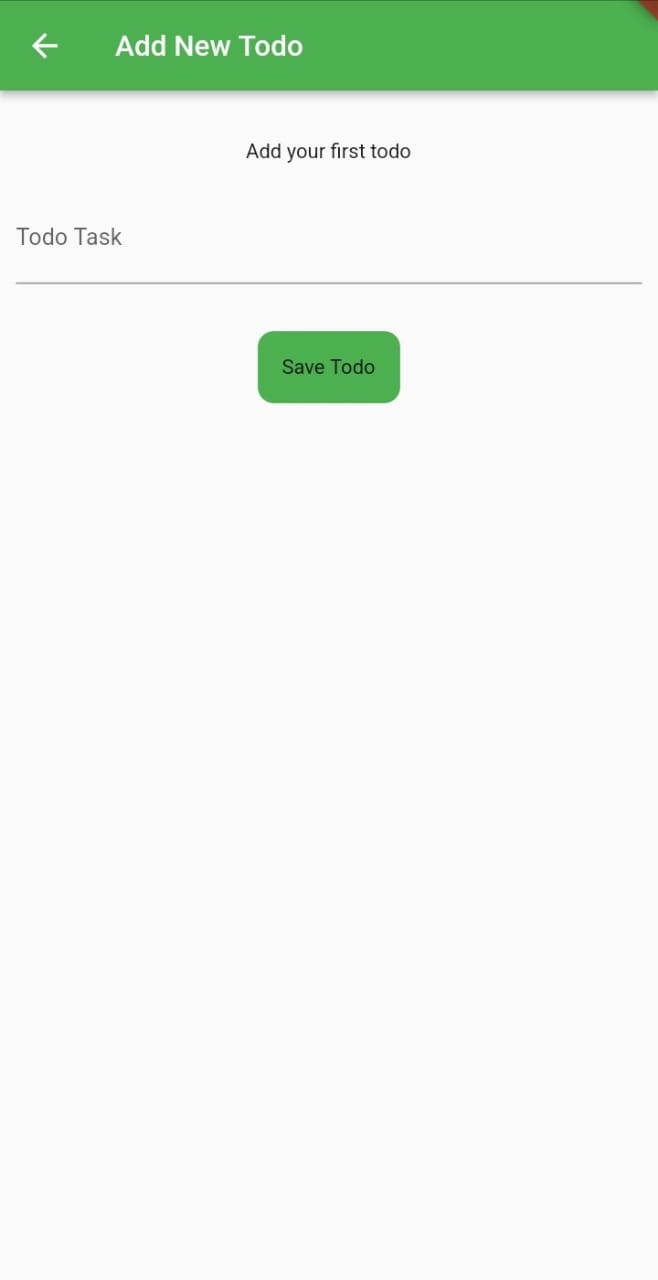
Clicking the plus button will launch the add todo screen to execute the mutations for adding data.
Conclusion
GraphQL and Flutter provide an easy approach to building mobile apps that can handle data retrieval and manipulation. GraphQL ensures you deliver optimal user experience by ensuring Flutter gets the exactly required data by reducing the rounds of requests between server and client.
Gain Debugging Superpowers
Unleash the power of session replay to reproduce bugs and track user frustrations. Get complete visibility into your frontend with OpenReplay, the most advanced open-source session replay tool for developers.