Convert Videos to GIF format for speed

GIF (Graphics Interchange Format) refers to a format of image file, which could be a collection of different images that can be played in quick succession to produce an animation. These images are soundless and looped continuously without needing player controls such as a “play” or “pause” button. GIFs are handy for creating a step-by-step presentation and can be preferable to using different images requiring extra descriptive text. And, due to their smaller size, they are loaded faster, providing better performance for your pages.
In this article, readers will learn about GIFs, their benefits, and how they can build a video-to-GIF converter.
What is a GIF?
A GIF (Graphics Interchange Format) is an image format, such as JPEG and PNG, invented by Steven Wilhite, a computer scientist working with a team of developers at CompuServe, an online service provider, in the year 1987. This image format comprises a series of images that can be looped together continuously to create an animation that will play on without needing a start button. Animations made using GIFs are animated images, not videos. They are a soundless set of moving images, similar to drawings made in a flip book.
A few notable benefits of GIFs include the following:
- GIFs can be used on social media platforms as a means of communication, and it is a popular format for creating and sharing memes, emotions, and even stickers.
- GIFs are lightweight and can be easily shared.
- GIFs are far smaller in size than videos and are suitable for use on web pages, as they load much faster.
- GIFs can be used to create animations and can be used to advertise a product’s brand.
- GIFs can add more context or ideas to a message, better than a still image, and can convey information in place of a short message.
This brings us to the question, why would one want to convert a video to a GIF? GIFs take the saying “a picture is worth a thousand words” to a whole new level as they can be used to guide the audience in a tutorial in place of numerous still images and descriptive text. For things such as a how-to guide, or a step-by-step tutorial that doesn’t require a voice-over, GIFs are an excellent choice for instructing your target audience: they are light-weighted, can be easily downloaded or replicated, and can play over and over continuously to pass the required information across.
Building the GIF converter
To follow up with this article, you need to clone the GitHub Starter Repo. After cloning the repository, install the application’s dependencies via CLI with the following commands:
cd React-video-to-gif-front-end
npm install
This will install the dependencies necessary for a React application. If we run the React application with the npm start command in CLI, we have the following result:
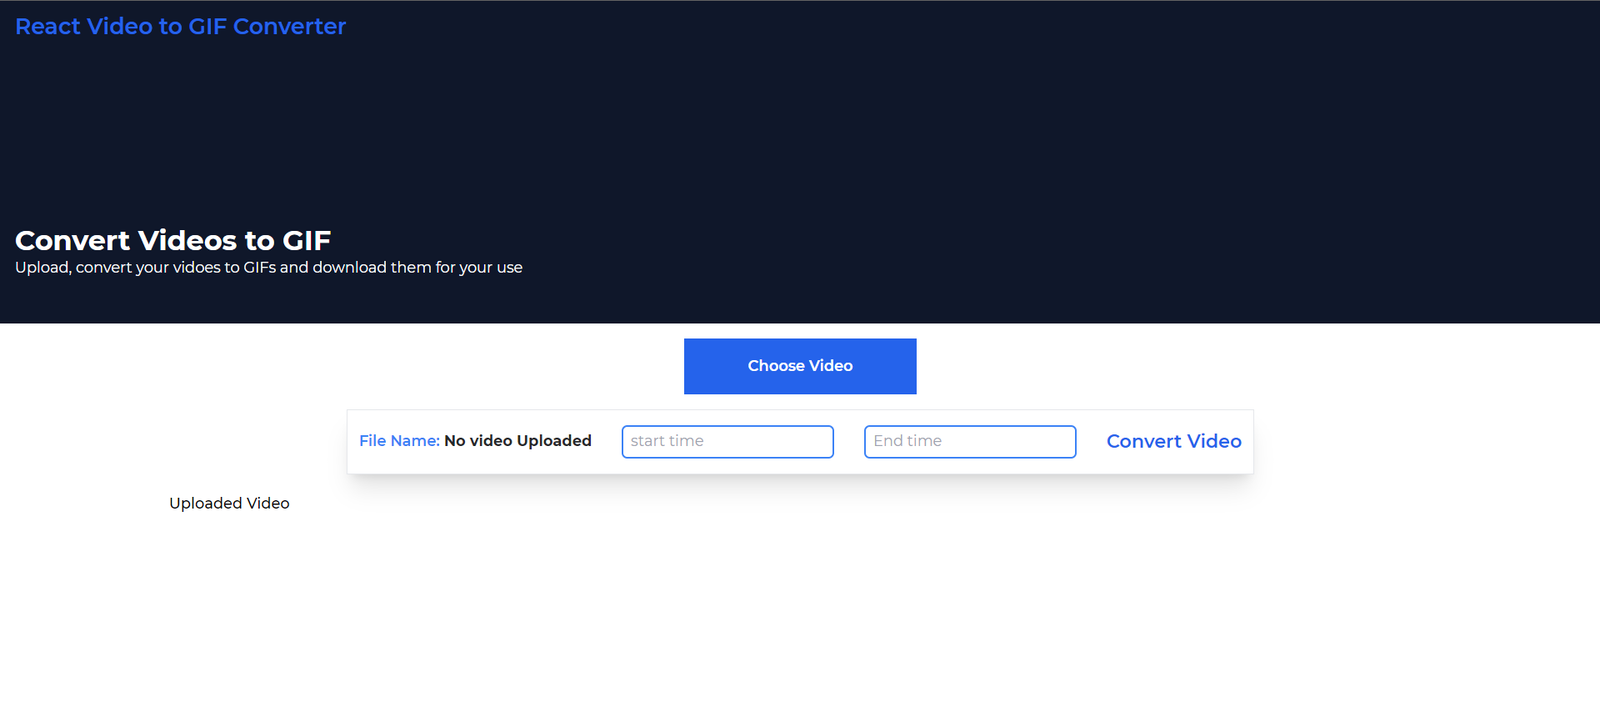
Here, we have a button to select a video, the name of the uploaded video will be shown, and we will be able to specify the start and end points of the video to be converted to a GIF. We will also display the uploaded video alongside the created GIF and add a download button feature.
Now, let’s add the video upload functionality. Firstly, we will create state variables to handle changes in the file upload button, the uploaded file name, and the input for the start and end times of the video. Next, we will only display the Choose Video button if no video has been selected. If a video is selected, we will display the video along with the file name and the conversion option.
We can do this in App.js by modifying the code as follows:
//....
function App() {
  const [isUpload, setUpload] = useState();
  const [getStart, setStart] = useState(0);
  const [getEnd, setEnd] = useState(0);
  const [videoUploaded, getVideoUploaded] = useState(false);
//...
The isUpload state would contain the uploaded video in the states declared above. We will use getStart and getEnd states to manage the onChange event handler for the start and end time fields. The last state, videoUploaded, will determine if we will display the Choose Video button or the rest of the components.
{!videoUploaded ? (
  <div className=" w-full flex justify-center items-center mt-4">
    <input
      type="file"
      id="file"
      className=" px-3 py-2 rounded-md text-white bg-blue-500"
      onChange={(e) => {
        // When the video gets uploaded we set the state to the value of the uploaded item
        setUpload(e.target.files?.item(0));
        //setting getVideoUploaded to true will update the state videoUploaded, hide the button, and renders the code in the truth block
        getVideoUploaded(true);
      }}
    />
    <label for="file">Choose Video</label>
  </div>
) : (
  <div className=" w-full px-3 py 4 mt-4 flex justify-center items-center flex-col">
    <div className=" bg-white shadow-xl py-4 px-3 w-max flex justify-between gap-8 border items-center">
      <div>
        <h2 className=" font-bold text-small text-zinc-800">
          <span className=" text-blue-500 font-semibold">File Name:</span>{" "}
          {isUpload? isUpload.name : 'No video Uploaded'}
          // if isUpload is true we return the name of the video
        </h2>
      </div>
      <div className=" border-2 border-blue-500 rounded-md">
        <input
          type="number"
          //set the value of the input field to the getStart state
          value={getStart}
          placeholder="start time"
          className=" px-2 py-1 bg-transparent outline-none"
          onChange={(event) => {
            //handle updateing the getStart State. the maximum character entry is 2 and is less than 30 but greater than zero
            if (event.target.value.length === 3)
              return false; //limits to 2 digit entry
            else if (event.target.value > 30 event.target.value<=0) return false; //limits to 2 digit entry
            setStart(event?.target.value); //saving input to state
          }}
        />
      </div>
      <div className=" border-2 border-blue-500 rounded-md">
        <input
          type="number"
          //set value of the getEnd state
          value={getEnd}
          placeholder= "End time"
          className=" px-2 py-1 bg-transparent outline-none"
          onChange={(event) => {
            // handle getEnd state update
            if (event.target.value.length === 3)
              return false; //limits to 2 digit entry
            else if (event.target.value > 30) return false; //limits to 2 digit entry
            setEnd(event?.target.value); //saving input to state
          }}
        />
      </div>
      <button className=" text-xl font-semibold text-blue-600">
        //button to convert video to GIF
        Convert Video
      </button>
    </div>
    <div className=" mt-5 w-4/5">
      //if the isUpload state has a value
      {isUpload && (
        <div>
          <h2 className=" text-left font-medium mb-3"> Uploaded Video</h2>
          <video
            controls
            width="400"
            src={URL.createObjectURL(isUpload)}
          ></video>
        </div>
      )}
    </div>
  </div>
)}
In the code block above, we used the videoUploaded state to determine what will be displayed on the screen. When a video is uploaded by clicking on the Choose Video button and selecting a video, the button would be hidden and the as videoUploaded becomes true. The code in the truth block is rendered instead. This shows the file name and the fields for the start and end time of the video along with the Convert Video button.
If isUpload is true, the name of the uploaded video will be displayed. For the start and end time fields, we set the values to their respective states and updated the states in the onChange event handlers. We will also display the uploaded video using a video player component.
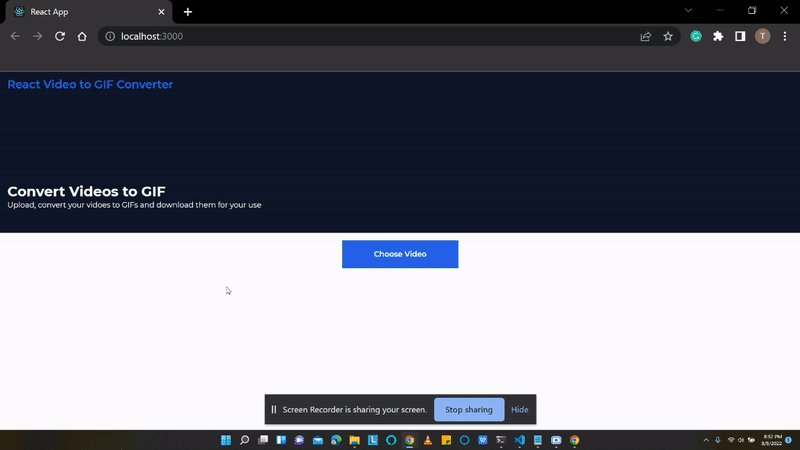
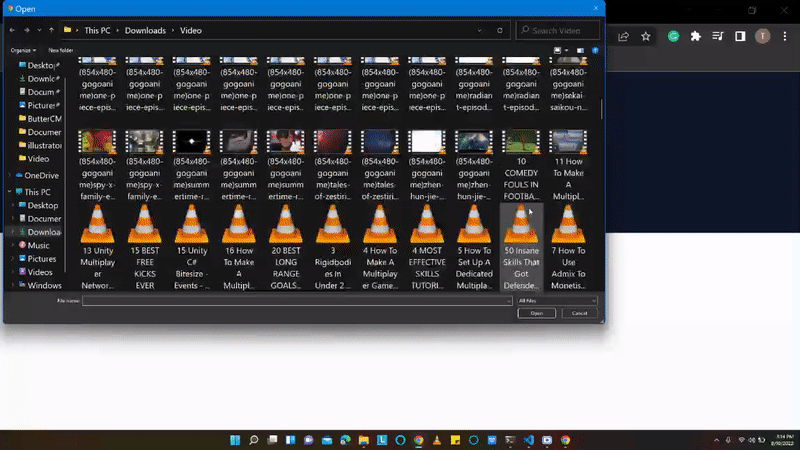
Now, if we run our code, we get the following result when we upload a video.
Open Source Session Replay
OpenReplay is an open-source, session replay suite that lets you see what users do on your web app, helping you troubleshoot issues faster. OpenReplay is self-hosted for full control over your data.

Start enjoying your debugging experience - start using OpenReplay for free.
Converting the video to GIF
To handle video conversions, we will use FFmpeg, a web assembly module developed with the C programming language. With its web assembly support, it can handle video and audio record, conversion, and streaming on a webpage. To install this module, enter the following command in the CLI of your working directory:
npm install @ffmpeg/ffmpeg @ffmpeg/core To use FFmpeg to handle the conversion of a video into a GIF, we will need to specify the following:
- The video input (-i)
- The dimensions of the video (-s)
- The number of frames to be rendered per second (-r)
- Start time and length of the video (-ss and -t)
- The output format (-f)
Firstly, we will add an import for this module in App.js:
import {createFFmpeg, fetchFile} from "@ffmpeg/ffmpeg";Next, we will create an instance of FFmpeg using createFFmpeg:
const ffmpeg = createFFmpeg({ log: true });We will create a new state for our file conversion to check if the video is ready to be converted. We will also define a conversion that will handle this:
import { React, useState, useEffect } from "react";
//...
const [isVideoReady, setVideoReady] = useState(false);
const [GIF, getConvertedGIF] = useState();
  useEffect(() => {
    loadVideo();
  }, []);

  const loadVideo = async () => {
    await ffmpeg.load();
    setVideoReady(true);
  };
We will also create a function that would be called by the Convert Video button, to handle converting our videos to GIF using FFmpeg. For this, we will use fetchFile earlier imported from FFmpeg:
const convertVideoToGIFCreator = async () => {
  // Write the .mp4 video to the FFmpeg file system
  ffmpeg.FS("writeFile", "video.mp4", await fetchFile(isUpload));
  // handle converting the video to a gif
    await ffmpeg.run(
      "-i",
      "video.mp4",
      "-s",
      "480x320",
      "-r",
      "3",
      "-t",
      getEnd,
      "-ss",
      getStart,
      "-f",
      "gif",
      "output.gif"
    );
    // handle converting the gif to a base64 string
    const data = ffmpeg.FS("readFile", "output.gif");
    const url = URL.createObjectURL(
      new Blob([data.buffer], { type: "image/gif" })
    );
    getConvertedGIF(url);
  };
In the code above, the start and length of the video have been specified using the getEnd and getStart states. Also, we have set the frame rate “-r”, the file type “GIF”, and the dimensions. To run this function, we will add a function call in the onClick event handler of the Convert Video button:
<button
  className=" text-xl font-semibold text-blue-600"
  onClick={() => {
    convertVideoToGIFCreator();
  }}
>
  Convert Video
</button>
Displaying the created GIF
To display the converted GIF, we will need to check if the GIF state has data, then we will render an image tag to show the converted GIF using the URL saved to the GIF state in the convertVideoTOGIFCreator function:
{isVideoReady ? (
  <div>
    {GIF && (
      <div>
        <h2 className=" text-left font-medium mb-3">
          Converted GIF
        </h2>
        <img src={GIF} alt="gif" className=" w-80 h-52" />
        {/* for the button to download the GIF */}
        <button className=" px-3 py-1 mt-2 rounded-md text-white bg-blue-500">
          Download GIF
        </button>
      </div>
    )}
  </div>
) : (
  <h2>Converting Video</h2>
)}
With this, when our video gets converted, we see a preview of the GIF:
To make use of our Download GIF button, we just need to add the following in the onClick event handler:
<button
  className=" px-3 py-1 mt-2 rounded-md text-white bg-blue-500"
  onClick={(e) => {
    e.preventDefault();
    const link = document.createElement("a");
    link.href = GIF;
    link.download = isUpload.name.split(".")[0];
    link.click();
  }}
>
  Download GIF
</button>
Conclusion
In this article, we learned about GIFs, their applications, and how we can build a video-to-GIF converter with FFmpeg.
Resources
The entire source code used in this tutorial can be found in this GitHub repository.
A TIP FROM THE EDITOR: On a related topic, you can produce videos at the front end by following our Produce videos in React with Remotion article, so by adding the code seen here you would be able to equally well produce GIFs.