
Create Push Notifications in React Native with Notifee


Notifee is a React Native library that streamlines push notifications for Android and iOS devices, eliminating the need for complex configurations, which usually prove challenging. Notifee, however, simplifies the entire process, and this article will show how to use it.

Discover how at OpenReplay.com.
Setting Up
In this section, we’ll guide you through the setup of Notifee. The installation process is straightforward, and it assumes you already have an existing React Native app. It’s worth noting that this library works seamlessly with both JavaScript (JS/JSX) and TypeScript (TS/TSX) files, requiring no additional configuration for TypeScript. If you don’t have a React Native app installed yet, I recommend checking out the installation process here.
To install the dependencies for Notifee, simply run the command below in your project’s terminal.
#npm
npm install --save @notifee/react-native

## Yarn
yarn add @notifee/react-native
After running the code, you can sync the gradlew file on the android folder by running ./gradlew clean. After that, it’s recommended to restart your server in your project’s root directory to ensure that the dependencies take effect.
In the following sections, we will explore the process of creating push notifications, removing them with a simple button click, organizing them into groups, customizing their appearance, and handling images within push notifications.
Building Your First Push Notification
To create your first push notification, start by importing the notification library at the top section of your component. Please note that we will be implementing three key steps to get our first notification working:
- Create a channel to initialize the push notification with the
notifee.createChannelfunction. - Obtain permission from the device using the
notifee.requestPermissionfunction. - Finally, display the push notification using the
notifee.displayNotificationfunction.
The following code is a function that incorporates the previously mentioned functions for displaying notifications:
import { StyleSheet, Text, TouchableOpacity, View } from "react-native";
import React from "react";
import notifee from "@notifee/react-native";
const NotificationPlayGround = () => {
async function onDisplayNotification() {
const channelId = await notifee.createChannel({
id: "default",
name: "Default Channel",
});
// Required for iOS
// See https://notifee.app/react-native/docs/ios/permissions
await notifee.requestPermission();
await notifee.displayNotification({
id: "1234",
title: `<p style="color: white;"><b>John sent a message</span></p></b></p>`,
body: "Hey there! 🌟",
android: {
channelId,
color: "#6495ed",
timestamp: Date.now() - 800, // 8 minutes ago
showTimestamp: true,
},
});
}
// Clearing notification
const onClearNotification = () => {};
return (
<View style={styles.body}>
<TouchableOpacity style={styles.button} onPress={onDisplayNotification}>
<Text style={styles.btn_text}>Create</Text>
</TouchableOpacity>
<TouchableOpacity
style={[styles.button, { backgroundColor: "red" }]}
onPress={onClearNotification}
>
<Text style={styles.btn_text}>Clear</Text>
</TouchableOpacity>
</View>
);
};
export default NotificationPlayGround;
const styles = StyleSheet.create({
body: {
flex: 1,
backgroundColor: "black",
padding: 20,
justifyContent: "center",
alignItems: "center",
},
button: {
width: "100%",
backgroundColor: "cornflowerblue",
margin: 20,
padding: 20,
},
btn_text: {
color: "white",
fontWeight: "bold",
fontSize: 27,
textAlign: "center",
},
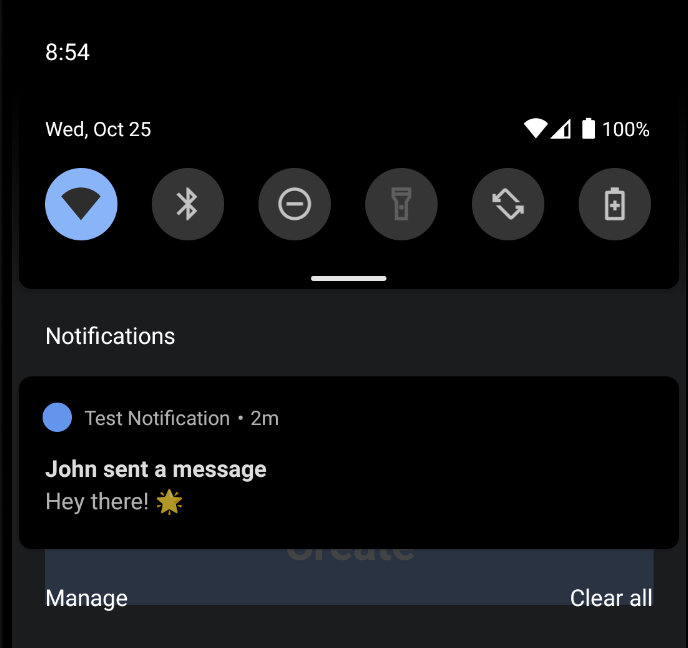
});The code above simplifies the process of creating push notifications using Notifee, and you can easily customize the appearance for both Android and iOS with the same configuration. In the code, we’ve added a timestamp that displays the date in a format like ‘8 days ago,’ making the notification more readable. If the notification is being created in real-time, it will display ‘now’ as the timestamp in the notification.
The image below showcases the notification created with Notifee:
Grouping Notifications for Clarity
Grouping notifications simply refers to organizing notifications in an orderly manner. For instance, in WhatsApp, you receive push notifications for messages from different contacts and push notifications for missed calls from various contacts. These notifications can be organized by grouping them using unique IDs. In this section, we will group push notifications by arranging them in a list, with new messages appearing at the top if they share the same ID. The code responsible for this feature is shown below:
import { StyleSheet, Text, TouchableOpacity, View } from "react-native";
import React, { useState } from "react";
import notifee from "@notifee/react-native";
import { TextInput } from "react-native-gesture-handler";
const NotificationPlayGround = () => {
  const [enteredValue, setEnteredValue] = useState("");
  async function onDisplayNotification() {
    const channelId = await notifee.createChannel({
      id: "default",
      name: "Default Channel",
    });
    await notifee.requestPermission();
    await notifee.displayNotification({
      id: "123",
      title: `<p style="color: white;"><b>New message</p></b></p>`,
      body: enteredValue,
      android: {
        channelId,
        color: "#6495ed",
        timestamp: Date.now() - 800, // 8 minutes ago
        showTimestamp: true,
        groupSummary: true,
        groupId: "123",
      },
    });
    // Grouping
    await notifee.displayNotification({
      title: `<p style="color: white;"><b>New message</b></p>`,
      body: enteredValue,
      android: {
        channelId,
        groupId: "123",
        color: "#6495ed",
        timestamp: Date.now() - 800, // 8 minutes ago
        showTimestamp: true,
      },
    });
  }
  return (
    <View style={styles.body}>
      <TextInput
        placeholder="Write something."
        style={styles.input}
        onChangeText={(value) => setEnteredValue(value)}
        value={enteredValue}
      />
      <TouchableOpacity style={styles.button} onPress={onDisplayNotification}>
        <Text style={styles.btn_text}>Create</Text>
      </TouchableOpacity>
    </View>
  );
};
export default NotificationPlayGround;
const styles = StyleSheet.create({
  body: {
    flex: 1,
    backgroundColor: "black",
    padding: 20,
    justifyContent: "center",
    alignItems: "center",
  },
  input: {
    width: "100%",
    backgroundColor: "#323232",
    height: 150,
    textAlignVertical: "top",
    padding: 20,
  },
  button: {
    width: "100%",
    backgroundColor: "cornflowerblue",
    margin: 20,
    padding: 20,
  },
  btn_text: {
    color: "white",
    fontWeight: "bold",
    fontSize: 27,
    textAlign: "center",
  },
});
In the code above, we utilize the onDisplayNotification function from the @notifee/react-native library to display notifications. Here’s a breakdown:
- The function begins by creating a notification channel named’ Default Channel’ and the ID ‘default’ to categorize notifications.
- Next, it requests permission to display notifications, a crucial step to ensure the app can notify the user.
- The code proceeds to create two notifications:
- The first notification is assigned a unique ID ‘123’ with a white text title. It also includes the text entered by the user. Some Android-specific settings, such as the channel ID, color, timestamp, and grouping, are configured to create a summary of grouped notifications.
- The second notification code is similar to the first one, with the added functionality of grouping summaries. This allows new notifications to be grouped under the same ID as the first notification.
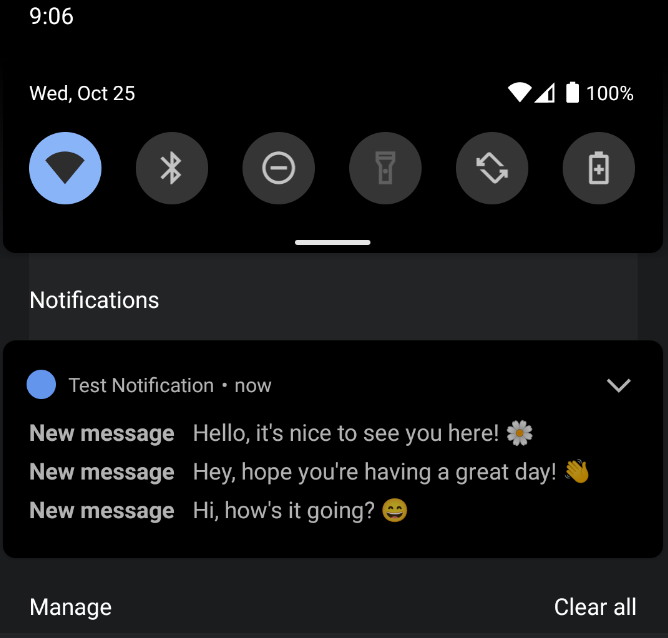
The image below illustrates the grouping of messages we generated. Please use the input field to compose a message and click the ‘Create’ button to generate a notification, which will appear at the top.
How to Cancel Push Notifications
Canceling push notifications is straightforward, similar to clearing notifications on our device. To get started, we simply need to use the notifee.cancelNotification() function and pass the notification ID obtained from notifee.displayNotification, as demonstrated below:
// The notification ID is assigned to a constant variable for easier reference.
const notiID = await notifee.displayNotification(......
Below is the code for clearing the notification:
//  Clear notification
const onClearNotification = async () => {
  await notifee.cancelNotification(notificationId);
};
You can easily associate the onClearNotification function with a button to allow the user to cancel the notification. Below is the complete code for creating a notification and enabling its cancellation by clicking the ‘Cancel’ button:
import { StyleSheet, Text, TouchableOpacity, View } from "react-native";
import React, { useState } from "react";
import notifee from "@notifee/react-native";
import { TextInput } from "react-native-gesture-handler";
const NotificationPlayGround = () => {
  const [enteredValue, setEnteredValue] = useState("");
  const [notificationId, setNotificationId] = useState("");
  async function onDisplayNotification() {
    const channelId = await notifee.createChannel({
      id: "default",
      name: "Default Channel",
    });
    await notifee.requestPermission();
    const notiID = await notifee.displayNotification({
      id: "123",
      title: `<p style="color: white;"><b>New message</p></b></p>`,
      body: enteredValue,
      android: {
        channelId,
        color: "#6495ed",
        timestamp: Date.now() - 800, // 8 minutes ago
        showTimestamp: true,
        groupSummary: true,
        groupId: "123",
      },
    });
    setNotificationId(notiID); // from useState
    // Grouping
    await notifee.displayNotification({
      title: `<p style="color: white;"><b>New message</b></p>`,
      body: enteredValue,
      android: {
        channelId,
        groupId: "123",
        color: "#6495ed",
        timestamp: Date.now() - 800, // 8 minutes ago
        showTimestamp: true,
      },
    });
  }
  //  Clear notification
  const onClearNotification = async () => {
    await notifee.cancelNotification(notificationId);
  };
  return (
    <View style={styles.body}>
      <TextInput
        placeholder="Write something."
        style={styles.input}
        onChangeText={(value) => setEnteredValue(value)}
        value={enteredValue}
      />
      <TouchableOpacity style={styles.button} onPress={onDisplayNotification}>
        <Text style={styles.btn_text}>Create</Text>
      </TouchableOpacity>
      <TouchableOpacity
        style={[styles.button, { backgroundColor: "red" }]}
        onPress={onClearNotification}
      >
        <Text style={styles.btn_text}>Cancel</Text>
      </TouchableOpacity>
    </View>
  );
};
export default NotificationPlayGround;
const styles = StyleSheet.create({
  body: {
    flex: 1,
    backgroundColor: "black",
    padding: 20,
    justifyContent: "center",
    alignItems: "center",
  },
  input: {
    width: "100%",
    backgroundColor: "#323232",
    height: 150,
    textAlignVertical: "top",
    padding: 20,
  },
  button: {
    width: "100%",
    backgroundColor: "cornflowerblue",
    margin: 14,
    padding: 14,
  },
  btn_text: {
    color: "white",
    fontWeight: "bold",
    fontSize: 27,
    textAlign: "center",
  },
});
The video below shows how to create and cancel notifications. If you click the ‘Cancel’ button, it will remove all the notifications you’ve created.
Styling Your Push Notifications
Styling your push notifications is simple. You can use HTML-like syntax for formatting in the ‘title’ property of the displayNotification function. We’ve already covered this in previous sections, and the styling attributes for the title are similar to the code below:
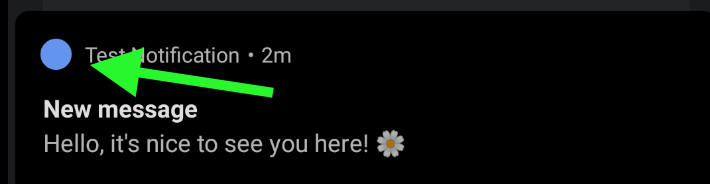
title: `<p style="color: white;"><b>New message</p></b></p>`,If you are using Android, you can also integrate colors into your notifications. In the example notification, we used the color code #6495ed with the name ‘cornflowerblue.’ You can customize the color to match your app’s theme or favorite color. Below is the section where we integrated the color for Android.
android: {
      channelId,
      color: '#6495ed',
    ....
This color will display as a circle if you are using Android. Below is an image that illustrates the notification with the circle and the color represented by the hex value #6495ed.
Handling Remote & Local Images
In this section, we’ll explore local and remote images in Notifee, and it’s a straightforward process. Additionally, we can set an icon logo; this ‘largeIcon’ often represents the app’s logo, and in Android, it will be displayed to the right of the notification.
It’s important to note that a remote notification is a message sent from a remote server to a user’s device, providing updates, alerts, or information from apps, even when the app is not actively running. In a later section of this article, we’ll work with Firebase to send push notifications from a Firebase server to our mobile devices. Firebase also allows us to include images displayed in the notification on users’ devices. However, this will be covered in a subsequent part of the article. For now, let’s focus on displaying images and icons in the Notifee notification system.
Displaying an image icon
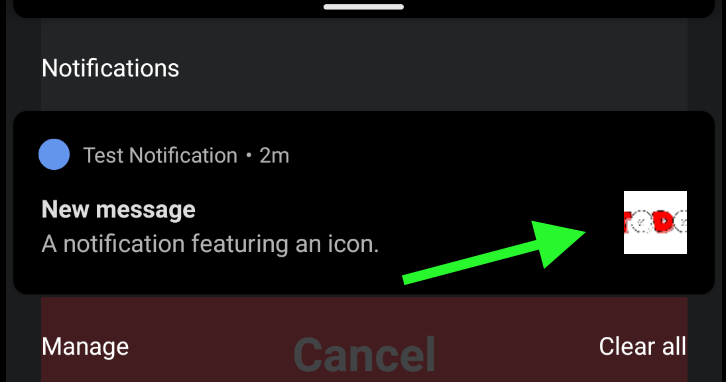
Let’s begin by displaying the image icon using the largeIcon property, which accepts hosted image links, such as ‘https://logos.flamingtext.com/City-Logos/Todo-Logo.png.’ If you are using a group notification system for grouping notifications, it’s advisable to add the largeIcon property to both displayNotification sections. Below is the code that includes the largeIcon property to display the notification:
const notiID = await notifee.displayNotification({
  id: "123",
  title: `<p style="color: white;"><b>New message</p></b></p>`,
  body: "Testing notification",
  android: {
      // ....
    largeIcon: "https://logos.flamingtext.com/City-Logos/Todo-Logo.png",
  },
});
Below is the output of the notification that includes the image icon on the right side of the notification:
Displaying an image in the notification body
In this section, we’ll display an image within the notification body, which is straightforward to achieve by using the style attribute and passing the picture. However, before doing this, we need to import AndroidStyle from the Notifee library, as shown below:
import notifee, {AndroidStyle } from '@notifee/react-native';This will facilitate our work with Android when rendering local or remote images in the notification. However, if you are working with iOS, please import IOSStyle instead of AndroidStyle.
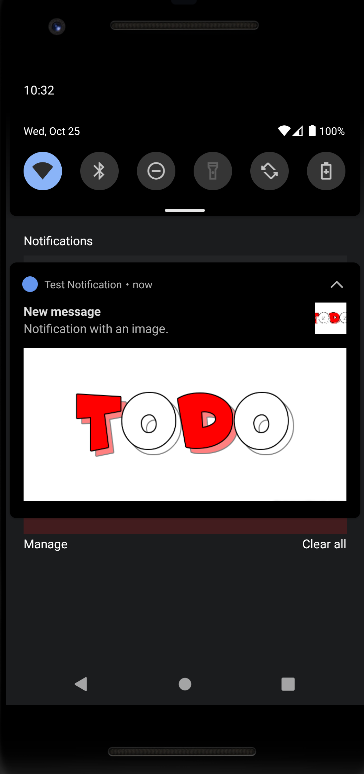
The next step is to include the AndroidStyle within a type property in the style object and also pass a picture property in the style object, providing the image link as described below:
const notiID = await notifee.displayNotification({
  id: "123",
  title: `<p style="color: white;"><b>New message</p></b></p>`,
  body: enteredValue,
  android: {
    channelId,
    color: "#6495ed",
    timestamp: Date.now() - 800, // 8 minutes ago
    showTimestamp: true,
    groupSummary: true,
    groupId: "123",
    largeIcon: "https://logos.flamingtext.com/City-Logos/Todo-Logo.png",
    style: {
      type: AndroidStyle.BIGPICTURE,
      picture: "https://logos.flamingtext.com/City-Logos/Todo-Logo.png",
    },
  },
});
Here is an image output that displays the notification with the included image, as discussed above:
Sending Notifications with Firebase
In cases where you want to send remote notifications to your app, Firebase is a great option. In this section, we will send push notifications with Firebase, which will be done remotely. However, in this section, we won’t use Notifee; we’ll focus on basic Firebase configuration. You can still use Notifee to display the notifications because when we send notifications from Firebase, they are sent as objects that our app can listen to in real-time. You can listen to these events from Firebase and use the details from the Firebase object to display notifications using Notifee.
To get started, simply install the Firebase app and Firebase messaging by using the command below:
## Using npm
npm install --save @react-native-firebase/app @react-native-firebase/messaging
## Using Yarn
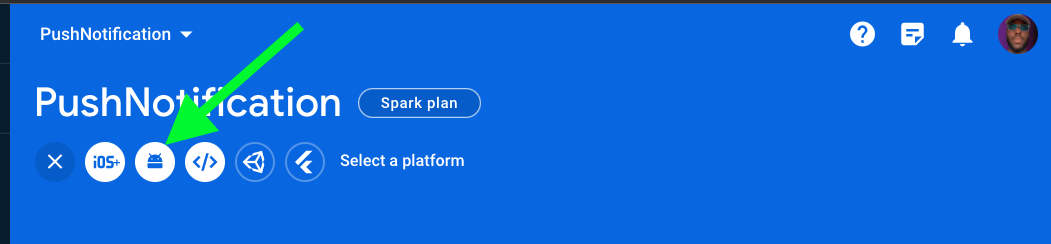
yarn add @react-native-firebase/app @react-native-firebase/messagingNext, you must visit the official Firebase website and navigate to the Firebase console to create a new project. In my case, I named my project ‘PushNotification.’ After creating your project, simply click the notification bell icon to begin creating your notifications.
Next, you will see a section titled ‘Add Firebase to your Android app,’ a form field. Simply fill out the form. For the Android package name, navigate to the app/build.gradle file, and you will find your package name starting with ‘com.yourpackagename.’ Copy this name and paste it into the Android package name field.
After you’ve filled out the form, click ‘Next,’ and you’ll be prompted to download the configuration file named google-services.json. Paste this file into the app folder inside your Android folder.
Once you’ve completed these steps, you must include the Google SDK in your project by following the steps below.
Step 1:
Navigate to the <project>/build.gradle file and include the following line of code inside the dependencies section.
dependencies {
    //...... other classpaths
    classpath('com.google.gms:google-services:4.3.8')  //..Add this line
}
Set 2:
In your project folder, navigate to <app-module>/build.gradle, and add the following line of code at the top section of the build.gradle file:
apply plugin: 'com.google.gms.google-servicesThen, proceed by scrolling to the bottom of the page, where you will find the dependencies section, and include the following code:
dependencies {
        ... other implementations
        implementation platform('com.google.firebase:firebase-bom:32.3.1') // Add this line
The steps outlined above involve installing the necessary Google and Firebase plugins to enable push notifications in your app. After completing these steps, sync your project by running ./gradlew clean in your Android folder. Once you’ve finished, relaunch your application.
After incorporating the Google and Firebase SDKs, as previously mentioned, the next step is to create a notification helper file. This file will be instrumental in handling permission requests for receiving notifications, particularly when notification permissions haven’t been enabled. In this helper file, we will also establish listeners for incoming messages, ensuring they work seamlessly in various scenarios, including when the app is in the foreground, background, or even when it’s completely closed. These functionalities can be achieved using the @react-native-firebase/messaging library, which we installed earlier.
To get started, create a folder named utils; within that folder, create a file named pushnotification_helper.js. This file will contain the requestUserPermission function and a function to save and retrieve a token generated by @react-native-firebase/messaging. The FCM token is an ID issued to an app for receiving messages from Firebase.
Below is the complete code that contains the functions for requesting permission and getting the FCM token:
import AsyncStorage from "@react-native-async-storage/async-storage";
import messaging from "@react-native-firebase/messaging";
export async function requestUserPermission() {
  const authStatus = await messaging().requestPermission();
  const enabled =
    authStatus === messaging.AuthorizationStatus.AUTHORIZED ||
    authStatus === messaging.AuthorizationStatus.PROVISIONAL;
  if (enabled) {
    console.log("Authorization status:", authStatus);
    getFcmToken();
  }
}
const getFcmToken = async () => {
  let fcmToken = await AsyncStorage.getItem("fcmToken");
  console.log("Old token", fcmToken);
  if (!fcmToken) {
    try {
      const fcmToken = await messaging().getToken();
      if (fcmToken) {
        console.log(fcmToken, "The new generated token");
        AsyncStorage.setItem("fcmToken", fcmToken);
      }
    } catch (error) {
      console.log(errorm, "Error raised in fcm token");
    }
  }
};
export const notificationListener = async () => {
  // Listen in background
  messaging().onNotificationOpenedApp((remoteMessage) => {
    console.log(
      "Notification caused app to open from background state:",
      remoteMessage.notification,
    );
  });
  //   Listen in forgorund
  messaging().onMessage(async (remoteMessage) => {
    console.log("eveived on foreground", remoteMessage);
  });
  messaging()
    .getInitialNotification()
    .then((remoteMessage) => {
      if (remoteMessage) {
        console.log(
          "Notification caused app to open from quit state:",
          remoteMessage.notification,
        );
      }
    });
};
The first function mentioned above requests the user’s permission to receive push notifications and logs the authorization status. If the user grants permission, it proceeds to obtain and store a unique token, crucial for sending notifications to that user’s device.
The second function also seeks the user’s consent for push notifications, checking if the permission has been granted. When authorized, it displays the authorization status and generates a unique token, saving it for future use.
The third function establishes handling functions for notifications when the app is in both the background and foreground, logging information about the received notifications.
In the next steps, we will call both of these functions in our app.js file using useEffect, as demonstrated below:
import React, { useEffect } from "react";
import {
  requestUserPermission,
  notificationListener,
} from "./utils/pushnotification_helper";

const App = () => {
  useEffect(() => {
    requestUserPermission();
    notificationListener();
  }, []);
};
After incorporating the code mentioned above into your app, navigate to your index.js file and add the following code to receive notifications while the app is closed or in a quit state.
import messaging from "@react-native-firebase/messaging";
messaging().setBackgroundMessageHandler(async (remoteMessage) => {
  console.log("Message handled in the background", remoteMessage);
});
Sending messages from Firebase:
In this section, we will be sending notification messages from Firebase. Navigate to your project folder in Firebase that has the name of your application, typically starting with com.your_application_name. Expand the ‘Engage’ section in your left sidebar and click the ‘Messaging’ button to send your first message.
Complete the notification form by providing a notification title, text, and the image to display in the notification body. You can consult the video for guidance on the required fields when creating a notification message in Firebase.
Once you press the “publish” button in the notification form, your notification will be in an active state until it is delivered, and the status will change to “completed.” The image below shows the Firebase Messaging Console and the Android device that received the notification message from Firebase.
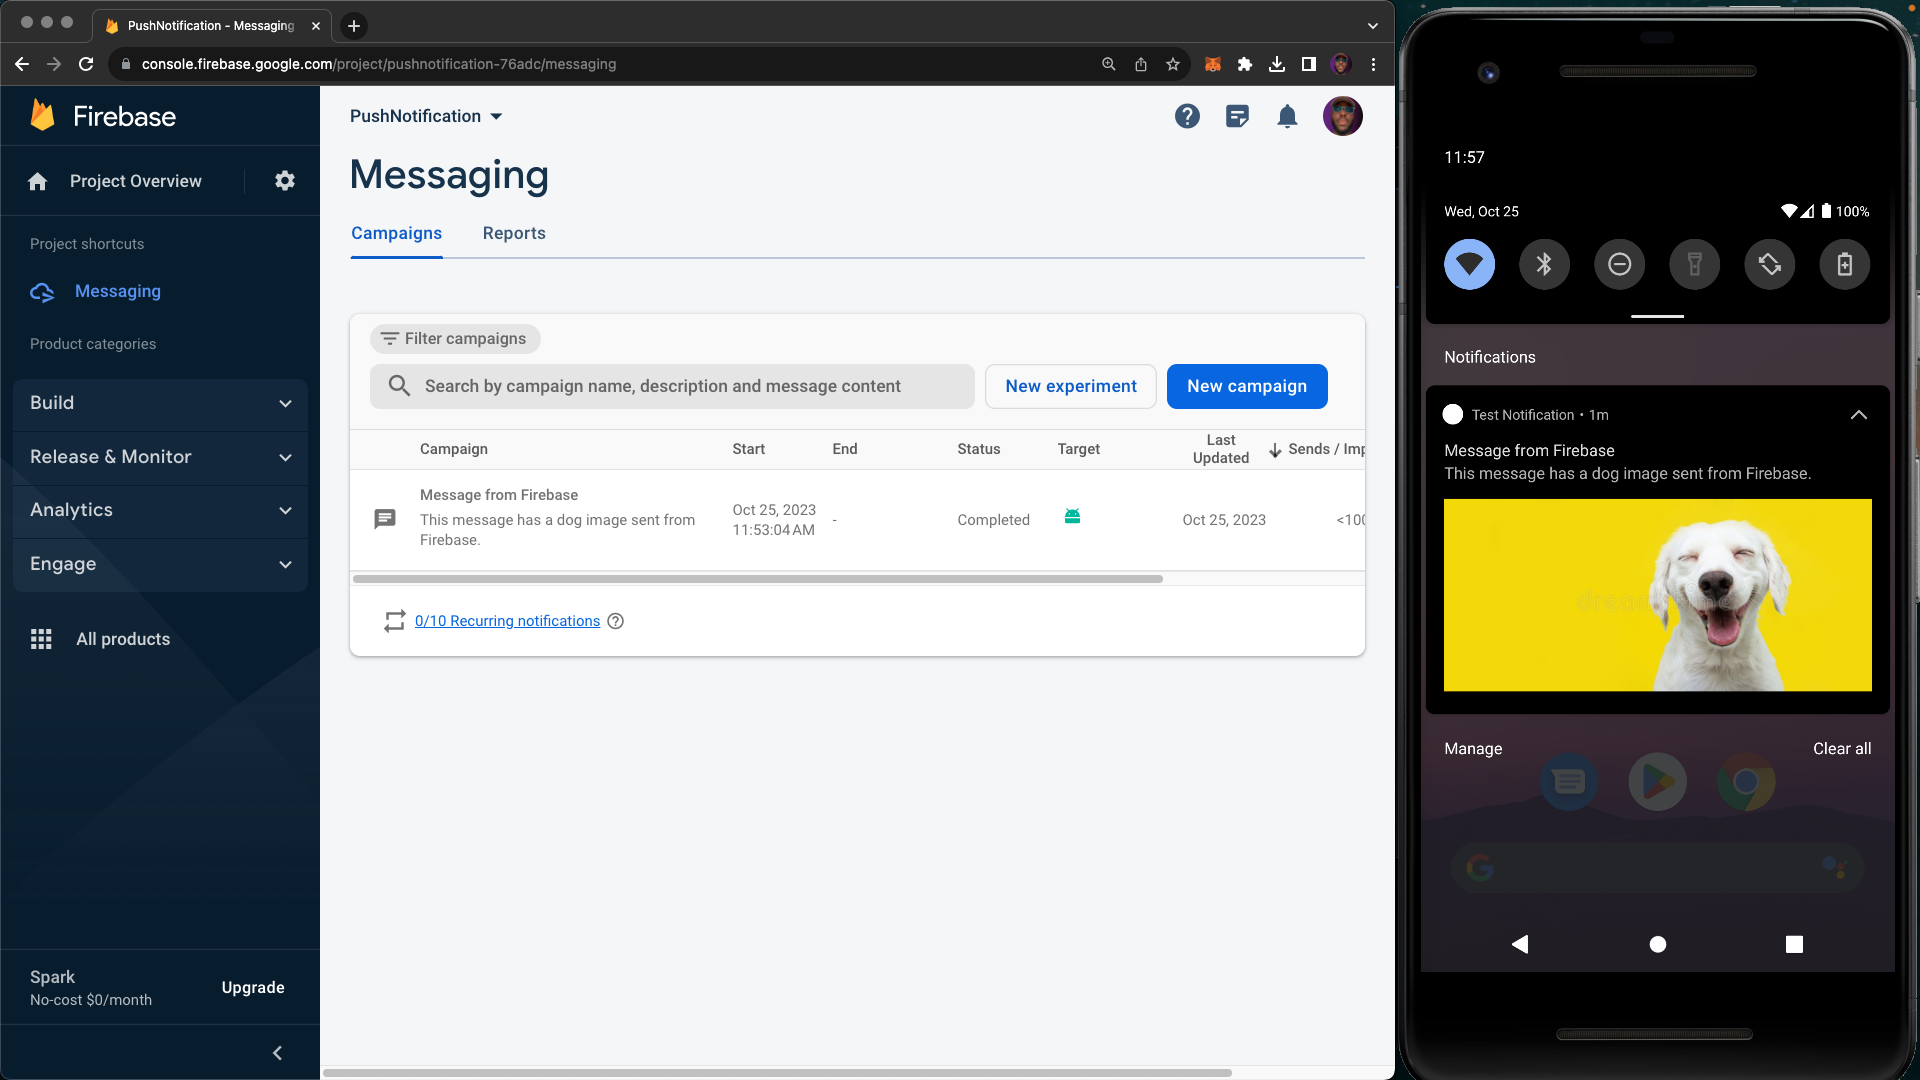
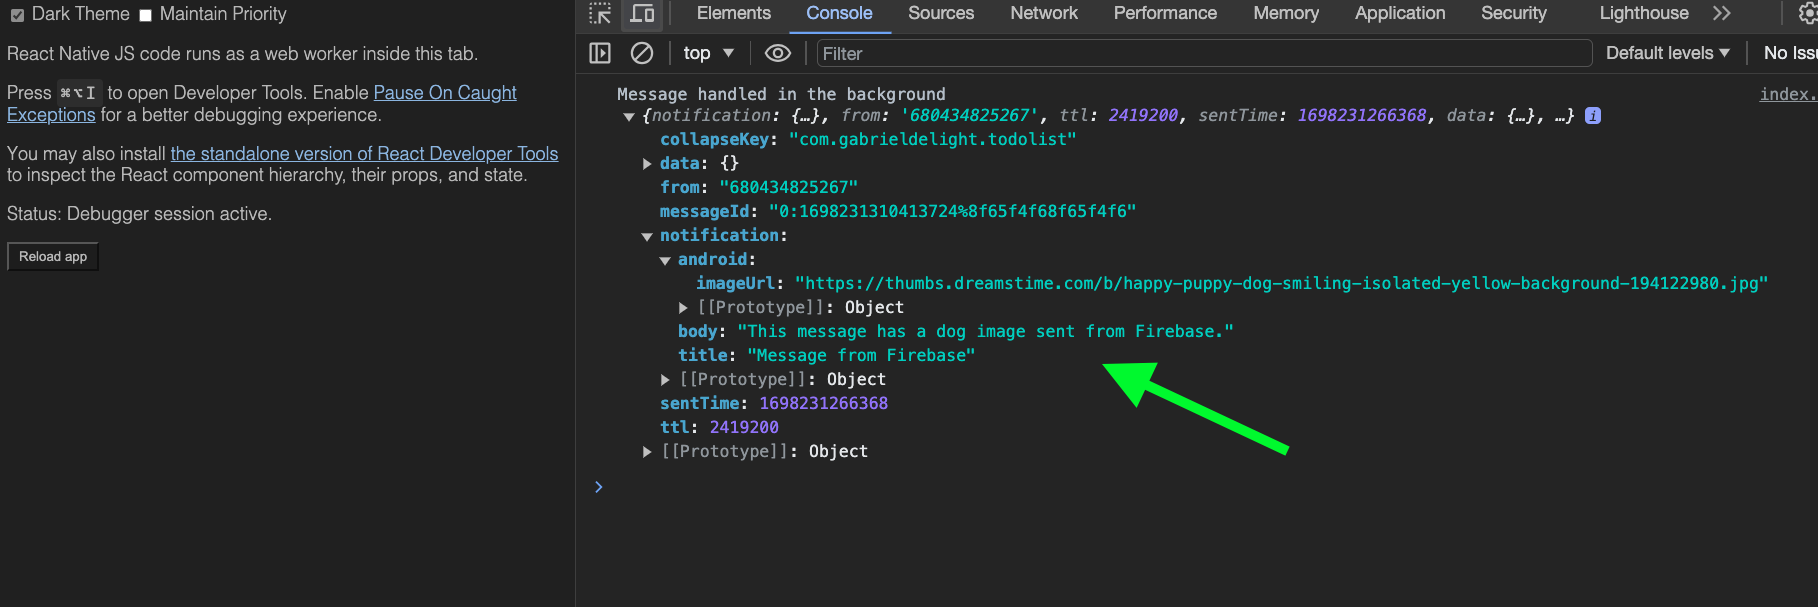
From the example above, I copied an image URL from Google that contains an image of a dog, illustrating how remote images can be incorporated into notifications. For more information about messaging, please visit the React Native Developer console to view the message object obtained from Firebase, as shown below:
Conclusion
I hope you found this article informative and enjoyable to read. In this article, we covered various aspects of using Notifee, including creating notifications, grouping them, and clearing them with a button click. We also delved into the process of styling notifications and handling images. Lastly, we explored how to send push notifications from Firebase, a crucial skill for sending remote push notifications.
With the knowledge we’ve covered here, you’re well-equipped to start integrating push notifications into your mobile applications more efficiently using Notifee.
Understand every bug
Uncover frustrations, understand bugs and fix slowdowns like never before with OpenReplay — the open-source session replay tool for developers. Self-host it in minutes, and have complete control over your customer data. Check our GitHub repo and join the thousands of developers in our community.
