Creating a Blockchain Decentralized App with Vue and Tezos
Interacting with smart contracts on the Tezos blockchain


Many organizations/individuals have adopted blockchain technology and development in recent years. Blockchain technology is gaining so much traction due to the decentralization and security provided by storing data on the blockchain. Decentralization here means that control and decision-making aren’t handled by an individual or a centralized entity but by a distributed network. You can say that a blockchain by its users. Ultimately blockchain provides a very secure network that is impossible to hack. This security increases as more blocks are included in the chain.
Tezos is a blockchain built to adjust, adapt, and add features and functionality through its proven on-chain upgrade mechanism. It is a notable skill to learn and understand how to connect a Vuejs application to smart contracts built on the Tezos blockchain. Holding Tezos tokens (“tez”) allows one to interact with the Tezos blockchain. You can store tez in digital wallets supported by Tezos. You can find additional information on the Tezos blockchain here.
This article will walk you through interacting with a smart contract for a memo application deployed on the Tezos blockchain from a Vue application. To continue with this article, you need a fundamental knowledge of Vue and Vuex; you can find the complete code for the project here.
Creating our app
To start with our Vue application, we will create a Vue app and add Vuex from the CLI.
vue create tez_memo && vue add vuex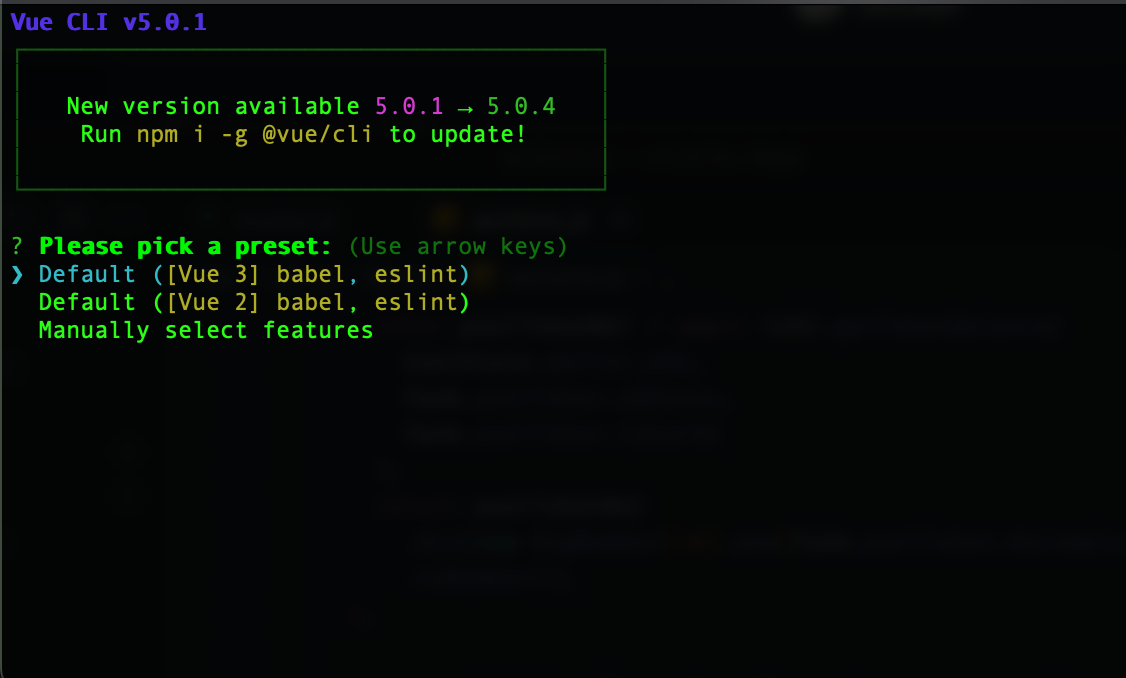
Select your configuration option and continue with the app setup. For this article, we will select the “Default ([Vue 3] babel, eslint)” configuration. After creating the app, you will need to install all the required dependencies for the project.
yarn add @airgap/beacon-sdk @taquito/beacon-wallet @taquito/taquito bignumber.js buffer path-browserify stream-browserifyAdditionally, we will need to configure webpack to resolve polyfill errors due to webpack 5 in the vue.config.js file we will include.
const { defineConfig } = require("@vue/cli-service");
var webpack = require('webpack');

module.exports = defineConfig({
//…
configureWebpack: {
  resolve: {
    fallback: {
    path: require.resolve("path-browserify"),
    stream: require.resolve("stream-browserify"),
    buffer: require.resolve("buffer"),
    crypto: false,
    },
  },
  plugins: [
    new webpack.ProvidePlugin({
      Buffer:  ["buffer",  "Buffer"],
    }),
  ],
},
//…
});
Setting Up Store and RPC Provider
The next step will be to set up the state and actions. We will create the following files in the store folder.
📂store
┣ 📜actions.js
┣ 📜getters.js
┣ 📜index.js
┗ 📜mutations.js
I will be focusing on setting up the Tezos connection, so I will move to the actions file. You can preview the content of the other files in store here.
In actions.js, we will be setting up the Tezos RPC connection to the ithacanet, a testnet on the Tezos blockchain. The smart contract we will be working with is deployed on ithacanet. To connect to ithacanet, we will have the following code.
import { TezosToolkit } from "@taquito/taquito";
import { BeaconWallet } from "@taquito/beacon-wallet";
import { ColorMode, NetworkType } from "@airgap/beacon-sdk";
import { CONTRACT_ADDRESS } from "@/utils";
import BigNumber from "bignumber.js";
// Set the network
const network = { type: NetworkType.ITHACANET };
// initialize the SDK
const Tezos = new TezosToolkit("https://ithacanet.ecadinfra.com");
const wallet = new BeaconWallet({
  name: "Tez-memo",
  preferredNetwork: network.type,
}); // Takes the same arguments as the DAppClient constructor
Tezos.setWalletProvider(wallet);
// setting the color mode for beacon wallet
wallet.client.setColorMode(ColorMode.DARK);
const getContract = async () => await Tezos.wallet.at(CONTRACT_ADDRESS);
On line 9, I set up a new TezosToolkit with the RPC link to the ithacanet test network; check here for links to other RPC nodes. On line 10, we set up a connection to Beacon; this allows our decentralized app (“dApp”) to interact with the wallet. For additional information on Beacon, you can look at their official documentation.
The next step will be to pass the wallet in the setWalletProvider method on Tezos. On line 17, we have a function that connects to the smart contract. The at method accepts the contract address (a unique identifier for smart contracts deployed on the Tezos blockchain) as a parameter; the wallet to sign contract calls for this use case. Alternatively, you can set up other formats for signing contract calls via TezBridge or inMemory (using the account private key). You can read more on the other formats of signing contract calls here.
Wallet Connection
The next act will be to set up a wallet connection on our dApp; to achieve this, you must request permission to connect to a wallet. In the actions.js file, I have a function connectWallet; it requests permission to connect to a wallet.
...
    async connectWallet({ dispatch }) {
    try {
      await wallet.requestPermissions({
        network: network,
      });
      dispatch("checkWalletConnection");
    } catch (error) {
      console.log(error);
    }
  },
...
On line 4, the request to connect to a wallet is initiated with the requestPermissions method; this function is passed to the connect wallet button in the vue application. When the “Connect Wallet” button is clicked, a modal will pop up with different wallet options.
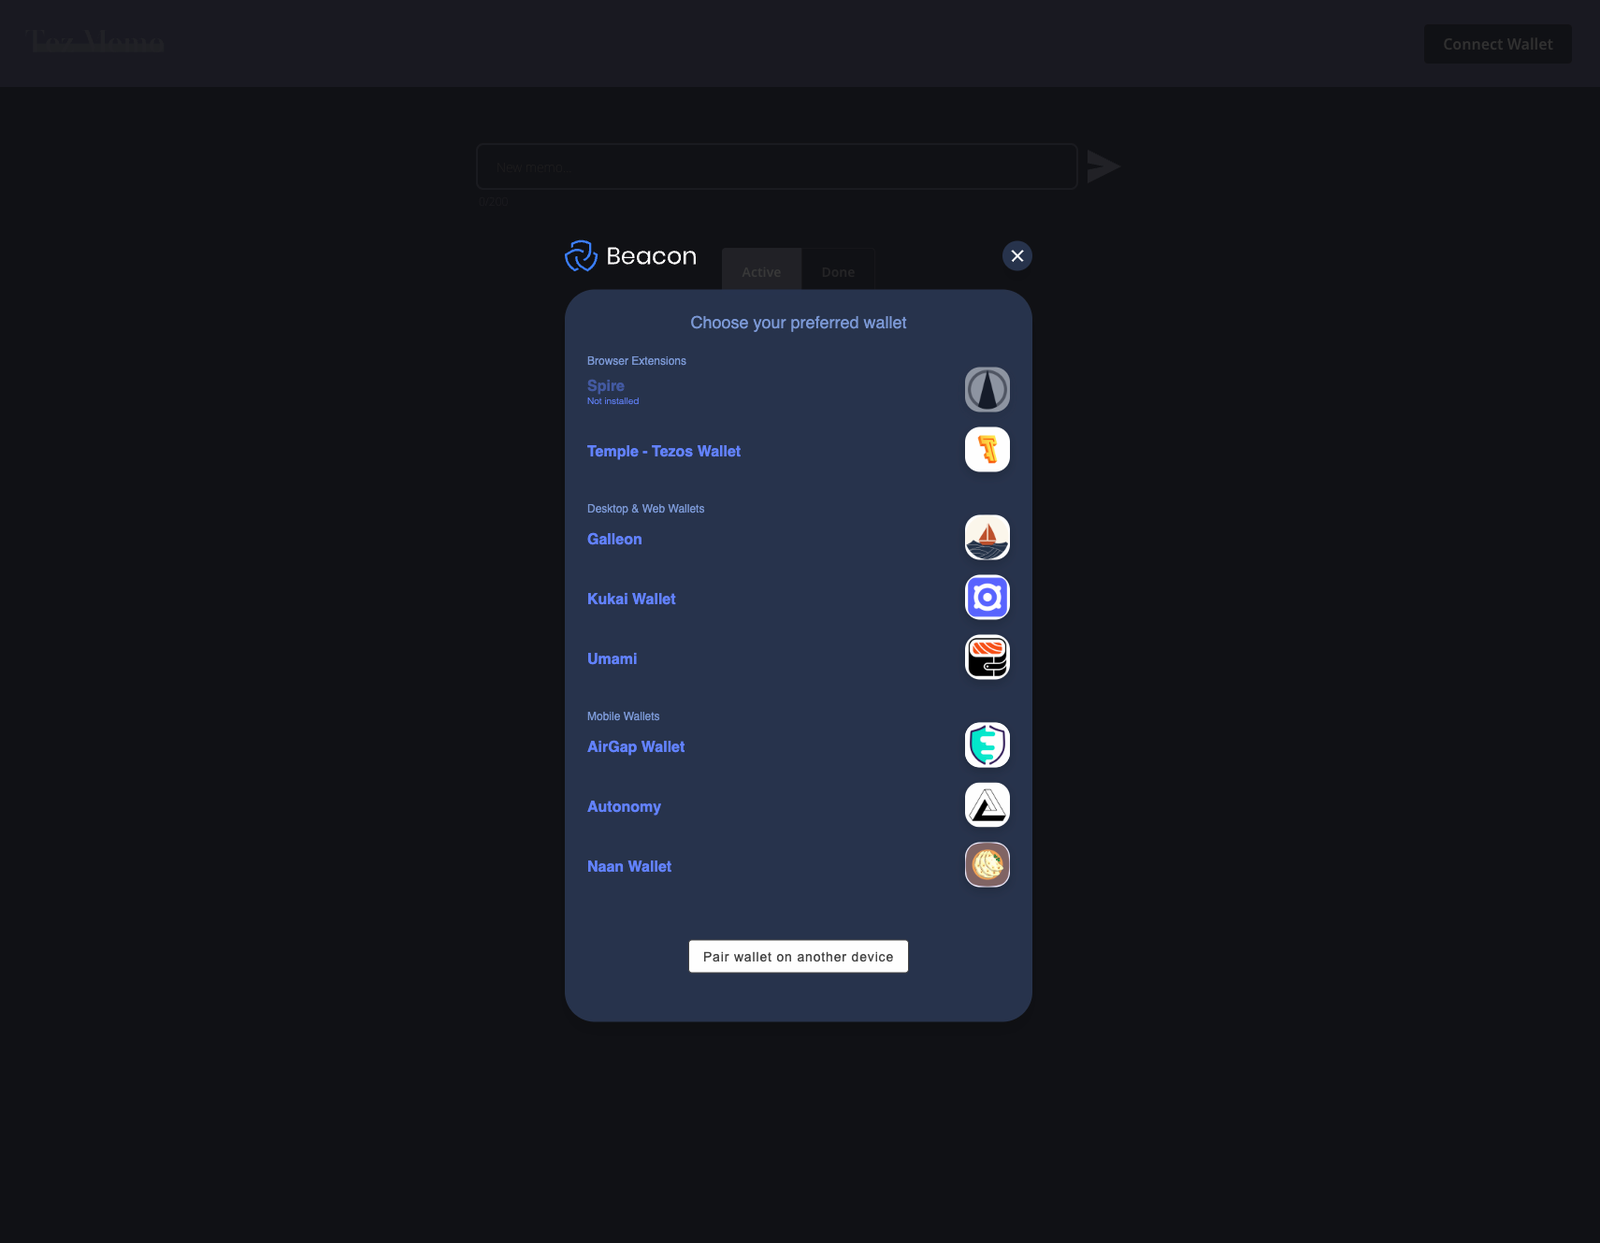
For this article, I will be using the temple wallet, a browser extension wallet. You can download the extension here. Once the connection request has been approved, the connectWallet action will dispatch checkWalletConnection.
...
    async checkWalletConnection({ commit }) {
    try {
      const activeAccount = await wallet.client.getActiveAccount();
      let pkh;
      if (activeAccount) {
        // If defined, the user is connected to a wallet.
        pkh = activeAccount.address;
        commit("updatePkh", pkh);
        commit("updateConnected", true);
      } else {
        commit("updatePkh", "");
        commit("updateConnected", false);
      }
    } catch (error) {
      console.log(error);
    }
  },
...
This action checks if an account with active permission is on the wallet on line 4. If an active account exists, the pkh (Public Key Hash)/account address is assigned to the pkh state, and the connected state is true. When no active account exists, connected is false, and pkh is an empty string. There is also a need to disconnect wallet permission, and this can be achieved by calling the clearActiveAccount method on the wallet:
...
  async disconnectWallet({ dispatch }) {
    await wallet.clearActiveAccount();
    dispatch("checkWalletConnection");
  },
...
Open Source Session Replay
OpenReplay is an open-source, session replay suite that lets you see what users do on your web app, helping you troubleshoot issues faster. OpenReplay is self-hosted for full control over your data.

Start enjoying your debugging experience - start using OpenReplay for free.
Smart Contract Interaction
After setting up a wallet connection for the application, the next step will be to set up smart contract interaction and access to contract storage. You can preview smart contract storage and methods on a smart contract through network explorers. An example of a network explorer for Tezos is Better Call Dev. To preview the contract, you will need to enter the contract address and search on the platform. To find the smart contract for this project on the explorer here
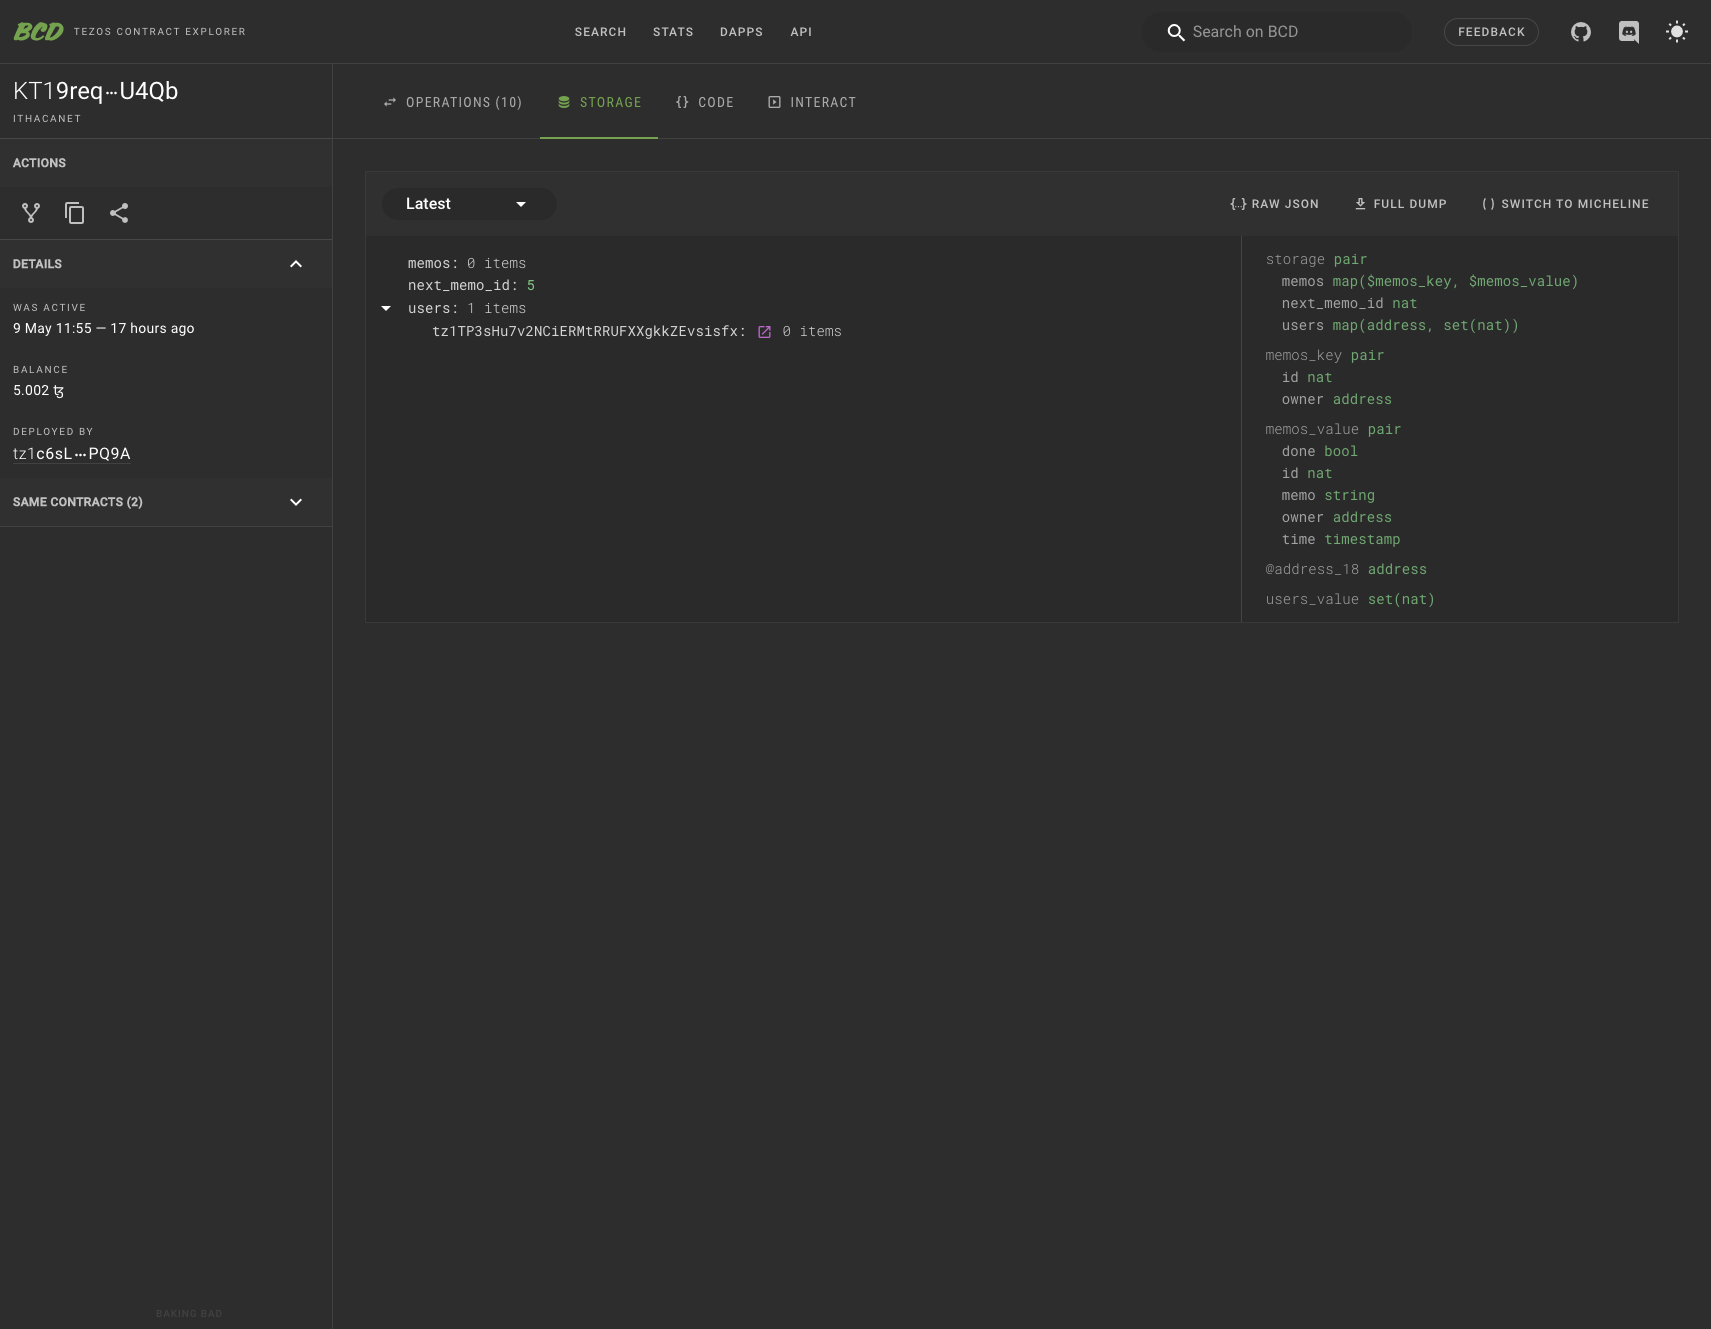
The image shows the storage structure. We have a key for setting the id for a new memo, a map with an id and account address pair as key and memo object as value, and a user map that uses an account address as a key and a set of memo ids tied to the account address.
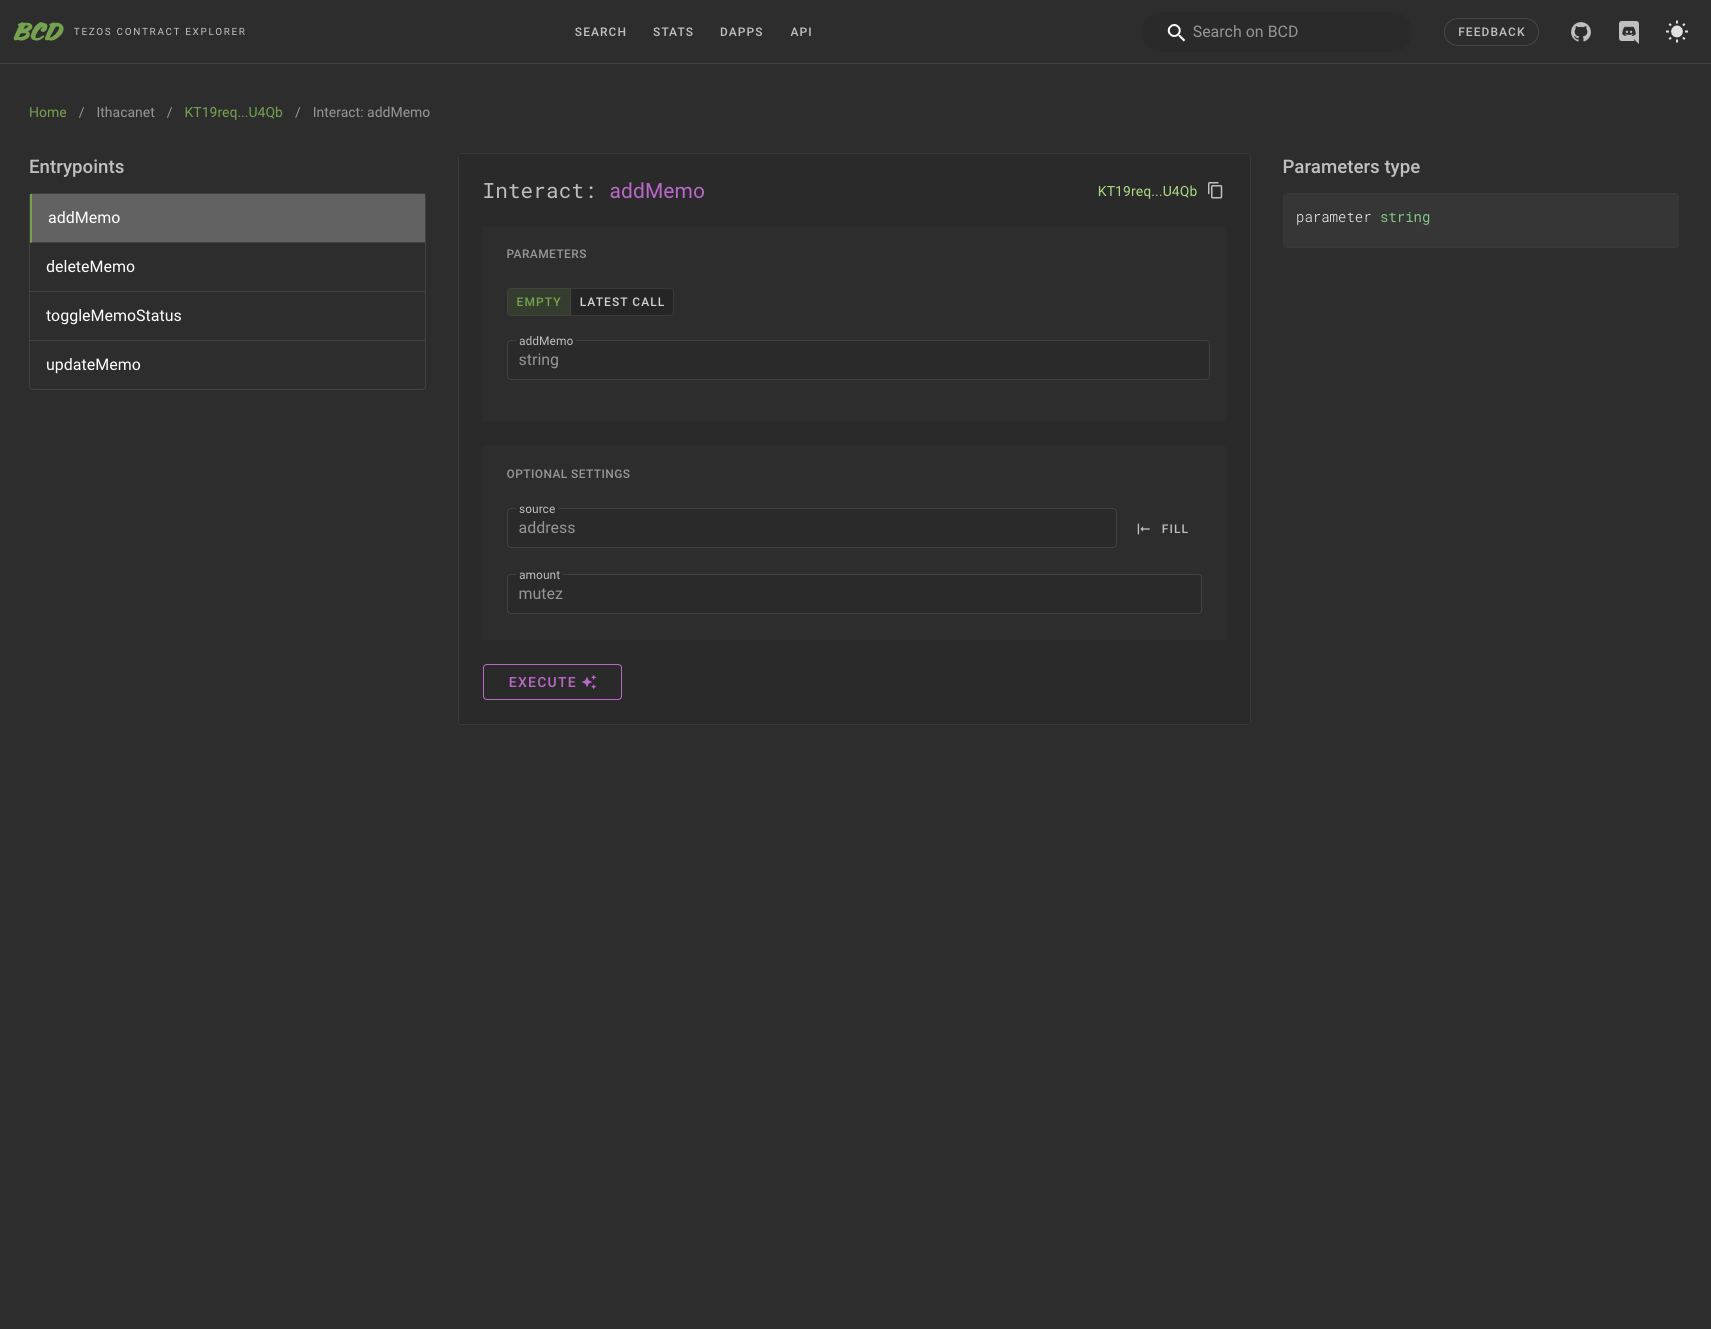
In this image you can see that the smart contract has four methods: addMemo, deleteMemo, toggleMemoStatus and updateMemo.
Accessing Contract Storage
The next action will be to access the contract storage and display memos existing on storage. I will be doing this in the getMemoList function in the actions file.
...
async getMemoList({ state, commit }) {
  commit("updateLoading", true);
  try {
    let active_memo = [];
    let done_memo = [];
    if (state.connected) {
      const contract = await getContract();
      const storage = await contract.storage();
      const storage_user_memos = await storage.users.get(state.pkh);
      const user_memos = storage_user_memos.map((val) => new BigNumber(val).toNumber());
      console.log(user_memos);
      for (let index = 0; index < user_memos.length; index++) {
        const memo = await storage.memos.get({
          owner: state.pkh,
          id: user_memos[index].toString(),
        });
        const formated_memo = { ...memo, id: new BigNumber(memo.id).toString() };
        if (!memo.done) {
          active_memo.push(formated_memo);
        } else {
          done_memo.push(formated_memo);
        }
      }
    }
    commit("updateActiveMemo", active_memo);
    commit("updateDoneMemo", done_memo);
  } catch (error) {
    console.log(error);
  } finally {
    setTimeout(() => {
      commit("updateLoading", false);
    }, 1000);
  } // end try catch
},
...
You need to call the storage method on the contract to access contract storage, as seen in line 9. To access the set of memo ids for the currently connected account, call the get method on users and pass in the key for the value to access; in this case, the address connected to the dApp. This will return an array of big numbers. On line 11, we loop through the set to convert the big numbers to numbers. The updated set is looped through to get all memos with the id belonging to the active address on lines 13 through 25. Subsequently, the active_memo and done_memo states are updated with the memos returned from the storage.
Making Smart Contract Calls From The Vue Application
From image 3, we know that the smart contract has four methods that can be interacted with. The addMemo method allows you to create a new memo, accepting the memo string as value.
...
async addMemo({ dispatch }, memo) {
  try {
    const contract = await getContract();
    const op = await contract.methods.addMemo(memo).send();
    await op.confirmation()
    dispatch("softUpdateMemoList");
  } catch (error) {
    console.log(error);
  }
},
...
On line 4, a smart contract is initiated by calling the send() method. Line 5 waits for the transaction to be confirmed on the blockchain, and dispatches the softUpdateMemoList action. The softUpdateMemoList is similar to the getMemoList, with the only difference being that it does not update the loading state.
The following method on the smart contract is the deleteMemo; this deletes an existing memo by the account that created the memo. It accepts the memo id as a parameter.
N/B: The memo id should be a string.
...
async deleteMemo({ dispatch }, id) {
  try {
    const contract = await getContract();
    const op = await contract.methods.deleteMemo(id).send();
    await op.confirmation()
    dispatch("softUpdateMemoList");
  } catch (error) {
    console.log(error);
  }
},
...
To toggle a memo, you will call the toggleMemoStatus method on the contract. The deleteMemo also accepts the memo id and needs to be called from the account that created the memo.
...
async toggleMemoStatus({ dispatch }, id) {
  try {
    const contract = await getContract();
    const op = await contract.methods.toggleMemoStatus(id).send();
    await op.confirmation()
    dispatch("softUpdateMemoList");
  } catch (error) {
    console.log(error);
  }
},
...
method vs methodsObject
The updateMemo method accepts an object with properties memo and id as the parameter. Previously I initiated smart contract calls in this format:
contract.methods.['smart contract method'].send()The contract call sequence will not work if you need to pass an object as a parameter to the smart contract method. To do this, you will use the methodObject , which is demonstrated in updatedMemo action:
async updateMemo({ dispatch }, payload) {
  try {
    const contract = await getContract();
    const op = await contract.methodsObject.updateMemo(payload).send();
    await op.confirmation()
    dispatch("softUpdateMemoList");
  } catch (error) {
    console.log(error);
  }
},
on line 4 methodObject is used to replace method.
Conclusion
The decentralized application is complete, with all smart contract methods integrated into the application. You can deploy the application on any platform that supports Vue applications. Suppose you want to take it further and deploy the application on a decentralized hosting platform like Fleek. In that case, you can find documentation on achieving that here.
In this article, we went through the complete process of integrating a smart contract deployed on the Tezos blockchain into a Vue application. If you made it to this point, you should be able to connect to a wallet and make smart contract calls on the Tezos blockchain. If you want to learn how to write a smart contract, look at this documentation. You can also find the complete code for the project here and a live version of the application here. Cheers.