Doing speech-to-text with React Native
How to transform speech into text in your React Native app.


We live in a progressive world where people rely more on technology and automation to make their lives easier. As a result, many individuals are investing in gadgets and accessories that help them with their daily tasks. In different applications, individuals use various techniques, such as image search, image-to-text, and speech-to-text functionality.
In this article, we’d learn how to build speech-to-text recognition with React Native using a 3rd party package called React Native Voice. Have you ever used Alexa or Siri? If so, you might have wondered how these systems understand your voice and words. These tools convert your spoken words into text and then provide a response.
Setting up the development environment
Let’s get started by creating a new React Native project by running the following command in our terminal:
npx react-native init voice_2_textOnce the command above finishes installing the necessary dependencies, cd into the project directory we just created and install the 3rd party libraries needed to aid our development.
To install the React Native voice library, Let’s open our terminal and paste the following code:
npm i @react-native-community/voice --saveConfiguring iOS
In this section, we’d configure our mobile app to work on iOS devices. But first, we’d have to head to the iOS folder in our project directory.
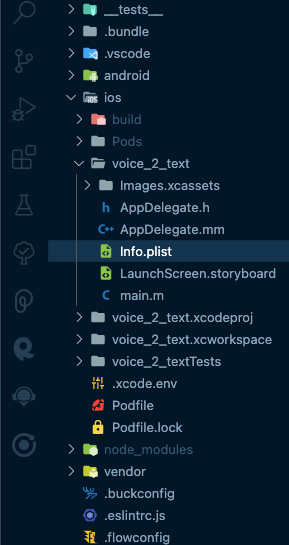
We’d be adding permissions for NSMicrophoneUsageDescription and NSSpeechRecognitionUsageDescription in our Info.plist.
    <dict>
      ...
      <key>NSMicrophoneUsageDescription</key>
      <string>Description of why you require the use of the microphone</string>
      <key>NSSpeechRecognitionUsageDescription</key>
      <string>Description of why you require the use of the speech recognition</string>
      ...
    </dict>
After adding the required permissions, Let’s cd to our iOS directory using our terminal and paste the following code:
pod installpod install is a command used to install the dependencies specified in your project’s Podfile. The Podfile is a text file specifying which dependencies your project needs to build correctly.
Configuring Android
To configure our app for Android devices, Let’s begin by heading to our android/setting.gradle and add the following:
    include ':@react-native-community_voice', ':app'
    project(':@react-native-community_voice').projectDir = new File(rootProject.projectDir, '../node_modules/@react-native-community/voice/android')
After that, we’d head to the android/app/build.gradle directory and also include the following:
    dependencies {
        ...
        compile project(':@react-native-community_voice')
    }
Building the UI
In this part of the section, we will create a user interface and integrate our logic into it. To do this, we need to update our App.js file in our root folder and copy the following code.
    const App = () => {
      return (
        <View style={styles.container}>
          <SafeAreaView>
            <Text style={styles.headingText}>Voice to Text Recognition</Text>
            <View style={styles.textInputStyle}>
              <TextInput
                value={result}
                multiline={true}
                placeholder= "say something!"
                style={{
                  flex: 1,
                  height: '100%',
                }}
                onChangeText={text => setResult(text)}
              />
            </View>
            <View style={styles.btnContainer}>
                <TouchableOpacity style={styles.speak}>
                  <Text style={{color: 'white', fontWeight: 'bold'}}>Speak</Text>
                </TouchableOpacity>

              <TouchableOpacity style={styles.stop}>
                <Text style={{color: 'white', fontWeight: 'bold'}}>Stop</Text>
              </TouchableOpacity>
            </View>
            <TouchableOpacity style={styles.clear}>
              <Text style={{color: 'white', fontWeight: 'bold'}}>Clear</Text>
            </TouchableOpacity>
          </SafeAreaView>
        </View>
      );
    };
Styling App.js
const styles = StyleSheet.create({
container: {
flex: 1,
backgroundColor: '#fff',
padding: 24,
},
headingText: {
alignSelf: 'center',
marginVertical: 26,
fontWeight: 'bold',
fontSize: 26,
},
textInputStyle: {
flexDirection: 'row',
justifyContent: 'space-between',
alignItems: 'center',
backgroundColor: 'white',
height: 300,
borderRadius: 20,
paddingVertical: 16,
paddingHorizontal: 16,
shadowOffset: {width: 0, height: 1},
shadowRadius: 2,
elevation: 2,
shadowOpacity: 0.4,
},
speak: {
backgroundColor: 'black',
display: 'flex',
alignItems: 'center',
justifyContent: 'center',
padding: 8,
borderRadius: 8,
},
stop: {
backgroundColor: 'red',
display: 'flex',
alignItems: 'center',
justifyContent: 'center',
padding: 8,
borderRadius: 8,
},
clear: {
backgroundColor: 'black',
display: 'flex',
alignItems: 'center',
justifyContent: 'center',
padding: 10,
borderRadius: 8,
marginTop: 15,
},
btnContainer: {
display: 'flex',
flexDirection: 'row',
with: '50%',
justifyContent: 'space-evenly',
marginTop: 24,
},
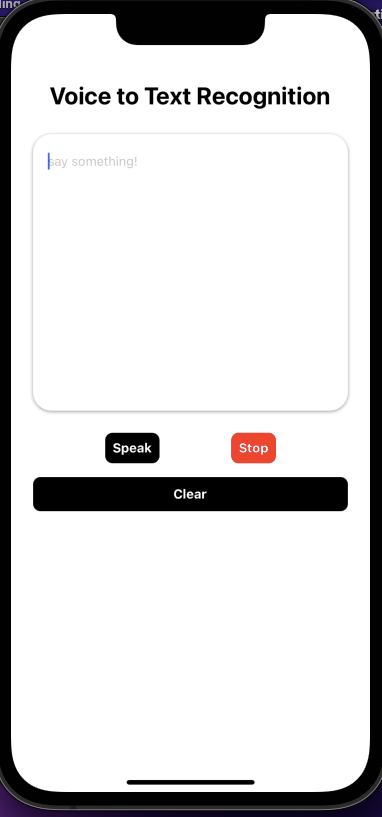
});Here’s a preview of what our user interface looks like:
Session Replay for Developers
Uncover frustrations, understand bugs and fix slowdowns like never before with OpenReplay — an open-source session replay tool for developers. Self-host it in minutes, and have complete control over your customer data. Check our GitHub repo and join the thousands of developers in our community.
Implementing the speech-to-text functionality
After building the user interface, we will implement the logical part of our application. First, Let’s import the library we’d be using:
import Voice from '@react-native-community/voice';Let’s define our state.
     const [result, setResult] = useState('');
     const [isLoading, setLoading] = useState(false);
These two lines of code define two state variables: result and isLoading. result is a string representing the current result of the speech recognition process, and isLoading is a boolean indicating whether the speech recognition process is currently in progress.
The Voice module from the react-native voice package includes several events, including the following:
-
onSpeechStart: This event is triggered when the .start() function is called without encountering any errors.
-
onSpeechEnd: This event is activated when the SpeechRecognizer stops recognizing speech.
-
onSpeechError: This event is triggered when an error occurs.
-
onSpeechResults: This event is activated when the SpeechRecognizer has finished recognizing speech.
You can reference the @react-native-community/voice ****docs to check out more callbacks that are triggered when a native event is emitted.
For each of these events, we need to define functions that will be called whenever any of these events are called.
      const speechStartHandler = e => {
        console.log('speechStart successful', e);
      };

      const speechEndHandler = e => {
        setLoading(false);
        console.log('stop handler', e);
      };

      const speechResultsHandler = e => {
        const text = e.value[0];
        setResult(text);
      };

      const startRecording = async () => {
        setLoading(true);
        try {
          await Voice.start('en-Us');
        } catch (error) {
          console.log('error', error);
        }
      };

      const stopRecording = async () => {
        try {
          await Voice.stop();
          setLoading(false);
        } catch (error) {
          console.log('error', error);
        }
      };

      const clear = () => {
        setResult('');
};-
In the
startRecordingfunction, we use Voice.start() to trigger the start of the speech recognition process. We pass en-US as the first parameter to indicate that the user will speak English. This allows the interpreter to understand the language being spoken. -
The
stopRecordingfunction is designed to be called when the user wants to stop the speech recognition process. It calls the Voice.stop() method to stop the process and updates the isLoading state variable to false. -
The
speechResultsHandlerhandler is called whenever the speech recognition process produces new results. It updates the component’s state with the latest recognized text, which can then be displayed to the user. The event object passed to the handler contains information about the recognition results, including the recognized text. The text is extracted from the event object’s value property, an array of strings. The first element of the array (e.value[0]) is the most accurate result and is used to update the result state variable. -
The
speechStartHandlerhandler is called whenever the speech recognition process starts. It can be used to perform any necessary initialization tasks or to display a message to the user indicating that the process has started. -
The
speechEndHandlerhandler is called whenever the speech recognition process ends. It is used to update the component’s state to indicate that the process has ended and to perform any necessary cleanup tasks.
To use the event handlers we have declared, we will attach them to the Voice package in the useEffect() hook so that they are activated when the component mounts. This will allow the event handlers to be triggered as needed.
    useEffect(() => {
        Voice.onSpeechStart = speechStartHandler;
        Voice.onSpeechEnd = speechEndHandler;
        Voice.onSpeechResults = speechResultsHandler;
        return () => {
          Voice.destroy().then(Voice.removeAllListeners);
        };
      }, []);
The useEffect hook is used to bind the event handlers speechStartHandler, speechEndHandler, and speechResultsHandler to the Voice object. The useEffect hook will run this code when the component mounts (that is, when it is first rendered). Also, notice that the useEffect hook returns a function triggered when the component unmounts. In this case, the returned function calls Voice.destroy() and then Voice.removeAllListeners(). This ensures that the Voice object is properly cleaned up when the component is no longer being used.
The empty dependency array of the useEffect hook tells React to only run the code inside the hook when the component mounts (and not on subsequent updates). This is important because we only want to bind the event handlers once, when the component is first rendered.
Let’s conditionally render a statement that will trigger the start of the speech recognition process. We will use the ActivityIndicator component in this tutorial to indicate that the process is in progress.
      {isLoading ? (
            <ActivityIndicator size="large" color="black" />
          ) : (
            <TouchableOpacity onPress={startRecording} style={styles.speak}>
              <Text style={{color: 'white', fontWeight: 'bold'}}>Speak</Text>
            </TouchableOpacity>
          )}
The above code snippet uses a ternary operator to conditionally render an ActivityIndicator or a “Speak” button based on the value of the isLoading state variable.
If isLoading is true, the ActivityIndicator is displayed. If isLoading is false, the “Speak” button is displayed.
The “Speak” button has an onPress handler that calls the startRecording function when the button is pressed. This will start the speech recognition process and update the isLoading state variable to true, causing the ActivityIndicator to be displayed.

Now that we have completed our application’s logical implementation and user interface, To finish up, Let’s integrate and join them.
    import React, {useEffect, useState} from 'react';
    import {
      View,
      Text,
      StyleSheet,
      SafeAreaView,
      TextInput,
      TouchableOpacity,
      ActivityIndicator,
    } from 'react-native';
    import Voice from '@react-native-community/voice';
    const App = () => {
      const [result, setResult] = useState('');
      const [isLoading, setLoading] = useState(false);
      const speechStartHandler = e => {
        console.log('speechStart successful', e);
      };
      const speechEndHandler = e => {
        setLoading(false);
        console.log('stop handler', e);
      };
      const speechResultsHandler = e => {
        const text = e.value[0];
        setResult(text);
      };
      const startRecording = async () => {
        setLoading(true);
        try {
          await Voice.start('en-Us');
        } catch (error) {
          console.log('error', error);
        }
      };
      const stopRecording = async () => {
        try {
          await Voice.stop();
          setLoading(false);
        } catch (error) {
          console.log('error', error);
        }
      };
      const clear = () => {
        setResult('');
      };
      useEffect(() => {
        Voice.onSpeechStart = speechStartHandler;
        Voice.onSpeechEnd = speechEndHandler;
        Voice.onSpeechResults = speechResultsHandler;
        return () => {
          Voice.destroy().then(Voice.removeAllListeners);
        };
      }, []);

      return (
        <View style={styles.container}>
          <SafeAreaView>
            <Text style={styles.headingText}>Voice to Text Recognition</Text>
            <View style={styles.textInputStyle}>
              <TextInput
                value={result}
                multiline={true}
                placeholder= "say something!"
                style={{
                  flex: 1,
                  height: '100%',
                }}
                onChangeText={text => setResult(text)}
              />
            </View>
            <View style={styles.btnContainer}>
              {isLoading ? (
                <ActivityIndicator size="large" color="black" />
              ) : (
                <TouchableOpacity onPress={startRecording} style={styles.speak}>
                  <Text style={{color: 'white', fontWeight: 'bold'}}>Speak</Text>
                </TouchableOpacity>
              )}
              <TouchableOpacity style={styles.stop} onPress={stopRecording}>
                <Text style={{color: 'white', fontWeight: 'bold'}}>Stop</Text>
              </TouchableOpacity>
            </View>
            <TouchableOpacity style={styles.clear} onPress={clear}>
              <Text style={{color: 'white', fontWeight: 'bold'}}>Clear</Text>
            </TouchableOpacity>
          </SafeAreaView>
        </View>
      );
    };
    const styles = StyleSheet.create({
      container: {
        flex: 1,
        backgroundColor: '#fff',
        padding: 24,
      },
      headingText: {
        alignSelf: 'center',
        marginVertical: 26,
        fontWeight: 'bold',
        fontSize: 26,
      },
      textInputStyle: {
        flexDirection: 'row',
        justifyContent: 'space-between',
        alignItems: 'center',
        backgroundColor: 'white',
        height: 300,
        borderRadius: 20,
        paddingVertical: 16,
        paddingHorizontal: 16,
        shadowOffset: {width: 0, height: 1},
        shadowRadius: 2,
        elevation: 2,
        shadowOpacity: 0.4,
        color: '#000',
      },
      speak: {
        backgroundColor: 'black',
        display: 'flex',
        alignItems: 'center',
        justifyContent: 'center',
        padding: 8,
        borderRadius: 8,
      },
      stop: {
        backgroundColor: 'red',
        display: 'flex',
        alignItems: 'center',
        justifyContent: 'center',
        padding: 8,
        borderRadius: 8,
      },
      clear: {
        backgroundColor: 'black',
        display: 'flex',
        alignItems: 'center',
        justifyContent: 'center',
        padding: 10,
        borderRadius: 8,
        marginTop: 15,
      },
      btnContainer: {
        display: 'flex',
        flexDirection: 'row',
        with: '50%',
        justifyContent: 'space-evenly',
        marginTop: 24,
      },
    });
    export default App;
We can run the application on an iOS emulator to see our progress. To do this, we will need to run the following command.
npx react-native run-iosHere’s a link to a live video of the app.
Conclusion
In this tutorial, we learned how to create a speech recognition application using the @react-native-community/voice library. The application can listen to our voice, record our speech, and display the text of what we said. You can always improve the build by including a few unique features to make the application to your taste. Here’s a link to the repo on GitHub.
Gain Debugging Superpowers
Unleash the power of session replay to reproduce bugs and track user frustrations. Get complete visibility into your frontend with OpenReplay, the most advanced open-source session replay tool for developers.