
End-to-end testing: Unleash the power of WebDriverIO


WebdriverIO (WDIO) is an open source test automation framework for Node.js that provides a high-level API for automating web applications across multiple browsers, such as Chrome, Firefox, Internet Explorer, and Safari. Its main objective is to make online automation testing easier to use, even for developers with little prior browser automation experience, avoiding harder and slower manual testing, and this article will teach you how to take full advantage of its features.
WebdriverIO comes with many features out of the box. These features can be extended by installing third-party libraries. Some of these features include:
- Quick and Easy Installation: To get started with using WebdriverIo, you only need to install a Node package using NPM by running this command:
npm i webdriverio - Supports Native Mobile Application Testing: With some configurations and setups, you can effortlessly test your native mobile applications with the WebdriverIO framework.
- Supports Video and Trace Logging: Video and trace logging are supported with third-party package including taking screenshots.
- Support for Cross-Origin Resource Sharing: WebdriverIO does not block cross-origin requests as these requests can be automated by testers unconditionally.
- Cross-browser support for testing: E2E testing with WebdriverIO is supported across multiple browsers, such as Chrome, Firefox, Internet Explorer, and Safari. This allows you to write test scripts once and run them on multiple browsers, ensuring consistent behavior and functionality across different platforms.
- Extendable and Customizable: WebdriverIO is highly extendable and customizable thanks to its support for third-party plugins.
- Reporters: WebdriverIO is extendable by integrating third-party reporter plugins. These reporters allow you to generate different reports for your test cases in different formats, such as HTML, JSON, Markdown, etc.
- iFrame Support: WebdriverIO doesn’t restrict in terms of iFrame. Testers can automate iframe-based scenarios using simple web driver commands.
- Supports other Testing Framework: WebdriverIO supports Mocha, Jasmine, and Cucumber test frameworks.
- Support for Multiple Tab/Windows: WebdriverIO Supports switching to and from multiple windows and tabs.
- Parallel Tests: WebdriverIO can be configured by testers to run tests concurrently across many instances.
Why You Should Use WebDriverIO
Aside from the WebDriverIO features listed above, WebDriverIO’s popularity and usage have grown since its initial release by Christian Bromann. You should consider using WebDriverIO in your next test project because:
- WebdriverIO has 8k+ starts on GitHub - (June, 2023)
- At least 1.2M downloads/week (June, 2023)
- Forks: 2.32k (June, 2023)
- License: MIT
- Active and supportive community: Yes
- Extensive documentation: Yes
- Bundle size: 577Kb (v.8)
Setting Up WebdriverIO in Your Project: Code Examples and Walk-Through
For you to get started with WebdriverIO, follow these step-by-step guides to install and set up WebdriverIO:
-
Install NodeJS: The first step is to install NodeJS. Go to https://nodejs.org/en/download/ to download the latest LTS version of Node. As of when writing this article, the LTS version of Node is 18.16.1.
-
Install NodeJS: Follow the installation guideline to install NodeJS.
-
Confirm a successful NodeJS installation by running the following command in your terminal:
node -v. You should see something like this:
$ node -v
v18.15.0- Confirm a successful NPM installation by running the following command:
npm -v. NPM is included automatically when you install NodeJS:
$ npm -v
9.5.0-
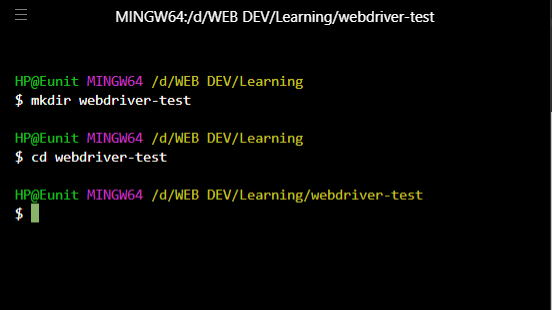
Create Your Project Directory: Your project directory will help you organize your project data inside a single folder. To create this folder, run this command:
mkdir webdriver-test. This would create a directory calledwebdriver-test. -
Change Directory: Change your directory into the newly created
webdriver-testby runningcd webdriver-test.
-
Create a
package.jsonfile: Open your terminal in the same directory aswebdriver-test, and runnpm init -yto initialize a new project.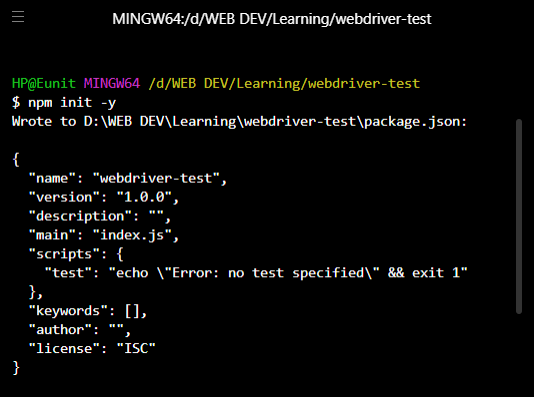
-
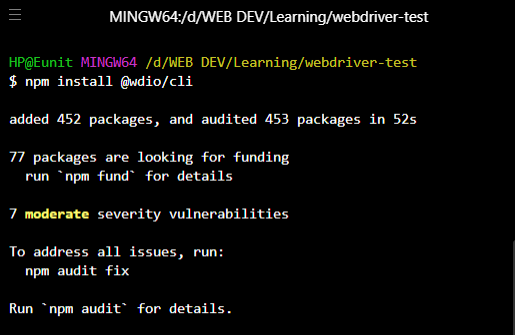
Install the WebdriverIO CLI tool: After initializing your project, you need to install the WebdriverIO CLI tool. Run this command to do that:
npm install @wdio/cli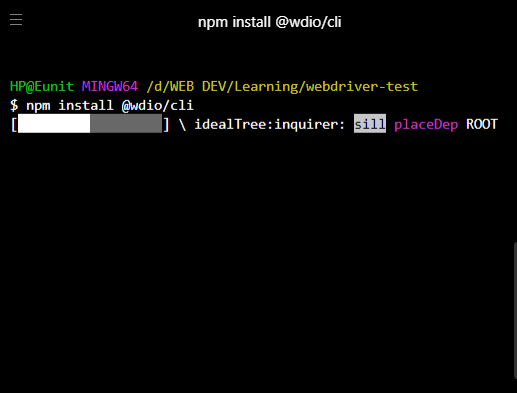
- Create a WebDriverIO Configuration File: The webdriverIO configuration file contains all the necessary information required to run your test suite. It is essentially a NodeJS module that exports a JSON file.
The WDIO config file enables you to execute test scripts. Open your terminal and enter this command:
npx wdio config. This opens the config wizard.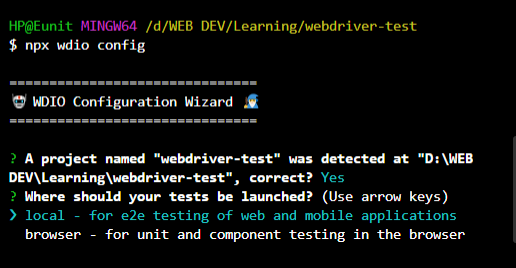 Provide the necessary information as the wizard sets up the configuration.
- Where should your test be launched? local
- Where is your automation backend located? On my local machine
- Would you like to set up Appium for mobile testing? N
- Which framework do you want to use? Mocha
- Do you want to use a compiler? No
- Do you want WebdriverIO to autogenerate some test files? n
- Which reporter do you want to use? Spec
- Do you want to add a plugin to your test setup? wait-for
- Do you want to add a service to your test setup? chromedriver
- What is the base URL? https://openreplay.com/
- Do you want me to run
npm install? Y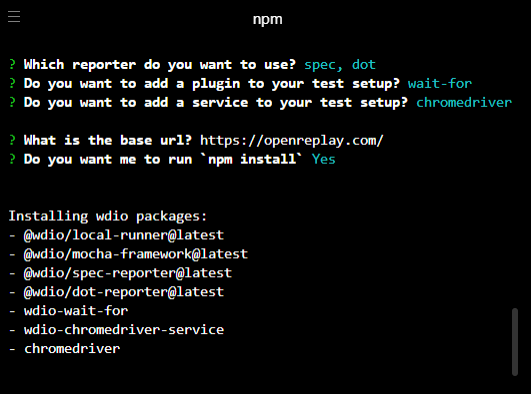
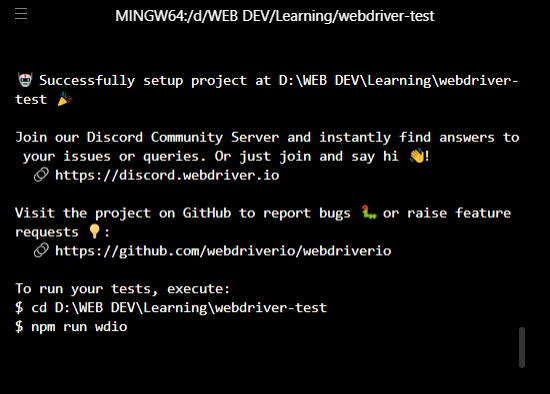
- Upon successful installation, a success message will be displayed.
Writing Efficient End-To-End Tests With Webdriverio
Many testers often complain about the stability and reliability of their automation tests. Usually, the cause of these issues is not with the testing tool but rather with how the tests were written—in other words, the design of the tests.
This section will list some of the best practices for working with WDIO tests.
- Use Page Object Pattern: The page object pattern is an abstraction technique to separate HTML implementations from the assertions of your test cases. Page object are used for querying DOM elements, as they add filling forms, waiting for things to load, etc. As a result, your test specifications have a clear API to work with and can stay focused on making assertions. The fact that page objects can be used repeatedly in tests adds to their value.
- Use
waitFor,waitForVisible,waitForDialog, etc. appropriately: It is recommended not to use timeouts, such aspausebecause using them only makes your tests fail falsely more often than others. WebdriverIO already has built-in methods to wait in your program. It is recommended to use WebdriverIO waitFor APIs, such aswaitFor,waitForVisible,waitForDialog,waitForClickable,waitForDisplayed,waitForEnabled, andwaitForExist. - Avoid
browser.pause(): In your test code, it is recommended not to executebrowser.pause(randomNumber). Even though a pause is relatively simple, it can be confusing when used in.specfiles. Rather, enclose it in a page-object method like this:
// pageObject.js
waitForDialog() {
  browser.pause(DIALOG_ANIMATION_TIME);
}
// test.spec.js
it('should close the dialog', () => {
  page.someButton.click();
  page.waitForDialog();
  // assert something
})- Write only one test case in a test file: Writing a single unit test in a file helps support parallel testing and maintain the test cases separate from one another and analyze failure. It is also advisable to speed up testing, to avoid duplicate tests. You should be strategic and avoid testing for the same functionality twice. Duplicating tests will slow down testing.
- Use headless browsers and drivers: Run your tests using the headless browser mode in WDIO for a speedy test. A headless browser is essentially a browser without a UI. You can run your tests using CI/CD. Example:
a. In Chrome
browserName: 'chrome',
       'goog:chromeOptions': {
           args: ['--headless', '--disable-gpu']
       }
b. Firefox
browserName: 'chrome',
       'goog:chromeOptions': {
           args: ['--headless', '--disable-gpu']
       }
Session Replay for Developers
Uncover frustrations, understand bugs and fix slowdowns like never before with OpenReplay — an open-source session replay tool for developers. Self-host it in minutes, and have complete control over your customer data. Check our GitHub repo and join the thousands of developers in our community.
Integrating WebdriverIO
Leveraging Webdriverio’s Strengths With Webdriverio’s Cross-Browser Support
WDIO provides many features, such as support for native mobile application testing, extendability with custom helper functions, and integrable with major test frameworks, such as Mocha, Jasmine, and Cucumber.js. When combined with WDIO’s cross-browser support, these strengths make WDIO a powerful automation framework.
By leveraging WebdriverIO’s strengths with its cross-browser support, you can utilize the framework’s capabilities while ensuring your tests are executed on various browsers. This combination enables you to write efficient and reliable automation scripts that can be easily maintained and executed across different browser environments.
Examples Tests with WebdriverIO
In this tutorial, I will walk you through carrying out your first automated test using WDIO. If you are reading this section, it means you have installed and set up WDIO in your project. If you have not, please follow the instructions above. If you have, let’s dive in.
- Create your test files: You must create your actual test file to carry out your test. To do that, you must properly structure your test file in some directories. Run the following command in your terminal:
cd test && cd specs && && mkdir tests && touch homepage-test.jsWhat the above command does is:
- change the directory into the
testfolder, change the directory into thespecsfolder, - Create a new directory called
tests - and then create a
homepage-test.jsfile.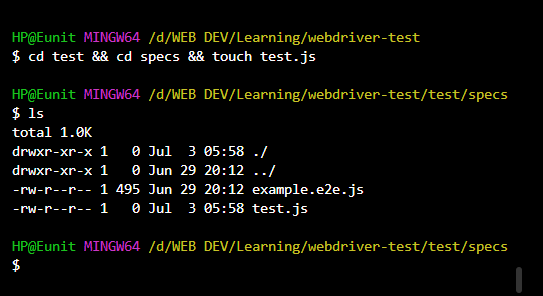
- Paste this test script in your
homepage-test.jsfile:
describe(`OpenReplay.com page`, () => {
  it(`should contain text`, async () => {
     await browser.url(`https://openreplay.com/`);


     await expect($(`.display-3`)).toHaveTextContaining(`Session replay`);
  })
});- What this code does is:
- You started by describing your E2E test
- You navigate to the OpenReplay website
- You are testing that the class
display-3contains the textSession replayon the website
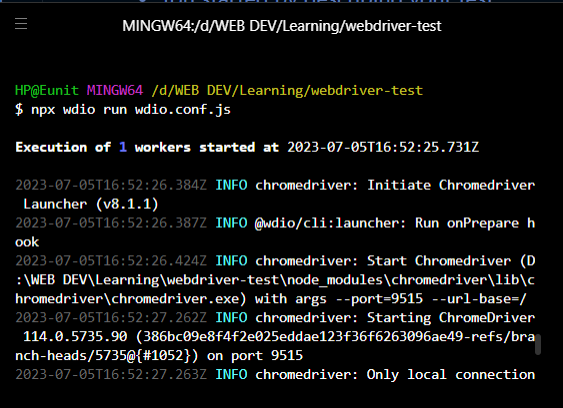
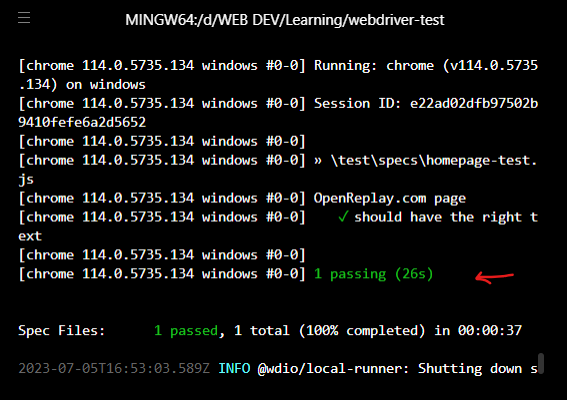
- To run your test, enter this command: It is now the moment of truth to see a context of what WDIO can do. Enter this command on your terminal
npx wdio run wdio.conf.js.
- Your code will run, and the test results will be displayed on your terminal.
Check out the GitHub repository for this code here.
Advanced Techniques for Effortless Testing
So far, you have read how to use WDIO to carry out test cases. In this section, I will describe some advanced techniques you can implement while carrying out your tests to maximize your automation.
Implementing Parallel Testing For Faster Test Execution
WDIO enables you to run your tests with maximum concurrency. This means that no matter how many files and tests you have, they can all run in parallel.
The advantages of running tests in parallel include:
- Move from the development stage to the production stage in no time.
- It allows you to save costs. This is because it enables the utilization of resources more effectively, as multiple tests are executed simultaneously.
- It enables you to cache bugs early in your project.
- Saves your time and enables faster execution.
To start running tests in parallel, modify the maxInstances in your wdio.conf.js file. Read more about this configuration in the official WDIO documentation. To configure and maximize concurrency, you may also use the WDIO third-party packages, such as WebdriverIO Parallel Runner.
Implementing Visual Regression Testing With Webdriverio
Visual regression testing ensures code changes do not unintentionally affect your application’s or web application’s UI (visual parts). Its purpose is to prevent UI bugs when making code changes or adding new features to your web application.
Visual regression testing is important because a bad UI plays a huge part in bounce rate to websites. You can use the WDIO third-party visual regression testing module in your test automation project.
Conclusion
In this article, you learned what webdriverIO is - a powerful and user-friendly test automation framework for Node.js. You read how WDIO is an excellent choice for software testers, given its many features.
Also, in this article, you were walked through how to carry out basic test automation with the WDIO framework, from installing the framework to writing your automation script.
Finally, you ran your test to give you a context of what WDIO can do.
Check out how OpenReplay can help you understand and surface issues in your web applications. OpenReplay helps you spend less time debugging and empowers you to create delightful web experiences.
Gain Debugging Superpowers
Unleash the power of session replay to reproduce bugs and track user frustrations. Get complete visibility into your frontend with OpenReplay, the most advanced open-source session replay tool for developers.
