
As your web application gets larger, it becomes harder to write bug-free code; you’ll need to integrate tests into your application sooner or later. There are a plethora of testing libraries for React, but in this article we will learn how to get started with end-to-end (E2E) testing with Cypress. We will talk about what E2E testing is, the benefits of using Cypress to test our application, and the tests we can perform on a React application. Moving forward, we will clone an example project, writing basic and advanced tests for it. We’ll also look at adding custom commands. Let’s dive in!
What is E2E testing?
End-to-end (E2E) testing is a software testing method used to test the overall functionality of a software application. E2E tests simulate real-world user scenarios and ensure that the application works as expected from the user’s perspective. This is important because it allows developers to catch any issues that may not have been seen during unit testing and helps ensure that the application is reliable and user-friendly.
In React, E2E testing can be performed using a tool called Cypress. Cypress is a modern, browser-based E2E testing tool that is easy to set up and use. It works by running your tests in a real browser, allowing you to test the actual user experience of your application.
What does Cypress offer?
Cypress is a modern, browser-based E2E testing tool designed to make writing and debugging tests for web applications easy. In addition, it offers several features that make it particularly well-suited for testing React applications, including:
- Real-time reloads: Cypress automatically reloads the application being tested whenever a change is made, making it easy to see the effects of your code changes in real time.
- Time travel: Cypress allows you to “time travel” by rewinding and fast-forwarding through your test commands, which can help debug and understand your application’s behavior.
- Network traffic control: Cypress allows you to control network traffic, which can be helpful for testing offline or slow-loading scenarios.
- Automatic retries: Cypress will automatically retry failed commands, which can help reduce flaky tests.
- Easy integration with CI/CD pipelines: Cypress has native support for running tests in continuous integration (CI) environments, which can be easily integrated into existing CI/CD pipelines.
Types of tests written with Cypress
Several types of tests can be written using Cypress, including:
- Unit tests: These tests are designed to test the smallest unit of functionality in an application. In the context of a React application, this might be a single component or function.
- Integration tests: These tests are designed to test the interaction between different units of functionality in an application. A React application might involve testing the interaction between multiple components or between a component and a back-end API.
- End-to-end (E2E) tests: These tests simulate real-world user scenarios and test the application’s overall functionality from the user’s perspective. E2E tests ensure that the application works as expected and catch any issues that may not have been caught during unit or integration testing.
- Visual regression tests: These tests compare the current appearance of the application with a reference image, and they can be used to catch visual changes that may have been introduced unintentionally.
Cypress is particularly well-suited for writing E2E tests, as it allows you to easily simulate real-world user scenarios and test the application’s overall functionality. However, it can also be used to write unit and integration and visual regression tests.
Project setup
Clone the GitHub repo. This is what our application looks like:

Run this command at the root of your project:
yarn installIf you don’t have yarn installed. You can install it globally by following this guide.
Install Cypress
First, let’s start by installing Cypress. Run the following command in the terminal:
npm install --save-dev cypressThis will install Cypress and add it as a dev dependency in our project.
Next, we must add a cypress.config.js file to our project root. This file is used to configure Cypress and will contain information such as the base URL for our application. In the file, we add the code:
const { defineConfig } = require('cypress')
module.exports = defineConfig({})
In our package.json, we’ll add a line of code to spin up Cypress. In the scripts, add this line:
"scripts": {
    ...
    "cypress": "cypress open"
},
So now, when we want to initialize Cypress, we run the command
npm run cypressWhen we run the command, we are greeted with a Cypress Test Runner, the interface we will use to write and run our tests, asking us to choose the type of tests we want to carry out.
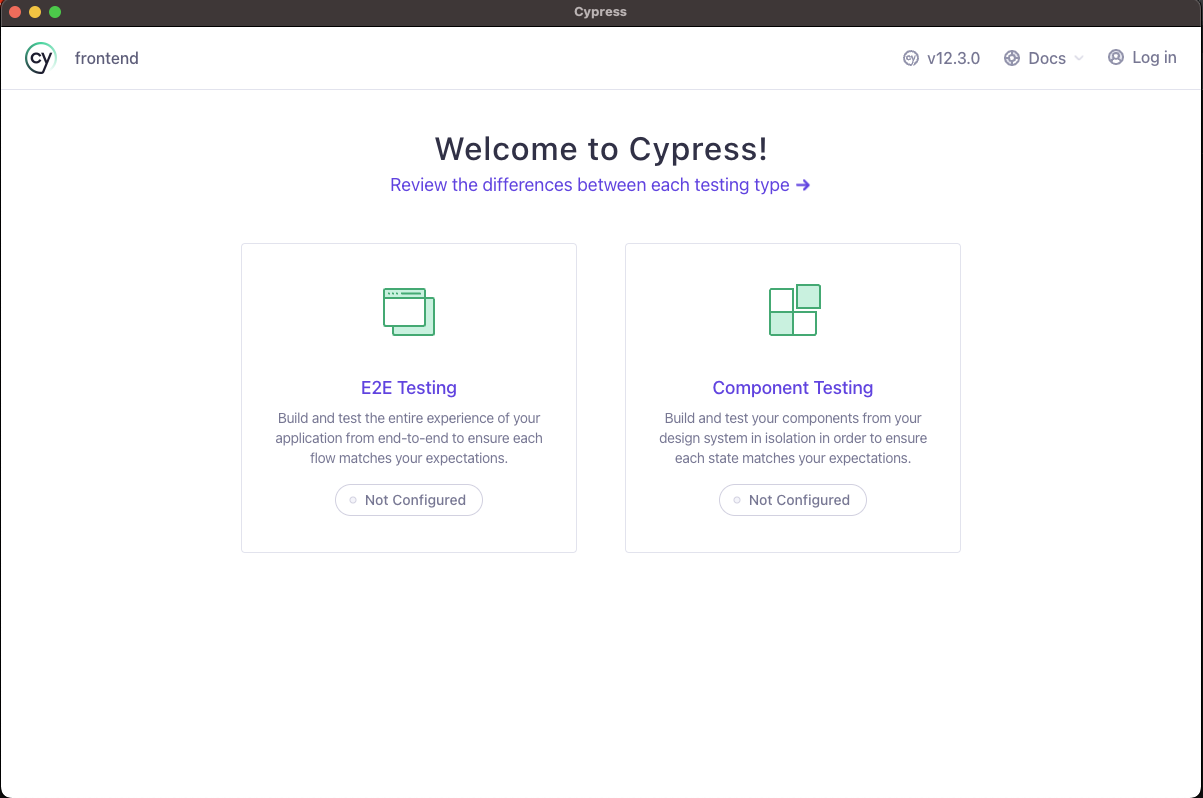
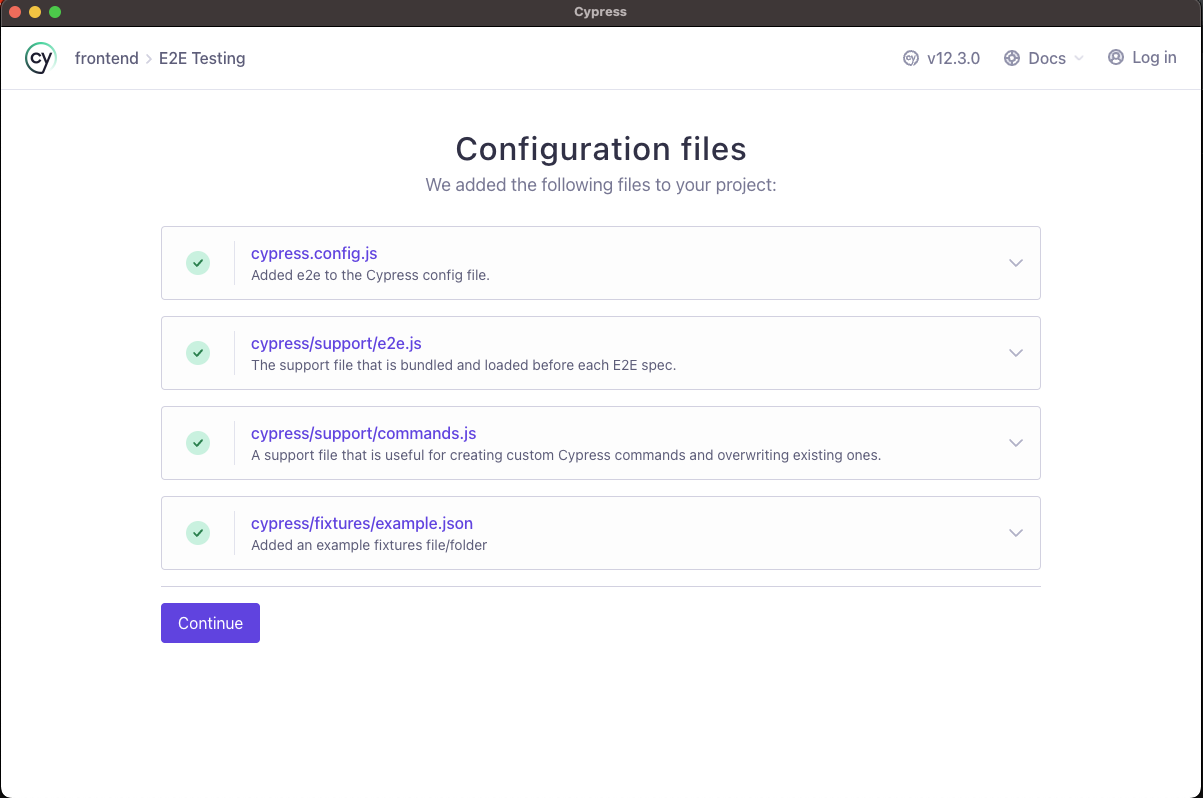
Here we choose E2E testing as that’s what this tutorial is focusing on. Next, we see the Cypress Test Runner, telling us the files it will add to our project.
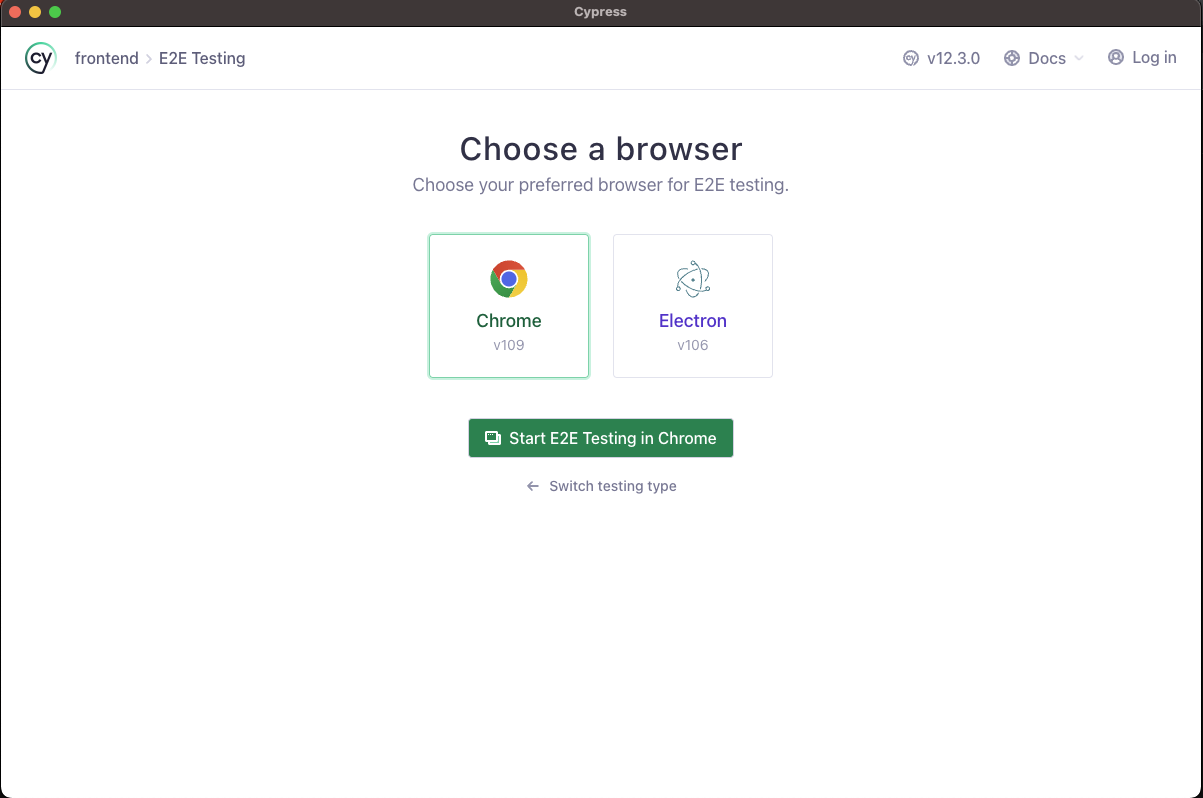
When we click on continue, we are asked to choose a browser. In my case, I have chrome set to default, so I’ll go with that.
Clicking on start E2E testing will spin up a window showing us our specs. In Cypress, a spec is a file that contains one or more tests. Cypress uses the Mocha test framework, and each spec file typically contains a series of describe and it blocks.
The describe block is used to group related tests together and describe what the tests are for. The it block contains the actual test, and it uses Cypress commands such as cy.visit(), cy.get(), and cy.click() to interact with the application under test and assertion methods such as should() to make assertions about the application’s state.
Writing basic tests
We have looked at how to get up and running with Cypress. In this section, let’s learn how to run basic tests with Cypress. For the Cypress test runner, this is what we see.
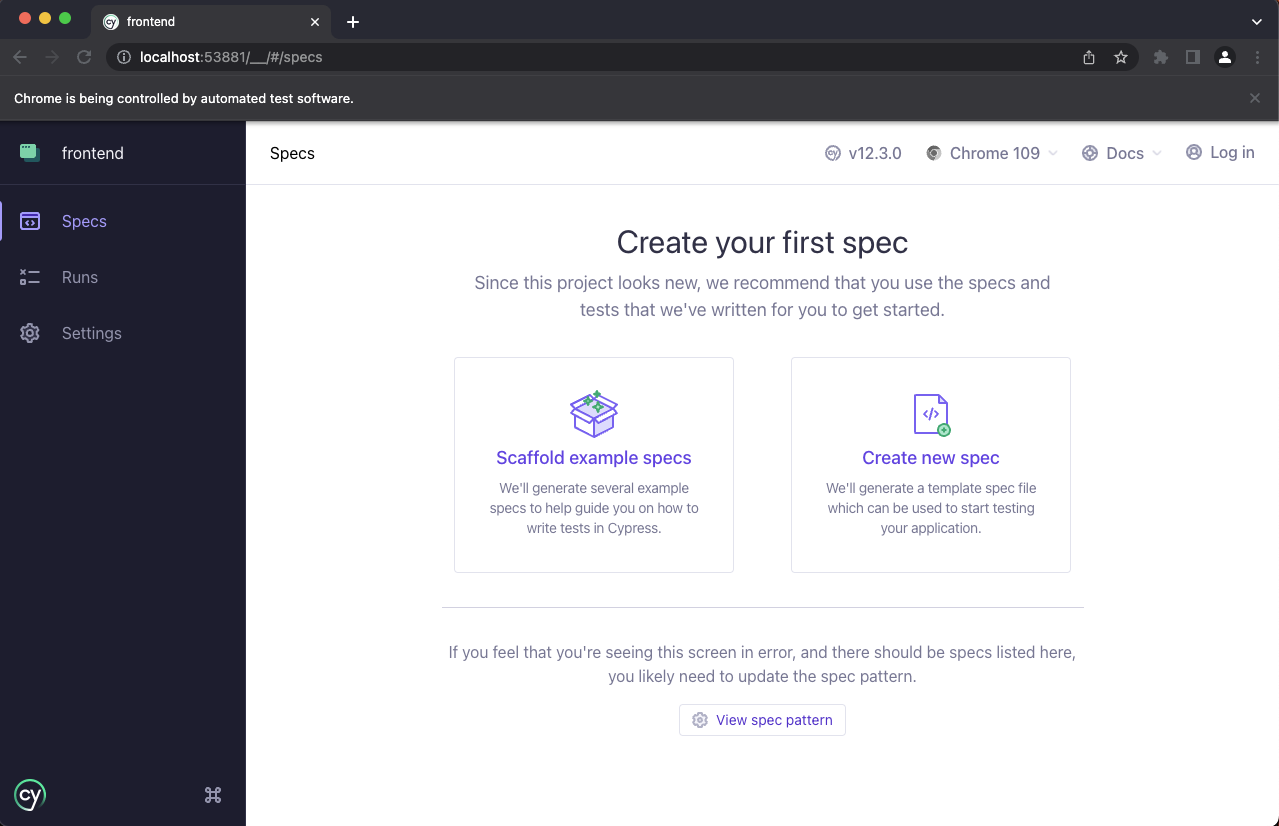
We don’t have any specs yet, so let’s create one. Click on Create new spec, and we’ll be prompted to enter the path to our specs.
If you check our folder structure, Cypress added a new folder named ‘cypress’. So the file path looks just like the one above.
Overview of the cypress folder
The structure of the Cypress folder may vary depending on the specific project, but it typically includes the following:
cypress: This is the main folder where Cypress is installed and contains the core Cypress files.fixtures: This folder contains data files used in the tests.integration: This folder contains test files organized by the feature or page being tested.support: This folder contains the Cypress commands and supporting files used in the tests.
It is good practice to keep the Cypress folder at the root of your project to be easily accessible for running tests and debugging purposes.
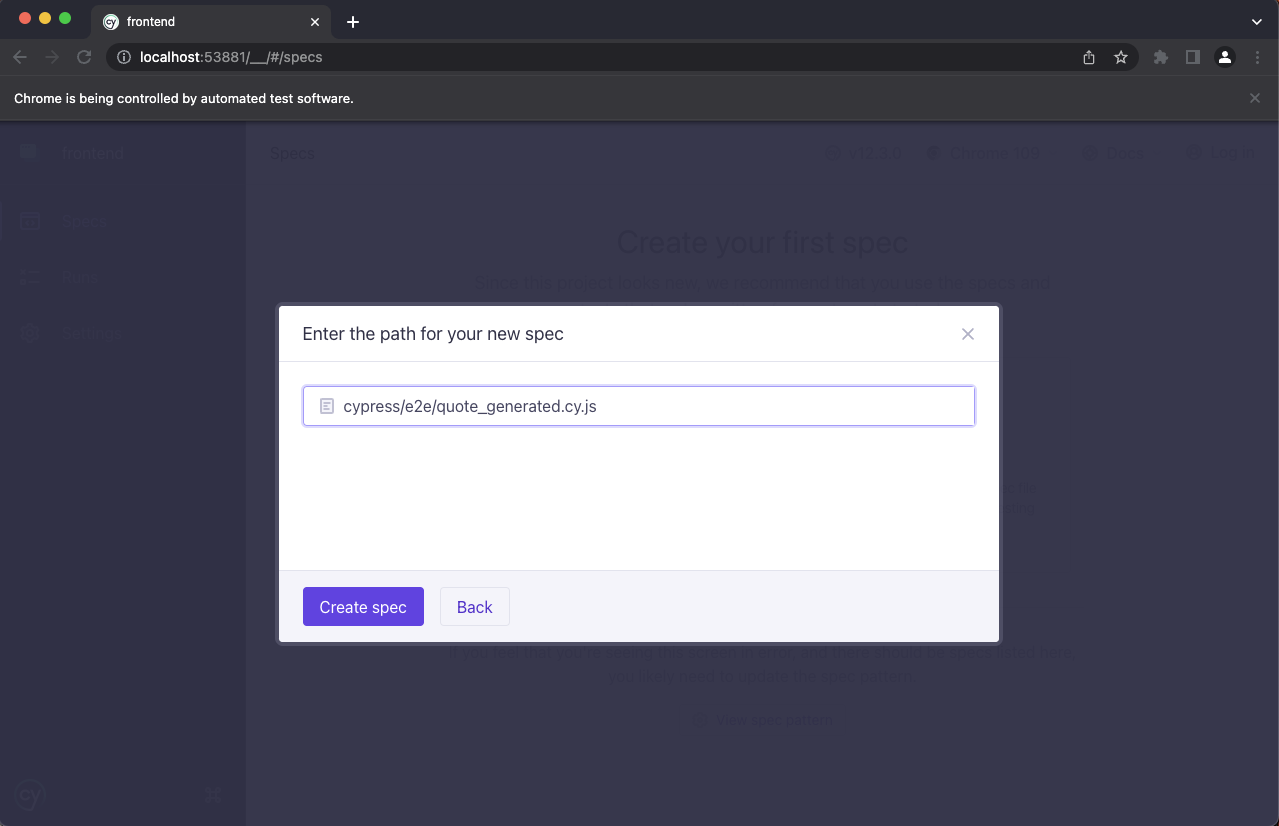
Now we name the new spec quote_generated.cy.js. This test aims to check if a quote is generated once the user visits the page. Click on Okay, run the spec, and we will see an example test run:
describe("template spec", () => {
  it("passes", () => {
    cy.visit("https://example.cypress.io");
  });
});
This test visits the Cypress example URL, as we can see in our test runner. Let’s get started doing some fun stuff. First, let’s set up environmental test variables.
In the quote_generated.cy.js file, we will write our tests. For example, we can test that the application displays a quote when the page loads:
describe("Quote App", () => {
  it("displays a quote when the page loads", () => {
    cy.visit("/");
    cy.get('[data-testid="quote"]').should("be.visible");
  });
});
In this test, we are using the Cypress commands cy.visit() to navigate to the root of our application and cy.get() to select an element with the attribute data-testid set to “quote”. We then use the should() command to assert that the element is visible on the page.
If we save this file and check our test runner, we can see there is an error because the route to our front end is wrong. We can fix this by setting a base URL in our cypress.config.js file. Add this line:
module.exports = defineConfig({
  e2e: {
    baseUrl: "http://localhost:3001", //line here
    setupNodeEvents(on, config) {
      // implement node event listeners here
    },
  },
});
Another thing we should note is the data-testid.
data-testidis an attribute that can be added to HTML elements in order to make them more easily selectable in Cypress tests. This attribute is not used by the application itself but rather is used solely for the purpose of testing.
When an element has a data-testid attribute, Cypress can use this attribute to select the element in its tests. This can be useful when an element does not have a unique class or id or when the class or id is subject to change. Now that we know this, we’ll attach a data-testid named quote to the h2 tag of our quotes in App.js:
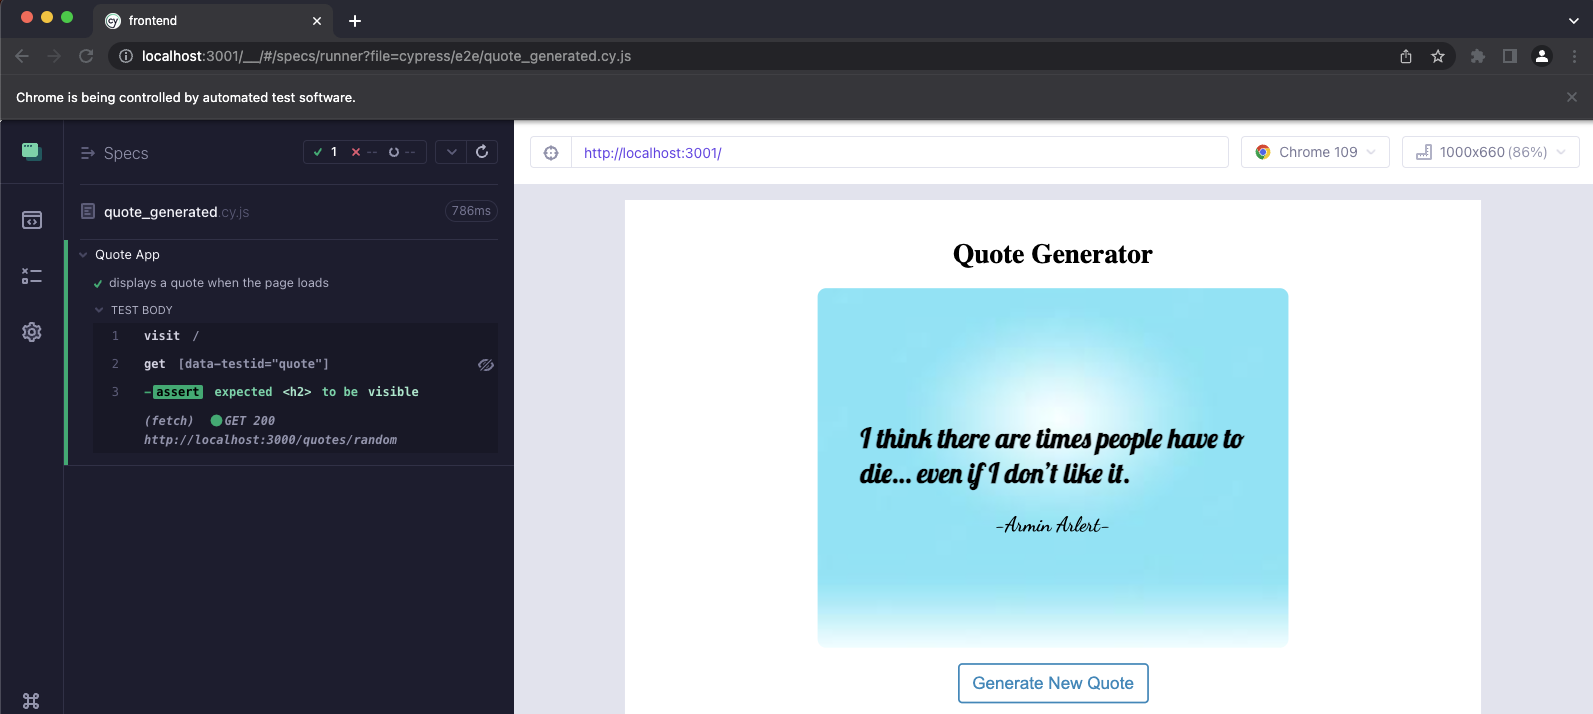
<h2 data-testid="quote">{quote}</h2>Now, if we save the quote_generated.cy.js file, we see all our tests running in the test runner:
We can also test that the user can generate a new quote by clicking a button:
const initialQuoteText = "A lovely quote from Eren Yeager";
it("generates a new quote when the button is clicked", () => {
  cy.visit("/");
  cy.get('[data-testid="generate-quote-button"]').click();
  cy.get('[data-testid="quote"]').should("not.have.text", initialQuoteText);
});
In this test, we are selecting the button with the attribute data-testid set to generate-quote-button and using the click() command to simulate a click. We then use the should() command to assert that the text in the quote element has changed.
You can run your tests on the Cypress Test Runner by clicking on it on the specs page. We will see a green indicator in the Test Runner if all tests pass. If any tests fail, we will see a red indicator, and we can investigate the failure by looking at the logs and the browser window.
Now you can play around with some basic tests. Something I’d like you to try is testing for the app name Quote generator.
Let’s write more advanced tests.
Session Replay for Developers
Uncover frustrations, understand bugs and fix slowdowns like never before with OpenReplay — an open-source session replay tool for developers. Self-host it in minutes, and have complete control over your customer data. Check our GitHub repo and join the thousands of developers in our community.
Writing Advanced tests
In this section, we’ll look at more advanced tests and explore other parts of cypress testing by writing custom commands and fixtures.
Custom commands
Custom commands are a way to encapsulate repetitive or complex logic in Cypress, making the tests more readable and maintainable. For example, let’s say our quote app had the functionality of authentication and logging in; we can write a custom login command like this:
Cypress.Commands.add("login", (username, password) => {
  cy.visit("/");
  cy.get("[data-testid='username-input']").type(username);
  cy.get("[data-testid='password-input']").type(password);
  cy.get("[data-testid='submit-button']").click();
});
This custom command will be written in the support folder in the command.js file and used in the e2e test:
it("displays a quote when the page loads", () => {
  cy.login("testuser", "password");
  cy.get('[data-testid="quote"]').should("be.visible");
});
Let’s turn the generating quote basic test into a command. We can achieve this by adding the code below in the command.js file.
Cypress.Commands.add("generateQuote", () => {
  cy.get("[data-testid='generate-quote-button']").click();
});
The custom command can now be used in the test like this:
const initialQuoteText = "A lovely quote from Eren Yeager";
it("generates a new quote when the button is clicked", () => {
  cy.visit("/");
  cy.generateQuote();
  cy.get('[data-testid="quote"]').should("not.have.text", initialQuoteText);
});
We can turn this into a new spec using the process we did earlier and name it command_test. Run the test in the test runner and see if it still works.
Fixtures
In Cypress, fixtures are a way to store data that can be used during testing. Fixtures are typically used to store data to simulate a specific state of the application, such as test data for a form or a mocked response from an API.
Fixtures can be stored in JSON or JavaScript files and are loaded into the test context using the cy.fixture() command. Once the fixture is loaded, it can be accessed as a JavaScript object, and its properties can be used in the test.
For example, let’s say we have a fixture called quotes.json that contains a list of quotes. The fixtures can be loaded in a test like this:
it("displays a list of quotes", () => {
  cy.fixture("quotes.json").then((quotes) => {
    // do something with the quotes
  });
});
Fixtures can also be used in conjunction with the cy.route() command to simulate a response from an API. For example, if we want to test that the application displays a list of quotes that are returned from an API, we can use the cy.route() command to intercept the API request and return the quotes from a fixture:
it("displays a list of quotes returned from an API", () => {
  cy.fixture("quotes.json").as("quotes");
  cy.route("GET", "/api/quotes", "@quotes").as("getQuotes");
  cy.visit("/");
  cy.wait("@getQuotes");
  cy.get('[data-testid="quote"]').should("have.length", 5);
});
In this example, we are using the cy.fixture() command to load the quotes from the quotes.json fixture, and we are using the cy.route() command to intercept the GET request to the /api/quotes endpoint and return the quotes. We are also using the cy.wait() command to wait for the response from the API before checking that the quotes are displayed on the page.
Fixtures are a powerful feature in Cypress, as they allow you to test your application with real data, which can help make sure the application behaves as expected in different scenarios.
Conclusion
This tutorial taught us about Cypress and how to write some basic and advanced tests. In conclusion, E2E testing of a React application using Cypress is a powerful and efficient way to ensure that your application functions correctly. With Cypress, you can have confidence that your application will work as intended and provide a good user experience.
Gain Debugging Superpowers
Unleash the power of session replay to reproduce bugs and track user frustrations. Get complete visibility into your frontend with OpenReplay, the most advanced open-source session replay tool for developers.