
Fast web applications using Astro


A static site generator is a tool that generates an entirely static HTML website from raw data and a collection of templates. A static site generator, in essence, automates the job of writing individual HTML pages and makes those sites ready to be delivered to users ahead of time. This tutorial will introduce a new static site generator for building fast web applications. You’ll create a static blog application using Astro at the end of this tutorial.
Let’s get to it.
What is Astro?
Astro is a new static site builder with a robust developer experience that meets light output for the modern web. Astro uses a current server-side templating language that renders directly to HTML & CSS, eliminating heavy JavaScript automatically. It is the first site builder to eliminate dead code from your website and only hydrate your basic, interactive UI.
Note: Astro is still beta software. Therefore, missing features and bugs are expected! The developers are still working towards a stable, production-ready v1.0 release.
Scaffold new Project
Ensure you have `Node.js - 14.15.0, v16.0.0, or higher. The code for this tutorial is available here; feel free to clone it to follow along.
Let’s create a new project with the command below:
mkdir my-astro-project && cd $_
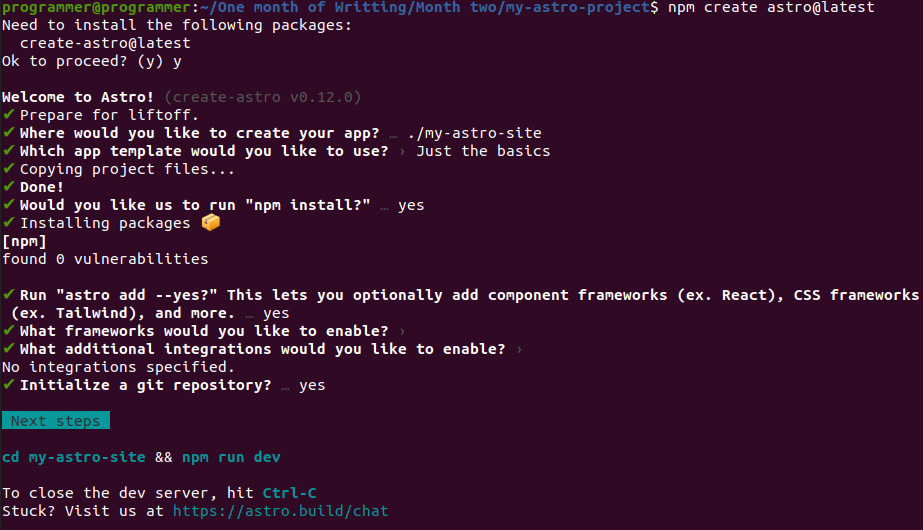
npm create astro@latest
The above command will create a my-astro-project folder and prompt for the configuration for the project. Your selection should look like the one in the screenshot below:
After selecting the configuration for your project, change the directory to the project directory. Then, start the application with the command below:
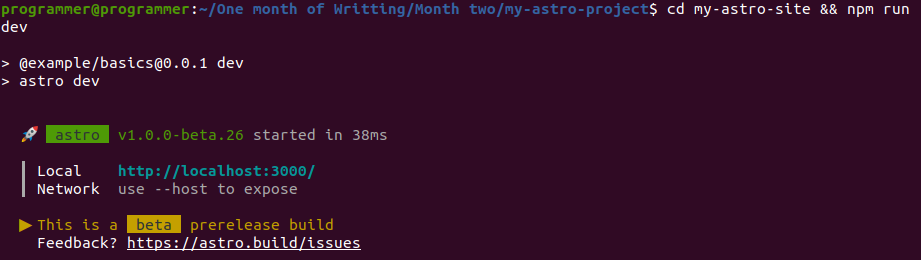
cd my-astro-site && npm run dev
You should see the output on the screenshot below on your terminal.
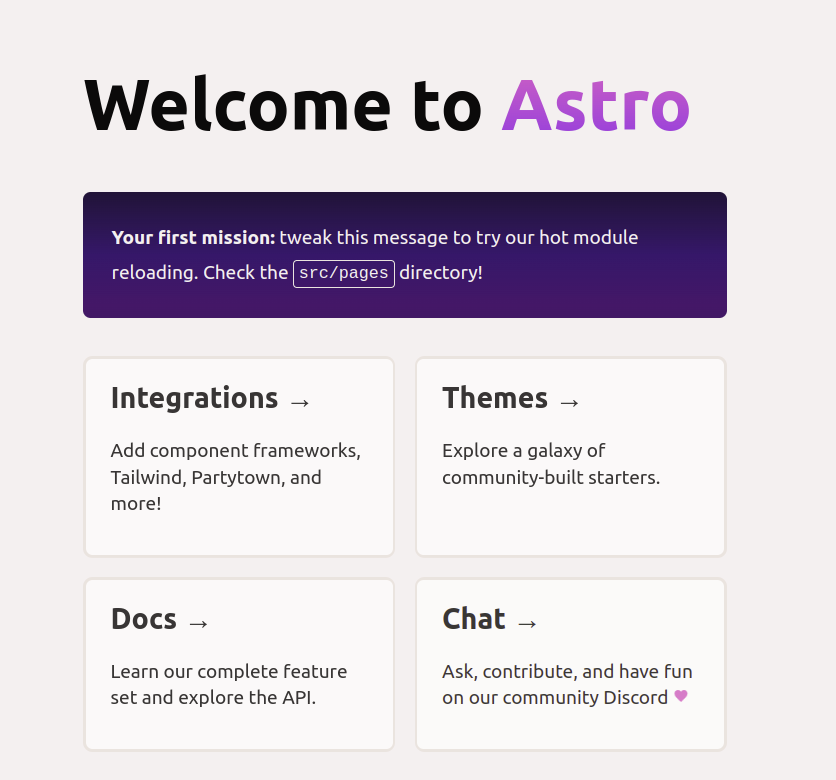
Now navigate to `http://localhost:3000/ in your browser. You’d see the Astro welcome, as shown in the screenshot below.
After going through the prompts in the Astro create command, Astro will create the folder structure below:
📦my-astro-site
┣ 📂.git
┣ 📂public
┃ ┗ 📜favicon.ico
┣ 📂src
┃ ┣ 📂components
┃ ┃ ┗ 📜Layout.astro
┃ ┗ 📂pages
┃ ┃ ┗ 📜index.astro
┣ 📜.gitignore
┣ 📜.npmrc
┣ 📜README.md
┣ 📜astro.config.mjs
┣ 📜package-lock.json
┣ 📜package.json
┗ 📜tsconfig.json
Create Components
Let’s create our project component. Before getting started, we’ll rename the Layout.astro file to Blog.astro. Then replace the code with the code snippet below:
---
interface Blogs {
    id: number;
    name: string;
    description: string;
    author: string;
    slug:string;
}

const blogs: Blogs[] = [{
    id: 1,
    name: 'Building fast web application using-Astro',
    description: 'This is the first blog',
    author: 'John Doe',
    slug:"Building-fast-web-application-using-Astro"
},
{
    id: 2,
    name: 'Building-a-Smart-contract with vyper',
    description: 'This is the second blog',
    author: 'Mandy Eden',
    slug:"Building-a-Smart-contract with vyper"
},
];
---
    <div>
        <h1>Blogs</h1>
        <ul>
            {
                blogs.map(blog =>
                <div class="media mb-3">
                    <div class="media-body p-2 shadow-sm rounded bg-light border">
                        <h6 class="mt-0 mb-1 text-muted">{blog.author}</h6>
                        <a href={blog.slug}>{blog.name}</a>
                    </div>
                </div>)
            }
        </ul>
    </div>
Every Astro component ends with an .astro extension. The areas starting and ending with --- are known as the component script, where we write all of the Javascript code. So we created a blog interface to define a pattern for our blogs. Then we create a blog array with some blog data. We also created a link to our blog details using the blog’s slug.
Open Source Session Replay
OpenReplay is an open-source, session replay suite that lets you see what users do on your web app, helping you troubleshoot issues faster. OpenReplay is self-hosted for full control over your data.

Start enjoying your debugging experience - start using OpenReplay for free.
Creating App Layout
Now let’s create our app layout. A layout in Astro enables you to create reusable components. We’ll create a header layout for all the pages in our application. To do that, create a layout directory in the src folder, create a Header.astro file, and add the code snippet below:
---
    const title = 'Blog App';
---
<!DOCTYPE html>
<html lang="en">
<head>
<meta charset="UTF-8">
<meta name="viewport" content="width=device-width">
<link rel="icon" type="image/x-icon" href="/favicon.ico" />
<title>{title}</title>
</head>
<body>
    <nav class="navbar navbar-light bg-light">
        <div class="container-fluid">
        <a class="navbar-brand">Navbar</a>
        <form class="d-flex">
            <input class="form-control me-2" type="search" placeholder="Search" aria-label="Search">
            <button class="btn btn-outline-success" type="submit">Search</button>
        </form>
        </div>
    </nav>
<div class="container mb-4">
    <slot/>
</div>
</body>
</html>
In the code snippet, we create a global title variable to add a title to our application. Then we used the <slot/> to specify where the other components will be injected.
Creating Static Asset
To speed things up a little bit, we’ll use Bootstrap to add styling to our application. Open the Header.astro and add the Bootstrap CDN.
<link href="https://cdn.jsdelivr.net/npm/bootstrap@5.0.2/dist/css/bootstrap.min.css" rel="stylesheet" integrity="sha384-EVSTQN3/azprG1Anm3QDgpJLIm9Nao0Yz1ztcQTwFspd3yD65VohhpuuCOmLASjC" crossorigin="anonymous">Creating an App page
Now that we have our component and layout, let’s create the page for our application to display the content to the user. Astro uses a routing strategy known as File-based routing, which means that every .astro file we create in the src/pages/ folder becomes a page on our site. So, replace the content of the pages/index.astro file with the code snippet below:
---
import Blog from "../components/Blog.astro";
import Header from "../layouts/Header.astro";
---
<Header>
<Blog></Blog>
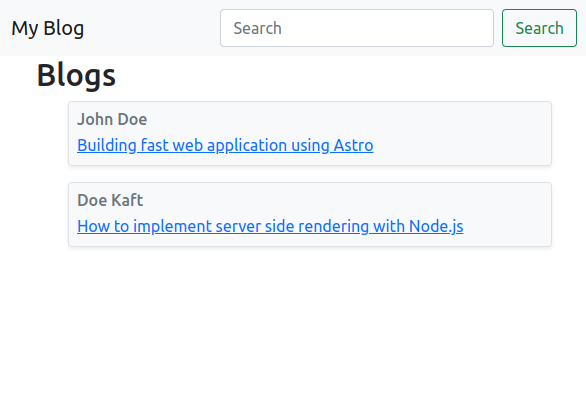
</Header>We imported the Blog component and header layout in the above code snippet. We injected the Blog component into the Header layout. Astro will look for the location of the <slot/> and inject our Blog component.
If you go back to your browser, you’ll see the output below.
Adding Markdown
Like the .astro files in an Astro pages folder, you can also add a .md file, which is also rendered as a page. We’ll create our blog data in a markdown file here. Create a How-to-implement-server-side-rendering-with-Node.js file, and Building-fast-web-application-using-Astro.md. Ensure your Markdown file matches the slug of the blog.
Add the following content (taken from an earlier version of this blog entry!) to the Building-fast-web-application-using-Astro.md file:
---
layout: '../layouts/Header.astro'
---

# Building fast web application using Astro

A static site generator is a tool that generates an entirely static HTML website from raw data and a collection of templates. A static site generator, in essence, automates the job of writing individual HTML pages and makes those sites ready to be delivered to users ahead of time.
This tutorial will introduce a new static site generator for building fast web applications. You'll create a static blog application using Astro at the end of this tutorial.

Let's get to it.

## What is Astro

Astro is a new static site builder with a robust developer experience that meets light output for the modern web. Astro uses a current server-side templating language that renders directly to HTML & CSS, eliminating heavy JavaScript automatically. It is the first site builder to eliminate dead code from your website and only hydrate your basic, interactive UI.

> Note: Astro is still beta software. Therefore, missing features and bugs are expected! The developers are still working towards a stable, production-ready v1.0 release.


## Prerequisites
Ensure you have `Node.js - 14.15.0, v16.0.0, or higher` to get started.
In the above markdown, we used the layout property in our front matter to specify the parent layout for our blog. If you click on the blog’s link, you’ll be redirected to the blog details page.
Conclusion
Glad you made it to this point. You’ve learned how to build a fast web application using Astro by building a demo blog application. We started with an introduction to Astro, and then moved right into building a demo project. Now that you have an understanding of Astro, would you try Astro in your next project? Perhaps you can learn more about Astro from the official documentation.