Fetching Data from GraphQL APIs with Apollo React
Query your GraphQL database from your React App with a few lines of code thanks to Apollo React

Apollo Client is a modern and comprehensive state management library that helps developers to fetch, cache or update data from GraphQL APIs. In this article, we will take a look at how to use this library to query a GraphQL API and display its data in a React app.
Prerequisite
Before you read further, you should have at least a beginner-level of knowledge in GraphQL. If not, please check out my GraphQL for Beginner Series.
Introduction to Apollo React
Apollo React has a declarative data fetching approach that gives the code predictability and efficiency. There is no need to manually track loading states with Apollo React.
It is also fully compatible with any GraphQL API and setup, allowing it to be easily integrated with such apps. Specifically, it is very powerful with React apps as it features built-in support and React Hooks.
For more information on Apollo Client, feel free to read its documentation.
Step 1: Getting Started
In this example, I will be using the Pokémon GraphQL API to fetch and display data in my app.
Let’s get started by installing Apollo Client and GraphQL packages in a React App:
npm install @apollo/client graphqlStep 2: Initialize ApolloClient
In our index.js, let us initialize an ApolloClient instance by importing the following:
import {
  ApolloClient,
  InMemoryCache,
  ApolloProvider
} from "@apollo/client";
Below the import statement, we initialize the instance like so:
const client = new ApolloClient({
uri: 'https://beta.pokeapi.co/graphql/v1beta',
cache: new InMemoryCache()
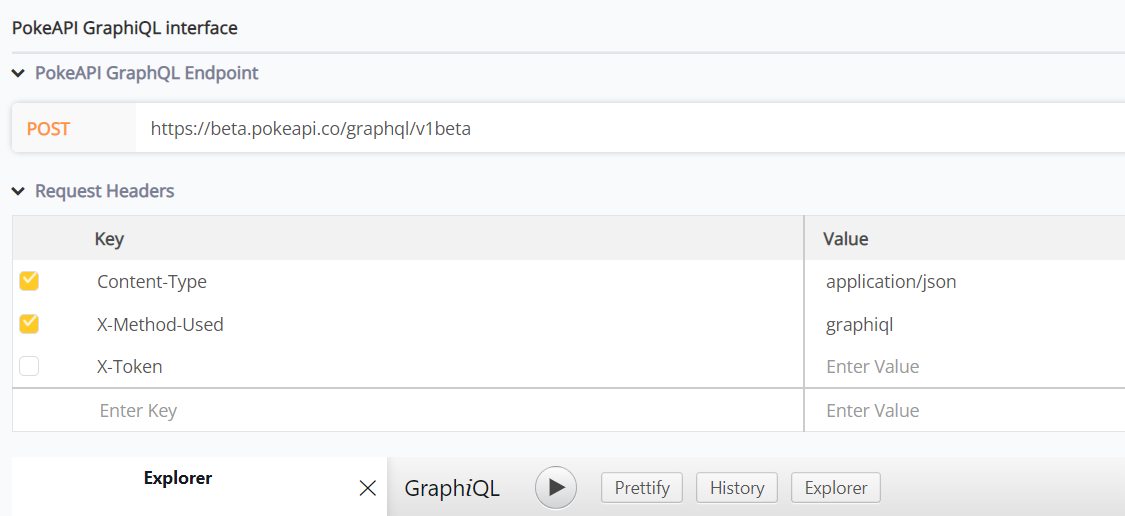
});The uri refers to the endpoint of the GraphQL API. As shown in the screenshot below, our PokeAPI is located at: https://beta.pokeapi.co/graphql/v1beta
Finally, we wrap the ApolloProvider component around our App component, passing client as a prop.
ReactDOM.render(
  <ApolloProvider client={client}>
  <React.StrictMode>
    <App />
  </React.StrictMode>
  </ApolloProvider>,
  document.getElementById('root')
);
Step 3: Write the Query
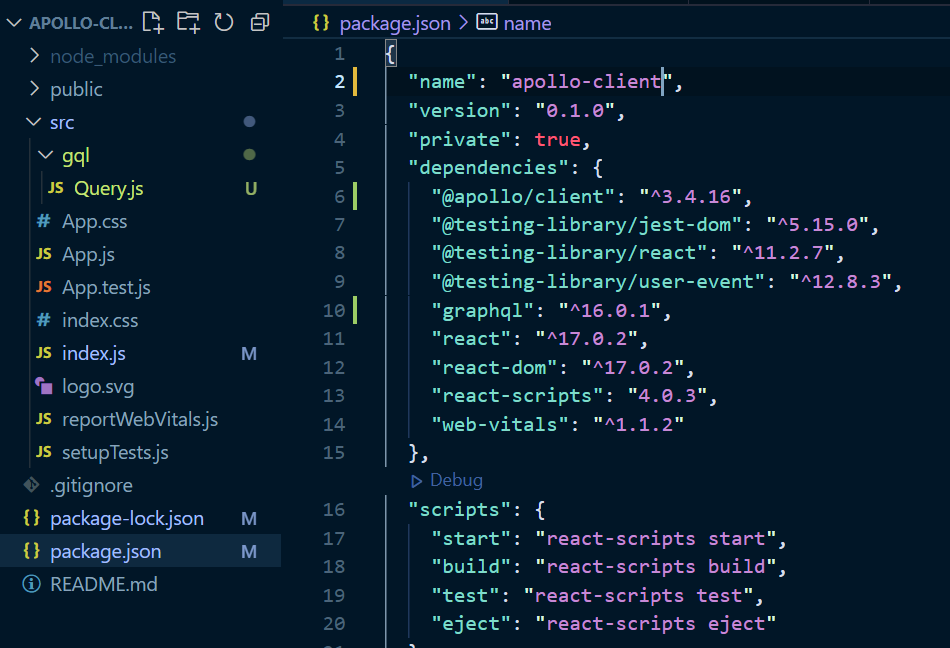
In the React’s app src folder, let’s create a gql folder. This is where we will write all our queries or mutation. It keeps the code organized.
Inside the gql folder, create a file called Query.js, where we will write our query to fetch data from the PokeAPI.
At this point, the app structure should roughly look like this:
In gql/Query.js, we will first import gql, then export and write our GraphQL query inside it like so:
import { gql } from "@apollo/client";

export const GET_GEN_3 = gql`
  query getGen3 {
    pokemon_v2_pokemonspecies(
      order_by: { id: asc }
      where: { pokemon_v2_generation: { name: { _eq: "generation-iii" } } }
    ) {
      name
      id
    }
  }
`;
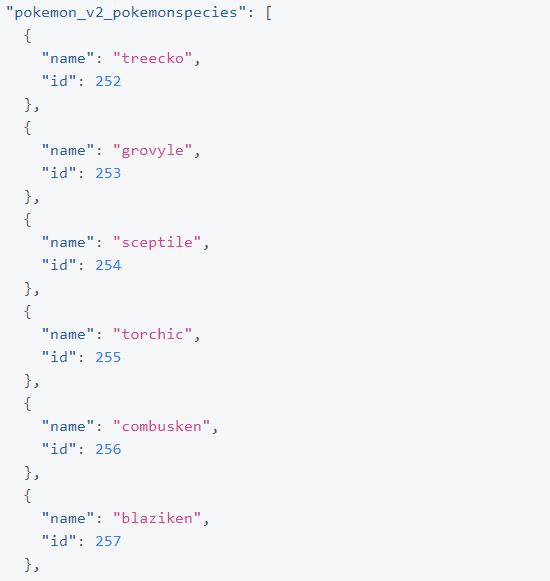
In this example, we are querying all Pokémon’s name and id that were from Generation 3 aka Hoenn region (i.e. created in 2003).
Step 4: Run the Query
To execute the query, head over to App.js. Import the useQuery Hook and the query:
import { useQuery } from '@apollo/client';
import { GET_GEN_3 } from "./gql/Query";
Then, run the query with this one line:
function App() {
   const { loading, error, data } = useQuery(GET_GEN_3);
   console.log(data);
   //...
}
Now, we can run npm start and we should see our Pokémon data has been successfully fetched in the following format:
Step 5: Display Data in React
Our next step is to display this fetched data in our App.
In the return function of App.js, we can simply use conditionals and map the data like this:
 return (
    <div className="App">
      <header className="App-header">
        {loading ? (
          <img src={logo} className="App-logo" alt="logo" />
        ) : error ? (
          <p>Error: {error}</p>
        ) : (
          <div>
            {data.pokemon_v2_pokemonspecies.map((pokemon) => {
              return (
                <p>
                  {pokemon.id} {pokemon.name}
                </p>
              );
            })}
          </div>
        )}
      </header>
    </div>
  );
In the code above, we show different UI based on the state of the query. If it is loading, we will show a loading animation. Else if there’s an error, we simply print it on the app. Else, we shall map the pokemon_v2_pokemonspecies array and print each Pokemon’s name and id.
Open Source Session Replay
OpenReplay is an open-source, session replay suite that lets you see what users do on your web app, helping you troubleshoot issues faster. OpenReplay is self-hosted for full control over your data.

Start enjoying your debugging experience - start using OpenReplay for free.
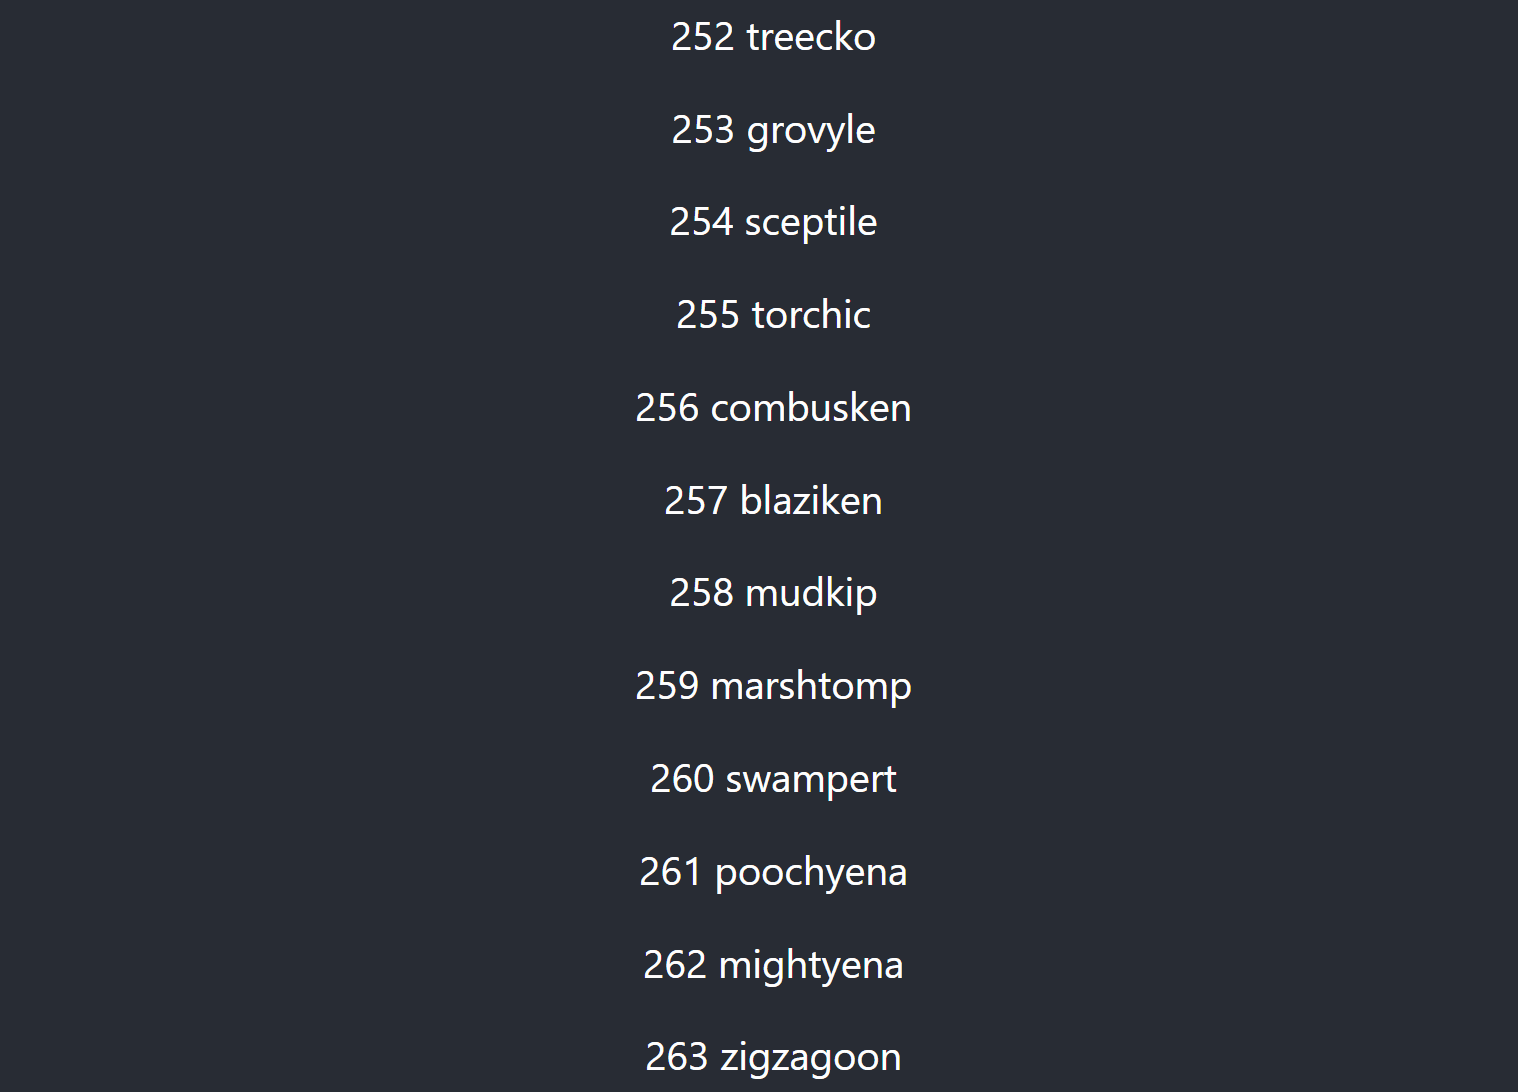
Result
Here is the result of our very simple example.
Conclusion
Thanks for reading. I hope this article has helped you in getting started with Apollo Client. Note that Apollo Client automatically caches queries and therefore, subsequent executions of the same query will be very fast.
Apollo Client also supports other GraphQL operations such as Mutations, Subscriptions and more. Do read their documentation to learn more. Cheers!