Four useful built-in JavaScript web APIs
Explore a quartet of fully available JS APIs for your code


An Application Programming Interface (API) is a software interface that allows two or more programs to communicate by acting as an intermediary between them.
All browsers have a set of built-in APIs that extend their functionality, usually by supporting complex operations.
In this article, you will learn about four built-in JavaScript Web APIs you can use in your projects.
The Notification API
The notification API is a built-in browser API that allows web pages to display notifications to the end user. The notifications generated with this API can be displayed even if the user has switched tabs or is on a different app, provided the user has granted the required permissions.
Requesting Permission
Before a notification can be displayed on a user’s window, the user must first grant notification permissions to the application.
It is regarded as good practice to ask for user permission in response to a user gesture, for example, clicking a button. Many browsers have already disallowed permission requests not triggered by a user gesture due to the abuse of push notifications in the past.
You can request notification permissions for your application by calling the requestPermission method on the Notification class in response to a user gesture. The requestPermision method is available in a promise-based version and a callback version (supported in older browsers).
For example:
const noficationButton = document.getElementById("notify");

const requestPermission = function () {
  //check if the browser supports notifications
  if (!("Notification" in window))
    throw new Error("Browser does not support notifications");

  //Request permission (Promise-based)
  Notification.requestPermission().then((status) => {
    console.log(status);
  });
};
//Ask for permission in response to a gesture
noficationButton.addEventListener("click", requestPermission);
In the requestPermission function above, you first check if the user’s browser supports notifications by checking for the Notification object in the window object.
Next, you call requestPermission method on the Notification class. This method returns a promise that, when resolved, returns granted or denied depending on whether the user granted permission.
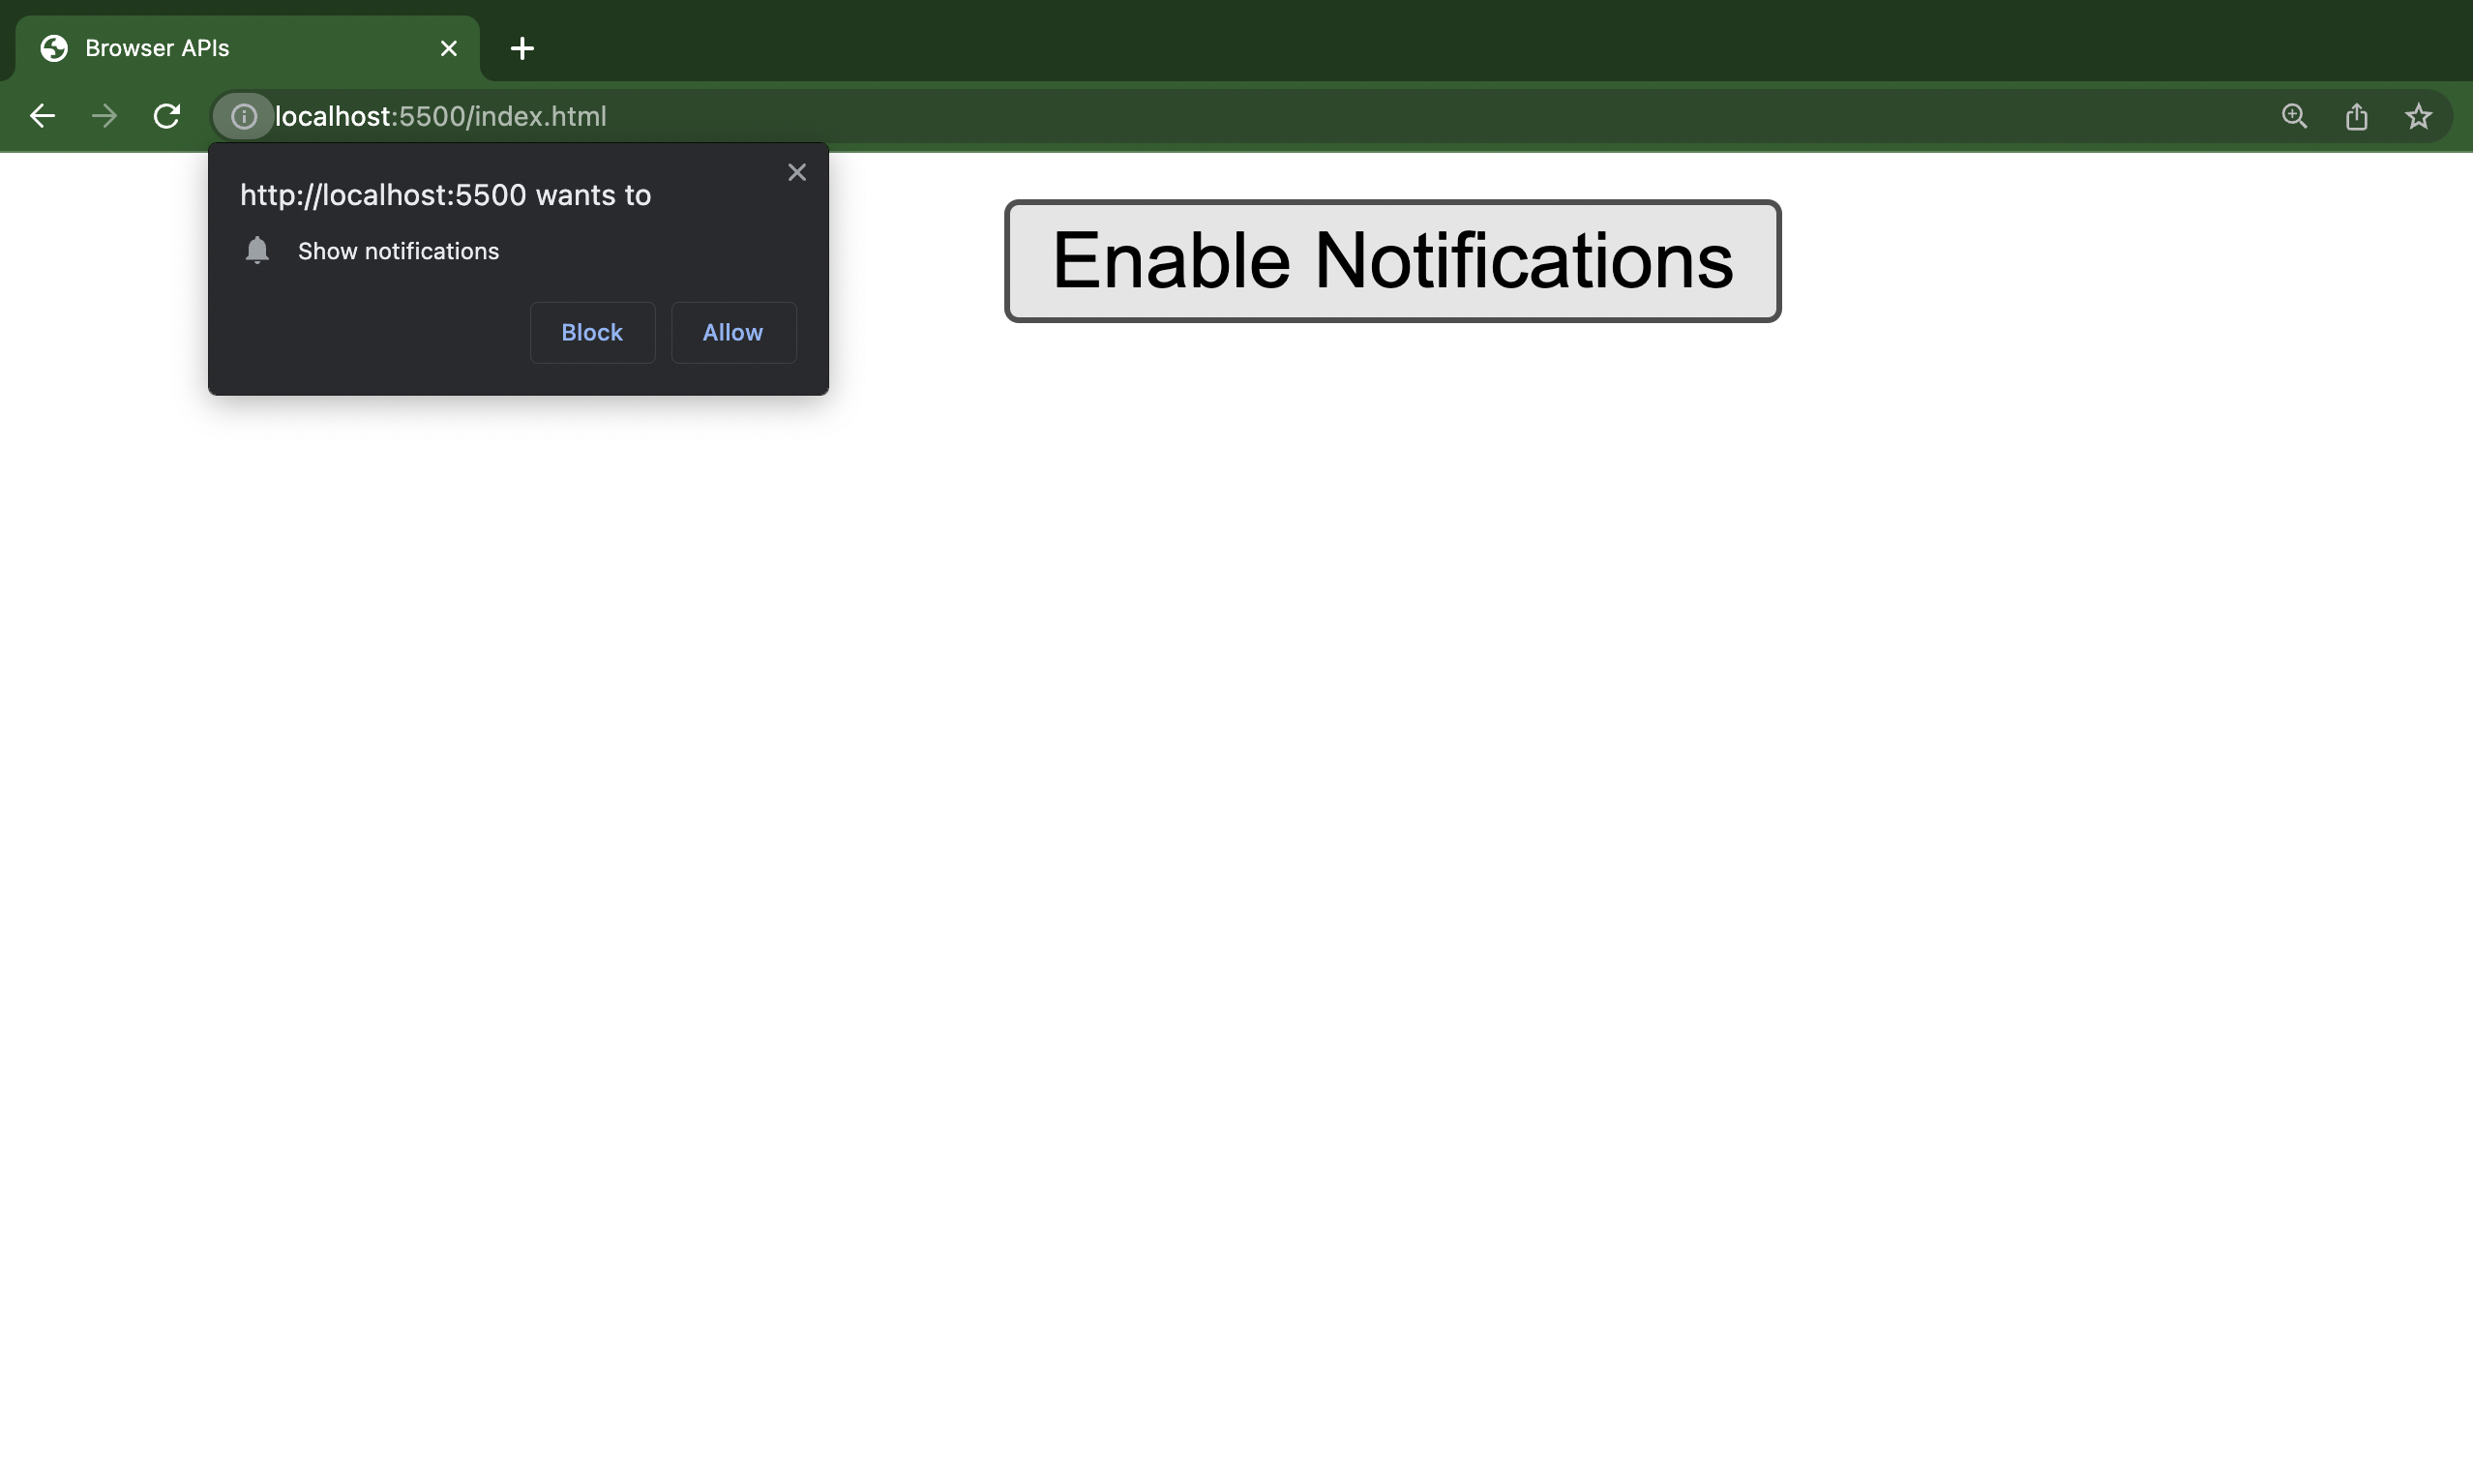
Below is an image of an application requesting permission to display notifications in response to a user clicking the Enable Notifications button.
Creating a Notification
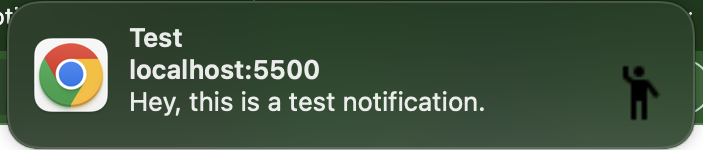
The Notification constructor allows you to create and customize notifications to your specifications. It takes two arguments: a title and an optional configuration object. The title is a string that describes the notification, and the configuration object comprises some options to enhance the notification, such as a text body. For example:
const notification = new Notification("Test", {
      body: "Hey, this is a test notification",
      icon: "./imgs/notification.png",
    });
The code block above will render the notification below:
Most modern browsers close notifications on their own after a few seconds. Still, you can manually do this by calling the close method on notification and wrapping it in a setTimeout function.
For example:
setTimeout(4000, notification.close())You can learn more about the Notification API in the MDN documentation.
The Geolocation API
The geolocation API is a built-in browser API that allows web applications to access a user’s location, provided the user grants the appropriate permissions.
Access to a user’s location can be helpful in several scenarios, such as deliveries and displaying local content (weather, events, etc.).
Working with the Geolocation Object
You can access the geolocation API throw the navigator.geolocation object. The geolocation API allows you to get a user’s current position and watch a user’s position using the getCurrentPostion and watchPosition methods, respectively.
The getCurrentPosition is an asynchronous method that returns the user’s current location. This method takes two callback functions as arguments: a success callback and an error callback. Additionally, it takes a configuration object where specific options, like the accuracy level of the position, can be set.
The success callback is executed when the user’s position is successfully retrieved, while the error callback is executed when an error occurs.
For example:
navigator.geolocation.getCurrentPosition(
  (position) => console.log(position),
  (error) => console.error(error),
  {
    enableHighAccuracy: true,
    timeout: 5000,
  }
);
The code block above returns a GeolocationPosition object with a coords and a timestamp property. With the enableHighAccuracy set to true, the coordinates returned will be more accurate. Setting the timeout property to 5000ms (5 seconds) will timeout the API and execute the error callback if fetching the location takes more than 5000ms.
The watchPosition method updates the user’s current location as the user moves or as more accurate geo-information arrives. This method returns an ID used to uniquely identify the requested position watcher and takes the exact arguments as the getCurrentPosition method.
For example:
const watcherID = navigator.geolocation.watchPosition(
  (position) => console.log(position),
  (error) => console.error(error)
);
The watcherID is used with the clearWatch method to stop monitoring a user’s current location.
Like so:
navigator.geolocation.clearWatch(watcherID);You can learn more about the geolocation API in the MDN documentation.
Open Source Session Replay
OpenReplay is an open-source, session replay suite that lets you see what users do on your web app, helping you troubleshoot issues faster. OpenReplay is self-hosted for full control over your data. Start enjoying your debugging experience - start using OpenReplay for free.
The History API
The history API is an API that allows developers to move forward or backward, move to a particular page in a user’s history and modify the website’s URL without refreshing the whole page.
It is mainly used to modify the website’s URL without refreshing the whole page in single-page applications (SPAs) using its pushState method.
Moving Forward, Backward, and to a Specific Point
You can move forward in a user’s history by calling the forward method on history.
Like so:
history.forward()This command takes the users one step forward in their browsing history.
You can move backward through a user’s history by calling the back method on history.
Like so:
history.back()You can move to a specific point in a user’s history by calling the go method on history and passing the page’s index as an argument.
For example:
//forward
history.go(3)
//backward
history.go(-3)
The commands above take the users three steps forward and backward in their browsing history.
Note: calling the go method without any argument or with 0 as an argument, will refresh the page.
The pushState Method
The pushState method allows you to add entries to the user’s web history without leaving or refreshing the page. As stated above, this is useful in SPAs that load additional data into the DOM in response to an event.
It takes three arguments: [state, title, and url](https://developer.mozilla.org/en-US/docs/Web/API/History_API/Working_with_the_History_API#the_pushstate_method).
For example:
let stateObject = {
  property: "State Object",
};

history.pushState(stateObject, null, "state.html");
The title argument is set to null in the code block above because many modern browsers ignore it. Hence, conventionally set to null. When this method is called, the address bar will display https://example.com/state.html, but the page won’t reload. If the user clicks Back, the URL will change to https://example.com/ and a popstate event will be fired with a null state object.
You can learn more about the history API in the MDN documentation.
The Barcode Detection API
The barcode detection API is an experimental built-in API that detects linear and two-dimensional barcodes in images.
Since this API is still experimental, you should check its browser compatibility before using it in production environments.
This feature is also not available in many browsers, so before you use it, you need to check if it is available in the browser. Like so:
if ("BarcodeDetector" in window) {
  console.log("The Barcode Detector is supported!");
} else {
  console.log("The Barcode Detector is not supported in this browser");
}
Creating a Barcode Detector
You can create a barcode detector by creating an instance of the BarcodeDetector class and passing an array of the type of barcodes you want to scan for.
For example:
const barcodeDetector = new BarcodeDetector({
  formats: ["qr_code", "aztec"],
});
You can get a list of all barcode formats supported by your browser by calling the getSupportedFormats method on BarcodeDetector. This asynchronous method returns an array of all the barcode formats supported by your browser.
For example:
BarcodeDetector.getSupportedFormats().then((supportedFormats) => {
    console.log(supportedFormats);
  });
Scanning a Barcode
You can scan a barcode by calling the detect method on your BarcodeDectector instance. The detect method expects an image object as an argument. The image object can either be an element, a Blob, ImageData, or a CanvasImageSource.
The detect method returns an object with the following properties:
- boundingBox: This is an object containing the coordinates of the barcode.
- cornerPoints: This is an array containing the objects bearing the barcode coordinates:
leftTop,rightTop,rightBottom, andleftBottom. - format: This is a string depicting the detected format of the barcode.
- rawValue: This is a string depicting the value of the barcode.
For example:
const imageElement = document.getElementById("barcode");
const barcodeDetector = new BarcodeDetector({
  formats: ["qr_code", "aztec"],
});

barcodeDetector
  .detect(imageElement)
  .then((barcodes) => {
    barcodes.forEach((barcode) => console.log(barcode.rawValue));
  })
  .catch((err) => {
    console.log(err);
  });
You can learn more about the barcode detection API in the MDN documentation.
Conclusion
In this article, you learned about certain built-in browser APIs that you can use to perform various tasks like displaying notifications, tracking a user’s location, manipulating a user’s browsing history, and detecting and extracting data from multiple barcode formats. Using these APIs in your web applications can extend their functionality, thus enhancing the user’s experience.
These APIs are only available in secure contexts (HTTPS) as a security measure.
A TIP FROM THE EDITOR: One of the APIs in the article is used to work with bar codes; check our Generating Barcodes With Vue article for a related topic.