Generating barcodes with Vue


Encrypting data has been a tough nut to crack for researchers over the ages. Barcodes are vertical lines that machines can read and offer information about the products they are affixed to. Barcodes encode product information into bars and alphanumeric characters, making it much faster and easier to ring up items at a store or track inventory in a warehouse.
Barcodes were invented in 1948 by two Drexel University students as an alternative for encrypting large chunks of data. The Barcode can shrink large pieces of data into thin and thick colored lines and has been widely used for holding details in shipping containers and shopping products. Besides ease and speed, bar codes’ significant business benefits include accuracy, inventory control, and cost savings.
In this tutorial, we’ll generate Barcodes dynamically from written text and save them to our device. To follow along with this tutorial, you should be familiar with Vue and the Vue_cli.

Getting started
Let’s start by creating our Vue app using the Vue_cli.
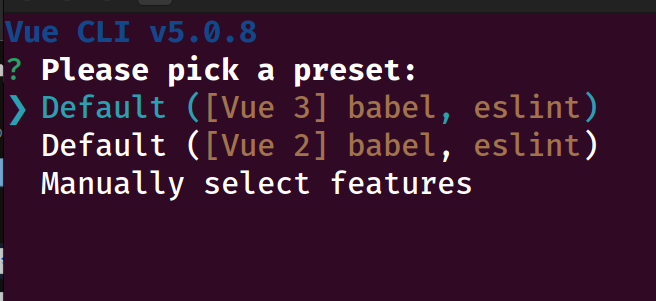
vue create barcode-generatorSelect the Default ([Vue 3] babel, eslint) option.
After completing the creation process, change the directory to the project directory using the command below.
cd barcode-generatorWe’ll use the vue-barcode plugin. Run the command below to install.
yarn add vue@3 jsbarcode@3 @chenfengyuan/vue-barcode@2With the vue-barcode package successfully installed, let’s register it as a component in our application. Copy the code block below and update the entire script tag.
<script>
import VueBarcode from "@chenfengyuan/vue-barcode";

export default {
  data() {
    return {
      BarcodeValue: null,
    };
  },
  components: {
    "vue-barcode": VueBarcode,
  },
};
</script>
In the code block above, we’re importing the VueBarcode and registering it as a vue component. We’re also initializing an observable value called BarcodeValue and setting its default value to null.
Creating the UI
Let’s create a user interface for the application. So users can type values and generate barcodes. We’ll start by creating some basic styles. Copy the code below and replace the style tag
<style scoped>
#app {
  font-family: Avenir, Helvetica, Arial, sans-serif;
  -webkit-font-smoothing: antialiased;
  -moz-osx-font-smoothing: grayscale;
  text-align: center;
  color: #2c3e50;
  margin-top: 60px;
}
.form {
display: flex;
  align-items: center;
  justify-content: center;
  flex-direction: column;
}
button {
  height: 40px;
  width: 310px;
  background-color: green;
  color: white;
  border: none;
  border-radius: 0.5rem;
  font-size: medium;
  display: block;
  margin-top: 1.3rem;
}
input {
  height: 30px;
  width: 300px;
  padding: 5px;
  font-size: 1rem;
  border-radius: 7px;
}
</style>
The code block above will give a nicer appearance to our form. Next, replace the entire template tag with the code block below.
<template>
  <form @submit.prevent="downloadBarCode()" class="form">
  <h1>Type to view BarCode</h1>
    <div ref="barCodeDiv">
      <vue-barcode
        ref="BarImg"
        v-if="BarcodeValue"
        tag="img"
        :value="BarcodeValue"
        :options="{ displayValue: true, lineColor: '#2B2B2C' }"
      />
    </div>
    <input type="text" v-model="BarcodeValue" />
    <button v-if="BarcodeValue">Save BarCode</button>

  </form>
</template>
Based on the code block above, we’re setting our input value to the BarcodeValue created earlier and using it to generate our Barcode in the vue-barcode component. We’re also displaying the Barcode and the Save button if the BarcodeValue has value and hiding it when it does.
We are also running a downloadBarCode() function upon submission of our form. This runs whenever the Save BarCode button is clicked.
Saving barcodes
After generating our Barcode, we’ll like to save it as an image on our device. Let’s import the [html2canvas](https://www.npmjs.com/package/html2canvas) package to achieve this feature.
yarn add html2canvasThe html2canvas package makes it possible to convert an HTML tag to an image. With the package installed, head over to the script tag and import the package.
<script>
import VueBarcode from "@chenfengyuan/vue-barcode";
import html2canvas from "html2canvas";   // imported the html2canvas package

export default {

  ...   // other code blocks

  methods: {
    downloadBarCode() {
      html2canvas(this.$refs.barCode).then((canvas) => {
        var barcodeImgTag = document.createElement("a");
        document.body.appendChild(barcodeImgTag);
        barcodeImgTag.download = "Barcode.jpg";
        barcodeImgTag.href = canvas.toDataURL();
        barcodeImgTag.target = "_blank";
        barcodeImgTag.click();
      });
    },
  },
};
</script>
In the code block above, we’re importing the html2canvas and using it in downloadBarCode() function. We’re grabbing the barCode div using our ref, converting it into an image, and then save it to our device storage. Finally, run the code using the command below.
yarn serve
Conclusion
In this tutorial, we’ve been able to look at what Barcodes are, their uses, and how to generate them. We’ve also learned how to save the generated barcodes to our device as an image.
Here is the link to the complete code on Github.