Getting started with Deno: Building a REST API
Learn how to use Deno by building a RESTful API


When deciding which Javascript runtime environment to use for your next project, Node.js would be the first to come to your mind. This is because Node.js is powerful, popular, and widely used. This article will provide you with a very valid option by showing you how to use Deno, by building a RESTful API as an example.
Node.js is an open-source, server-side runtime environment that allows developers to use JavaScript on the server side. However, Node.js has some limitations, such as security issues and difficulty managing dependencies. Deno is a secure and modern runtime environment for JavaScript and TypeScript. Deno was created to address some of the limitations of Node.js by providing built-in security features, such as sandboxed execution and a built-in package manager that allows for easier dependency management.
The main features of Deno are:
TypeScript support: Deno has first-class support for TypeScript, meaning you can write code in TypeScript and automatically compile it to JavaScript when you run your scripts.Secure by default: Deno has built-in security features such as restricted permissions, a secure default runtime environment, and the ability to explicitly grant permissions to specific scripts.ES6 module support: Deno supportsES6modules natively, meaning you can write modular code using theimport/exportsyntax without needing a bundler like webpack or Rollup.Built-in utilities: Deno has several built-in utilities that make it easier to work with JavaScript and TypeScript, such as a built-in test runner, a file watcher, and a debugger.Standard Library: Deno has a standard library of modules included with the runtime, including modules for working withHTTP,HTTPS, WebSocket, cryptography, testing, and more.Built-in code formatter: Deno has a built-in code formatter that can automatically format your code according to a set of style rules, which helps to keep your code consistent and easy to read.Dependency management: Deno has a built-in dependency manager that allows you to import dependencies directly fromURLsorlocal files, which makes it easy to manage your project’s dependencies without needing an external package manager.
One of the most significant differences between Deno and Node.js is how they handle dependencies. Node.js uses a centralized package manager called npm, which allows developers to install and manage third-party modules. On the other hand, Deno relies on importing modules directly from URLs or local file paths, which makes it more flexible.
Deno Installation
Before we get started with Deno, we need to install it on our computer. To install Deno on the shell, run the following command:
curl -fsSL https://deno.land/x/install/install.sh | shAfter installation, you should see a message like this:
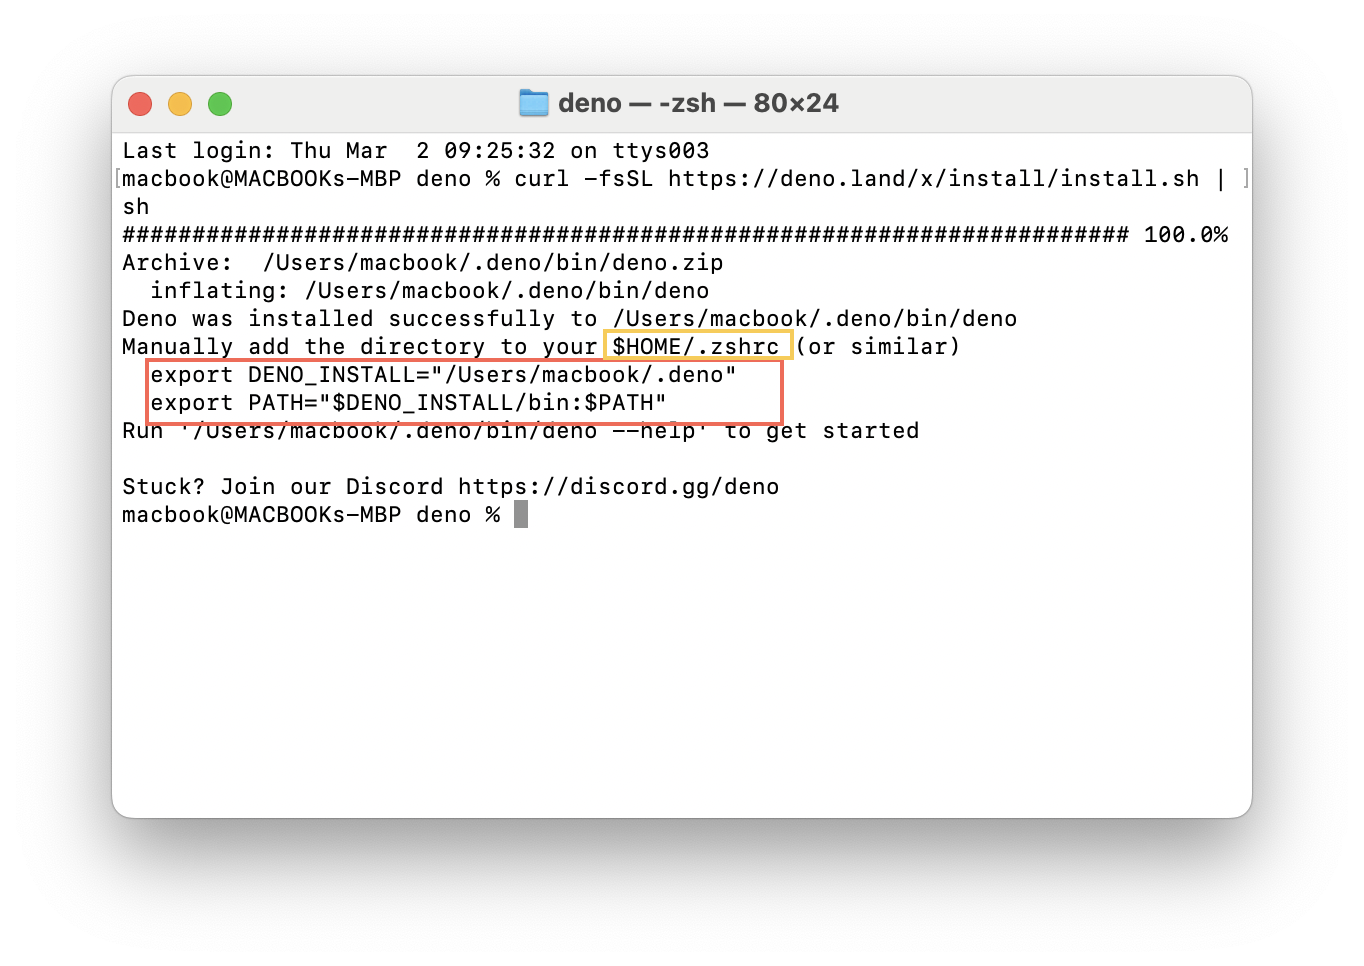
You must add the Deno binary to your system path to use Deno. The message above suggests adding the following lines to your .zhsrc or similar:
export DENO_INSTALL="/Users/macbook/.deno"
export PATH="$DENO_INSTALL/bin:$PATH"
Make sure to replace macbook with your actual system username.
Create a file called deno_app.ts and copy the code below to it:
console.log("Welcome to Deno!");Run the code on your terminal using the command below:
deno run deno_app.tsIf you see Welcome to Deno! on your terminal, congratulations, you have Deno installed successfully.
Creating MYSQL database
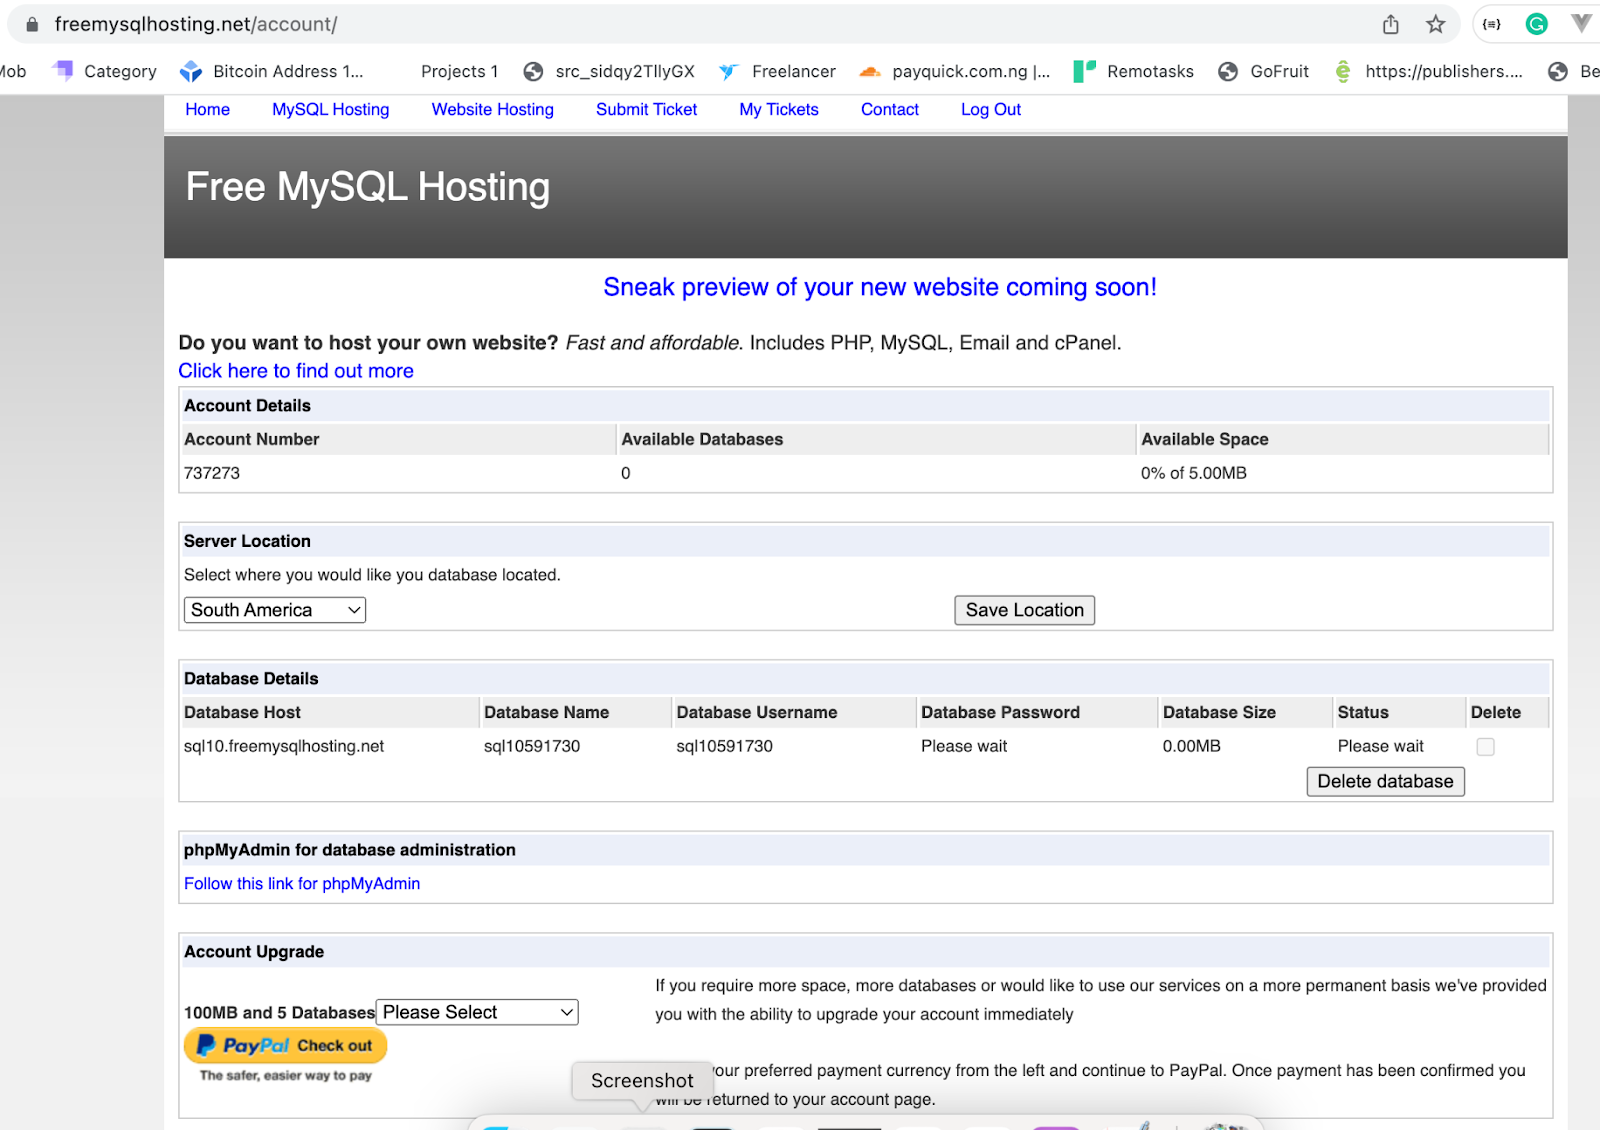
Let’s create the database for the application. In this tutorial, we’ll use Freemysqlhosting.net to create a free testing MySQL database. Visit https://www.freemysqlhosting.net/register/ and create a new account or sign in if you already have one. Create a new database, as shown in the screenshot below:
 Once you have created the database, check your inbox for the password. Visit http://www.phpmyadmin.co/ to log in to
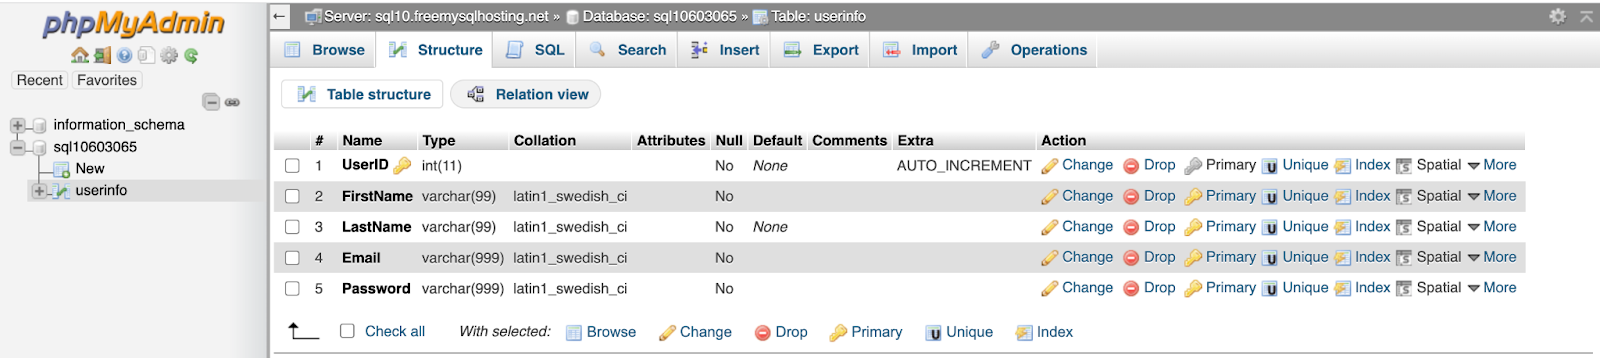
 phpMyAdmin.
Next, create a userinfo table in the database with the following fields: UserID, Firstname, Lastname, Email, and Password.
Building the REST API:
To get started, we need to create a Deno server using the Oak framework. Inside the application working directory, create a file named app.ts and add the following code.
import { Application, Router } from "https://deno.land/x/oak/mod.ts";
import { Client } from "https://deno.land/x/mysql/mod.ts";

const client = await new Client().connect({
  hostname: "sql10.freemysqlhosting.net",
  username: "sql10603065",
  db: "sql10603065",
  password: "1KhA464QMh",
});

const router = new Router()

  .post("/register", async (ctx) => {})

  .post("/login", async (ctx) => {})
  .get("/userinfo/:UserID", async (context) => {})
  .post("/update", async (ctx) => {})
  .get("/deleteuser/:UserID", async (context) => {});

const app = new Application();
app.use(router.routes());
app.use(router.allowedMethods());

await app.listen({ port: 8000 });
In the code structure above, we first import the Application and Router classes from the Oak framework and the Client class from the MySQL module.
Next, we create a new instance of the Client class to establish a connection to the MySQL database.
Replace the hostname, username, db, and password details with your own.
After connecting to the database, we create the following API endpoints:
POST "/register": This endpoint is used to register a new user.POST "/login": This endpoint is used to authenticate a user.GET "/userinfo/:UserID": This endpoint is used to retrieve information about a user based on their UserID.POST "/update": This endpoint is used to update user information.GET "/deleteuser:UserID": This endpoint is used to delete a user based on their UserID.
Session Replay for Developers
Uncover frustrations, understand bugs and fix slowdowns like never before with OpenReplay — an open-source session replay tool for developers. Self-host it in minutes, and have complete control over your customer data. Check our GitHub repo and join the thousands of developers in our community.
User’s Registration
In the /register route, we will validate and register user details in the database. To do that, add the following code inside the /register route.
.post("/register", async (ctx) => {
const { firstname, lastname, email, password } = await ctx.request.body()
.value;
const checkemail = await client.query(
`SELECT * FROM userinfo WHERE Email='${email}'`
);
if (checkemail.length == 1) {
ctx.response.body = { message: "Email already exit." };
} else {
await client.query(
`INSERT INTO userinfo('Firstname','Lastname','Email','Password')VALUES
('${firstname}','${lastname}','${email}','${password}')`
);
ctx.response.body = { message: "User registered successfully" };
}
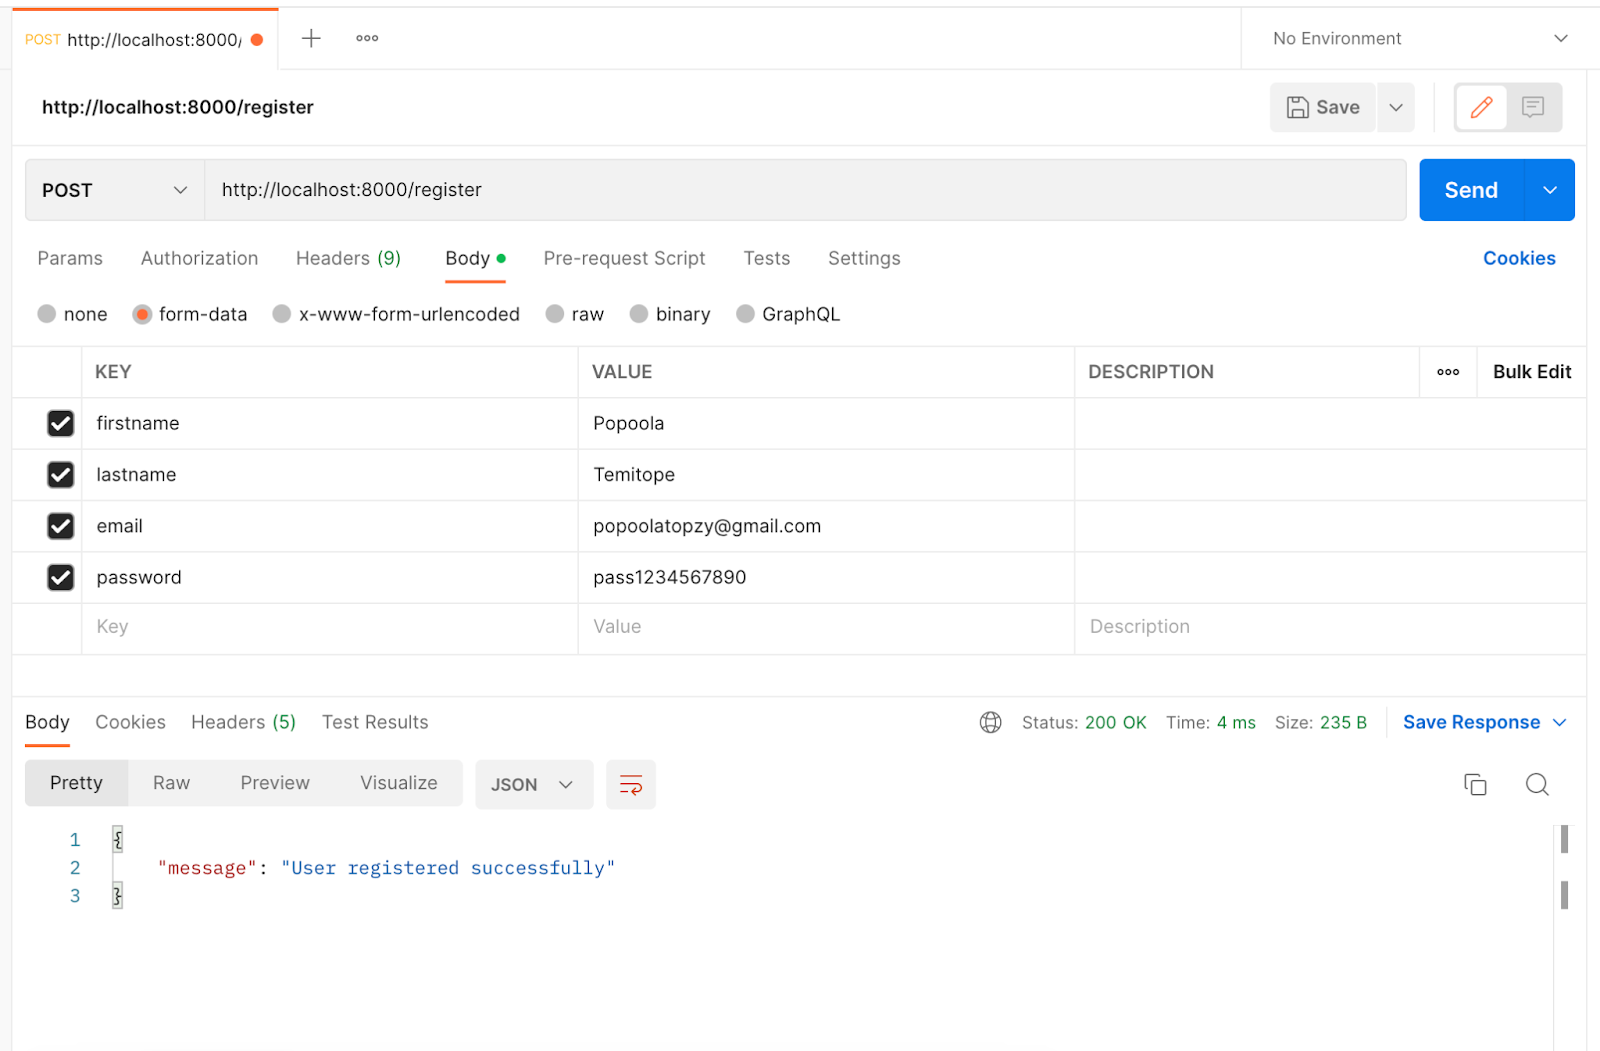
});In the code above, we get the request data using ctx.request.body().value. We then check if the user’s email has not been registered in the database before registering the user.
Next, run the following command on the terminal to start the application.
deno run --allow-net --watch app.tsAfter starting the application, the endpoint http://localhost:8000/register should work. Here is the output result of the endpoint on Postman.
User’s Login
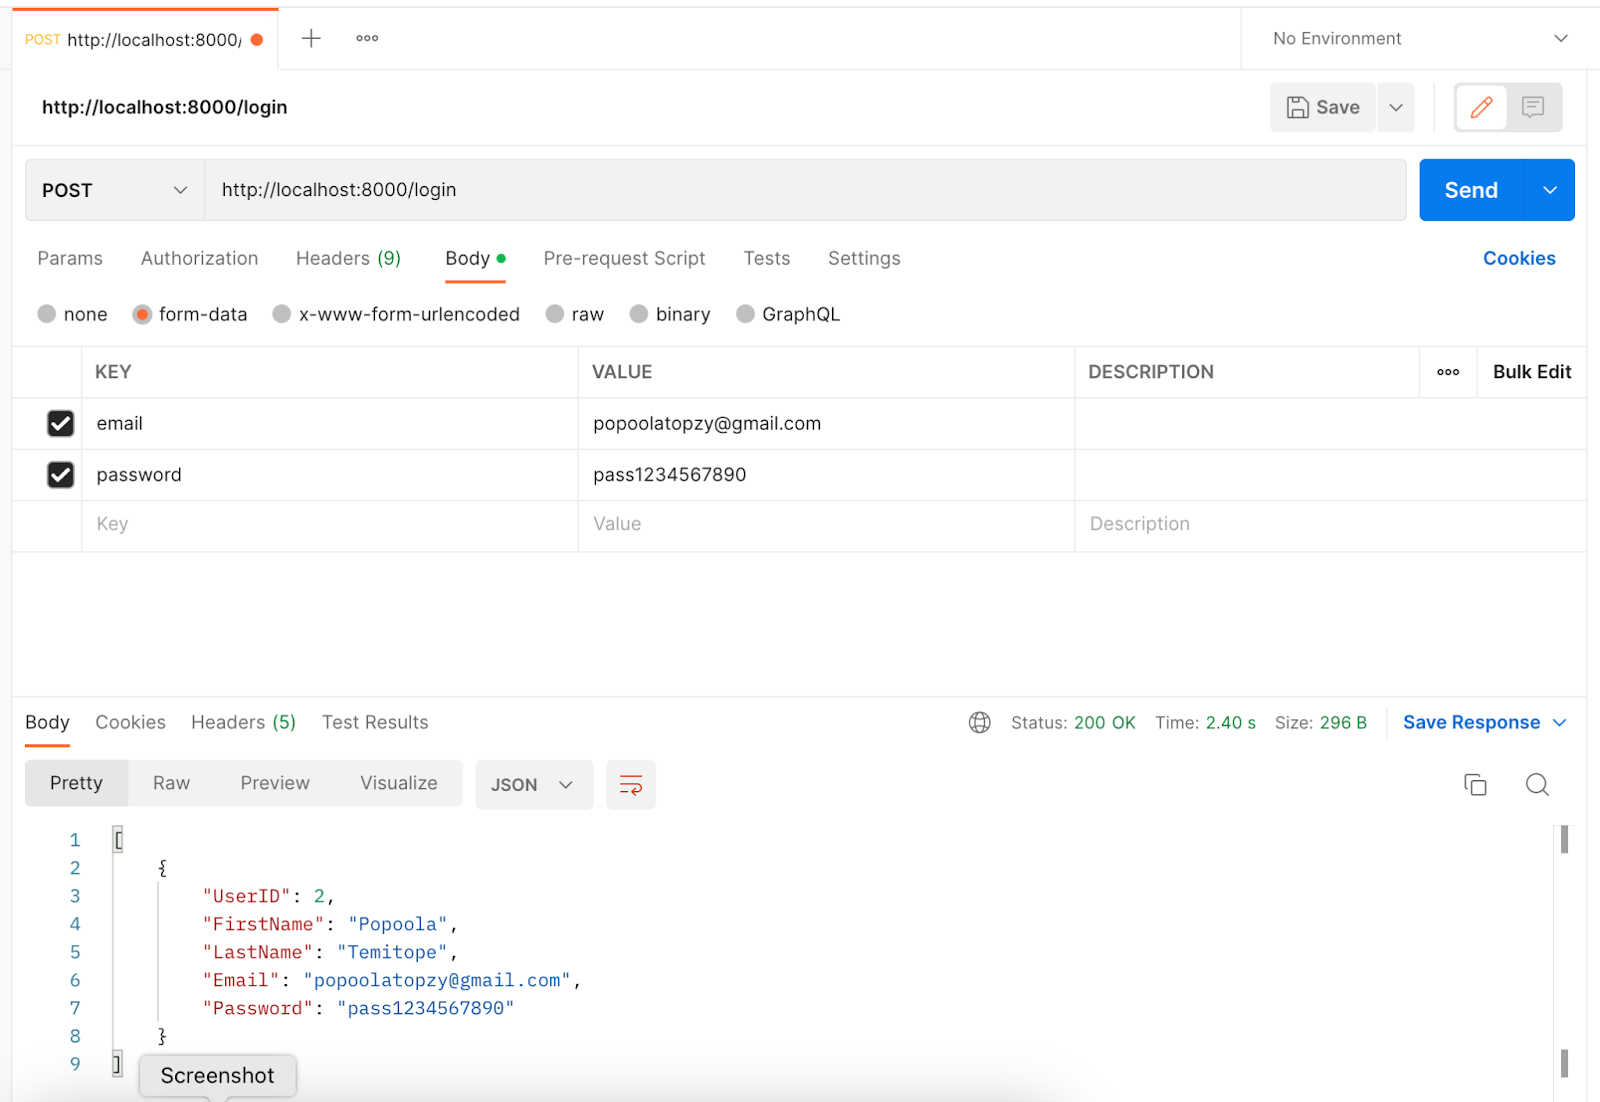
The login endpoint will be used to authenticate the users. Add the following code to the /login route to create the endpoint.
.post("/login", async (ctx) => {
  const { email, password } = await ctx.request.body().value;
  const login = await client.query(
    `SELECT * FROM userinfo WHERE Email='${email}' and Password='${password}'`
  );
  if (login.length == 1) {
    ctx.response.body = login;
  } else {
    ctx.response.body = { message: "Email/Password incorrect" };
  }
});
In the code above, we validate whether the email and password are correct. An error message is returned for invalid credentials, while the user details are returned for correct credentials, as shown below.
Getting User Details
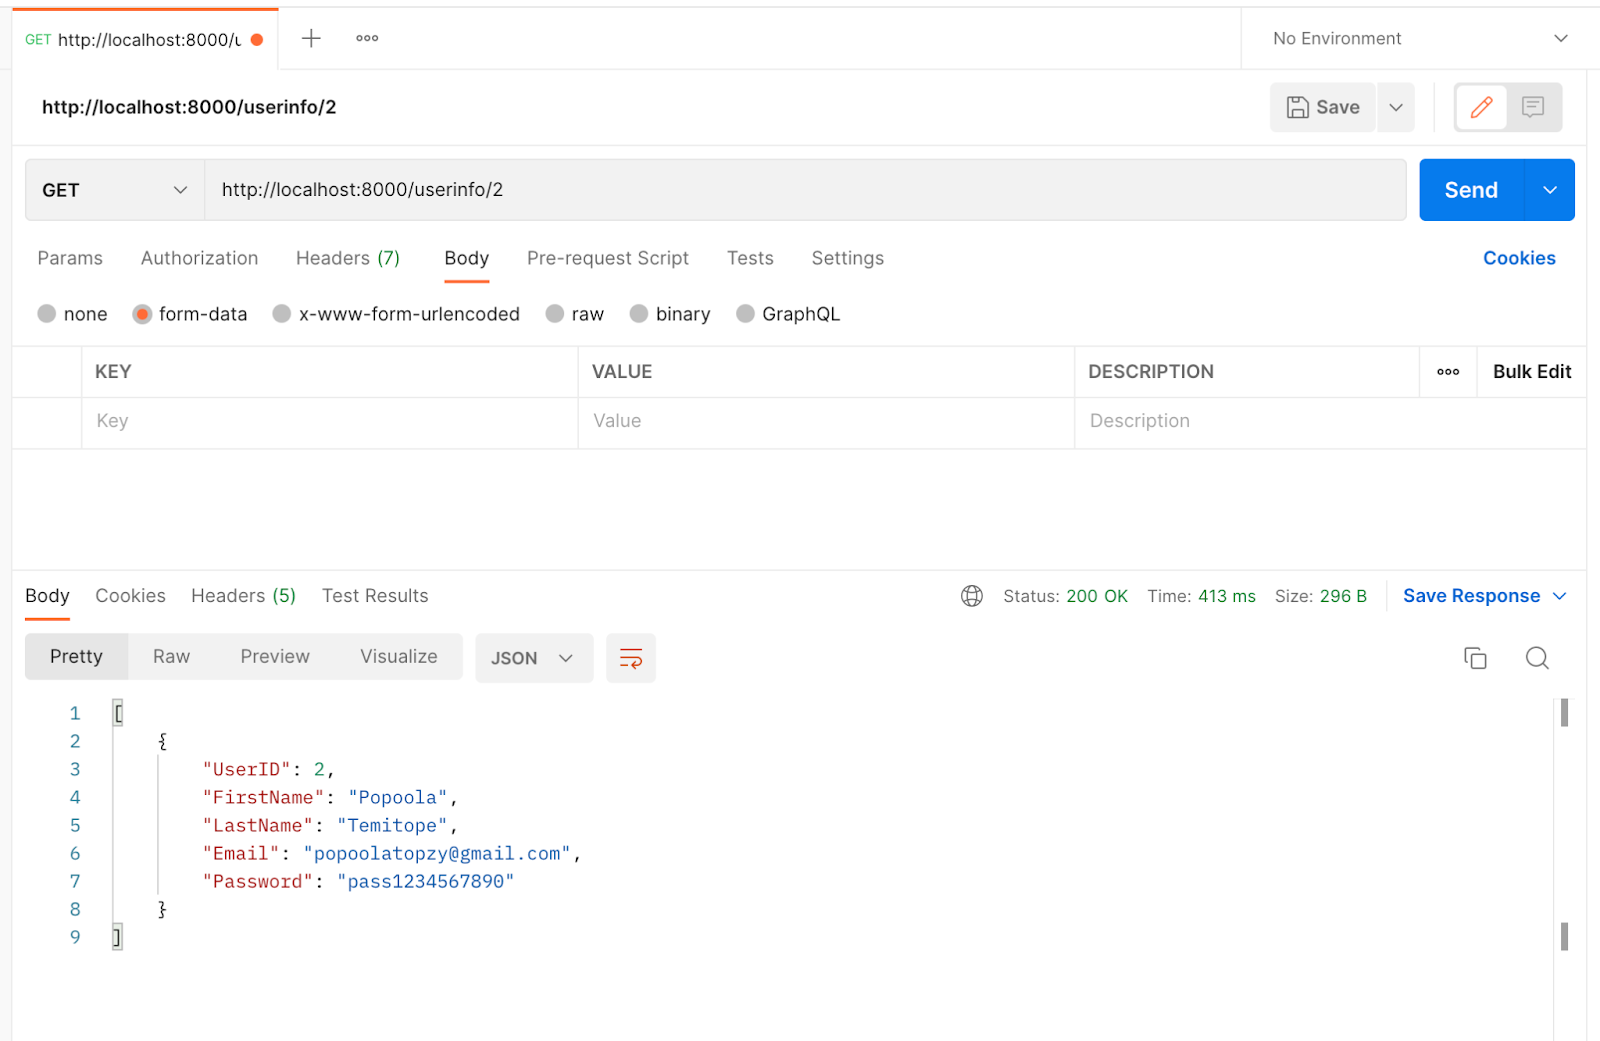
To get a user’s record, we must pass the user ID along with the /userinfo/:UserID endpoint using the GET method. Add the following code to the /userinfo/:UserID route in the app.ts file.
.get("/userinfo/:UserID", async (context) => {
  var userid = context.params.UserID;
  const userinfo = await client.query(
    `SELECT * FROM userinfo WHERE UserID='${userid}'`
  );
  if (userinfo.length == 1) {
    context.response.body = userinfo;
  } else {
    context.response.body = {
      status: "Invalid UserID",
      errorMessage: "Enter a valid user ID",
    };
  }
});
The above API endpoint can be accessed using http://localhost:8000/userinfo/1, as shown in the image below.
Update User Information
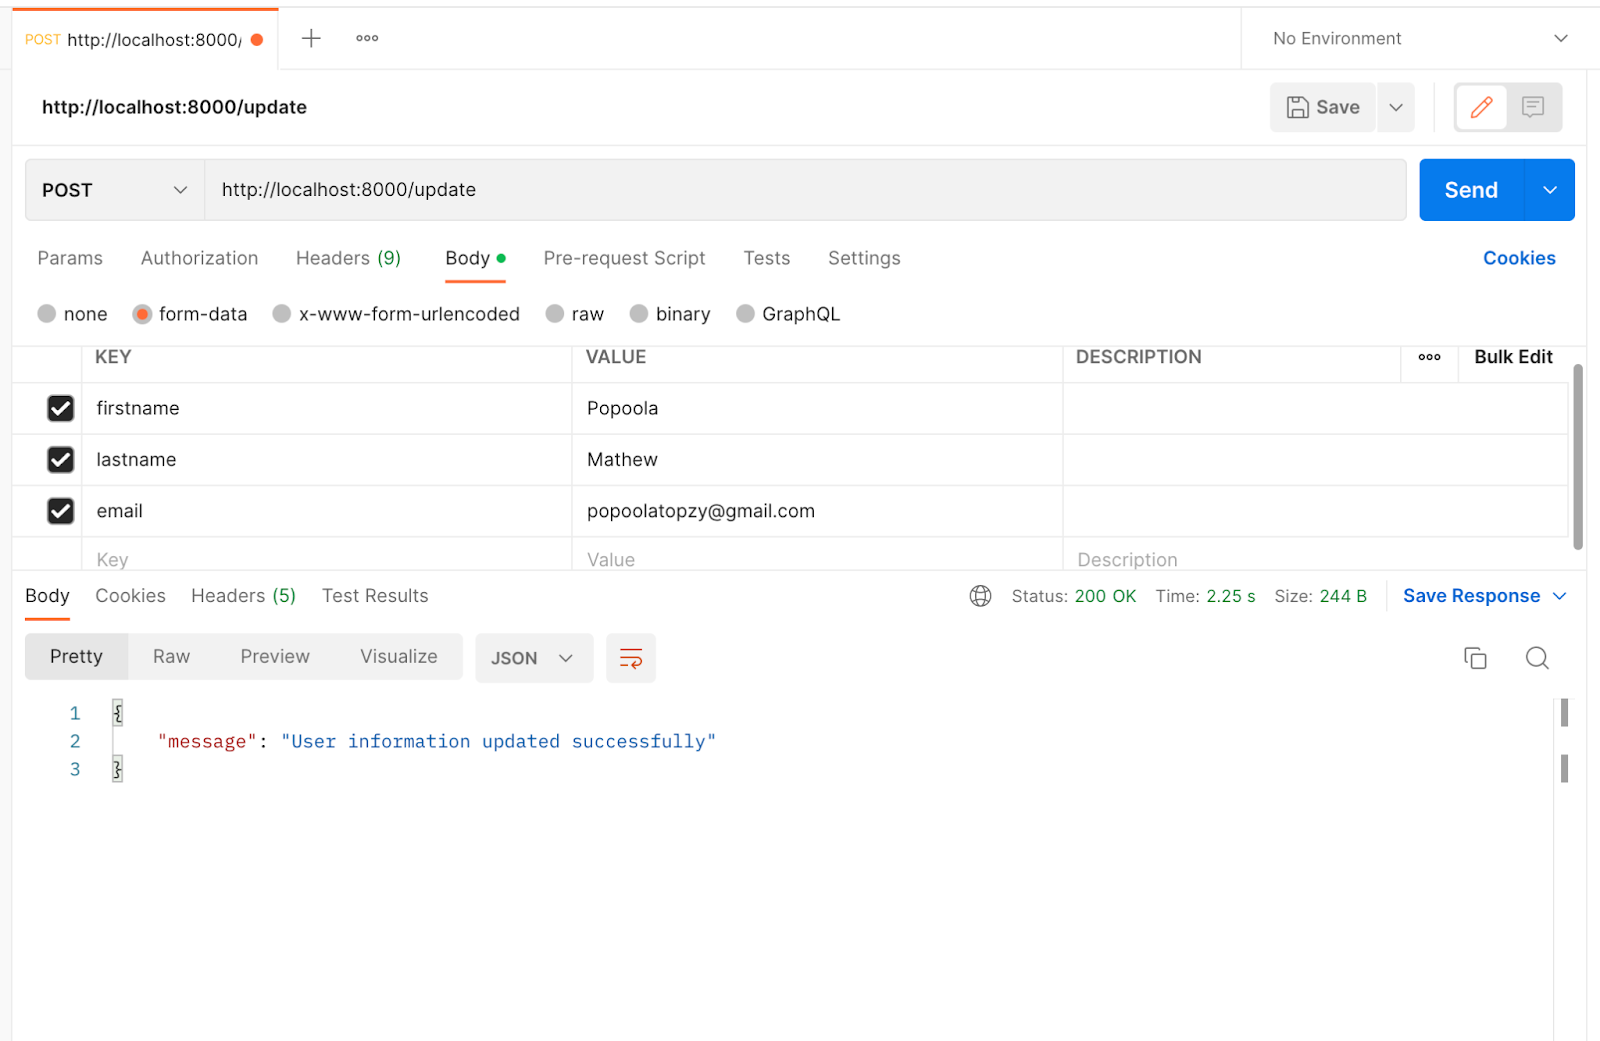
Next, we need to be able to update user details via the API using a POST request. Add the following code to the /update route to create the update endpoint.
.post("/update", async (ctx) => {
  const { firstname, lastname, email } = await ctx.request.body().value;
  const checkemail = await client.query(
    `SELECT * FROM userinfo WHERE Email='${email}'`
  );
  if (checkemail.length == 0) {
    ctx.response.body = { message: "Email does not exit." };
  } else {
    await client.query(
      `UPDATE userinfo SET Firstname='${firstname}',Lastname='${lastname}' WHERE Email='${email}'`
    );
    ctx.response.body = { message: "User information updated successfully" };
  }
});
We can now update user info using the http://localhost:8000/update endpoint, as shown in the image below.
Delete User From the Database
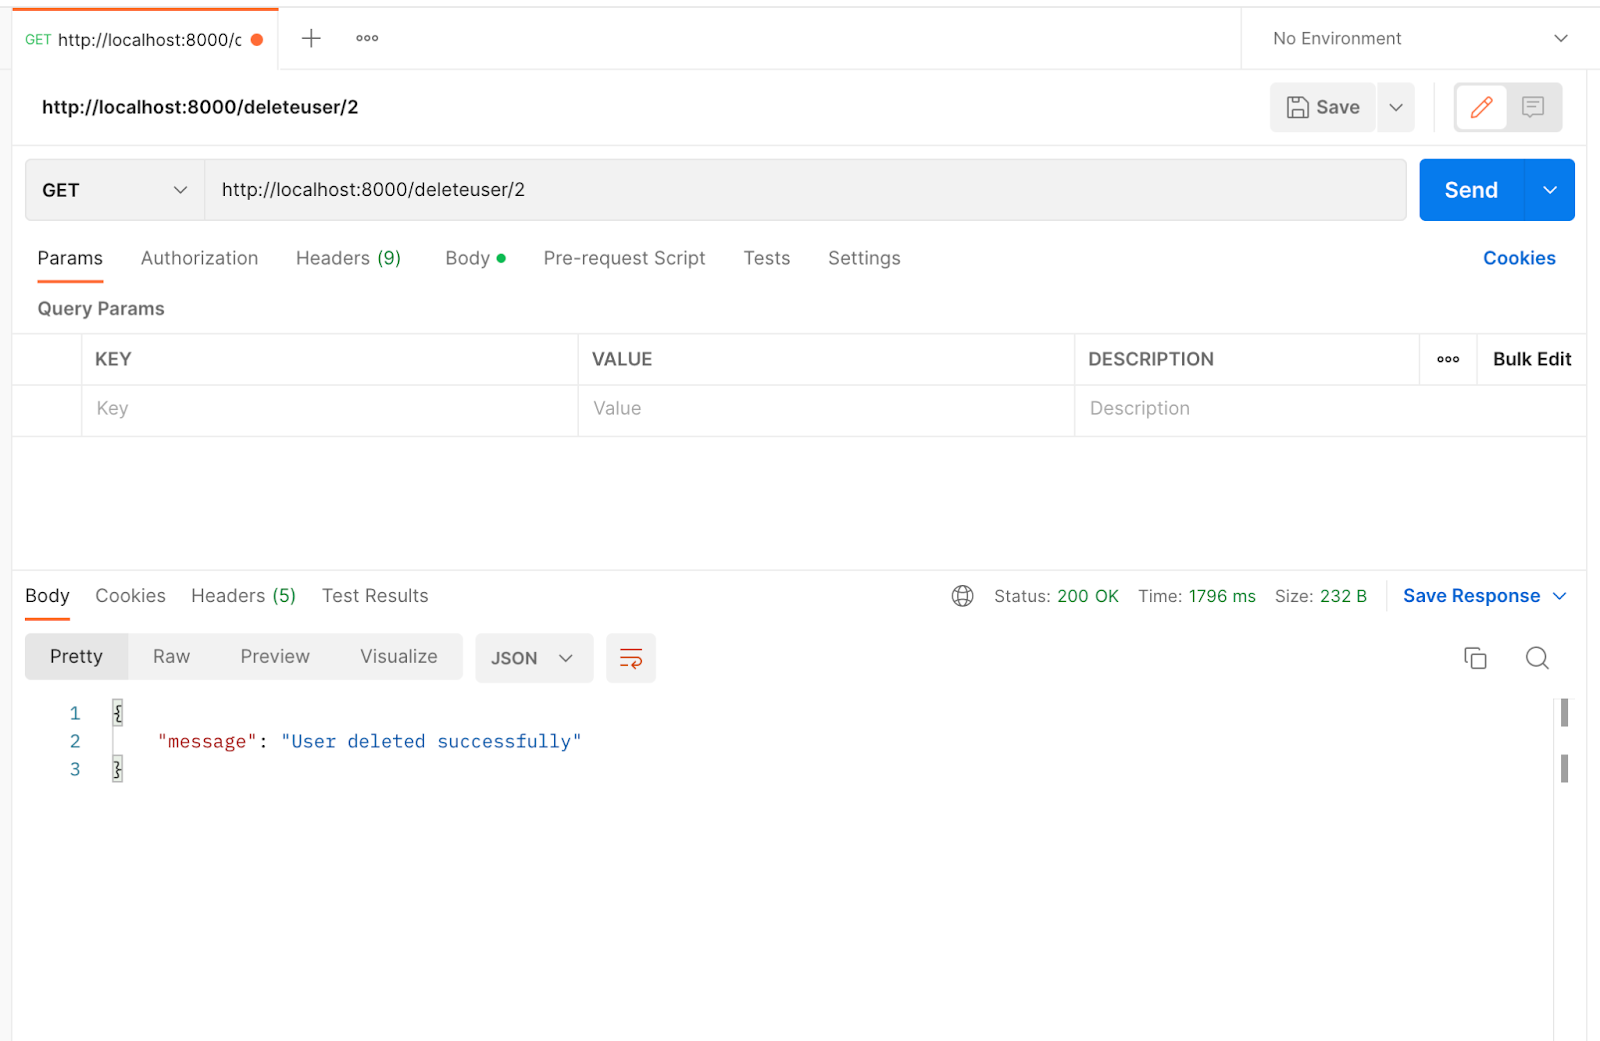
To avoid accidentally deleting users, we can delete them one by one using their User ID. To delete a user via the API endpoint, add the following code to the /deleteuser/:UserID endpoint.
router.get("/deleteuser/:UserID", async (context) => {
  var userid = context.params.UserID;
  const deleteuser = await client.query(
    `DELETE FROM userinfo WHERE UserID='${userid}'`
  );

  context.response.body = {
    message: "User deleted successfully",
  };
});
We can delete the user with ID 2 by calling the endpoint http://localhost:8000/deleteuser/2, as shown below.
Conclusion
Getting started with Deno is simple. In this tutorial, we learned how to build a complete REST API using Deno, Oak, and MySQL. If you want to learn more about the runtime environment, you can visit the official Deno documentation.
Gain Debugging Superpowers
Unleash the power of session replay to reproduce bugs and track user frustrations. Get complete visibility into your frontend with OpenReplay, the most advanced open-source session replay tool for developers.