

In web, mobile, or platform-independent software application development, you would probably need to request data using a service. An excellent practice to quickly write, debug, and test APIs is using an API tester, such as Postman, and this article will show you how to use it to advantage.
Postman is a popular stand-alone software for building, testing, and documenting Application Programming Interfaces (APIs). APIs are software that serves as intermediaries between two applications, controlling the communication between them, e.g., an API for sending atmospheric condition stats to a weather application.
Postman allows users to test the operation of APIs using a user-friendly Graphical User Interface (GUI) to send and receive responses to HTTP(s) requests. The API tool can perform different HTTP requests such as GET, POST, PUT, DELETE, etc., allowing users to pass headers, parameters, and body content as desired. The Postman API tester consists of various tools that can significantly improve the API lifecycle, from design, testing, documenting, and implementation.
Benefits of Postman in API Development
Below are the benefits of Postman in the field of API development:
- Postman provides a user-friendly visual interface that makes creating and executing API requests easy. It is easy to learn, properly documented, and a tool with vast capabilities.
- Automated test scripts and validation of API responses can be defined to ensure that it meets a desired schema.
- Postman provides features for team collaboration, version control, and documentation, making it easy to onboard and work hand-in-hand with others on API development and testing.
- Postman supports authentication methods, making it possible to develop and test APIs that require authentication.
- With Postman, users can debug APIs in development, get metrics to track the API’s performance and identify improvement areas.
- Postman also provides various integration options with other software tools for your API development needs.
- API requests, when poorly written, return errors that may not be easily decipherable to most programmers, and Postman helps you understand and debug them.
Setting up Postman
In this section, we will discuss how to start using the Postman tool. Two options are available to use Postman; you can either use the web version or download and set up the Postman software.
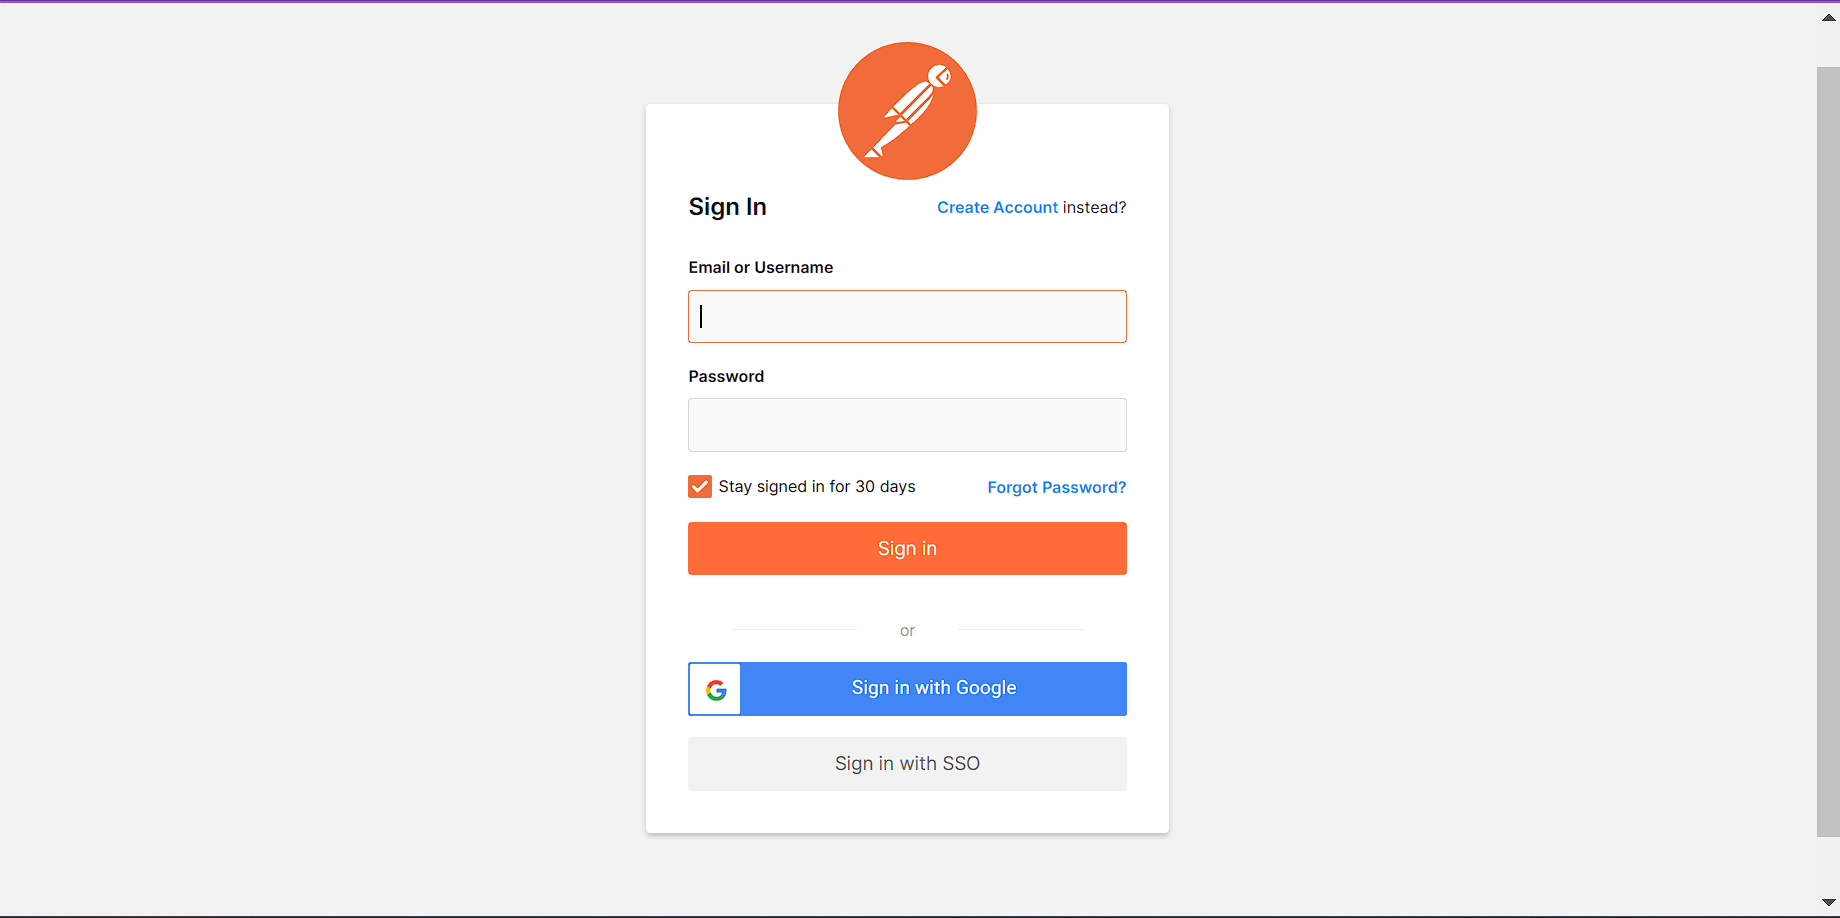
To make use of the web version, in your web browser, navigate to the Postman URL and sign in if you have an existing account; else, create a new user account on the platform.
If you use the installation method instead, you can find and install the appropriate build for your OS on the download page. Instructions to install Postman for Windows, Mac, and Linux systems are here. After downloading the application, launching it will produce a result similar to the image below:
For this tutorial, we will be making use of the web version. But don’t fret; both the web and app versions are similar.
Understanding the Postman Interface
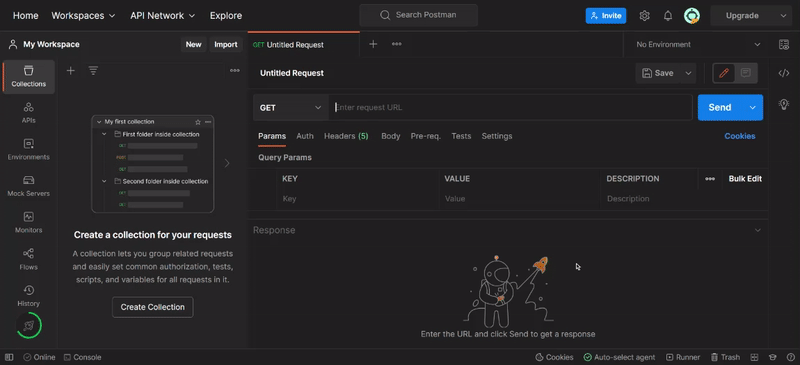
This section aims at giving you an understanding of the features offered by Postman at a glance. After completing the account creation process, you will be directed to a page similar to the image below:
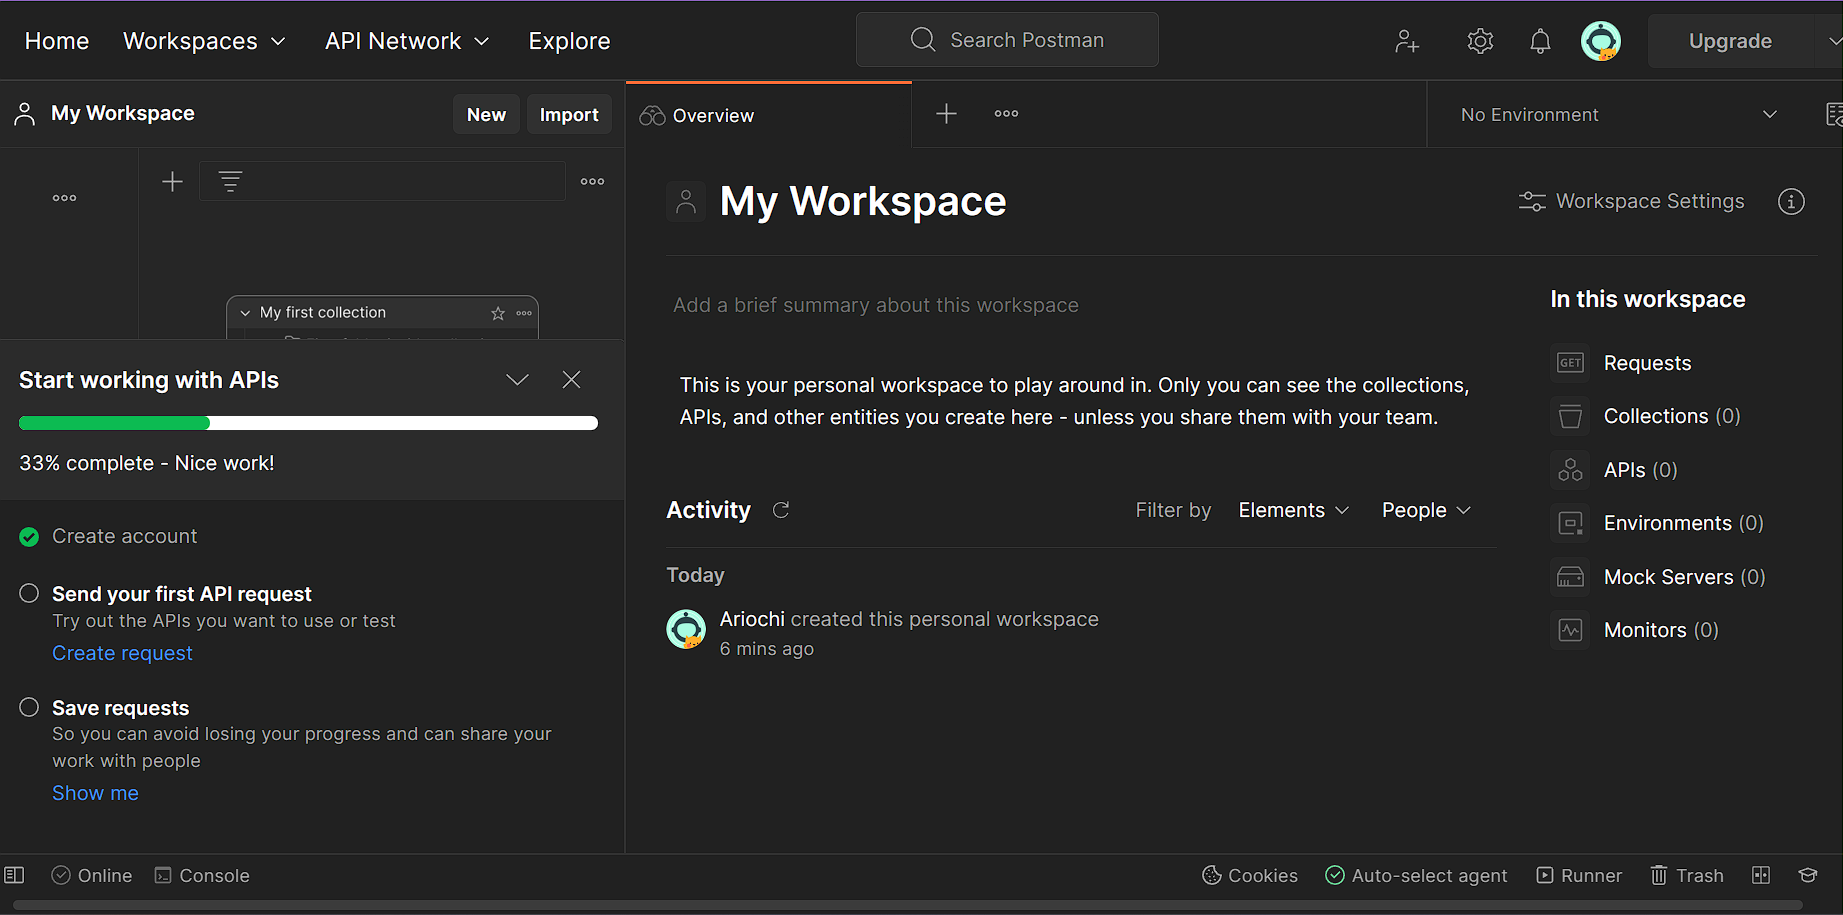
We have a custom workspace, “my workspace,” created for us by default. You can create additional workspaces from the “Workspace” dropdown option on the navigation bar. Workspaces are a great way to organize your API collections and related entities. To open up an API testing section in the workspace, click the plus icon next to the “overview” tab.
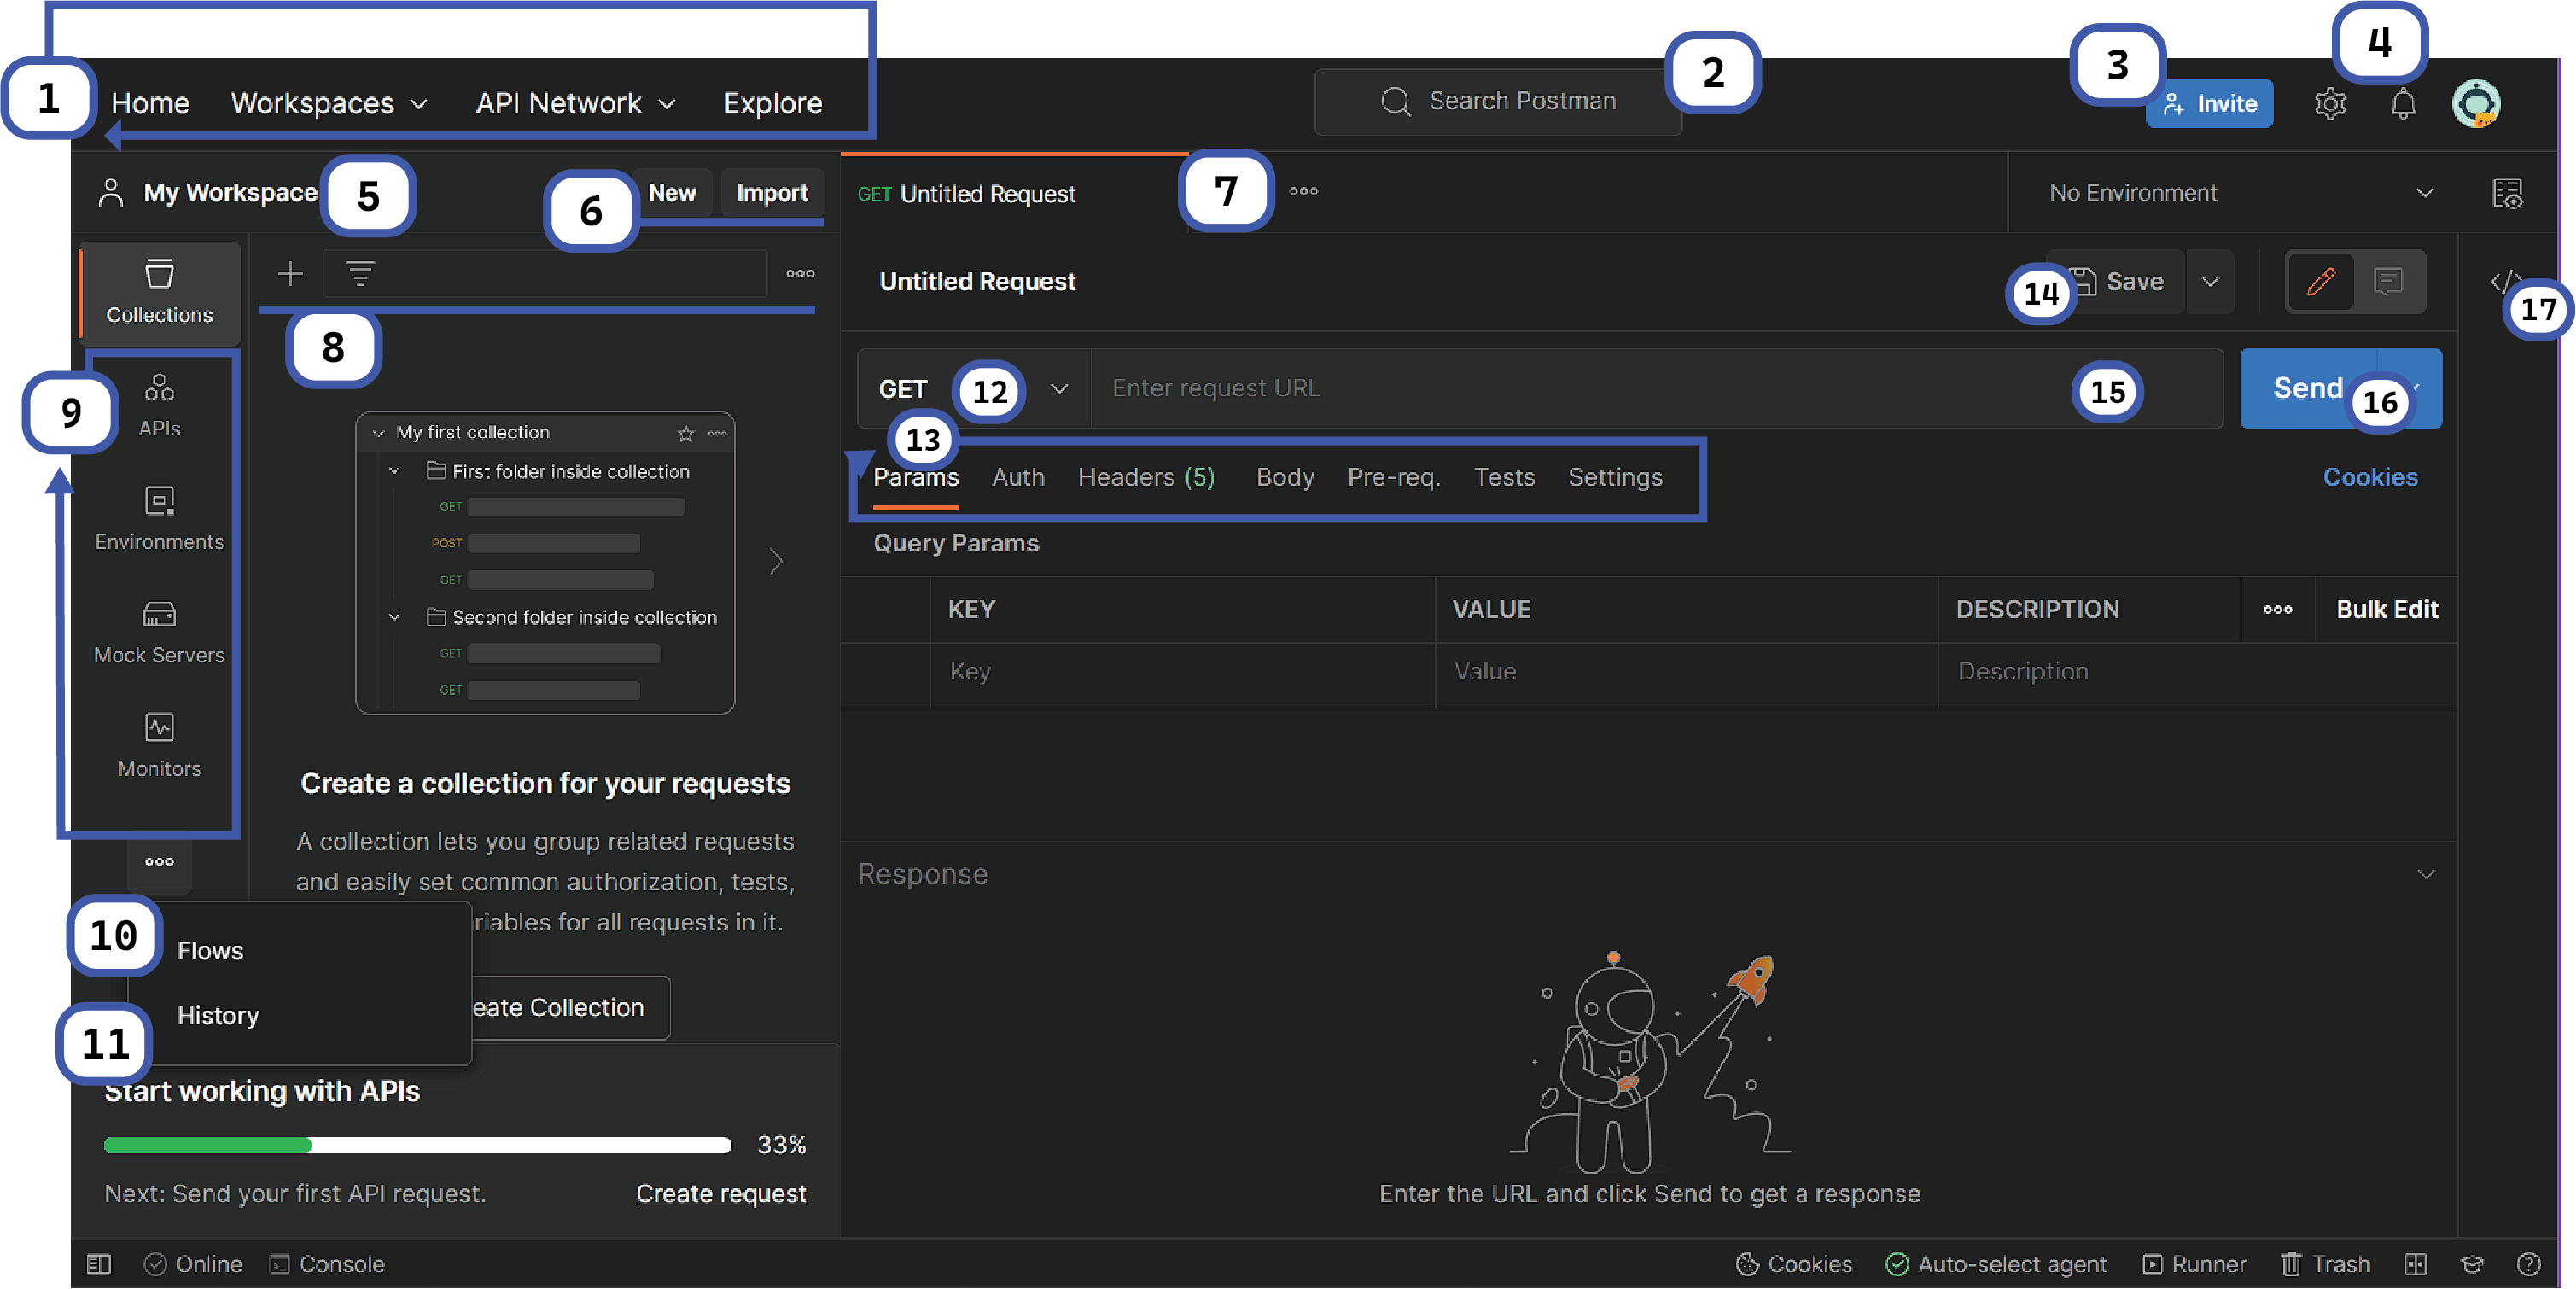
- In this section, we have the following tabs:
- Home – This will redirect you to the default home page, where you can select the workspace you desire to work with.
- Workspaces - This lets you change the current workspace or create new ones.
- API Network - With API network, you can choose from private, public, and partner API networks to work with.
- Explore - Explore opens up a new tab with a page that shows different examples of APIs, workspaces, and collections created by other users, which you may want to test out.
- Search Postman: This section provides a search field that can look through APIs, collections, teams, requests, etc., available in Postman.
- Invite – Provides the option to collaborate on a workspace by inviting additional team members.
- Settings and a notification tab
- This displays the name of the current workspace you are working in. In this case, the current workspace is “My Workspace”.
- New and Import - With the “new” option, you can create new requests, collections, or environments. The “import” option provides the functionality to import collection or environment into the current workspace. These imports can also be files, folders, links, raw texts, etc.
- Request tab – This tab displays the titles of the requests you are working on or have opened. By default, “Untitled Request” is assigned to a request without a specified title.
- Collections section - You can organize your test suite by creating collections here. The created collections can also have subfolders and contain multiple requests. You can also duplicate the created folders and requests here.
- This tab contains the APIs, Environments, Mock Servers, and Monitors sections. Here, you can organize and create new elements in any of the mentioned sections.
- Flows - This is a visual tool for creating chains of requests to handle data and create API workflows in the workspace.
- History – Past requests you have made using Postman will be displayed in the History section. This makes it easy to track previous actions taken in past requests.
- HTTP Request – This displays the current type of request being used. In this case, the request is the
GETrequest. Clicking the dropdown arrow will display a list of requests such asGET,POST,PUT,PATCH,COPY,DELETE, etc. The most commonly used request types are theGETandPOSTrequeTheype. - This tab contains the following options:
- Params – This is where you will write the required parameters to perform a request, such as key values or search queries.
- Authorization – To access authenticated APIs, proper authorization credentials are required. This could be in the form of usernames or passwords, authorization bearer tokens, etc.
- Headers – Content type JSON header or other header types can be set depending on the type of request.
- Body – In this section, you can customize details to be passed across. The
Bodyis commonly used inPOSTrequests. - Pre-request Script – These refer to scripts that will be executed before the run-time of the request. Usually, a pre-request script sets up the environment to run with predetermined settings to ensure tests run as required.
- Tests – These refer to the scripts in the request which are executed.
- Settings – This contains a checklist of options that can be enabled for particular requests, such as SSL certificate verification, automatic redirects, etc.
- Save – The save option is used to create a save date of the current request or overwrite the previous changes if the save data already exists.
- Request URL – This is the text field where you must enter the endpoint URL to communicate with the API.
- Send – The send button executes the request to the specified endpoints.
Using Postman for API Development
In this section, we will demonstrate how you can easily create, send and handle API requests and responses.
Creating and Sending Requests on Postman
To use a specific API, we first need to understand how we can communicate with that API. Information on such can always be found in the API documentation. Important information to note is the endpoints of the API and authorization credentials (if required).
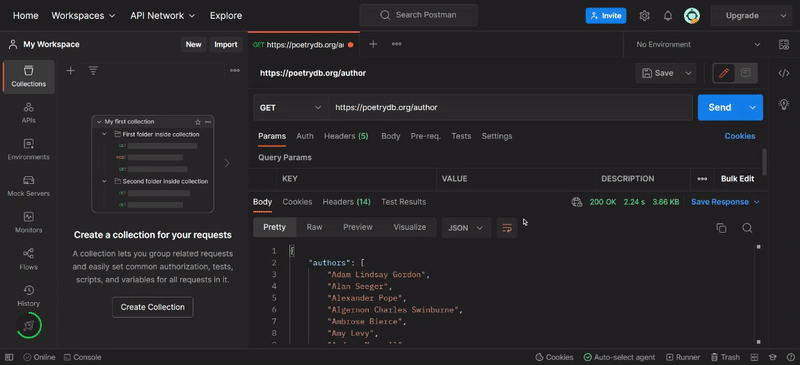
For this section, we will use a simple poetry API that returns poetry data based on the request endpoint.
In the GIF above, we are fetching titles of poetries available on the API. POST requests will be made in the next section as such requests usually require authorization.
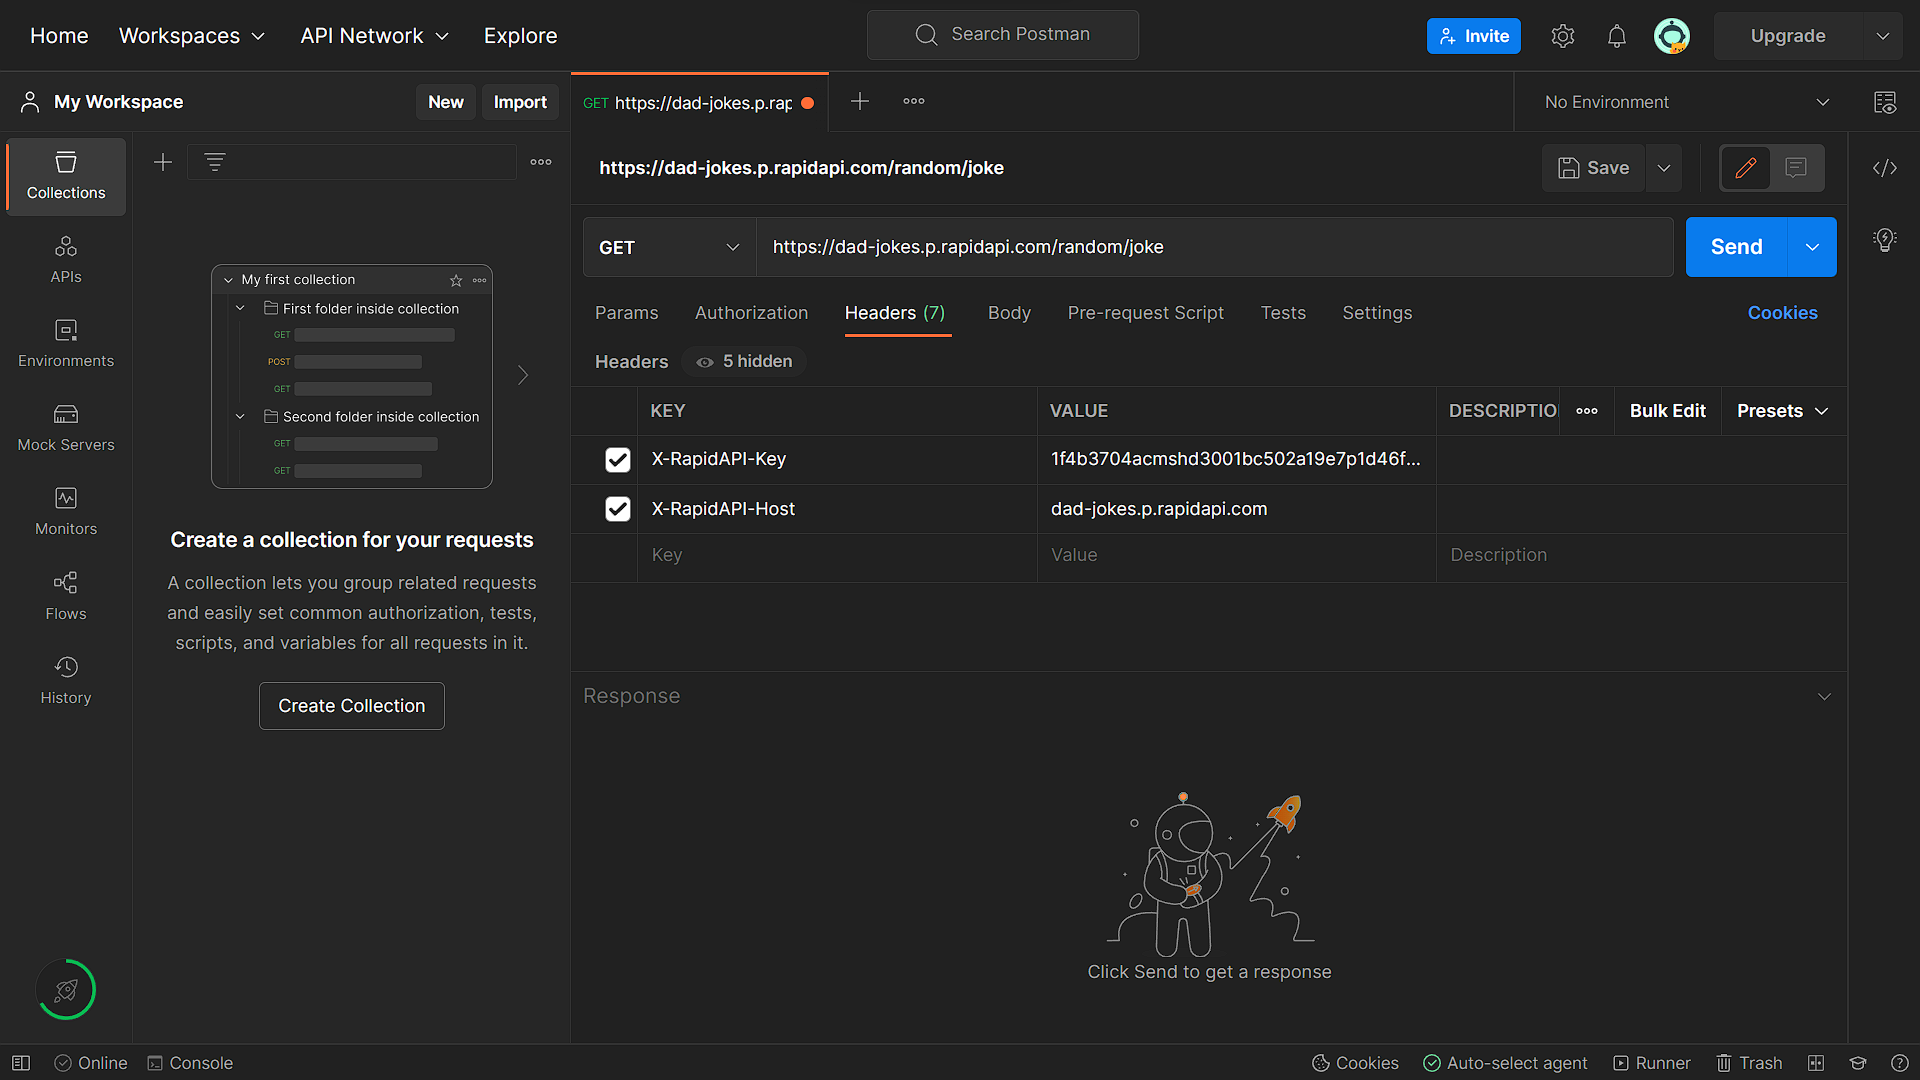
Handle APIs with Authentication Credentials
To demonstrate requests requiring authentication tokens, we will use a dad jokes API. This API returns a random joke as a response when a GET request is made.
To create a request to the API, we will use the specified GET endpoint https://dad-jokes.p.rapidapi.com/random/joke. Dad Jokes is among the APIs owned and managed by RapidAPIs. To get an authorization token, sign up on the RapidAPI platform. After creating an account, search for the desired API and subscribe to it. The API test endpoint sections will display your personal authentication info for the API, in this case, an API key and string.
There are two ways we can add our authentication credentials, the first is to add it directly in the headers pair-value fields, and the second is to specify the token in the Authorization section.
To add the authorization details, open the Headers section and enter the corresponding key-value pairs. To make the request, we must paste the endpoint in the HTTP request field and hit the send button.
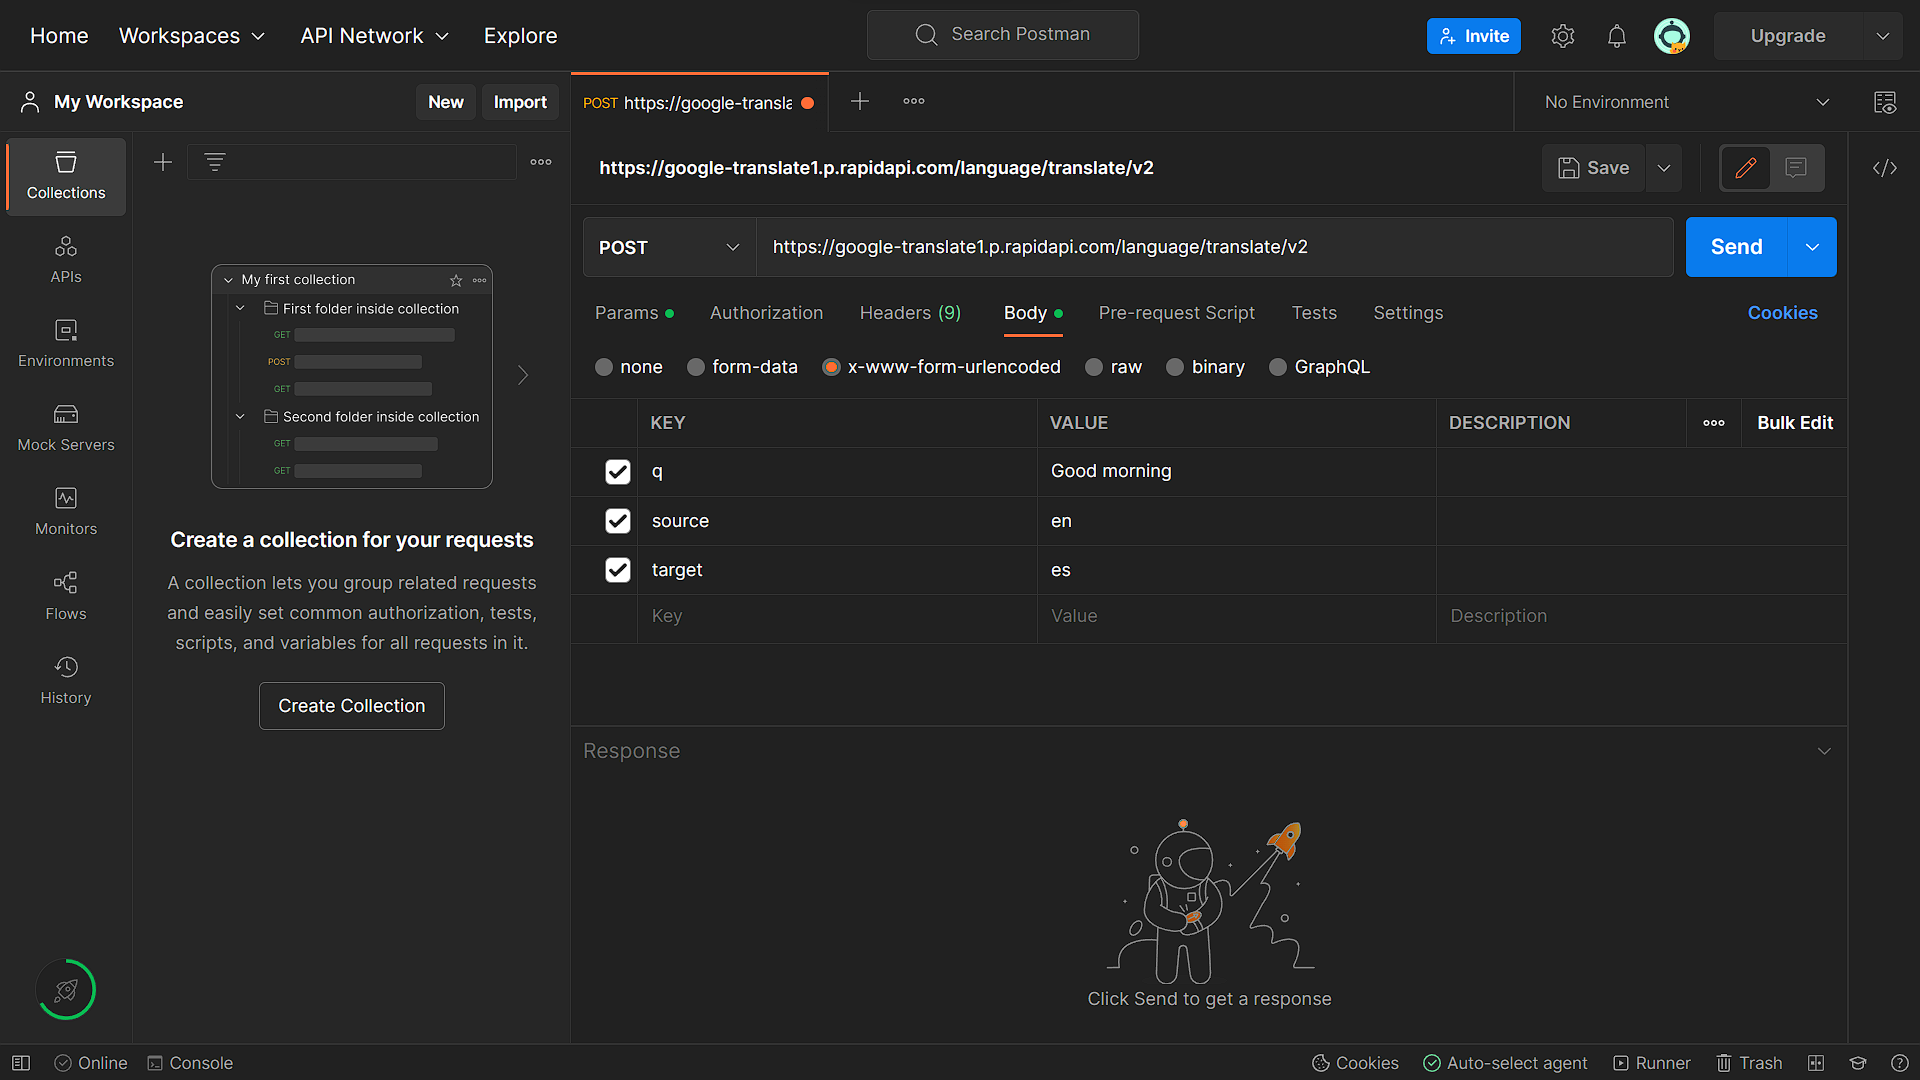
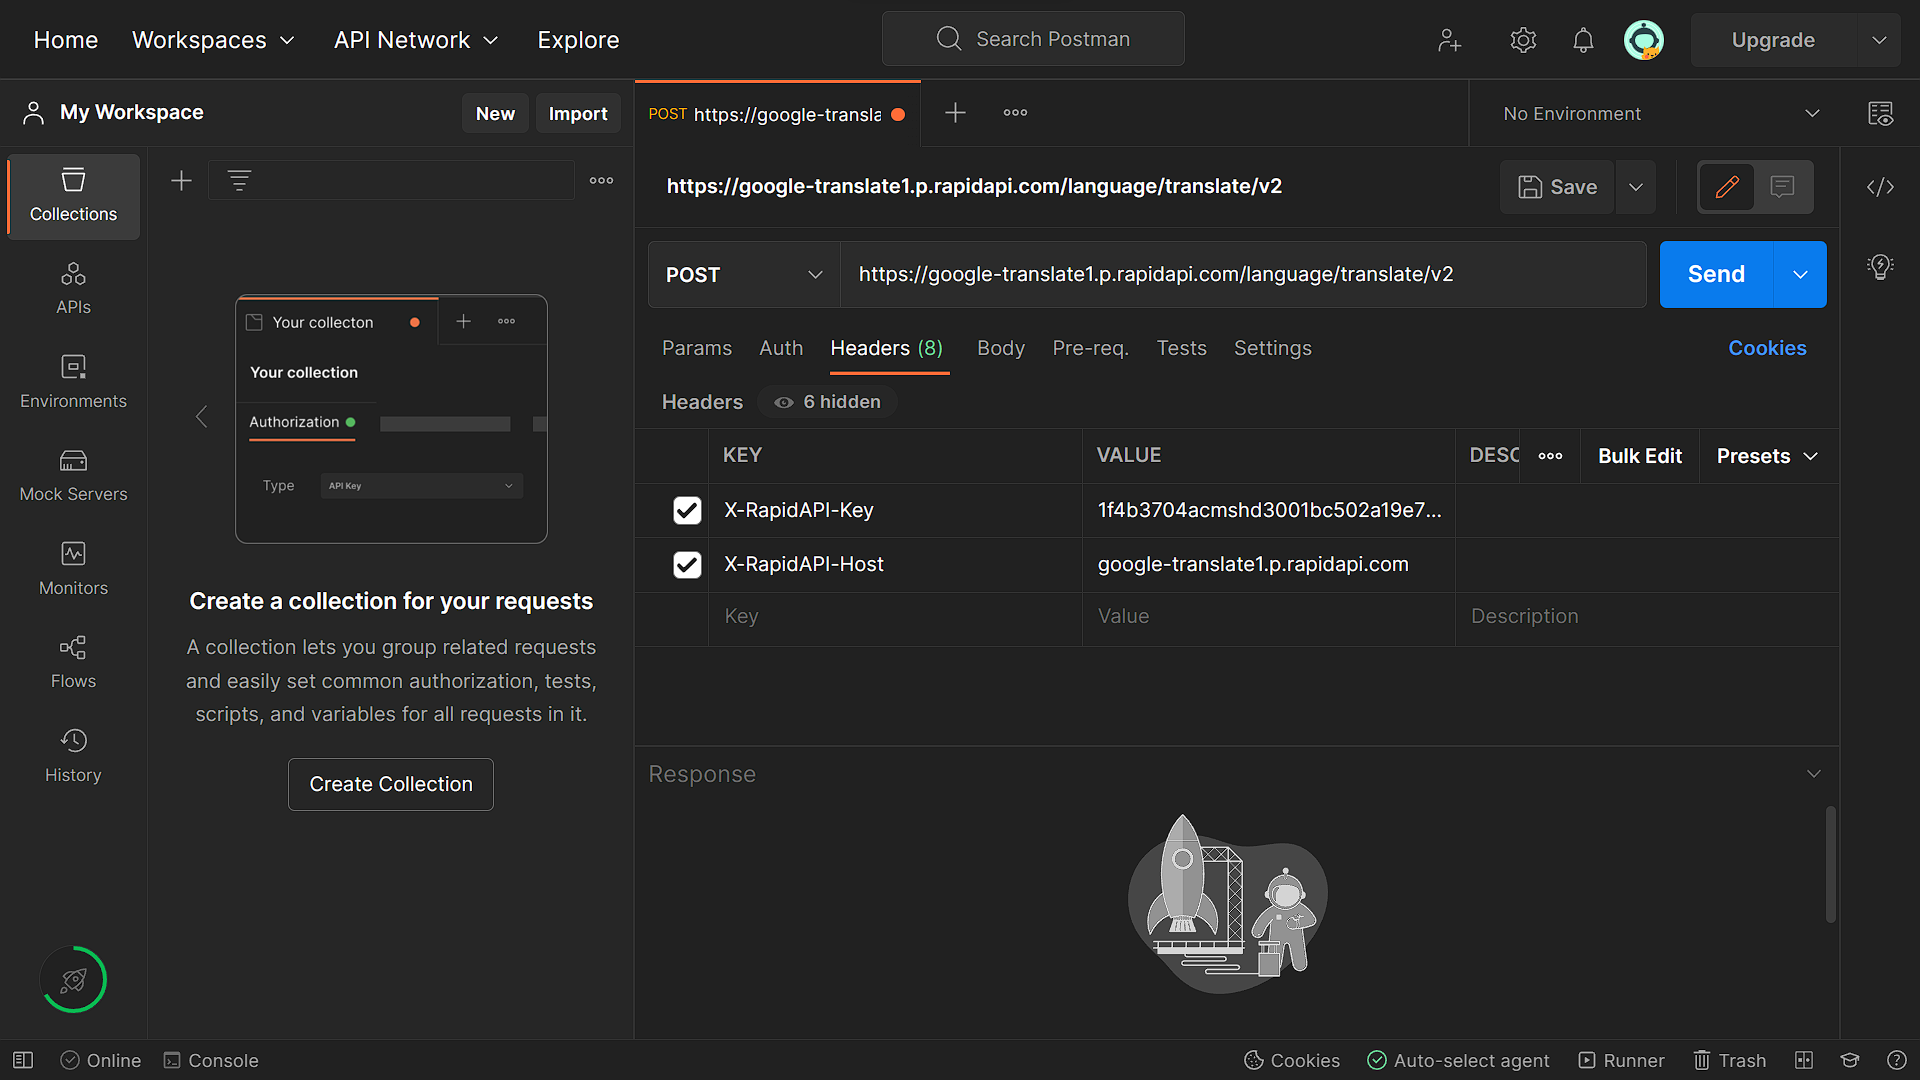
To send a POST request, we will use the Google Translate API to translate an English string to another language. You can find the API on the RapidAPI platform; subscribing to it gives you access to make use of the API. For the post request, we will add the authorization headers and also pass across data in the body containing the string to be translated, the current language, and the expected language translation.
-
Create the API body:
-
Add the API headers:
Running the request will produce the following results:
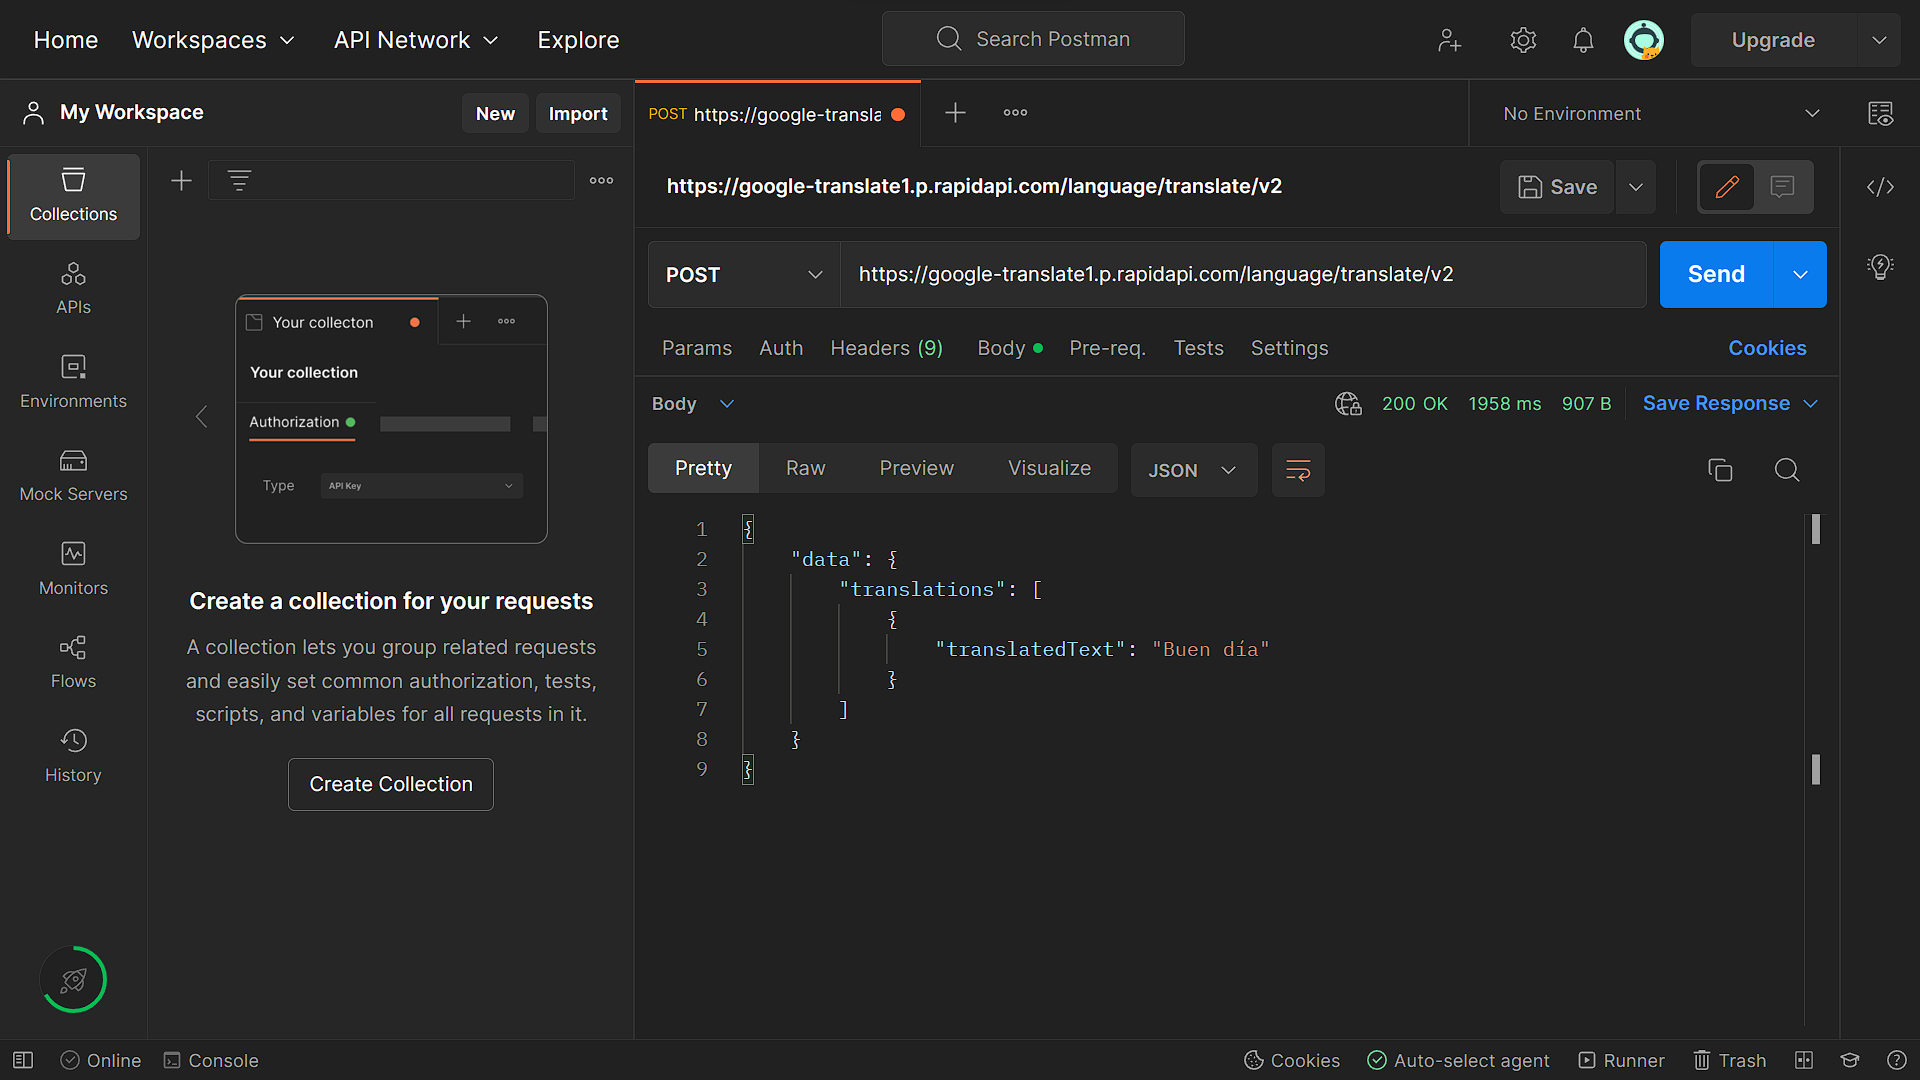
Analyzing API Responses
If we analyze the response obtained in the request above, we can deduce the following:
- From the top, we can see a response code of
200, the time taken in1958ms, and the response size of907 bytes. The response code says a lot about the status of an API. Based on the code, we can easily deduce what went wrong with the request. Below is a list of some response codes and what they mean:- 200 Ok: This status code signifies that the request was successful and the response has been returned.
- 201 Created - This indicates that the request made was successful and a new resource has been created.
- 204 No Content - The server has successfully processed the request, but the response is empty as there is no data to return.
- 400 Bad Request: The request cannot be made as it is invalid.
- 401 Unauthorized - The request requires authentication credentials that are either not provided or invalid.
- 403 Forbidden - You do not have the required permissions to access the API resources.
- 404 Not Found - The requested server resource cannot be found.
- 500 Internal Server Error - An internal error occurred while the server was processing the made request.
- 503 Service Unavailable - The server is currently unavailable, has too many requests, or is unable to handle your request at the moment.
- In the text area, we can see a JSON response from the API containing the data with the translated text.
Managing Requests and Responses
In Postman, requests and responses can be managed in the following ways:
- Making a new request: In Postman, just choose the HTTP method (GET, POST, PUT, DELETE, etc.) and type the URL of the API endpoint to make a new request. Moreover, you can include the request body, headers, and parameters as necessary.
- Request saving: By selecting the “Save” button, you can store API requests in Postman for later use. This enables easy access to and reuse of routine API requests.
- Request organization: In Postman, you can create folders to keep API requests structured and simple to find. Drag and drop the requests you want to include into a new folder.
- Viewing responses: The response is shown in the “Body” tab after you send an API request in Postman. You can view the response as plain text, JSON, XML, or other formats as needed.
- Saving responses: You can save API responses in Postman by clicking the “Save Response” button. This allows you to store and reuse API responses later.
- Testing responses: Postman allows you to create test scripts for making requests to test an API. These scripts can be further improved with verification, such as writing JavaScript code to verify that the response meets specific criteria or contains specific data.
Session Replay for Developers
Uncover frustrations, understand bugs and fix slowdowns like never before with OpenReplay — an open-source session replay tool for developers. Self-host it in minutes, and have complete control over your customer data. Check our GitHub repo and join the thousands of developers in our community.
Organizing Requests and Responses into Collections
Proper organization is required when collaborating with others to make it easier for team members to locate files or requests of interest. In this section, we will demonstrate the organizing of requests into collections and how they can be shared. To save requests or responses, follow the following steps:
To create a new collection, select the Collection item from the left side menu. Rename the newly created collection. With the collection created, you can save requests to it and share them with others.
In the file-sharing window, you can choose to share with individuals or teams via emails, make the collection available to the public, make the collection accessible via external API requests, or choose to embed the collection into a web application via a Run in Postman button.
Advanced Postman Features
In this section, we will discuss some advanced features offered by Postman.
Automated testing with Postman
Postman provides us with a powerful tool for automated API testing to ensure APIs meet the expected performance, functionality, security, etc. To make use of the testing tool, follow the steps below:
- Create a new collection and add requests to it, as illustrated in the previous section.
- Write your API test in the
Teststab. Your test will consist of code to verify if your API response meets the defined criteria. You can write tests for each request using JavaScript. - Run the tests: After writing the tests, you can execute them by running the API requests. Postman will send the API requests and execute the defined tests. The results of the Test, based on the API responses, will be displayed in the
Test Resultstab. In the tab, you can view, analyze and also export the test results.
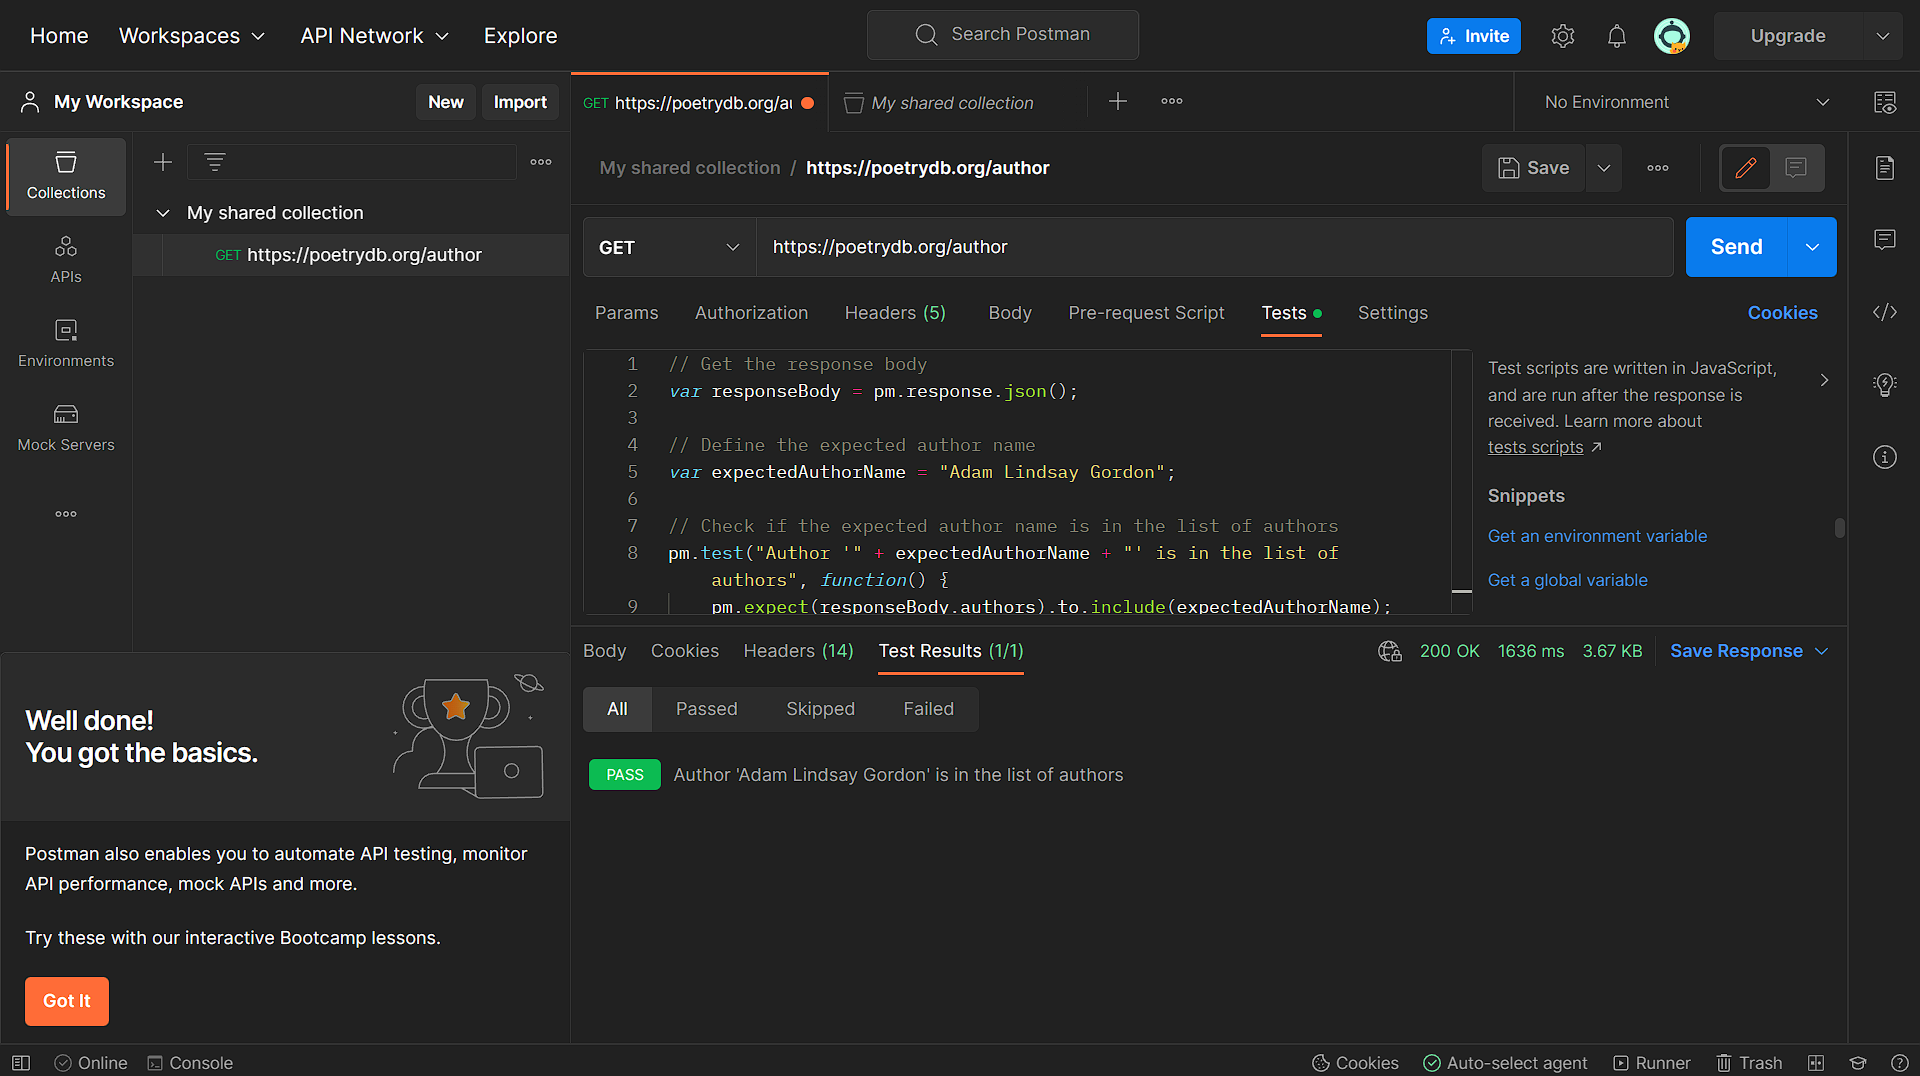
For example, we can write a test to determine if a particular item is included in the API response. For this, we will make use of the Poetry API GET endpoint and add the following JavaScript code to the test tab:
// Get the response body
var responseBody = pm.response.json();
// Define the expected author name
var expectedAuthorName = "Adam Lindsay Gordon";
// Check if the expected author name is in the list of authors
pm.test("Author '" + expectedAuthorName + "' is in the list of authors", function() {
 pm.expect(responseBody.authors).to.include(expectedAuthorName);
});
Executing the request will produce the following result:
Working with Environment Variables
Environment variables allow you to define key-value data that consist of a name and its value. With the variable created, you can make use of it in multiple requests without having to define it multiple times. If your API testing requires the addition of environment variables, these can be added in Postman as follows:
- Create a new environment: This can be done on the Postman interface using the
Environmenttab from the left navigation menu. Create and name your environment. - Add your environment variables: In the created environment, you can define and add variables by clicking on the
Addbutton and entering the name and value of the variable(s). - Adding defined variables to requests: To add the variables in your request, you can reference the name assigned to the variable when making the request. To do this, add the variable name to the URL field using the following syntax:
{{variable_name}}. Variable names are added using double curly braces, otherwise known as a Mustache syntax.
How does Postman Fare with CI/CD?
Postman is an excellent tool for handling Continuous Integration/Continuous Deployment (CI/CD) operations. Below is how Postman will fare in such situations:
- Automation of testing: Postman makes it simple to build and execute automated tests for APIs. To guarantee that new code changes do not impair the functionality of the API, these tests can be incorporated into the CI/CD process.
- Regression Testing: To make sure that recent modifications haven’t introduced any faults or caused any regressions, APIs can run regression tests using Postman.
- Version control is supported by Postman, enabling developers to work together on the creation and testing of APIs. This function makes sure that all users are using the most recent version of the API and that all modifications are recorded and logged.
- Collaboration: Team members can work together on developing and testing APIs using Postman. The program has functionality for document sharing, test result sharing, and collection sharing, allowing team members to work together more efficiently.
- Integration with CI/CD Tools: Postman can be integrated with other CI/CD tools such as Jenkins and CircleCI. This integration makes it easy to include API testing in the CI/CD pipeline and automate the entire process.
Conclusion
Congratulations! We have come to the end of this article. In this article, we learned about the Postman tool and how it can be used in API testing and development. We also went further to discuss some of its advanced features and its capabilities in CI/CD.
Gain Debugging Superpowers
Unleash the power of session replay to reproduce bugs and track user frustrations. Get complete visibility into your frontend with OpenReplay, the most advanced open-source session replay tool for developers.