Handle your calendar in React with Calendly

As someone who regularly has meetings upon meetings or as a developer who is stuck with multiple conference meetings with product managers and marketers, You discover that most of the time, one gets stuck with what time a meeting is; how do I not forget about the upcoming conference, did an email arrive or not, and who will notify me when it’s time for each task. And eventually, developers came up with a platform called Calendly.
Calendly is a platform for arranging events such as meetings. In essence, it allows you to keep track of who you need to meet with or where you need to be. Calendly offers features including automated email and calendar event notifications, the ability to set up recurring appointments and meetings, and integrations with several calendar and email services, including Google Calendar, Outlook, and Office 365.
Features of Calendly
Let’s look at the fascinating features of Calendly:
- API: The API feature allows integration with other tools and applications, making the scheduling process even more streamlined.
- Access Limits and Permissions: Access Limits and Permissions allows administrators to control who has access to what, ensuring the privacy of sensitive information.
- Activity Monitoring: The Activity Monitoring feature provides real-time updates on who has scheduled appointments, allowing for better management and oversight.
- Alerts system/ Notifications: The Alerts system and Notifications keep users informed and up-to-date with any changes or updates to their appointments
- Management of appointments: The Management of Appointments feature allows users to view and edit their appointments in one convenient location.
- Making appointments: Making appointments is effortless with Calendly’s intuitive interface.
- Automated Planning: The Automated Planning feature takes the guesswork out of scheduling by suggesting the best available time slots.
- Responsive: It can be used on any device and adapts to the screen size, providing a seamless user experience no matter where you are.
There are two methods to integrate Calendly into your website or whatever platform you desire. First is the Embedded solution, which we’ll explain, and the second is the NPM package solution, i.e., React-Calendly, which is today’s major focus.
Embedded Code Solution
Before we proceed with this method, we have to go to the Calendly webpage to sign up if we don’t already have an account with the platform.
All you have to do is input your email and create a password, follow the prompts, and you’ll be tasked to create a URL and link your 3rd party calendar, such as Google Calendar.
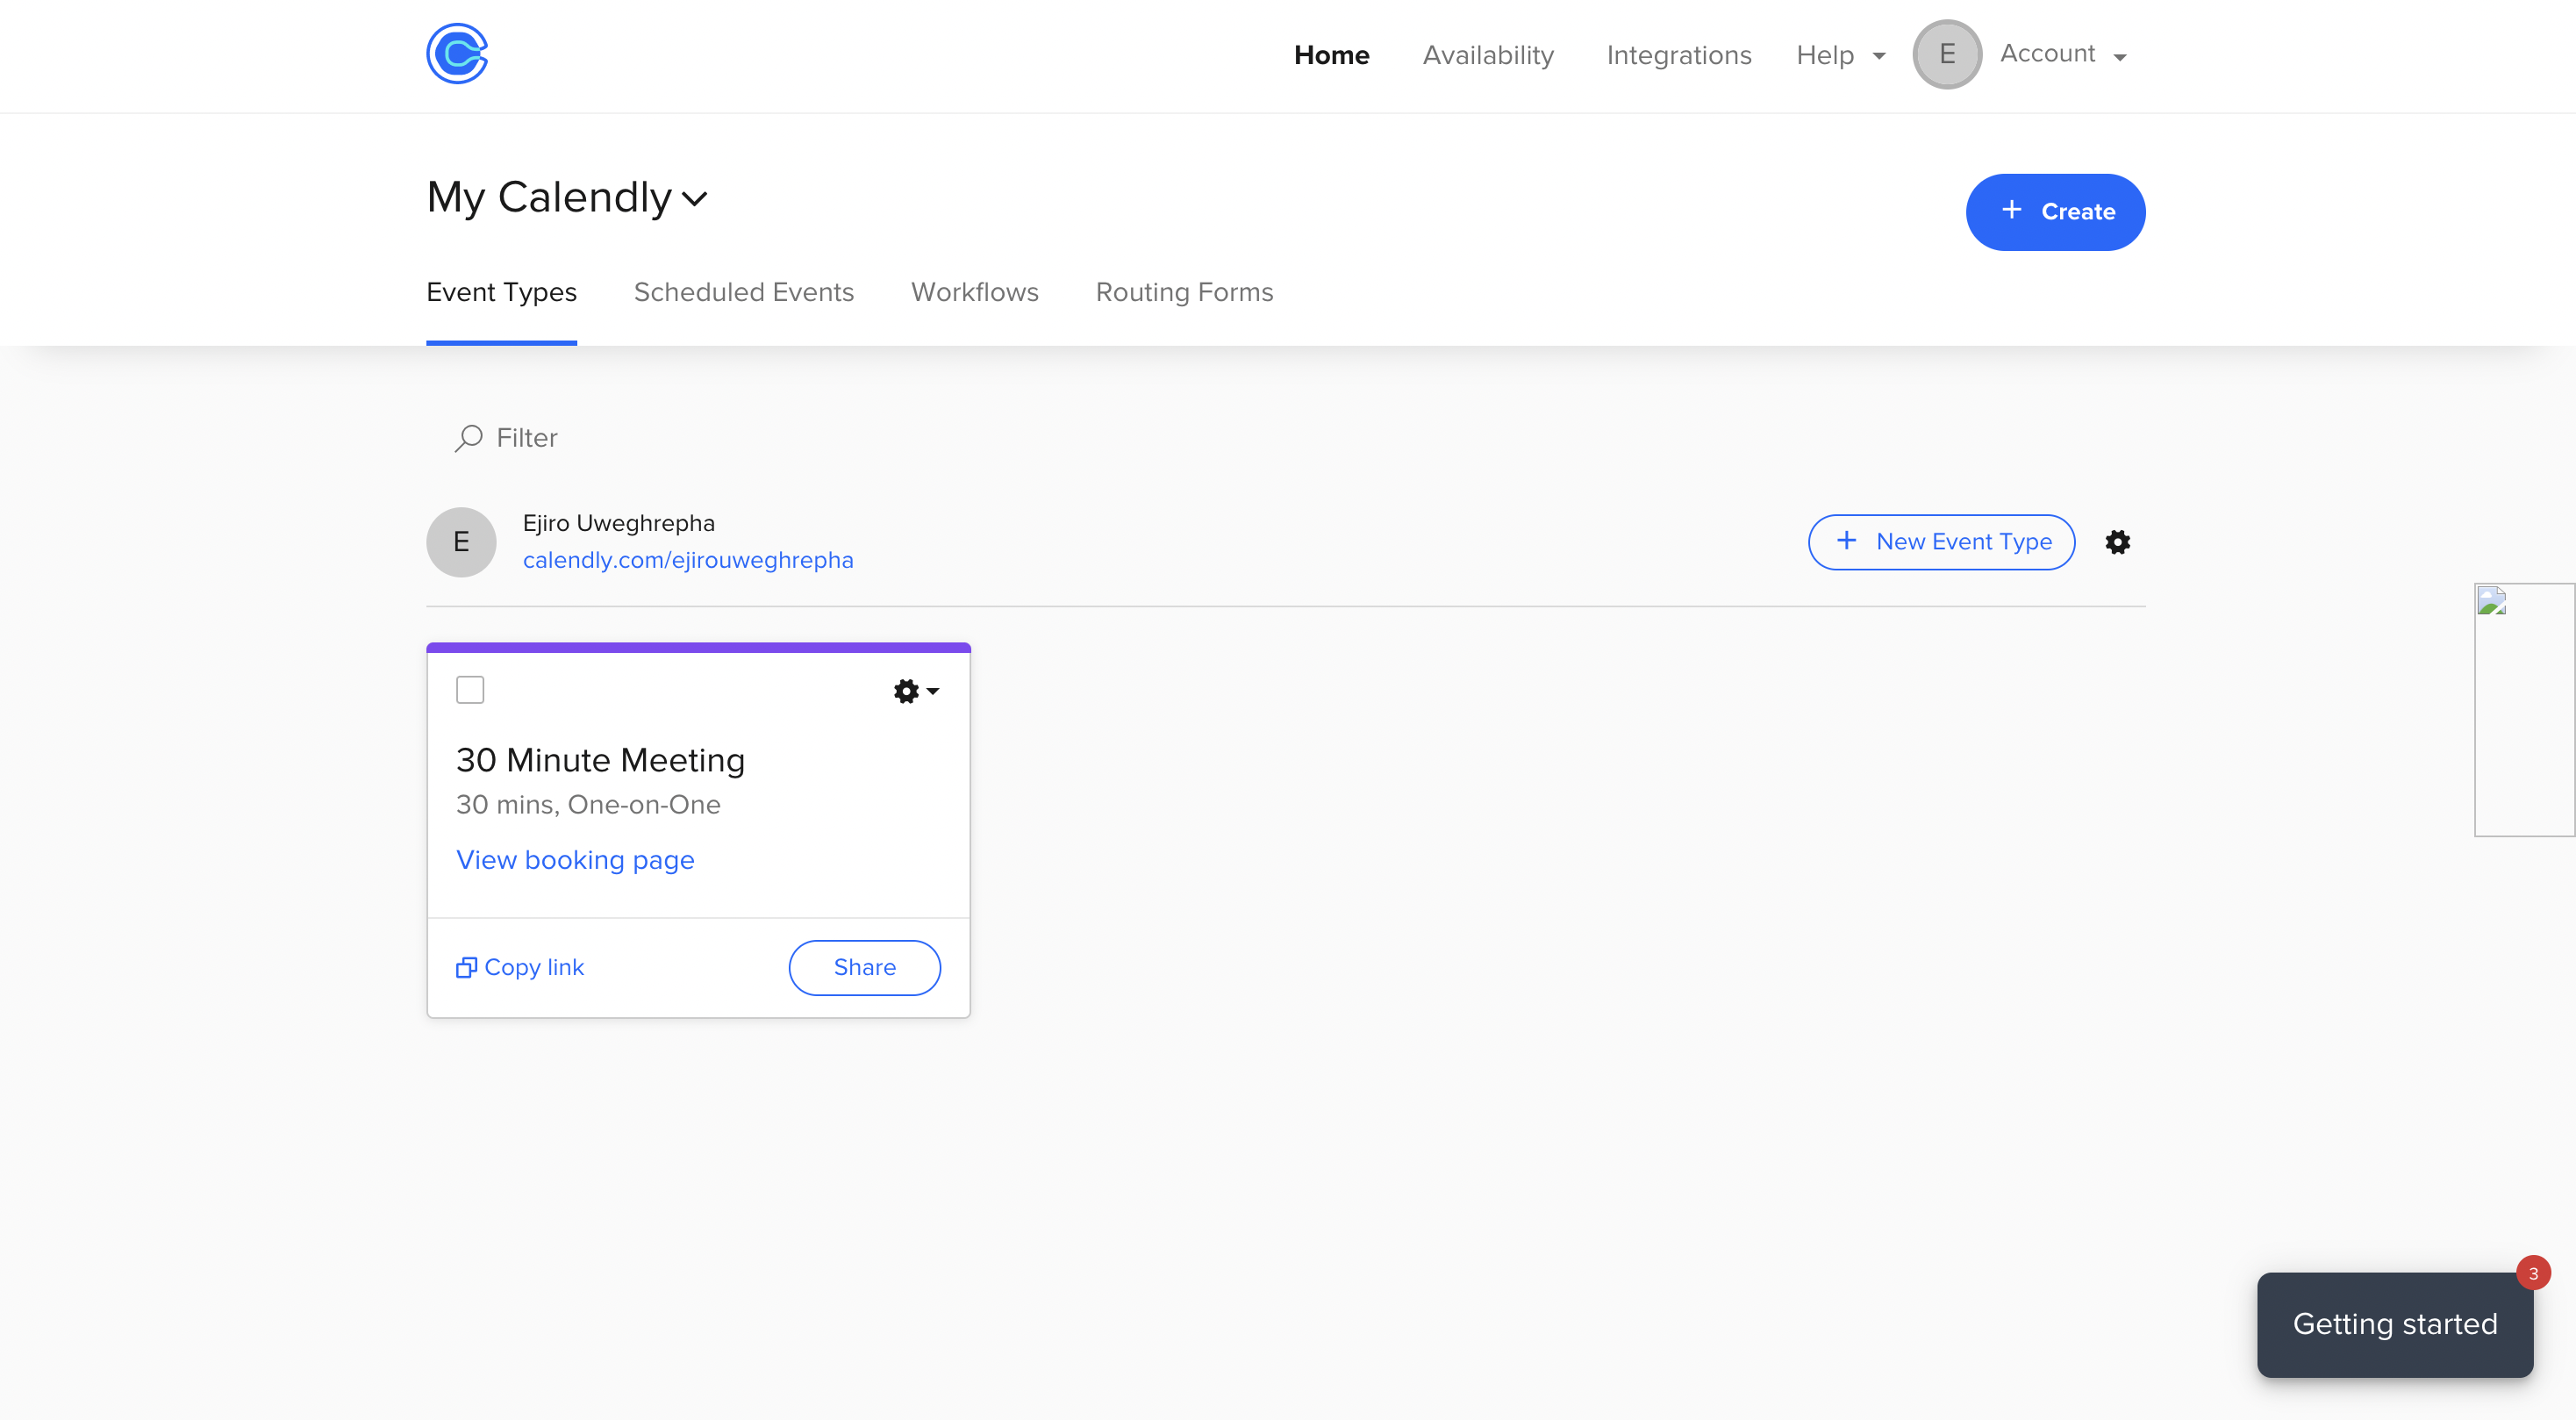
After all, is set and done, we’ve arrived at the home page, and you’ll see the Event Types below.
Embed to React Project
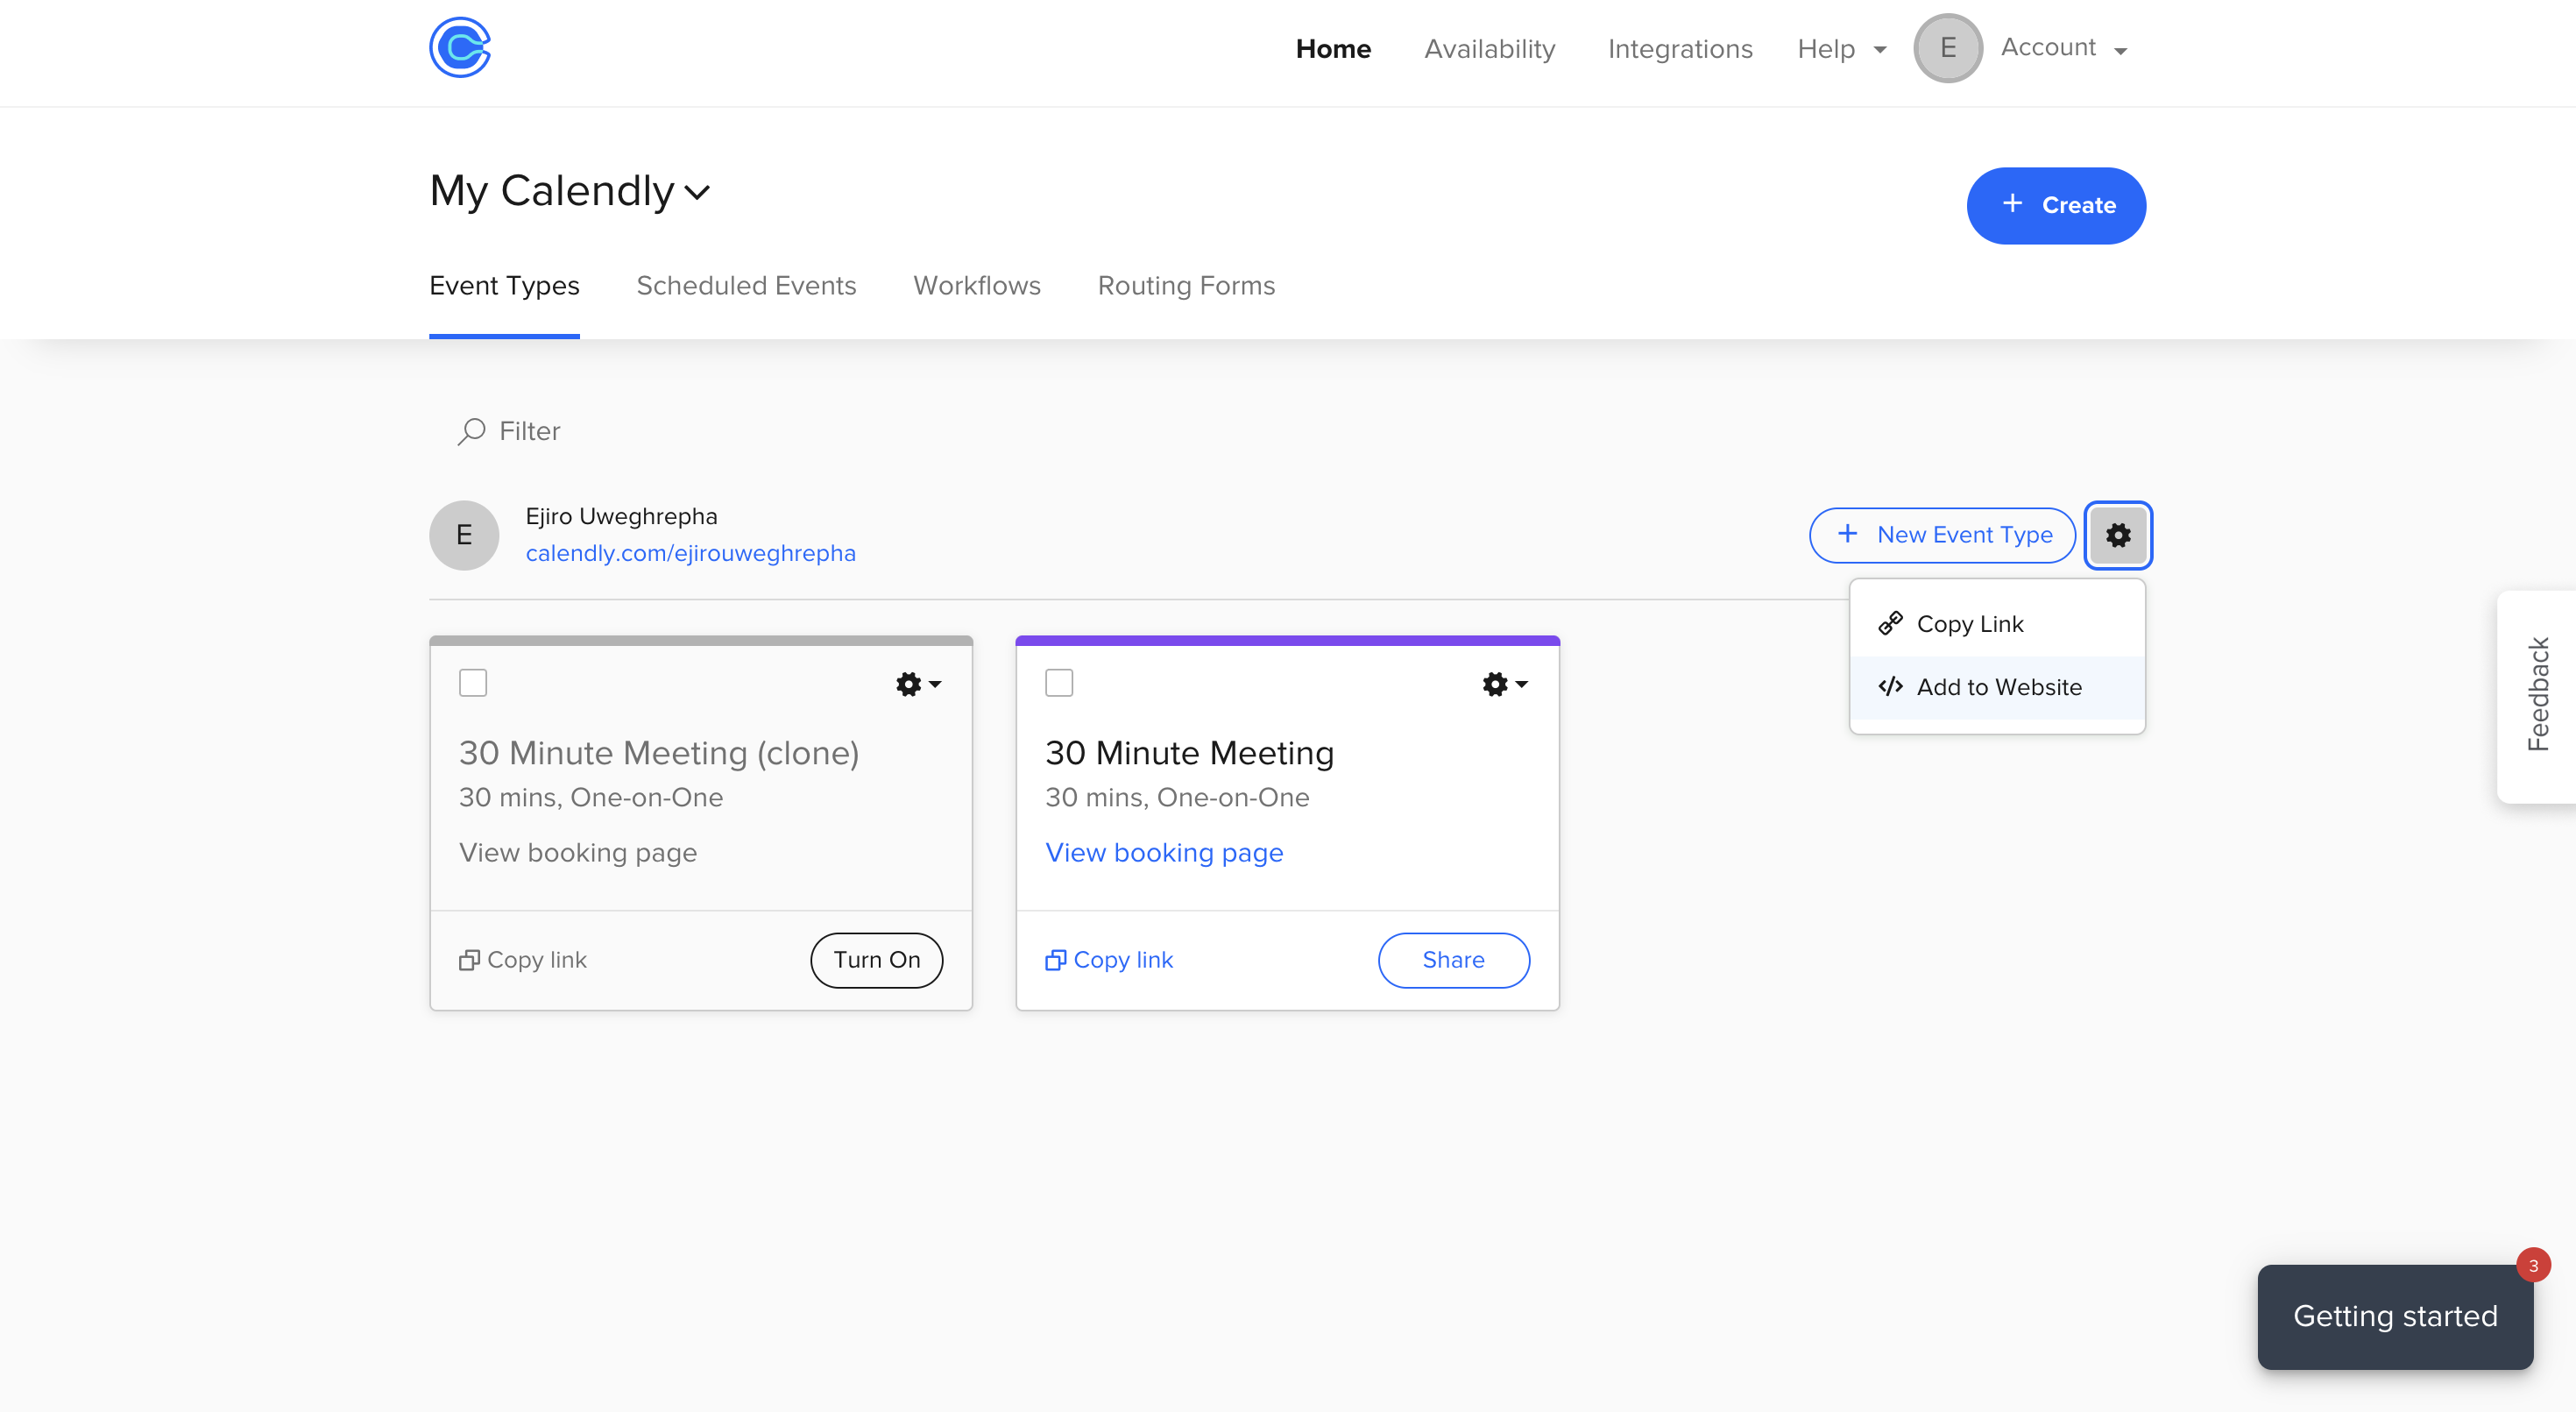
By your right-hand side, you’d see a cog icon close to the add New Event Types, click on it, and click on Add to Website.
After that, you have to choose the output you want Calendly to portray, be it Inline Embed Popup Widget or Popup Text.
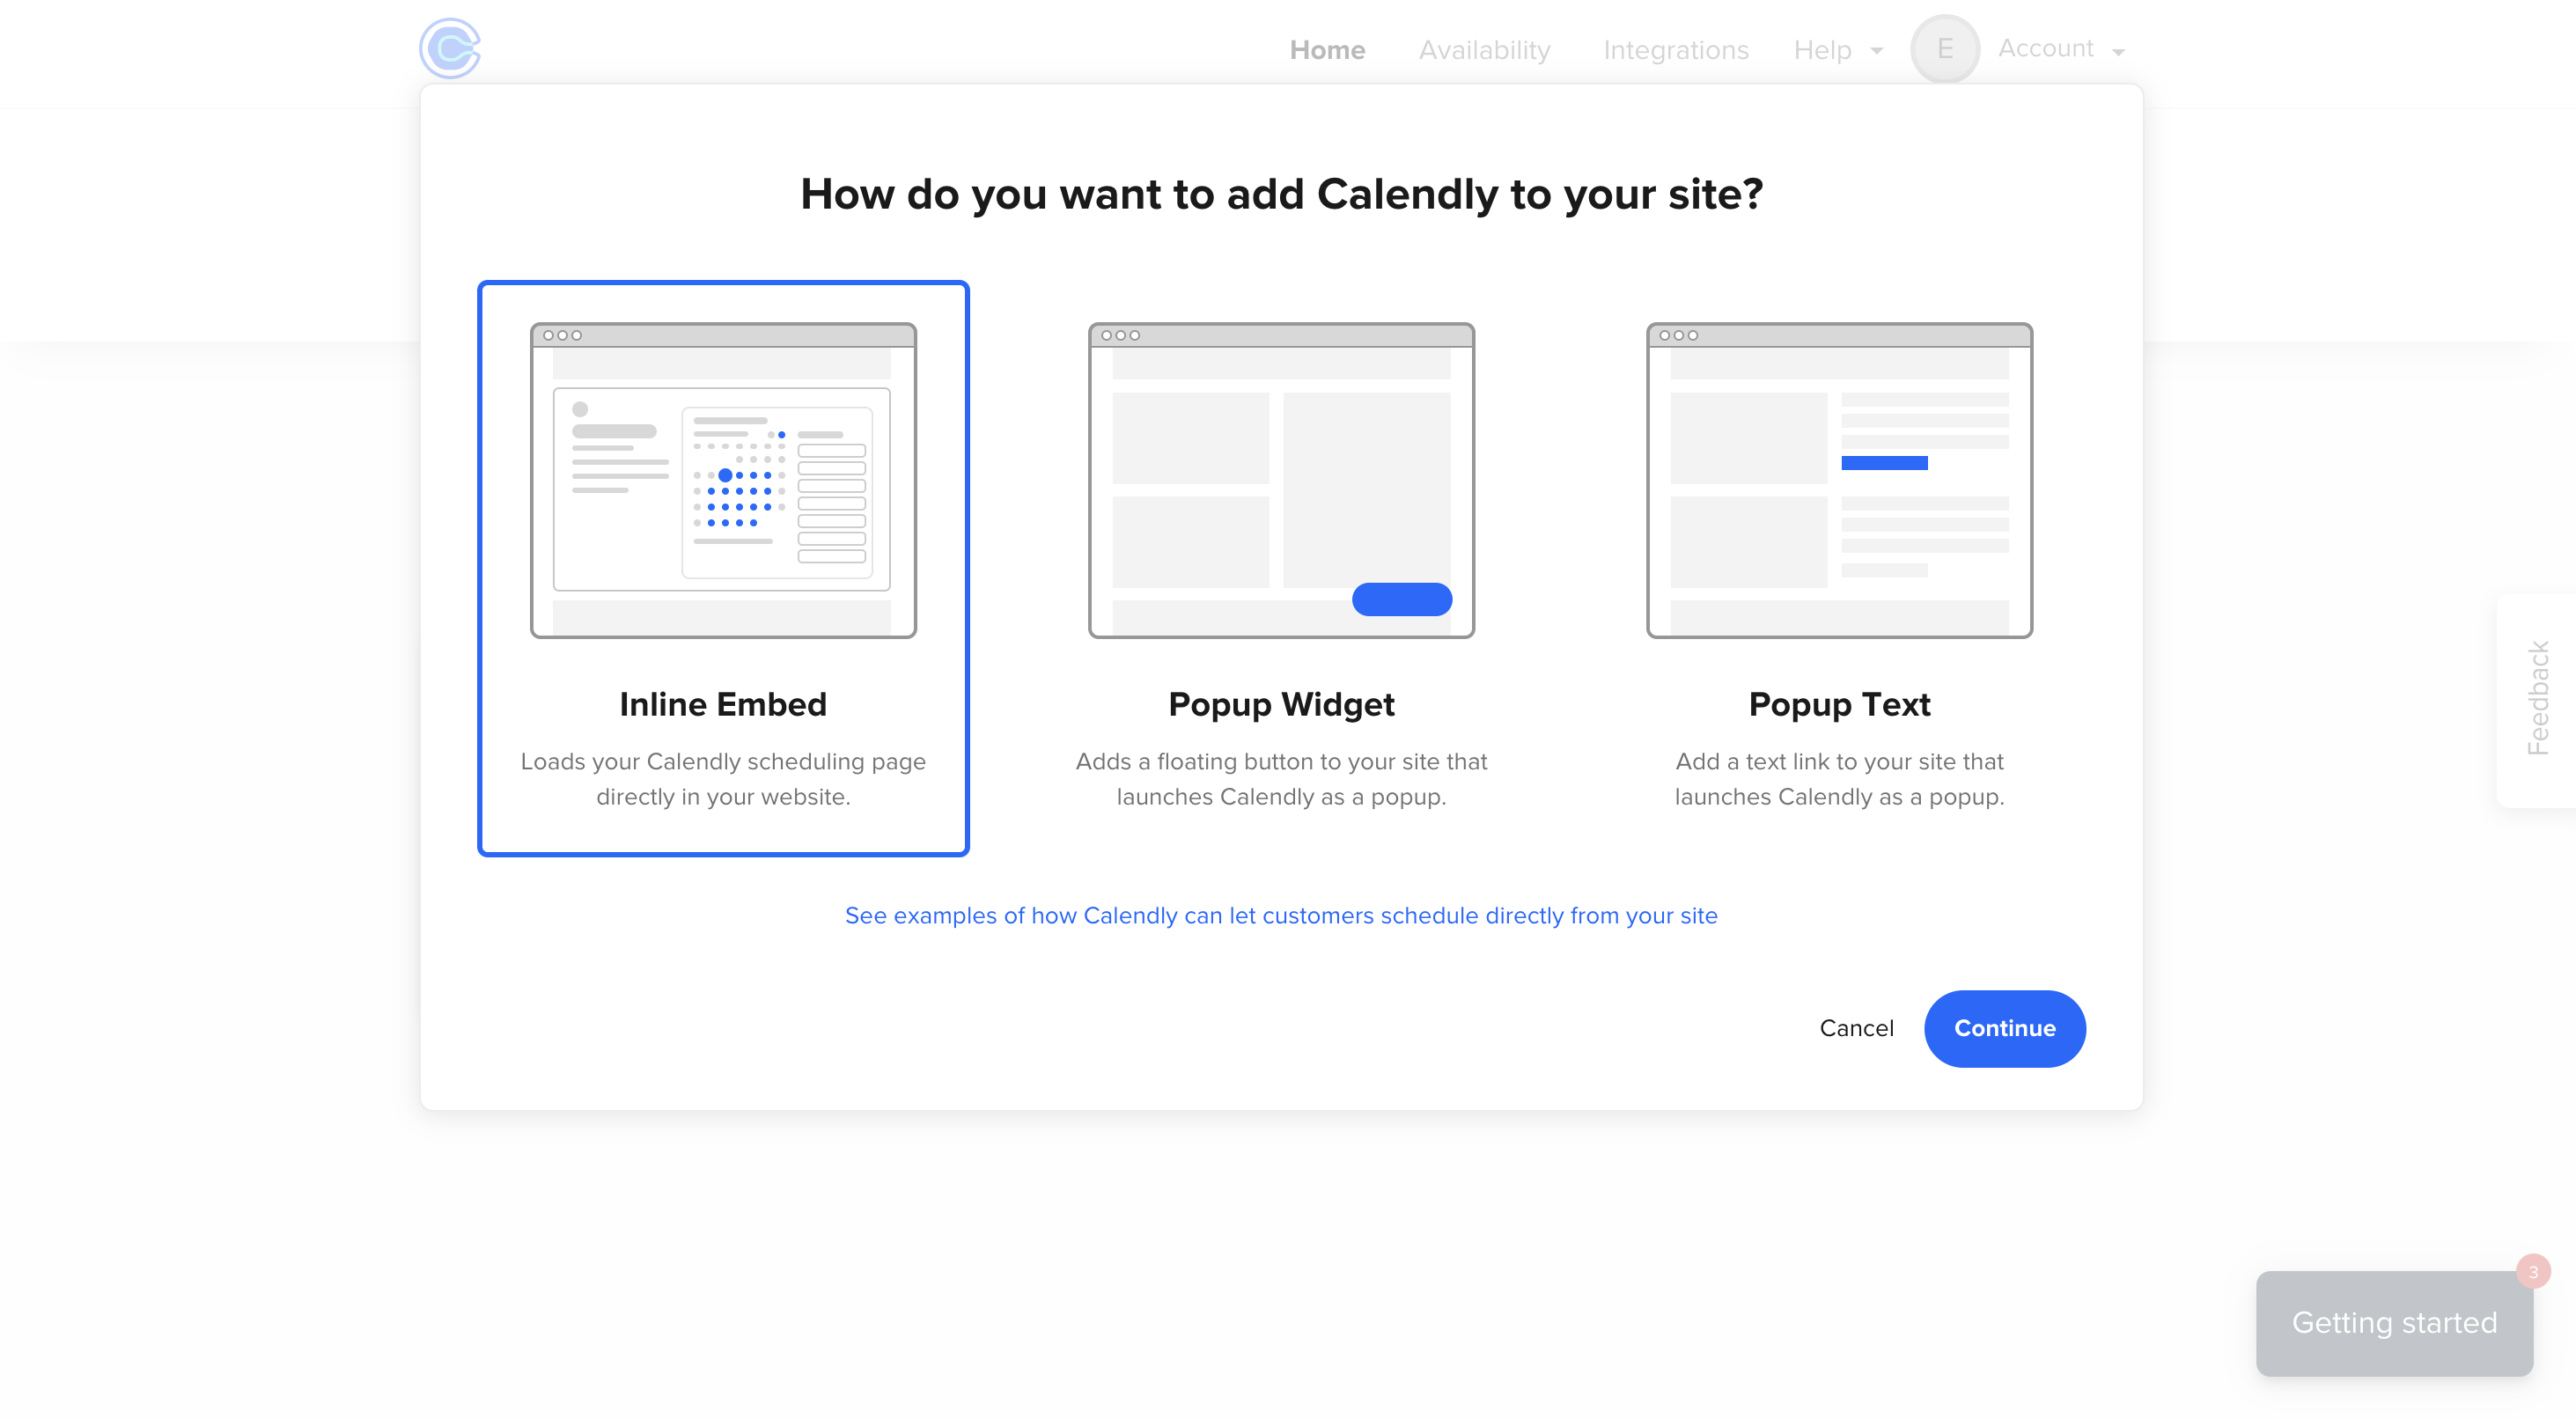
We’ll go with Inline Embed since it’s our first option there.
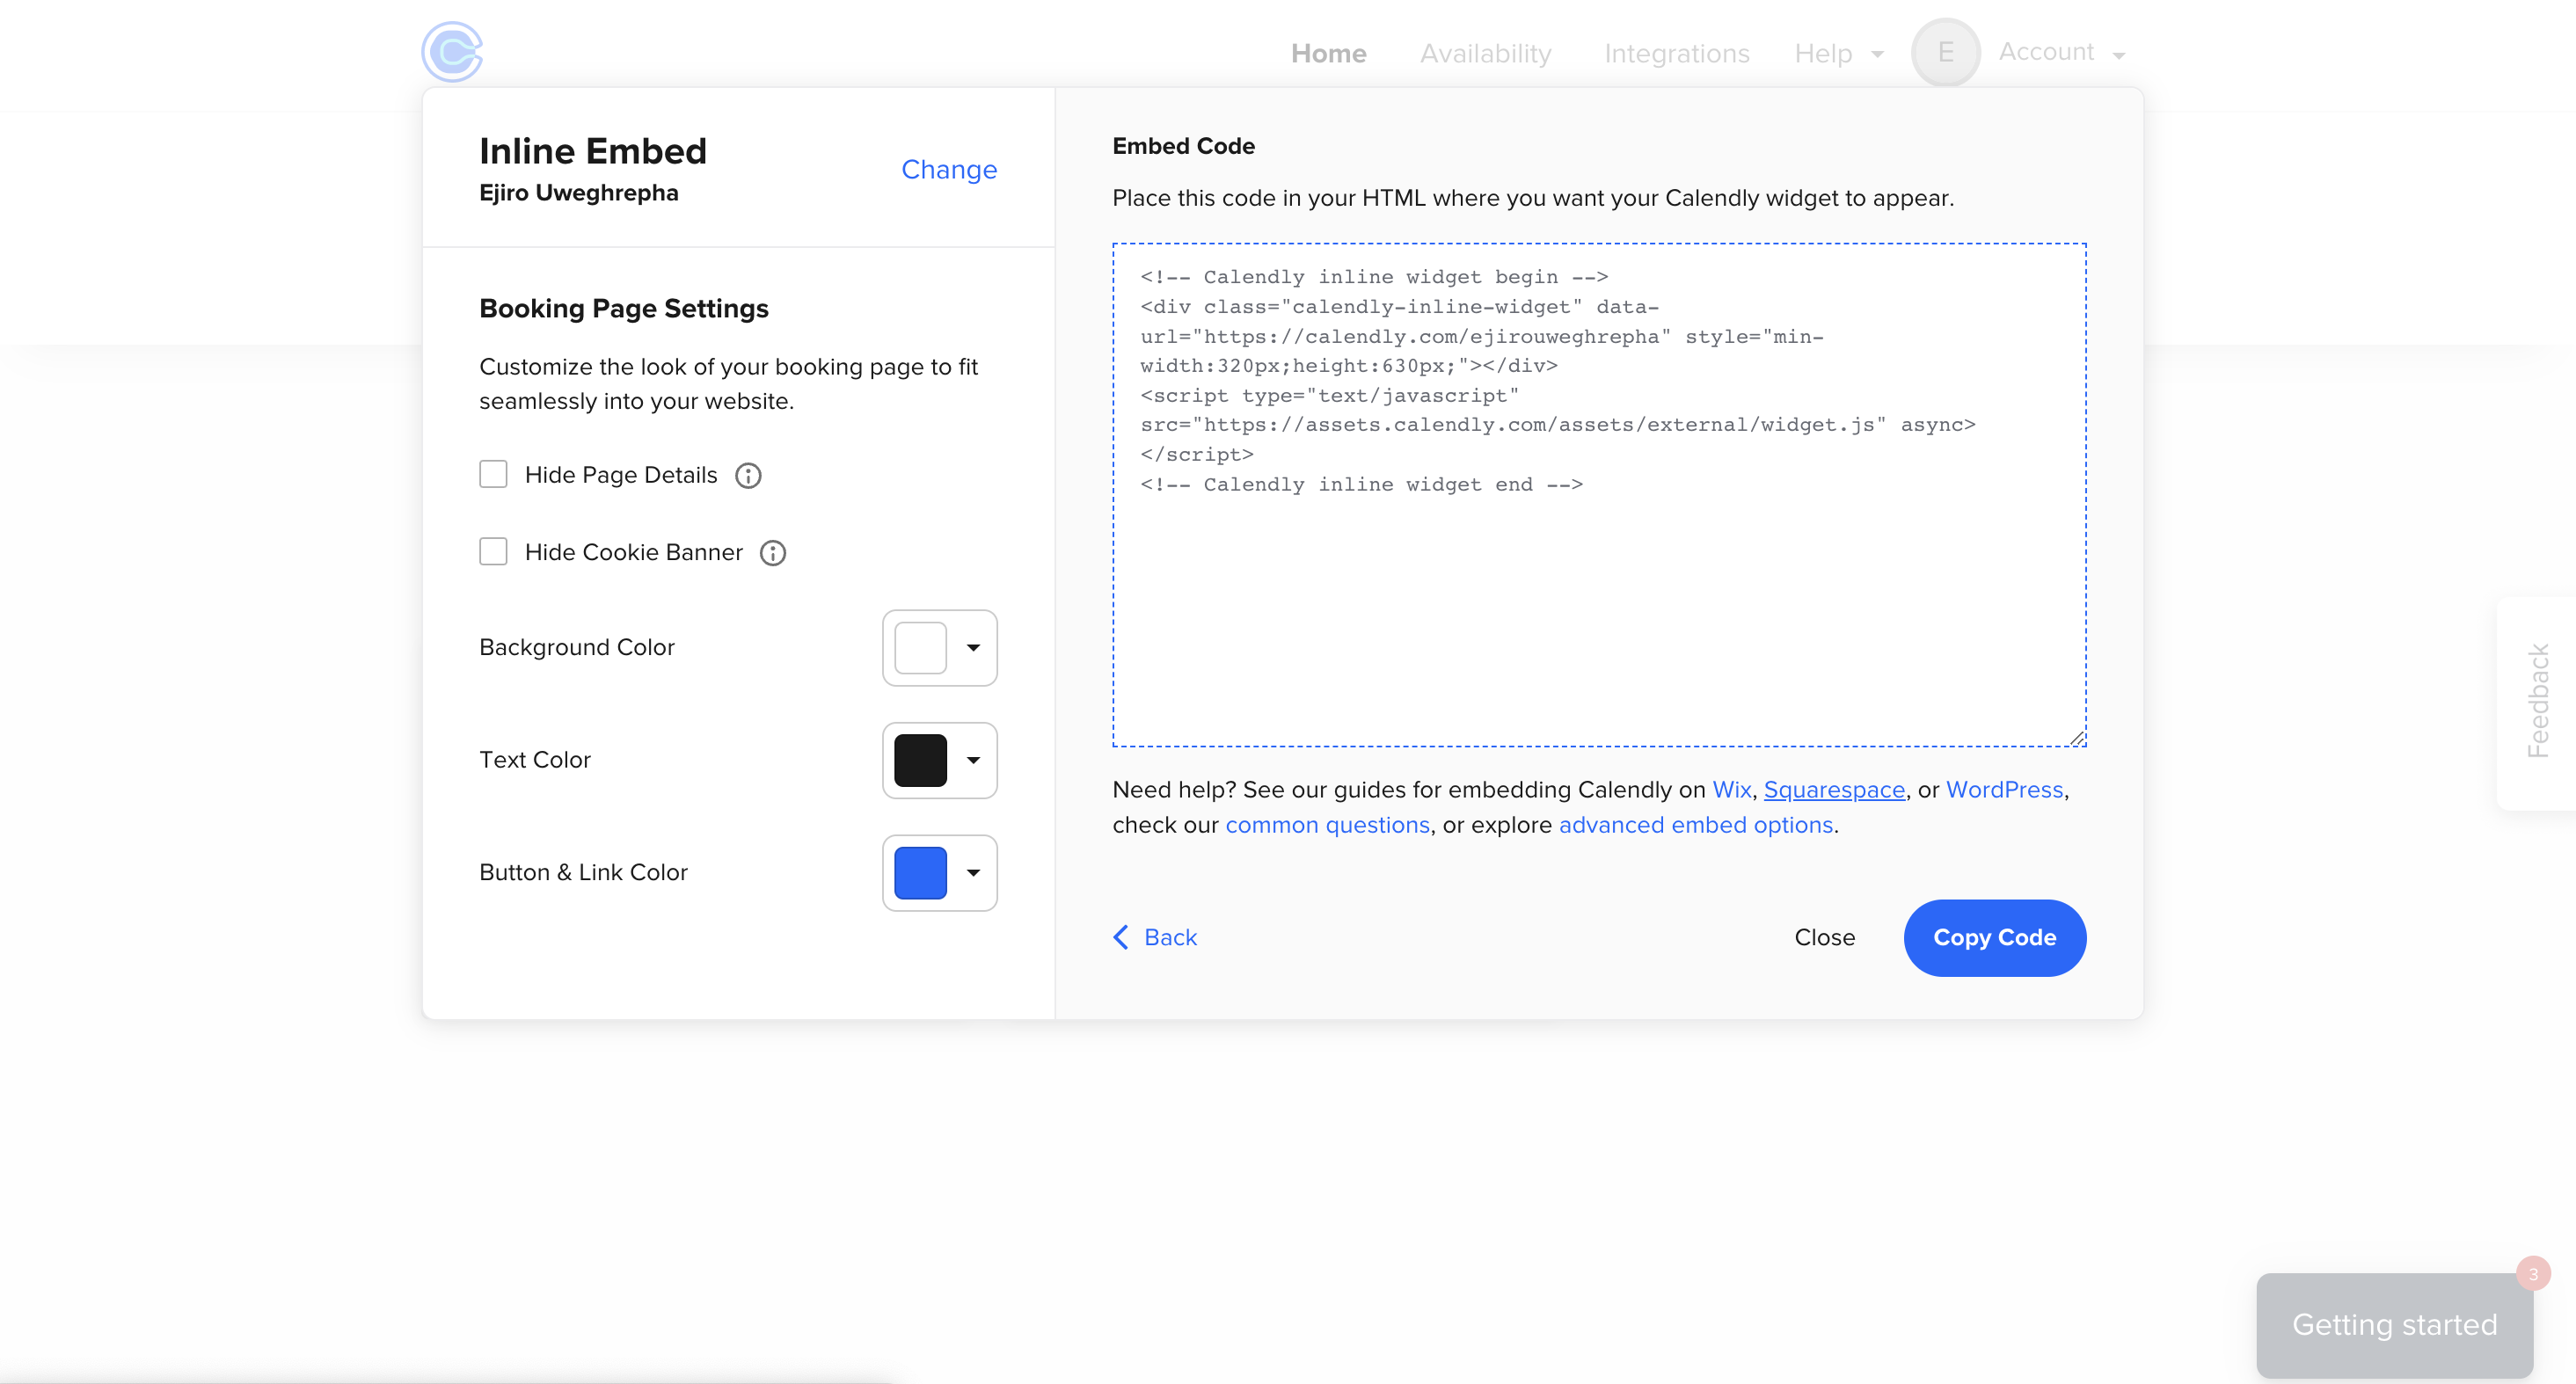
We must copy the code below, paste it into our project, and run it up.
    <!-- Calendly inline widget begin -->
    <div class="calendly-inline-widget" data-url="https://calendly.com/ejirouweghrepha" style="min-width:320px;height:630px;"></div>
    <script type="text/javascript" src="https://assets.calendly.com/assets/external/widget.js" async></script>
    <!-- Calendly inline widget end -->
Once you run your npm command, you should have something below.
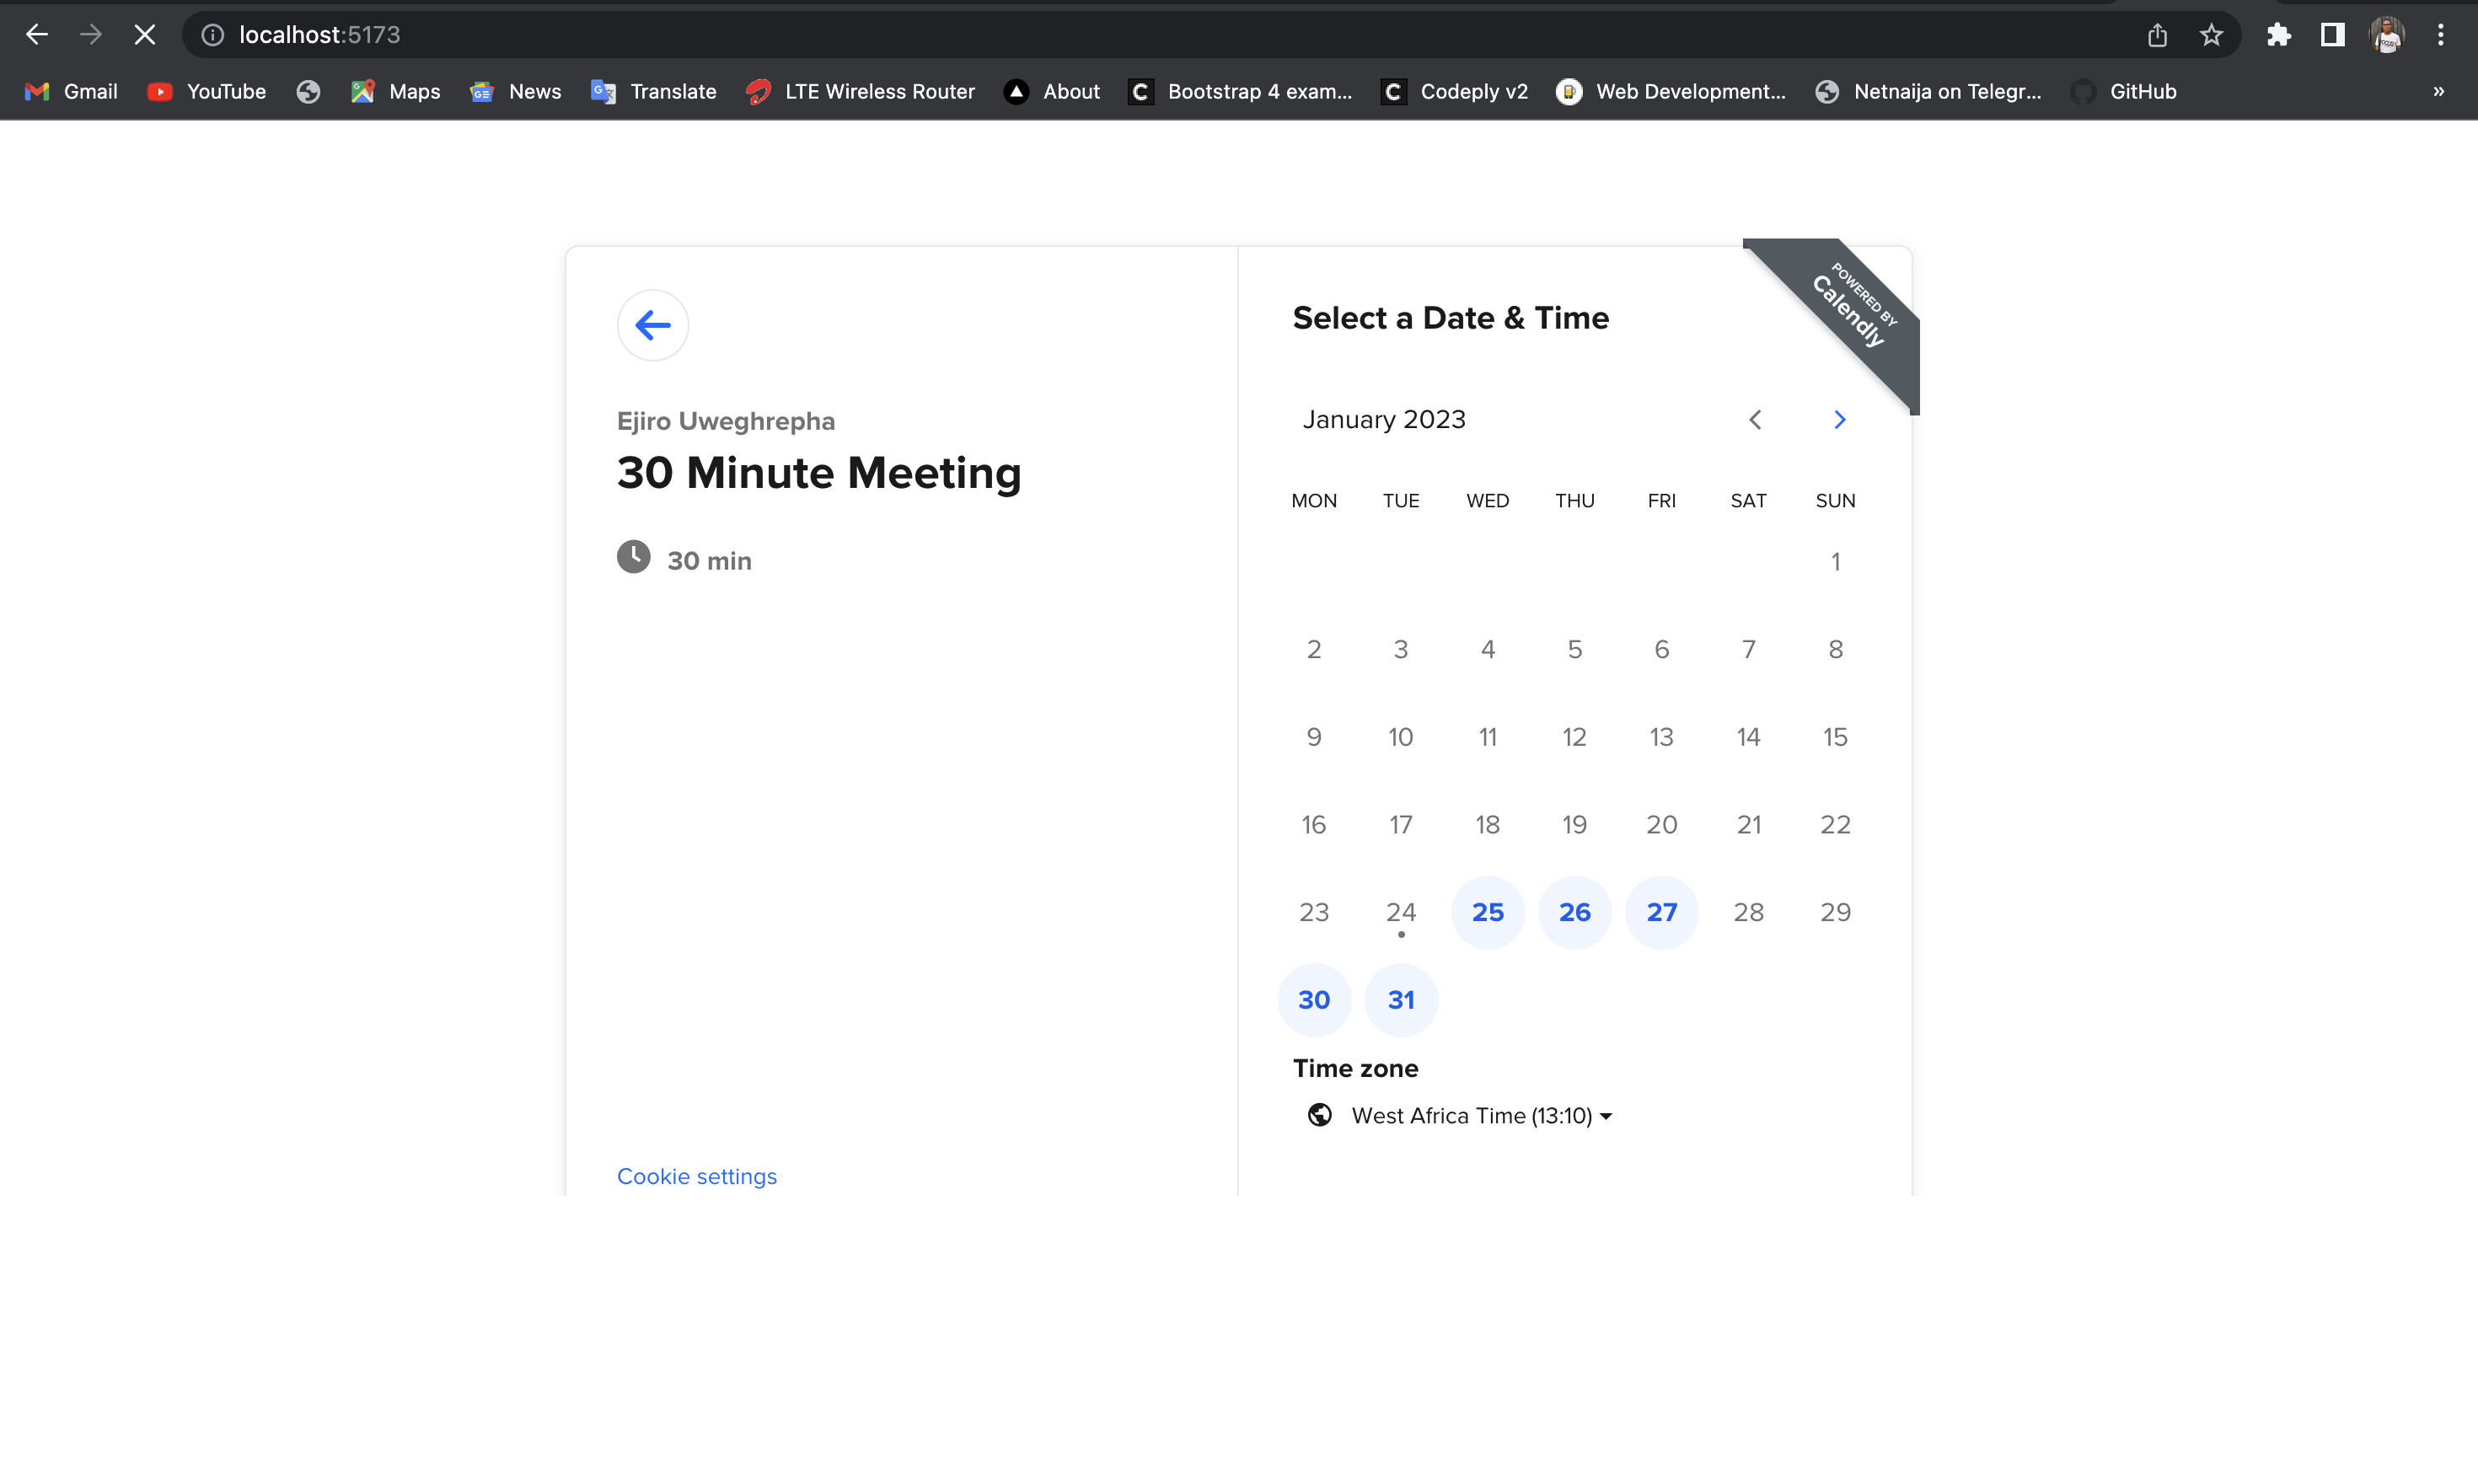
Now, if we look at the whole process, we’d understand it was simple and fast. Still, if we go deeper, we’d know that this process might seem challenging for some upcoming developers who don’t understand embedded coding or for advanced developers who want more control over their code block.
If we go to the Calendly API, we’ll see more features like personal access tokens, OAuth, and more. Therefore, we will explain the NPM package method for integrating Calendly with React.
React-Calendly Solution
React-Calendly was created by the same team as Calendly, so this is just another method of the integration process.
Also, you need to sign up, which seems to be the only process that’s being replicated here. After that, we’re going to install the NPM package React-Calendly.
npm install --save react-calendlyAfter installing the package, we go over to our code editor. Three implementations can be carried out with the NPM package, which are:
InlineWidgetPopupWidgetuseCalendlyEventListener
We’ll be looking at each and every one of them.
InlineWidget
Copy the code below to your React project.
import React from "react";
import { InlineWidget } from "react-calendly";
const App = () => {
  return (
    <div className="App">
      <InlineWidget url="https://calendly.com/your_scheduling_page" />
    </div>
  );
};
export default App;
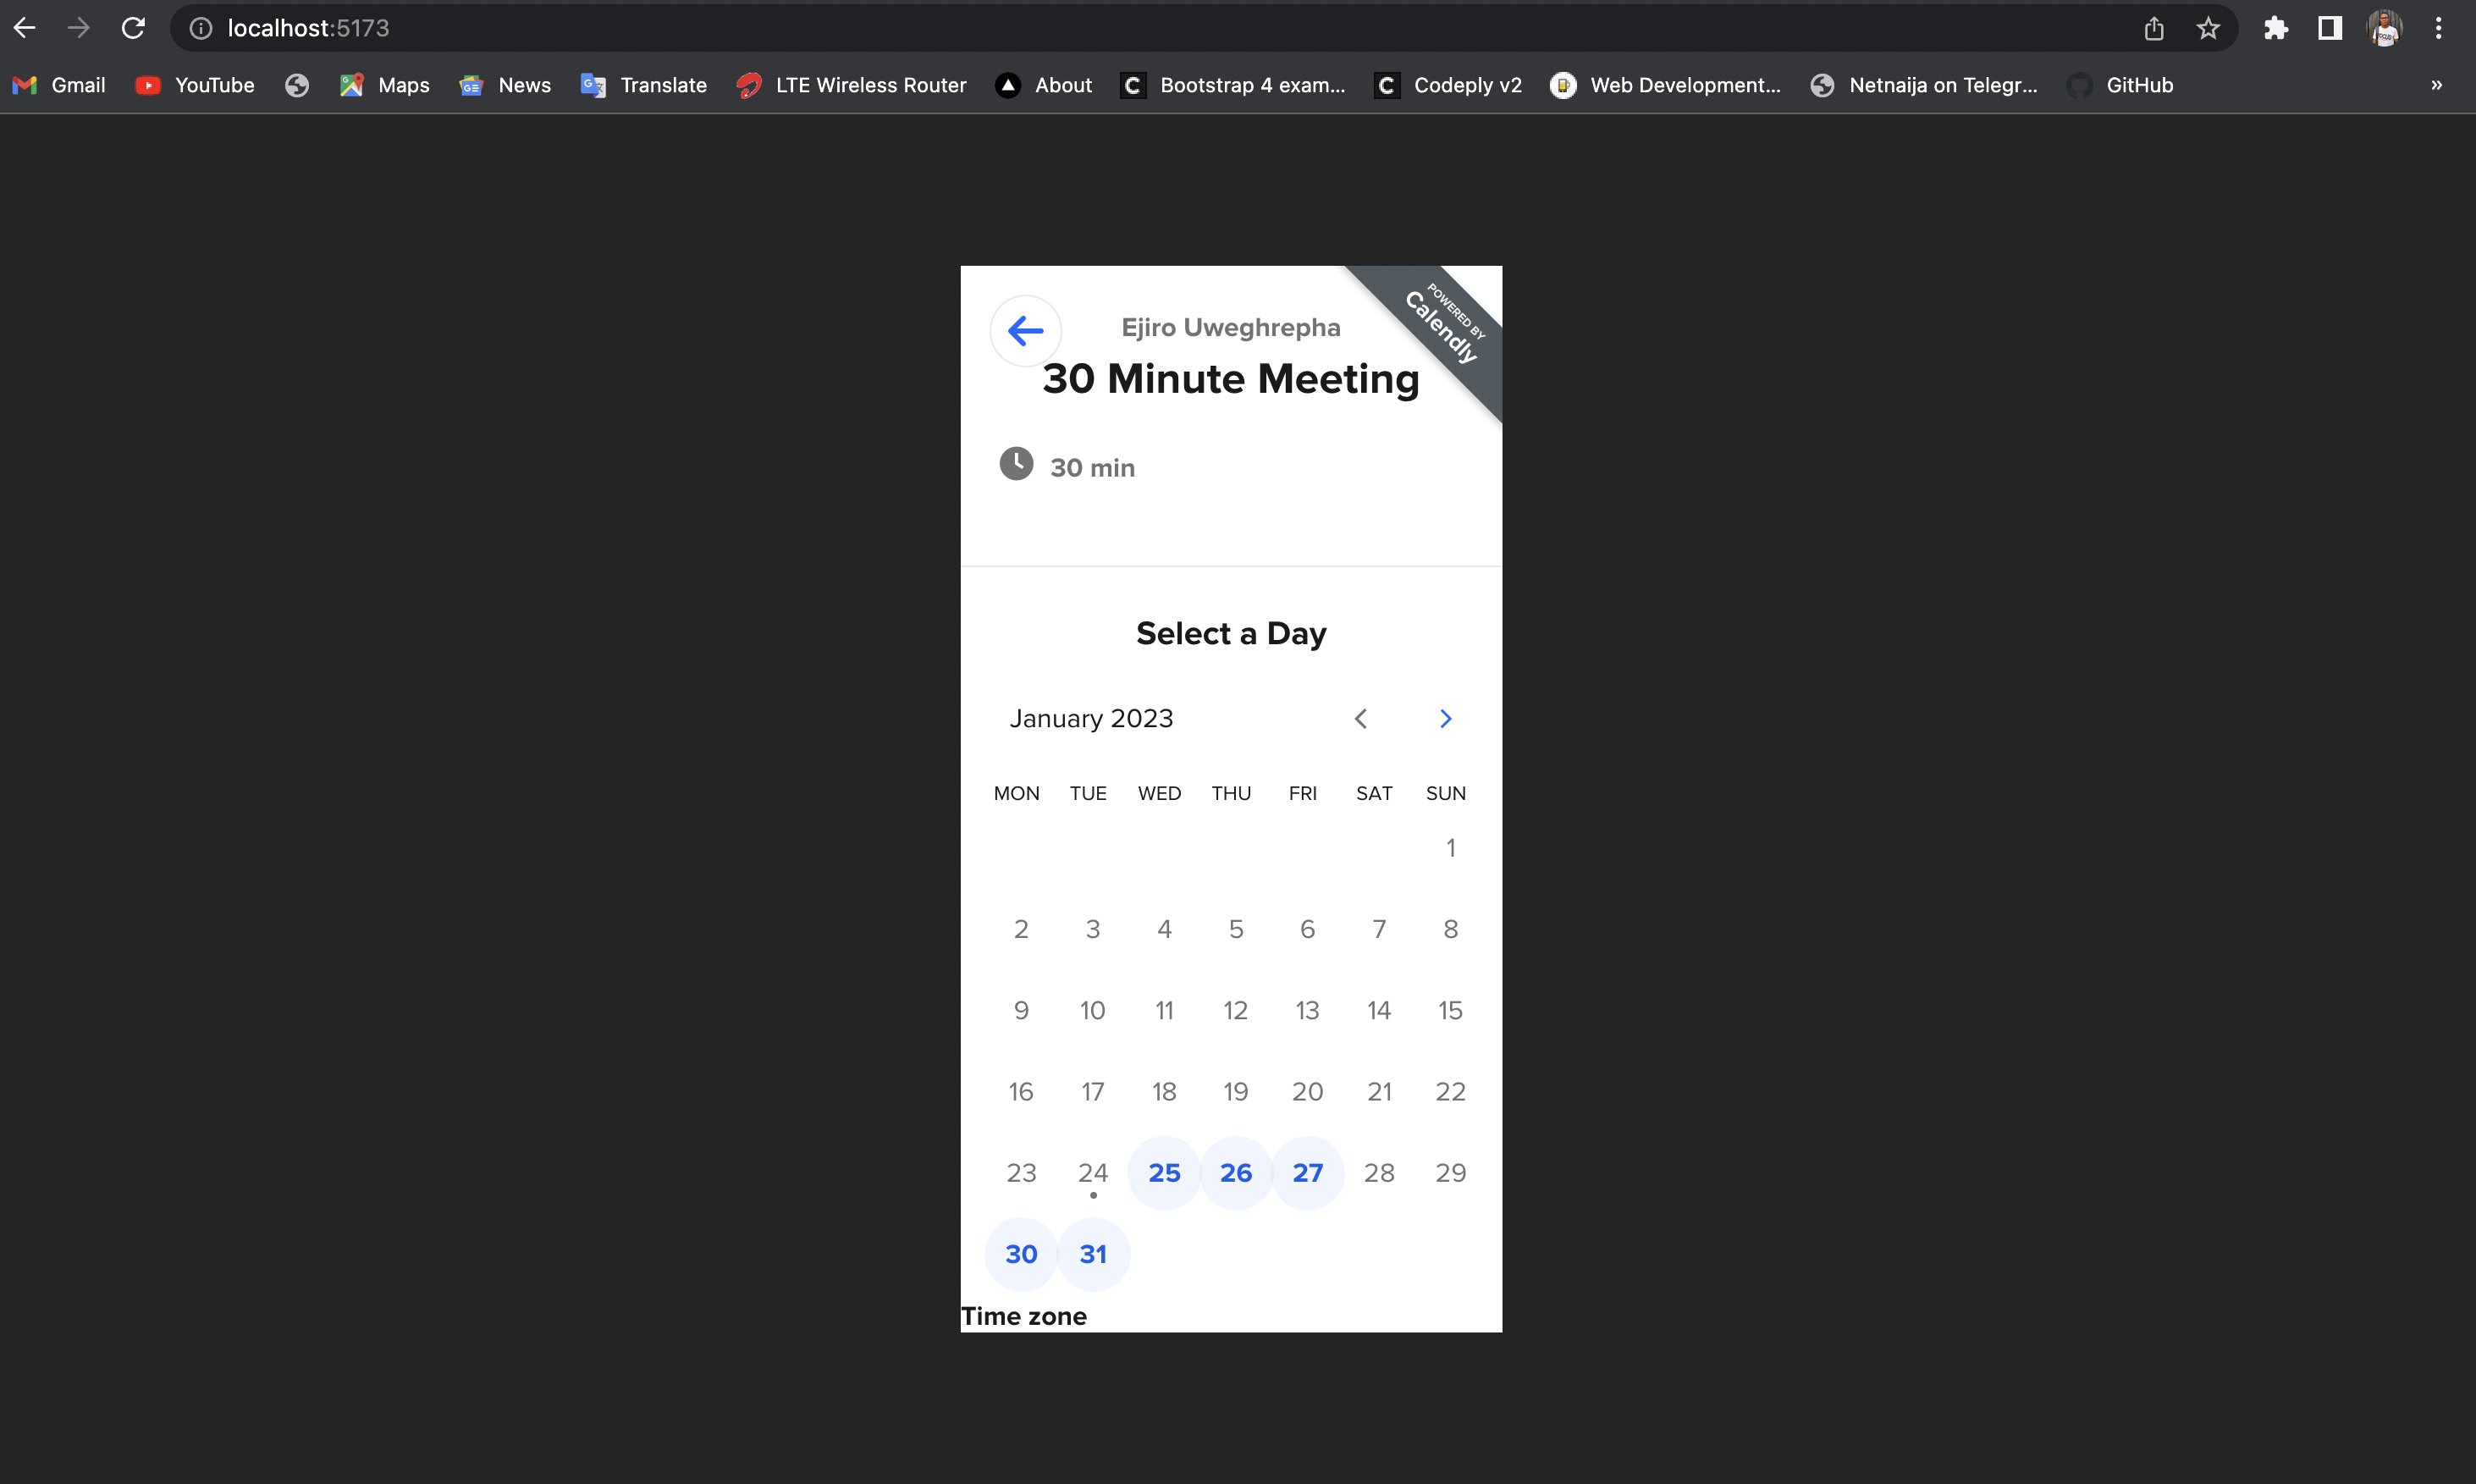
And if we check our webpage, we have something similar here.
PopupWidget
import React from "react";
import { PopupWidget } from "react-calendly";

const App = () => {
  return (
    <div className="App">
      <PopupWidget
        url="https://calendly.com/your_scheduling_page"
        /*
         * react-calendly uses React's Portal feature (https://reactjs.org/docs/portals.html) to render the popup modal. As a result, you'll need to
         * specify the rootElement property to ensure the modal is inserted into the correct domNode.
         */
        rootElement={document.getElementById("root")}
        text="Click here to schedule!"
        textColor="#ffffff"
        color="#00a2ff"
      />
    </div>
  );
};

export default App;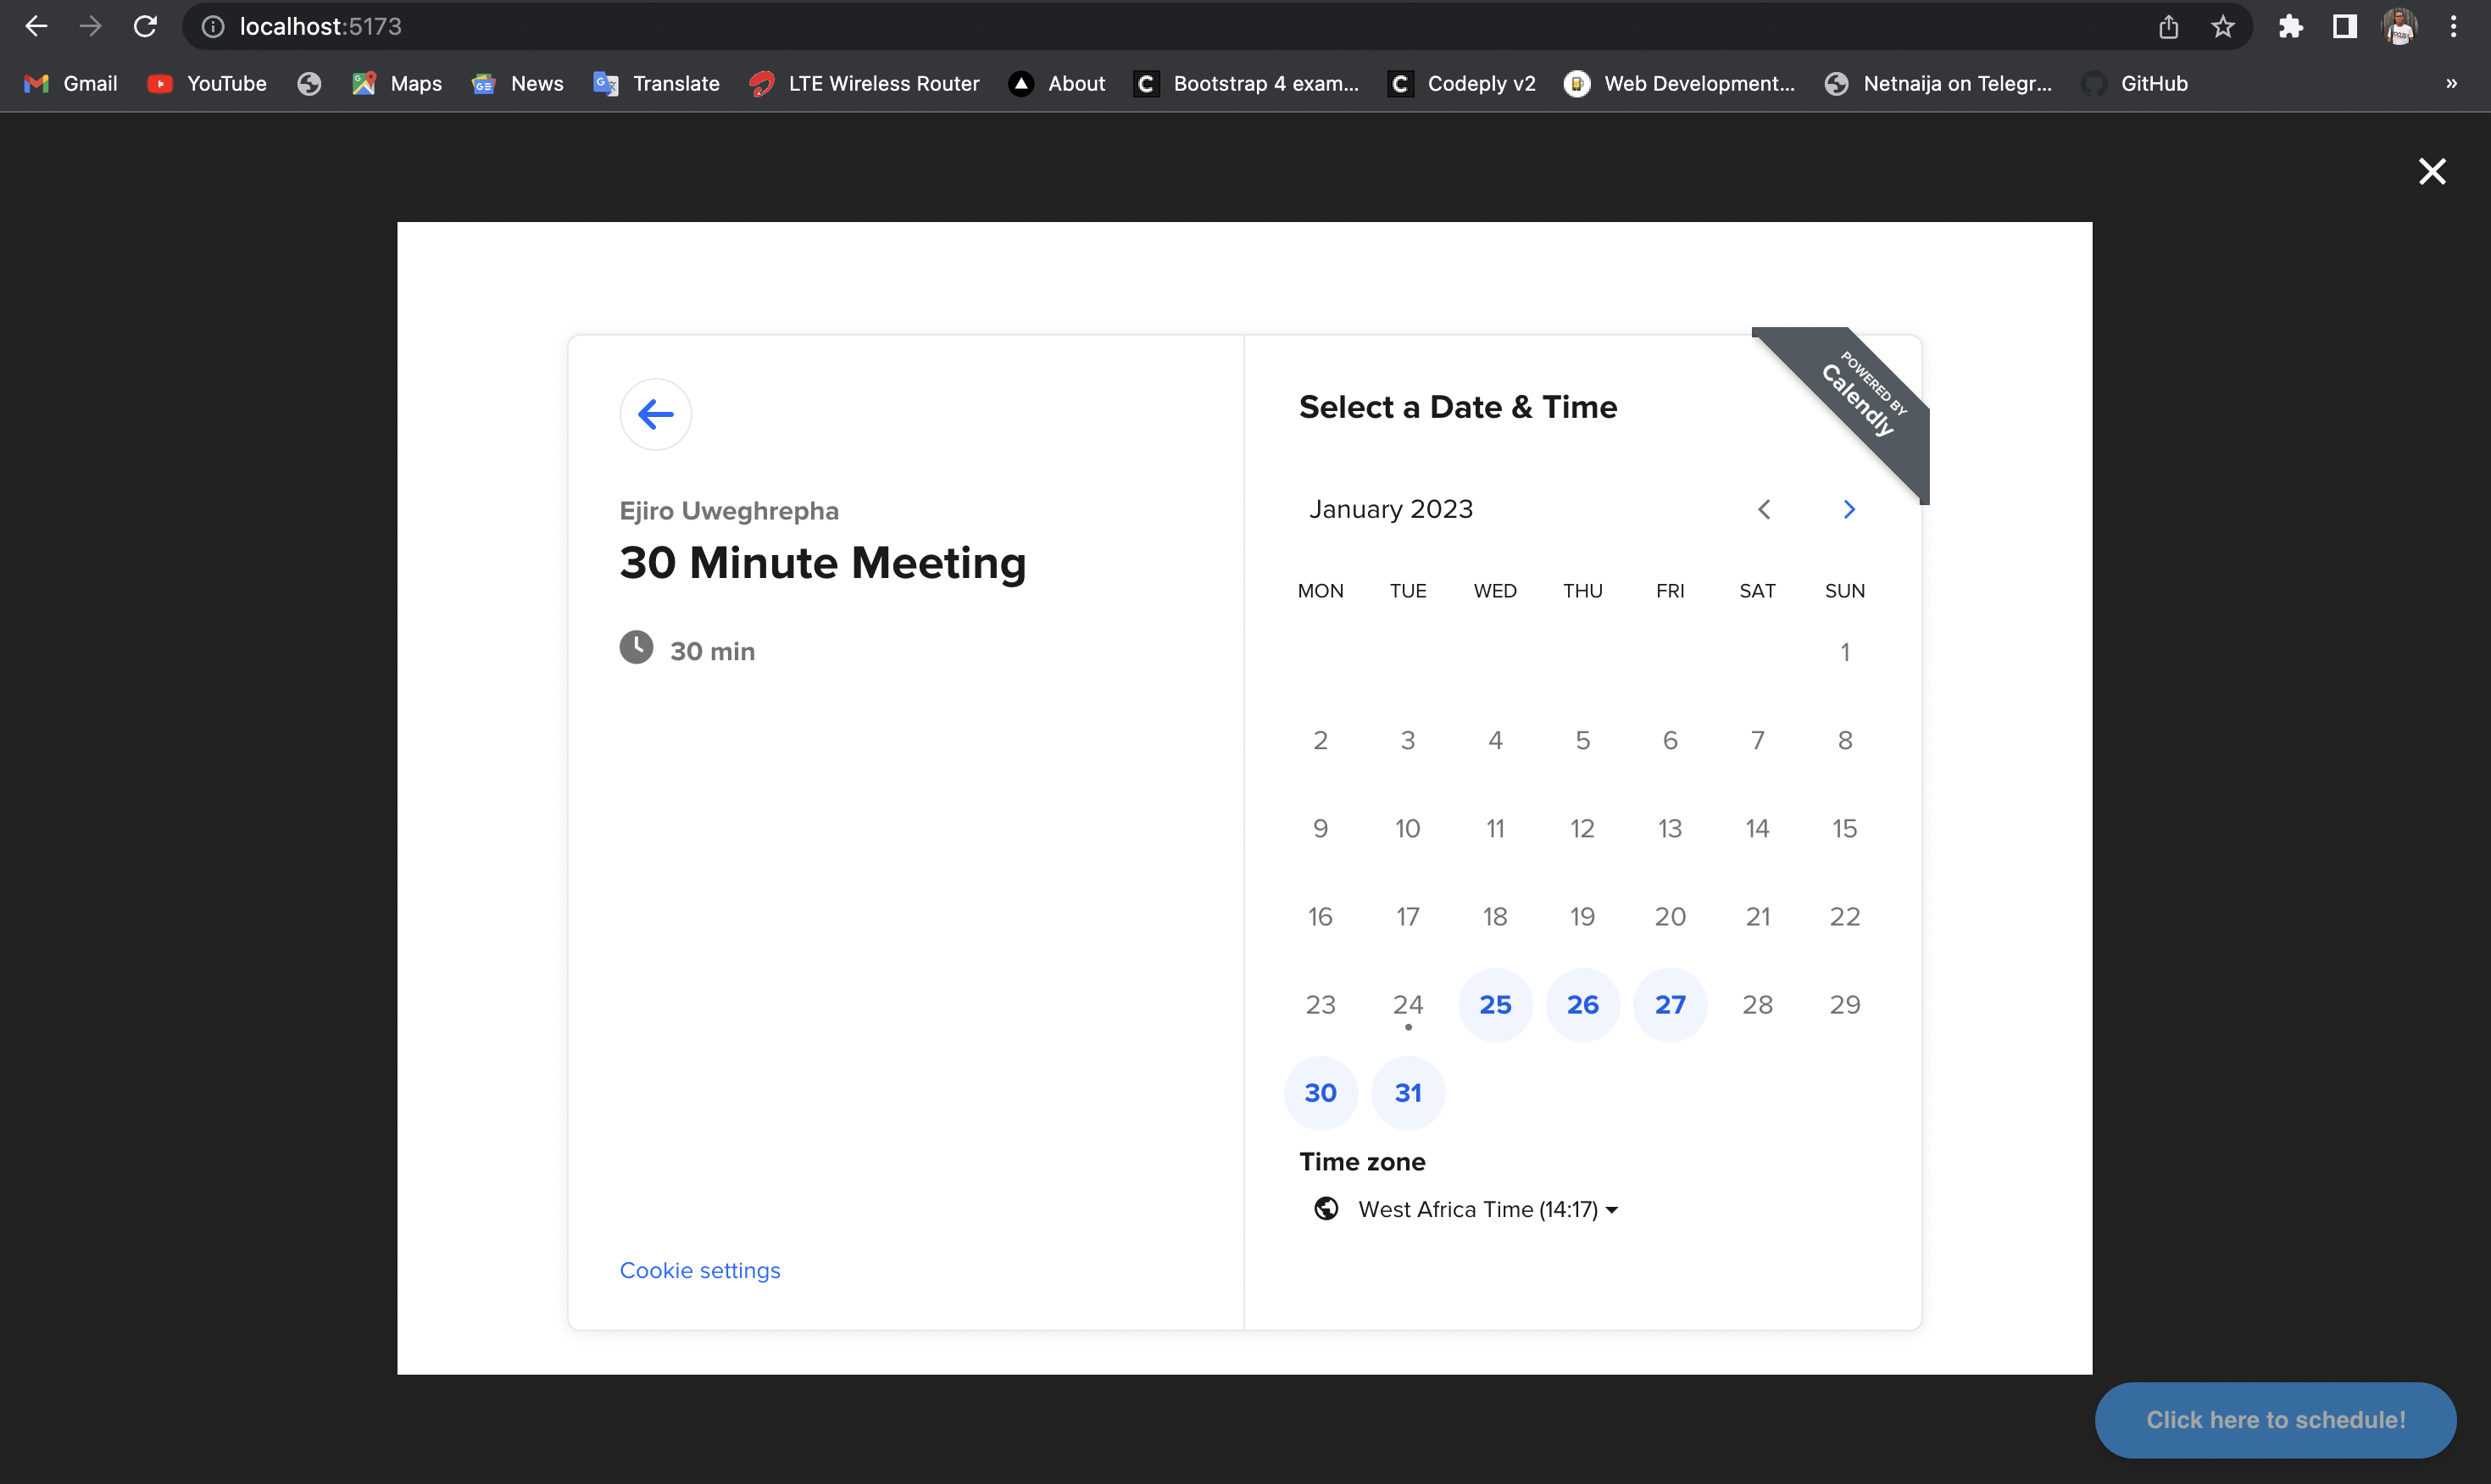
useCalendlyEventListener
Here we’re using an Eventlistener to detect when our Calendly profile is being viewed.
import React from "react";
import { useCalendlyEventListener, InlineWidget } from "react-calendly";

const App = () => {
  useCalendlyEventListener({
    onProfilePageViewed: () => console.log("onProfilePageViewed"),
    onDateAndTimeSelected: () => console.log("onDateAndTimeSelected"),
    onEventTypeViewed: () => console.log("onEventTypeViewed"),
    onEventScheduled: (e) => console.log(e.data.payload),
  });

  return (
    <div className="App">
      <InlineWidget url="https://calendly.com/your_scheduling_page" />
    </div>
  );
};

export default App;
So whenever we click on any event on the calendar, we get a console.log of each event on the webpage.
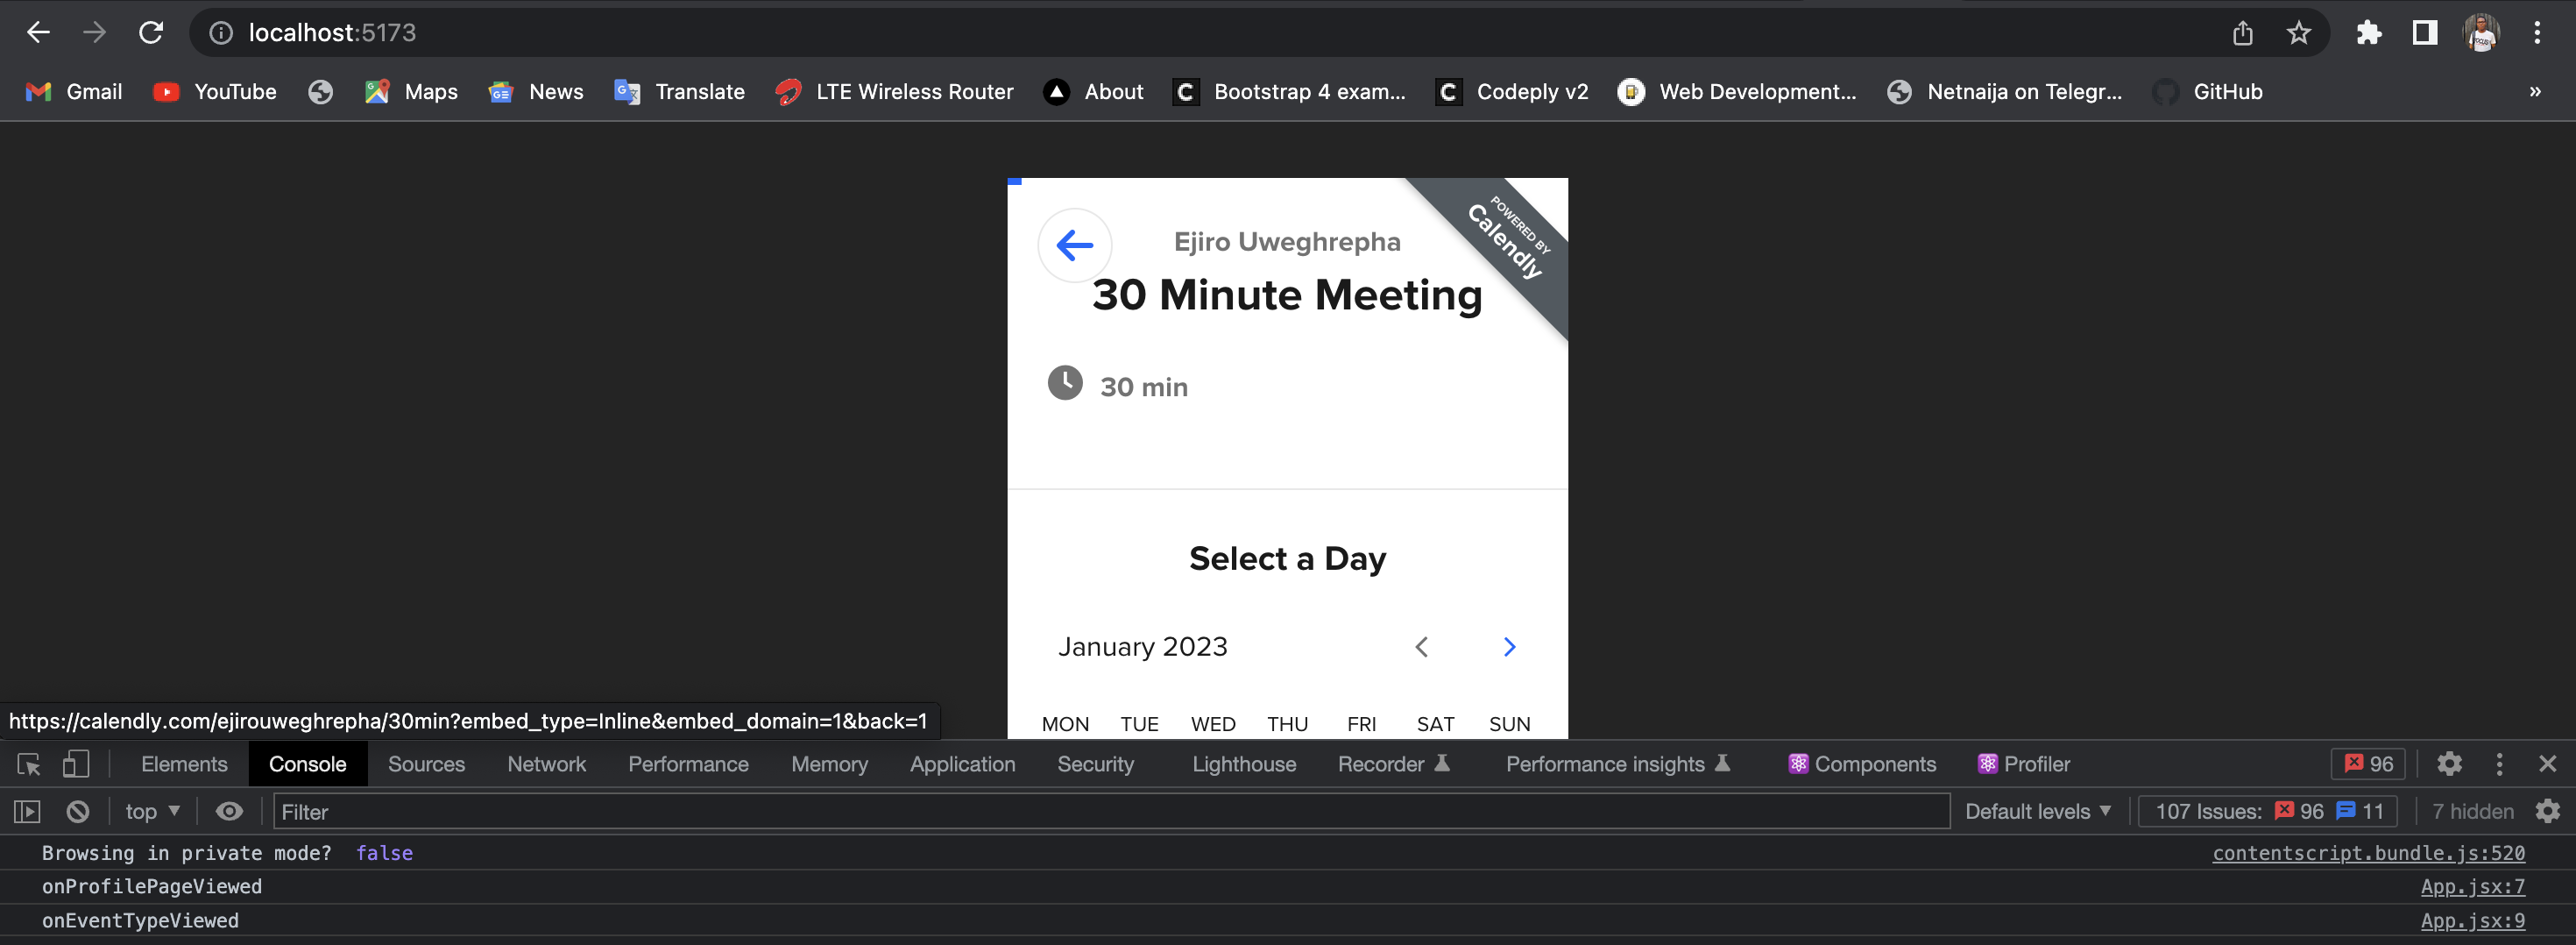
As a result, we can further customize the component and include more properties or elements, such as:
Embed Height
The embed height can be adjusted to ensure the entire scheduling page, including all available event types and scheduling options, is visible to the user. By setting the embed height appropriately, you can create a seamless scheduling experience for your visitors when modifying your component.
 styles={{
      height: '100px'
    }}
Page Settings
Page settings refer to the options available for customizing the look and behavior of your scheduling page. For example, you might use page settings to choose a custom color scheme, add background color, and change the text that appears on your scheduling page.
pageSettings={{
  backgroundColor: 'ffffff',
  hideEventTypeDetails: false,
  hideLandingPageDetails: false,
  primaryColor: '00a2ff',
  textColor: '4d5055'
}}
Prefill Values
In scheduling tools like Calendly, prefill values can also be used to automatically schedule events with specific details such as email address and name. By using prefill values, filling out forms and scheduling events is streamlined, and important information is captured accurately, leading to increased efficiency, better data quality, and improved customer experience.
prefill={{
  email: 'test@test.com',
  firstName: 'Jon',
  lastName: 'Snow',
  name: 'Jon Snow',
  guests: [
    'janedoe@example.com',
  ],
  customAnswers: {
    a1: 'a1',
    a2: 'a2',
    a3: 'a3',
    a4: 'a4',
    a5: 'a5'
  },
  date: new Date(Date.now() + 86400000)
}}
UTM Parameters
UTM parameters are additional pieces of information that can be added to a URL to track and analyze the clicks it generates. By adding UTM parameters to the code in your Calendly scheduling pages, you can keep tracking the date and time of your scheduling page visit.
utm={{
  utmCampaign: 'Spring Sale 2019',
  utmContent: 'Shoe and Shirts',
  utmMedium: 'Ad',
  utmSource: 'Facebook',
  utmTerm: 'Spring'
}}
We can as well include the above mention components and props together below.
 <InlineWidget
  url="https://calendly.com/your_scheduling_page"
  pageSettings={this.props.pageSettings}
  utm={this.props.utm}
  prefill={this.props.prefill}
/>;
Session Replay for Developers
Uncover frustrations, understand bugs and fix slowdowns like never before with OpenReplay — an open-source session replay tool for developers. Self-host it in minutes, and have complete control over your customer data. Check our GitHub repo and join the thousands of developers in our community.
When To Use Either Method
Some developers reading this article might get stuck between which method is the best, suits their work environment, and has the least complexity in terms of integration. Well, for a start, you have to decide what you have in mind, like whether you’re using Calendly just for your notifications, emails, and other tasks or looking for something to add to your workflow.
Although similar, both methods have vast differences, affecting our usage. Suppose you are looking for something more user-friendly and with less complexity. In that case, the embedded solution is your guy, but if, as a developer, you want something more, let’s say you have multiple integrations you’d like to make in your work environment, then the NPM package is your guy.
Conclusion
There you have it; all you have to do is use react-calendly to add Calendly to your ReactJS project. The react-calendly library lets you display the Calendly form in a popup window, immediately on the page, or with a customizable button. The useCalendlyEventListener hook can also monitor events and respond accordingly.


