
In web development, middleware plays a crucial role, as a bridge that connects or links various functions or components, simplifying interactions between different elements. This article illustrates the application of middleware for server-side logic in Next.js, particularly in tasks such as securing routes and automatically redirecting users by validating a token’s status in a token-based system.

Spot abnormal user behaviors and iron out the bugs early with OpenReplay. Dive into session replays and reinforce your front-end against vulnerabilities that hackers search for.
Discover how at OpenReplay.com.
In the context of Next.js, middleware runs before routes are matched. It enables you to execute code before completing a request, allowing you to modify responses by rewriting, redirecting, adjusting request or response headers, or responding directly. This article will guide you through utilizing these features to enhance the security of your app.
What challenges are encountered with authentication in Next.js?
Let’s explore the challenges encountered with authentication in Next.js:
- Establishing and maintaining secure user sessions.
- Defining and enforcing granular access controls.
- Implementing effective token-based authentication.
- Establishing logging and monitoring practices.
- Ensuring secure integration with external identity providers.
- Guarding against Cross-Site Request Forgery (CSRF) attacks.
To overcome these challenges, we can address them with the aid of middleware. How? This involves developing logic for secure session validation, logic for improving control over permissions through role-based access checks, logic for validating tokens for secure authentication, and logic for logging and monitoring purposes, depending on the needs of your application.
Remember that Middleware runs before a particular task; therefore, we can take action to address the aforementioned challenges.
Moreover, using middleware is secure; the primary reason middleware is secure is that it runs on the server side. Since it doesn’t get sent to the client’s browser, the logic remains on the server, making it less susceptible to client-side attacks. This inherent security is why middleware is well-suited for these critical tasks.
Step-by-Step Guide to Implementing Middleware
Without further ado, let’s dive right into it.
To keep this article concise, I’ve shared a starter file for you to follow. Access it here. If you need guidance on cloning or downloading, refer to this article.
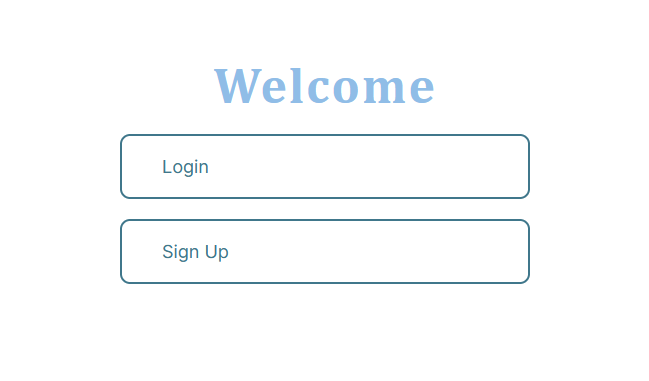
Once you’ve cloned the repository, install all the required dependencies and launch the application. You should observe the following user interface.
Given our focus on middleware, I won’t delve deeply into the server or backend code in this article. Nonetheless, I’ll provide a walkthrough of the starter file’s code to assist you in getting started.
Let’s begin with our database. For this article, I’m using a JSON file. However, in your application, you’ll likely use a database.
File: /utils/token-based-authenticated-users.json
{
  "users": [
    {
      "id": 1,
      "username": "user1",
      "password": "password123"
    },
    {
      "id": 2,
      "username": "user2",
      "password": "pass456"
    }
  ]
}
As shown in the snippet above, the JSON file contains a list of registered users.
Moving on, Next.js API routes have been used to handle server requests. I’ve established two route handlers, /api/login and /api/signup. The demonstration of signup page functionalities isn’t covered here; You can explore with the logic already in place.
File: app/api/signup/route.tsx
const fs = require("fs");
import { NextResponse } from "next/server";

// Dummy user data (loaded from users.jso
const userData = require("@/utils/token-based-authenticated-users.json");

interface SignupFormDataType {
  username: string;
  password: string;
}

// API route handler
export async function POST(request: Request) {
  const { username, password } = (await request.json()) as SignupFormDataType;

  if (!username || !password) {
    return NextResponse.json({ message: "Signup fail" }, { status: 400 });
  }

  userData.users.push({ username, password, id: userData.users.length + 1 });

  // Save the updated user data back to users.json (in a real app, use a database)
  fs.writeFileSync(
    `utils/token-based-authenticated-users.json`,
    JSON.stringify(userData, null, 2)
  );

  return NextResponse.json({ message: "Signup successful" }, { status: 201 });
}
Simply put, the code in the snippet above takes the data from the form in the request, does some basic checks, adds it to our fake data list, and sends back a response. In a real application, you’ll go beyond this basic step. You’ll connect to your database, introduce additional features such as password hashing, and implement other functionalities.
File: app/api/login/route.tsx
const jwt = require("jsonwebtoken");
import { NextResponse } from "next/server";
// Dummy user data (loaded from users.jso
const userData = require("@/utils/token-based-authenticated-users.json");

export interface LoginFormDataType {
  username: string;
  password: string;
}

// Function to generate a JWT with user information
function generateToken(user: {
  username: string;
  password: string;
  id: string;
}) {
  // Include relevant user information in the token
  const payload = {
    userId: user.id,
    username: user.username,
  };

  // Sign the token with a secret key and set an expiration time
  return jwt.sign(payload, "mySecretKey", { expiresIn: "1h" });
}
// API route handler
export async function POST(request: Request) {
  const { username, password: claimedCorrectPassword } =
    (await request.json()) as LoginFormDataType;

  // Find the user by username
  const user = userData.users.find(
    (u: LoginFormDataType) => u.username === username
  );

  // Check if the user exists and the password is correct
  if (user && user.password === claimedCorrectPassword) {
    // Generate a JWT with user information
    const token = generateToken({ ...user, id: userData.users.length + 1 });

    return NextResponse.json(
      { message: "Login successful", token },
      { status: 200 }
    );
  } else {
    return NextResponse.json(
      { message: "Invalid credentials" },
      { status: 401 }
    );
  }
}
The snippet above is the logic in the login route handler; upon receiving login credentials, it checks if the user exists and if the provided password is correct. If so, it generates a JWT containing user information and sends a successful response; otherwise, it sends an error response. Additionally, store the secret key used to sign your token in a secure location, such as your environment variables.
And that is that about the route handlers.
Let us go ahead to the page files.
File: /app/signup/page.tsx
"use client";

import { useState } from "react";
import Link from "next/link";
import { useRouter } from "next/navigation";

const SignUp = () => {
  const [formData, setFormData] = useState({
    username: "",
    password: "",
  });

  const handleChange = (e) => {
    setFormData({
      ...formData,
      [e.target.name]: e.target.value,
    });
  };
  const router = useRouter();
  const handleSubmit = async (e) => {
    e.preventDefault();
    try {
      const response = await fetch("/api/signup", {
        method: "POST",
        headers: {
          "Content-Type": "application/json",
        },
        body: JSON.stringify(formData),
      });

      if (response.ok) {
        const data = await response.json();
        console.log("Signup successfull", data);
        router.push("/login");
      } else {
        const errorData = await response.json();
        console.error("Login failed:", errorData);
      }
    } catch (error) {
      console.error("Error during login:", error);
    }
  };

  return (
    <div className="form__container">
      <h2 className="">Sign Up</h2>

      <form className="form" onSubmit={handleSubmit}>
        <div>
          <label htmlFor="username">Username</label>
          <input
            type="text"
            id="username"
            name="username"
            value={formData.username}
            onChange={handleChange}
          />
        </div>

        <div>
          <label htmlFor="password">Password</label>
          <input
            type="password"
            id="password"
            name="password"
            value={formData.password}
            onChange={handleChange}
          />
        </div>

        <button type="submit">Sign Up</button>
      </form>

      <Link href="/">Go to home page</Link>
    </div>
  );
};

export default SignUp;
This SignUp page code captures user input from the form, sends a POST request to /api/signup, and either redirects to the login page upon successful signup or logs any encountered errors.
File: /app/login/page.tsx
"use client";

import Link from "next/link";
import { useState } from "react";
import { useRouter } from "next/navigation";

const Login = () => {
  const [formData, setFormData] = useState({
    username: "",
    password: "",
  });

  const handleChange = (e) => {
    setFormData({
      ...formData,
      [e.target.name]: e.target.value,
    });
  };

  const handleSubmit = async (e) => {
    e.preventDefault();

    const router = useRouter();

    try {
      const response = await fetch("/api/login", {
        method: "POST",
        headers: {
          "Content-Type": "application/json",
        },
        body: JSON.stringify(formData),
      });

      if (response.ok) {
        const data = await response.json();
        console.log("Login successful:", data);
        // Redirecting
        router.push("/dashboard");
      } else {
        const errorData = await response.json();
        console.error("Login failed:", errorData);
      }
    } catch (error) {
      console.error("Error during login:", error);
    }
  };

  return (
    <div className="form__container">
      <h2 className="">Login</h2>

      <form className="form" onSubmit={handleSubmit}>
        <div>
          <label htmlFor="username">Username</label>
          <input
            type="text"
            id="username"
            name="username"
            value={formData.username}
            onChange={handleChange}
          />
        </div>

        <div>
          <label htmlFor="password">Password</label>
          <input
            type="password"
            id="password"
            name="password"
            value={formData.password}
            onChange={handleChange}
          />
        </div>

        <button type="submit">Login </button>
      </form>

      <Link href="/">Go to home page</Link>
    </div>
  );
};

export default Login;
The logic in the Login Page is quite similar to the Signup page, but this time, we’re redirecting to the dashboard.
Now, to improve the Login component, we need to include the logic to store the token in the cookie. This way, we can fetch and utilize the token for future requests to the backend, just like in real-world situations. We’ll also keep track of its expiration time to log the user out of our application (or routes that require authentication).
const handleSubmit = async (e) => {
  e.preventDefault();

  try {
    const response = await fetch("/api/login", {
      method: "POST",
      headers: {
        "Content-Type": "application/json",
      },
      body: JSON.stringify(formData),
    });

    if (response.ok) {
      const data = await response.json();
      console.log("Login successful:", data);

      // Logic to set cookie
      // Set the expiration time to 1 hour from the current time
      const expirationTime = new Date(
        new Date().getTime() + 1 * 60 * 60 * 1000
      );

      // Set the "accessToken" cookie with an expiration time
      Cookies.set("accessToken", data.token, {
        expires: expirationTime,
        path: "/",
      });

      // Redirecting
      router.push("/dashboard");
    } else {
      const errorData = await response.json();
      console.error("Login failed:", errorData);
    }
  } catch (error) {
    console.error("Error during login:", error);
  }
};
In the above code, the handleSubmit function has been revised to incorporate the logic for storing the access token. The Cookies object is employed from the js-cookie library, a lightweight tool designed for efficient cookie handling. Make sure to install the library by executing npm install js-cookie and import it at the beginning of the file with import Cookies from "js-cookie". For additional information on using js-cookie, refer to this link.
I set the expiration time to one hour because that’s what we did on the server, too. They need to match each other for effective authorization and authentication (Users won’t be able to send a request with an expired token because they would have already been logged out of the application.).
Currently, a user can access the dashboard page without logging in, and if we implement the logic to retrieve the token directly in the dashboard page component before redirecting unauthorized users, the user will briefly see the page rendered before being redirected to the login page. This is why it is preferable to implement the logic in a middleware file since the middleware code executes before a page is rendered. Let’s observe all these aspects in action.
File: /app/dashboard/page.tsx
"use client";

import { useRouter } from "next/navigation";

import Cookies from "js-cookie";

const DashBoard = () => {
  const router = useRouter();

  const accessToken = Cookies.get("accessToken");

  if (!accessToken) {
    router.push("/login");
  }

  // Function to clear the token and redirect the user to the homepage
  const logoutHandler = () => {
    Cookies.remove("accessToken");
    router.push("/");
  };

  return (
    <section className="card__container">
      <div className="card">
        <h2>Welcome to the Dashboard!</h2>
        <p>This is a protected page.</p>
      </div>
      <button className="logout__button" onClick={logoutHandler}>
        Logout{" "}
      </button>
    </section>
  );
};
export default DashBoard;
Let’s discuss the code in our dashboard component. Essentially, the code checks for the existence of the access token and redirects to the homepage based on the result. If a user is not logged in and attempts to visit the dashboard URL in their browser, they may briefly see the page’s content before being redirected to the login page. Why does this happen?
The brief visibility of the dashboard content before redirection occurs because the check for the access token and the subsequent redirection is done after the component has already started rendering.
React components go through a lifecycle, and during the initial rendering phase, the component starts rendering based on its current state and props. In the dashboard case, it begins rendering the content before reaching the point in the code where the access token is checked and the redirection is triggered.
This is precisely why middleware becomes crucial in our setup! Additionally, we’ve implemented the logoutHandler function, which removes the token from the cookie and directs the user back to the homepage.
Let us go ahead and update the dashboard component code and also start developing our middleware file.
Below is the revised code in the dashboard component file
"use client";

import { useRouter } from "next/navigation";

import Cookies from "js-cookie";

const DashBoard = () => {
  const router = useRouter();

  // Function to clear the token and redirect the user to the homepage
  const logoutHandler = () => {
    Cookies.remove("accessToken");
    router.push("/");
  };

  return (
    <section className="card__container">
      <div className="card">
        <h2>Welcome to the Dashboard!</h2>
        <p>This is a protected page.</p>
      </div>
      <button className="logout__button" onClick={logoutHandler}>
        Logout{" "}
      </button>
    </section>
  );
};
export default DashBoard;
To start the development of our middleware code, we must create a file named middleware.ts in the project’s root directory.
import { NextResponse } from "next/server";
import type { NextRequest } from "next/server";

export function middleware(request: NextRequest) {
  const accessToken = request.cookies.get("accessToken")?.value;

  if (request.nextUrl.pathname === "/dashboard" && !accessToken) {
    return NextResponse.redirect(new URL("/login", request.url));
  }

  return NextResponse.next();
}
We’ve implemented middleware in the provided code snippet to protect the dashboard route. The middleware checks if the request is directed to the dashboard and if the access token is absent. If these conditions are met, the user is redirected to the login page.
This ensures that only authenticated users can access the protected dashboard route. Routes can be protected individually, as demonstrated, or collectively, as we’ll explore further in the subsequent sections of this article.
In the middleware file, it’s important to note the following:
- That only one function can be returned.
- If there’s a necessity to perform asynchronous operations, the function can be changed to an asynchronous one.
- The codes in the middleware execute from top to bottom.
Now, if you try to access the dashboard component page without logging in, you will be redirected without seeing the content of the dashboard page.
If desired, you have the option to chain multiple routes within a single if check, as illustrated below:
if (
  request.nextUrl.pathname === "/dashboard" ||
  request.nextUrl.pathname === "/protected_route_2" ||
  request.nextUrl.pathname === "/protected_route_3"
) {
  if (!accessToken)
    return NextResponse.redirect(new URL("/login", request.url));
}
Additionally, let us say we want to protect all the routes that start with /dashboard; all we need to do is as shown below. This will match endpoints such as /dashboard/profile, /dashboard/settings, etc.
if (request.nextUrl.pathname.startsWith("/dashboard") && !accessToken) {
  return NextResponse.redirect(new URL("/login", request.url));
}
Another approach to collectively match multiple endpoints is by using a matcher configuration. Let’s explore this method in action.
import { NextResponse } from "next/server";
import type { NextRequest } from "next/server";

export function middleware(request: NextRequest) {
  const accessToken = request.cookies.get("accessToken")?.value;

  if (!accessToken) {
    return NextResponse.redirect(new URL("/login", request.url));
  }

  return NextResponse.next();
}

export const config = {
  matcher: ["/dashboard/:path*", "/protected_route_2", "/protected_route_3"],
};
In the provided code snippet above, the middleware will be executed for /dashboard and any nested route(s) as well as /protected_route_2 and /protected_route_3. And that is it for implementing effective token-based authentication. Keep in mind that the token-based authentication process is similar to establishing and maintaining secure user sessions.
How to integrate role-based authentication?
To implement this, let us start by updating the user’s properties in the database to include the user’s role.
File: /utils/token-based-authenticated-users.json
{
  "users": [
    {
      "id": 1,
      "username": "user1",
      "password": "password123",
      "role": "user"
    },
    {
      "id": 2,
      "username": "user2",
      "password": "pass456",
      "role": "user"
    },
    {
      "id": 3,
      "username": "Joel",
      "password": "Password@123",
      "role": "admin"
    }
  ]
}
In the code snippet below, you can observe that I have modified the response sent to the client after a successful login. This response now includes the user object, which will subsequently be stored in the cookie by the client.
File: app/api/login/route.tsx
return NextResponse.json(
  { message: "Login successful", token, user },
  { status: 200 }
);
File: app/login/page.tsx
// Set the "accessToken" cookie with an expiration time
Cookies.set("accessToken", data.token, {
  expires: expirationTime,
  path: "/",
});

// Set the user role to the cookie.
Cookies.set("userRole", data.user.role, {
  expires: expirationTime,
  path: "/",
});
On the login page’s handleSubmit handler, we’ve included the logic to save the user’s role in the cookie together with the token, as can be seen in the code snippet above.
Additionally, let’s create an admin dashboard page. Create a new folder in the app directory, name it “admin_dashboard”, and place the following code in it.
"use client";

import { useRouter } from "next/navigation";

import Cookies from "js-cookie";

const AdminDashBoard = () => {
  const router = useRouter();

  // Function to clear the token and redirect the user to the homepage
  const logoutHandler = () => {
    Cookies.remove("accessToken");
    Cookies.remove("userRole");
    router.push("/");
  };

  return (
    <section className="card__container">
      <div className="card">
        <h2>Welcome to the Admin Dashboard!</h2>
        <p>This is a protected page.</p>
      </div>
      <button className="logout__button" onClick={logoutHandler}>
        Logout{" "}
      </button>
    </section>
  );
};
export default AdminDashBoard;
To implement role-based access, we will check the role of the user in our middleware file and redirect based on the role. Let us do that now.
import { NextResponse } from "next/server";
import type { NextRequest } from "next/server";

export function middleware(request: NextRequest) {
  const accessToken = request.cookies.get("accessToken")?.value;
  const userRole = request.cookies.get("userRole")?.value;

  if (
    request.nextUrl.pathname === "/dashboard" ||
    request.nextUrl.pathname === "/admin_dashboard"
  ) {
    if (!accessToken)
      return NextResponse.redirect(new URL("/login", request.url));
  }

  if (request.nextUrl.pathname === "/dashboard") {
    if (userRole === "admin") {
      return NextResponse.redirect(new URL("/admin_dashboard", request.url));
    }
  }

  return NextResponse.next();
}
The code above reflects the recent changes I made. Two actions were performed: retrieving the user’s role from the cookie and redirecting to the /admin_dashboard page if the user’s role is admin.
If you log in as a user with the ‘user’ role, you can currently access the admin_dashboard due to the existing logic, which does not limit the route to admin users. Let’s address this by implementing route protection. This time, we’ll opt for individual checks. Remember, we can match routes individually or collectively.
Below is the revised code to protect the admin_dashboard route.
import { NextResponse } from "next/server";
import type { NextRequest } from "next/server";

export function middleware(request: NextRequest) {
  const accessToken = request.cookies.get("accessToken")?.value;
  const userRole = request.cookies.get("userRole")?.value;

  if (
    request.nextUrl.pathname === "/dashboard" ||
    request.nextUrl.pathname === "/admin_dashboard"
  ) {
    if (!accessToken)
      return NextResponse.redirect(new URL("/login", request.url));
  }

  if (request.nextUrl.pathname === "/dashboard") {
    if (userRole === "admin") {
      return NextResponse.redirect(new URL("/admin_dashboard", request.url));
    }
  }

  if (request.nextUrl.pathname === "/admin_dashboard") {
    if (userRole === "user") {
      return NextResponse.redirect(new URL("/dashboard", request.url));
    }
  }

  return NextResponse.next();
}
In the snippet above, the following is what was done:
-
First Condition:
- The initial
ifstatement checks if the current route is either/dashboardor/admin_dashboard. - If the access token (accessToken) is missing, it redirects the user to the login page.
- The initial
-
Second Condition:
- The following
ifblock focuses specifically on the/dashboardroute. - If the user role is identified as “admin,” it redirects the user to the
/admin_dashboardroute.
- The following
-
Third Condition:
- This
ifblock is designed for the/admin_dashboardroute. - If the user role is identified as “user,” it redirects the user to the
/dashboardroute.
- This
And that is a wrap!
Conclusion
In this article, specific challenges related to authentication in Next.js and the role of middleware in addressing these authentication challenges in Next.js.
We’ve delved into the implementation of token-based and role-based authentication in a Next.js application using middleware. We’ve examined how to manage user roles and tokens, set them in cookies during login, and leverage middleware to control access to specific routes based on user roles.
To learn more about Nextjs middleware, follow this link. Additionally, self-practice is essential for effective learning and mastery of this topic.
Detect, Fix, and Fortify
Spot abnormal user behaviors and iron out the bugs early with OpenReplay. Dive into session replays and reinforce your front-end against vulnerabilities that hackers search for.
Explore DevTools