How To Parse and Render Markdown In Vuejs
Markdown is a tool to help you write HTML without the hustle of the tags, however turning it into HTML is not that trivial.

HTML stands for Hypertext Markup Language, and probably the most used markup language on the web today. Markdown have evolved as a way to simplify markup for web users. You can use makrdown to render text and don’t get to sacrifice quality and it is practically a faster way to write because it’s light weighted and you don’t need to learn a lot to get started. Markdown might just turn into your favorite tool when you next want to create a blog post or a website or even write as a technical writer fter going through this tutorial.
Throughout this tutorial, we will be looking at simple basic steps that should help you get started at working with markdowns on your Vue project.
Why Use the Marked.js Library
Vue does not have as much support for Vue as there is for React. Examples are markdown-it, Remark.js, marked.js. But hopefully in the future, there should be more support, and after much research, I picked marked.js because it has the most stars and has zero vulnerability. Marked does not sanitize (meaning it does not secure HTML documents from attacks like cross-site scripting (XSS) ) marked output HTML as that feature is deprecated and has vulnerability but however, it supports the use of other libraries to secure output HTML such as DOMPurify (recommended), sanitize-html or insane.
Setting Up Our Vue App
In this section, we will be using the Vue demo app to demonstrate how to render markdowns safely into our vue app. Before we dive in on the markdown context, let us create a new project and install the marked.js library.
Create A Vue Project From CLI
CLI is the standard way of creating Vue projects not withstanding the fact that you can also use CDN (Content Delivery Network) but in this tutorial, CLI is recommended because it is more user friendly. Just incase you do not have Vue CLI installed, you can use the code below to install Vue CLI
sudo npm i -g @vue/cliNext, let us walk through how to set up our Vue projects and what our file structure should look like. To create a new Vue Project, we need to use the code below
vue create marked-exampleAfterwards, we will be prompted to choose how to create our project, either use the default structure mapped out by the Vue team or manually choose the features we will need for our project. For this tutorial, we will be creating ours manually and choosing our features. After setting up our project, our file structure should be more like so
+— src/i | +— assets/ | +— components | +— HelloWorld.vue | +— App.vue | +— main.js
Then we start up our server locally by
npm run serveAfter the above command, it should give you a link to where the project was built.
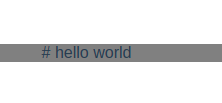
Now that our project is ready, lets display a simple Text header using markdown,
<template>
  <div>
   {{ markdown }}
  </div>
</template>
<script>
export default {
  name: "App",
  data() {
    return {
      markdown: " # hello world ",
    };
  },
};
</script>
<style>
#app {
  font-family: Avenir, Helvetica, Arial, sans-serif;
  -webkit-font-smoothing: antialiased;
  -moz-osx-font-smoothing: grayscale;
  text-align: center;
  color: #2c3e50;
  margin-top: 60px;
}
</style>
Based on the code above, we have created a data entry point which carries a dynamic property although in our case, it is carrying a string which we expect to display as a header on output. The string value bound to the markdown property when rendered is not the expected result as it should, so instead of displaying this output as just plain text, we want to make it display what it should represent as a header as the ”#” tag is used for a header in HTML, so lets see how we can achieve this in our Vue app.
Setup Marked.js
Marked or marked.js is a low-level compiler that helps you convert Markdowns into HTML. Markdown is a simple text format which was designed to be very easy to read and write. Let’s get marked into our Vue app. To install marked.js library into our Vue app, use the command below
npm install markedAfterwards, import the library into the project more likely so you can copy it below and add it to your app.vue component within the script tag.
import marked from 'marked';Render Live Markdown
Let’s create a computed property below the data entry whose function is to re-render the markdown in our Vue app.
<template>
<!-- {{ markdown }} -->
  <textarea v-model="markdown"></textarea>
  <div v-html="markdownToHtml"></div>

</template>
<script>
import marked from 'marked';
export default {
  name: 'App',
 data(){
   return {
     markdown:  "# Hello World",
   };
 },
 computed: {
   markdownToHtml(){
     return marked(this.markdown);
   }
 }
}
</script>
<style>
#app {
  font-family: Avenir, Helvetica, Arial, sans-serif;
  -webkit-font-smoothing: antialiased;
  -moz-osx-font-smoothing: grayscale;
  text-align: center;
  color: #2c3e50;
  margin-top: 60px;
}
</style>
For complex logic that involves reactive data, computed property is used. That is, whenever the user enters a text in the text box, it is passed into the marked function from the marked library which compiles the markdown into HTML and the computed property re-renders it to our app instantly as it changes.
So the next thing we want to do is render this markdown in our project and it is very straight forward or rather very simple to do so in Vue. We will add this line of code below to our template to create a text box where we can enter text. Recall we mentioned that the text will be passed to the function created inside the computed property.
<textarea v-model="markdown"></textarea>This line of code just simply states that the text area should trace the markdown model and so every time a new text is entered, the computed function is runned but lets make changes to it so we can bind it to the computed function only rather than bind it to both the data point and the function.
Let us also add to our template, just beneath the text area, a div tag and add the property [v-html](https://v3.vuejs.org/api/directives.html#v-html) which is just a Vue directive when it receives a text, it renders it to HTML.
<div v-html="markdownTohtml"></div>This line of code above simply states that the value being passed into the markdown should be converted to html and displayed on the screen and once it is saved, we should have it displayed like a HTML header on the screen rather than have it displayed like it was from the first result above. We can also give you the ability to create a live editor in your Vue app using a text area, so as you write down the text area, live changes take place immediately

Pretty much the right result that we need and way better than what we first got.
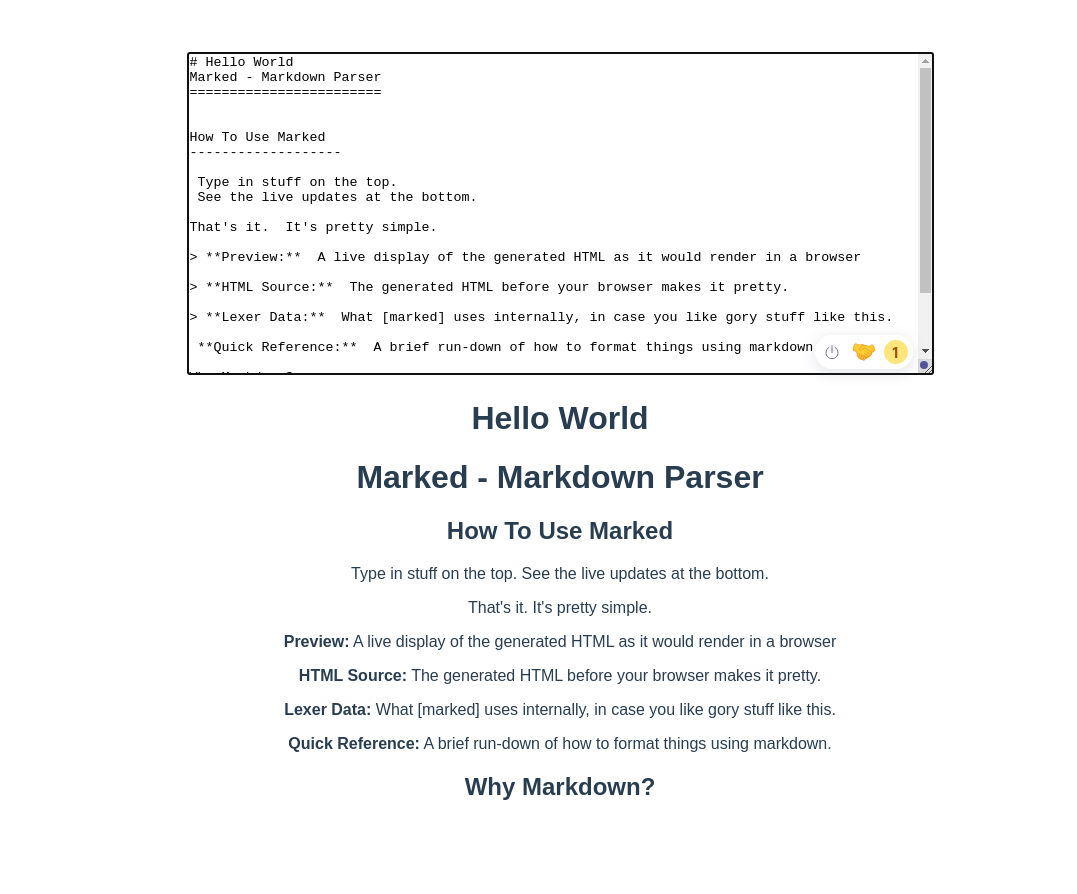
So the image above shows a text area that accepts text and renders them immediately without writing so much code.
Why Make a Global Import
The thing here is, when you want to use a library, you do not want to always import it over and over again. Let’s say you have ten different component files, you don’t want to import the marked library into those components every time you want to use the marked library, let’s see if there’s a way we can get around it.
How To Import Marked Globally
All we have to do here is to make marked a global function and doing this is very straight forward and this can be added in our main.js located at src/main.js and the way to achieve making marked library global is the use of Mixins.
Mixins is just a distribution of reusable functionalities in Vue components.
Let’s go ahead and refactor the code
Go to your main.js @ src/main.js file and paste this code
import marked from 'marked';
const markedMixin = {
    methods: {
         md: function (input) {
            return marked (input);
        },
    },
};


createApp(App).mixin(markedMixin).mount('#app')
To access this mixin in any of the components, we will use the keyword this.md and it should have the exact same function as when we imported the library separately in different components.
The line of code below will allow us to use the md function in any part of our Vue app.
createApp(App).mixin(markedMixin).mount('#app')Open Source Session Replay
OpenReplay is an open-source, session replay suite that lets you see what users do on your web app, helping you troubleshoot issues faster. OpenReplay is self-hosted for full control over your data.

Start enjoying your debugging experience - start using OpenReplay for free.
Conclusion
In this tutorial, we have looked at some tips that would help you get a basic understanding of how markdown works and how to use them in your Vue components. We started off with a simple explanation as to what the intent of the markdown is (which is not to replace the implementation of HTML), a few steps on creating Vue projects manually, we also learned how to setup marked.js library, which will help newbies and seasoned developers in making their work less stressful.
Further Resources
Here are some resources to help you get a deeper dive into the some of the things we discussed above.