Integrating the Cache API with Service Workers


The Cache API is a browser API that allows the storage of resources in a locally stored cache. Storing these resources locally improves the overall performance of your web application by providing faster access to the cached resources, as you can retrieve them directly from the cache instead of being fetched over a network.
Service Workers, on the other hand, enable you to create offline-first web applications, which means that the web application will work even if the user does not have an active internet connection. This works by using the Cache API to store resources needed for the web application to function, using the Service Worker to intercept network requests made by the client, and returning the cached resources instead of making a network request.
This article will teach you how to integrate the Cache API with a service worker. This integration makes it possible to create progressive web apps, which are web applications that deliver native application features such as offline use to the end users.
Setting up Service Workers
To enable a Service Worker in your web application, create a Service Worker file in your project’s root directory.
You can create a Service Worker file by running the command below:
touch sw.jsNext, you will need to register the Service Worker. You can achieve this by adding the code block below to your project’s HTML file:
<script>
if ("serviceWorker" in navigator) {
  window.addEventListener("load", () => {
    navigator.serviceWorker
      .register("../sw.js")
      .then((registration) => {
        console.log("Service worker registered successfully");
      })
      .catch((err) => {
        console.error("Registration failed:", err);
      });
  });
}
<script/>
The code block above checks if the serviceWorker property is available in the navigator object, which indicates whether the user’s browser supports Service Workers. If Service Workers are supported, the code registers your Service Worker script by calling the register() method, which takes the file path of your Service Worker file as an argument on the navigator.serviceWorker object. The then() method is used for logging a message if the registration is successful, and the catch() method is used for logging an error if the registration fails.
Session Replay for Developers
Uncover frustrations, understand bugs and fix slowdowns like never before with OpenReplay — an open-source session replay tool for developers. Self-host it in minutes, and have complete control over your customer data. Check our GitHub repo and join the thousands of developers in our community.
Integrating the Cache API with Service Workers
The cache API allows you to store various data, such as static assets, that would allow your web application to work offline.
It is generally recommended that you use the Cache API in response to Service Worker events because doing this ensures that your cache is created, updated, and deleted in a consistent and controlled manner.
In this tutorial, you will listen to and handle three Service Worker events: install, activate, and fetch.
Listening for the install Event
The install event is emitted when the Service Worker is first installed. When the service worker emits this event, you cache all your application’s static assets. It’s important to note that the install event is only emitted once in a Service Worker lifecycle when it is first installed.
To update your cache, you must implement a strategy for invalidating the old cache entries and adding new ones. This tutorial will feature a versioned cache where each version of the cache will have a unique name.
To listen for the install event and cache static assets when the Service Worker emits the event, open your Service Worker file, create an array and populate it with each of the static files you want to cache.
For example:
//sw.js
const staticAssets = [
  "/",
  "/src/index.html",
  '/css/style.css',
  '/js/app.js',
  '/images/logo.png',
  '404.html',
  'offline.html'
];
Next, create two variables, cacheVersion, and cacheName. Then assign a value of 0 and cache-v${cacheVersion} respectively. For example:
//sw.js
let cacheVersion = 0;
let cacheName = `cache-v${cacheVersion}`;
Then, add the code block below to create a helper function that increments the cacheVersion:
function increment() {
  cacheVersion ++;
  cacheName = `cache-v${cacheVersion}`;
}
Next, add an event listener to the Service Worker using the self.addEventListener() method and pass it the 'install' event as the first argument and a callback function that receives the event object as the second argument. Populate the callback function with caching logic for your static assets and wrap the logic in a waitUntill method.
For example:
//Add cache while installing Sw
self.addEventListener("install", (event) => {
  console.log("Attempting to install service worker and cache static assets");
  event.waitUntil(
    caches
      .open(cacheName)
      .then((cache) => {
         //Update version
         increment();

        //add files to the cache
        return cache.addAll(staticAssets);
      })
      .catch((err) => console.log(err))
  );
});
When the install event is emitted, the code block above opens a cache called cache-v1 and adds all the static assets to the cache using the addAll() method. The waitUntil() method ensures that the cache is fully populated before the install event is complete.
Listening for the activate Event
The activate event is emitted when the Service Worker becomes active, which means it is now controlling the web page. When the service worker emits this event, you will delete old cache entries to keep your cache up to date and ensure that the cache only contains the resources currently used by the web application.
Add an event listener to the Service Worker using the self.addEventListener() method and pass it the 'activate' event as the first argument and a callback function that receives the event object as the second argument. Populate the callback function with deleting and updating logic for your caches and wrap the logic in a waitUntill method.
For example:
self.addEventListener("activate", (event) => {
  console.log("Activating new service worker...");

  event.waitUntil(
    caches.keys().then((cacheNames) => {
      return Promise.all(
        cacheNames.map((storedCacheName) => {
          if (storedCacheName !== cacheName) {
            return caches.delete(storedCacheName);
          }
        })
      );
    })
  );
});
When the activate event is emitted, the code block above uses the caches.keys() method to get a list of all the current cache names. It then iterates through the list of cache names and checks whether the current cache name is equal to the name of the cache you want to keep. If it’s not, it uses the caches.delete() method to delete it.
Listening for the fetch Event
The fetch event is emitted whenever a network request is made from the web page controlled by the Service Worker. It allows the Service Worker to intercept the request and modify its behavior, such as returning a cached response or making a network request and caching the response.
Add an event listener to the Service Worker using the self.addEventListener() method and pass it the 'fetch' event as the first argument and a callback function that receives the event object as the second argument. Populate the callback function with the logic for your caches and wrap the logic in a waitUntill method.
This logic should account for the following:
- When the response is found in the cache.
- When the response is not found in the cache and over the network.
- Caching the response after making a network request.
- If the response is not found in the cache and a network failure occurs, preventing you from fetching the resources.
For example:
self.addEventListener("fetch", (event) => {
  console.log("Fetch event for", event.request.url);

  event.respondWith(
    caches
      .match(event.request)
      .then((response) => {
        //If the response is found in the cache
        if (response) {
          console.log("Found ", event.request.url, " in cache");
          return response;
        }

        return fetch(event.request).then((response) => {
          // If a response is not found
          if (response.status === 404) {
            return caches.open(cacheName).then((cache) => {
              return cache.match("404.html");
            });
          }

          //Caching and returning the response if it doesn't exist in the cache
          return caches.open(cacheName).then((cache) => {
            cache.put(event.request.url, response.clone());
            return response;
          });
        });
      })
      .catch(async (error) => {
        console.log("Error, ", error);
        //If page is offline/ Network failure
        return caches.open(cacheName).then((cache) => {
          return cache.match("offline.html");
        });
      })
  );
});
When the fetch event is emitted, the code block above uses the caches.match() method to check if the request is already in the cache. If it’s found, it returns the cached response. Otherwise, it fetches the request over the network. If the response status is 404, it opens the cache and returns the content of 404.html. If there’s any error or the page is offline, it returns the content of offline.html.
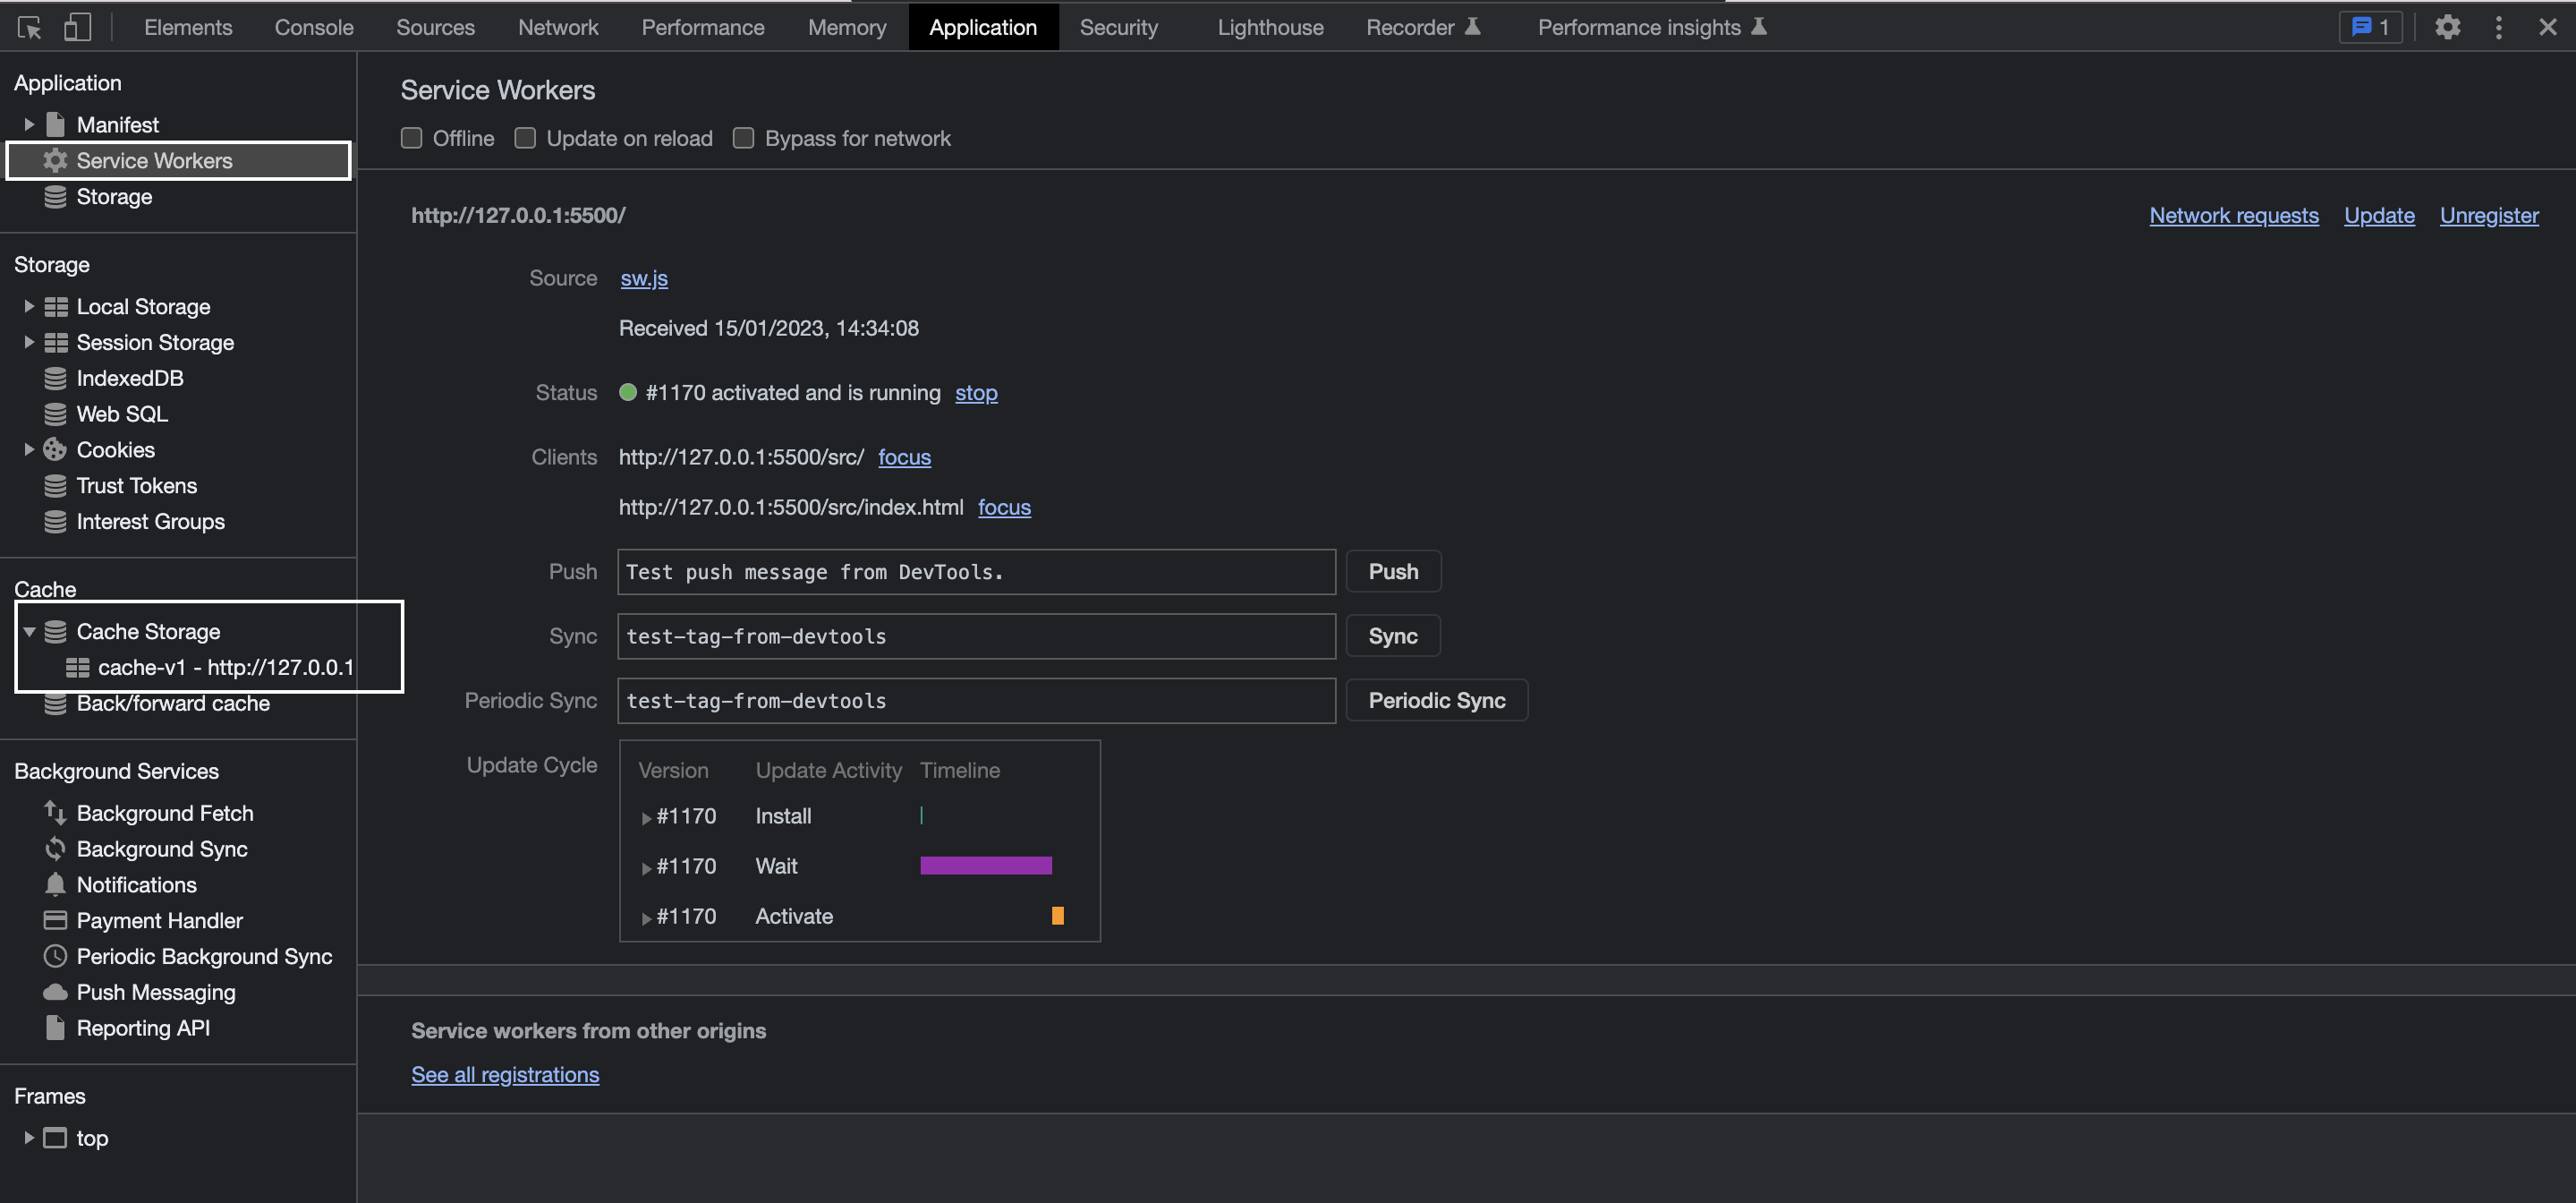
Now, if you start up your web app and navigate to the application tab in your chrome dev tools, you should see your service worker active and the current version of your cache, as shown in the image below.
Conclusion
Integrating these two technologies can be challenging, but with a good understanding of how they work together, you can create progressive web apps that are faster, more reliable, and provide a better user experience.
Gain Debugging Superpowers
Unleash the power of session replay to reproduce bugs and track user frustrations. Get complete visibility into your frontend with OpenReplay, the most advanced open-source session replay tool for developers.