Interacting with form data using Next.js and Hygraph
Develop an API quickly with Hygraph plus Next.js

Hygraph, formerly known as GraphCMS, is a headless CMS that leverages many advantages of GraphQL, such as predictability, performance, development speed, stability, and flexibility. It also takes advantage of advanced Next.js lifecycle methods to access the data on the client and all server-rendered. Using Hygraph combined with Next.js, you can build PWA, eCommerce stores, blogs, and desktop app projects.
In this tutorial, we’ll take the power of Next.js and combine it with Hygraph by using Next.js to create an API in our Next.js backend that will interact with Hygraph services. We will make an HTTP request in our Next.js application that we can use to collect user-submitted comments on a blog post and view them in our Hygraph dashboard. It allows us to publish or delete the comment in our Hygraph dashboard. Once published, it will display in our blog site comment section.
To follow this tutorial, you need to know JavaScript, Next.js, and a Hygraph account. You should have node.js installed.
Configuring Hygraph
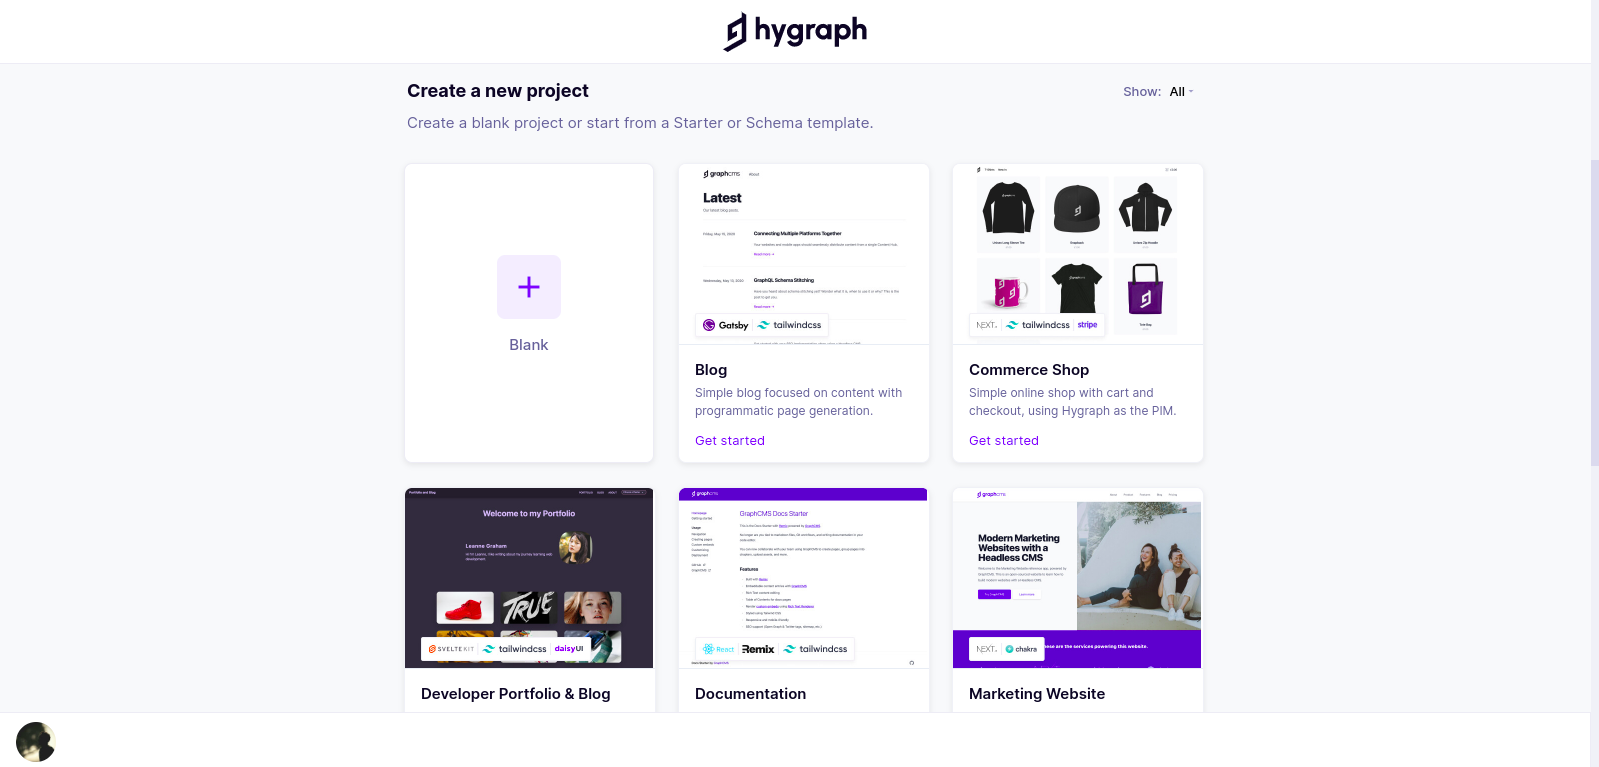
To create a Hygraph account, follow the instructions here to create one. After successfully setting up a Hygraph account, click on the blog starter template. We want to focus on implementing the form and capturing users’ submissions.
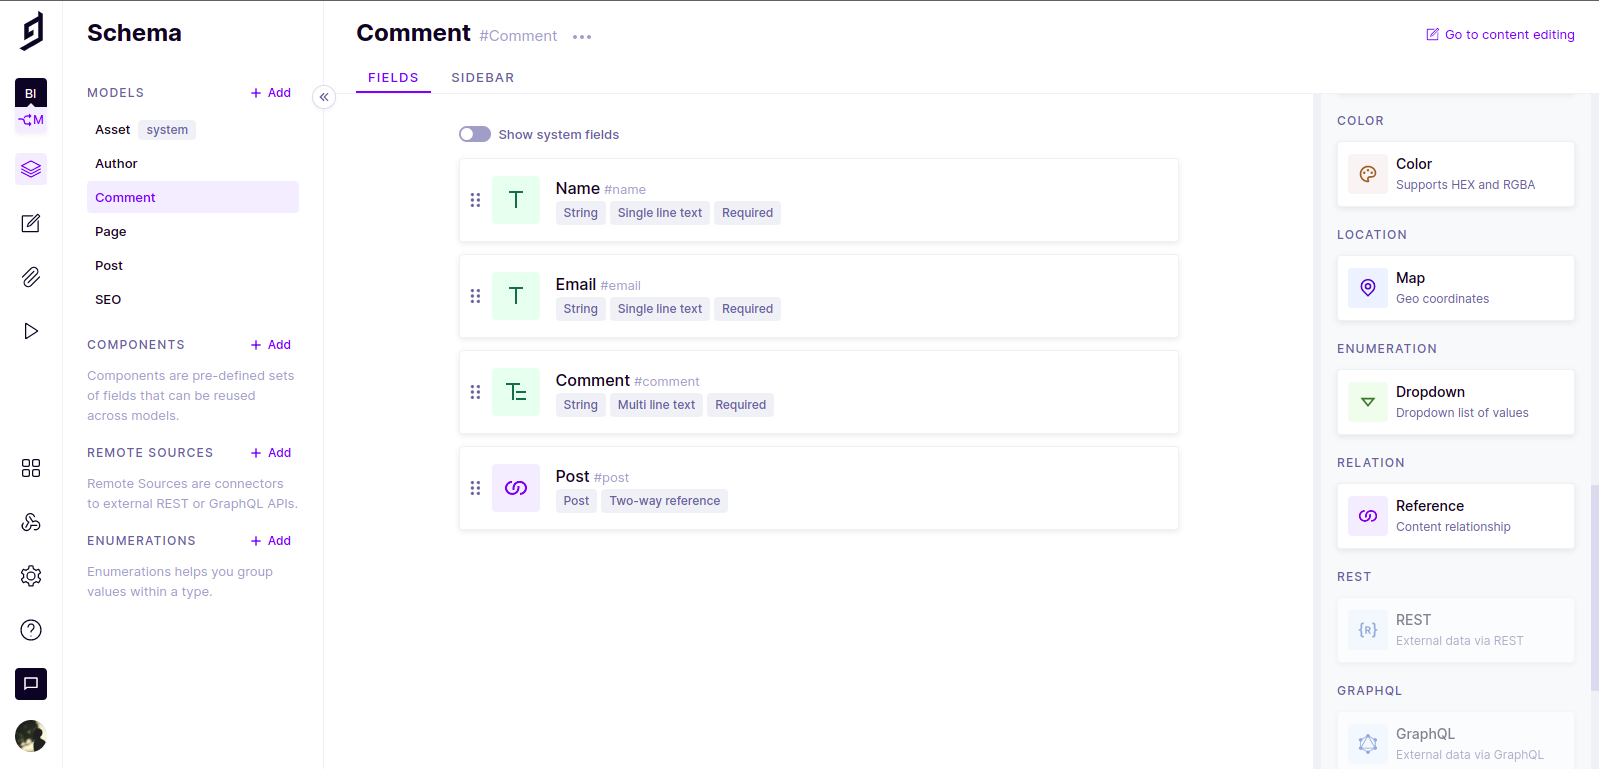
Once the project is created, go to ‘schema’ on your Hygraph project dashboard and create a new model. Name the model Comment and add the following fields:
Name- String, Single line text and make itrequired.Email- String, Single line text and make itrequired.Comment- String, Multi-line text, and make itrequired.
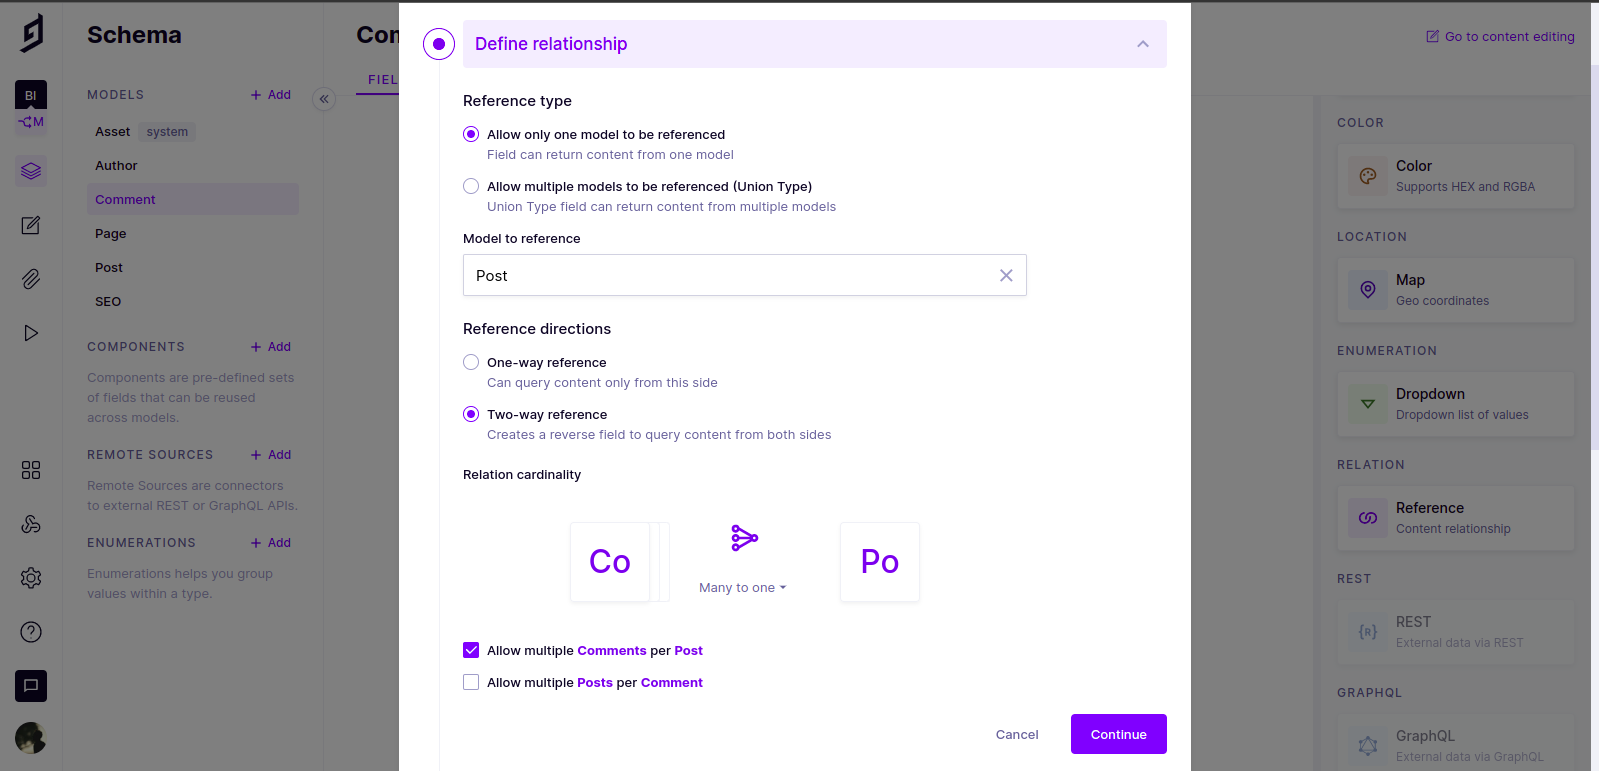
Scroll down to Reference and follow the image below to define your reference type, reference your post, reference the direction, and click continue.
Here’s how the Comment content is structured.
Setting up our Next.js project
Let’s start by running the command below on our terminal:
yarn create next-app --example cms-graphcms cms-graphcms-app && cd cms-graphcms-appOr, if you’re using NPM, run the command below:
npx create-next-app --example cms-graphcms cms-graphcms-app && cd cms-graphcms-appFor the rest of the tutorial, I’ll be using Yarn.
This project is a single-page application bootstrapped with Next.js and Tailwind CSS. Just for the sole purpose of this tutorial, the command we run is a statically generated blog example template using Next.js and GraphCMS. This method allows us to focus on configuring our backend and implementing the comment section on our blog.
Setting up Roles & Permission
Rename the .env.local.example file in this directory to .env.
HYGRAPH_PROJECT_API=
HYGRAPH_PROD_AUTH_TOKEN=
HYGRAPH_DEV_AUTH_TOKEN=
HYGRAPH_PREVIEW_SECRET=
Go back to Hygraph. Inside your project dashboard, navigate to Settings > API Access page. Then set each variable in .env:
HYGRAPH_PROJECT_API: Set it to the Content API endpoint under Endpoints at the top of the page.HYGRAPH_PROD_AUTH_TOKEN: Copy theNEXT_EXAMPLE_CMS_GCMS_PROD_AUTH_TOKENtoken under Permanent Auth Tokens > Existing tokens, at the bottom of the page. This will only query the content that is published.HYGRAPH_DEV_AUTH_TOKEN: Copy theNEXT_EXAMPLE_CMS_GCMS_DEV_AUTH_TOKENtoken under Permanent Auth Tokens > Existing tokens at the bottom of the page. This will only query the content that is in the draft.HYGRAPH_PREVIEW_SECRETcan be any random string (but avoid spaces), likeMY_SECRET- this is used for Preview Mode.
In your next.config.js file, replace the images.domain with the code below.
// next.config.js
module.exports = {
  images: {
    domains: ['media.graphassets.com'],
  },
}
In your root folder, run the following command:
yarn install
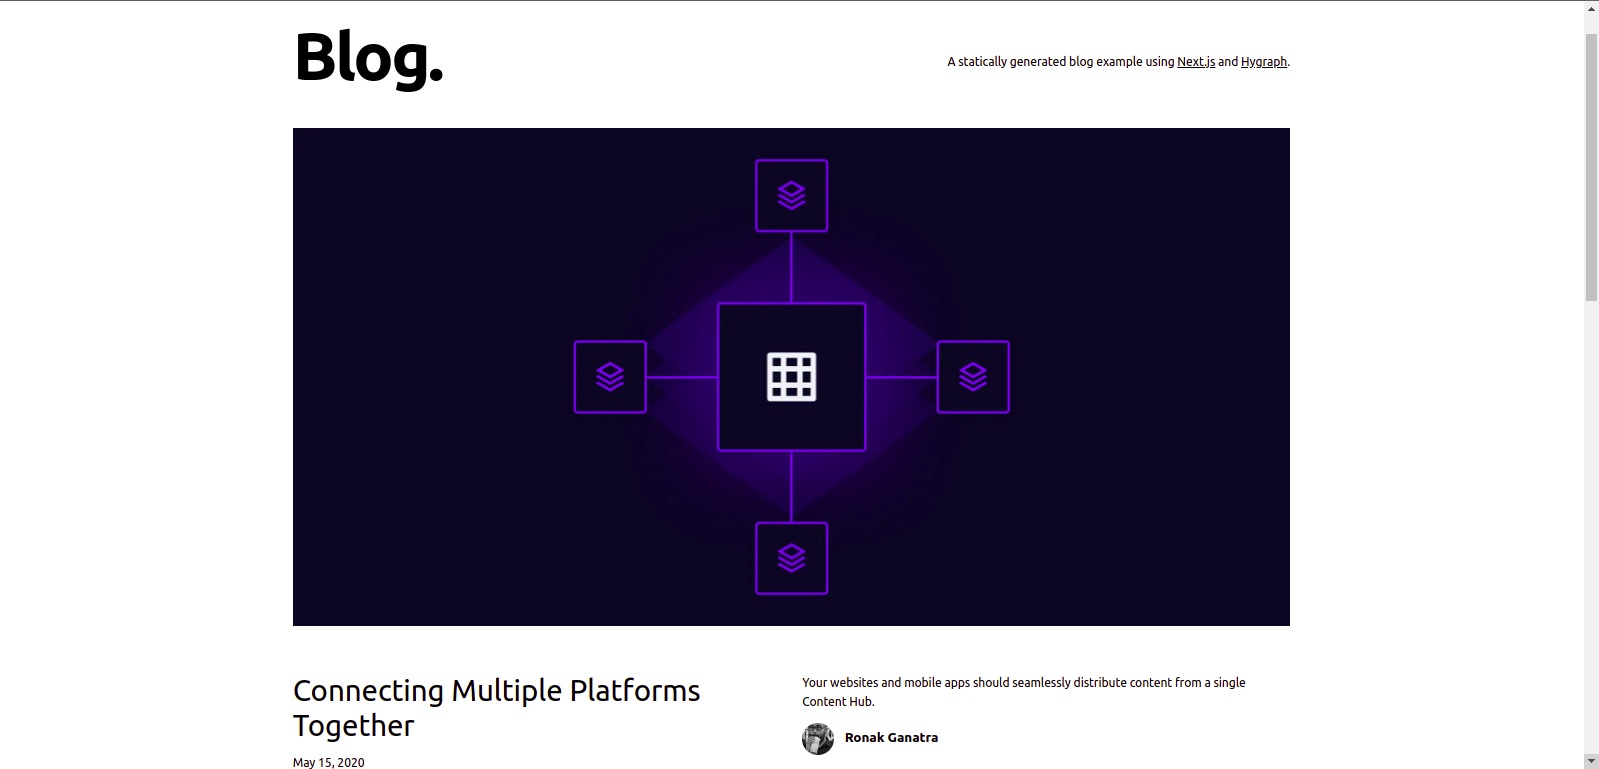
yarn devYour blog should be up and running at http://localhost:3000! Here’s what our blog looks like.
Query data from Hygraph
Next.js allows us to create APIs in our Next.js application without creating a separate Node.js server. Here we will write a request that will go straight to our Next.js backend. Create a new file getComment.js in the lib folder and add the following code:
// lib/getComment.js

// submit user comment to GraphCMS
export const submitComment = async (obj) => {
  const result = await fetch('/api/comments',{
    method: 'POST',
    headers: {
      'Content-Type': 'application/json'
    },
    body: JSON.stringify(obj),
  })
  return result.json();
}
Here, we accept comment objects - obj and make an HTTP request to our Next.js backend. We made a fetch request to our /api/comments. All files inside the folder pages/api are mapped to /api/ and are treated as an API endpoint instead of a page.
Building our form layout
In your components folder, create a CommentsForm.js file and add the code below:
// components/CommentsForm.js

import React, { useRef, useState} from 'react';
import { submitComment } from 'lib/getComment';

const CommentsForm = ({ slug }) => {
  const [error, setError] = useState(false);
  const [showSuccessMessage, setShowSuccessMessage] = useState(false);
  const commentEl = useRef();
  const nameEl = useRef();
  const emailEl = useRef();

  const handleCommentSubmission = () => {
    setError(false);

    const { value: comment } = commentEl.current;
    const { value: name } = nameEl.current;
    const { value: email } = emailEl.current;

    if(!comment || !name || !email) {
      setError(error);
      return
    }

    const commentObj = {
      name, email, comment, slug
    };

    submitComment(commentObj)
      .then((res) => {
        setShowSuccessMessage(true);
        setTimeout(() => {
          setShowSuccessMessage(false);
        }, 3000);
      })
  }
  return (
    <div className='bg-white shadow-lg rounded-lg p-8 pb-12 mb-8 lg:w-1/2 justify-center items-center my-0 mx-auto'>
      <h3 className='text-xl mb-8 font-semibold border-b pb-4'>Leave a Reply</h3>
      <div className='grid grid-cols-1 gap-4 mb-4'>
        <textarea
          ref={commentEl}
          className='p-4 outline-none w-full rounded-lg focus:ring-2 focus:ring-gray-200 bg-gray-100 text-gray-700'
          placeholder='Comment'
          name='comment'
        />
      </div>
      <div className='grid grid-cols-1 lg:grid-cols-2 gap-4 mb-4'>
        <input
          type={'text'}
          ref={nameEl}
          className='py-2 px-4 outline-none w-full rounded-lg focus:ring-2 focus:ring-gray-200 bg-gray-100 text-gray-700'
          placeholder='Name'
          name='name'
        />
        <input
          type='email'
          ref={emailEl}
          className='py-2 px-4 outline-none w-full rounded-lg focus:ring-2 focus:ring-gray-200 bg-gray-100 text-gray-700'
          placeholder='Email'
          name='email'
        />
      </div>
      {error && <p className='text-xs text-red-500'>All fields are required.</p>}
      <div className='mt-8'>
        <button type='button' onClick={handleCommentSubmission}
          className='transition duration-500 ease hover:bg-gray-500 inline-block bg-gray-700 text-lg rounded-full text-white py-3 px-8 cursor-pointer'
        >
          Post Comment
        </button>
        {showSuccessMessage && <span className='text-xl float-right font-semibold mt-3 text-green-500'>Comment Submitted for review</span>}
      </div>
    </div>
  )
}
export default CommentsForm;
In our commentForm, we send in each post’s slug. We used the useRef hook because we don’t want to store the data in the state, but to read the values from the input field and then send it to Hygraph. We also used the [useState](https://reactjs.org/docs/hooks-state.html) hook to handle the state when there is an error, and our comments are successfully sent to Hygraph.
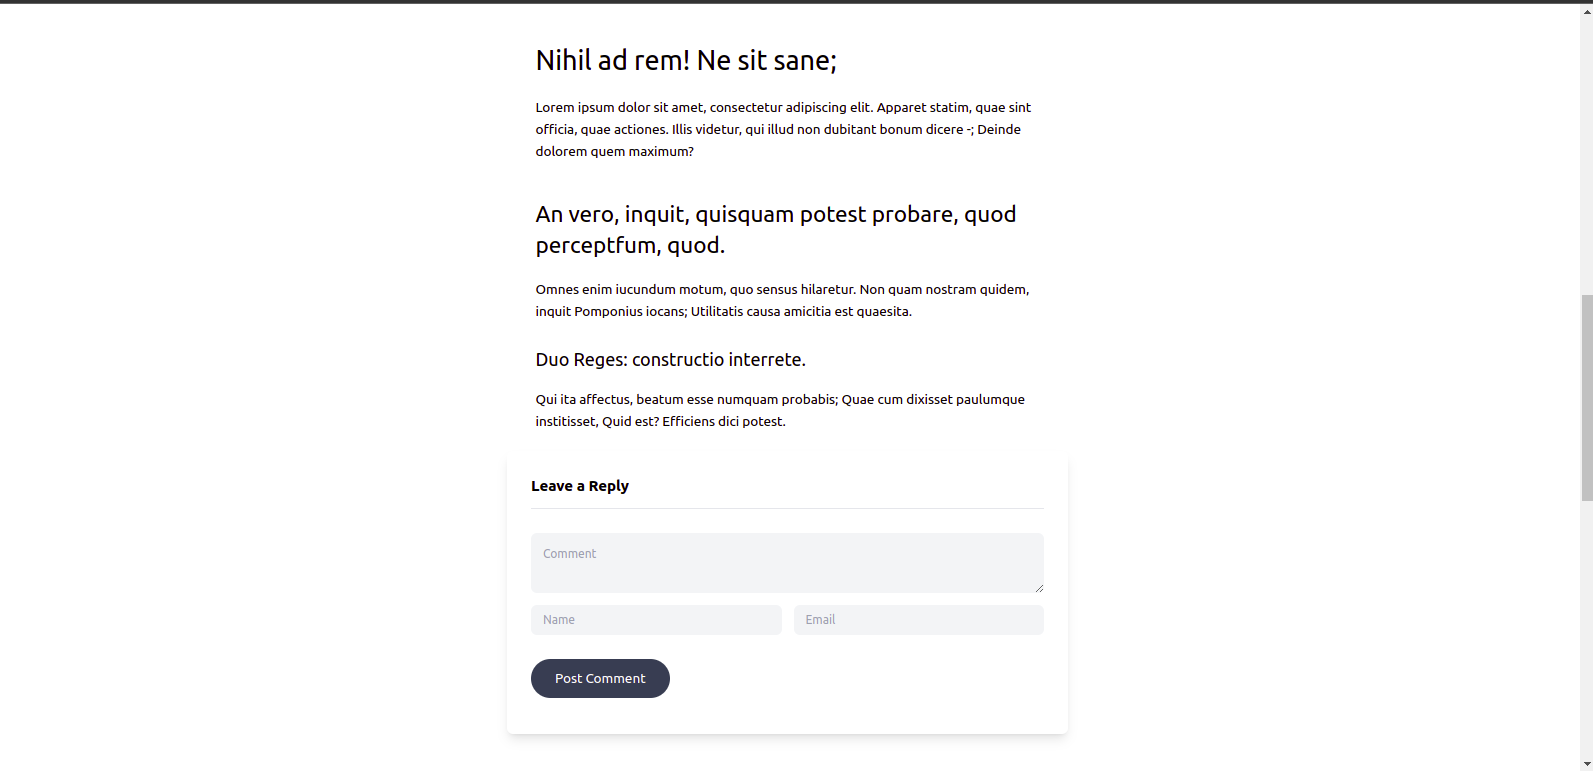
In pages/[slug].js file, import CommentForms.js and add it in the article element below <Postbody /> and pass the slug as props.
// pages/[slug].js
import CommentsForm from 'components/CommentsForm'
export default function Post({ post, morePosts, preview }) {
/* */
<CommentsForm slug={post.slug} />
/* */
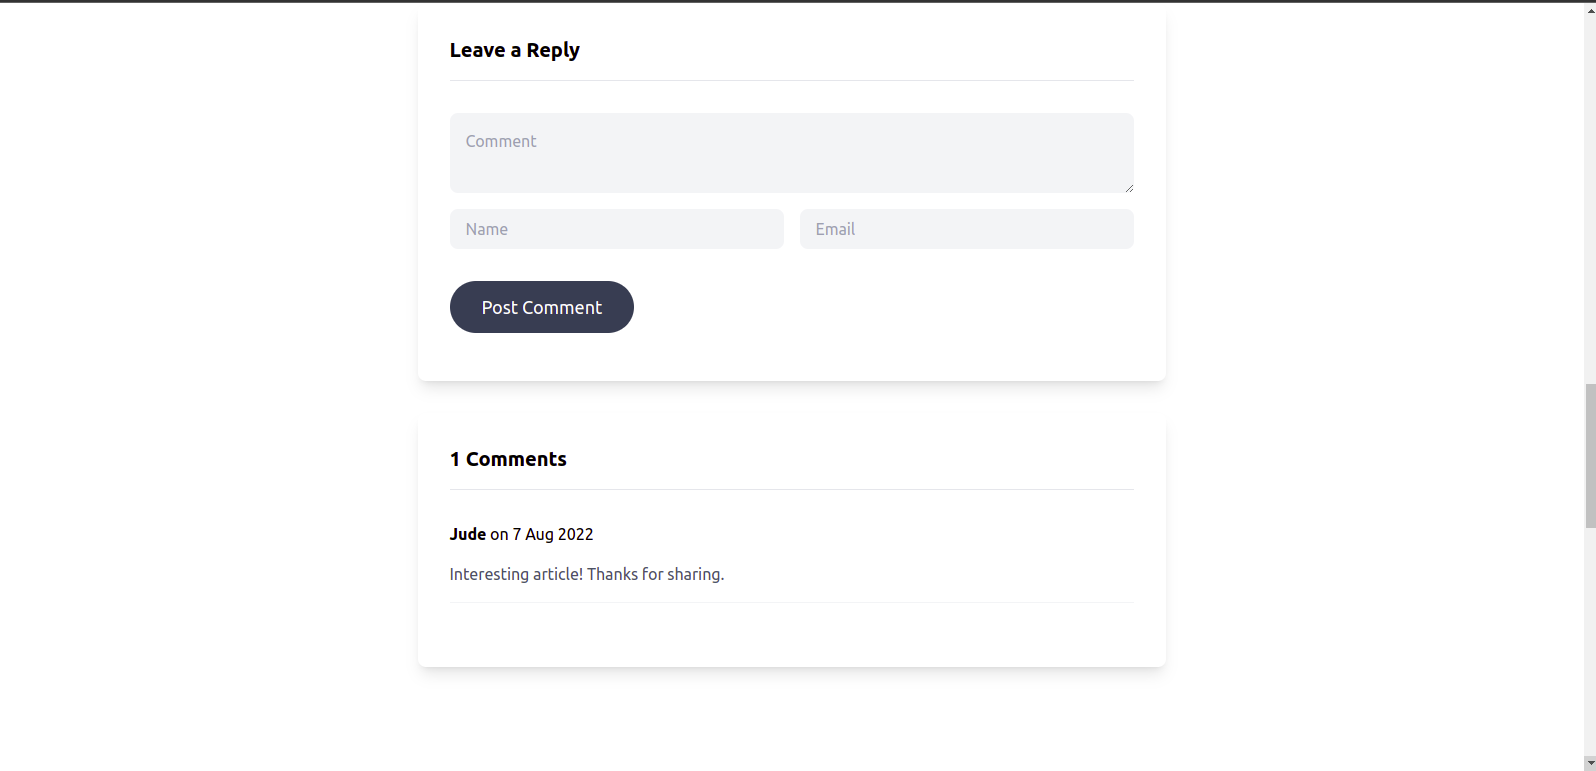
}Here’s what our comment form looks like:
Open Source Session Replay
OpenReplay is an open-source, session replay suite that lets you see what users do on your web app, helping you troubleshoot issues faster. OpenReplay is self-hosted for full control over your data.

Start enjoying your debugging experience - start using OpenReplay for free.
Creating our API in Nextjs to interact with Hygraph
In our pages/api, create a new file comments.js and add the code below:
// pages/api/comments.js

import { GraphQLClient, gql } from 'graphql-request';

const graphqlAPI = process.env.HYGRAPH_PROJECT_API;

// export a default function for API route to work
export default async function comments(req, res) {
  const graphQLClient = new GraphQLClient((graphqlAPI), {
    headers: {
      authorization: `Bearer ${process.env.HYGRAPH_DEV_AUTH_TOKEN}`,
    },
  });
  const query = gql`
    mutation CreateComment($name: String!, $email: String!, $comment: String!, $slug: String!) {
      createComment(data: {name: $name, email: $email, comment: $comment, post: {connect: {slug: $slug}}}) { id }
    }
  `;
  const result = await graphQLClient.request(query, {
    name: req.body.name,
    email: req.body.email,
    comment: req.body.comment,
    slug: req.body.slug,
  });
  return res.status(200).send(result);
}
As you may have noticed, we import GraphQLClient and gql from graphql-request. To add these dependencies, run the command below in your terminal.
yarn add graphql graphql-requestGraphQLClient enables us to post data to Hygraph. We set up GraphQLClient by specifying the authorization header with HYGRAPH_DEV_AUTH_TOKEN from Hygraph. This will help authorize the GraphQLClient. We also created a mutation query that will help us add new data - new comments. We also use it to connect to a specific post the user commented on by specifying the slug.
App in action
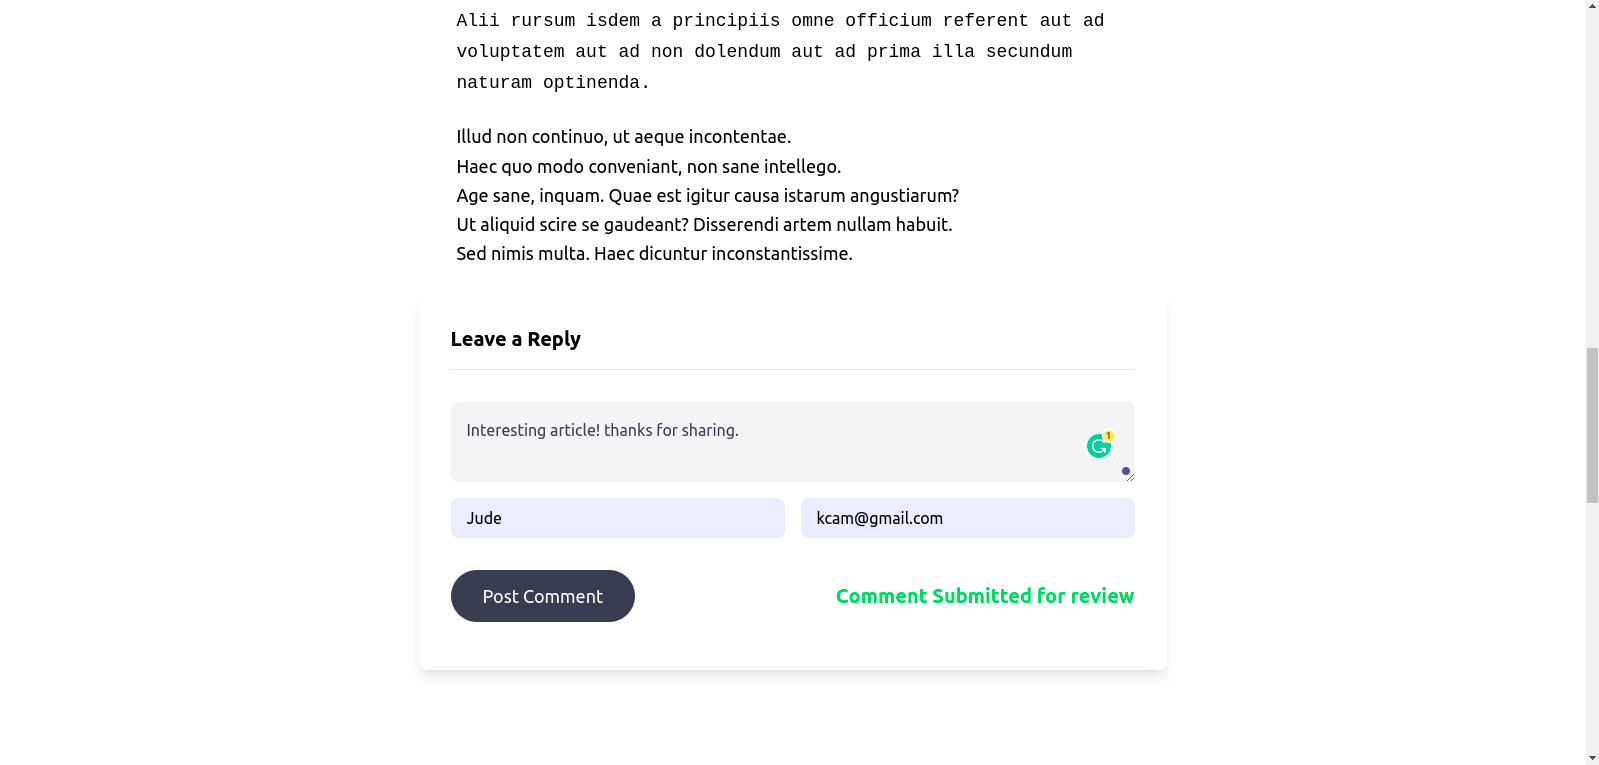
Now head over to our blog post and comment.
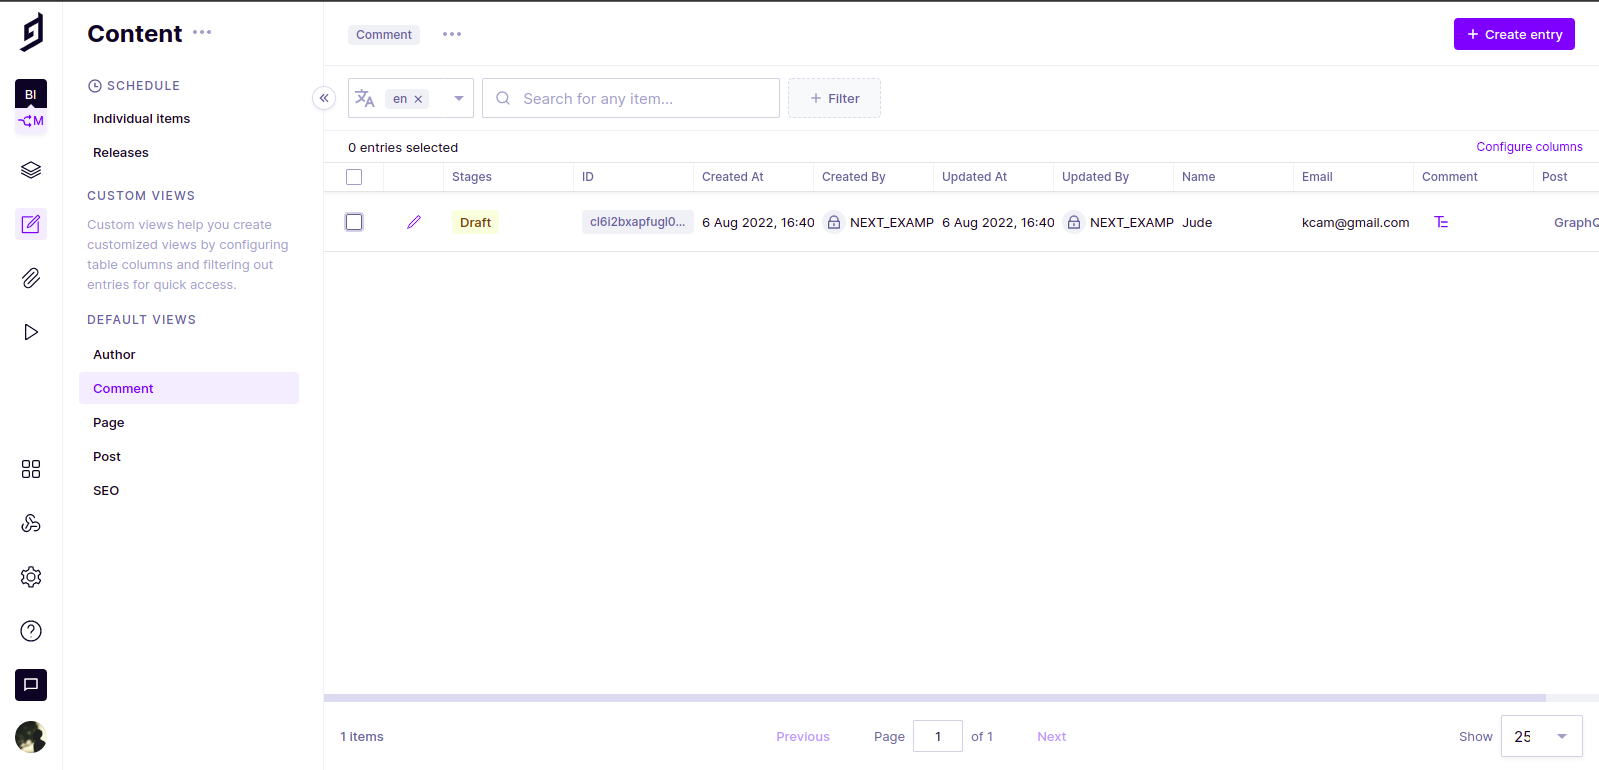
Head over to Hygraph, and we will see our comment, and it has been saved as a draft. So either we publish it, or we delete it.
Displaying user comments
In this section, we will look at displaying the user’s comment for each specific post after it has been published on our front-end.
Inside the lib/getComment.js file, import request and gql from graphql-request and use them to fetch the name, comment, and the date the user commented on the blog post.
// lib/getComment.js

import { request, gql } from "graphql-request";

const graphqlAPI = "Your api key"

// getting post comments
export const getComments = async (slug) =>   {
    const query = gql`
        query GetComments($slug: String!) {
            comments(where: { post: { slug: $slug } }) {
                name
                createdAt
                comment
            }
        }
    `
    const result = await request(graphqlAPI,query, { slug });
    return result.comments;
}
In our components folder, create a Comments.js file and add the code below:
// components/Comments.js

import React, { useEffect, useState } from 'react'
import  parse  from 'html-react-parser';
import { getComments } from 'lib/getComment';

const Comments = ({ slug }) => {
  const [comments, setComments ] = useState([]);
  useEffect(() => {
      getComments(slug)
        .then((result) => setComments(result))
  }, [])
  return (
    <>
      {comments.length > 0 && (
        <div className='bg-white shadow-lg rounded-lg p-8 pb-12 mb-8'>
          <h3 className='text-xl mb-8 font-semibold border-b pb-4'>
            {comments.length}
            {''}
            Comments
          </h3>
          {comments.map((comment) => (
            <div key={comment.createdAt} className='border-b border-gray-100 mb-4 pb-4'>
              <p className='mb-4'>
                <span className='font-semibold'>{comment.name}</span>
                {''}
                on
                {''}
                {new Date(comment.createdAt).toLocaleDateString(undefined, {
                      day:   'numeric',
                      month: 'short',
                      year:  'numeric',
                  })}
              </p>
              <p className='whitespace-pre-line text-gray-600 w-full'>{parse(comment.comment)}</p>
            </div>
          ))}
        </div>
      )}
    </>
  )
}
export default Comments;
We used useEffect to get the newly added comments. Install html-react-parser by running the command below:
yarn add html-react-parserIn pages/[slug].js file, import Comment.js and add it in the article element below <CommentsForm /> and pass in the slug as prop.
// pages/[slug].js

import Comments from 'components/Comments'

export default function Post({ post, morePosts, preview }) {
  /*   */
  <Comments slug={post.slug} />
  /*   */
}
Here’s what our comment form looks like:
Conclusion
In this article, we demonstrated how to implement a comment section using Next.js. We looked at how to create an API in our Next.js backend that will interact with Hygraph. We also looked at how to set up Hygraph, and send and fetch data using Next.js and GraphQL from Hygraph.
Hygraph is one of the best GraphQL content management systems. Hygraph is a great tool that enables seamless integration with any application.
All code for this article can be found at Github.
A TIP FROM THE EDITOR: For using GraphQL in React, don’t miss our Fetching Data from GraphQL APIs with Apollo React article.