Interacting with Smart Contracts using Web3


Web3.js is a collection of libraries that make it easier to interact with the Ethereum blockchain. For example, it can be used to check if a given string is a valid Ethereum address, retrieve user accounts, send transactions, and make interacting with contracts much easier. In this article, we will look at how you can interact with the blockchain from your React web application using Web3.js, a library that lets you interact with the blockchain efficiently.
Creating our React app
Creating a React app project is pretty straightforward. All you have to do is go into your terminal and type in the following command:
npx create-react-app my-web3Go into your device folder and open the newly created React app project on your code editor. Then, open your App.js file in your directory and edit the code to look like this.
import React, {useEffect} from 'react';
import Web3 from 'web3'

function App() {
  useEffect(() => {

}, []);
  return <div className='App'></div>;
}
export default App;
Then go ahead and run the following command in your terminal, to install Web3.
npm install web3 --saveEthereum nodes and providers
Let’s look at how you can pass in a provider URL, which will be a link to your Ethereum node.
function App() {
  const providerUrl = process.env.PROVIDER_URL;

  useEffect(() => {
    const web3 = new Web3(providerUrl)
}, []);
  return <div className='App'></div>;
This node is your gateway to the rest of the network. But not to worry, you won’t need to set up your own node and host it on something like AWS. Luckily, there are many services, such as Infura or Alchemy, that already do all that. All you need is a link from them, to paste in providerUrl.
Deploying Smart Contracts to Blockchain
For this article, you will have your own smart contract that you will deploy using Truffle. In this tutorial, we have a straightforward NFT smart contract.
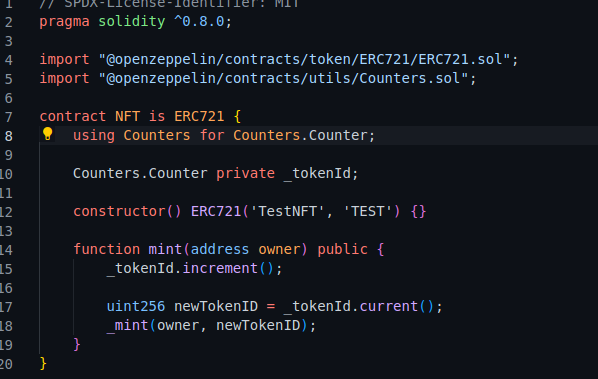
This will be deployed to the local Ganache instance, a local blockchain that you can use for testing purposes. So, go to your terminal and run this command:
npx ganache-cliOnce you run the command, you should be able to see something like this on your terminal.

Now let’s deploy the contract. To do this, go to your terminal and run these commands, so Truffle will compile the contracts.
truffle init
npx truffle migrate
How the user interacts with your dApp
The thing with dApps (decentralized applications) is that your users will need a wallet to sign the transactions, and the most popular wallet of all is, of course, Metamask. If your users are already familiar with crypto and the blockchain space, they probably already have installed Metamask as a Chrome extension. To follow this tutorial, you should also have it installed. (If your users are unfamiliar with crypto and blockchain, they can use other services such as Fortmatic; they will give your users a wallet without installing anything.) In this article, I will only be showing you how to integrate Metamask, but steps for other wallets should be pretty similar.
Metamask injects itself into the browser, so when you make any transactions or calls, you will be dealing with Metamask itself, not with your provider. Metamask also uses Infura in the background, but you will not be interacting directly with them, and you will be dealing with Metamask or the wallet service you are using. We are going to look at how we can integrate Metamask. If you haven’t already done so, you can download the Metamask extension here.
useEffect(() => {
  const web3 = new Web3(providerUrl)

  let provider = window.ethereum;

  if (typeof provider !== 'undefined') {
      //Metamask is installed
  provider
  .request({method: 'eth_requestAccounts' })
  .then((accounts) => {
    console.log(accounts);
  })
  .catch((err) => {
    console.log(err);
  });
  }
}, []);
Here we check if Metamask is installed using let provider = window.ethereum;. We then asked the user to connect their wallet to the website by sending a .request to the provider to gain access to the user’s account. If you save and run this using the npm start command, you should be able to get something like this.
You can also listen to Metamask account changes by adding an event listener.
provider
    .request({method: 'eth_requestAccounts' })
    .then((accounts) => {
      console.log(accounts);
    })
    .catch((err) => {
      console.log(err);
    });
    window.ethereum.on('accountsChanged', function (accounts) {
      console.log(accounts);
    });
    }
    const web3 = new Web3(provider);
  }, []);
Once you save this, go to your browser console and open your Metamask. Change your wallet account, and you should be able to see that there is another output on the console, as shown below.
So, with a few lines of code, we have linked Metamask and can now start interacting with smart contracts. But first, we need to do some tidying up because this code isn’t very reusable. So, we create a new file in our src folder titled Web3Client.js and edit it to look like this.
import Web3 from 'web3'

let selectedAccount;

export const init = () => {
    let provider = window.ethereum;

    if (typeof provider !== 'undefined') {

    provider
    .request({method: 'eth_requestAccounts' })
    .then((accounts) => {
      selectedAccount = accounts[0];
      console.log(`Selected account is ${selectedAccount}`);
    })
    .catch((err) => {
      console.log(err);
    });
    window.ethereum.on('accountsChanged', function (accounts){
      selectedAccount = accounts[0];
      console.log(`Selected account changed to ${selectedAccount}`);
    });
  }
  const web3 = new Web3(provider);
};
Then edit the App.js file to look like this.
import React, { useEffect } from 'react';
import {init} from './Web3Client';

function App() {

  useEffect(() => {
    init();
  }, []);

  return <div className='App'></div>;
}
export default App;
Rerun the code, and you will still get the same results.
Adding a Smart Contract to your Web app
We will now look at how we can define the smart contract.
import Web3 from 'web3'
import NFTContractBuild from '../truffle/build/contracts/NFT.json';
let selectedAccount;

export const init = async () => {
    let provider = window.ethereum;

    if (typeof provider !== 'undefined') {

    provider
    .request({method: 'eth_requestAccounts' })
    .then((accounts) => {
      selectedAccount = accounts[0];
      console.log(`Selected account is ${selectedAccount}`);
    })
    .catch((err) => {
      console.log(err);
    });
    window.ethereum.on('accountsChanged', function (accounts){
      selectedAccount = accounts[0];
      console.log(`Selected account changed to ${selectedAccount}`);
    });
  }
  const web3 = new Web3(provider);
  const networkId = await web3.eth.net.getId();
  const nftContract = new web3.eth.Contract(NFTContractBuild.abi,NFTContractBuild.networks[networkId].address
  );
};
You will probably get this error when you try to run this code.

If you used the create-react-app to create your own application, then all you need to do is go into your dependencies for React, and add a new dependency, as shown in the example below.
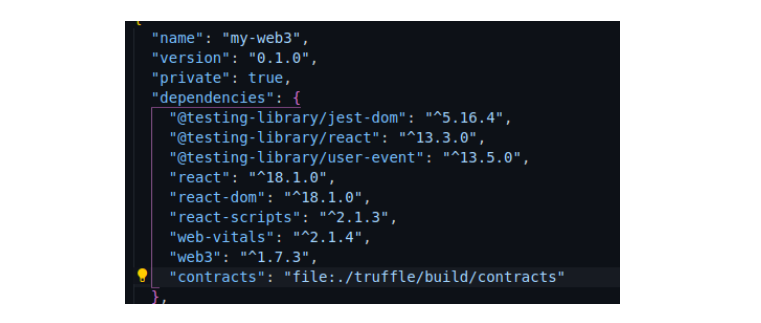
As you can see, "contracts": "file:./truffle/build/contracts" was added to the dependencies. Next, enter the command `npm i’ to install the dependency. Now we can do different things with the NFT contract. For this article, we will only use the smart contract to make a transaction (mint a token).
Open Source Session Replay
OpenReplay is an open-source, session replay suite that lets you see what users do on your web app, helping you troubleshoot issues faster. OpenReplay is self-hosted for full control over your data.

Start enjoying your debugging experience - start using OpenReplay for free.
Making a transaction
Let’s take a look at how we can make a transaction.
import Web3 from 'web3'
import NFTContractBuild from '../truffle/build/contracts/NFT.json';

let selectedAccount;
let nftContract;
let isInitialized = false;

export const init = async () => {
    let provider = window.ethereum;

    if (typeof provider !== 'undefined') {

    provider
    .request({method: 'eth_requestAccounts' })
    .then((accounts) => {
      selectedAccount = accounts[0];
      console.log(`Selected account is ${selectedAccount}`);
    })
    .catch((err) => {
      console.log(err);
      return;
    });
    window.ethereum.on('accountsChanged', function (accounts){
      selectedAccount = accounts[0];
      console.log(`Selected account changed to ${selectedAccount}`);
    });
  }
  const web3 = new Web3(provider);
  const networkId = await web3.eth.net.getId();
  nftContract = new web3.eth.Contract(NFTContractBuild.abi,NFTContractBuild.networks[networkId].address
  );
  isInitialized = true;
};

export const mintToken async = () => {
  if (!isInitialized) {
    await init();
}
  return nftContract.methods
    .mint(selectedAccount)
    .send({from: selectedAccount})
}
Here, what we did is mint a new token. Now, let’s go back into our App.js component and make more changes.
import React, { useEffect } from 'react';
import {init, mintToken} from './Web3Client';

function App() {
  const [minted, setMinted] = useState(false);
  const mint = () => {
    mintToken().then(tx => {
    console.log(tx);
    setMinted(true);
    }).catch(err => {
    console.log(err);
    });
}
  return <div className='App'>
    {!minted ? (
        <button onClick={() => mint()}>Mint Token</button>
        ):(
        <p>Token minted successfully!</p>
        )}
        </div>
      );
}
export default App;
We created a button that says “Mint token” if no token is minted, then a paragraph that says “Token minted successfully” if a token is already minted. Then we imported mintToken from our ./Web3Client file. We also setMinted to true. Once you rerun the code, click on Mint token, and you should see something like this.
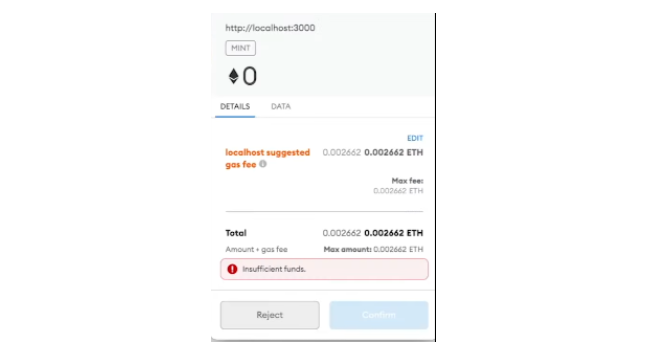
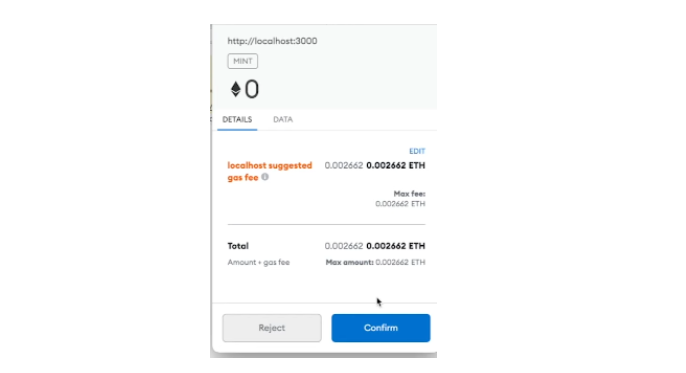
Metamask will now pop up and ask us to approve and send the transaction. However, we do not have any ether to pay the gas fee. So, let’s go back to our terminal, run the npx ganache-cli command again, and find and copy the private key.

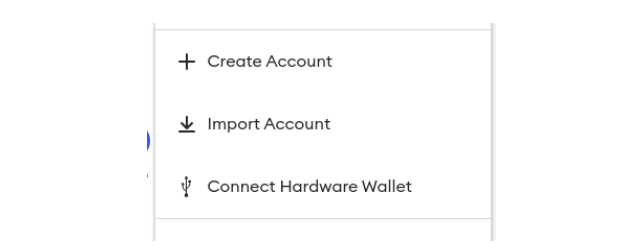
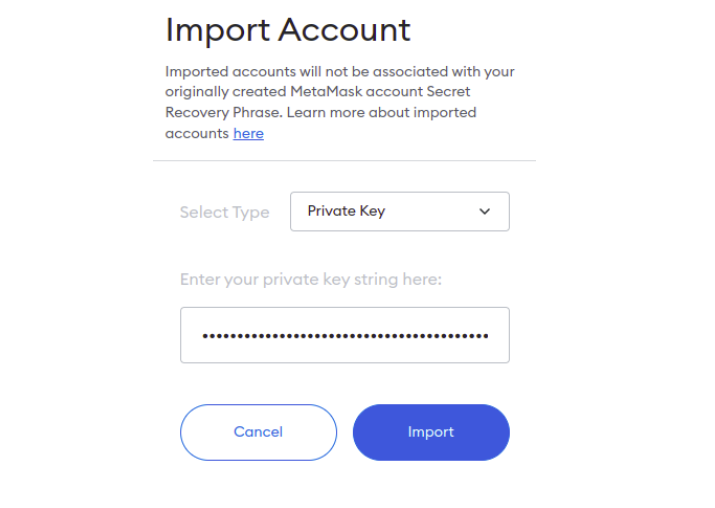
Head back to your Metamask, click on Import Account, and paste.
Click on import.
You should now be able to see this.

Note that this is not real Ethereum, and it appears this way because when you run the ganache command, it will automatically generate some ether, 100 by default. Click on confirm.
You should see this.

So, that’s it!
Conclusion
In this article, we looked at how we can use web3.js to interact with smart contracts, especially with the Ethereum smart contract. We also looked at how users interact with the dApp (decentralized applications) and how transactions can be made.
Here is the link to the complete code on my GitHub.