Live streaming has also become a powerful tool for businesses to increase brand awareness, foster customer trust and loyalty, and provide more authentic opportunities for engagement. Businesses can engage with their audiences in real time, creating a sense of immediacy and authenticity that traditional marketing methods lack. This article will show you an example of building your own streaming platform without complications, using simple broadcast software.
The influence of live streaming on contemporary society cannot be overstated. Live streaming has evolved far beyond the simple live broadcast of events such as concerts and sporting events since its inception in the late 1990s and early 2000s. Platforms like Twitch, YouTube Live, Facebook Live, TikTok Live, and Instagram Live have made it a widely known mode of communication and entertainment. These platforms offer a wide range of activities, such as gaming, music, vlogging, and teaching, among others.
Given its popularity, there is an ever-growing demand for the development of live-streaming platforms. As such, this tutorial focuses on how we can build our very own live stream platform using powerful tools like Mux and Nuxt.js.
What is Mux?
Mux is a powerful API-based open-source software tool that enables developers to easily create and manage live streams and video content. With Mux video, developers and average users can leverage a range of APIs to manage their content and preview it in real-time.
In addition to live-streaming, Mux offers various other video-related services, such as encoding, transcoding, and delivery. With the Mux API, developers can seamlessly integrate these functionalities into their applications, allowing for a highly customizable video experience.
Mux’s intuitive API interface and developer-friendly documentation make it an ideal choice for teams of all sizes, whether building a small-scale application or a large-scale enterprise system. By using Mux, developers can focus on creating engaging and immersive live video experiences for their users without worrying about the underlying technical details - and there’s no need for a video expert on the development team!
Following that, we’ll learn about Nuxt.js, its advantages, and what it offers.
What is Nuxt.js?
Nuxt.js is a cutting-edge JavaScript web framework designed for building Vue.js applications. With its powerful rendering strategies at the route level, including Server Side Rendering (SSR), Static Site Generation (SSG), and Client Side Rendering (CSR), Nuxt.js provides a structured code base for unparalleled flexibility and scalability.
Some of the features provided by Nuxt.js include:
-
SEO: Due to its Server Side rendering capabilities, Nuxt.js websites are indexable by the search engine. This implies search engines can crawl and analyze its website contents and index its webpages. This improves online visibility and traffic on search engines.
-
Multiple Rendering Strategies: As stated previously, Nuxt.js provides various rendering strategies. These rendering strategies allow Nuxt.js to be flexible, provide optimizations, and foster low-cost hosting.
-
Ready-to-Use Modules: There are several modules that as easy to integrate and readily available to be used in conjunction with Nuxt.js. These modules can facilitate faster development time. Examples of these modules include VueUse, TailwindCSS, i18n, and many others.
-
Large and growing community: Because of its popularity, Nuxt.js has a large community that can help developers using Nuxt.js resolve issues and improve their knowledge of Nuxt.js.
-
Built-In support for modern web technologies: Nuxt.js allows using modern web technologies such as CSS preprocessors, ES6/7, Typescript, and many more. With these modern technologies, the development process’s speed, accuracy, and efficiency can be improved.
-
Modular architecture: Building applications using Nuxt.js can allow developers to easily add and remove features.
Next, we’ll start building our application using these tools.
Prerequisites
To build our live-streaming application, we’ll need to have the following:
- A code editor, preferably Visual Studio Code (VS Code).
- Knowledge of JavaScript and Vue.js 3.
- FFmpeg CLI tool installed.
- Yarn package manager installed.
- Node.js v16 and above installed.
Platform Overview
To broadcast video to an Real-Time Messaging Protocol (RTMP) server, we’ll need to use a medium that is capable of doing so, as most web browsers do not support this functionality. This involves sending the video streams to a specialized server (in this case, the Mux server) capable of broadcasting to an RTMP server and receiving incoming streams. While there are several methods that we could use to connect to the server, the WebSocket protocol is typically the most popular option.
Building the Client Section
The live-streaming application is split into two components: the server and the client. The server’s primary function is broadcasting video streams from the client to the Mux RTMP server. The client records and sends the recorded streams to the server to be broadcasted via a web socket connection.
To get started, We need to first set up our Nuxt.js project by running the command:
npx nuxi init nuxt-live-streamerAfter the command has been executed successfully, we then run:
cd nuxt-live-streamer && yarnThis creates a Nuxt.js project folder called nuxt-live-streamer in this form:
└── nuxt-live-streamer/
   ├── README.md
   ├── app.vue
   ├── list.md
   ├── nuxt.config.ts
   ├── package.json
   ├── public/
   │   └── favicon.ico
   └── tsconfig.json
Then we need to install the dependencies needed:
- TailwindCSS: Follow these instructions to set up tailwind for our project.
- Mux: To install Mux, run the following command in your terminal:
yarn add @mux/mux-playerAfter Tailwind has been successfully installed, we can open our projects folder in the code editor (preferably VS Code) and add the necessary pages for our Nuxt.js app.
To add these pages, firstly, we need to update our app.vue to support pages by replacing the content of this file with the following:
<template>
<div>
  <NuxtPage />
</div>
</template>
Next, create a folder called pages in the project’s root directory. This pages folder contains the pages for our application. Then we can create our first page --- the landing page which contains information about the application.
Before we proceed, it’s essential to add a utils folder in the root directory to house the Timer class file. This class provides timing functionality for the application, enabling us to measure how long a certain operation takes to complete. Here’s how to add the Timer.js class file to the utils folder:
- Create a new folder named
utilsin the root directory of your project. - Create a new file named
Timer.jsinside the’ utils’ folder. - Add the code from the link to the
Timer.jsfile.
To add this landing page, we need to create the file main.vue in the pages directory and add the following code from here to the file.
The template in the file renders the video player for the recording feedback, such as the switch camera and mic controls, and the enter stream key and start streaming button.
It also renders the get key button, which displays when the user has not entered their stream key. Once the get stream key is clicked, it requests to generate a stream key and displays its result containing the shareable playback ID and the key using the {{ streamCredential?.playbackId[0] }}.
For the script section, the provided code in the script tag begins by importing the required dependencies and initializing variables for different elements and states. These include references to video elements, streaming status, WebSocket connection, input stream, device list visibility, stream key, media recorder, recorder settings, timer, and elapsed time. It also defines reactive objects to store information about available devices, selected devices, and the enabled state of each device type.
import Timer from "~~/utils/Timer";

const videoRef = ref();
const isStreaming = ref();
const isWSconnected = ref();
const inputStreamRef = ref();
const showDeviceList = ref();
const streamKey = ref();
const websocket = ref();
const mediaRecorderRef = ref();
const recorderSettings = ref();

const timer = ref();
const elapsedTime = ref();

const devices = reactive({
 video: [],
 audio: [],
});

const selectedDevices = reactive({
 video: null,
 audio: null,
});

const isDeviceEnabled = reactive({
 video: true,
 audio: true,
});

const constraints = reactive({
 audio: true,
 video: true,
});
Upon mounting the component, the timer is initialized by creating a new instance of the Timer class. Then the getRecorderSettings() function is called, which retrieves the recorder settings. This determines the appropriate settings based on browser compatibility.
function getRecorderSettings() {
 const video = MediaRecorder.isTypeSupported("video/webm;codecs=h264")
   ? "h264"
   : "vp8";
 const codecs = `;codecs=${video}, opus`;

 const result = MediaRecorder.isTypeSupported("video/mp4")
   ? {
       format: "mp4",
       video: "h264", // Know what this means
       audio: "aac",
       codecs: "",
       mimeType: "video/mp4",
     }
   : {
       video,
       format: "webm",
       audio: "opus",
       codecs,
       mimeType: `video/webm${codecs}`,
     };

 recorderSettings.value = result;
}
Then calls the enableCamera() function, which requests access to the user’s media devices, specifically audio and video. The retrieved media stream is then assigned to the videoRef element as the source object, allowing the video to be played. Additionally, the getDevices() function is called to enumerate and store information about available media devices in the devices object.
function getDevices() {
 navigator.mediaDevices.enumerateDevices().then(function (d) {
   devices.video = d.filter((e) => e.kind === "videoinput");
   devices.audio = d.filter((e) => e.kind === "audioinput");
 });
}
const enableCamera = async () => {
 inputStreamRef.value = await navigator.mediaDevices.getUserMedia(constraints);

 videoRef.value.srcObject = inputStreamRef.value;
 await videoRef.value.play();
};
The toggleDisableTrack(type) function handles toggling the enabled state of a device track, either audio or video. If the track is enabled, it sets the constraints to false to disable it by calling the setConstraints() function. Conversely, if the track is disabled, it sets the constraints to the selected device or true to enable it again. The isDeviceEnabled object is updated accordingly.
function toggleDisableTrack(type) {
 if (isDeviceEnabled[type]) {
   setConstraints(type, false);
   isDeviceEnabled[type] = false;
 } else {
   setConstraints(type, selectedDevices[type] || true);
   isDeviceEnabled[type] = true;
 }
}
The setConstraints(type, newValue) function sets constraints for a specific device type, either audio or video. It updates the constraints object with the new values and triggers the enableCamera() function to apply the updated constraints and refresh the media stream.
function setConstraints(type, newValue) {
 constraints[type] = newValue;
 enableCamera();
}
The getKeys() function is an asynchronous function that fetches the stream credential from /api/getKey. It retrieves the stream credential value and stores it in the streamCredential and streamKey variables.
async function getKeys() {
 const { data } = await useFetch('/api/getKey')
 streamCredential.value = data.value;
 streamKey.value = data.value.key;
}
The selectDevice(type, deviceId) function is used to select a specific device. It updates the selectedDevices object with the chosen device’s ID, sets the appropriate constraints based on the selected device, and hides the device list.
function selectDevice(type, deviceId) {
 selectedDevices[type] = { deviceId };
 setConstraints(type, { deviceId });
 showDeviceList.value = false;
}
The stopStreaming() function stops the media recorder, resets the timer, and updates the streaming state. If the media recorder is currently recording, it is stopped. The timer is then stopped and reset to its initial state. The elapsed time is set to null, and the isStreaming variable is set to false to indicate that streaming has stopped.
function stopStreaming() {
 if (mediaRecorderRef.value?.state === "recording") {
   mediaRecorderRef.value.stop();
 }
 timer.value.stop()
 timer.value.reset()
 elapsedTime.value = null;
 isStreaming.value = false;
}
To initiate streaming, the function startStreaming() is called. The function checks if the stream key exists and establishes a WebSocket connection.
...
if (!streamKey.value) return alert("Please enter a stream key");

const protocol = window.location.protocol === "https:" ? "wss:" : "ws:"
const wsUrl = new URL(`${protocol}//${window.location.host}`);

wsUrl.searchParams.set("key", streamKey.value);
wsUrl.searchParams.set("video", recorderSettings.value?.video);
wsUrl.searchParams.set("audio", recorderSettings.value?.audio);

websocket.value = new WebSocket(wsUrl);

websocket.value.addEventListener("open", () => {
 isWSconnected.value = true;
});

websocket.value.addEventListener("close", () => {
 isWSconnected.value = false;
 stopStreaming();
});
...
Then it prepares the audio and video streams for recording, and creates an output stream combining the audio and video.
...
const audioStream = new MediaStream();
const audioTracks = inputStreamRef.value.getAudioTracks();

const videoStream = new MediaStream();
const videoTracks = inputStreamRef.value.getVideoTracks();

// Added tracks from the media input stream ref to the audioStream
audioTracks.forEach(function (track) {
 audioStream.addTrack(track);
});

videoTracks.forEach(function (track) {
 videoStream.addTrack(track);
});

// created outputStream to add both the video and audio streams together
const outputStream = new MediaStream();
[audioStream, videoStream].forEach(function (s) {
 s.getTracks().forEach(function (t) {
   outputStream.addTrack(t);
 });
});
...
After that, it initializes a MediaRecorder object, starts the recording process, and sends the streams.
...
mediaRecorderRef.value = new MediaRecorder(outputStream, {
 mimeType: recorderSettings.value?.mimeType,
 videoBitsPerSecond: 3000000,
 audioBitsPerSecond: 64000,
});

mediaRecorderRef.value.addEventListener("dataavailable", (e) => {
 console.log(e);
 websocket.value.send(e.data);
});

mediaRecorderRef.value.addEventListener("stop", () => {
 stopStreaming();
 websocket.value.close();
});

mediaRecorderRef.value.start(1000);
...
It also handles event listeners for video data availability and recording stoppage. Additionally, it manages the timer and provides error handling for a smooth streaming experience.
...
timer.value.start(0, (time) => {
 elapsedTime.value = Timer.toTimeString(time)
})
isStreaming.value = true;
...
After that, we’ll add a page for viewing the streams. Create a new folder called preview in the pages folder, then a new file called +[id].vue inside it.
Then add the code below.
<template>
<div class="flex h-screen items-center">
  <mux-player
    stream-type="on-demand"
    :playback-id="playbackId"
  />
</div>
</template>


<script setup>
import "@mux/mux-player"
import { useRoute, useRouter } from "vue-router";

const $route = useRoute();
const $router = useRouter();
const playbackId = ref();

onMounted(() => {
playbackId.value = validateAndSanitizePlaybackId($route.params.id);
})

function validateAndSanitizePlaybackId(id) {
if (id || id.split().length > 10) return id.trim();
setTimeout(() => {
  $router.push("/main")
}, 5000)
}
</script>
When the page is mounted, we extract the mux playback key from the route and attach it to the mux-player tag to ensure smooth video playback on this page. Furthermore, to protect against invalid playback IDs, we use the validateAndSanitizePlaybackId() function, which checks if the provided ID is valid and returns the trimmed ID if it is. The browser will automatically redirect to the landing page if the ID is invalid.
Session Replay for Developers
Uncover frustrations, understand bugs and fix slowdowns like never before with OpenReplay — an open-source session replay tool for developers. Self-host it in minutes, and have complete control over your customer data. Check our GitHub repo and join the thousands of developers in our community.
Building the Server
The backend section consists of a WebSocket server and the video converter that converts and forwards the stream to the mux servers.
To get started, create a modules folder in the root directory of the Nuxt project. Then create a wss.ts file. This file will contain our WebSocket server and setup.
To continue, we need to install the websocket package by running the command:
yarn add wsOn the wss.ts file, add the code here.
The provided code consists of several components that work together to set up a WebSocket server and stream data to an RTMP server using FFmpeg.
First, the necessary modules are imported. One of which is the WebSocketServer. The WebSocketServer class is imported from the “ws” module, enabling a WebSocket server creation. After that, the defineNuxtModule function is imported from the @nuxt/kit module, allowing the definition of a module for Nuxt.js.
import { WebSocketServer } from "ws"
import { defineNuxtModule } from '@nuxt/kit'
import child_process from 'child_process';
import url from 'url';
...
Within the setup function, an event handler is attached to the listen hook of the Nuxt.js server. This event handler is triggered when the server starts listening. Inside this event handler, a WebSocket server instance is created using the imported WebSocketServer class, with the server object passed as an argument.
Another event handler is attached to the connection event of the WebSocket server. This event handler is executed whenever a new web socket connection is established.
Upon a connection, the code performs the following:
- Logs a message to the console and sends a message to the connected WebSocket client, indicating that the streaming socket is connected.
- Parses the query parameters from the request URL using the
urlmodule and extracts the values of ‘key’, ‘video’, and ‘audio’ parameters. - Constructs an RTMP URL using the extracted ‘key’ parameter.
- Constructs an array of FFmpeg codec options based on the values of the ‘video’ and ‘audio’ parameters.
- Spawns a new FFmpeg process using the child_process module, passing the constructed command-line arguments.
- Sets up event handlers for the stdin, stderr, and close events of the FFmpeg process.
- Handles incoming WebSocket messages by writing them to the stdin of the FFmpeg process.
- Handles the WebSocket ‘close’ event by killing the FFmpeg process and logging a message.
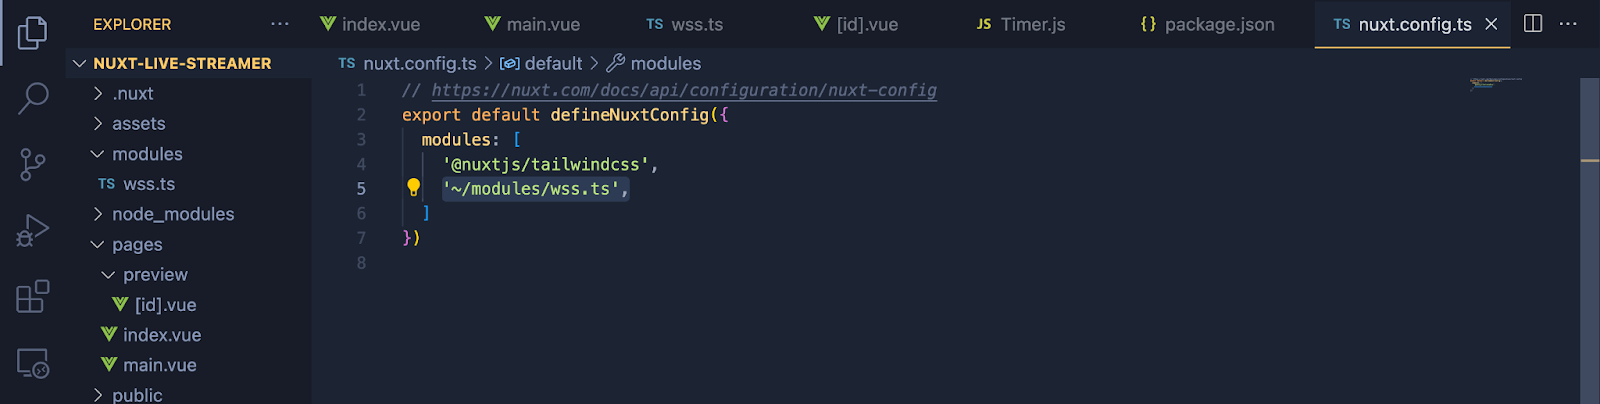
Then we can register our module to the nuxt.config.ts file. Open the nuxt.config.ts file, and add the following to the modules array:
'~/modules/wss.ts'Here’s how your nuxt.config.ts file should look like:
After that, we add our endpoint for generating the stream keys.
To do this, create a server folder in the project’s root directory, and create another folder api in the server folder. Here we create a file getKey.ts on that api folder.
Once this is done, add the following code:
import Mux from "@mux/mux-node";

export default defineEventHandler(async (event) => {
 const config = useRuntimeConfig()
 const { Video } = new Mux(config.MUX_TOKEN_ID, config.MUX_TOKEN_SECRET);
 const stream = await Video.LiveStreams.create({
   new_asset_settings: { playback_policy: 'public' },
   playback_policy: 'public',
 });
 return {
   key: stream.stream_key,
   playbackId: stream.playback_ids?.map((e) => e.id)
 }
})
This creates the server event that generates the stream keys and playback ID requested to start streaming.
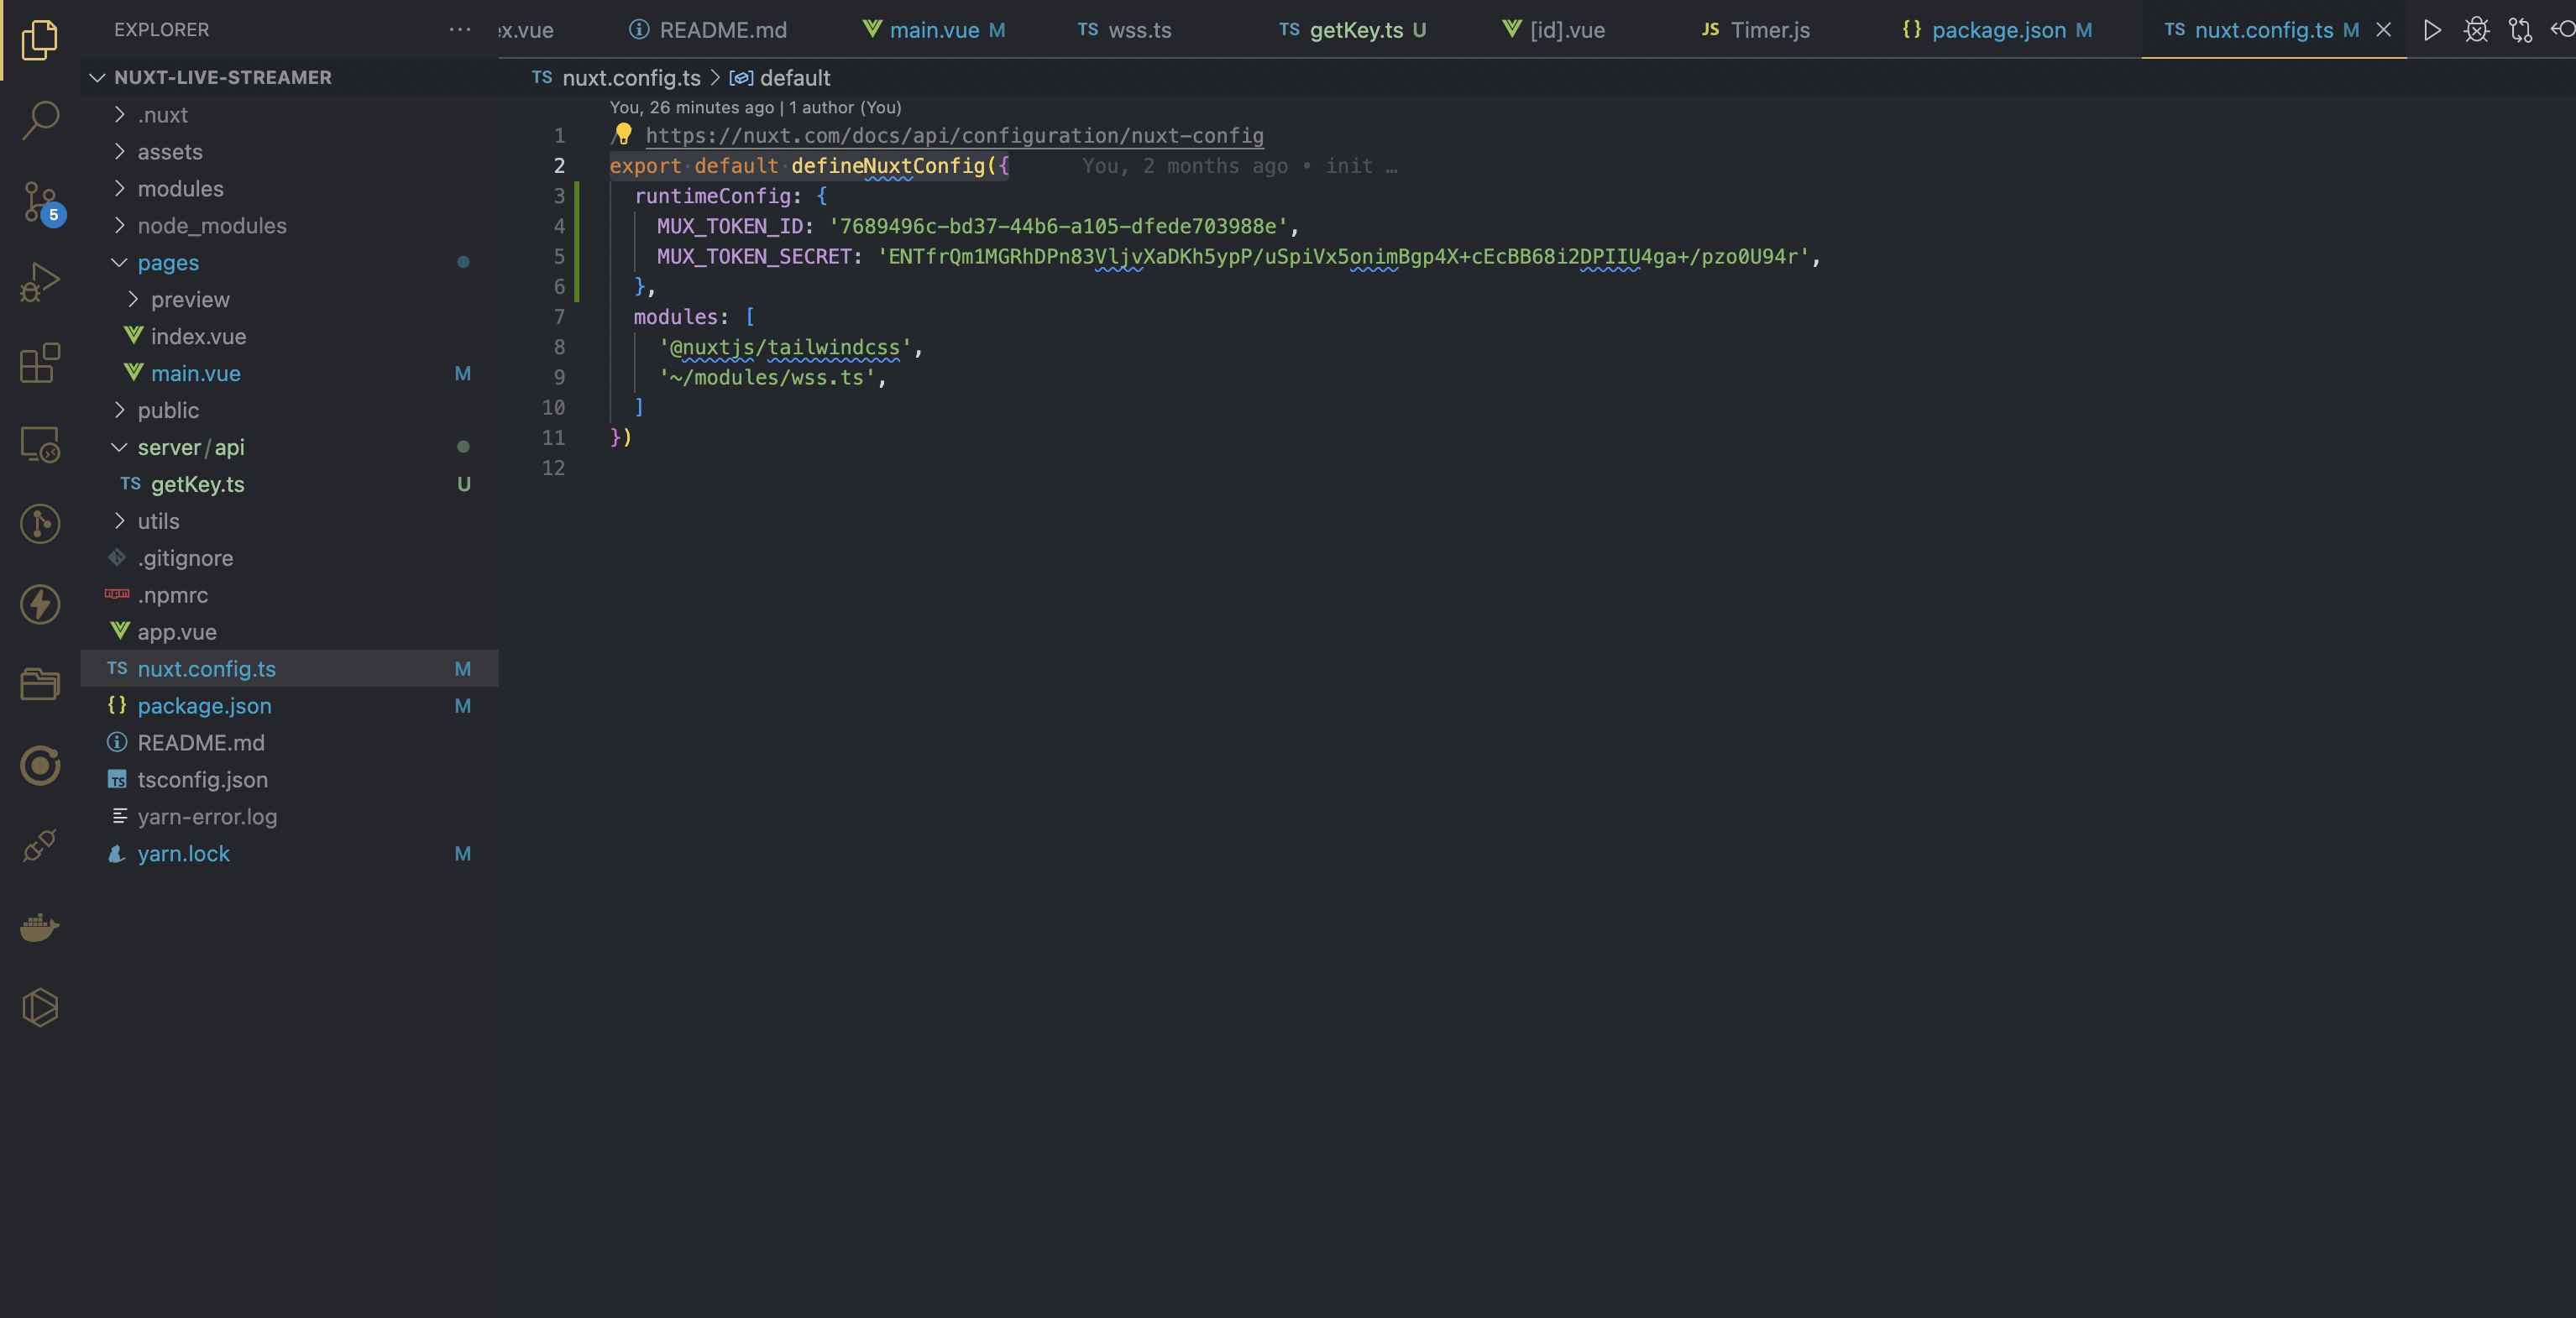
Then add the following to the nuxt config with the API access token data:
export default defineNuxtConfig({
 runtimeConfig: {
   MUX_TOKEN_ID: '******',
   MUX_TOKEN_SECRET: '********',
 },
   ...
})
Testing
To test the application, We can run our nuxt.js application in the development environment using the command on our terminal.
yarn devThis spins up the development server.

Then we can visit the http://localhost:3000 URL on our web browser.
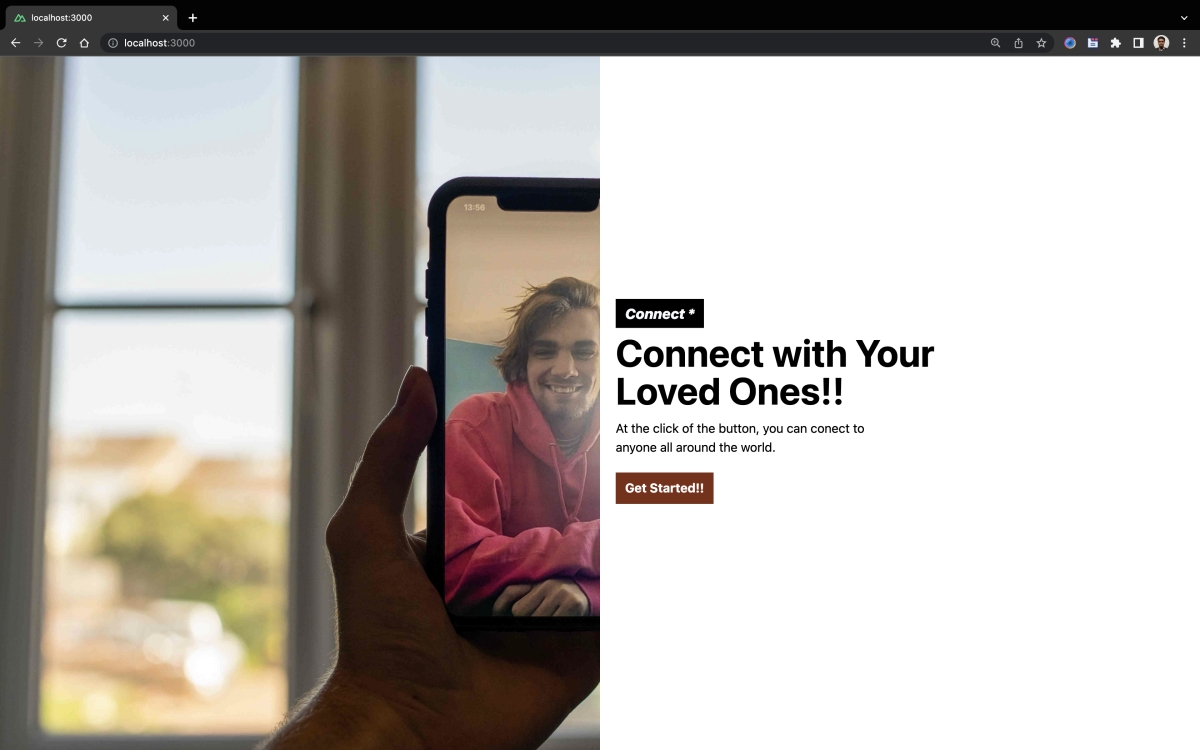
Click on the “Get Started” button to navigate to the page to enter the mux key.
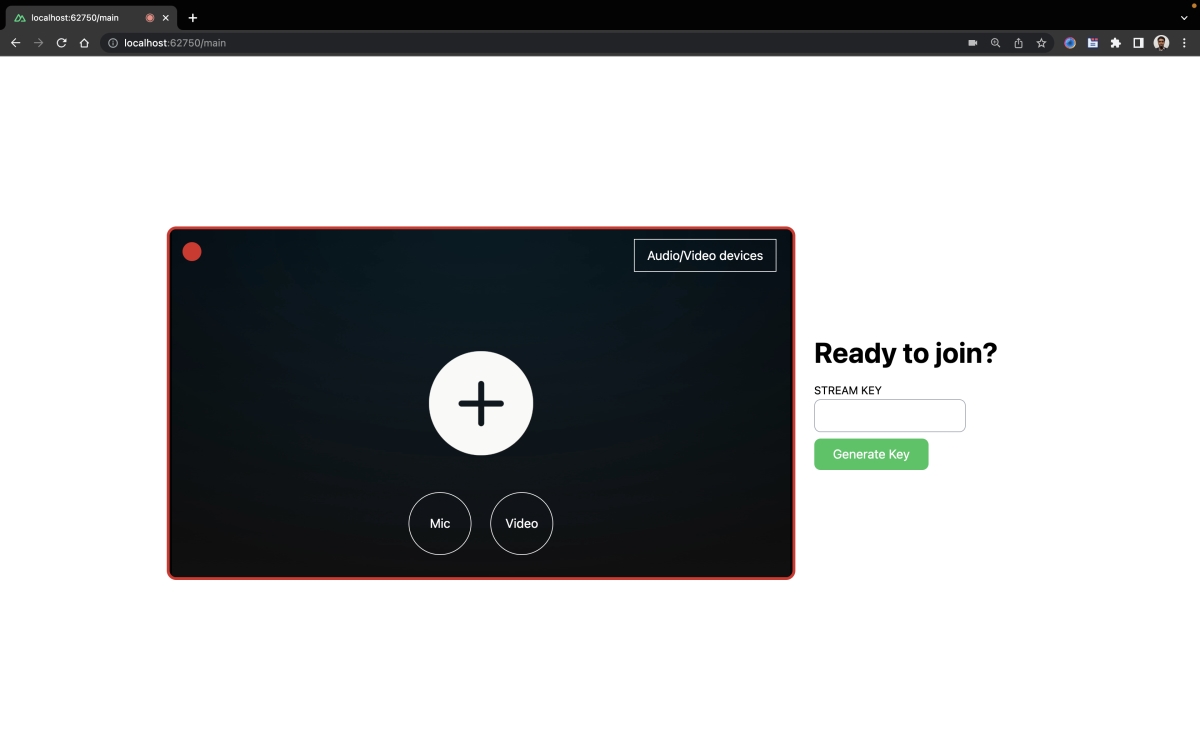
Click on the Generate Key button to generate the key, then copy the playback Id, as indicated below.

After that, open a new browser tab or instance, then go to http://localhost:3000/preview/GfqR666oAsb1S4LLPf3V02VtoWhy5JQ1y1xmTDHzRDG4, to preview the stream.
 A screenshot showing the video stream.
This is currently not showing the video, as we haven’t started the stream yet.
Navigate back to the tab where we copied the playback Id from, then click on “Start Stream” to start the stream.

Navigate back to the preview tab to view our stream. We’ll see that the play button is now available. Click on it to start viewing the streams


Conclusion
Finally! You’ve come to the end of this article, where you learned how to create a live-streaming platform using Mux and Nuxt. For business owners looking to foster customer trust and loyalty, live streaming is an excellent tool for communication and entertainment. In addition, developers can utilize Mux and Nuxt.js modular architecture to easily create and manage live streams and build highly customizable and engaging video experiences.
Resources
You may find the following resources useful:
Gain Debugging Superpowers
Unleash the power of session replay to reproduce bugs and track user frustrations. Get complete visibility into your frontend with OpenReplay, the most advanced open-source session replay tool for developers.