
Maximize Angular's performance with efficient state management


Adopting efficient state management techniques is crucial for making your Angular app operate quickly and effectively. Based on your application’s size, complexity, and requirements, it’s critical to select the best state management technique. Your applications’ overall performance and scalability can be increased, and they can be easier to test and maintain with the aid of a well-designed state management system, and this article will show you what to do to achieve these goals.
In Angular, state management refers to the process of controlling and modifying the data that powers your application.
Maintaining order and consistency throughout your application is essential since it impacts its behavior and appearance.
In Angular, the process of managing an application’s state, including all the data and variables used by the application, is referred to as state management.
User input, data from APIs, and any other information the application needs to operate effectively can all be found in this state.
In an average Angular application, components are in charge of managing the state. Every component has a state that it can utilize to access input properties, local variables, and other data.
It can be challenging to maintain state in this fashion, though, and it can result in issues like inconsistent data and unpredictable behavior as the application’s size and complexity increase.
State Management in Angular: Why is State Management Important in Angular :confused:?
This is what a state that isn’t well-managed looks like:

The example above works which is quite ok. Imagine you are adding more cars to the example above :confounded: everything becomes a bigger mess.
Take a look at what a managed state looks like:

Nice right?
A poorly handled state can cause inconsistencies, mistakes, and slowdowns, negatively impacting the user experience and decreasing your app’s overall effectiveness.
But even as your Angular project expands in size and complexity, a properly managed state can keep it running quickly and effectively.
Angular State Management Techniques
The Angular popular web development framework provides various features and tools to build sophisticated online apps.
Effectively maintaining the application state is one of the most crucial components of web application development.
Angular provides several state management strategies, each with unique benefits and drawbacks.
In this article, you will learn some of the most popular Angular state management techniques and their best use cases;
- Services: Services, a key component of Angular, can be utilized to manage state. Services are injectable singleton objects that can be used in other services and components. By storing data and offering ways to access and update it, they can be used to manage the state.
- Reactive Forms: Building forms in Angular is frequently done with Reactive Forms. It provides a sophisticated and versatile approach to managing form state and handling user input. In this article, we’ll review some best practices for managing state on Reactive Forms.
- Angular NgRx: NgRx is a package used to manage the state in Angular applications at its core. It is founded on the ideas of Redux, a well-liked state management toolkit for React apps. Similar to Redux, NgRx manages the state through a unidirectional data flow, thus, changes to the state are made through a series of actions sent to the store.
State management based on services
The ability to establish and manage services and dependencies is one of Angular’s main capabilities.
This enables enhanced modularity, better concern segregation, and simpler testing.
Because they can be used to encapsulate and manage data and carry out activities that impact the state of the application, services are the perfect answer for managing the state in Angular applications.
They are an effective tool for maintaining state in complex systems since they can interface with APIs and other external data sources.
What is a Service in Angular?
A piece of code that completes a specified purpose and may be reused throughout an application is known as an Angular service.
Services are simple and easy to use, making them a good choice for small to medium-sized applications.
They are also a good choice for applications that do not require a centralized store or complex state management.
Confused :confused:? Don’t worry; the animation below explains how you can think about this;

Think of a service in angular as an injection, which cannot be used by itself, but needs a body to perform its task.
How to create a Service in Angular
In Angular, creating a service is simple. Simply use the following command on your terminal to get started:
ng g s <service-name>This will produce a new service in your application with the following default implementation:
import { Injectable } from "@angular/core";

@Injectable({
  providedIn: "root",
})
export class ExampleService {
  constructor() {}
}
What is Dependency Injection in Angular?
To handle services and other dependencies across your application with Angular, you must utilize Dependency Injection.
Say, for illustration, that you have a component that demands the utilization of a service.
You can use Angular’s Dependency Injection mechanism to inject that service into the component rather than making an instance there.
Your components’ dependencies are simpler to handle, and your code is more tested.
The animation below explains how you can think about this;

This is what it means to inject a service into a component, which can also be called Dependency Injection in angular.
How to use Dependency Injection in Angular
Using Dependency Injection in Angular is straightforward. You simply need to include the service or dependency in the constructor of your component:
import { ExampleService } from "./example.service";

@Component({
  selector: "app-example",
  template: ` <p>Example Component</p> `,
  providers: [ExampleService],
})
export class ExampleComponent {
  constructor(private exampleService: ExampleService) {}
}
By providing the ExampleService in the constructor, we inject it into the ExampleComponent in this example. This enables us to utilize the service by simply referencing this.exampleService throughout the component.
How to Manage State Using Angular Services
A service in Angular is a class that may be used to communicate information and functionality between several components. Here’s an illustration of how a service can be used in Angular to handle state:
ng new my_appThe above command will set up your angular boilerplates. You can change my_app to your desired application name. Start the server by running ng serve --open in your terminal.
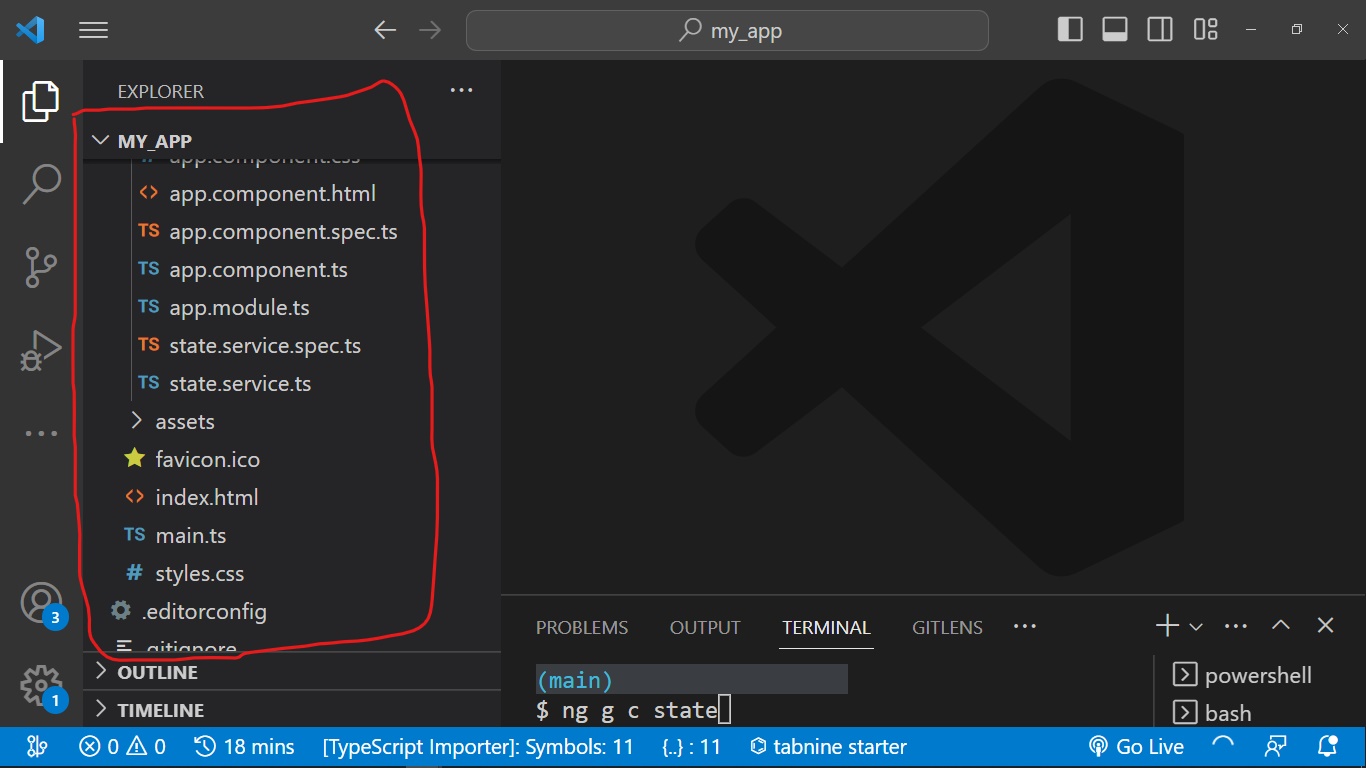
Then you generate a service by running the following command:
ng g s stateAfter running the command above, your folder should look like the image below:
In the state.service.ts file, you will add the data for each country and a method to get the data.
import { Injectable } from "@angular/core";
@Injectable({
providedIn: "root",
})
export class StateService {
constructor() {}
private data = [
{ country: "Nigeria", capital: "Abuja" },
{ country: "Canada", capital: "Ontario" },
{ country: "Ethopia", capital: "Addis Ababa" },
{ country: "Ghana", capital: "Accra" },
{ country: "India", capital: "New Delhi" },
];
getCountry() {
return this.data;
}
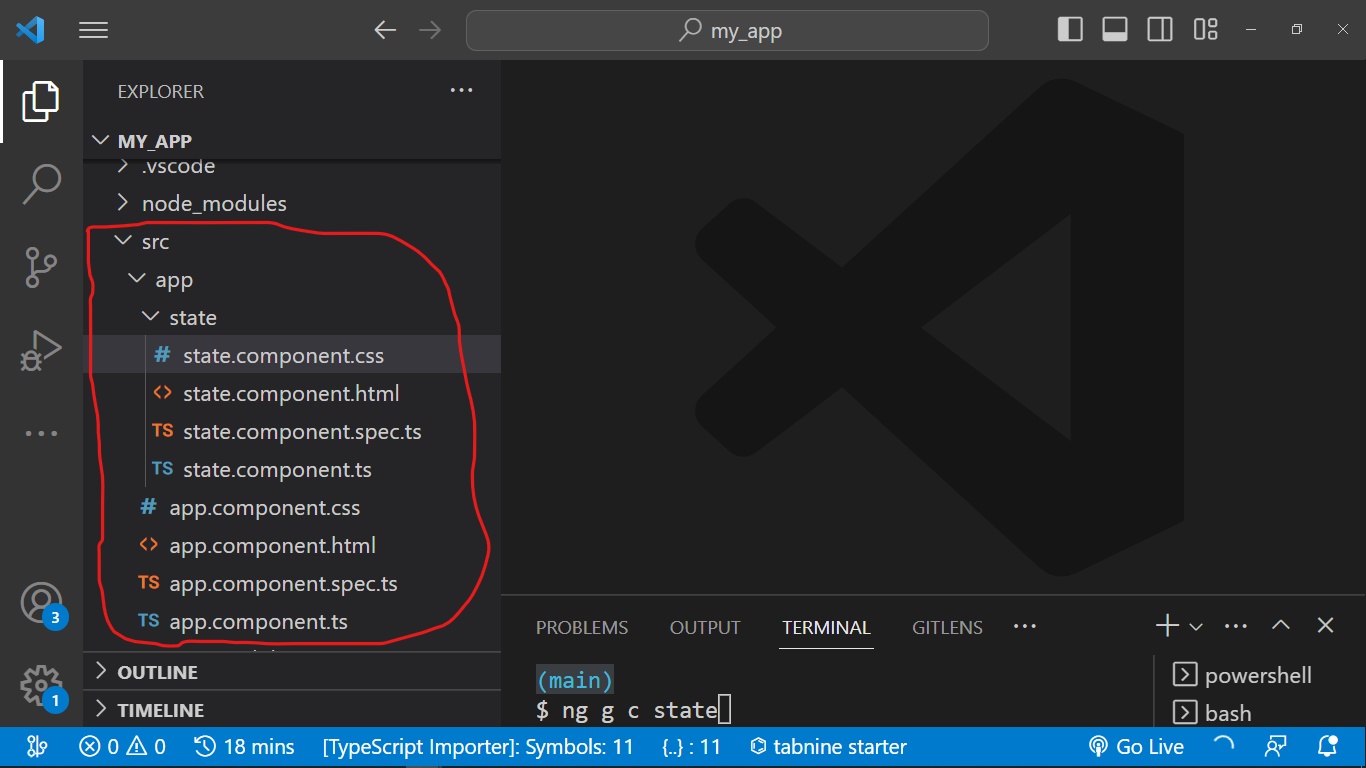
}After this is done, you can create your component and inject the service you created above into the component. The following command is used to create a component.
ng g c stateAfter running the command above, your folder should look like the image below:
In the state.component.ts file, you will inject your service into the component.
import { Component } from "@angular/core";
import { StateService } from "../state.service";

@Component({
  selector: "app-state",
  templateUrl: "./state.component.html",
  styleUrls: ["./state.component.css"],
  providers: [StateService],
})
export class StateComponent {
  data: any[];
  constructor(stateService: StateService) {
    this.data = stateService.getCountry();
  }
}
In the .html file of the component you created, you will add markups that will be displayed on the web page. In this example, I will be adding the markup to my state.component.html file:
<table id="countries">
  <tr>
    <th>Country</th>
    <th>Capital</th>
  </tr>
  <tr *ngFor="let state of data">
    <td>{{ state.country }}</td>
    <td>{{ state.capital }}</td>
  </tr>
</table>
You’re almost there :relaxed:…
You only need to import the component you created into app.component.html. Just like so;
<app-state></app-state>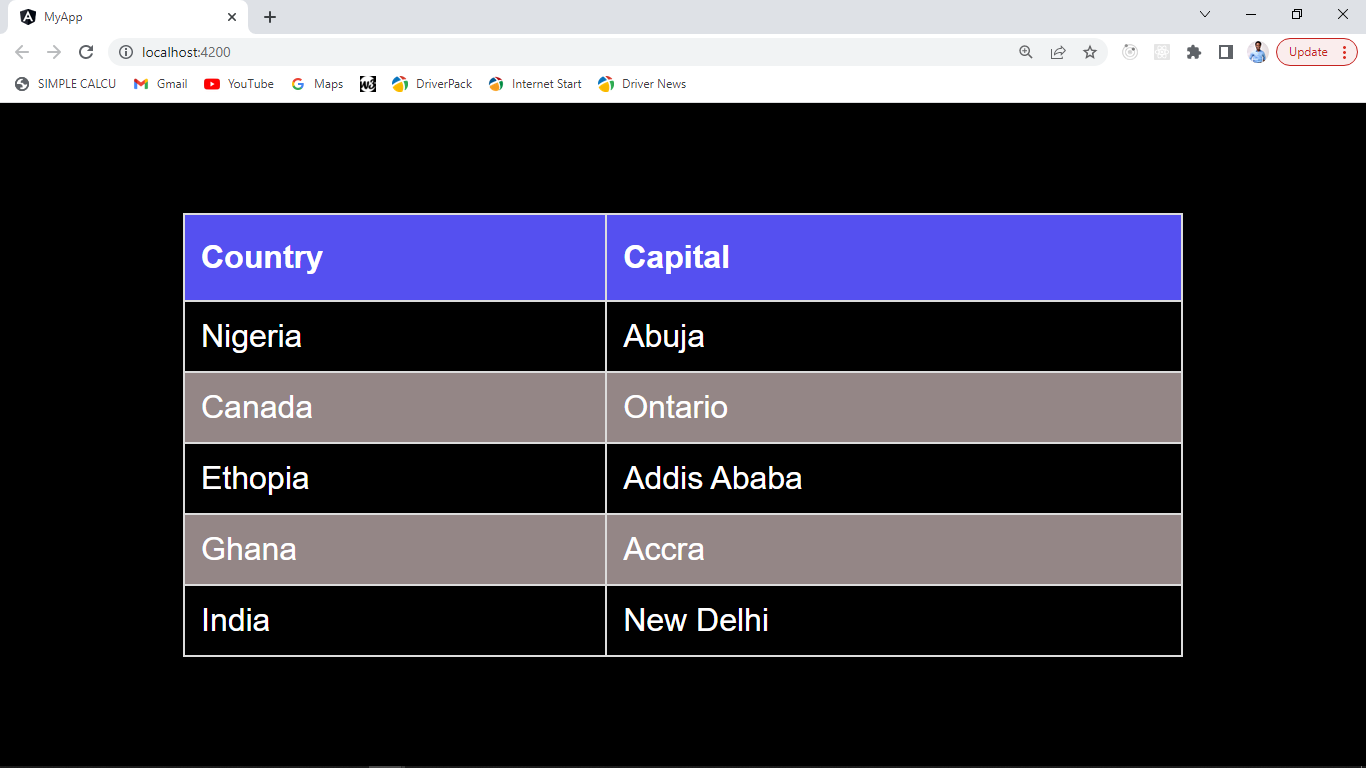
In this example, you have imported the StateService and injected it into the StateComponent using the constructor.
Now, you can use the stateService object to call the getCountry() method and get the data it returns, which you can then display on the web page.
Reactive Forms in Angular
What are Reactive Forms in Angular?
In Angular, reactive forms is a technique to build and manage forms that follow a reactive methodology. According to this method, the form data is represented as a continuous stream of changing values.
Due to their ability to handle complicated validation, execute asynchronous validation, and dynamically update the form, reactive forms offer a powerful solution to manage forms.
This has several advantages:
- Better control: Reactive forms give users better control over the form as they are done in code rather than templates.
- Improved performance: Performance is enhanced for reactive forms.
- Better error handling: Reactive forms simplify dealing with errors.
- Dynamic updates: Reactive forms can be dynamically changed, which makes it simpler to include or exclude form components.
How to Manage State Using Angular Reactive Forms
To implement reactive forms in Angular, import the ReactiveFormsModule from the @angular/forms library in your app.module.ts file.
import { ReactiveFormsModule } from "@angular/forms";
@NgModule({ imports: [ReactiveFormsModule] })
export class AppModule {}
You can then generate a component by doing the following:
ng g c manage-formThis component groups the forms and has control of the form data. In the manage-form.component.ts file of the component you just created, add the following code:
import { Component } from "@angular/core";
import { FormControl, FormGroup, Validators } from "@angular/forms";

@Component({
  selector: "app-manage-form",
  templateUrl: "./manage-form.component.html",
  styleUrls: ["./manage-form.component.css"],
})
export class ManageFormComponent {
  console = console;
  formData = new FormGroup({
    firstName: new FormControl("", [Validators.required]),
    lastName: new FormControl("", [Validators.required]),
    email: new FormControl("", [Validators.required]),
    password: new FormControl("", [Validators.required]),
  });
  onSubmitForm() {
    {
      this.formData?.valid
        ? (console.log(this.formData.value), this.formData.reset())
        : "";
    }
  }
}
Here, you are creating a new FormGroup called formData.
The form group contains four FormControls: firstName, lastName, email, and password. Each FormControl has the default value of an empty string '' with Validators to make sure each input field is filled before being able to click on the submit button.
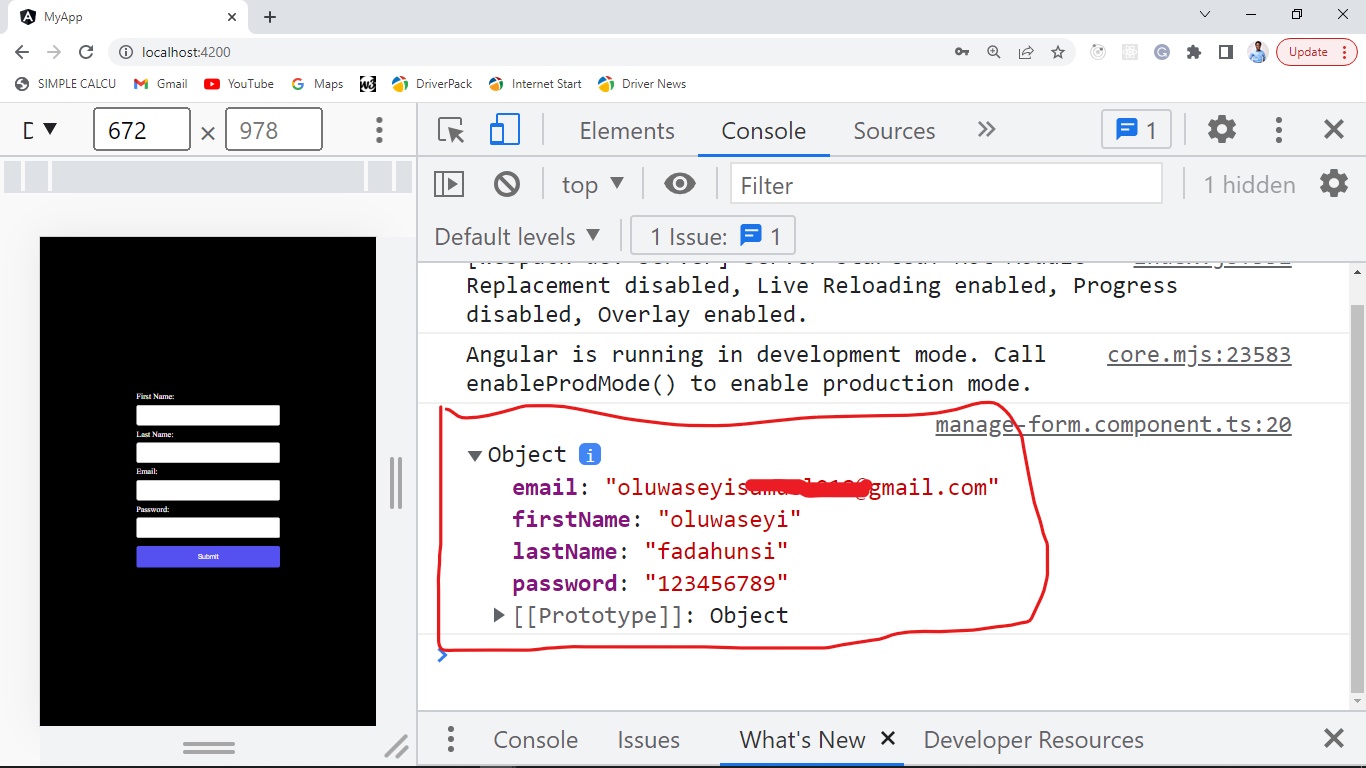
In this example, there is a method called onSubmit(), which we will use to log each value in the formData when the form is submitted and clear the inputs after logging the data to the console. You will implement this in the templateUrl, which can be found in manage-form.component.html file in the component we generated.
Now, you will add the form elements into the manage-form.component.html file just like so:
<form [formGroup]="formData" (ngSubmit)="onSubmitForm()">
  <div>
    <label>First Name:</label>
    <input type="text" formControlName="firstName" />
  </div>
  <div>
    <label>Last Name:</label>
    <input type="text" formControlName="lastName" />
  </div>
  <div>
    <label>Email:</label>
    <input type="email" formControlName="email" />
  </div>
  <div>
    <label>Password:</label>
    <input type="password" formControlName="password" />
  </div>
  <button type="submit">Submit</button>
</form>
In the example above, we use the [formGroup] directive to bind the formData group to the <form> element in the templateUrl.
The ngSubmit directive helps execute the function passed to it.
The formControlName directive is used to bind each FormControl, which has to match each key in the formData.
Remember to import your component into app.component.html like so:
<app-manage-form></app-manage-form>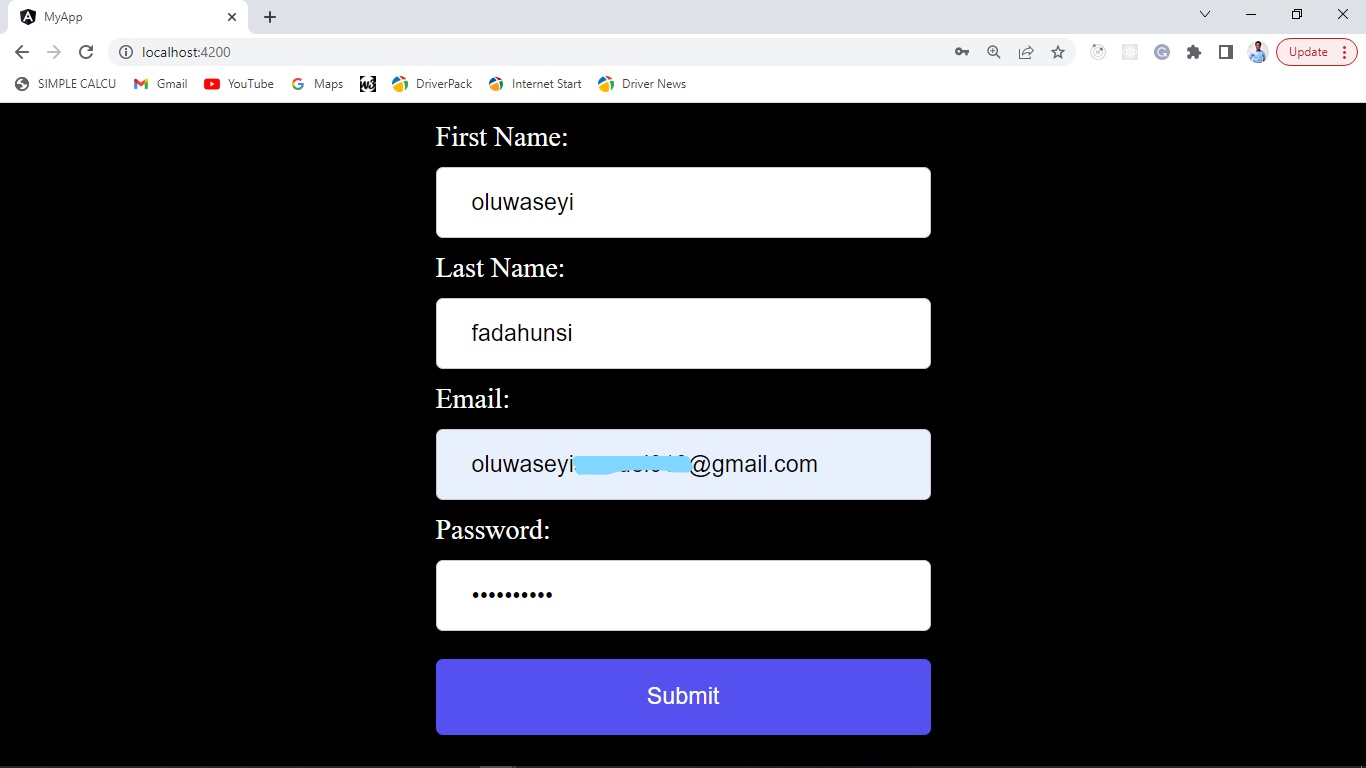
Session Replay for Developers
Uncover frustrations, understand bugs and fix slowdowns like never before with OpenReplay — an open-source session replay tool for developers. Self-host it in minutes, and have complete control over your customer data. Check our GitHub repo and join the thousands of developers in our community.
State Management With Angular NgRx
Modern web development requires state management, especially for Angular apps.
Ngrx is one of the most well-liked state management tools in the Angular ecosystem, which is a library that enables Angular apps to use the Redux pattern.
We will look at using ngrx for state management in an Angular application in this tutorial.
What is Angular NgRx?
A state management library for Angular apps is called Angular NgRx. It is based on the Redux paradigm, a JavaScript application state container with predictability.
State in an Angular application refers to the application’s present situation, which may include user input, server answers, and other elements that impact the application’s behavior.
It might be difficult to manage the state in an orderly and predictable manner as the application develops and becomes more complicated.
By offering a central repository for the application state and a set of tools for managing that information predictably, NgRx aids in resolving this problem.
Following the Redux pattern, it also offers tools for handling side effects like network requests and other asynchronous processes.
NgRx’s obvious separation of concerns between components and state management can help make Angular applications more scalable, manageable, and tested. In contrast to other state management solutions, it does need some additional setup and may have a steeper learning curve.
How to Manage State Using Angular NgRx
To manage the state using Angular NgRx, you will need to follow these basic steps:
- Define your state: Define the initial state of your application where you can define the structure of your state using interfaces or classes.
export const initialState = { counter: 0 }- Define your action: Define the actions that your application can perform. Actions are defined as constants, which are used to identify the type of action being dispatched.
import { createAction } from "@ngrx/store";

export const increment = createAction("INCREMENT");
export const decrement = createAction("DECREMENT");
export const reset = createAction("RESET");
The createAction function is used to define actions, which are simple objects that describe an event that occurred in the application. These actions can be dispatched by components or services to trigger state changes in the application. createAction creates an action creator function, which returns an action object with a type which is INCREMENT, DECREMENT, and RESET. It can also contain an optional payload.
- Define your reducers: Define the reducers that will update the state of your application based on the actions that are dispatched. Reducers are pure functions that take the current state and an action as input and return a new state as output. You can think of a reducer as the file handling the application’s logic based on the actions.
import { createReducer, on } from "@ngrx/store";
import { initialState } from "./counter-state";
import { decrement, increment, reset } from "./counter-action";

export const reducerCounter = createReducer(
  initialState,
  on(increment, (state) => {
    return {
      ...state,
      counter: state.counter + 1,
    };
  }),
  on(decrement, (state) => {
    return {
      ...state,
      counter: state.counter - 1,
    };
  }),
  on(reset, (state) => {
    return {
      ...state,
      counter: 0,
    };
  })
);
The createReducer function is used to define a reducer function, which takes the current state of the application and an action object as input. It returns a new state object that reflects the changes caused by the action. The reducer function is pure, meaning it does not modify the original state object but instead creates a new one.
The on function is used to define the state changes that occur in response to specific actions. It takes an action object and a callback function that returns a new state object and creates a reducer function that handles the specified action.
Making a Straightforward Angular Application with NgRx
Assume you have created a new Angular application. Run the following command to set up NgRx into your application ng add @ngrx/store@latest.
Now, run ng serve --open to start your application.
Go into your src/app directory, and create a folder called redux. This folder will contain your state, action, and reducer files.
Firstly, inside your redux folder, you will create a file called counter-state.ts, containing the initial state of your application. Copy the code below into the file you have just created.
export const initialState = { counter: 0 }Secondly, you will create another file called counter-action.ts, containing the actions dispatched in your application. Copy the code below into the newly created file in your redux folder.
import { createAction } from "@ngrx/store";

export const increment = createAction("INCREMENT");
export const decrement = createAction("DECREMENT");
export const reset = createAction("RESET");
Finally, in your redux folder, you will create another file called counter-reducer.ts, which will contain the logic of your application based on the dispatched action. Copy the code below into the newly created file.
import { createReducer, on } from "@ngrx/store";
import { initialState } from "./counter-state";
import { decrement, increment, reset } from "./counter-action";

export const reducerCounter = createReducer(
  initialState,
  on(increment, (state) => {
    return {
      ...state,
      counter: state.counter + 1,
    };
  }),
  on(decrement, (state) => {
    return {
      ...state,
      counter: state.counter - 1,
    };
  }),
  on(reset, (state) => {
    return {
      ...state,
      counter: 0,
    };
  })
);
In the code above, we imported createReducer, which is a function provided by the @ngrx/store library. The createReducer takes an initial state which in our code is called initialState, and a function called on is provided by the @ngrx/store library, which takes an action type, and an action handler function.
Before you proceed, you must ensure your application is aware of NgRx. You can do this by going into app.module.ts and updating it with this code snippet:
import { StoreModule } from "@ngrx/store";
import { reducerCounter } from "./redux/counter-reducer";

imports: [BrowserModule, StoreModule.forRoot({ counter: reducerCounter })];
It’s time to create components that will interact with one another in your application.
In the src/app directory, you will create a folder called counter containing other components you will generate in the application.
You’re going to create a component inside the counter directory called counter-btn by running ng g c counter/counter-btn in your terminal.
Inside counter-btn.component.ts in the counter directory, paste the following code;
import { Component } from "@angular/core";
import { Store } from "@ngrx/store";
import { decrement, increment, reset } from "src/app/redux/counter-action";

@Component({
  selector: "app-counter-btn",
  templateUrl: "./counter-btn.component.html",
  styleUrls: ["./counter-btn.component.css"],
})
export class CounterBtnComponent {
  constructor(private store: Store<{ counter: { counter: number } }>) {}

  onIncrement() {
    this.store.dispatch(increment());
  }
  onDecrement() {
    this.store.dispatch(decrement());
  }
  onReset() {
    this.store.dispatch(reset());
  }
}
In the code above, you imported Store from @ngrx/store and injected it into the constructor; this process is called Dependency Injection.
By defining the Store object in the constructor, the component or service can have access to the store instance as soon as it is created. This allows the component or service to subscribe to and interact with the store’s state and actions as needed.
Now that you have access to the store, you can dispatch actions by binding the methods in the code above to the buttons in counter-btn.component.html as seen below;
<button (click)="onIncrement()">Increment</button>
<button (click)="onDecrement()">Decrement</button>
<button (click)="onReset()">Reset</button> Again, you’re going to create a component inside the counter directory called counter-output by running ng g c counter/counter-output in your terminal.
Inside counter-output.component.ts, you will paste the code below;
import { Component, OnInit } from "@angular/core";
import { Store } from "@ngrx/store";

@Component({
  selector: "app-counter-output",
  templateUrl: "./counter-output.component.html",
  styleUrls: ["./counter-output.component.css"],
})
export class CounterOutputComponent implements OnInit {
  counter_result: number | undefined;
  constructor(private store: Store<{ counter: { counter: number } }>) {}
  ngOnInit(): void {
    this.store.select("counter").subscribe((data: any) => {
      this.counter_result = data.counter;
    });
  }
}
The value is then obtained from the store and assigned to the counter_result using the ngOnInit() lifecycle hook. This is accomplished by utilizing the select() method, which accepts a string that stands in for a property in the global state to subscribe to the Store. The property in this instance is known as 'counter'.
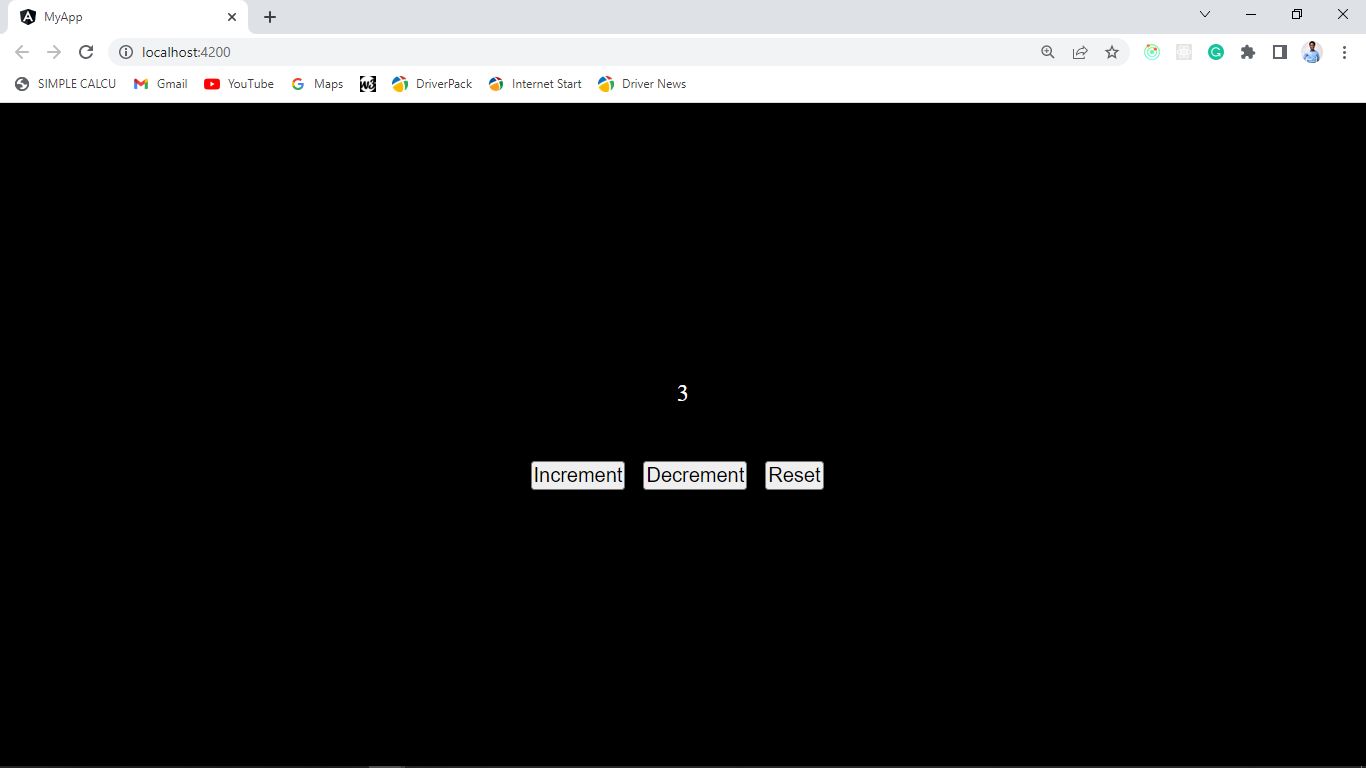
The next thing to do is call counter_result into your counter-output.component.html;
<p> {{counter_result}} </p>To view your application, you need to import the components created counter-btn and counter-output into app.component.html like the code below;
<div class="container">
<app-counter-output></app-counter-output> <br />
<br />
<app-counter-btn></app-counter-btn>
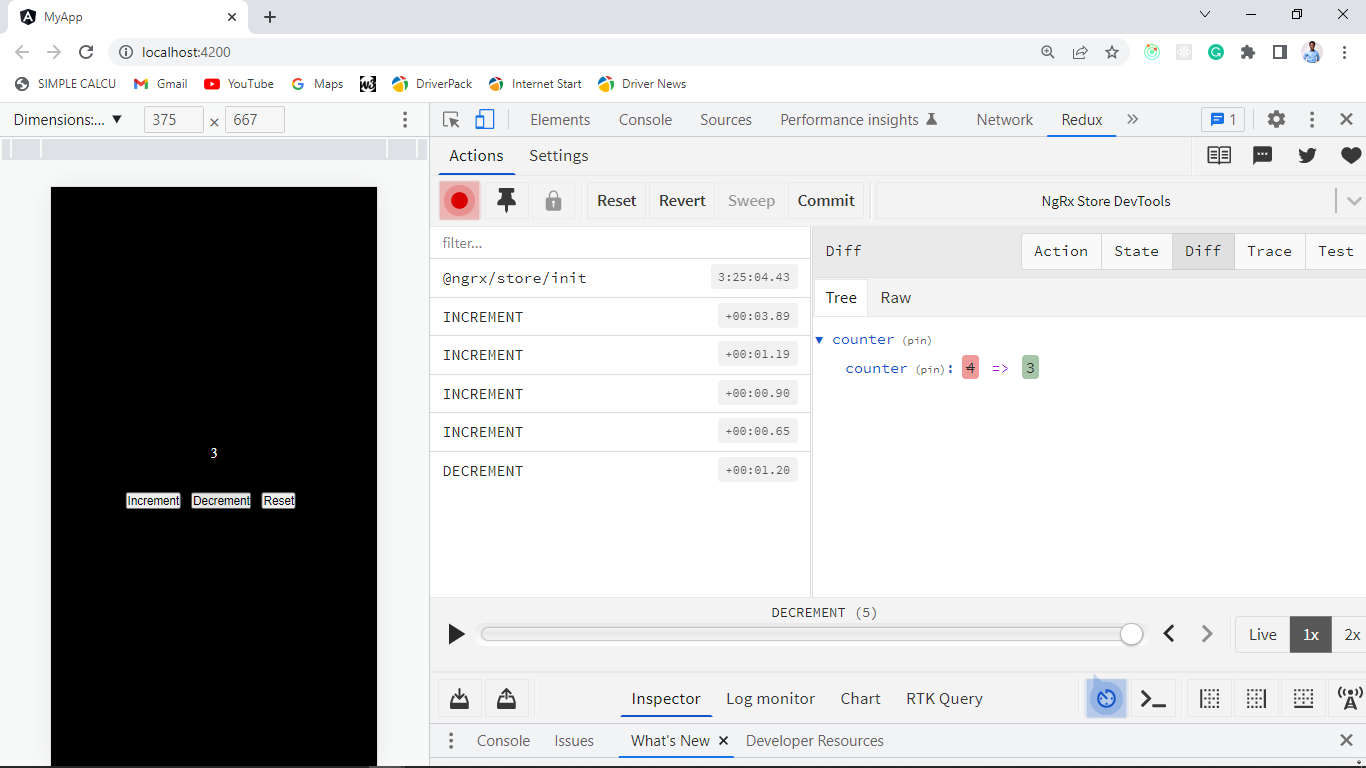
</div>;NB: You can have access to the redux devtools by running ng add @ngrx/store-devtools in your terminal, and also import it in your app.module.ts file like so;
imports: [
  BrowserModule,
  StoreModule.forRoot({ counter: reducerCounter }),
  StoreDevtoolsModule.instrument({ maxAge: 25, logOnly: !isDevMode() }),
];
Now, you can start your application by doing ng serve --open. Your application should look like the image below:
The benefits and drawbacks of utilizing Angular NgRx
Benefits:
- Centralized state management: A centralized location for managing and saving the state is offered by Angular NgRx. In particular, for larger and more complicated applications, this makes managing the state throughout the entire program easier.
- Predictable state changes: NgRx leverages a unidirectional data flow and immutable data structures to make state changes predictable and simpler to understand. Because of this, writing predictable and maintainable code is much simpler.
- Easy Testing: State and components are separated via NgRx, making it simpler to test individual components without setting up a complicated state.
Drawbacks:
- Learning curve: Using NgRx efficiently has a learning curve and can take some time. This can be particularly difficult for developers not experienced with state management.
- Increased complexity: Using NgRx can make an application more difficult, especially for smaller apps with less state management need.
- Boilerplate code: The amount of boilerplate code required by NgRx can make building and maintaining code more difficult.
Conclusion
In conclusion, efficient state management is essential to maintaining the scalability, responsiveness, and maintainability of your Angular application as it expands.
With the help of this article, you can keep your data orderly, predictable, and simple to debug by using the best state management solution for your particular needs.
Gain Debugging Superpowers
Unleash the power of session replay to reproduce bugs and track user frustrations. Get complete visibility into your frontend with OpenReplay, the most advanced open-source session replay tool for developers.
