Micro-Interactions using Anime.js

Micro-interactions are small, functional animations that give the user support using visual feedback and displaying changes more clearly. Micro-interactions are brief interactions between the user and the design. Micro-interactions improve the user’s experience with the design when they are carefully thought out. When they’re poorly made, the experience suffers: something you do not want for your users.
Micro-Interactions are just like other interactions with gadgets; they’re utilized to give users meaningful feedback because they must always be aware of the results of their actions. People tend to anticipate what will happen when they click a button, scroll down a page, add something to their cart, or swipe their credit card.
In this article, we will look at micro-interactions using Anime.js, but let’s first review examples of micro-interactions and get a project set up.
What are Micro-Interactions?
Let’s look at some of the beautiful examples of micro-interactions:
- Pull-to-refresh Animation: This type of micro-interaction gives visual feedback to a user whenever a user pulls down to refresh a page or content.
- Digital Alarm: If you have ever set an alarm or timer, I am sure you will be familiar with this micro-interaction.

- Bell Notification: The ****bell notification is one of the most common micro-interactions on the internet. Many applications and websites use this to alert a user whenever a new notification comes in.
-Animated loading screen: Sometimes, users do not have the patience to wait for a site to load for more than 2 seconds. With animated loading screens, users can be entertained and engaged while waiting for the site to load.
Setting up Project files
To get started with our project, we first need to clone our project starter repo. To do this, you have to run the following command on your terminal:
git clone https://github.com/wrongakram/micro-interactions-docket.gitOnce you are done cloning the repo, the next step is to open up the project directory on your code editor using the code . command if you use VS Code. Now run the `npm i’ to install all the dependencies we need to get our project up and running.
The next step is to run the npm run dev command to get started on our project on the http://localhost:1234 server. After running the project on localhost, you will notice that the project is responsive. But we need the starter code for our project, and we do not want the final branch yet. To get our starter project, you have to run the following command on your code editor terminal:
git checkout starter
git status
git checkout starter -f
Once you have done that, run the command npm run dev to start the project again. The project will no longer be responsive as we have now switched to the starter branch. This is what our project should look like:
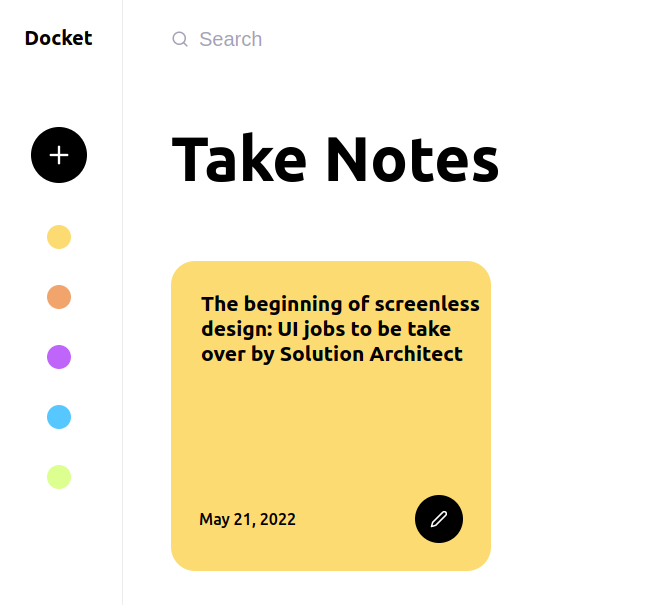
XState
The first thing we want to do is create a scripts folder inside src, and we need to create a state.ts file inside scripts. In this project, we will use XState, a library by David Khourshid that allows us to create JavaScript state machines and state charts. This library works with several concepts:
- Finite State Machines: A finite state machine is a mathematical model of computation. It is an abstract “machine” that can only ever be in one of a finite number of states at once. In response to certain inputs called events, the machine can change from one state to another. A list of the states, the initial state, and the events that cause each transition are used to design a finite state machine.
- Statecharts: A statechart is a state machine that allows states to include additional machines hierarchically. Doing this will remove some of the state machines’ intrinsic limitations.
- Actor Model: the actor model is an old mathematical model of computation that works well with state machines. It states that everything is an “actor” capable of three things: Receiving messages, Sending messages to other actors, and Acting on the messages it receives, such as changing its local state, sending messages to other actors, etc.
Click here to learn more about the concepts of XState.
Going back to our project, let’s go into our state.ts file and edit the code to look like this:
import {Machine} from 'xstate'

type ToggleEvent = {
    type: 'TOGGLE'
}
//State Machine
export const toggleMachine = Machine<ToggleEvent>({
    id: 'toggleButton',
    initial: 'idle',
    states: {
        idle: {
            on: {TOGGLE: "active"}
        },
        inactive: {
            on: {TOGGLE: "active"}
        },
        active: {
            on: {TOGGLE: "inactive"}
        },
    },
})
First, we imported Machine from XState; then, we created a generic type for our TogglEvent, setting type to TOGGLE, and created our state machine.
A better representation of the state machine code above is the XState visualizer, which looks like this:
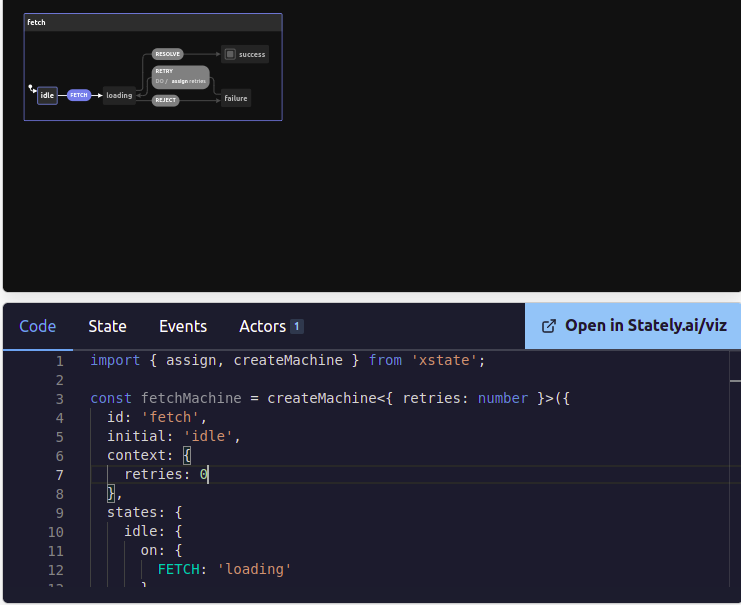
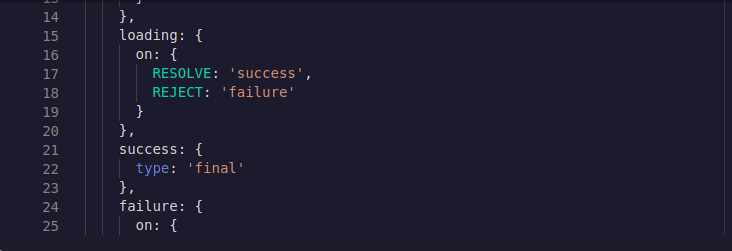
In the example they provided, a fetchMachine fetches specific data. If we look at how the code is broken down, they defined a fetchMachine at the top, setting the id to fetch and the initial state to idle. They also included context, which we didn’t.
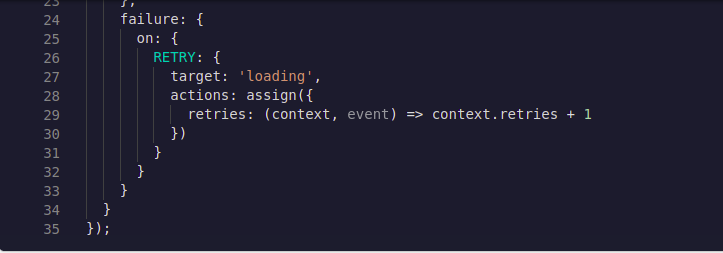
If we look at the visualizer, which looks like a diagram, we are currently in an idle state. If we click on fetch, it will update our state to loading, where we have two options: resolve or reject. If we resolve it now, it will set us to the success state, ending our state machine cycle. If it rejects our request, it will then move to the failure state. Here we have two options: either retry or assign the retry context.
We copied and pasted our state machine into the XState visualizer, then clicked on Visualize to get the result in the image below:
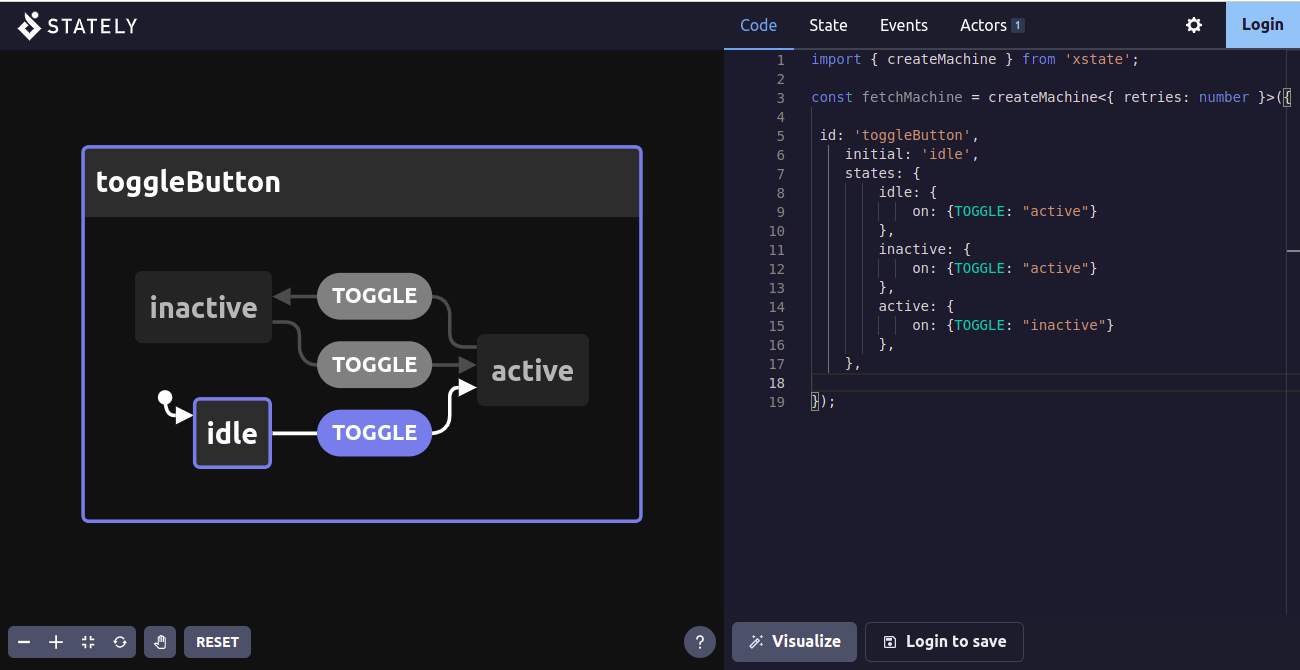
This is how our state machine operates. First, it is set to idle; if we toggle our button, it will become active. Once it is active and we toggle our button, it will become inactive. Now, from inactive, it can only become active, and now we are stuck in this constant loop, jumping from inactive and active all the time.
We are using the idle state because we don’t want any animations to occur on page load, and we only want to use it specifically if it’s inactive or active.
Going back to our project, let us go into our app.ts file and edit the code to look like this:
import {interpret} from "xstate";
import {toggleMachine} from "./scripts/state";


//Variables
const button: HTMLElement = document.querySelector("#addNote");
const toggleService = interpret(toggleMachine);
const toggle = () => {
    button.onclick = () => toggleService.send('TOGGLE')
  };
const init = () => {
    toggleService.onTransition((state) => {
        console.log(state.value);
    })
    .start();
    toggle()
}
init();
Here we created the variables for our button and our state machine. We also added a toggle function to toggle our state. An event listener was added to our toggle function, then we used the toggleService.send method, which allows us to define a transition of our next state, then we passed in our TOGGLE. To use our toggle function, we added it to our initialize function. Then we did the console.log(state.value); which will allow us to preview our project on our browser console.
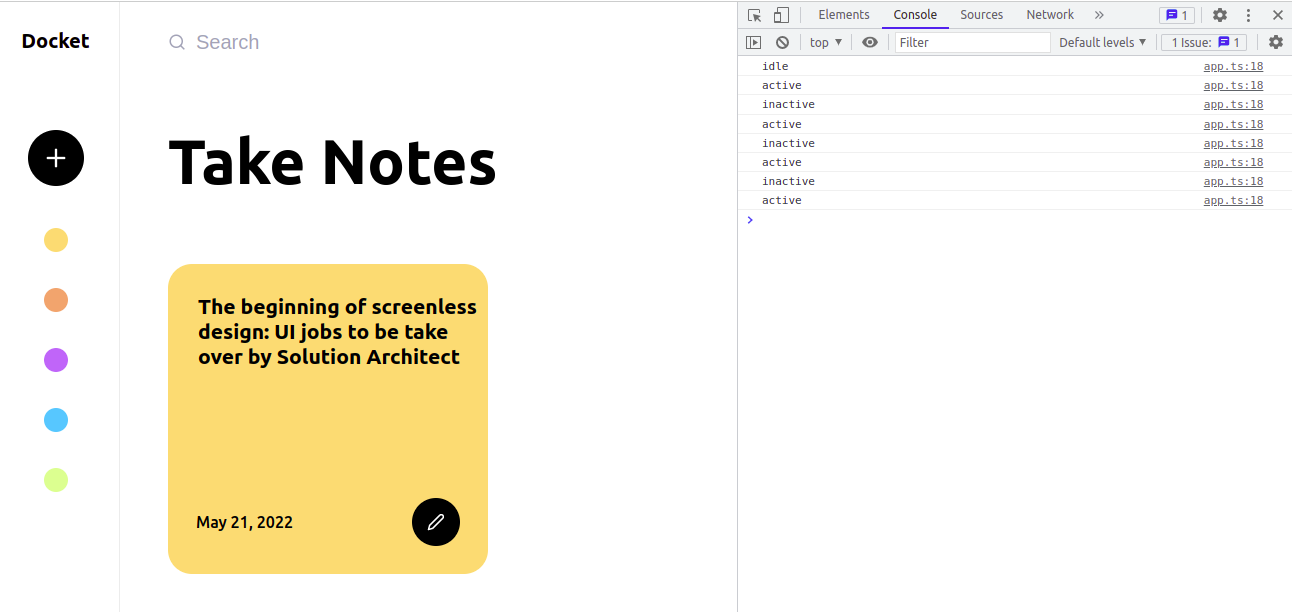
As you can see on the console, our initial state is set to idle, and if we click on the plus button on the left, it will switch to active. Click it again, and it will switch to inactive; if you keep clicking, it will keep changing from active to inactive, and so on.
SVG Filters
In this section, we will rely on SVG filters to create the wobble effect in our animation. According to MDN:
The
filterSVG element defines a custom filter effect by grouping atomic filter primitives. It is never rendered itself, but must be used by thefilterattribute on SVG elements, or thefilter CSSproperty for SVG/HTML elements.
In our index.html file, we add an SVG between our Nav and Header:
<!-- SVG Filter -->
<svg xmlns="http://www.w3.org/2000/svg" version="1.1">
<defs>
  <filter id="gooey-effect">
    <feGaussianBlur
      in="SourceGraphic"
      stdDeviation="10"
      result="blur"
    />
    <feColorMatrix
      in="blur"
      mode="matrix"
      values="1 0 0 0 0  0 1 0 0 0  0 0 1 0 0  0 0 0 20 -9"
      result="gooey-effect"
    />
    <feComposite
      in="SourceGraphic"
      in2="gooey-effect"
      operator="atop"
    />
  </filter>
</defs>
</svg>
Inside our SVG, we used the defs element, which is used to store graphical objects that will be used at a later time. It will only return the objects if we reference them. We also added an important filter effect, the [feColorMatrix](https://developer.mozilla.org/en-US/docs/Web/SVG/Element/feColorMatrix). When working with color manipulation, the feColorMatrix is one of the best options.
Note: You can read this article to learn more about the feColorMatrix.
What we want to do now is edit the size of our selectors because when we added the filters, the size of our elements shifted a bit. Let us edit our nav.scss like this:
//nav.scss

.note-selectors {
  display: flex;
  justify-content: center;
  position: relative;
  z-index: 10;
  margin-top: -24px;
  .selector {
    height: 32px;
    width: 32px;
    margin: 0px auto;
    border-radius: 100%;
    position: absolute;
    top: -20px;
    opacity: 0;
We switched our selectors height and width to 32px. Before we start animating, we must prepare our CSS for the selectors.
We want to hide all those selectors behind the plus button. To do this, we changed the margin-top to -24px. This is what our project now looks like:
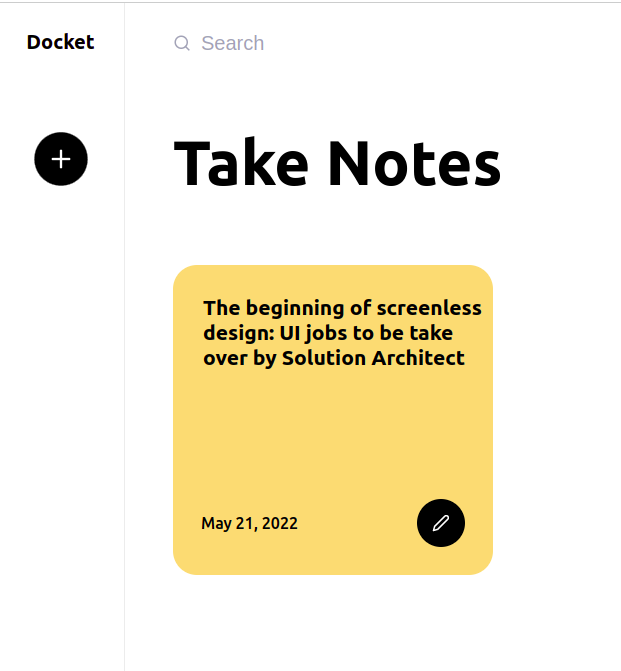
The selectors are now hiding behind the plus button.
Open Source Session Replay
OpenReplay is an open-source, session replay suite that lets you see what users do on your web app, helping you troubleshoot issues faster. OpenReplay is self-hosted for full control over your data.

Start enjoying your debugging experience - start using OpenReplay for free.
Animations (Anime.js)
Anime.js is a lightweight JavaScript animation library with a simple yet powerful API. It functions with DOM attributes, JavaScript objects, SVG, and CSS properties. With Anime.js, you can create simple animations that include the back-and-forth movement of objects or more complex animations that involve changing the appearance of a component through an action. Timelines, where you can create an animated chain of events, are another feature supported by anime.js. When showing multiple events at once, this is quite helpful.
The library has a basic API that allows developers to animate anything. Let’s look at some of its features:
- CSS Properties: With the help of Anime.js, we can animate multiple CSS values for various target elements, including color, width, and height.
- Animating SVG: Even SVG elements can be animated using Anime.js. We must only adhere to the requirement that the attribute values remain numerical. Using numbers makes it reasonably simple to animate some fantastic things that might appear difficult with standard SVG properties.
- CSS Conversion: Anime.js can be used to animate various CSS transition properties. Use
[translateX](https://developer.mozilla.org/en-US/docs/Web/CSS/transform-function/translateX)with[translateY](https://developer.mozilla.org/en-US/docs/Web/CSS/transform-function/translateY)properties and an axis centered to X and Y can be used to accomplish this.
Let’s go to our app.ts file in our project files, where we have already created the toggle state using XState. What we need to do next is use Anime.js to start animating our project. In our app.ts file, let us edit the code to look like this:
import {interpret} from "xstate";
import {toggleMachine} from "./scripts/state";
//Anime.js
import anime from "animejs/lib/anime.es.js";
//Variables
const button: HTMLElement = document.querySelector("#addNote");
const toggleService = interpret(toggleMachine);
const toggle = () => {
    button.onclick = () => toggleService.send('TOGGLE')
  };
  const buttonDisabled = (btnStatus : boolean) => {
    if(btnStatus) {
        button.setAttribute("disabled", "");
    }else {
        button.removeAttribute("disabled");
    }
  };
const animate = (status: any) => {
    const tl = anime.timeline();
    if(status === "active") {
        buttonDisabled(true);
        tl.add({
            targets: button,
            translateY: [0,-12,0],
            scale: [1,.85,1],
            rotate: 316,
            duration: 600,
            easing: "easeInOutSine",
        })
        .add(
            {
            targets: '.note-selectors .first',
            translateY: [0, 80],
            duration: 3200,
            scaleY: [1.8,1],
        },

        "-=400"

        )
        .add(
            {
            targets: '.note-selectors .other',
            translateY: function(el) {
                return [el.getAttribute("data-from"), el.getAttribute("data-to")];
            },
          scaleY: [0, 1],
          duration: 1600,
          opacity: {
            value: 1,
            duration: 10,
          },
          delay: anime.stagger(240),
          complete: function() {
            buttonDisabled(false);
          },
        },
          "-=2600"

          );
    }  else if (status === "inactive") {
        buttonDisabled(true);
        tl.add({
          targets: button,
          rotate: 0,
          duration: 600,
          easing: "easeInOutSine",
        }).add(
          {
            targets: ".note-selectors .selector",
            translateY: function (el) {
              return [el.getAttribute("data-to"), 0];
            },
            duration: 400,
            delay: anime.stagger(60),
            easing: "easeInOutSine",
            complete: function () {
              buttonDisabled(false);
            },
          },
          "-=400"
        );
      }
    };

const init = () => {
    toggleService.onTransition((state) => {
        console.log(state.value);
        animate(state.value);
    })
    .start();
    toggle();
};
init();
To get started with Anime.js, the first thing you need to do is run the following command:
npm install animejs --saveIn our code, the first thing we did was import anime from anime.js, and then we created a new function called animate where we declared a variable of tl, anime.timeline. The anime.timeline allows us to create a new timeline from the anime library. We also have our init function, where we passed in the state.value to our animate function. We also checked if our status is active; if yes, then run some animations, and if inactive, execute different types of animation.
The .note-selectors .first targets the first selector, while the .note-selectors .other targets every other selector except the first one. Let’s go into our index.html and create the data-from and data-to attributes:
</div>
  <div class="note-selectors">
    <div class="selector first"
    data-from="0"
    data-to="80"
    ></div>
    <div
    class="selector second other"
    data-from="100"
    data-to="140"
    ></div>
    <div
    class="selector third other"
    data-from="160"
    data-to="200"
    ></div>
    <div
    class="selector fourth other"
    data-from="220"
    data-to="260"
    ></div>
    <div
    class="selector fifth other"
    data-from="280"
    data-to="320"
    ></div>
</div>
Once we run our project using the npm run dev comma, this is the practical result:
We now have a beautiful micro-interaction. When we click the plus button, we see our selectors beautifully “wobbling” down.
Conclusion
This article taught us how to create a beautiful micro-interaction using tools like XState, SVG Filters, and Anime.js. With these tools and libraries, you can create micro-interactions on your project to improve user experience.
Link to GitHub.
A TIP FROM THE EDITOR: For a different approach to animations, don’t miss our How to Add Animations with React Transition Group article.