When working with full-stack applications, we often have to wait for the backend APIs to build the needed endpoints, affecting productivity and project timelines. Mocking API will solve this problem, and we can build complete front-end features even if the API does not exist.
In this tutorial, we will build a simple “phone book” React application to show how we work with Mirage mock API.
What is Mirage?
Mirage is an API mocking library that lets you create the backend APIs with seed data.
Unlike other mocking libraries, Mirage lets you recreate dynamic scenarios, which are only possible on the production server.
Mirage creates a fake server that runs in the client and can be used for both development and testing (unit and End to End).
Some of the best features of Mirage Includes
- Routes to handle HTTP requests
- A database and models for storing data and defining relationships
- Factories and fixtures for stubbing data, and
- Serializers for formatting HTTP responses
Alright, now we have some idea of what Mirage is and its features, let’s build a simple application to see things in action.
Creating our React application
Create a new folder, phone_book, and open it in your VSCode editor.
mkdir phone_bookAfter opening the phone_book folder, now open the terminal and run,
npx create-react-app .The above command will create a react application in the same folder.
Now we have the basic setup ready, let’s set up Mirage.
Creating our Mirage Server
Mirage is a third-party library, so we will have to install it in our application either by npm or yarn.
# Using npm
npm install --save-dev miragejs

# Using Yarn
yarn add --dev miragejs
We have successfully installed Mirage into our application; now, we have to create a server that will handle the routing of our API endpoints.
Create a server.js file in the src folder. This file will have all the codes for our Mock API.
# src/server.js

touch src/server.js
Mirage provides a method createServer to create a fake server. It accepts a bunch of configs to create a fake server. In this tutorial, we will be using a few of them.
- environment
- namespace
- routes
- seeds
- models
# src/server.js

import { createServer, Model } from "miragejs";

const DEFAULT_CONFIG = {
  environment: "development",
  namespace: "api",
};

export const makeServer = ({ environment, namespace } = DEFAULT_CONFIG) => {
  return createServer({
    environment,
    namespace,
    models: {
      contact: Model,
    },
  });
};
Here we are creating a fake server with a development environment and api namespace. We are also adding one model, contact, which will have the data structure of the phone book contacts.
Mirage lets you create a server in different environments, so if you are in development mode, you can pass the environment as development to load the server with some seed data.
You can pass the environment as a test for testing, so it will not load the seed data in the tests.
You can create data according to your test case.
Alright, we have a basic setup for the server. The next step is to create seeds and routes.
Creating API routes and seed data
We will use the fakerjs package to create seeds. Install it by running:
npm install @faker-js/faker --save-dev

#OR

yarn add @faker-js/faker --dev
Our phone book application will need the following routes:
- GET
/api/contactsto fetch all contacts records - GET
/api/contacts/:idto fetch a single contact record - POST
/api/contactsto create a new contact record - PATCH
/api/contacts/:idto update an existing contact record - DELETE
/api/contacts/:idto remove an existing contact record
After adding seeds and routes, server.js will be like this.
# src/server.js

import { createServer, Model } from 'miragejs';
import { faker } from '@faker-js/faker';

const DEFAULT_CONFIG = {
  environment: 'development',
  namespace: 'api',
};

export const makeServer = ({ environment, namespace } = DEFAULT_CONFIG) => {
  return createServer({
    environment,

    namespace,

    models: {
      contact: Model,
    },

    seeds(server) {
      const LIST_LENGTH = 5;

      // loop to create a seed data
      for (let index = 1; index <= LIST_LENGTH; index++) {
        server.create('contact', {
          name: faker.name.fullName(),
          number: faker.phone.number(),
        });
      }
    },

    routes() {
      // fetch all contacts records
      this.get('/contacts', (schema) => {
        return schema.contacts.all();
      });

      // fetch a single contact record
      this.get('/contacts/:id', (schema, request) => {
        const id = request.params.id;

        return schema.contacts.find(id);
      });

      // create a new contact record
      this.post('/contacts', (schema, request) => {
        const attrs = JSON.parse(request.requestBody);

        return schema.contacts.create(attrs);
      });

      // update an existing contact record
      this.patch('/contacts/:id', (schema, request) => {
        const newAttrs = JSON.parse(request.requestBody);
        const id = request.params.id;
        const contact = schema.contacts.find(id);

        return contact.update(newAttrs);
      });

      // remove an existing contact record
      this.delete('/contacts/:id', (schema, request) => {
        const id = request.params.id;

        return schema.contacts.find(id).destroy();
      });
    },
  });
};
Congratulations, our mock server is ready with initial data and routes. Let’s call the makeServer function in index.js to initiate the server.
Update the index.js with the below code.
# src/index.js

import React from 'react';
import ReactDOM from 'react-dom/client';
import './index.css';
import App from './App';
import { makeServer } from './server';

if (
  process.env.NODE_ENV === 'development' &&
  typeof makeServer === 'function'
) {
  makeServer();
}

const root = ReactDOM.createRoot(document.getElementById('root'));
root.render(
  <React.StrictMode>
    <App />
  </React.StrictMode>
);
Here we are checking if the environment is development and makeServer is a type of function; only then will we call the makeServer function.
All right, we have a server running. In the next section, we will set up the front end and access the mock APIs.
Session Replay for Developers
Uncover frustrations, understand bugs and fix slowdowns like never before with OpenReplay — an open-source session replay tool for developers. Self-host it in minutes, and have complete control over your customer data. Check our GitHub repo and join the thousands of developers in our community.
Setting up the front end
We will use the Chakra UI package for the front end. Chakra UI is a simple, modular and accessible component library that gives you the building blocks you need to build your React applications.
Install Chakra UI and its dependencies by running
npm i @chakra-ui/react @emotion/react @emotion/styled framer-motion

# OR

yarn add @chakra-ui/react @emotion/react @emotion/styled framer-motion
Start the server by running,
npm start

# OR

yarn start
Then visit the http://localhost:3000/ to view the changes.
Our phone book application will have the following features:
- Users can view the contact list
- Users can create the new contact
- Users can edit the contact
- Users can delete the contact
Listing all the contacts
Here in the App.jsx we are fetching the contact list from the /api/contacts endpoint and storing it in the contacts state.
...
const fetchContacts = useCallback(async () => {
    try {
      setIsLoading(true);
      const response = await fetch('/api/contacts');
      const contactList = await response.json();

      setContacts(contactList.contacts);
    } catch (error) {
      toast({
        title: 'Error while fetching contacts',
        description: error,
        status: 'error',
        duration: 9000,
        isClosable: true,
      });
    } finally {
      setIsLoading(false);
    }
  }, [toast]);
...
We also have the isLoading state, and we will show the loader when data is fetching; once data is fetched ContactList will be rendered.
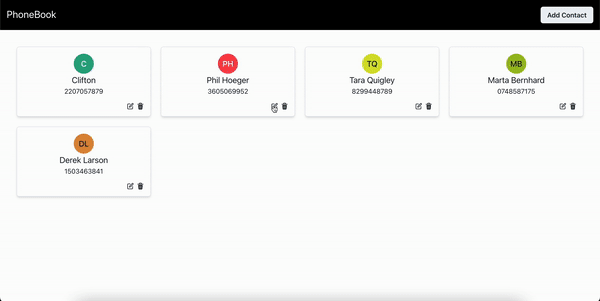
Now start the server, and you will see something like this.
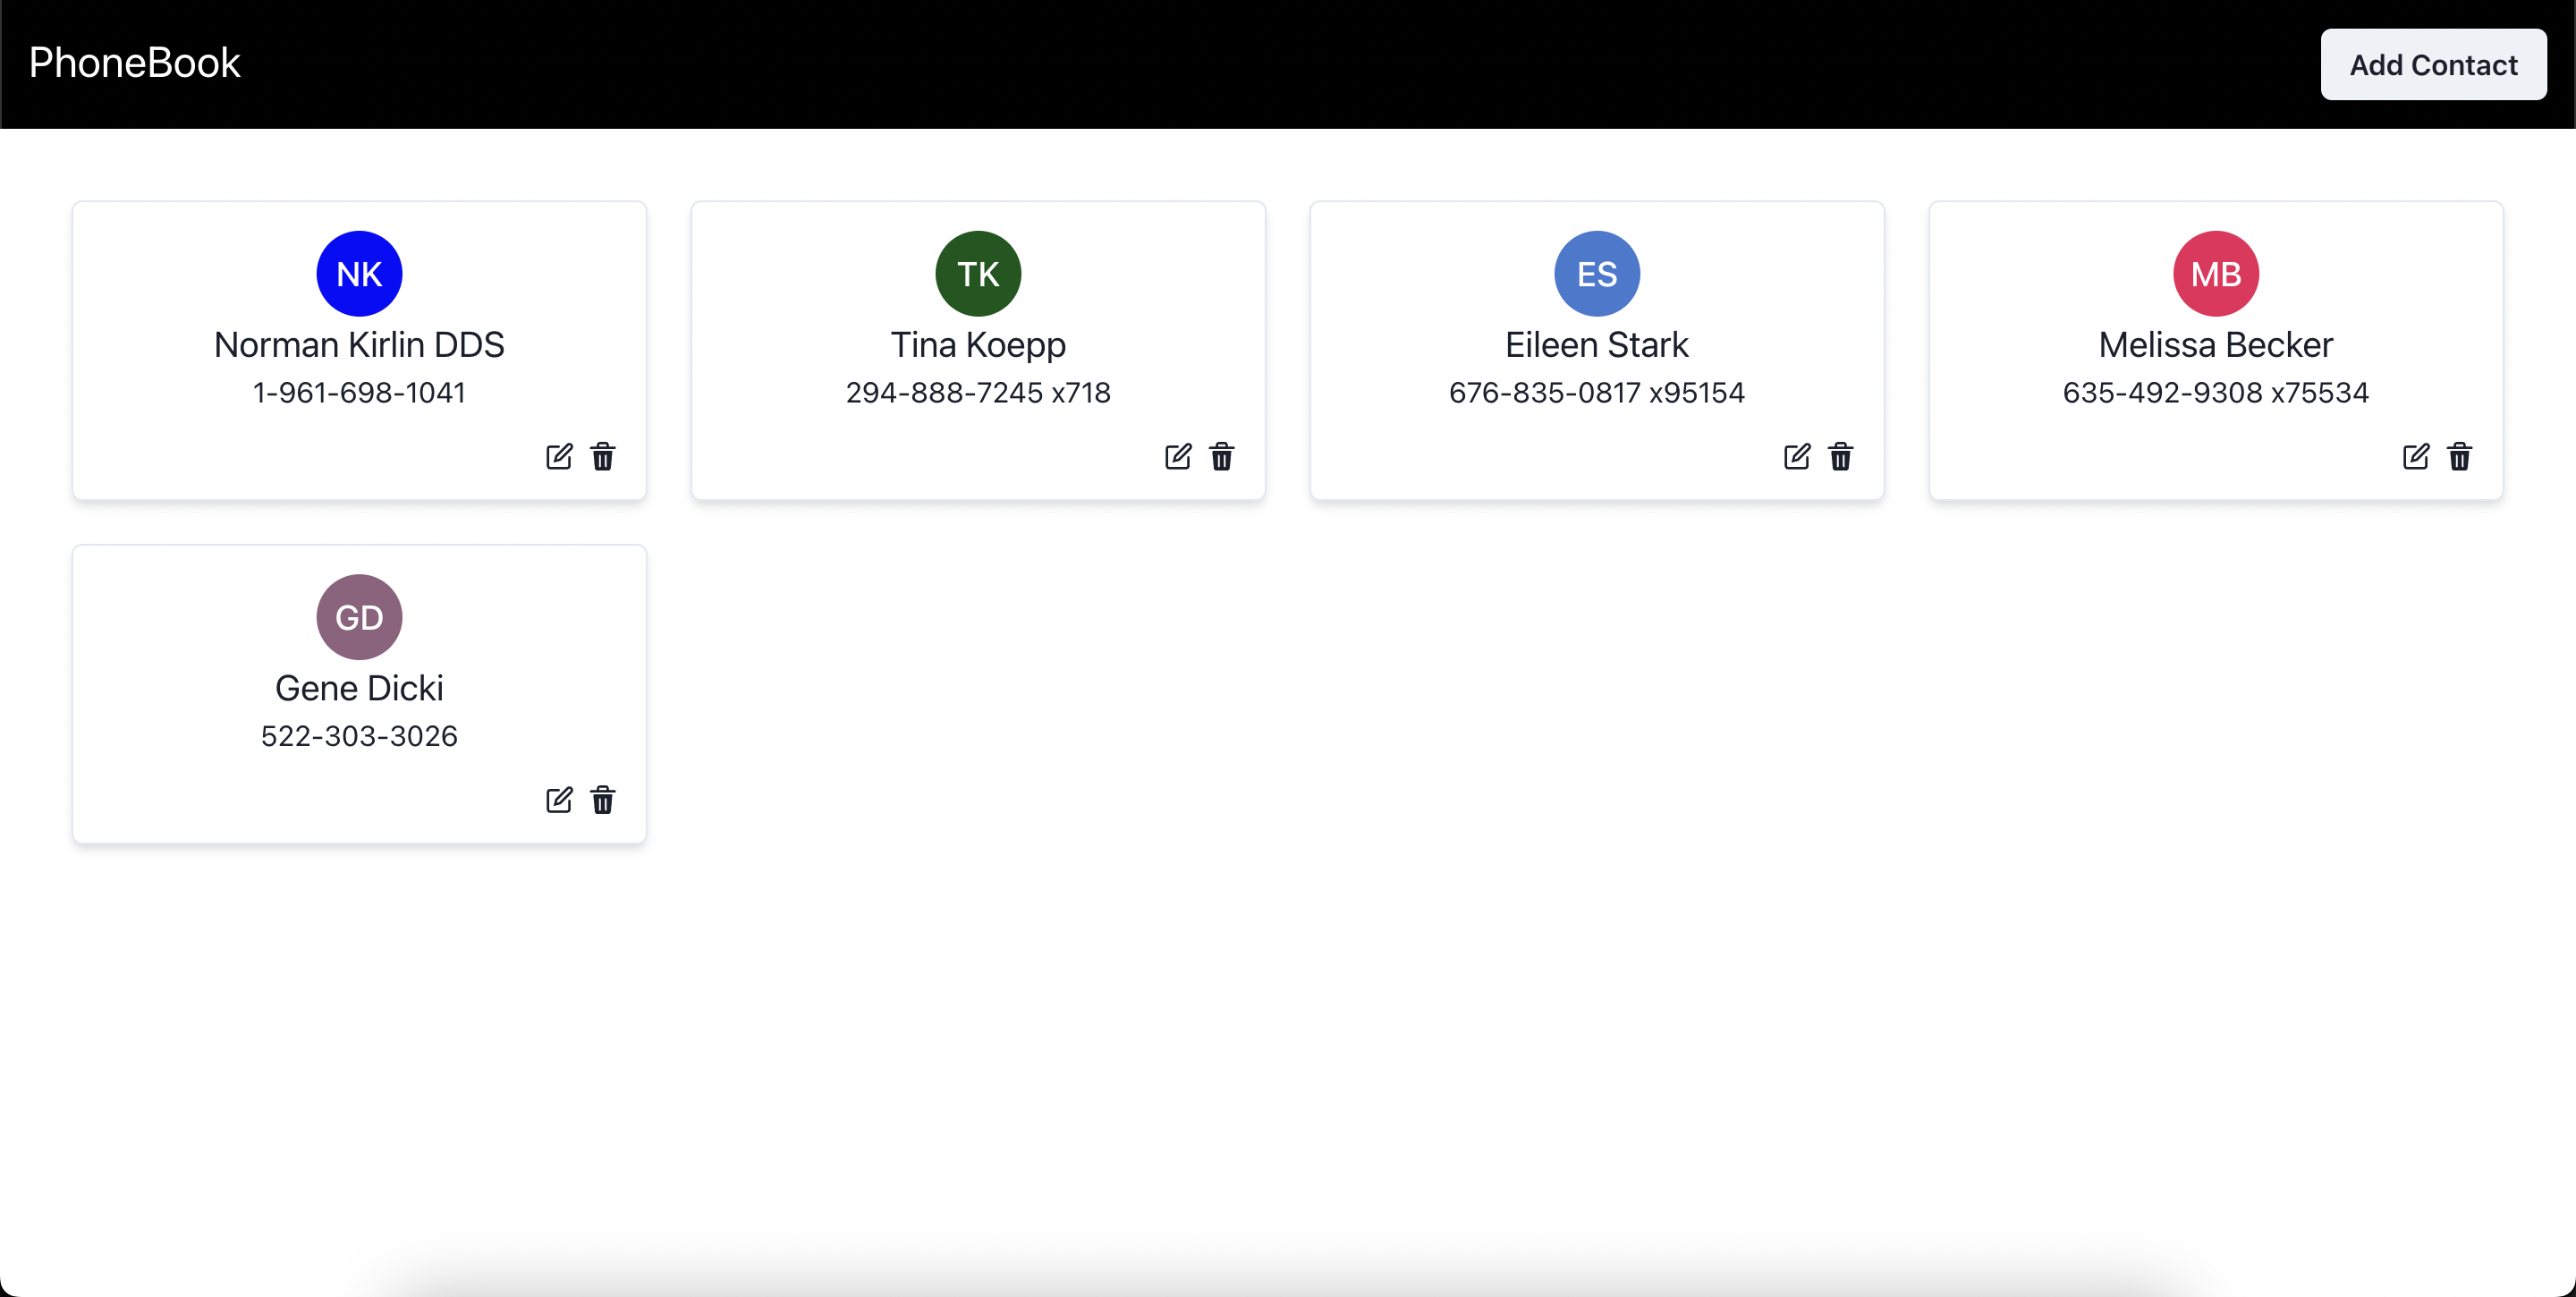
Great, our list view is ready. In the next step, we will create UI for adding new contacts.
Creating a contact
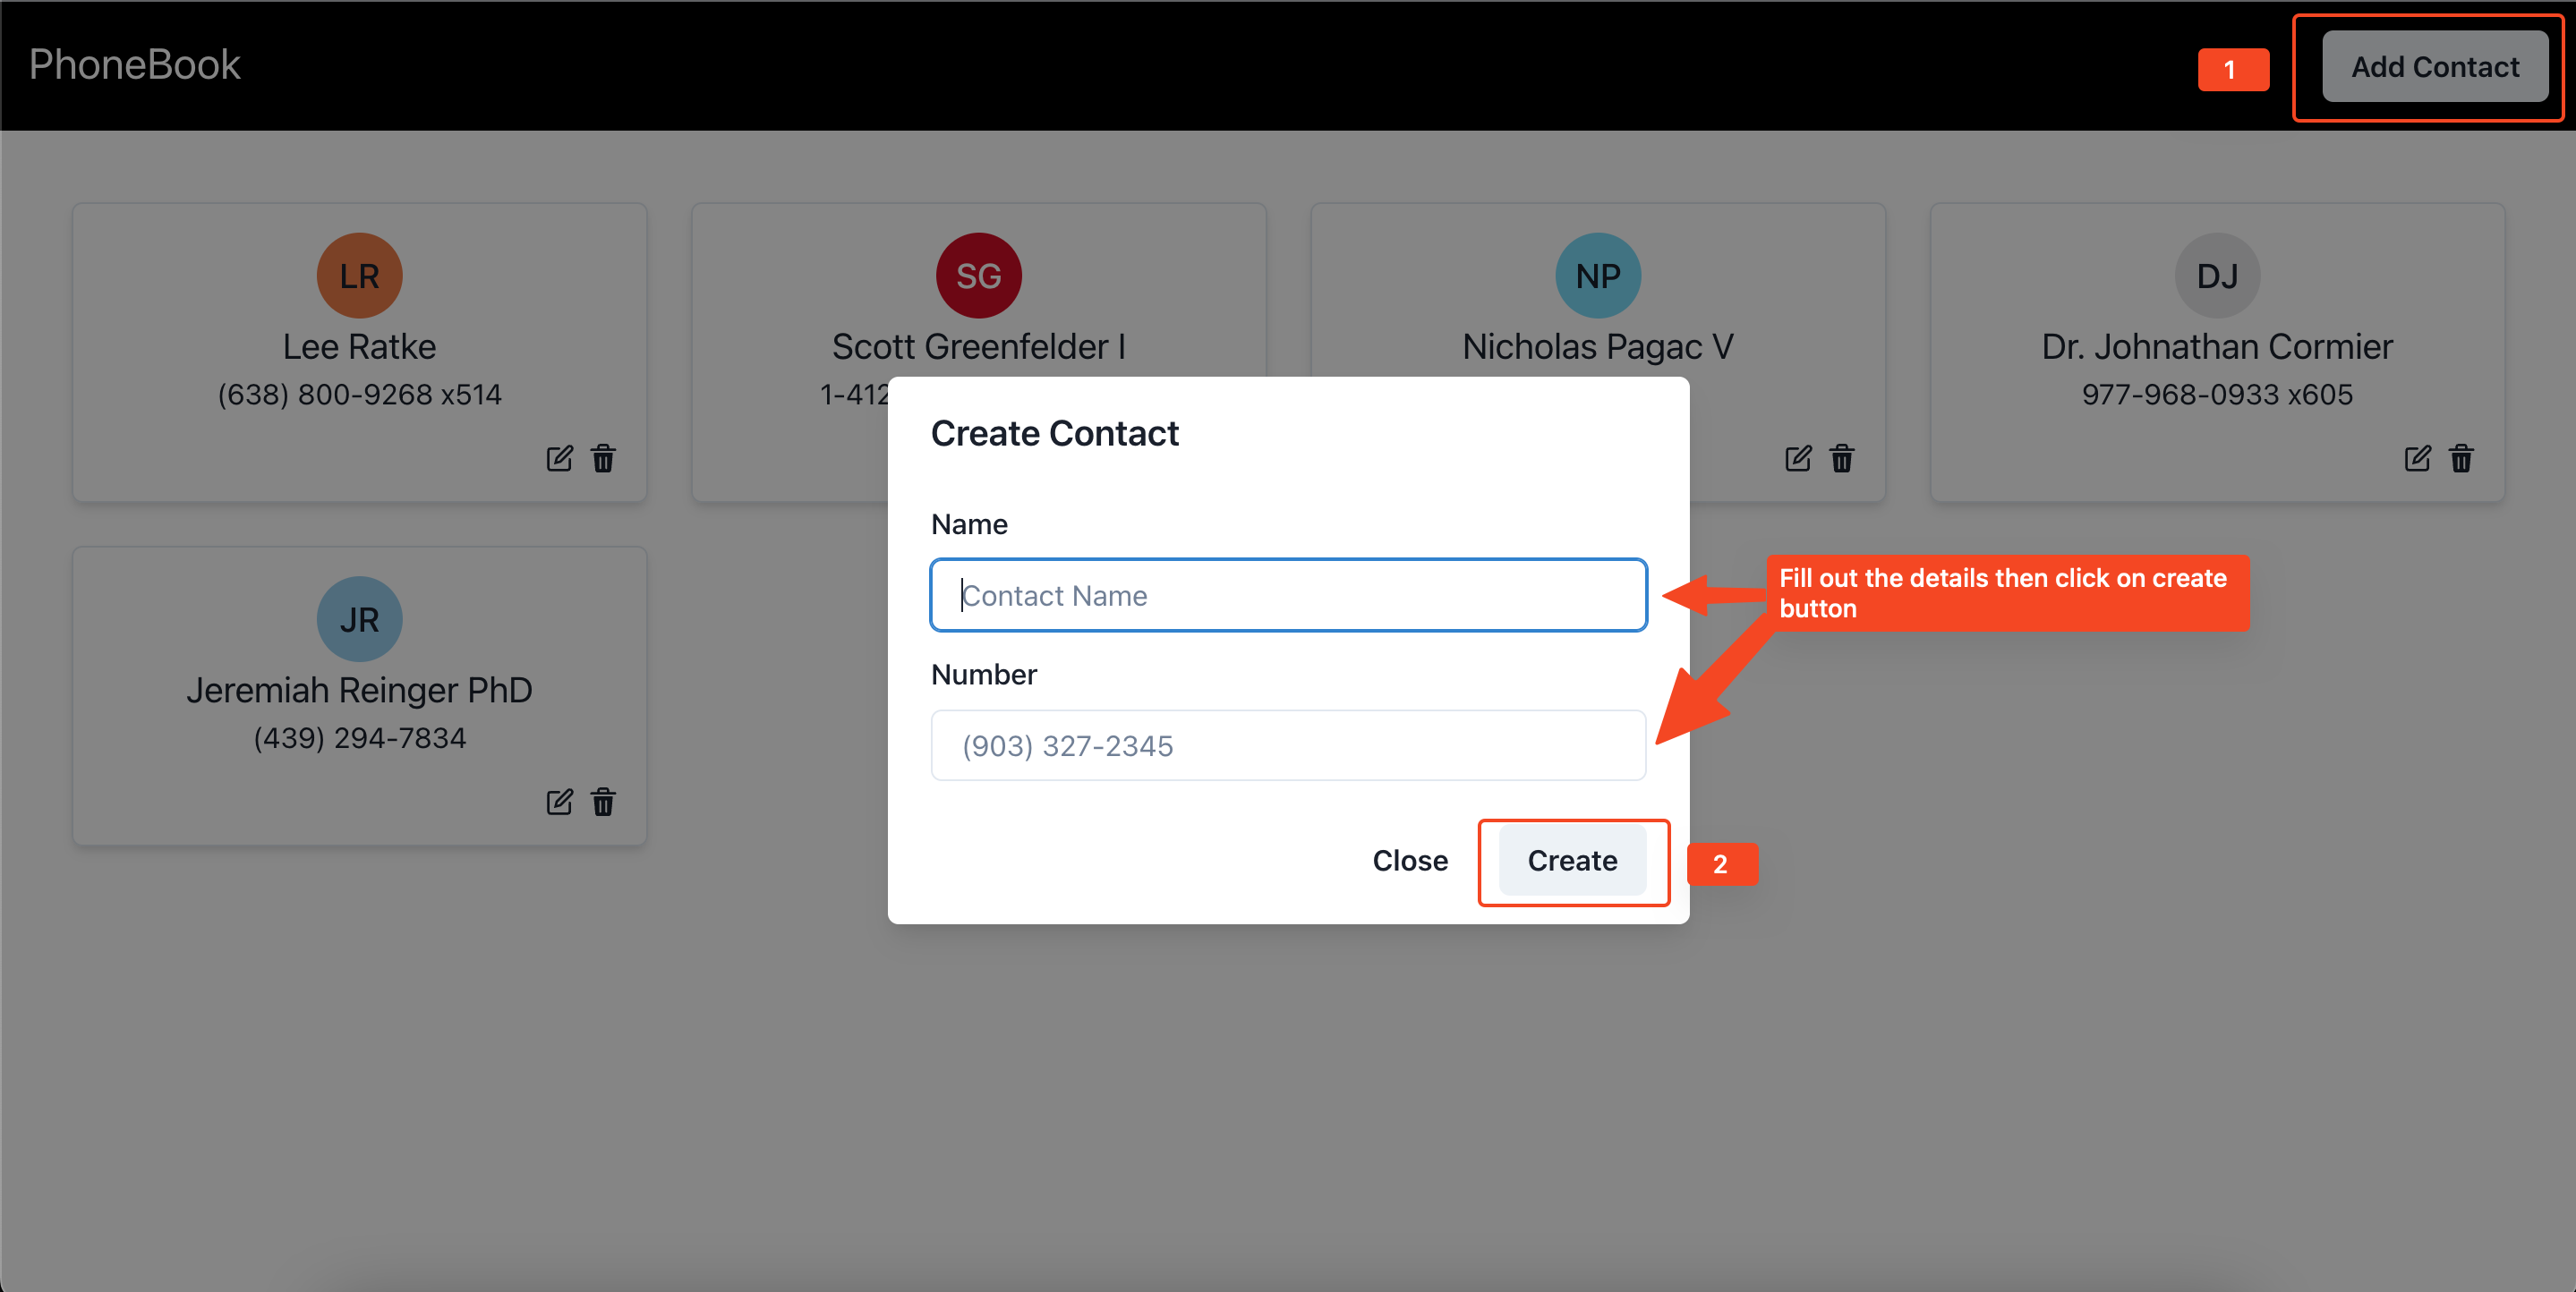
We will create a ContactModal component, and it will handle the create contact flow.
ContactModal will receive two props isOpen and onClose, isOpen will be responsible for showing/hiding the modal and onClose will be responsible for closing the modal when the user clicks on cancel or after contact gets created.
...
const handleCreateContact = async (e) => {
e.preventDefault();
const isValid = Object.values(contactErrors).every(
(value) => value === false
);
if (isValid) {
try {
const response = await fetch('/api/contacts', {
method: 'POST',
body: JSON.stringify(contactData),
});
await response.json();
} catch (error) {
toast({
title: 'Error while creating contact',
description: error,
status: 'error',
duration: 9000,
isClosable: true,
});
} finally {
onClose();
}
} else {
toast({
title: 'Invalid data',
description: 'Name or Number is invalid',
status: 'error',
duration: 9000,
isClosable: true,
});
}
};
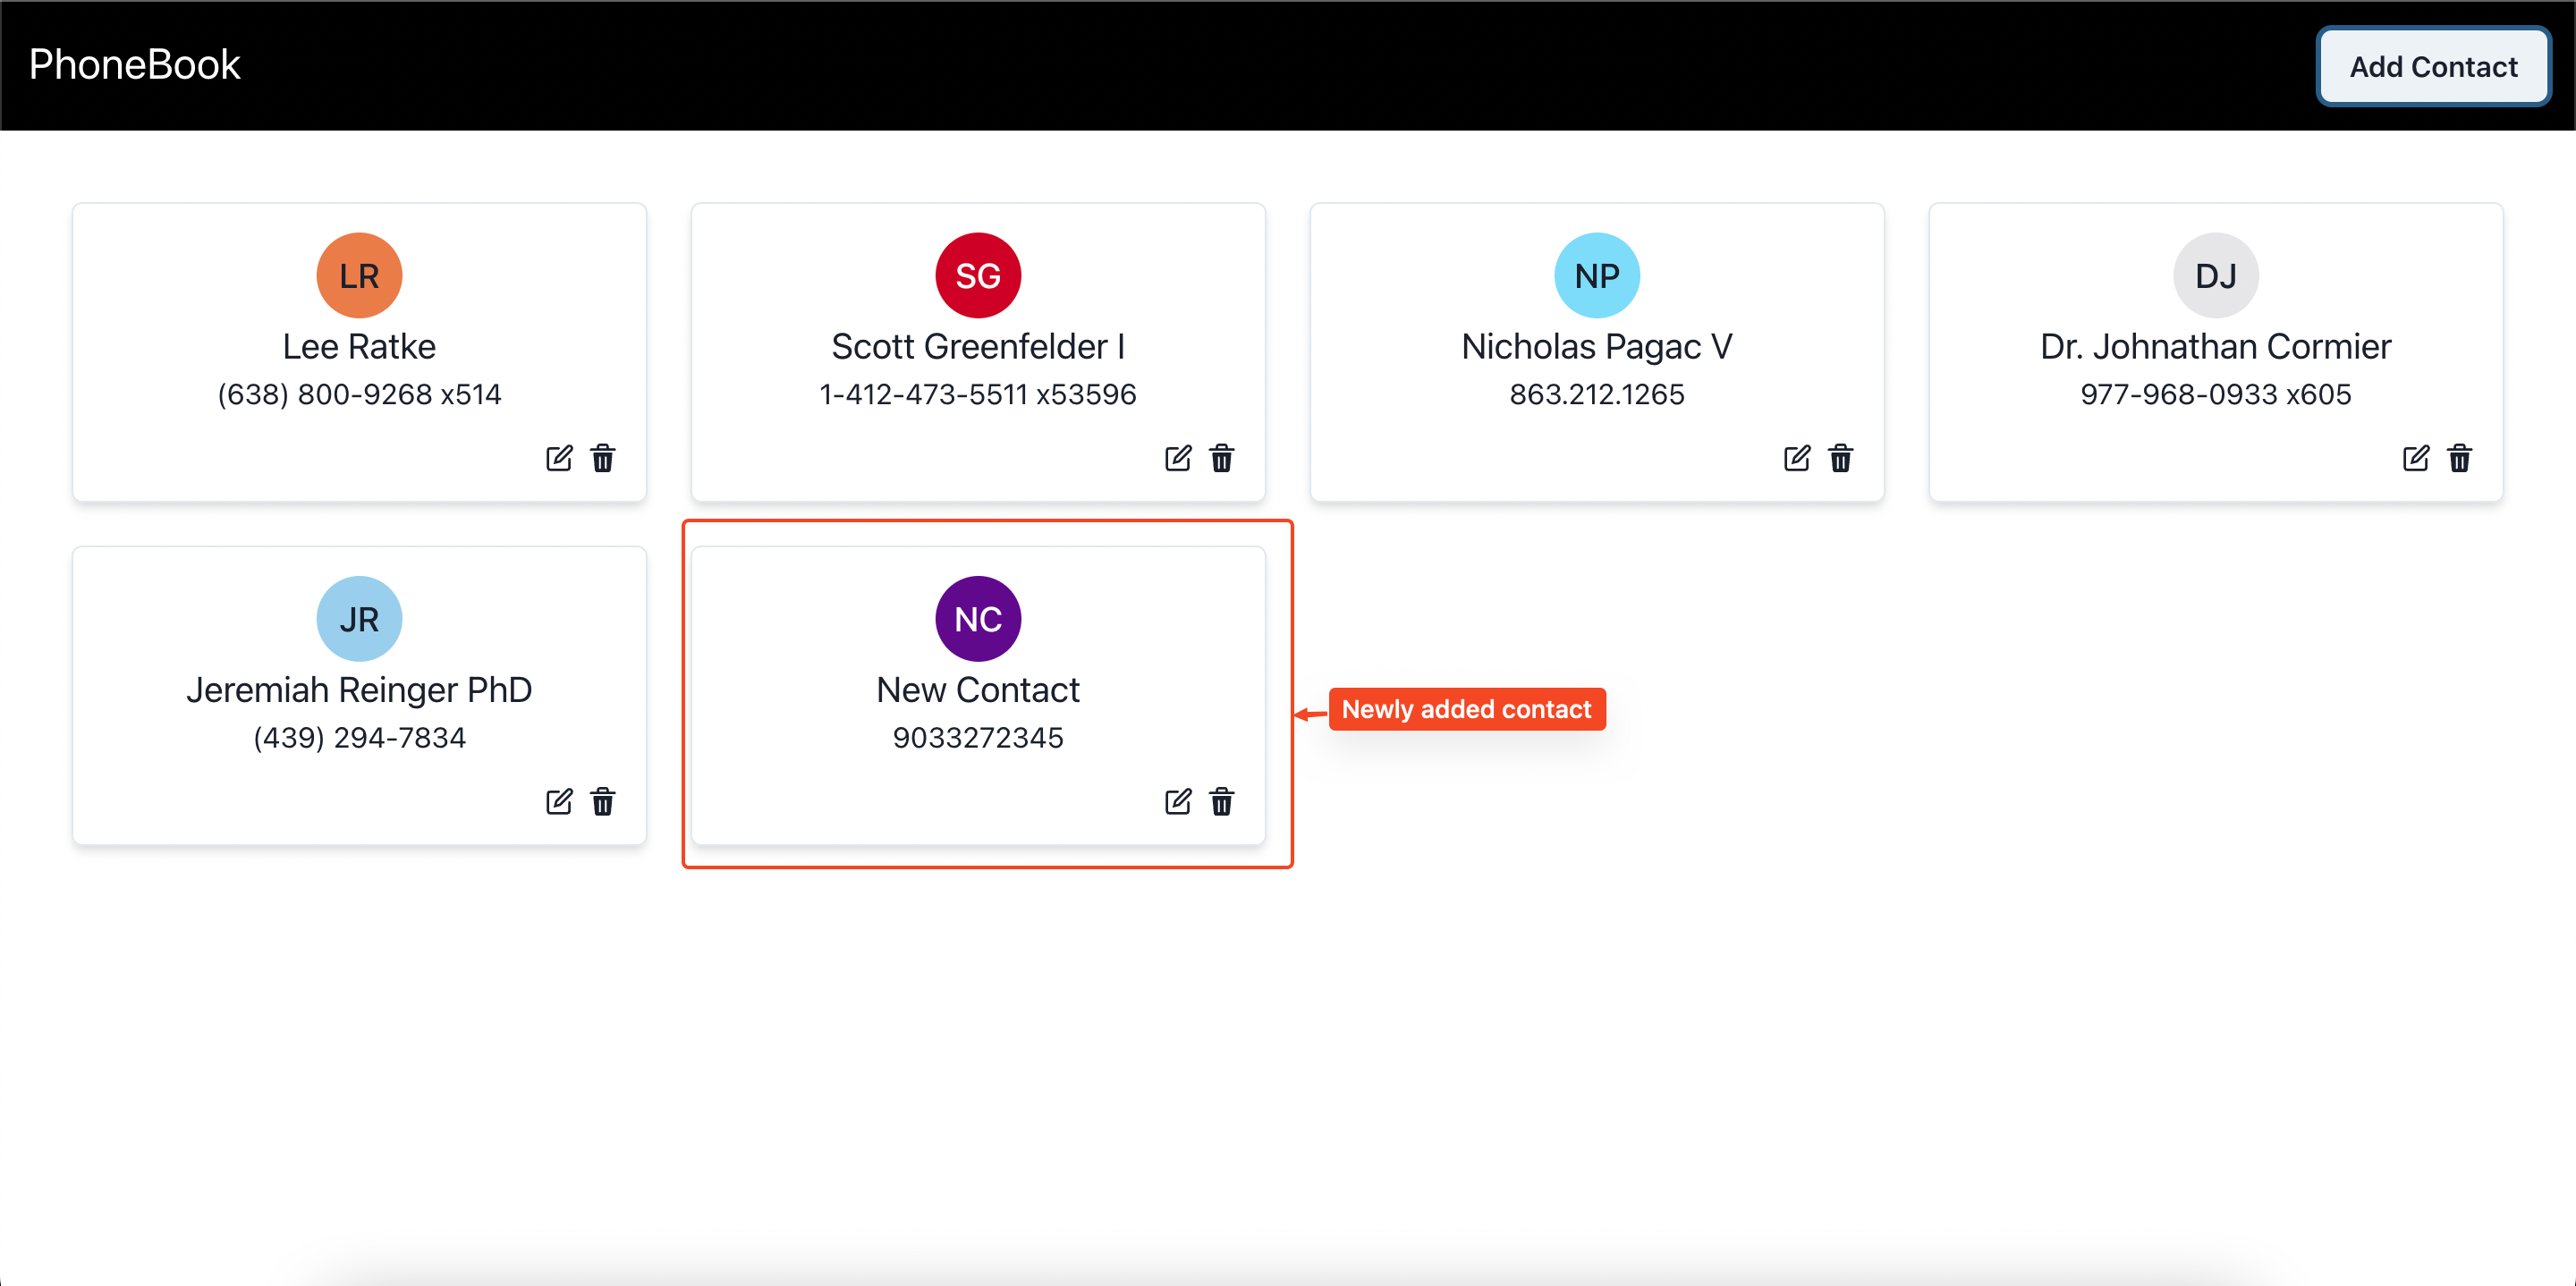
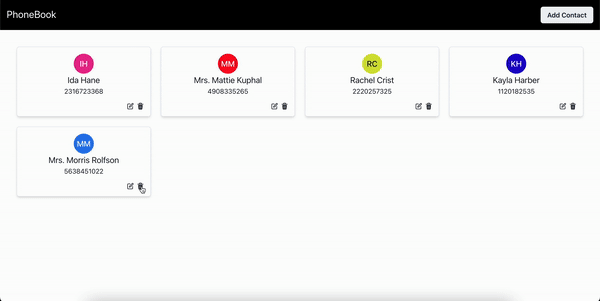
...Let’s try out the create contact flow, click on the Add Contact button, fill out the details, and click on the create button to create the contact.
Updating a contact
We will use the same modal for updating the contact, so the updated ContactModal component will look like this.
Here we have added one more prop, selectedContact, and based on this prop we will show the updated view for the contact.
The handleUpdateContact will be responsible for updating the contact. In this method, we have used the PATCH option to update the contact.
...
const handleUpdateContact = async (e) => {
    e.preventDefault();
    const isValid = Object.values(contactErrors).every(
      (value) => value === false
    );
    if (isValid) {
      try {
        const response = await fetch(`/api/contacts/${selectedContact.id}`, {
          method: 'PATCH',
          body: JSON.stringify(contactData),
        });

        await response.json();
      } catch (error) {
        toast({
          title: 'Error while updating contact',
          description: error,
          status: 'error',
          duration: 9000,
          isClosable: true,
        });
      } finally {
        onClose();
      }
    } else {
      toast({
        title: 'Invalid data',
        description: 'Name or Number is invalid',
        status: 'error',
        duration: 9000,
        isClosable: true,
      });
    }
  };
...
Now go to the browser and try out the update flow.
Deleting a contact
To build the Delete flow, we will need to select the contact id to take that id and make a delete request to delete the contact.
The last step is to pass the required props from the App component to child components and also render the DeleteContactModal when the contact id is selected.
...

const handleDeleteContact = async () => {
    try {
      await fetch(`/api/contacts/${contactId}`, {
        method: 'DELETE',
      });
      onClose();
    } catch (error) {
      toast({
        title: 'Something went wrong!',
        description: 'Error while deleting the contact',
        status: 'error',
        duration: 9000,
        isClosable: true,
      });
    } finally {
      onClose();
    }
  };
...
And that’s it for this topic. Thank you for reading!
Summary
- We have discussed what Mirage is, its features, and what problems Mirage solves.
- We have created a mock server with API routes and Seed Data
- We have built a
phone_bookapplication and used the Mock APIs.
Resources
A TIP FROM THE EDITOR: For a different way to mock APIs for testing, look at our Injecting For Purity article.
Gain Debugging Superpowers
Unleash the power of session replay to reproduce bugs and track user frustrations. Get complete visibility into your frontend with OpenReplay, the most advanced open-source session replay tool for developers.