
Running PostgreSQL, MongoDB, and NestJS concurrently with Docker Compose

Running several databases or other services is needed for development, and using containers and Docker Compose is a way to greatly simplify all the needed configuration and deployment work, as this article will show you.
Docker Compose is a tool that enables you to define and manage numerous containers as one service. You can easily construct and manage complicated applications that need several services with Docker Compose, such as web applications that require a database and a web server. Know more about Docker Compose here.
Running many databases at once can be essential for a variety of reasons. One is scalability, to improve performance and distribute the workload. Another is flexibility because different databases have different strengths and weaknesses. Lastly, for compatibility, because many applications require multiple databases. For example, a single database can be for transactional or ACID-compliant entities; another might be a NoSQL database for analytics. If interested in NoSQL databases, visit this Wikipedia page.
In this tutorial, we will look at how to use Docker-compose to run PostgreSQL and MongoDB services. Find out what PostgreSQL means. Visit their website to learn more about MongoDB. A NestJs server application will also be created, along with a server image and instructions on ways to add it as a service to our container. Visit NestJs here to learn more. We will also use API calls to communicate with the database containers.
As a bonus, we will also interact with our databases using psql, a terminal-based frontend for connecting to PostgreSQL, and mongo shell, an interactive JavaScript interface for MongoDB.
Prerequisites
We must first have the following before we can begin:
- A basic understanding of Docker technology and how it works.
- A basic understanding of Nodejs Server development.
- Docker installed in our local machine. Visit the website to download docker.
- Postman or any HTTP client.
- Basic Experience working with Nestjs. Learn about NestJs on their website.
What is Docker?
Docker is an open-source platform that allows programmers to create, distribute, and run applications inside containers. A container is a small, standalone executable software package with all codes, libraries, and dependencies required to run a program. Containers are very portable and simple to deploy because they are isolated from the host system and one another.
What is Docker Compose?
Multi-container Docker applications can run using Docker Compose. It works by listing the services provided by your application, along with their dependencies and configurations, in a YAML file called a Compose file. Docker Compose uses this file when creating and maintaining the containers, networks, and volumes needed by your application.
An Overview of PostgreSQL and MongoDB Database
PostgreSQL is a relational database management system. It is a freely accessible RDBMS, and it is very well-liked because of its dependability, extensibility, and scalability. PostgreSQL is a database management system that supports many data types, including arrays, JSON, and XML. It is perfect for use cases requiring transactional consistency and uses SQL as its query language. Contrarily, MongoDB is a well-liked NoSQL database management system that uses a document-based data model. It can handle large amounts of unstructured or semi-structured data because it is scalable and adaptable. Moreover, MongoDB offers indexing, ad-hoc searches, aggregate pip, etc.
Importance of Running Multiple Databases Concurrently
Running many databases at the same time has many advantages. One benefit is that it increases performance and scalability by spreading the workload across several databases. Selecting a database for a task is crucial since different databases have different strengths and disadvantages. Using the optimal database for each unique use case is made possible by running numerous databases concurrently.
What is NestJs?
To make calls to our database services, we need a server. For this reason, we will be using NestJs, which is:
“A progressive Node.js framework for building efficient, reliable, and scalable server-side applications.” - Nestjs.com
Creating our Docker-compose file
Because Docker technology is great, we don’t need to install PostgreSQL or MongoDB on our local machine. So, create a folder for our application called postgres-mongodb-nestjs. Now inside it, create a file called docker-compose.yaml and add the following:
# path: ./docker-compose.yaml
version: "3.9"
services:
  postgres:
    image: postgres:13-alpine
    restart: always
    env_file:
      - .env
    environment:
      - POSTGRES_USER=$POSTGRES_USER
      - POSTGRES_PASSWORD:$POSTGRES_PASSWORD
    ports:
      - "$POSTGRES_PORT:$POSTGRES_PORT_DOCKER"

    volumes:
      - postgres_data:/var/lib/postgresql/data
    networks:
      - db_network

  mongo:
    image: mongo:latest
    restart: always
    env_file:
      - .env
    environment:
      - MONGO_INITDB_ROOT_USERNAME:$MONGO_INITDB_ROOT_USERNAME
      - MONGO_INITDB_ROOT_PASSWORD:$MONGO_INITDB_ROOT_PASSWORD
    volumes:
      - mongo_data:/data/db
    networks:
      - db_network

volumes:
  postgres_data:
  mongo_data:

networks:
  db_network:
In the file above:
- Line 3:we specify the version of our Docker-compose file.
- Line 4: for the services, we will run only
postgresandmongoservices. - Lines 5-19: we specify the image for our PostgreSQL. With
image: postgres:13-alpine, we specify the Docker image that will run the PostgreSQL service. In this case, the PostgreSQL 13.0 image based on Alpine Linux.restart:alwayshere means the container should be restarted if it stops.
env_file:
  - .env
The line above specifies that environment variables will load from a file named .env.
environment:
  - POSTGRES_USER=$POSTGRES_USER
  - POSTGRES_PASSWORD:$POSTGRES_PASSWORD
The above specifies the environment variables within the container, the PostgreSQL user, and the PostgreSQL password.
ports:
  - "$POSTGRES_PORT:$POSTGRES_PORT_DOCKER"
The above specifies the ports that the PostgreSQL service will use. $POSTGRES_PORT and $POSTGRES_PORT_DOCKER will be replaced by the values of those environment variables.
volumes:
  - postgres_data:/var/lib/postgresql/data
The above specifies that the PostgreSQL data directory inside the container (/var/lib/postgresql/data) will be mounted as a volume named postgres_data. It will allow the data to persist even if the container is deleted or recreated.
Lastly, we have:
networks:
  - db_network
The above specifies that the PostgreSQL service will be connected to a Docker network named db_network. This allows the service to communicate with other services on the same network.
- Line 21-32: we do the same for our
mongoservice, just as we did for our PosgtesSQL service.
Creating the .env file
Before we start our containers, we need to create a .env file to house our environment variables. Now create the file and add the following:
MONGO_URL=mongodb://127.0.0.1:27017/mongo-postgres

POSTGRES_USER=postgres

POSTGRES_URL=postgresql://postgres:12345@localhost:5432/mongo-postgres?schema=public

POSTGRES_PASSWORD=12345

POSTGRES_PORT_DOCKER=5432

POSTGRES_PORT=5432
In the file above, we specified the URLs of our MongoDB and PostgreSQL databases. We set the ports for our databases and the PostgreSQL user and password.
Spinning Up Our Services
Currently, we have created our Docker-compose file. Now, we need to start our services. Open your terminal and run the following. We have to be sure we are in the command terminal of our project directory, where the docker-compose.yaml file is.
docker compose upNow we should see the two images running in our container:
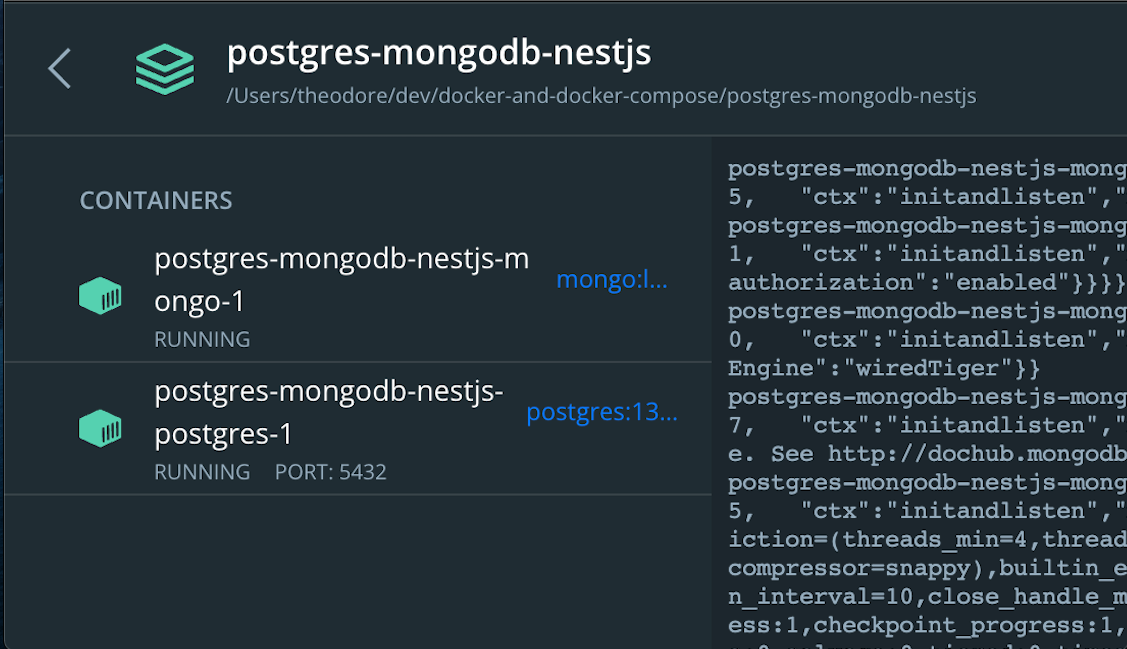
That will be all for now. We will come back later to add our backend service.
Installing NestJs
To communicate with our containers, we need a backend server.
Install the Nestjs CLI globally by running the command below:
npm i -g @nestjs/cliSince we already have a project folder name that houses our Docker-compose file, we do not need to specify a new name for our backend Nestjs server. For this reason, we have to run the command below:
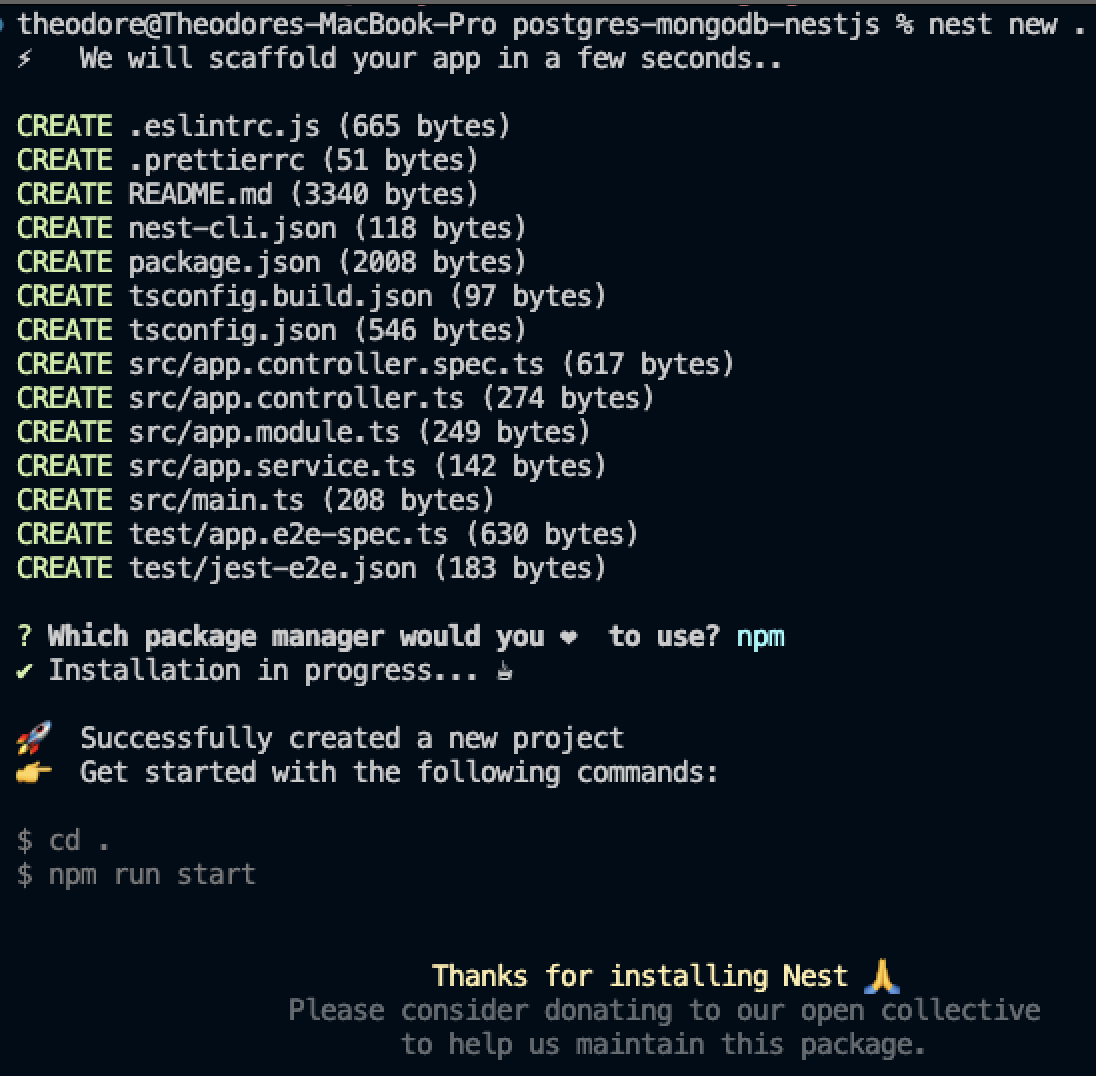
nest new .The command above creates a new NestJS application in our folder.
If creation was successful, we should see the following displayed on our terminal:
Starting our application
Run the command below to start our Nestjs development server.
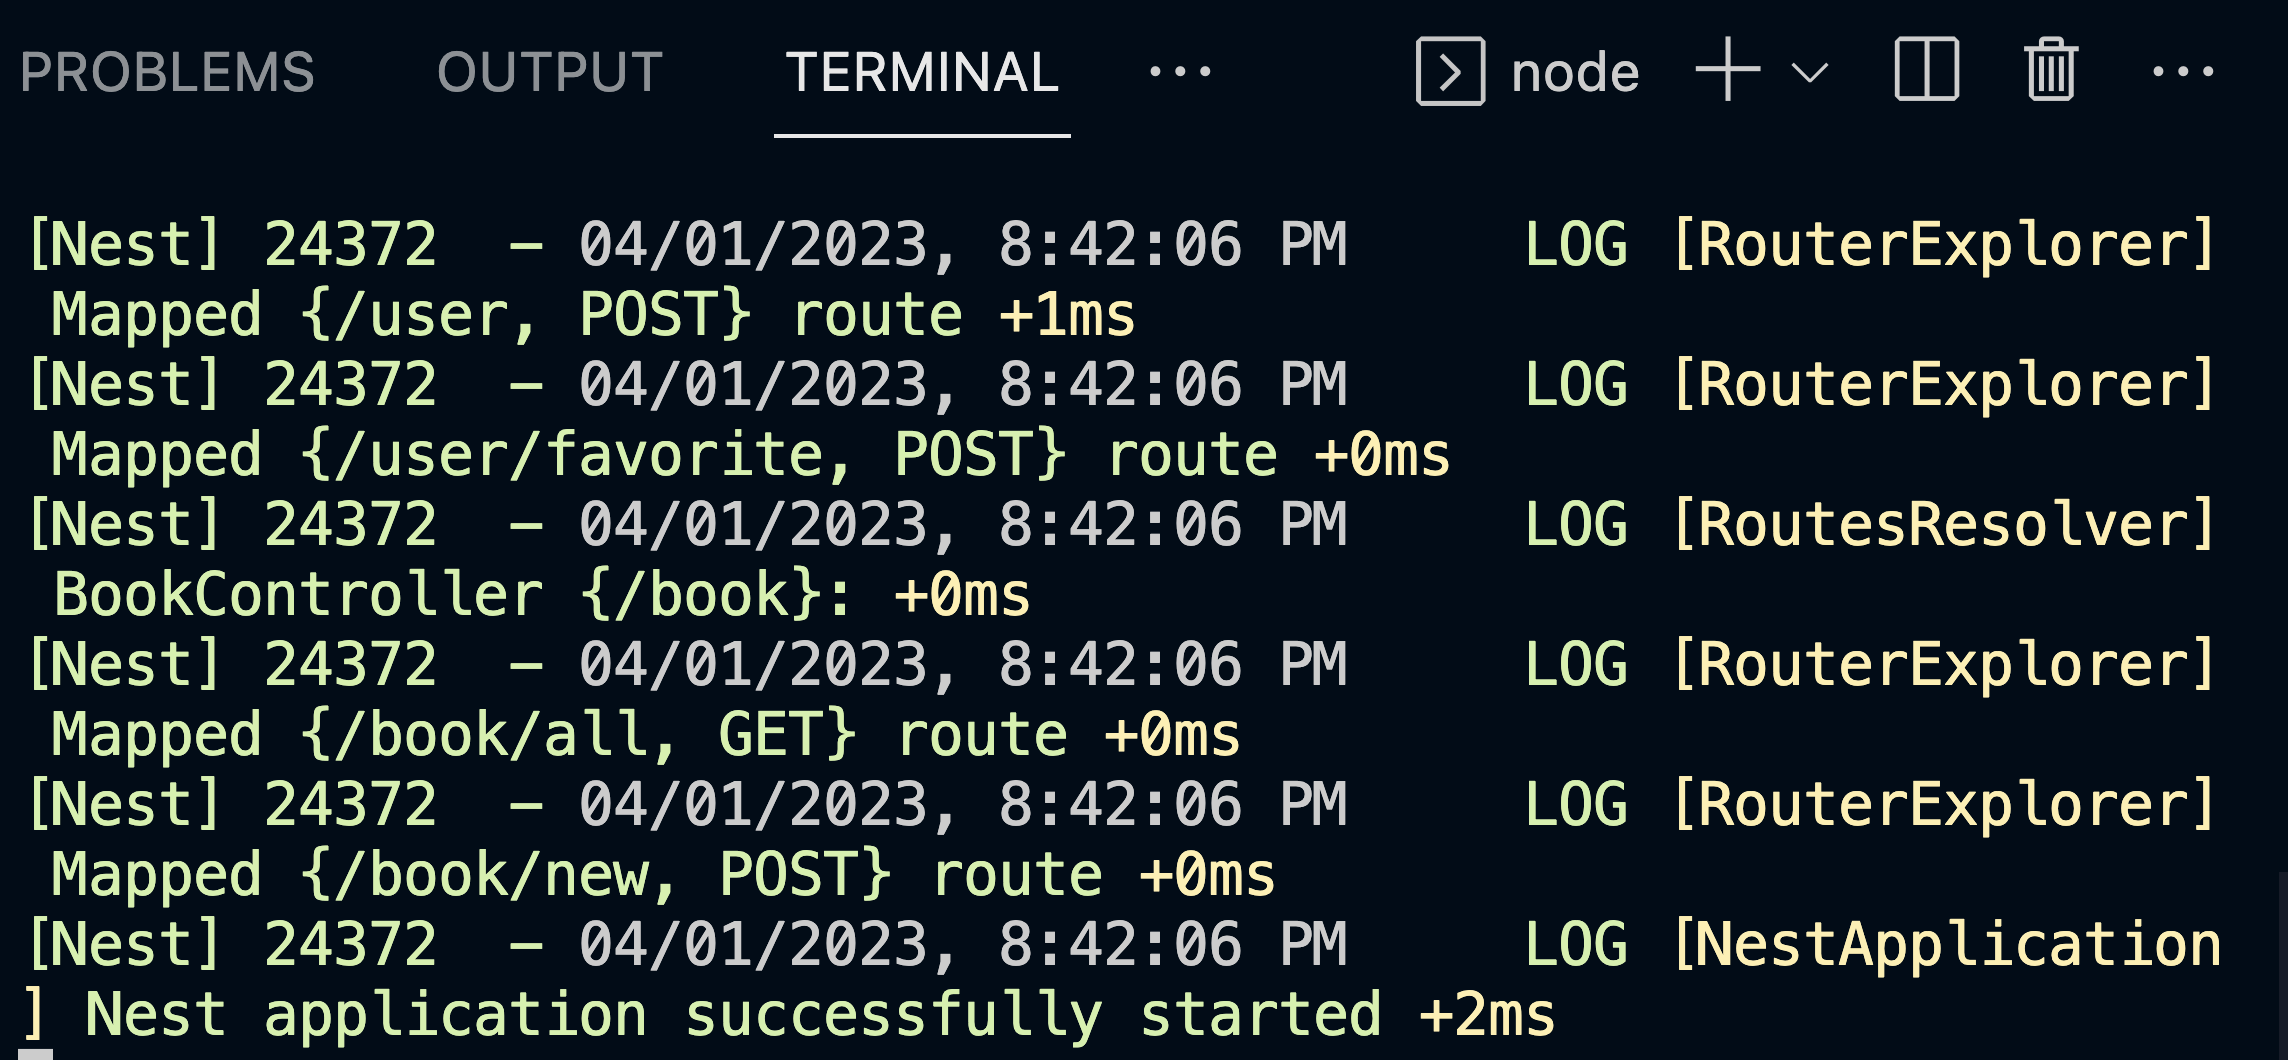
npm run start:devYou should see the following in your terminal:
Installing TypeORM
TypeORM will be the ORM to interact with our PostgreSQL database. An ORM stands for Object-Relational Mapping and is used to interact with relational databases like MySQL, PostgreSQL, or Oracle. Also, we need TypeORM-Nestjs integration. Run the command below to install it.
npm install typeorm @nestjs/typeorm --saveInstalling Mongoose
We will use Mongoose for our NoSQL database MongoDB. To install Mongoose, run the command below:
npm i @nestjs/mongoose mongooseInstalling Dotenv
We need the dotenv package to access our environment variables. Run the following:
npm i dotenvCreating our PostgreSQL Database
We need to click the CLI icon of our PostgreSQL container. The name of our PostgreSQL database will be mongo-postgres. Click it, and a container shell should open.
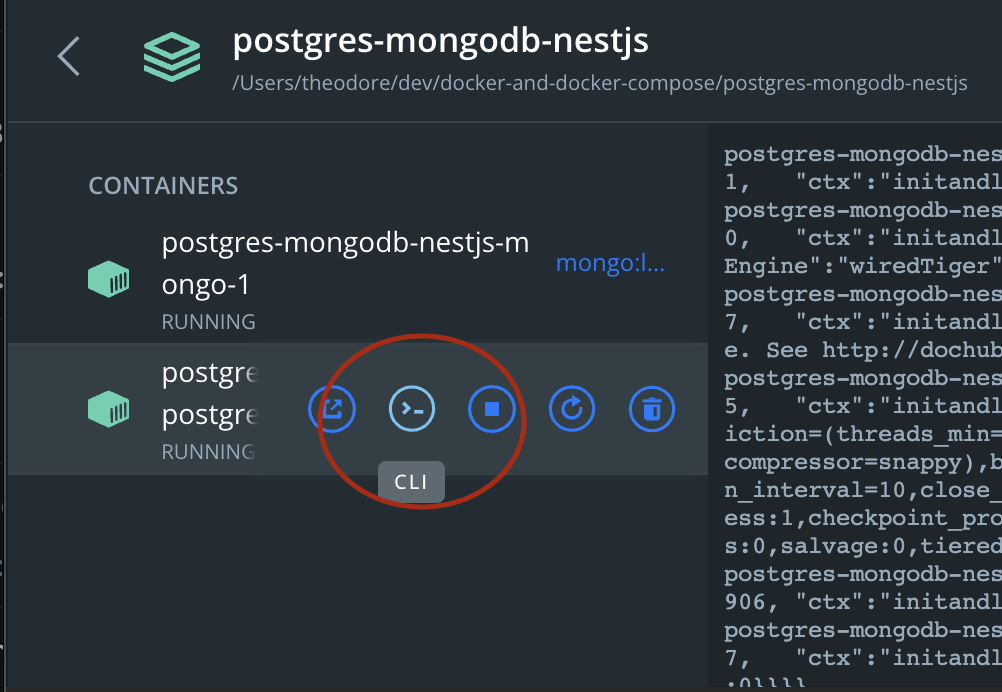
Now inside the shell, run the command createdb mongo-postgres
NOTE: if you have a “root” error, then run the command
createdb -U postgres mongo-postgres
We install a PostgreSQL client called pg to allow our backend server to connect with our PostgreSQL database.
npm install pg --saveCreating our MongoDB Database
We should have our MongoDB database created when we connect through our backend server. And remember, we have already specified the name of the database in our .env file as mongo-postgres, which is the same name as our PostgreSQL database.
Boostrapping our Server
Now we have to bootstrap our server. Our server is going to serve as a book and user application. Here are the features.
- We can create a user by just giving them a name.
- We can create a book by author and title.
- A user can add any book as their favorite.
- We can get all the users for our application.
- We can get all the books present in our application.
So we have only two entities, the user and book entities. We will store the user entity data in the MongoDB database. And for the book entity, we will store its data in our PostgreSQL database.
Creating our Entities
Now inside our project folder, locate the src folder and create a new folder called entities. Create the files book.ts and user.ts inside this new folder. Add the following code inside the book.ts.
// path: ./src/entities/book.ts
import { Column, Entity, PrimaryGeneratedColumn } from "typeorm";

@Entity()
export class Book {
  @PrimaryGeneratedColumn("uuid")
  id?: string;

  @Column({ type: "varchar", nullable: false })
  author: string;

  @Column({ type: "varchar", nullable: false })
  title: string;
}

export default Book;
From the code above, we define a Book entity using the Typeorm library. We specify three properties for the Book entity: id, author, and title. id is a generated UUID that is the primary key for the entity, while author and title are both strings that cannot be null. The @Entity() decorator marks the class as an entity in the TypeORM framework, while @Column() and @PrimaryGeneratedColumn() decorators define properties as database columns. Finally, the export default statement exports the Book class for use in other modules.
Now let us go ahead and add the code for the user entity or schema. Open the user.ts that is inside the entities folder and add the following:
// path: ./src/entities/user.ts
import { Prop, Schema, SchemaFactory } from "@nestjs/mongoose";
import { HydratedDocument } from "mongoose";

export type UserDocument = HydratedDocument<User>;

@Schema()
export class User {
  @Prop({ required: true, unique: true })
  name: string;

  @Prop()
  favoriteBook: string;
}

export const UserSchema = SchemaFactory.createForClass(User);
From the code above, we define a User schema using the @nestjs/mongoose library. The User schema has two properties: name and favoriteBook. name is a required string that must be unique, while favoriteBook is an optional string. The @Schema() decorator marks the class as a Mongoose schema, while the @Prop() decorator defines properties as schema fields. The export type statement defines a UserDocument type that is hydrated with the User schema. Finally, SchemaFactory.createForClass(User) creates a Mongoose schema object for the User class.
Session Replay for Developers
Uncover frustrations, understand bugs and fix slowdowns like never before with OpenReplay — an open-source session replay tool for developers. Self-host it in minutes, and have complete control over your customer data. Check our GitHub repo and join the thousands of developers in our community.
Creating our Modules
We will use only two modules, the book and the user modules. Again, inside the src folder, create a folder called modules. Inside this new folder, create two folders, book and user.
The Book Module
Create the following files in the book module folder: book.module.ts, book.service.ts, and book.controller.ts.
Inside the book.module.ts, add the following lines of code:
// path: ./src/modules/book/book.module.ts
import { Module } from "@nestjs/common";
import { TypeOrmModule } from "@nestjs/typeorm";
import Book from "src/entities/book";
import { BookController } from "./book.controller";
import { BookService } from "./book.service";

@Module({
  providers: [BookService],
  controllers: [BookController],
  imports: [TypeOrmModule.forFeature([Book])],
})
export class BookModule {}
The code above defines a BookModule module using the @nestjs/common and @nestjs/typeorm libraries. The BookModule module has one service, BookService, and one controller, BookController, which we will create shortly. The TypeOrmModule.forFeature([Book]) method imports the Book entity, which we created earlier, into the module, allowing it to be used in the service and controller. Finally, export class BookModule {} exports the BookModule class for use in other modules.
Now inside book.controller.ts, add the following lines of code:
// path: ./src/modules/book/book.controller.ts
import { Controller, Get, Post, Body, Req, Res } from "@nestjs/common";
import { Request, Response } from "express";
import { BookService } from "./book.service";

@Controller("book")
export class BookController {
  constructor(private readonly _BookService: BookService) {}

  @Get("all")
  async getAllBooks(@Req() req: Request, @Res() res: Response) {
    let books = await this._BookService.getBooks();
    res.status(books.statusCode).send(books);
  }

  @Post("new")
  async createBook(
    @Req() req: Request,
    @Res() res: Response,
    @Body() body: { author: string; title: string }
  ) {
    let newBook = await this._BookService.createBook(body);
    res.status(newBook.statusCode).send(newBook);
  }
}
From the code above, we create a BookController class using the @nestjs/common library. The controller has two routes: GET /book/all and POST /book/new. The GET route calls the getBooks() method of the BookService, which we will create soon, and returns the result as an HTTP response. The POST route calls the createBook() method of the BookService, which we will also create soon, with the request body, and returns the result as an HTTP response. The @Req() and @Res() decorators are used to inject the Request and Response objects, respectively, while the @Body() decorator is used to inject the request body.
Finally, inside the book.service.ts, add the following lines of code:
// path : ./src/modules/book/book.service.ts
import { Injectable } from "@nestjs/common";
import { InjectRepository } from "@nestjs/typeorm";
import Book from "src/entities/book";
import { Repository } from "typeorm";

@Injectable()
export class BookService {
  constructor(@InjectRepository(Book) private BookRepo: Repository<Book>) {}

  async getBooks() {
    try {
      const books = await this.BookRepo.find();
      return {
        statusCode: 200,
        data: books,
      };
    } catch (error) {
      return {
        statusCode: 500,
        data: null,
        message: error.message,
      };
    }
  }

  async createBook(body: { author: string; title: string }) {
    try {
      let book = await this.BookRepo.create({
        author: body.author,
        title: body.title,
      });

      await this.BookRepo.save(book);

      return {
        statusCode: 200,
        data: book,
        message: "Book created successfully",
      };
    } catch (error) {
      return {
        statusCode: 500,
        data: null,
        message: error.message,
      };
    }
  }
}
Looking at the code above, we create the BookService service. To get and create books, the BookService service has two methods: getBooks() and createBook(). Remember the features of our server. The @InjectRepository(Book) decorator injects the Book repository into the service. Both methods, getBooks() and createBook(), handle exceptions with a try-catch block and return an object with a status code, data, and message. Finally, the @Injectable() decorator marks the class as a service that can be injected with dependencies.
The User Module
Create the following files inside the user module folder: user.module.ts, user.service.ts, and user.controller.ts.
For the user.module.ts, we add the following codes:
// path: ./src/modules/user/user.module.ts
import { Module } from "@nestjs/common";
import { MongooseModule } from "@nestjs/mongoose";
import { TypeOrmModule } from "@nestjs/typeorm";
import Book from "src/entities/book";
import { User, UserSchema } from "src/entities/user";
import { UserController } from "./user.controller";
import { UserService } from "./user.service";

@Module({
  providers: [UserService],
  controllers: [UserController],
  imports: [
    MongooseModule.forFeature([{ name: User.name, schema: UserSchema }]),
    TypeOrmModule.forFeature([Book]),
  ],
})
export class UserModule {}
From the code above, we create the UserModule module using the @nestjs/common, @nestjs/mongoose, and @nestjs/typeorm libraries. The UserModule module has the provider UserService, which represents the service class for the user module and which will be created shortly. The UserController controller is also defined in this module. The module imports the MongooseModule and TypeOrmModule, which provide access to the User and Book entities. The MongooseModule.forFeature() method defines the User schema, which creates a model in the MongoDB database. The TypeOrmModule.forFeature() method defines the Book repository, which provides access to the book table in the PostgreSQL database.
Now for the user.controller.ts, add the following lines of code:
//path : ./src/modules/user/user.controller.ts
import { Controller, Get, Post, Param, Req, Res, Body } from "@nestjs/common";
import { UserService } from "./user.service";
import { Request, Response } from "express";

@Controller("user")
export class UserController {
  constructor(private readonly _UserService: UserService) {}

  @Get("all")
  async getAllUsers(@Req() req: Request, @Res() res: Response) {
    let users = await this._UserService.getUsers();
    res.status(users.statusCode).send(users);
  }

  @Get(":id")
  async getSingleUser(
    @Req() req: Request,
    @Res() res: Response,
    @Param() params
  ) {
    let user = await this._UserService.getSingleUser(params.id);
    res.status(user.statusCode).send(user);
  }

  @Post()
  async createUser(
    @Req() req: Request,
    @Res() res: Response,
    @Body() body: { name: string }
  ) {
    let newUser = await this._UserService.createUser(body.name);
    res.status(newUser.statusCode).send(newUser);
  }

  @Post("favorite")
  async makeFavorite(
    @Req() req: Request,
    @Res() res: Response,
    @Body() { userId, bookId }: { userId: string; bookId: string }
  ) {
    let user = await this._UserService.makeFavourite(userId, bookId);
    res.status(user.statusCode).send(user);
  }
}
The code above is the user controller for handling user-related HTTP requests, including getting all users, getting a single user by ID, creating a new user, and making a book a favorite for a user. It uses the UserService methods to handle the logic for these requests and sends responses back to the client using the Response object.
And lastly, we add the following code to the user.service.ts.
// path: ./src/modules/user/user.service.ts
import { Injectable } from "@nestjs/common";
import { User, UserDocument } from "src/entities/user";
import { Model } from "mongoose";
import { InjectModel } from "@nestjs/mongoose";
import { InjectRepository } from "@nestjs/typeorm";
import { Book } from "src/entities/book";
import { Repository } from "typeorm";

@Injectable()
export class UserService {
  constructor(
    @InjectModel(User.name) private UserModel: Model<UserDocument>,
    @InjectRepository(Book) private BookRepo: Repository<Book>
  ) {}

  async getUsers() {
    try {
      const users = await this.UserModel.find();
      return {
        statusCode: 200,
        data: users,
      };
    } catch (error) {
      return {
        statusCode: 500,
        data: null,
        message: error.message,
      };
    }
  }

  async getSingleUser(id: string) {
    try {
      let user = await this.UserModel.findById(id).select("-favoriteBook");
      const favoriteBook = await this.BookRepo.findOne({
        where: { id: user.favoriteBook },
      });
      delete favoriteBook.id;

      let result = { name: user.name, favoriteBook: favoriteBook };
      return {
        statusCode: 200,
        data: result,
      };
    } catch (error) {
      return {
        statusCode: 500,
        data: null,
        message: error.message,
      };
    }
  }

  async createUser(name: string) {
    try {
      let newUser = new this.UserModel({ name });
      newUser = await newUser.save();

      return {
        statusCode: 200,
        data: newUser,
      };
    } catch (error) {
      return {
        statusCode: 500,
        data: null,
        message: error.message,
      };
    }
  }

  async makeFavourite(userId: string, bookId: string) {
    try {
      let book = await this.BookRepo.findOne({ where: { id: bookId } });
      let updatedUser = await this.UserModel.findByIdAndUpdate(userId, {
        favoriteBook: book.id,
      });
      return {
        statusCode: 200,
        data: updatedUser,
        message: "Favorite book added!",
      };
    } catch (error) {
      return {
        statusCode: 500,
        data: null,
        message: error.message,
      };
    }
  }
}
In the code above is the UserService class, which provides methods to interact with our MongoDB database using Mongoose and a PostgreSQL database using TypeORM. It offers the ability to get all users, get one person with their favorite book, create a new user, and set up a person’s favorite book.
The App Module
Lastly, we replace the content of the app.module.ts with the following code:
// path: ./src/app.module.ts
import { Module } from "@nestjs/common";
import { MongooseModule } from "@nestjs/mongoose";
import { TypeOrmModule, TypeOrmModuleOptions } from "@nestjs/typeorm";
import { AppController } from "./app.controller";
import { AppService } from "./app.service";
import { config } from "dotenv";
import { Book } from "./entities/book";
import configuration from "../configuration";
import { UserModule } from "./modules/user/user.module";
import { BookModule } from "./modules/book/book.module";
config();

const SYNC = true;

export const pgConfig: TypeOrmModuleOptions = {
  url: configuration.pg.url,
  type: configuration.pg.name,
  entities: [Book],
  synchronize: SYNC,
} as TypeOrmModuleOptions;

@Module({
  imports: [
    TypeOrmModule.forRoot(pgConfig),
    MongooseModule.forRoot(configuration.mongo.mongoURL),
    UserModule,
    BookModule,
  ],
  controllers: [AppController],
  providers: [AppService],
})
export class AppModule {}
In our app module called AppModule, we import and configure other modules and services needed to run the application, including TypeORM and Mongoose for database connections, as well as the UserModule and BookModule. It also sets up a TypeORM configuration for PostgreSQL and defines the application’s AppController and AppService. Also, we import the configuration file that will contain our app configurations. Now let’s create this configuration file.
Creating a Configuration File
As seen in the app.modulet.ts we made use of some configurations. So we have to create a configuration file and add the following.
// path: ./configuration.ts
import { config } from "dotenv";
config();

const configuration = {
  mongo: {
    mongoURL: process.env.MONGO_URL,
  },
  pg: {
    name: "postgres",
    url: process.env.POSTGRES_URL,
    host: "postgres",
    db_name: "mongo-postgres",
    port: process.env.POSTGRES_PORT as unknown as number,
    username: process.env.POSTGRES_USER,
    password: process.env.POSTGRES_PASSWORD,
  },
};

export default configuration;
We create configurations for our MongoDB and PostgreSQL databases, and export them so they can be used elsewhere.
Restarting our Server
We need to restart our server to ensure it works perfectly now that we have bootstrapped it.
Run the command control c or command c depending on your machine. Then restart the server by running npm run start:dev.
Testing our Backend Server
Now that we are done with the backend server. We need to ensure that our API routes and HTTP methods work perfectly.
For testing our API, we are going to use Postman. Visit their website to download Postman.
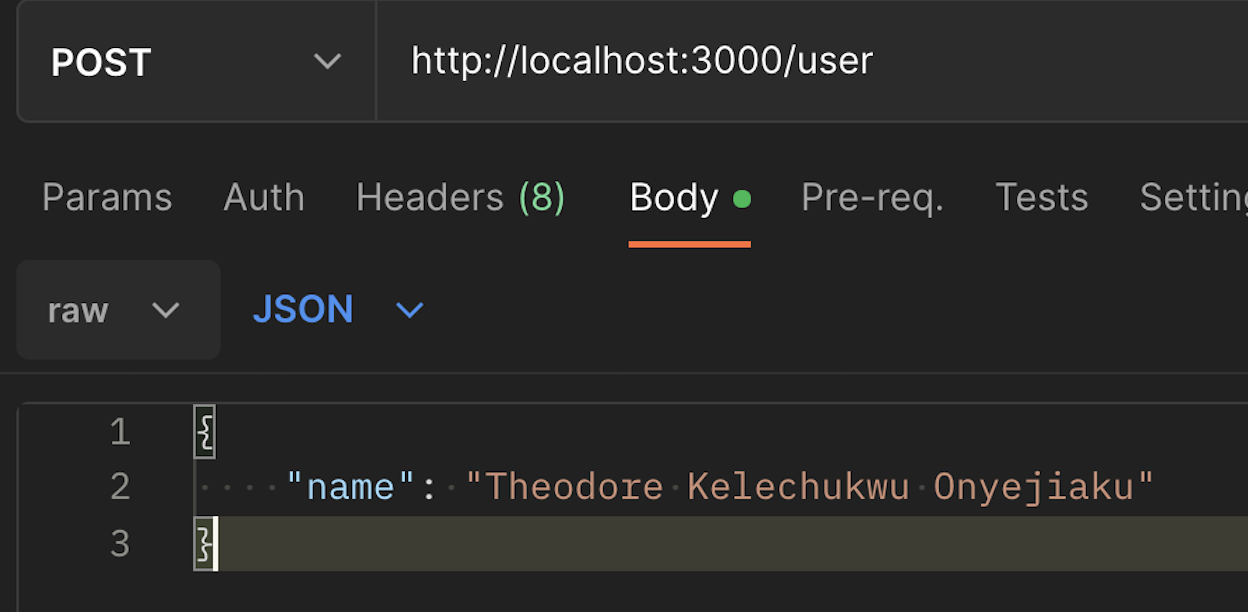
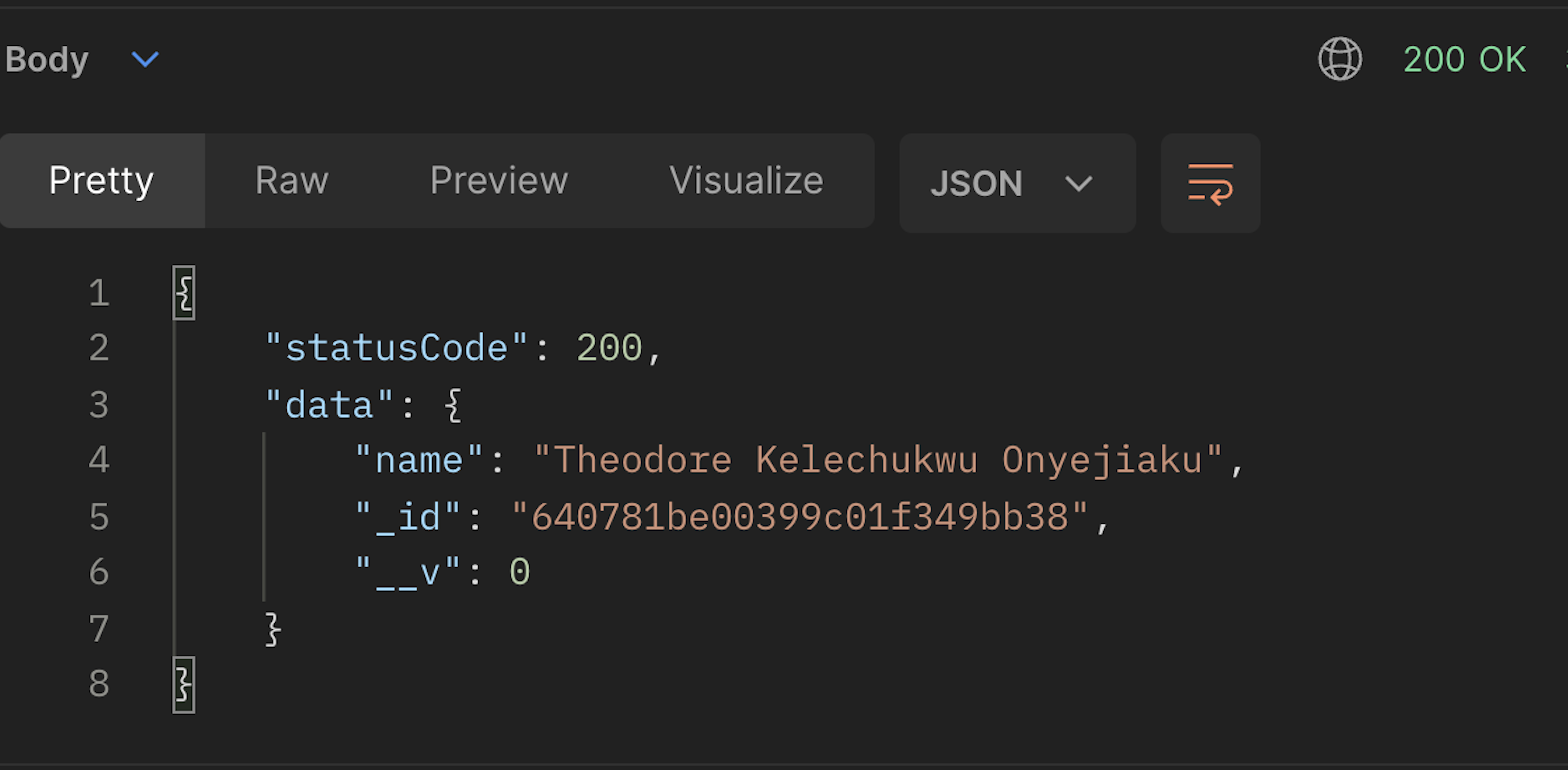
Creating a User
Now go ahead and create more users.
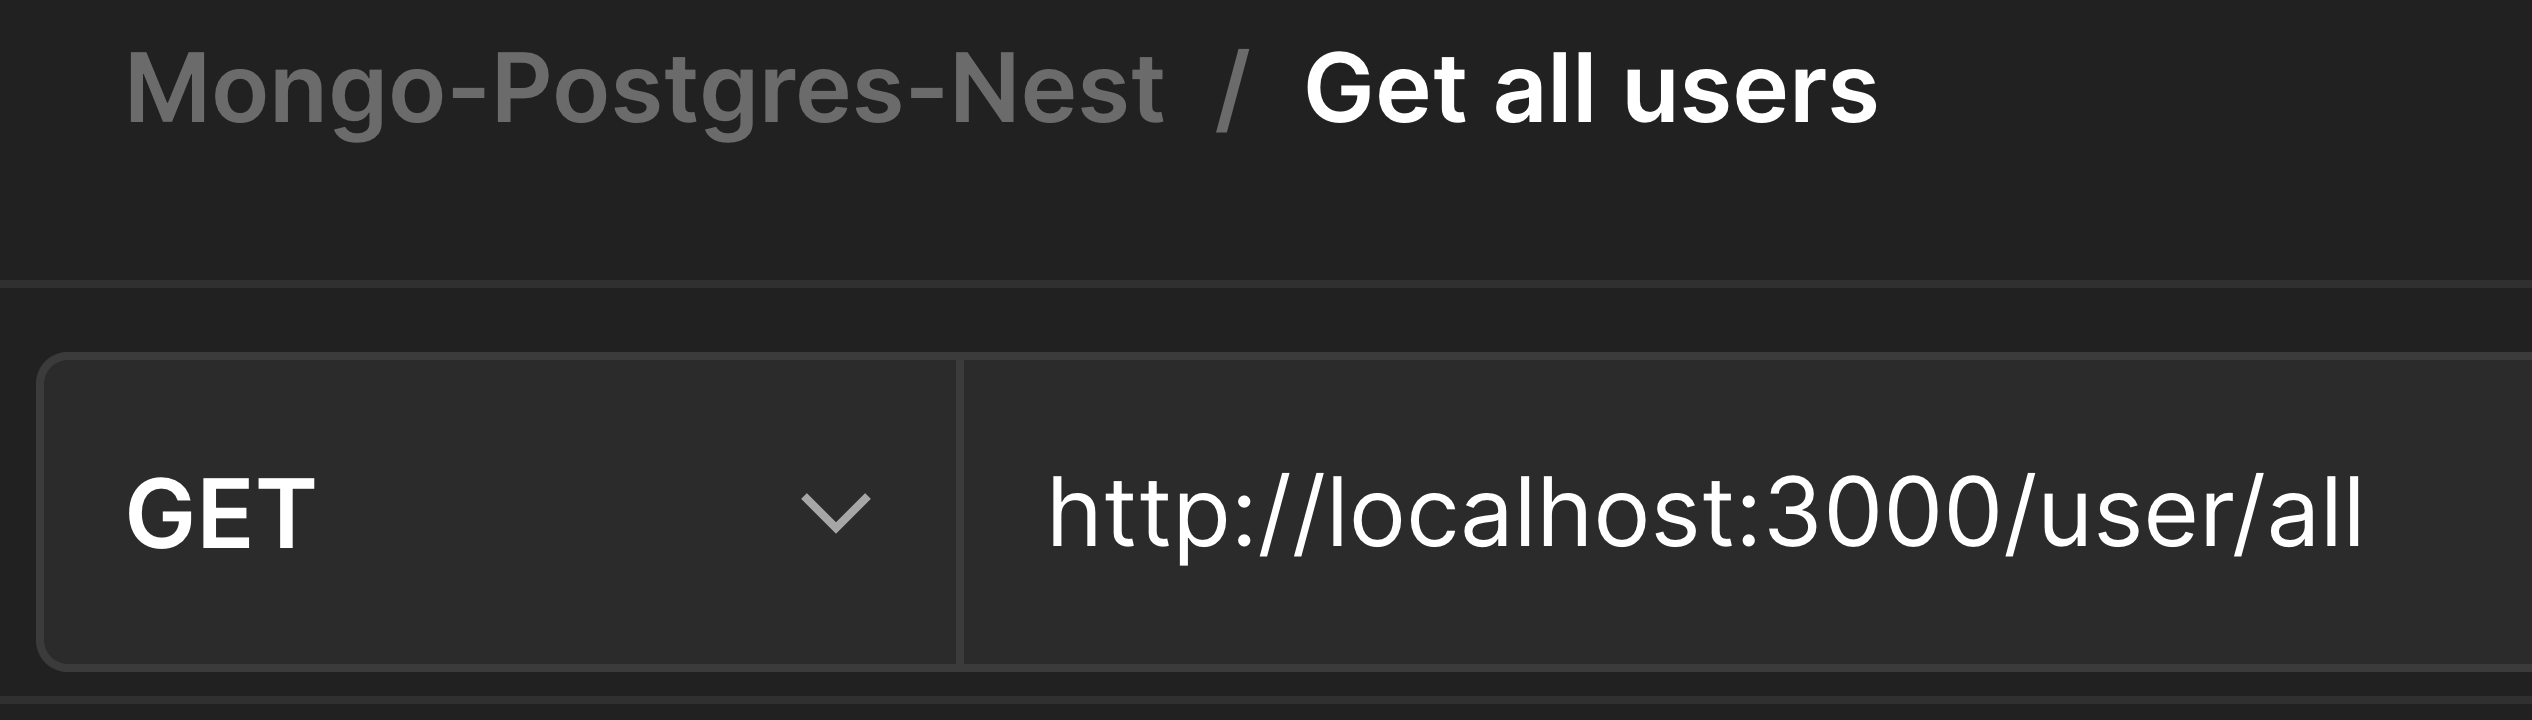
Getting all Users
Creating a Book
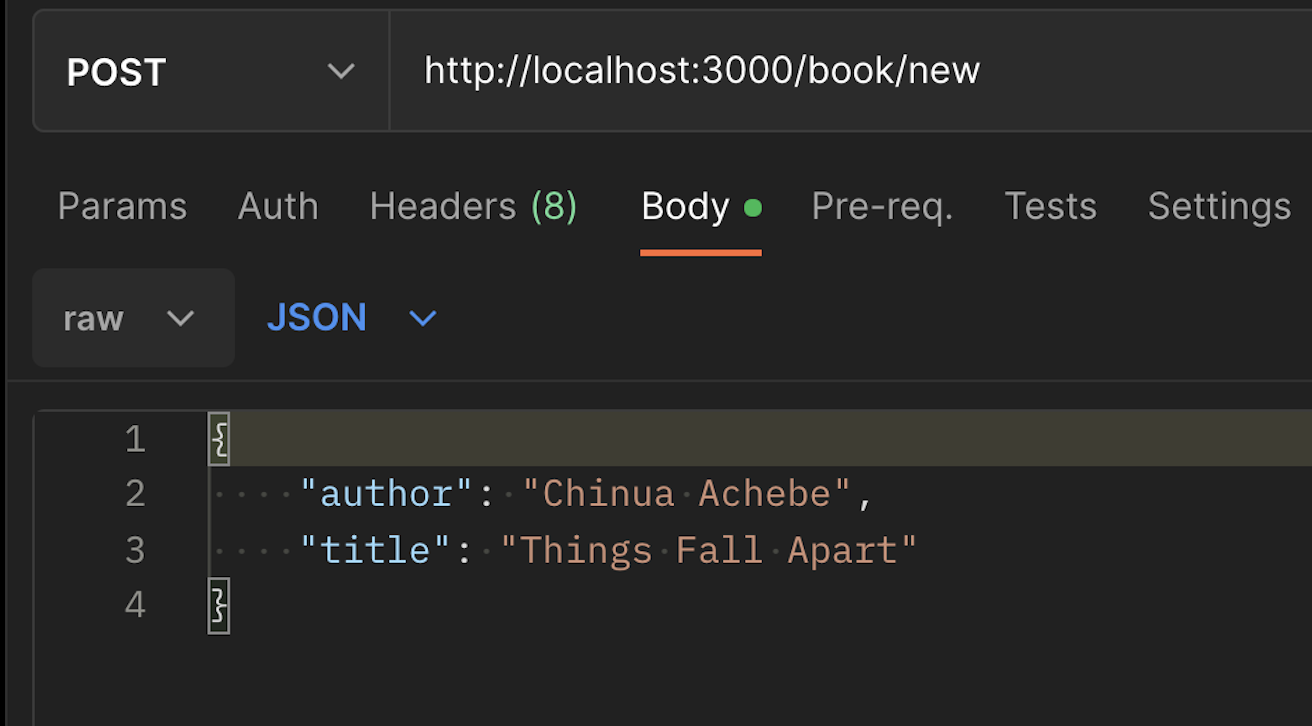
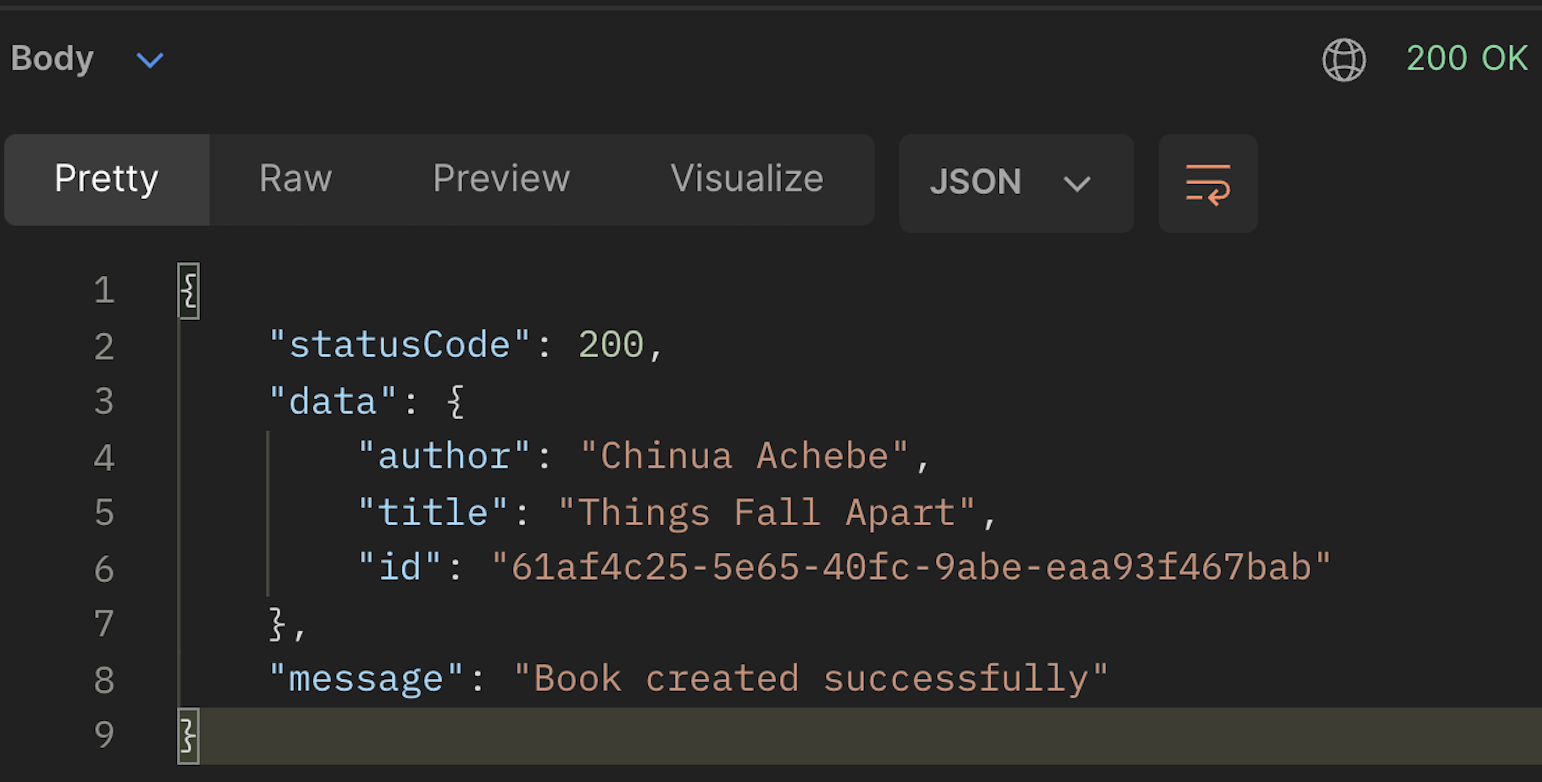
Now proceed to create more books.
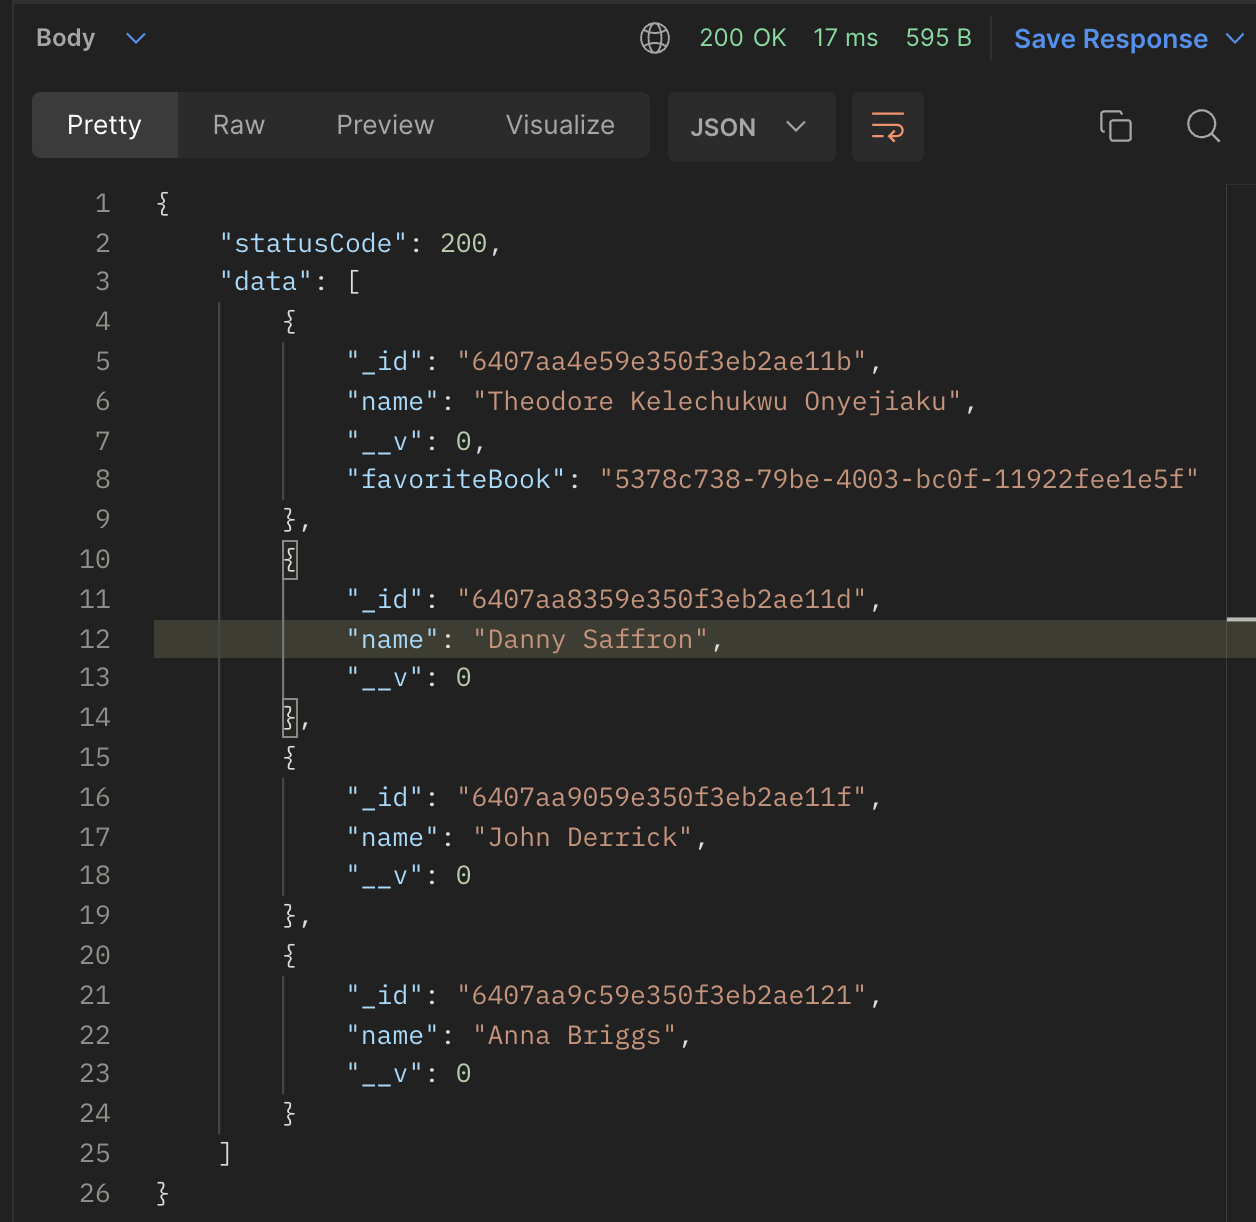
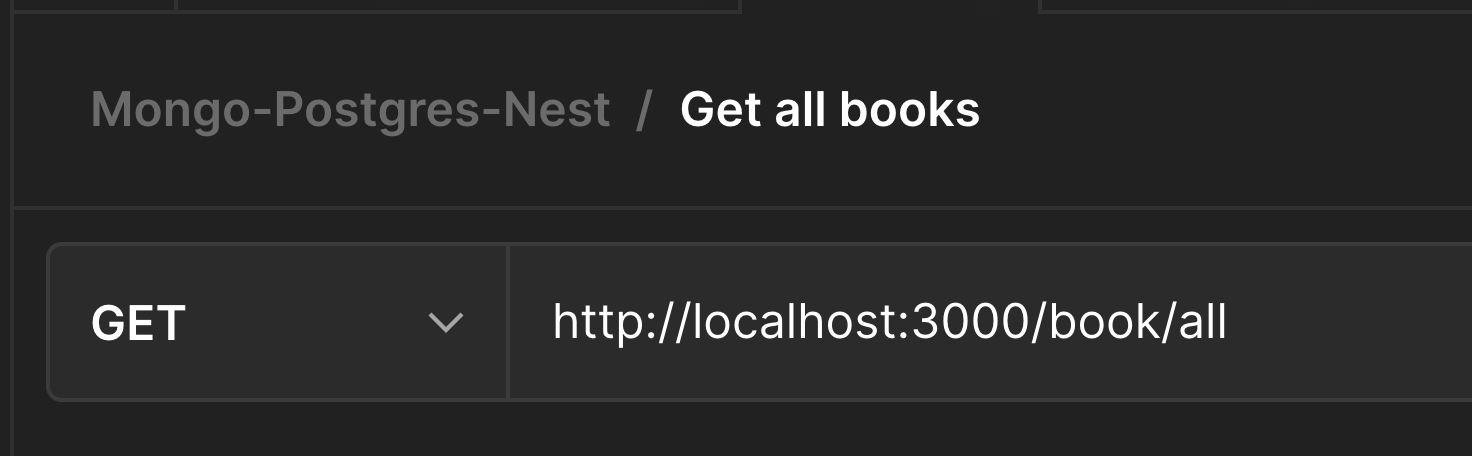
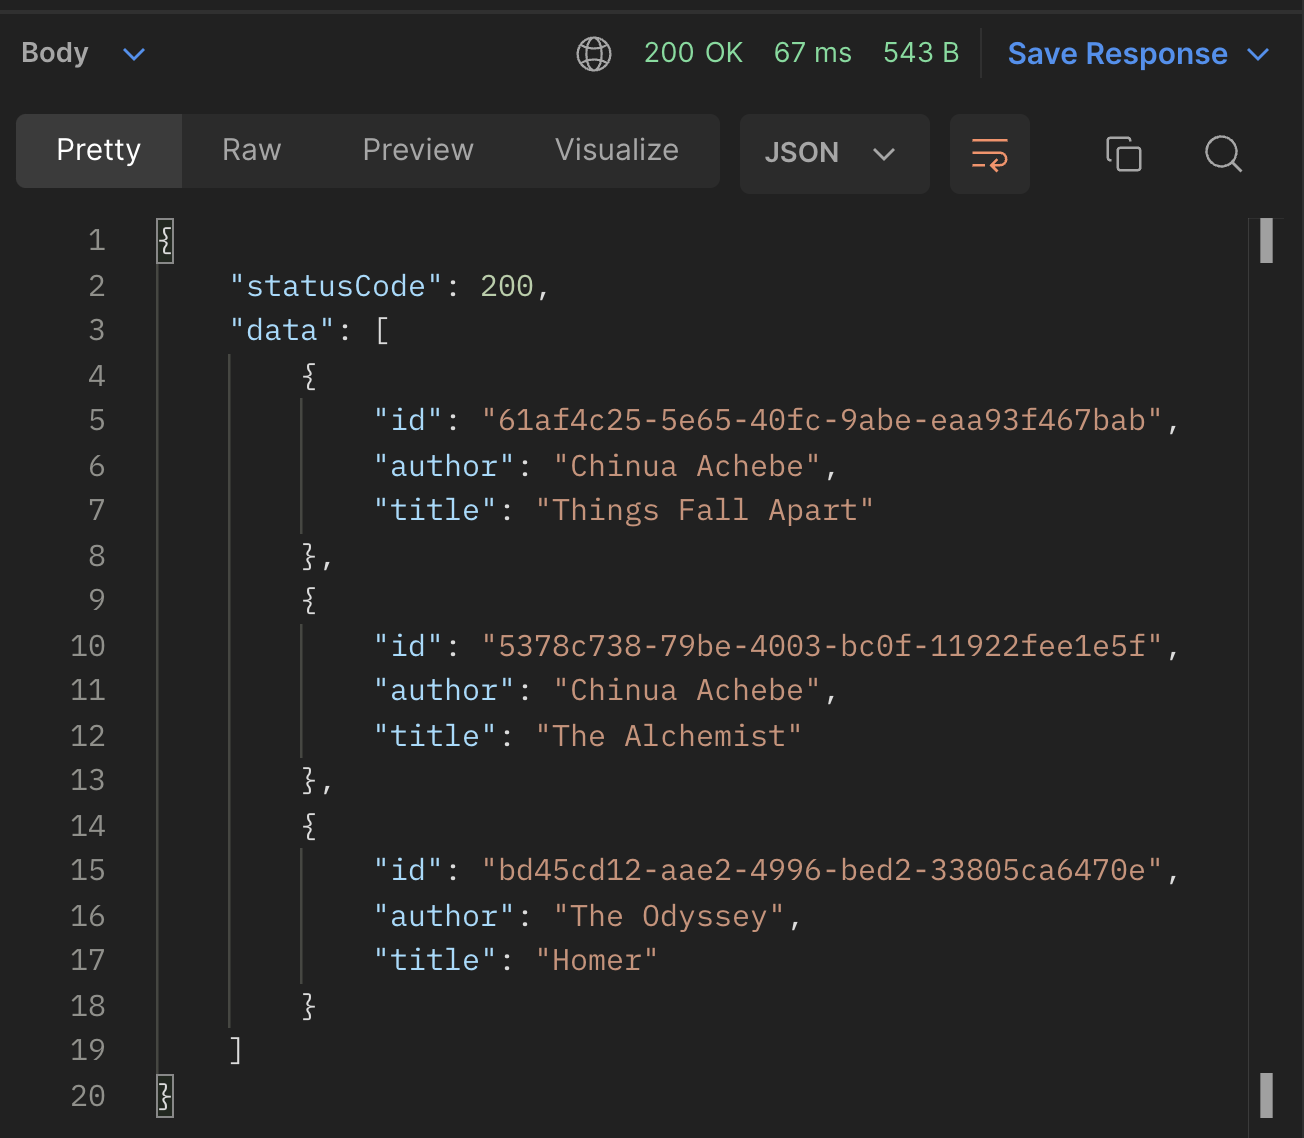
Get all Books
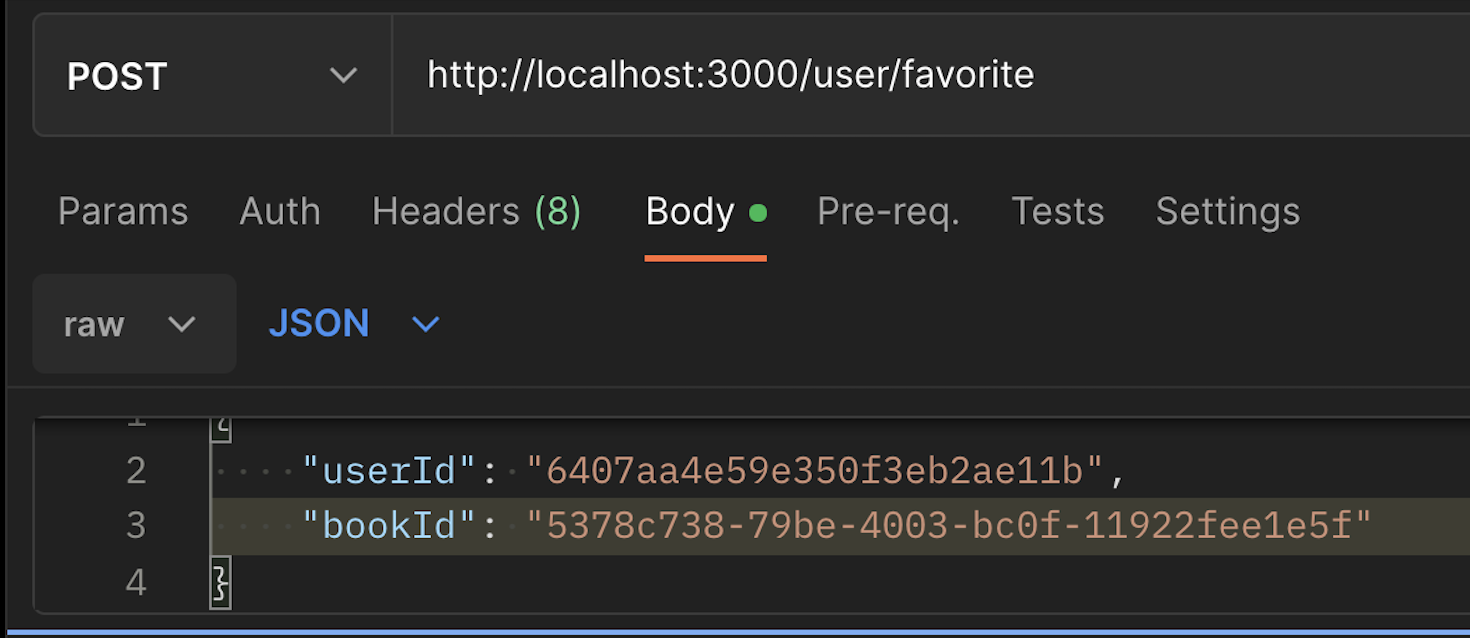
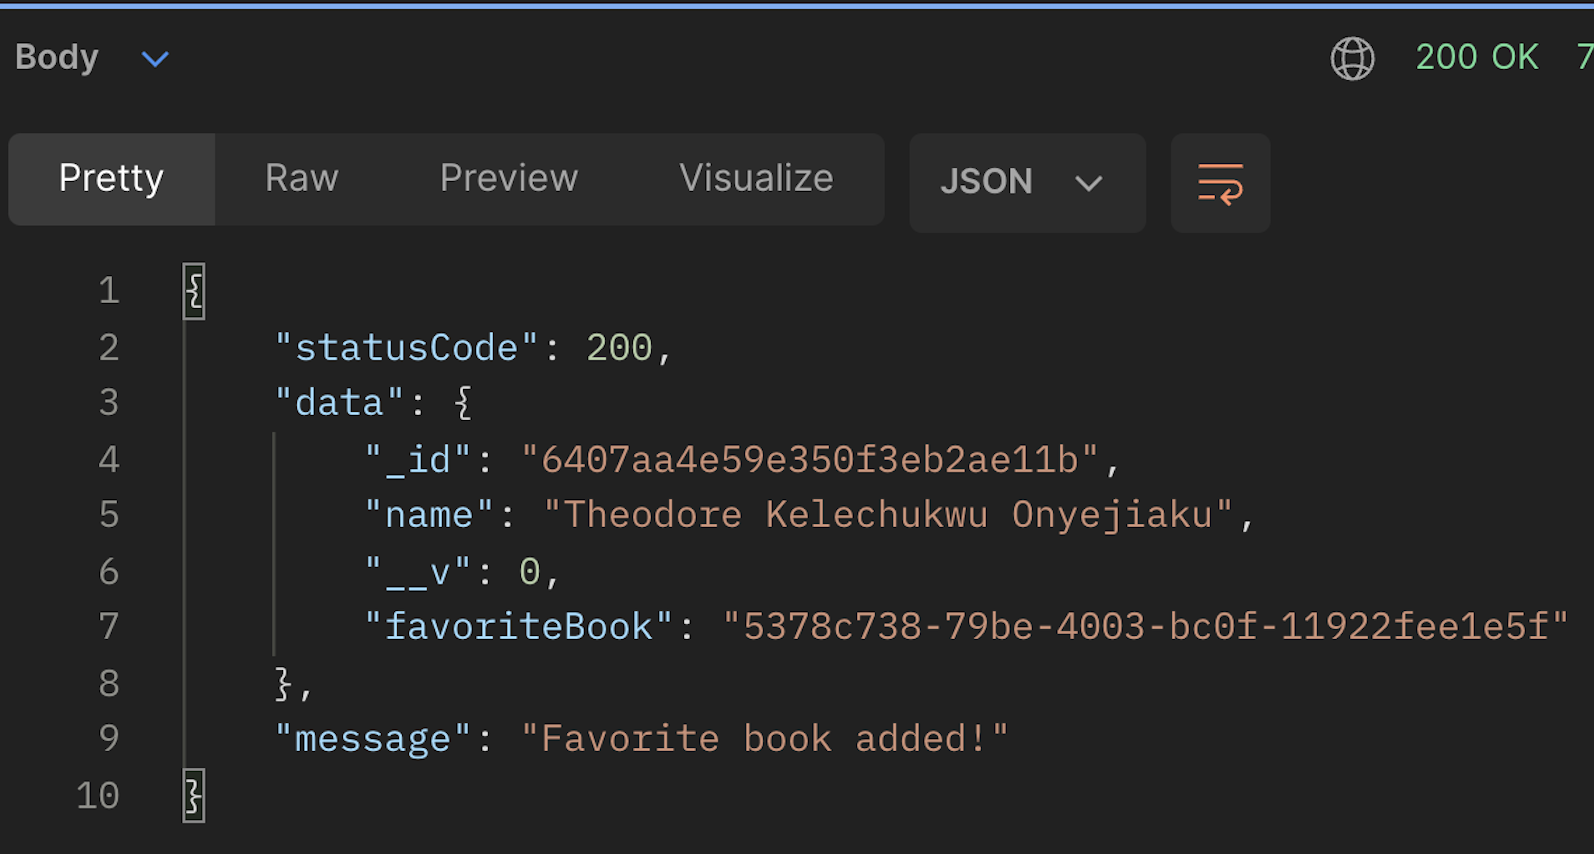
Making a Book User’s Favorite
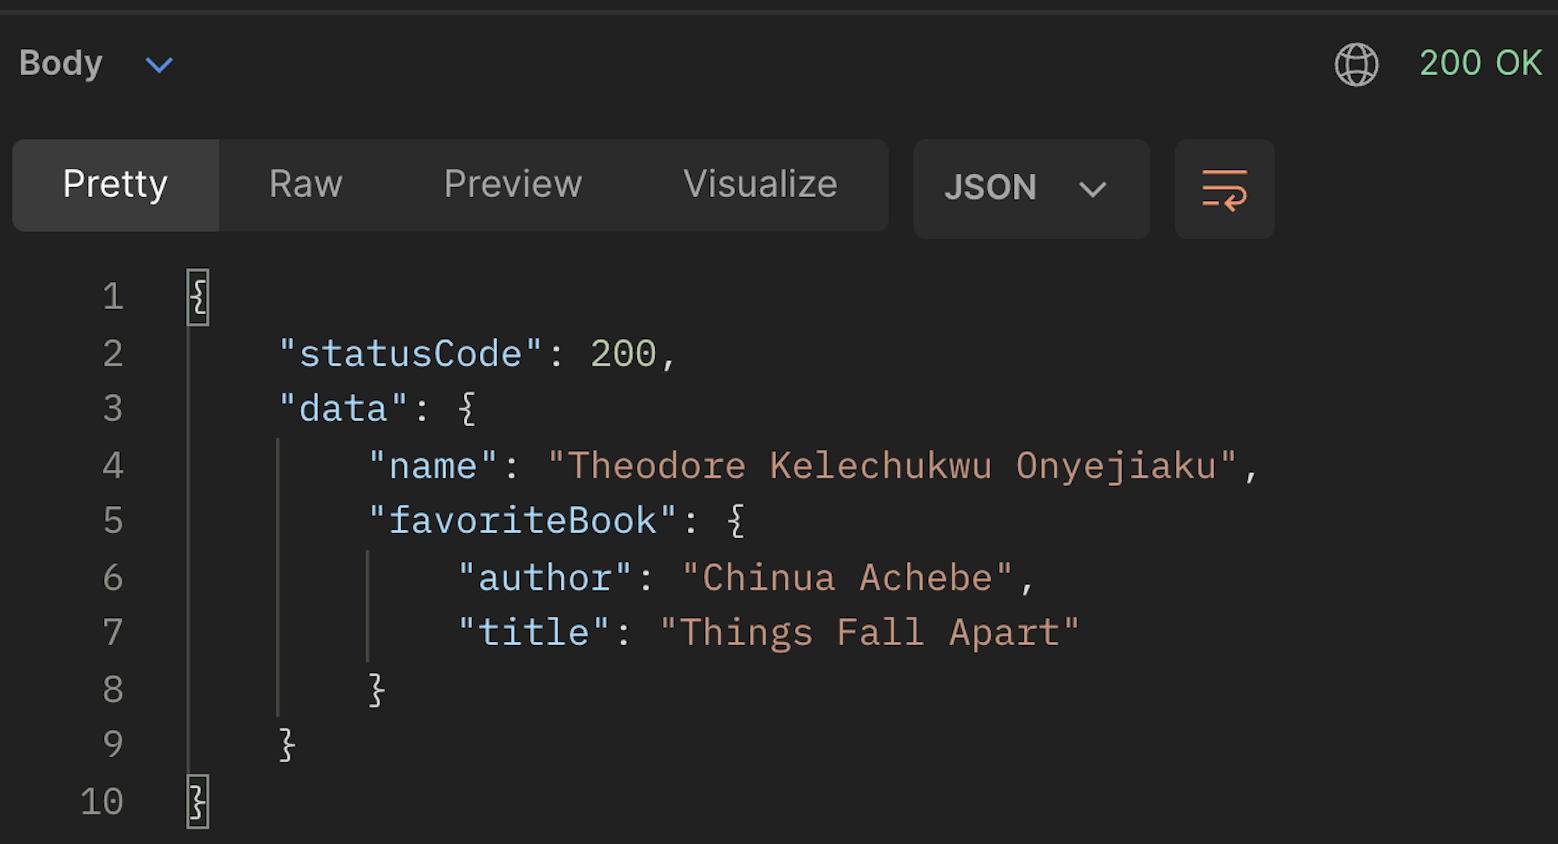
Getting a Single User

Dockerizing our Backend Server
Now that our application is ready, we need to containerize it.
For this, we will have to create a Dockerfile. Create a file called Dockerfile and put in the following as shown below:
# path: ./Dockerfile

# official Nodejs image
FROM node:18

# Create a directory for the app
WORKDIR /usr/src/app

# Copy package.json and package-lock.json to the container
COPY package*.json ./

# Install dependencies
RUN npm install

# Copy the rest of the app's source code to the container
COPY . .

# Expose port 3000
EXPOSE 3000

# Start the app
CMD ["npm", "start:dev"]
In the docker file above,
FROM node:18: uses the official Node.js Docker image with version 18 as the base image.WORKDIR /usr/src/app: sets the working directory inside the container to/usr/src/app.COPY package*.json ./: copies thepackage.jsonandpackage-lock.jsonfiles from the host machine to the container’s/usr/src/appdirectory.RUN npm install: runs thenpm installcommand to install the dependencies specified in thepackage.jsonfile.COPY . .: copies all the remaining files in the current directory on the host machine to the container’s/usr/src/appdirectory.EXPOSE 3000: exposes port3000, indicating that the container listens on that port and accepts incoming traffic.CMD ["npm", "start:dev"]: sets the default command to start the application in development mode using the commandnpm start:dev.
Creating an Image for our Backend Server
Now that we have our Docker file, to run our backend server as a service in our container, we need to create an image of it. To do this, we must run the command below:
docker compose -t If successful, you should see this:
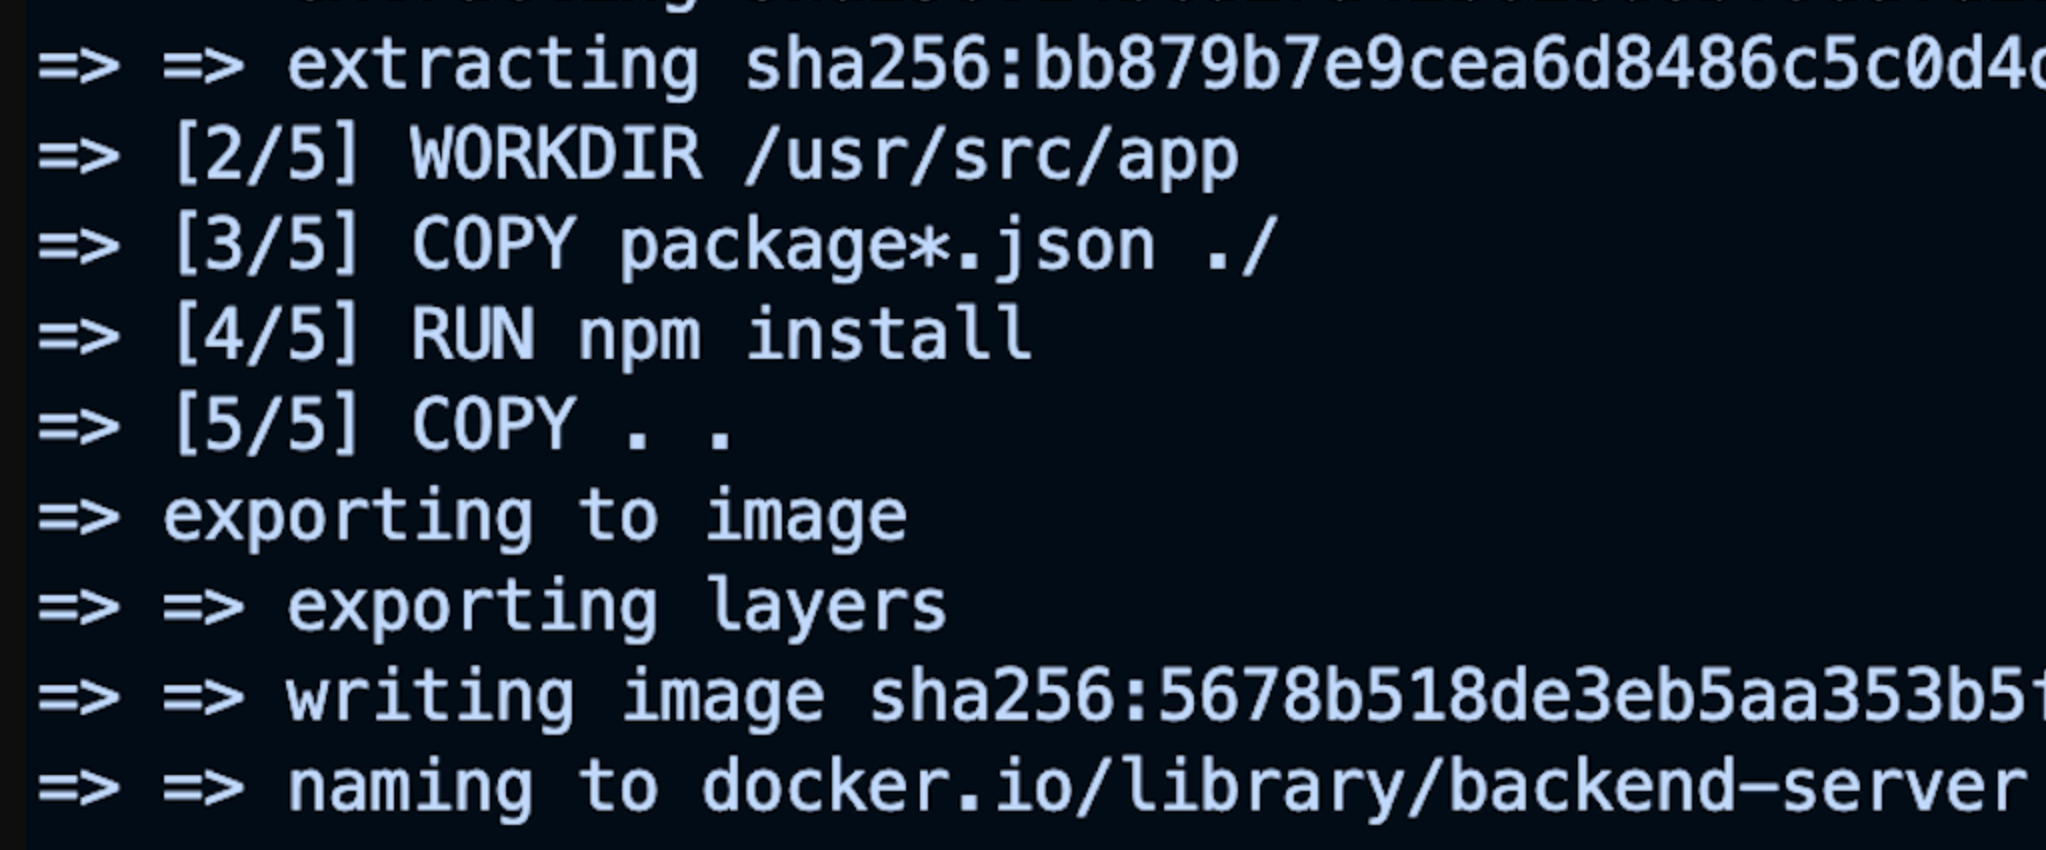
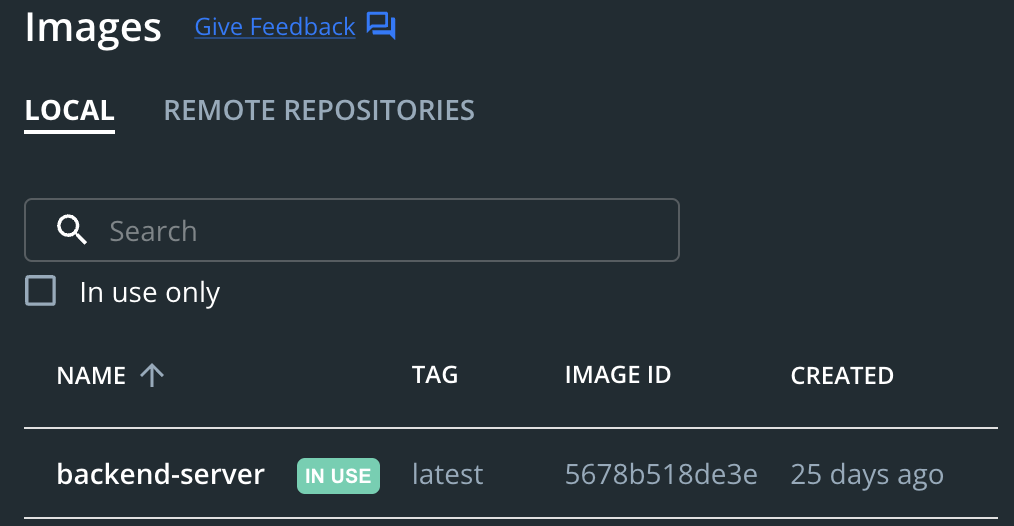
You should see this in your docker.
Now that we have successfully created the image it is time to update our docker-compose.yaml file.
# path: ./docker-compose.yaml
version: "3.9"
services:
  postgres:
    image: postgres:13-alpine
    restart: always
    env_file:
      - .env
    environment:
      - POSTGRES_USER=postgres
      - POSTGRES_PASSWORD:$POSTGRES_PASSWORD
    ports:
      - "$POSTGRES_PORT:$POSTGRES_PORT_DOCKER"

    volumes:
      - postgres_data:/var/lib/postgresql/data
    networks:
      - db_network

  mongo:
    image: mongo:latest
    restart: always
    env_file:
      - .env
    volumes:
      - mongo_data:/data/db
    networks:
      - db_network

  app:
    image: backend-server
    env_file:
      - .env
    environment:
      - MONGO_URL=mongodb://mongo:27017/mongo-postgres
      - POSTGRES_URL=postgresql://postgres:12345@postgres:5432/mongo-postgres?schema=public
    # Run a command against the development stage of the image
    command: npm run start:dev
    ports:
      - "3000:3000"
    depends_on:
      - postgres
      - mongo
    networks:
      - db_network

volumes:
  postgres_data:
  mongo_data:

networks:
  db_network:
In the updated docker-compose.yaml file, from line 31-46, we added the following:
app:Represents the name of our backend server service.
image: backend-serverUses the built image we called backend-server to run the service.
env_file:
  - .env
Loads environment variables from a file called .env.
environment:
  - MONGO_URL=mongodb://mongo:27017/mongo-postgres
  - POSTGRES_URL=postgresql://postgres:12345@postgres:5432/mongo-postgres?schema=public
Sets environment variables MONGO_URL and POSTGRES_URL.
Note that this will override the one specified in the .env of our backend service image. We have to change localhost in the PostgreSQL URL in the .env file to the name of the service our application depends on. Furthermore, we did the same for the MongoDB database by changing //127.0.0.1 to the name of the service our server image will depend on, which is mongo.
- We specified that the command
npm run start:devshould be run when the container starts. We added this to override the command we added in the Docker file.
# Run a command against the development stage of the image
command: npm run start:dev- Maps port
3000of the container to port3000of the host machine.
ports:
  - "3000:3000"
Depends on our database services called postgres and mongo, which are also defined in the Docker Compose file.
depends_on:
  - postgres
  - mongo
Attaches the service to our network called db_network.
networks:
  - db_network
Now run this command again to start our services:
docker compose up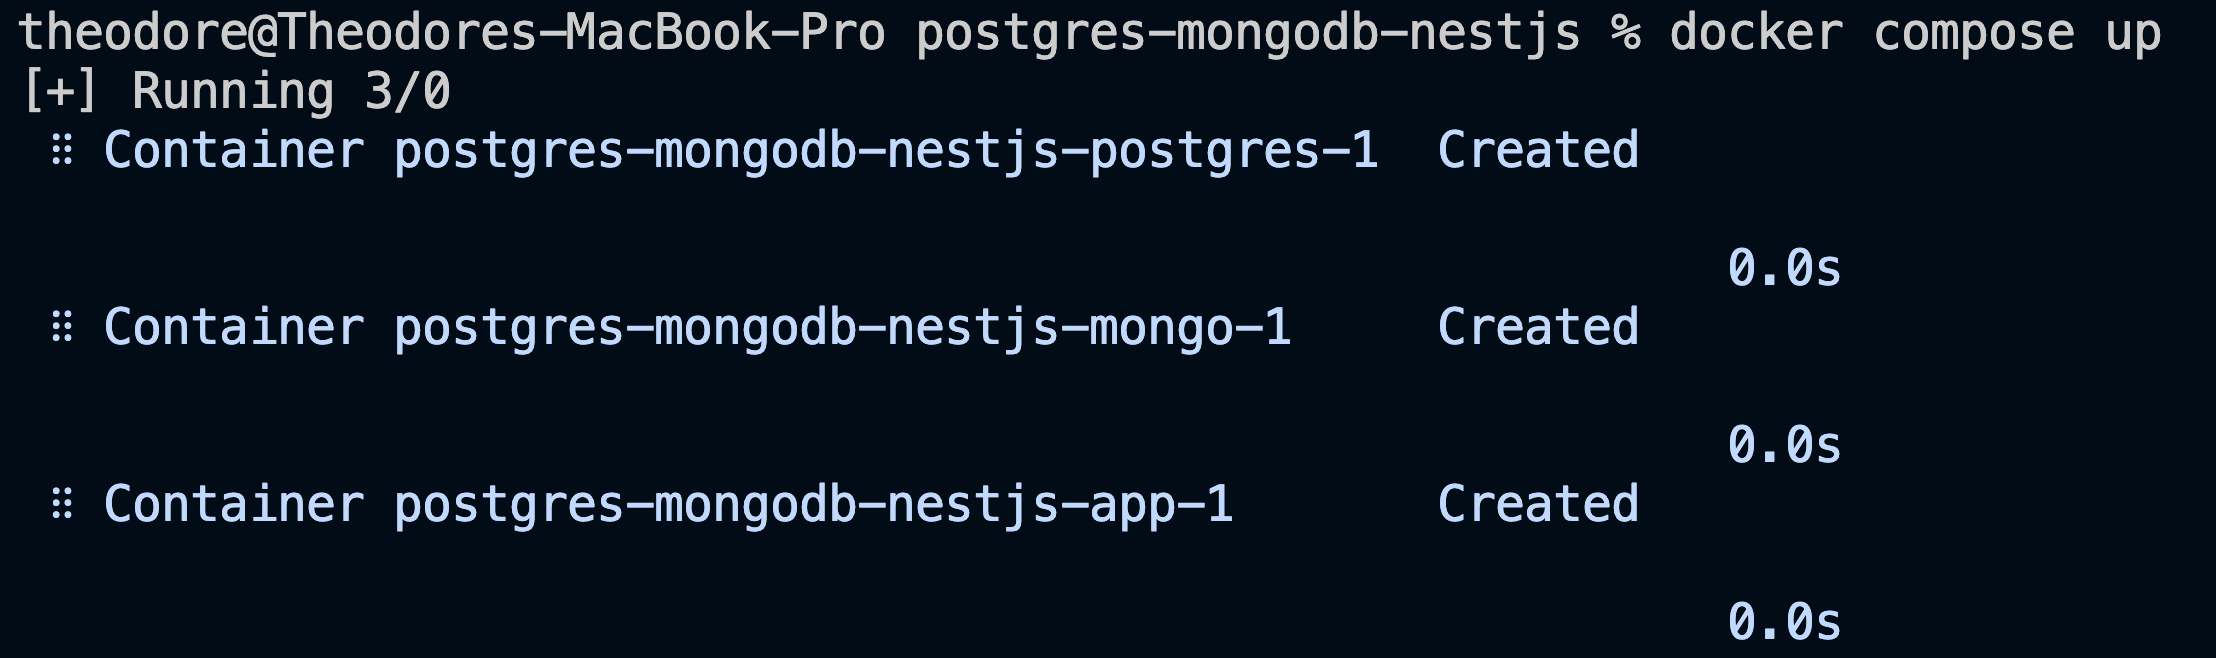
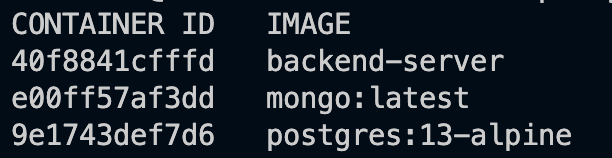
You can also confirm if our containers are running using the command below:
docker container lsYou should see the following after running the command above.
For the container ids and image names, we have the following:
And for the commands, the day they were created, and their status, we also have:

Lastly, for the ports and container names, we have the following:

Hurray! Our containers are running!
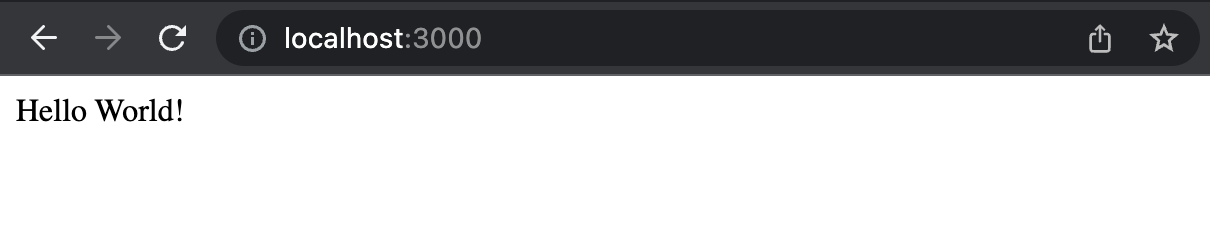
Now try making requests to our server on http://localhost:300. We should see the following. It is to show that our containers are running.
Proceed and test the APIs on the Postman or any HTTP Client.
As a bonus, we want to also be able to interact with our databases on the Docker shell.
Interacting with Our PostgreSQL Database
Run the command below:
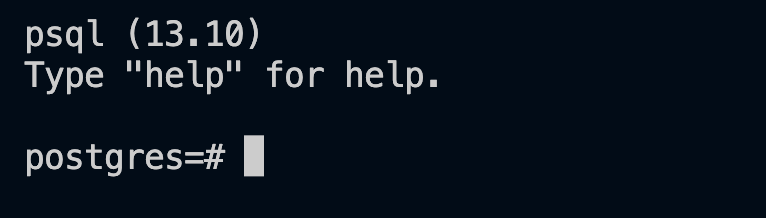
docker exec -it postgres-mongodb-nestjs-postgres-1 psql -U postgresThe following code allows us to use psql to interact with our PostgreSQL database. The postgres-mongodb-nestjs-postgres-1 represents the container name of our PostgreSQL database, and the postgres represents the database user. If successful, you should see the following displayed on your terminal.
Show Databases Present
Run the \list command.
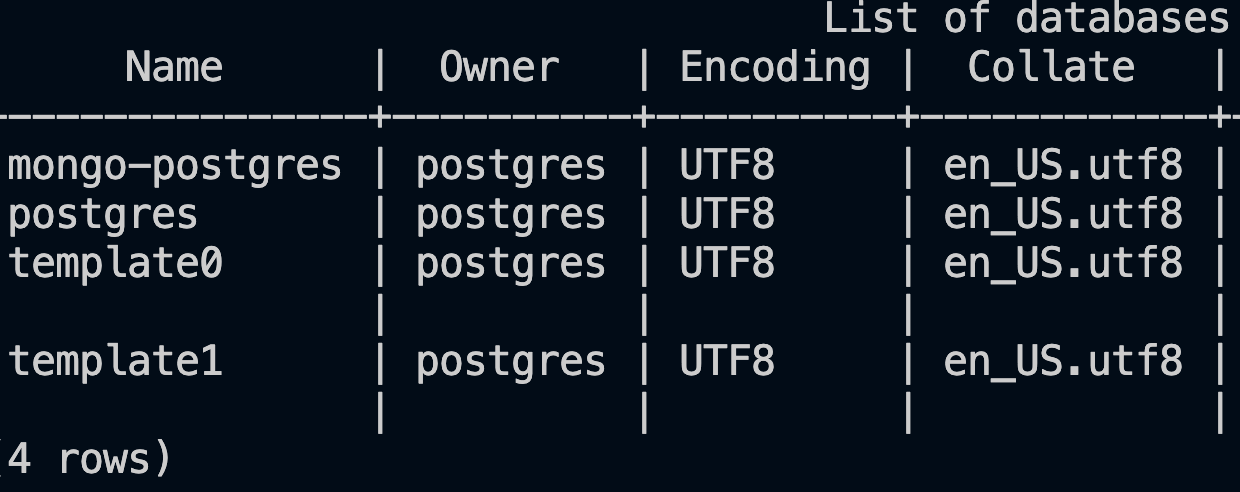
As we can see, the database mongo-postgres we created and have been interacting with using our server is present.
Selecting our Database
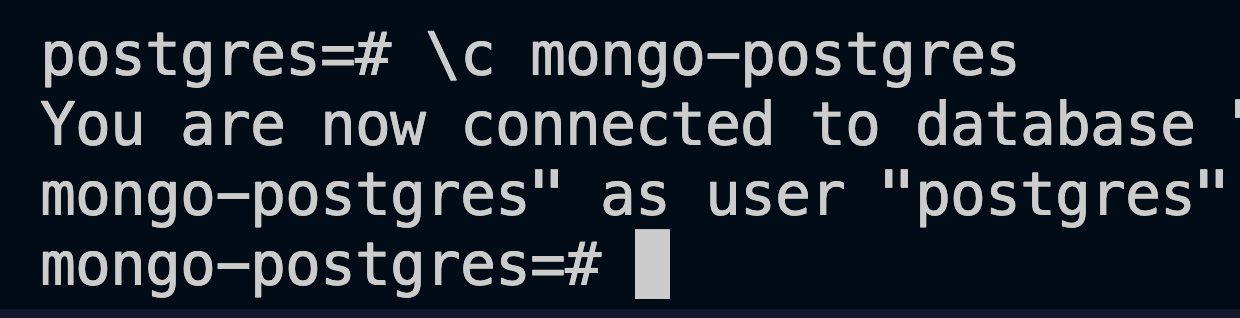
Before we proceed, we must select the database we want to interact with. Run the command below:
\c mongo-postgresIf successful, you should see:
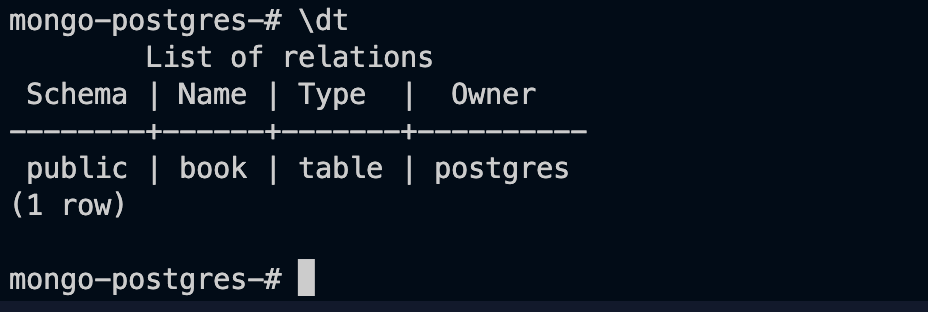
Show Tables Present in our Database
Now let us see the tables as they are. Of course, we should see only the book table.
Now run this command:
\dtIf successful as well, we should see this:
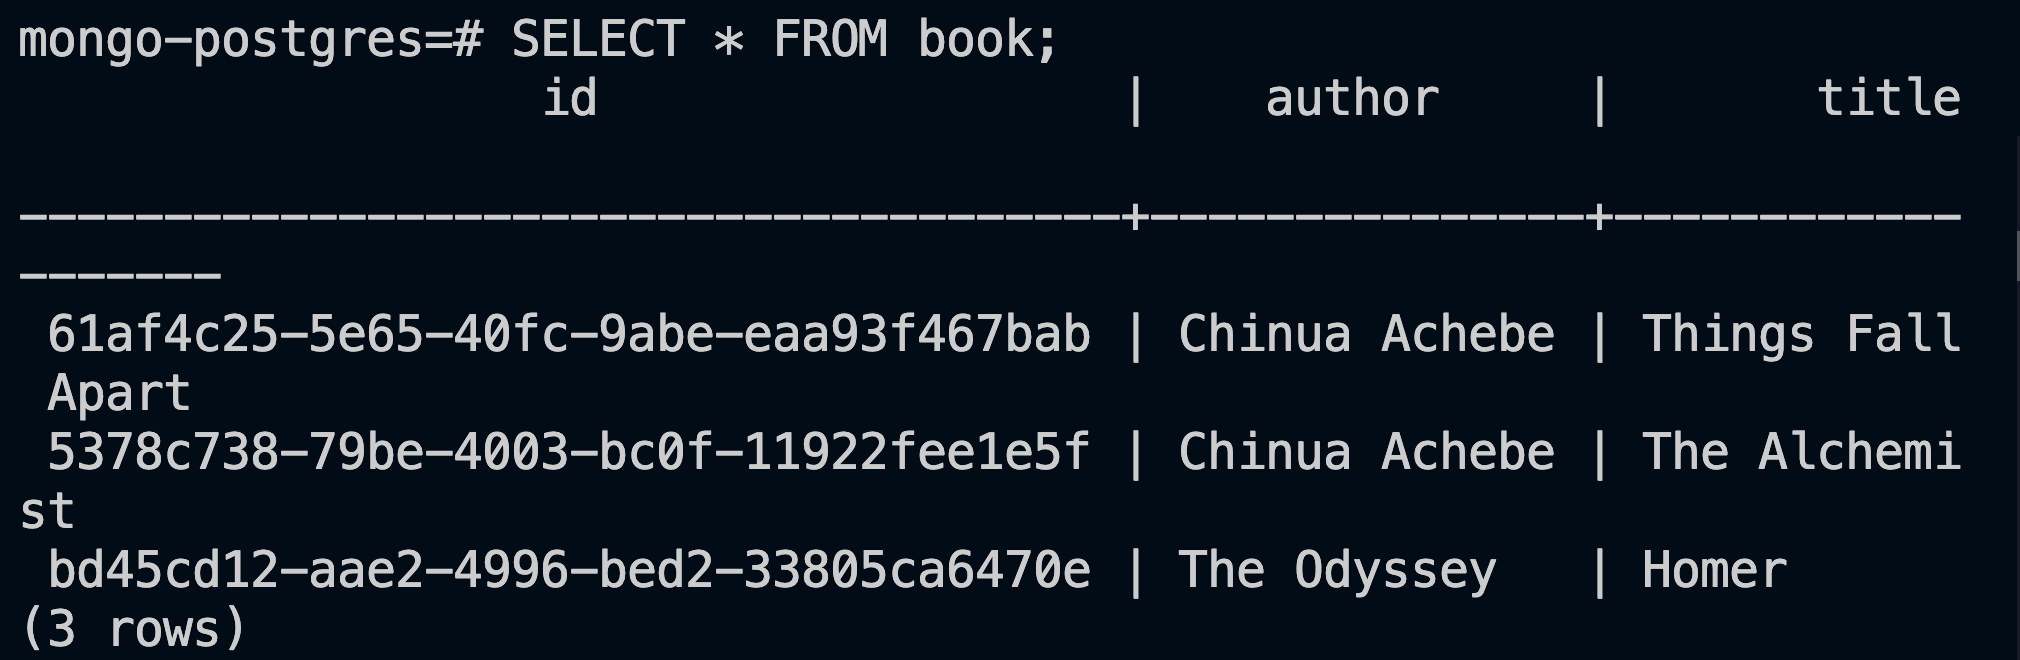
Displaying Table Records
Now let us display the records in our table: Run the command below:
SELECT * FROM book;Now we should see the following, which is a list of the books we have created:
Interacting with our MongoDB Database
We have to make sure we have mongo shell downloaded and installed.
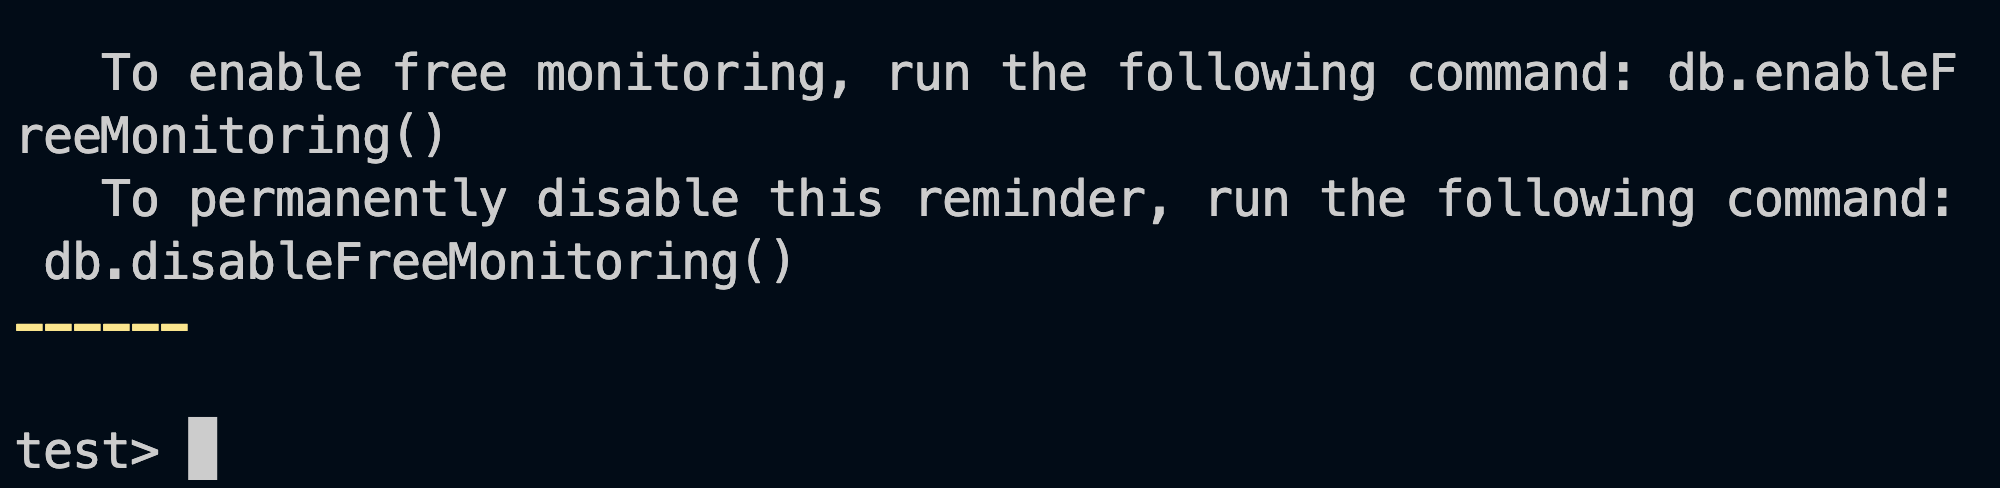
Run the command to open up the shell:
mongosh
# OR
mongo
You should see the following:
Displaying MongoDB Databases Available
Run the following to display the databases available.
show dbs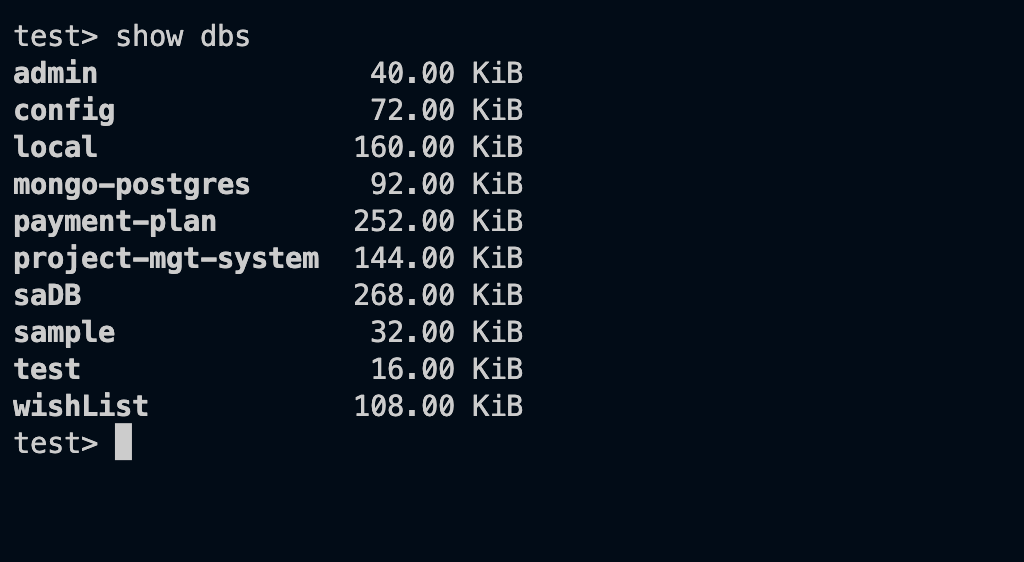
From the image above, we can see our application database mongo-postgres.
Selecting Our MongoDB Database
Run the command below to select our database.
use mongo-postgres
Displaying our Collection
Now that we are inside our database, we can list the collections present. And yes, we should see the users collection.
Run this command:
show collectionsThis command should display the following:

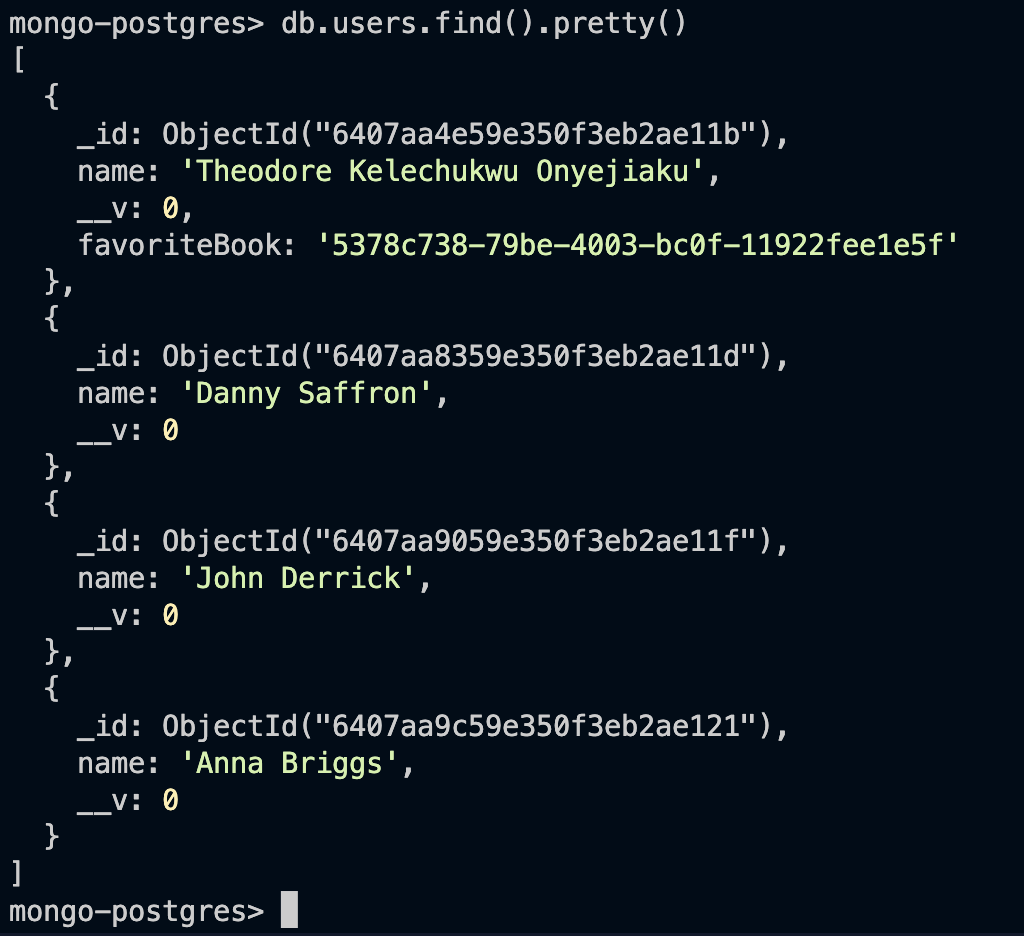
Displaying the Documents in our Users Collection
Run the command below to show the documents present in our collection.
db.users.find().pretty()This should show us the image below:
Displaying Container Details
To view the real-time resource statistics of our containers, please run the command below:
docker statsThe command will show other information, including this one below:


Note: You can also use the command
docker compose lsto see other details, just as we did previously.
Conclusion
In this tutorial, we have looked at how to create and run MongoDB and PostgreSQL containers using Docker Compose. We also learned how to create a NestJs API server to make calls to our databases.
We also learned how to create a new image by Dockerizing our backend server. And lastly, we learned how to interact with our databases using psql and mongo shells.
Gain Debugging Superpowers
Unleash the power of session replay to reproduce bugs and track user frustrations. Get complete visibility into your frontend with OpenReplay, the most advanced open-source session replay tool for developers.
