
Building a static website using Iles.js


This tutorial will guide you on building a static website in Vuejs using Iles.js, which we’ll do by creating a todo application. Without much ado, let’s get to it.
What is Iles, and why use it?
Iles is a static-site generator that provides excellent support for partial hydration. (Actually, the name is Îles meaning “islands” in French.) With Iles, you can use Vue and MDX to build your website while enjoying the smooth development experience provided by Vite.js. You can use client directives to specify which interactive components and automatically ship the minimal amount of JS needed when building for production.
Iles has lots of cool features in the pack for Vuejs developers to ease the use and development experience in building a site with Vue while shipping a zero Javascript site just the way you would when using Jekyll or eleventy. Let’s look at some of these features.
- Partial Hydration: By default, Iles ships Javascript only for the interactive parts.
- Powered by Vite.js: Iles is fast with instant HMR (Hot Module Replacement) because Vite.js powers it.
- Great Markdown Support: Iles has support for Markdown, which means you can use components inside Markdown. HMR gives you the hot reload features, which means the server reloads to reflect the latest changes.
- Layouts and Components: With Iles, you can use your Vue components as layouts for Markdown or Vue pages. Also, you don’t need to import your components to use them.
- File-Based Routing: With Iles, no need to create routes for your components because they are generated by default based on your pages. You only need to configure them to your nitch.
You can learn more about Iles from the official documentation.
Project setup
Let’s go ahead and set up our Todo application. To get started, create a new Iles project with the command below:
npm init iles@nextThe above command will prompt you to enter your project details. Your selection should look like the screenshot below:
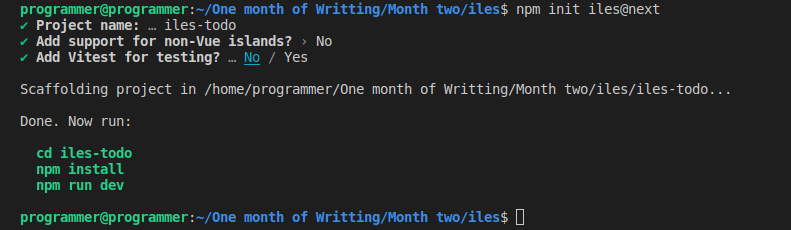
Once you are done with prompts, Iles will scaffold a new project. Change the directory to the project folder, install the required modules, and run the application with the commands below:
cd iles-todo
npm install
npm run dev
Creating Components
With our application up and running, let’s create our app components. Before that, we need to delete the boilerplates in the src/components folder. Then create two components, Navbar.vue, and TodoItems.vue. Open the Navbar.vue component and add the code snippets below:
<script setup lang="ts">
defineProps<{
    title: String;
    description: String;
}>();
</script>

<template>
    <div class="greetings">
        <h1 class="green">{{ title }}</h1>
        <p>{{ description }}</p>
    </div>
</template>

<style scoped>
.greetings {
    text-align: center;
}

h1 {
    font-weight: 500;
    font-size: 2.6rem;
    margin: 0;
    color: green;
}

p {
    font-weight: 500;
    font-size: 1rem;
}
</style>
In the above code snippet, we’ve created our Navbar component and defined two properties, title and description, to describe our application’s title and description. We also added some styling to make things look more appealing. You can style the component at your pleasure. Next, open the TodoItems.vue component and create the todo items component with the code snippet below:
<template>
  <div class="todoItem">
    <AddTodo @addTodo="addTodo" />
    <div class="todo">
      <Todo :todoData="todoData" @deleteTask="deleteTask" @toggleTaskComplete="toggleTaskComplete" />
    </div>
  </div>
</template>

<style scoped>
.todoItem {
  width: 50%;
  height: 60vh;
  margin: 20px auto;
  padding: 10px;
}
Then, we’ll define the methods to add, delete and update todos with the code snippet below:
<script setup lang="ts">

import data from '../service/todoData'
import { ref } from 'vue';
let todoData = ref(data);

function deleteTask(id: string): void {
  todoData.value = todoData.value.filter(td => td.id !== id)
}
function toggleTaskComplete(taskId: string): void {
  todoData.value =
    todoData.value.map(({ id, title, completed }) => ({
      id,
      title,
      completed: taskId === id ? !completed : completed
    }))
}
function addTodo(newTodo: any): void {
  if (newTodo) {
    todoData.value.push({
      ...newTodo
    });
  }
}
</script>
In the above code snippet, we also imported ref from Vue to have a direct reference to our DOM. Then we imported the todoData service, which we will create in a later section to create some dummy todo data for our application.
Create Todo Component
Now let’s create our basic todo component to add and display our todos on the page. Create a todo folder in src/component folder and create a Todo.vue component. Add the code snippet below to the Todo.vue file to loop through all the todos in the TodosData service and display them on the page.
<script setup lang="ts">
defineProps<{
  todoData: any[]
}>();

const emit = defineEmits(['deleteTask', 'toggleTaskComplete'])

function toggleTaskCompletedState(id: string): void {
  emit('toggleTaskComplete', id)
}

function emitDeleteTask(id: string): void {
  emit('deleteTask', id)
}
</script>

<template>
  <div v-for="item in todoData" :key="item.id">
    <div class="todo-item">
      <p>
        <span class="completed" :class="{ done: item.completed }" @click="toggleTaskCompletedState(item.id)">
          {{ item.title }}
        </span>

        <button class="del" @click="emitDeleteTask(item.id)">x</button>
      </p>
    </div>
  </div>
</template>
Then add some inline styles to the component with the code snippet below:
<style scoped>
.todo-item {
  background: #f4f4f4;
  padding: 10px;
  border-bottom: 1px #ccc dotted;
  margin: 10px 0px;
}

.completed {
  cursor: pointer;
}

.done {
  text-decoration: line-through;
}

.del {
  background: #ff0000;
  color: #fff;
  border: none;
  padding: 5px 9px;
  border-radius: 50%;
  cursor: pointer;
  float: right;
}
</style>
Next, create an AddTodo.vue component in the component/todo folder to handle the adding of new todos to the application with the code snippet below:
<script setup lang="ts">

import { genTodoId } from '../../service/todoData'
import { ref, computed } from 'vue';

let title = ref('')

const emit = defineEmits(['addTodo'])
const canAddNewTask = computed(() => title.value.trim().length > 0)

function addTodo() {
  const newTodo = {
    id: genTodoId(),
    title: title.value,
    completed: false,
  }
  emit('addTodo', newTodo)
  title.value = '';
}

</script>

<template>
  <div>
    <form @submit.prevent="addTodo()">
      <input type="text" name="title" v-model="title" placeholder="Add Todo....." />
      <input :disabled="!canAddNewTask" type="submit" value="submit" class="btn" />
    </form>
  </div>
</template>
Lastly, add some inline styles to the AddTodo component with the code snippet below:
<style scoped>
form {
  display: flex;
}

input[type="text"] {
  flex: 10;
  padding: 10px;
  border: 1px solid;
  border-top-left-radius: 4px;
  border-bottom-left-radius: 4px;
  outline: none;
}

input[type="submit"] {
  flex: 2;
  background: green;
  border: none;
  border-top-right-radius: 4px;
  border-bottom-right-radius: 4px;
  color: #fff;
  font-weight: bold;
  cursor: pointer;
}
</style>
Open Source Session Replay
OpenReplay is an open-source, session replay suite that lets you see what users do on your web app, helping you troubleshoot issues faster. OpenReplay is self-hosted for full control over your data.

Start enjoying your debugging experience - start using OpenReplay for free.
Create Interface
Now let’s create an interface for our todos. Our application’s todos will follow the pattern and types defined in our interface. Create an interface folder in the component folder, create index.ts and todo.interface.ts files. Define the todo interface in the todo.interface.ts file with the code snippet below:
/** @format */
export interface ITodo {
    title: string;
    completed: boolean;
    id: string;
}
Then export the interface in the index.ts file with the code snippet below:
/** @format */
export * from './todo.interface';
At this point, the component folder should look like this;
📦components
 ┣ 📂 todo
 ┃ ┣ 📂interface
 ┃ ┃ ┣ 📜index.ts
 ┃ ┃ ┗ 📜todo.interface.ts
 ┃ ┣ 📜AddTodo.vue
 ┃ ┗ 📜Todo.vue
 ┣ 📜Navbar.vue
 ┗ 📜TodoItem.vue
Adding pages
Now let’s make our components visible to the user by creating an MDX file. First, delete the about.vue file in the src/pages folder and replace the code in the index.mdx file with the code snippet below:
<TodoItem client:visible />Here we rendered the TodoItem component, which is the parent for other components.
Adding Custom Data
Now let’s create the TodosData service to create some dummy data for our application. To do that, create a service folder in the src folder, create a todoData.ts file, and add the code snippet below:
/** @format */
import { ITodo } from '../components/todo/interface/todo.interface';
export const genTodoId = (): string => Math.random().toString(36).slice(-6);
const data: ITodo[] = [
    {
        id: genTodoId(),
        title: 'React.js',
        completed: false,
    },
    {
        id: genTodoId(),
        title: 'Vue.js',
        completed: true,
    },
    {
        id: genTodoId(),
        title: 'Angular2+',
        completed: false,
    },
    { id: genTodoId(), title: 'iles.js', completed: false },
];
export default data;
In the code snippet, we created some todo data matching the ITodo interface we created earlier.
Creating Layouts
Now let’s create our application layout to place our Navbar component properly; replace the code in the layouts/default file with the snippet below.
/** @format */
import { ITodo } from '../components/todo/interface/todo.interface';
export const genTodoId = (): string => Math.random().toString(36).slice(-6);
const data: ITodo[] = [
    {
        id: genTodoId(),
        title: 'React.js',
        completed: false,
    },
    {
        id: genTodoId(),
        title: 'Vue.js',
        completed: true,
    },
    {
        id: genTodoId(),
        title: 'Angular2+',
        completed: false,
    },
    { id: genTodoId(), title: 'iles.js', completed: false },
];
export default data;
Configure Site
Now modify the code in the src/app.ts file with the code snippet below to use the properties we defined to create our application metadata.
/** @format */

import { defineApp } from 'iles';
import { computed } from 'vue';

export default defineApp({
    head({ frontmatter, site }) {
        return {
            meta: [
                { property: 'Favour Todo', content: site.title },
                { property: 'keywords', content: computed(() => frontmatter.tags) },
            ],
        };
    },
});
Lastly, update the code in the src/site.ts file with the code snippet below:
/** @format */
export default {
    title: 'Todo List App',
    description: 'What is the task for the day?',
};
Testing the application
Now let’s test the application. When you refresh your browser, you will see a user interface like the one on the screenshot below:
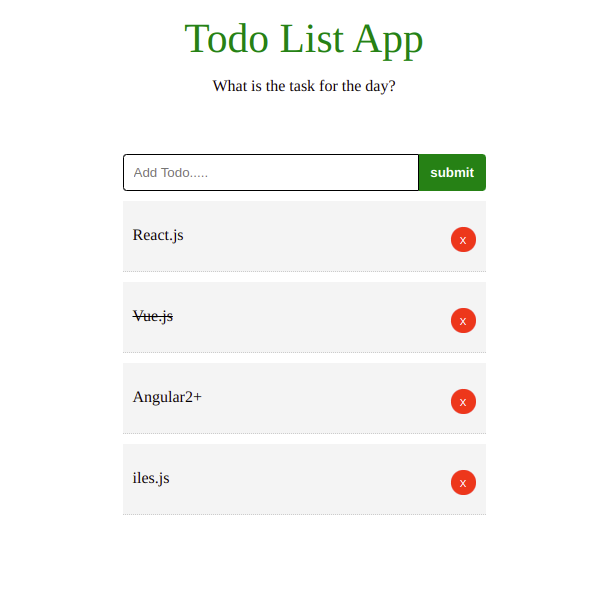
Go ahead, add, update and delete a todo from the application.
Conclusion
You’ve learned how to build a static website using Iles.js by creating a todo demo application. First, we started with an introduction to Iles. Then we discussed why you should use it in your application, and we built a demo application to explore its features. The code for this tutorial is available here on Github; feel free to clone and add more features to the demo application you just created.