Step-by-step Guide To Building and Deploying a Vue JS App with Netlify in 2021
Building and deploying your own apps with VueJs has never been so easy, learn how to deploy your Vue apps with Netlify in this detailed tutorial


One of the things web developers worry about after the main hustle of building an application that customers can use is how to distribute it to or serve the application publicly for the said customers. The web development industry has grown to the point where developers are now asked to focus on the core building process as other secondary parts are taken care of by easy-to-use services.
Before we start
You will need Node installed and also:
- A GitHub account, you can set one up here.
- Create a Netlify account, most preferably link your GitHub to it.
- A code editor: Visual Studio Code is highly recommended. (here’s why)
- Vue CLI 3.0 installed on your machine. To do this, uninstall the old CLI version first:
npm uninstall -g vue-clithen install the new one:
npm install -g @vue/cliWhere to host your Vue app
There are a lot of services you can use to deploy your Vue JS application some of these places include: Git platforms such as GitHub Pages, GitLab Pages, and Bitbucket Pages, other platforms include Firebase hosting, Heroku, Digital Ocean, AWS solutions, CloudFront, Now and Surge and many more. Today we would be focusing on one of the easiest to set up for your Vue JS application: Netlify.
What is Netlify?
Netlify in my opinion is the fastest way to deploy your Vue JS web application. It is a git-based serverless platform where you can build, collaborate and publish your apps for your customers with ease. It integrates with the most modern web development tools. Asides from deployment, Netlify offers solutions that cover cloud lambda functions and even JamStack architecture.
Why use Netlify?
The three main reasons to use Netlify to deploy your app are that it is super-fast to set up, it provides a very straightforward 3-step process that even a newbie can handle. The second reason is that it is free, and the final reason for me is that Netlify takes on the responsibility of continuously deploying as you make new changes and push them.
What we are building
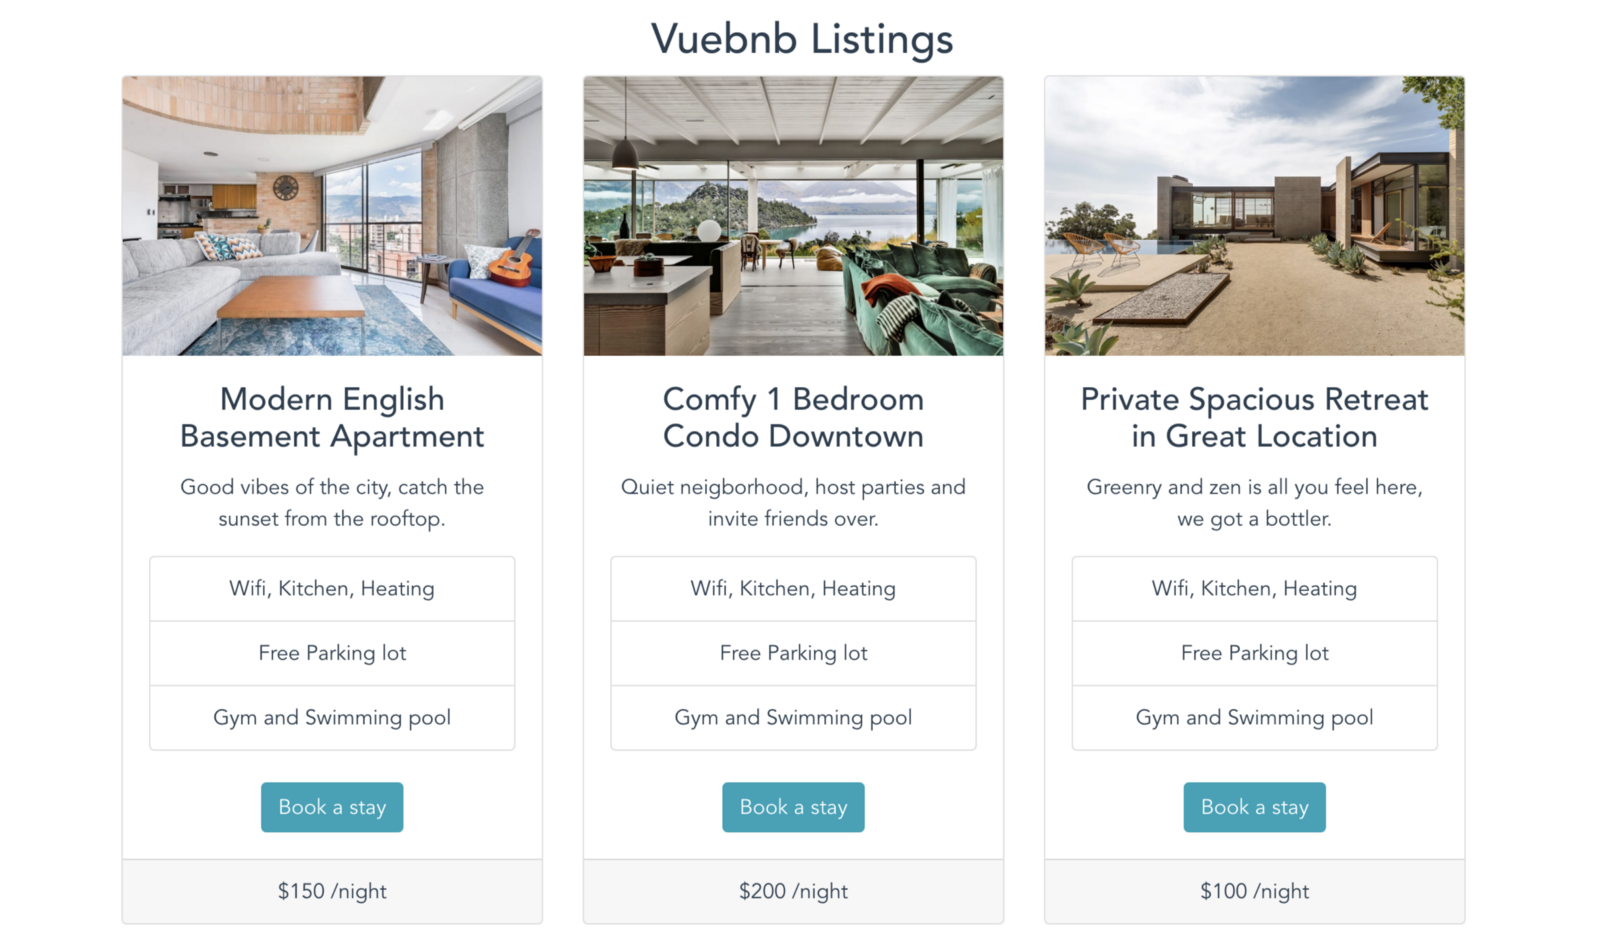
We would be building a re-imagined Airbnb listing component using UI elements displaying listing images, amenities, a booking button, and the price per night, let us call it Vuebnb. We would then deploy this component publicly using Netlify.
Getting started
If you have followed this post from the start, navigate to a file location of your choice and open it up in VS Code and then in the terminal, initialize a new Vue project with this command
vue create vuebnbThis would show you some options, choose default values and it will create a scaffold of a new Vue JS application in that file location you chose.
cd vuebnb
npm run start
This would show you the application in your local development server. Moving on, we would use elements from the Bootstrap Vue component library to build out this component so we need to install it.
# With npm
npm install vue bootstrap bootstrap-vue

# With yarn
yarn add vue bootstrap bootstrap-vue
Inside your source folder, update your main.js file with the code block below:
import Vue from 'vue'
import App from './App.vue'
import { BootstrapVue, IconsPlugin } from 'bootstrap-vue'
// Import Bootstrap an BootstrapVue CSS files (order is important)
import 'bootstrap/dist/css/bootstrap.css'
import 'bootstrap-vue/dist/bootstrap-vue.css'
// Make BootstrapVue available throughout your project
Vue.use(BootstrapVue)
// Optionally install the BootstrapVue icon components plugin
Vue.use(IconsPlugin)
Vue.config.productionTip = false
new Vue({
  render: h => h(App),
}).$mount('#app')
This file contains all the necessary import statements we need from BootStrapVue to work in the application. Also, update the content of your app.vue file to the code block below:
<template>
  <div id="app">
    <h2>Vuebnb Listings</h2>
    <HelloWorld msg="Welcome to Your Vue.js App"/>
  </div>
</template>
<script>
import HelloWorld from './components/HelloWorld.vue'
export default {
  name: 'app',
  components: {
    HelloWorld
  }
}
</script>
<style>
#app {
  font-family: 'Avenir', Helvetica, Arial, sans-serif;
  -webkit-font-smoothing: antialiased;
  -moz-osx-font-smoothing: grayscale;
  text-align: center;
  color: #2c3e50;
  margin-top: 30px;
  margin-bottom: 10px;
}
</style>
Testing out
The magic happens in the HelloWorld component, so in the template section we would create 3 card elements which would contain titles, footer details, image details and even styles. There are 3 cards as shown in the image above and each card has card texts, and list group item where amenities are listed for each apartment and finally buttons which are linked to the payment confirmation modal. Putting all of it together, navigate inside it, replace the content with the code block below:
<template>
  <div class="hello">
  <b-card-group deck>
  <b-card
    footer="$150 /night"
    footer-tag="footer"
    title="Modern English Basement Apartment"
    img-src="https://wander-lush.org/wp-content/uploads/2021/01/Medellin-Airbnb-Penthouse-in-Laureles.jpg"
    img-alt="Image"
    img-top
    tag="article"
    style="max-width: 20rem;"
    class="mb-2"
  >
    <b-card-text>
      Good vibes of the city, catch the sunset from  the rooftop.
    </b-card-text>
    <b-list-group>
    <b-list-group-item>Wifi, Kitchen, Heating</b-list-group-item>
    <b-list-group-item>Free Parking lot</b-list-group-item>
    <b-list-group-item>Gym and Swimming pool</b-list-group-item>
  </b-list-group>
  <br>
    <b-button href="#" variant="info" v-b-modal.modal-1>Book a stay</b-button>
    <b-modal id="modal-1" title="Payment Confirmation">
    <p class="my-4">You have just booked your Vuebnb</p>
  </b-modal>
  </b-card>
<!-- end of card 1 -->
  <b-card
    footer="$200 /night"
    footer-tag="footer"
    title="Comfy 1 Bedroom Condo Downtown"
    img-src="https://media.cntraveler.com/photos/5e9907c14ab09800086faf63/master/pass/airbnb-view-37143825.jpg"
    img-alt="Image"
    img-top
    tag="article"
    style="max-width: 20rem;"
    class="mb-2"
  >
    <b-card-text>
      Quiet neigborhood, host parties and invite friends over.
    </b-card-text>
    <b-list-group>
    <b-list-group-item>Wifi, Kitchen, Heating</b-list-group-item>
    <b-list-group-item>Free Parking lot</b-list-group-item>
    <b-list-group-item>Gym and Swimming pool</b-list-group-item>
  </b-list-group>
<br>
    <b-button href="#" variant="info" v-b-modal.modal-2>Book a stay</b-button>
    <b-modal id="modal-2" title="Payment Confirmation">
    <p class="my-4">You have just booked your Vuebnb</p>
  </b-modal>
  </b-card>
<!-- end of card 2 -->
  <b-card
    footer="$100 /night"
    footer-tag="footer"
    title="Private Spacious Retreat in Great Location"
    img-src="https://media.cntraveler.com/photos/5de7dbee45a09000087e427f/master/pass/airbnb-9232684-los-angeles.jpg"
    img-alt="Image"
    img-top
    tag="article"
    style="max-width: 20rem;"
    class="mb-2"
  >
    <b-card-text>
      Greenry and zen is all you feel here, we got a bottler.
    </b-card-text>
    <b-list-group>
    <b-list-group-item>Wifi, Kitchen, Heating</b-list-group-item>
    <b-list-group-item>Free Parking lot</b-list-group-item>
    <b-list-group-item>Gym and Swimming pool</b-list-group-item>
  </b-list-group>
<br>
    <b-button href="#" variant="info" v-b-modal.modal-3>Book a stay</b-button>
    <b-modal id="modal-3" title="Payment Confirmation">
    <p class="my-4">You have just booked your Vuebnb</p>
  </b-modal>
  </b-card>
<!-- end of card 3 -->
  </b-card-group>
</div>
</template>
<script>
export default {
  name: 'HelloWorld',
  props: {
    msg: String
  }
}
</script>
<!-- Add "scoped" attribute to limit CSS to this component only -->
<style scoped>
.hello{
  margin-left: 90px;
  padding-left: 20px;
}
</style>
Now if you run your application on the dev server it should look like this:
Production: setting up Netlify
Now the component is built the way we want it, let us prepare the project for deployment. The first thing to do is to run the Vue build command to minify files and bundle it up into chunks that are light-weight and easy to parse:
npm run build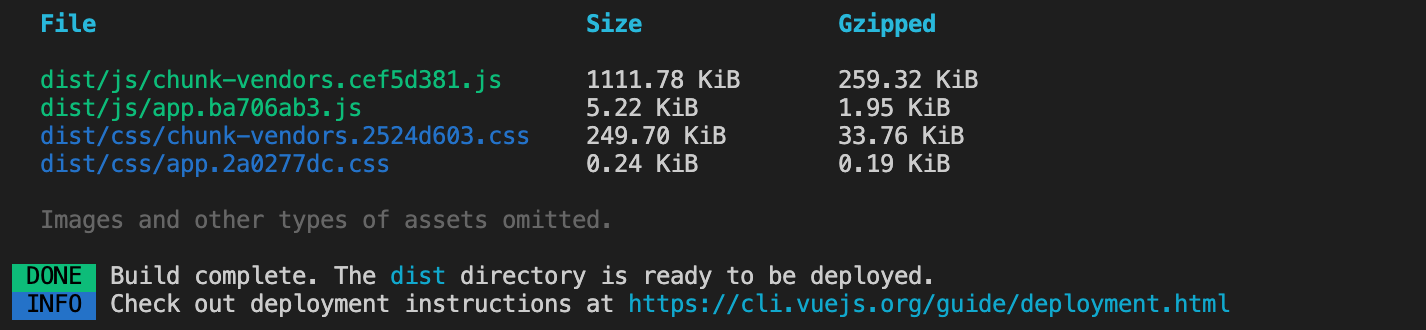
It should look something like the image above if successful. Inside your project files you would also see a new dist folder where Vue minifies everything to be production-ready. Now make sure that you push this entire project to GitHub, you can follow the guidelines here.
You only need to build for production once, subsequently Netlify runs the build command when you make a change to the repository.
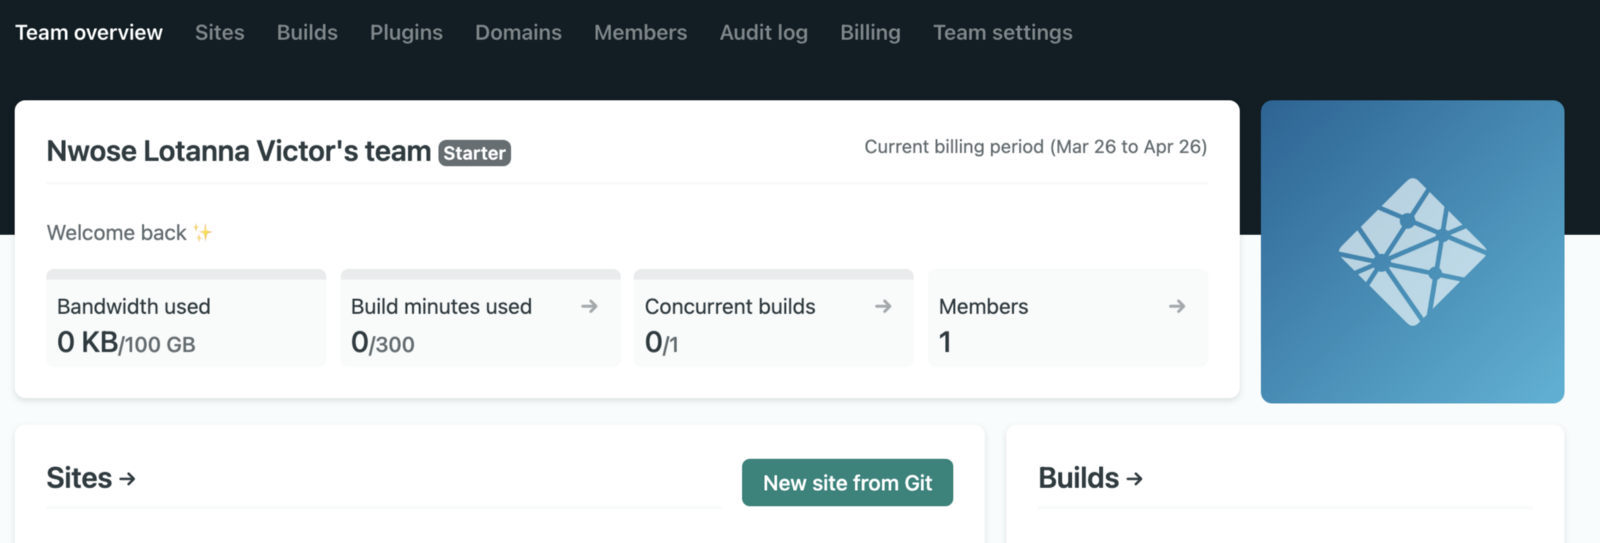
Now open Netlify and log-in, after you get in click on “New site from Git”
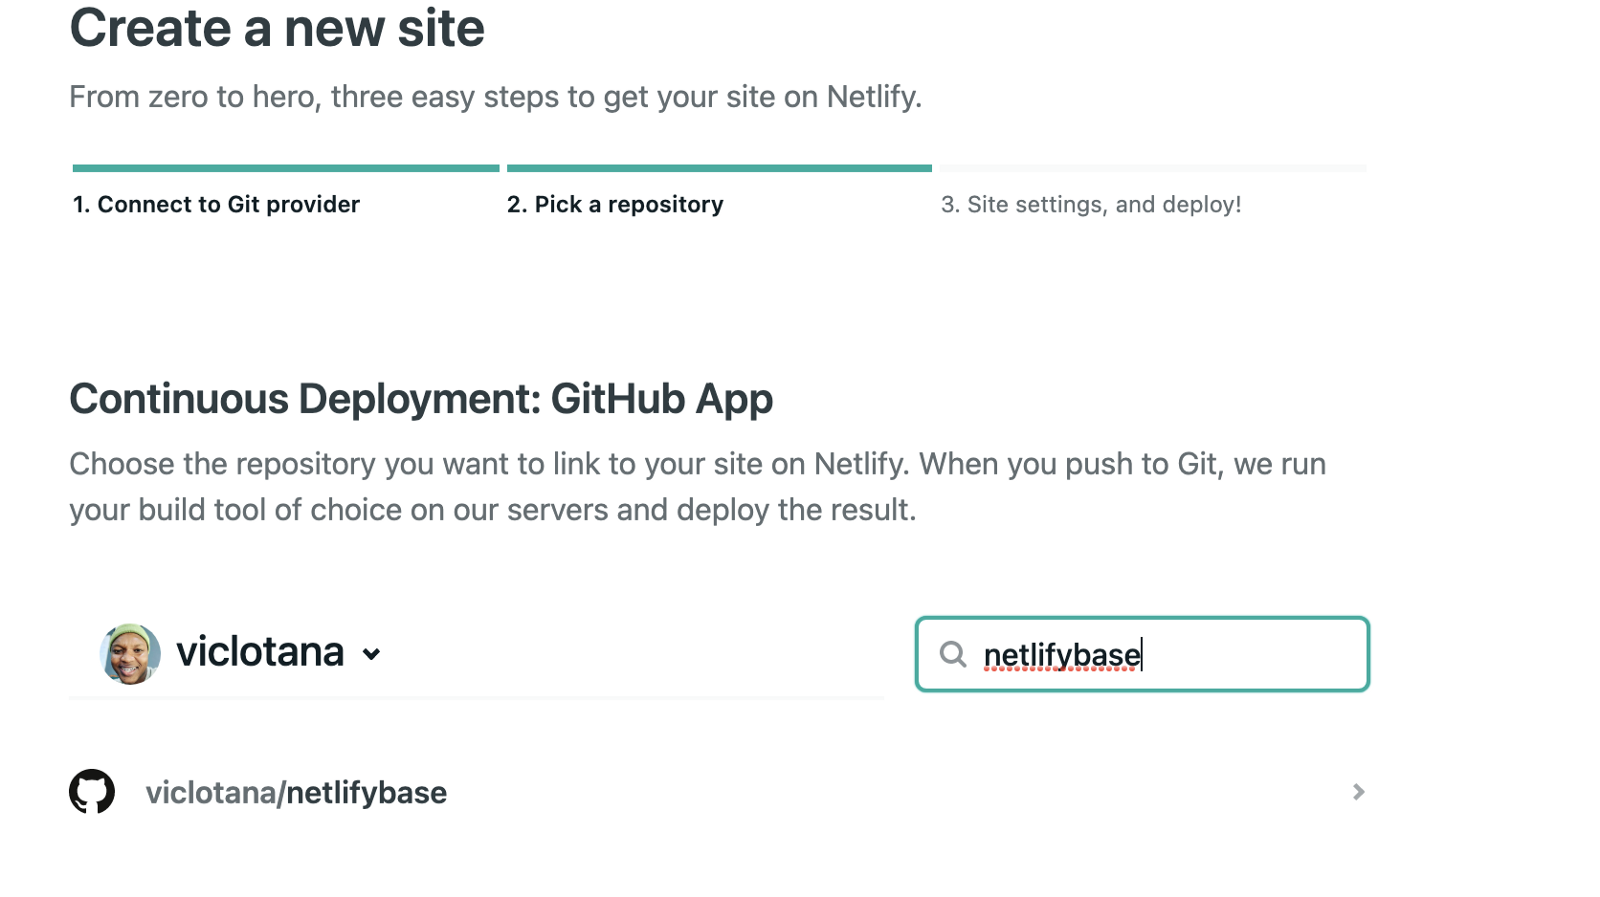
This takes you through a process of connecting any Git-based platform where your project is hosted (in our case GitHub) After you have been authenticated, you are asked to find the project on GitHub so you have to search for the project, in my case “NetlifyBase”
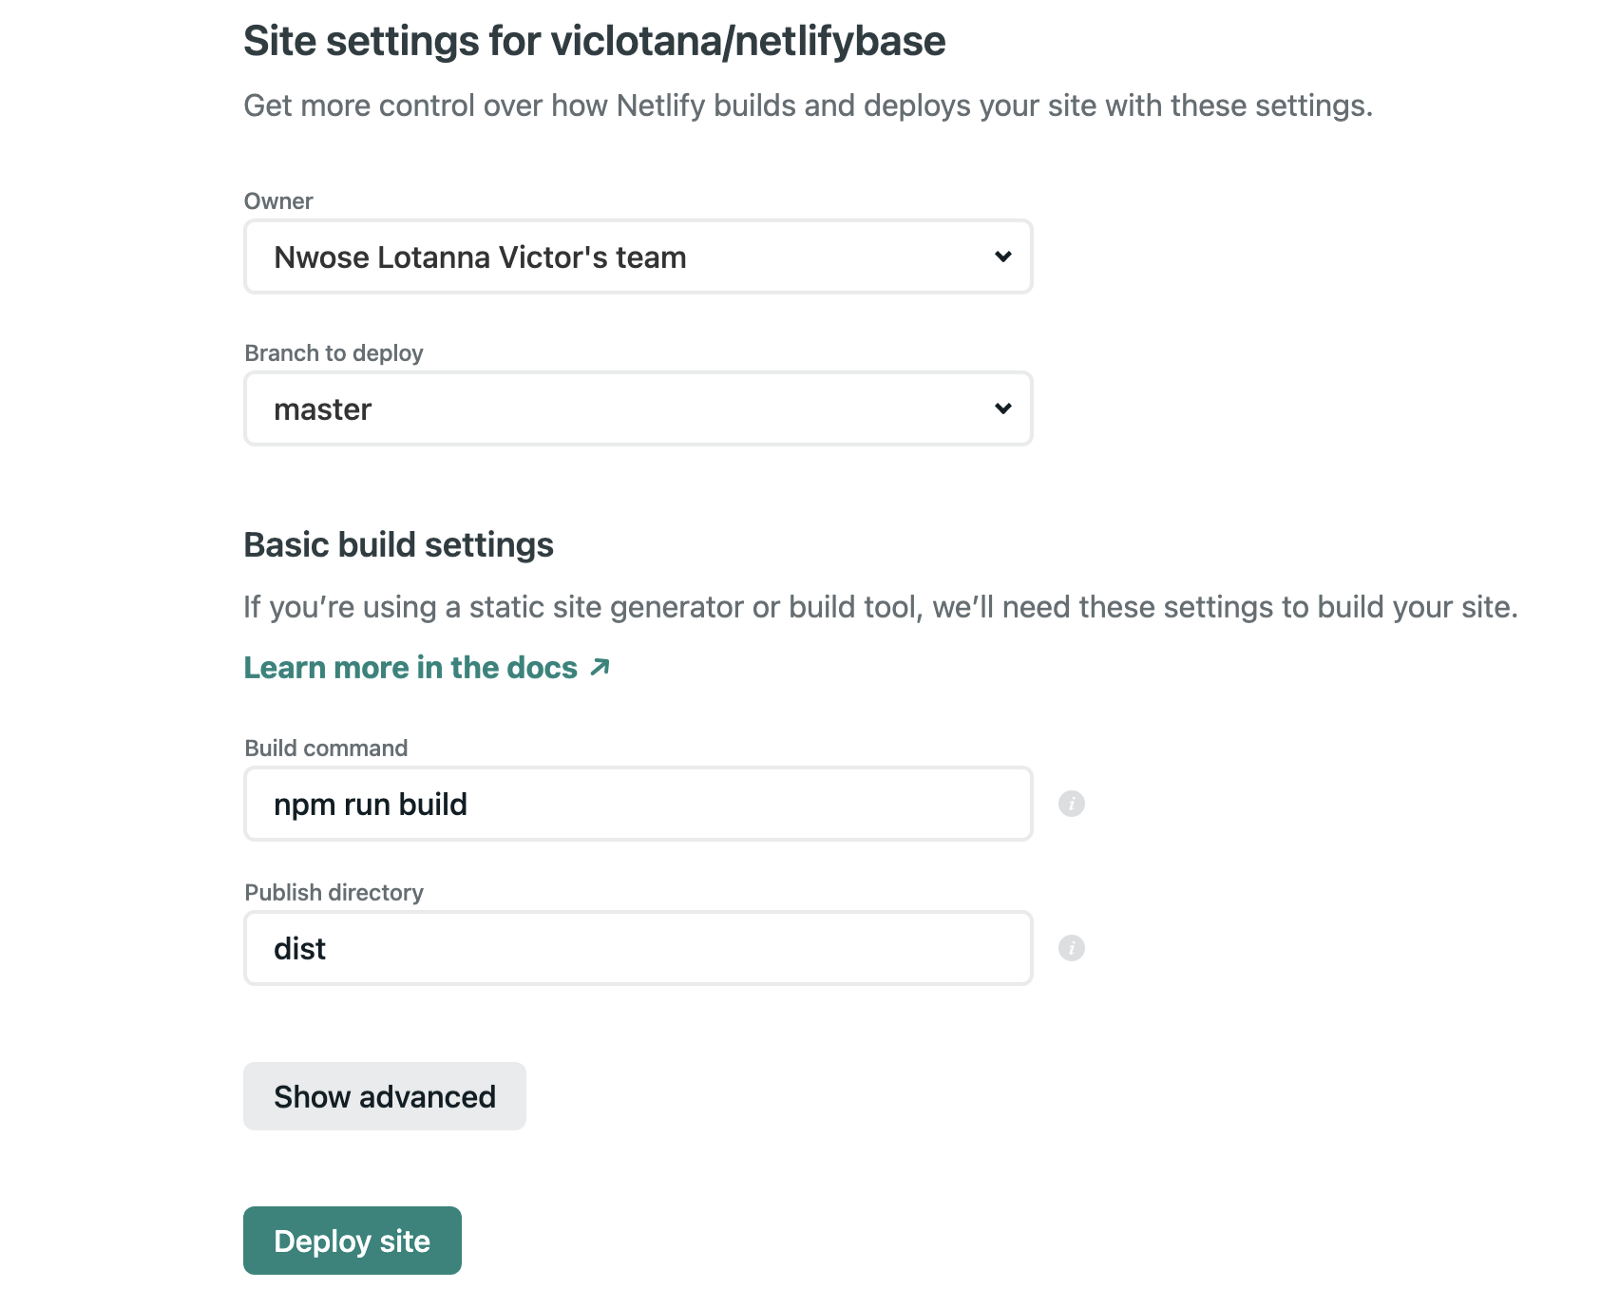
The third and final step is to specify the build command and your dist folder and click on “Deploy site”!
And in a few minutes (mine was 2) your project should be deployed! You can check out the demo app here: NetlifyApp
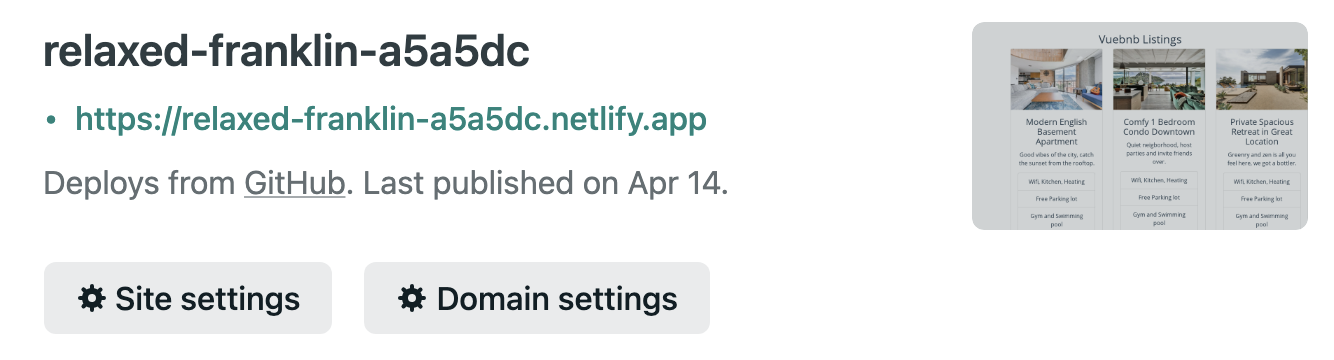
This is so cool, right? It gets even better!
Open Source Session Replay
OpenReplay is an open-source, session replay suite that lets you see what users do on your web app, helping you troubleshoot issues faster. OpenReplay is self-hosted for full control over your data.

Start enjoying your debugging experience - start using OpenReplay for free.
Updating to suit your taste
The update process for your app is also now automated thanks to Netlify, so whenever you have a new change, all you need to do is to push the commit to GitHub, and Netlify will pick it up and deploy the changes!
Wrapping up
This has been a good journey, from building a listings component in Vue JS to deploying the application using Netlify. The 3-step easy deploy process and the continuous automated updating capabilities are really solid features that make Netlify stand out!