Upgrade Your Static Website to a Progressive Web App: A Beginner's Guide and Resources
Easily produce PWAs from static websites.


Progressive Web Apps (PWAs) are like regular websites but with extra superpowers! They work offline, so you can still use them even when you don’t have an internet connection. PWAs are also super fast and can be installed right on your home screen, just like a regular app. The idea behind PWAs is to give you the best of both worlds - all the convenience of a native app combined with the reach and accessibility of the web.
Turning your website into a Progressive Web App (PWA) is effortless, especially if it’s a static site built with HTML, CSS, and JavaScript. For example, converting your GitHub Pages site to a PWA is a straightforward process, which you can do by following the steps in this guide.
PWAs are web apps developed using a number of specific technologies and standard patterns to allow them to take advantage of both web and native app features. For example, web apps are more discoverable than native apps; it’s a lot easier and faster to visit a website than to install an application, and you can also share web apps by sending a link. — From MDN Web docs
Icon, app icon, and favicon
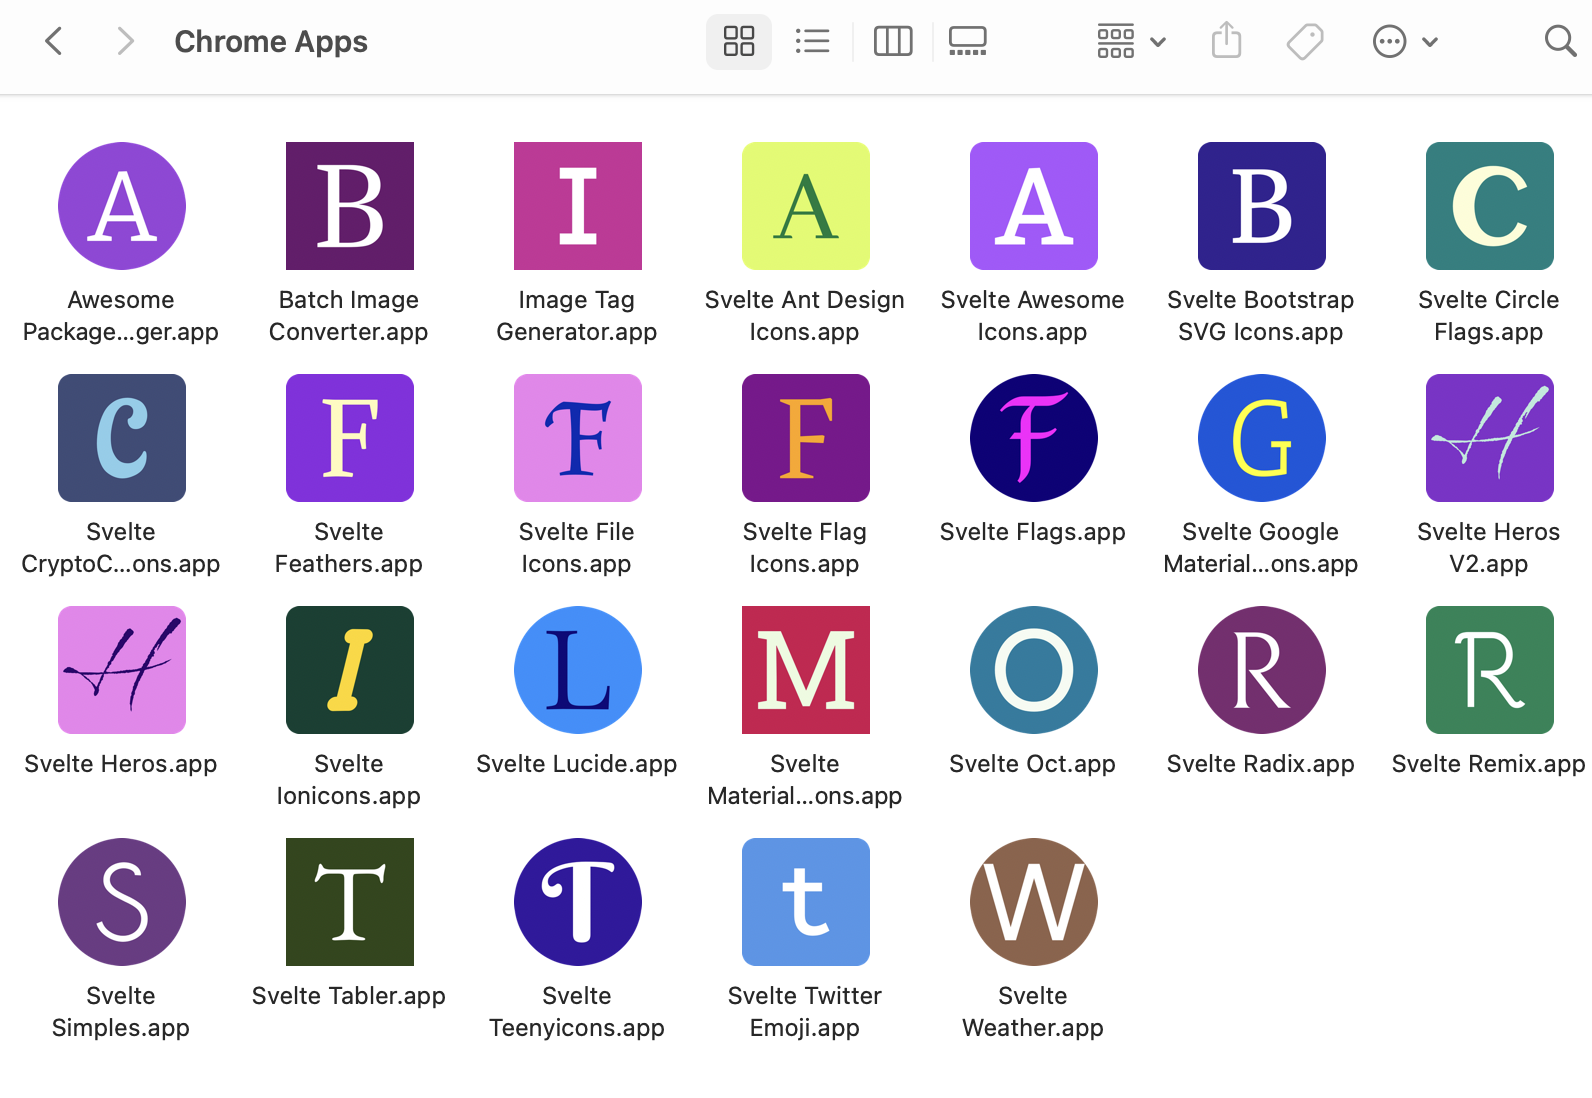
It’s essential to provide a unique icon when users install your Progressive Web App (PWA) on a laptop, desktop, or mobile device. The image above displays examples of icons in my Chrome Apps directory. Use the favicon-generator website to create your own. It generates six different icon sizes for various devices. Add a text, select font family, size, and background color, and download the resulting zip file.”

Pro Tip: Opt for white as the font color. To choose the background color, visit randoma11y.com and refresh the browser until you find a suitable hue.
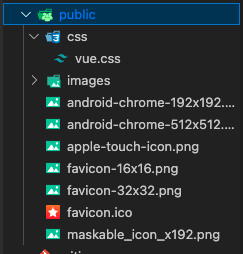
Finally, place the icons in the public directory.
Progressive Web Apps require a maskable icon. To create one, go to maskable.app and upload the android-chrome-192x192.png you just created. Then, click the Export button to save your new icon.
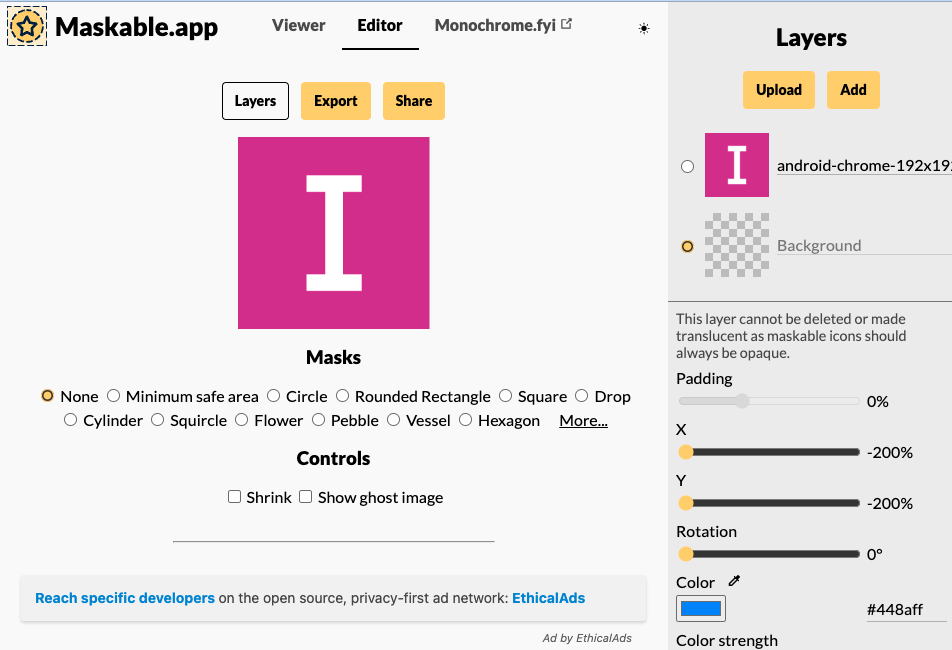
Pro Tip: To remove the background in the screenshot above, click on it and set the X and Y values to the minimum.
Place the icon in the public directory along with the other icons.
Creating a web manifest
PWAs require a web manifest file. To create it, add a manifest.webmanifest file to the root directory and include the following code:
{
 "name": "Your Project Name",
 "short_name": "project-short-name",
 "scope": "/",
 "start_url": ".",
 "icons": [
  {
   "src": "public/apple-touch-icon.png",
   "sizes": "180x180",
   "type": "image/png"
  },
  {
   "src": "public/android-chrome-192x192.png",
   "sizes": "192x192",
   "type": "image/png"
  },
  {
   "src": "public/android-chrome-512x512.png",
   "sizes": "512x512",
   "type": "image/png"
  },
  {
   "src": "public/maskable_icon_x192.png",
   "sizes": "192x192",
   "type": "image/png",
   "purpose": "any maskable"
  }
 ],
 "theme_color": "#ffffff",
 "background_color": "#ffffff",
 "display": "standalone"
}
Remember to replace the name and short_name fields with the name of your project. Also, make sure the link to the maskable icon is updated if necessary.
Updating index.html
We need to update the index.html file in your root directory. If it doesn’t exist, create it and add the following code:
<!DOCTYPE html>
<html lang="en">

<head>
  <meta charset="UTF-8" />
  <title>Your title</title>
  <meta http-equiv="X-UA-Compatible" content="IE=edge,chrome=1" />
  <meta name="description" content="Add your description." />
  <meta name="viewport" content="width=device-width, user-scalable=no, initial-scale=1.0, maximum-scale=1.0, minimum-scale=1.0" />
  <link rel="stylesheet" href="link/to/your-css.css" />
  <link rel="canonical" href="https://yourname.github.io/your-project-name/" />
  <link rel="manifest" href="manifest.webmanifest">
  <meta name="theme-color" content="#ffffff" />
  <link rel="shortcut icon" href="public/favicon.ico" type="image/x-icon">
  <link rel="icon" href="public/favicon.ico" type="image/x-icon">
  <link rel="apple-touch-icon" href="public/apple-touch-icon.png">
  <link rel="android-chrome-192x192" type="image/png" sizes="192x192" href="public/android-chrome-192x192.png">
  <link rel="android-chrome-512x512" type="image/png" sizes="512x512" href="public/android-chrome-512x512.png">
  <link rel="favicon-16x16" type="image/png" sizes="16x16" href="public/favicon-16x16.png">
  <link rel="favicon-32x32" type="image/png" sizes="16x16" href="public/favicon-32x32.png">
  <meta name="pwa-capable" content="yes">
</head>

<body>
  Your content goes here.

  <script>
    // PWA
    if ('serviceWorker' in navigator) {
      navigator.serviceWorker.register(
        '/service-worker.js', {
          scope: '/'
        }
      )
    }
  </script>
</body>

</html>
Remember to modify the title, description, stylesheet, content, and canonical fields.
Pro Tip: If your website is hosted on GitHub Pages and you have a custom domain, including the canonical field is a good idea. If not, you can safely remove it.
You may have noticed references to the manifest file, icon links, and service-worker.js. We’ll create the service-worker.js file next.
Session Replay for Developers
Uncover frustrations, understand bugs and fix slowdowns like never before with OpenReplay — an open-source session replay tool for developers. Self-host it in minutes, and have complete control over your customer data. Check our GitHub repo and join the thousands of developers in our community.
Creating service-worker.js
Create a new file in the root directory and name it service-worker.js. Then, add the following code to the file:
const GHPATH = 'https://your-github-pages-or-domain-name.com/';
// Change to a different app prefix name
const APP_PREFIX = 'my_awesome_';
const VERSION = 'version_01';

// The files to make available for offline use. make sure to add
// others to this list
const URLS = [
  `${GHPATH}/`,
  `${GHPATH}/index.html`,
  // add more paths if you need
  // `${GHPATH}/js/app.js`
]

const CACHE_NAME = APP_PREFIX + VERSION
self.addEventListener('fetch', function (e) {
  console.log('Fetch request : ' + e.request.url);
  e.respondWith(
    caches.match(e.request).then(function (request) {
      if (request) {
        console.log('Responding with cache : ' + e.request.url);
        return request
      } else {
        console.log('File is not cached, fetching : ' + e.request.url);
        return fetch(e.request)
      }
    })
  )
})

self.addEventListener('install', function (e) {
  e.waitUntil(
    caches.open(CACHE_NAME).then(function (cache) {
      console.log('Installing cache : ' + CACHE_NAME);
      return cache.addAll(URLS)
    })
  )
})

self.addEventListener('activate', function (e) {
  e.waitUntil(
    caches.keys().then(function (keyList) {
      var cacheWhitelist = keyList.filter(function (key) {
        return key.indexOf(APP_PREFIX)
      })
      cacheWhitelist.push(CACHE_NAME);
      return Promise.all(keyList.map(function (key, i) {
        if (cacheWhitelist.indexOf(key) === -1) {
          console.log('Deleting cache : ' + keyList[i]);
          return caches.delete(keyList[i])
        }
      }))
    })
  )
})
Be sure to update the GHPATH, APP_PREFIX, and VERSION fields. It’s important to keep the cache version up-to-date, as any changes made to the files should result in an updated version number to ensure users receive the latest version of your website.
Using Lighthouse to Test Your PWA:
Now that you’ve completed the necessary steps, it’s time to test your PWA with Lighthouse to check for any potential issues. To do this, open your website or GitHub Pages in Google Chrome and access the developer tools. Within the developer tools, select the Lighthouse tab.
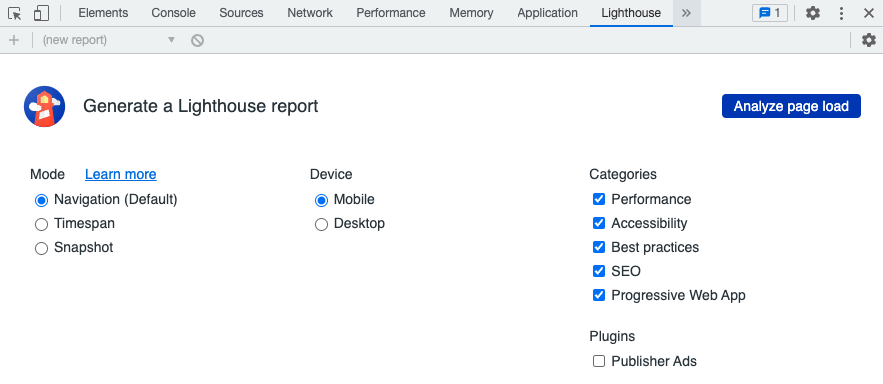
Once the Lighthouse panel is open, click the “Analyze page load” button. If your PWA passes the audit, you should see a green tick indicating that it meets the standards for progressive web applications.
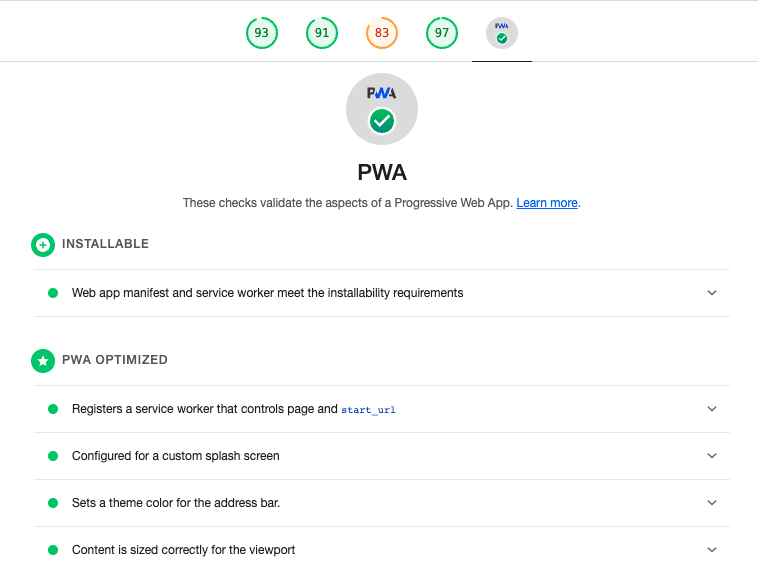
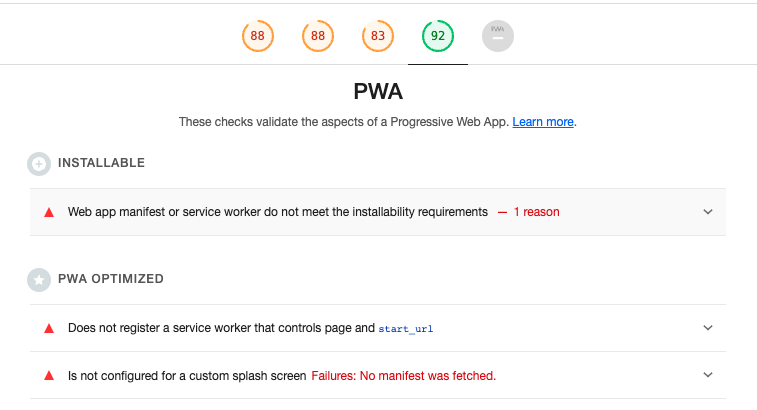
If your PWA fails to pass the audit, Lighthouse will provide clear explanations of the issues found. You can work through these issues one by one to resolve them and improve your PWA’s performance.
PWA Badge
Consider adding a PWA badge to clarify that your website is a Progressive Web App (PWA) and installable for offline use. Here’s an example:
<a href="https://developer.mozilla.org/en-US/docs/Web/Progressive_web_apps">
  <img src="https://img.shields.io/badge/PWA-enabled-brightgreen" alt="PWA Shield">
</a>
Installing and Uninstalling PWA
It is important to provide users with clear instructions on installing and uninstalling your PWA. You can add the following to the end of your index.html file:
Enjoy lightning-fast browsing and offline access with Our PWA.
This website can be downloaded and installed on your device for offline use as a Progressive Web App.
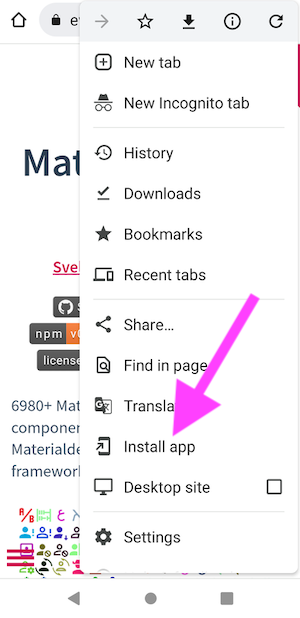
To install, look for the “Add to Home Screen” option in the browser’s menu or settings. On most mobile devices, this option can be found by visiting the website, then selecting the “Options” or “Menu” button in the browser, and searching for “Add to Home Screen.” On some desktop browsers, you can install the PWA by right-clicking on the page and selecting “Install.”
To uninstall, remove the PWA from your device’s home screen.
The following images show how users see where they can install your app.
PWA on a mobile:
PWA on a laptop:

Hosting GitHub Pages from the docs directory
If you are hosting your GitHub Pages website from the docs directory, simply move all the necessary files, including your index.html, icons, manifest, and service-worker.js files, into the docs directory.
Conclusion
Converting your website into a Progressive Web App (PWA) is a great way to provide your users with a superior experience, no matter where they are or what device they’re using. With many modern JavaScript frameworks capable of building to HTML, CSS, and JavaScript, creating a PWA has never been easier. So, if you’re looking to stay ahead of the curve and provide your users with the best possible experience, now is the perfect time to start exploring the world of PWAs.
Gain Debugging Superpowers
Unleash the power of session replay to reproduce bugs and track user frustrations. Get complete visibility into your frontend with OpenReplay, the most advanced open-source session replay tool for developers.