useReducer Is A Better Option Than useState


The useReducer React hook is complicated and a bit complex to scale through at first. Still, after you have gotten your head through this hook and how to use it, it makes state management as simple as anything could be, especially in the tracking aspect of different pieces of states implemented using the useState hook.
In this article, we will be looking at the useReducer hook and why it’s a better option for managing complex states in React than the useState hook. This tutorial is beginner-friendly, and you need to have Node.js and React installed.
State management
We often hear about state, state changes, and state management. What exactly is the state? We can take this literally by saying that it’s the current state of your program, but that might not be too easy to understand. In programming, the state is simply the combination of all the data we currently have in our application, the data that is utilized and returned by your ongoing program.
What exactly is state management? According to Wikipedia, “State management refers to the management of the state of one or more user interface controls such as text fields, OK buttons, radio buttons, etc.”
useReduce vs useState
Can state management be done without the use of useState? A widespread question with over 300,000+ results on Google:

If you find yourself keeping track of multiple pieces of state that rely on complex logic, the useReducer hook may be better. Let’s create an app that can increment and decrement numbers using that hook and see how efficient it could be.
Setting Development area
We need to run this:
npx create-react-app counter
cd counter
npm start
After installation, we should have this.

useReducer
const [state, dispatch] = useReducer(reducer, initialArg, init);UseReducer returns an array with the first element being the state and the second element being a dispatch function that will invoke the useReducer.
To build the counter application, we need four files: the main App.js to render our components; Counter.js for our counter application; Reducer.js where we will manage the application state using our useReducer logic; and our Styles.css. Questions arise: What are we doing? How are we managing state? What benefits will this provide over useState? And the questions go on. I will answer all these questions in this article.
Counter Application
This is the way we could start this.
const [count, dispatch] = useReducer(reducer, 0);Instead of a setter in useState, we used dispatch. “Dispatch” here has its literal meaning, more like you will want to send something: you could say “send an action”. We will process it with a reducer function. As we can see up there, we have the state 0. Let’s start building the counter application.
//counter.js
import React, { useReducer } from "react";
import reducer from "./Reducer";

function Counter() {
  const [count, dispatch] = useReducer(reducer, 0);

  return (
    <div className="container">
      <div className="card">
        <h1>Counter Application</h1>
        <h3>{count}</h3>
        <div>
          <button className="btn1" onClick={() => dispatch("increment")}>
            increment
          </button>

          <button className="btn2" onClick={() => dispatch("decrement")}>
            decrement
          </button>

          <button className="btn3" onClick={() => dispatch("reset")}>
            Reset
          </button>
        </div>
      </div>
    </div>
  );
}

export default Counter;
We also have:
//reducer.js

const reducer = (state, action) => {
  if (action === "increment") {
    return state + 1;
  } else if (action === "decrement") {
    return state - 1;
  } else if (action === "reset") {
    return 0;
  } else {
    throw new Error();
  }
};

export default reducer;
And styling:
//styles.css

.container {
  display: flex;
  align-items: center;
  justify-content: center;
}

h3 {
  display: flex;
  align-items: center;
  justify-content: center;
}

.btn1 {
  background-color: blue;
  margin: 20px;
  color: beige;
}

.btn2 {
  background-color: red;
  margin: 20px;
  color: beige
}

.btn3 {
  background-color: green;
  margin: 20px;
  color: beige
}
Finally, our main App file.
//App.js
import React from "react";
import "./styles.css";
import Counter from "./Counter";
function App() {
return (
<div>
<Counter />
</div>
);
}
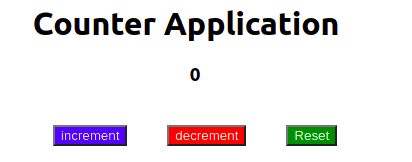
export default App;The code above shows a counter application whose state is managed by the useReducer hook. A counter doesn’t teach much about complex state management, but then I will explain the logic used above. The reducer takes in our state and a dispatched action. In Reducer.js, the reducer function takes in our state, and the action is dispatched, then we use our conditional statement. We had our if-else and passed in our action.type. We passed increment, decrement, and reset to the onclick function in JSX.
We can now test our application if this works out well. Initially we have:
After some increments, we get:

This is where we begin to see useReducer shine its light on us. We may not have observed that we have entirely detached the update logic of our state from our component. We are now mapping actions to state transitions, and we can now separate how the state updates from the actions that occurred. (We will dive into the more practical benefit of that later.) For now, let’s add more complex features to our app to explain better how convenient useReducer can be.
Instead of just incrementing and decrementing by 1, let’s make a slider where the user can choose the value he wants to increment or decrement ranging from 1 to 100.
import React, { useState } from "react";

function Slider({ onchange, min, max }) {
  const [value, setvalue] = useState(1);

  return (
    <div className="slide">
      {value}
      <input
        type="range"
        min={min}
        max={max}
        value={value}
        onChange={(e) => {
          const value = Number(e.target.value);
          onchange(value);
          setvalue(value);
        }}
      />
    </div>
  );
}

export default Slider;
We need to import this in our Counter.js so it can be rendered on the browser. We will also pass the min, max, and onchange props giving them values.
import Slide from "./Slide";

function Counter() {
  const [state, dispatch] = useReducer(reducer, { count: 0, step: 1 });

  return (
    <div className='container'>
        <div className='card'>
            <h1>Counter Application</h1>
            <h3>{state.count}</h3>
            <div >
                <button className='btn1' onClick={() => dispatch('increment')}>increment</button>
                <button className='btn2' onClick={() => dispatch('decrement')}>decrement</button>
                <button className='btn3' onClick={() => dispatch('reset')}>Reset</button>
            </div>
            <div>
                <Slide
                    min={1}
                    max={100}
                    onchange={()=>({})}
                />
            </div>
        </div>
    </div>
  );
}
This is what we get.
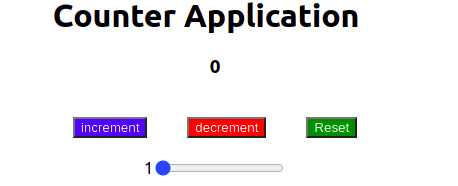
Now we can get the slider’s value from the onChange prop. This lets us decide how much we can increment and decrement the values. We need to make a few changes to manage the piece of state on our slider value and enable our slider to determine what we will increment or decrement.
Let’s make our state an object: thus, any new piece of state that our Reducer needs to manage can go as a property on that object. First, we change our initial state to be an object.
const [state, dispatch] = useReducer(reducer, { count: 0, move: 1 });Our state is an object. We need to update our reducer to return an object with two properties.
const reducer = (state, action) => {
  if (action === "increment") {
    return {
      count: state.count + 1,
      move: state.move,
    };
  } else if (action === "decrement") {
    return {
      count: state.count - 1,
      move: state.move,
    };
  } else if (action === "reset") {
    return {
      count: 0,
      move: state.move,
    };
  } else {
    throw new Error();
  }
};
export default reducer;
Back in the counter, we need to pass state to our JSX.
<h3>{state.count}</h3>It works just fine, but instead of our state being an integer, we now have it as an object, enabling us to pass other properties. Now the question comes out: what do you want to dispatch in’onChangeto update the state of our reducer? Up to now, we have been able to dispatch the type of action that has occurred (increment, decrement, or reset). That worked just fine, but we are now running into its limitations. Along with theaction type`, some more data is needed. Specifically, we need to pass along the value of the slide to add it to our state value and update the state. Instead of having our action passed as a string, let’s change it to an object with a type property. In this way, we can still dispatch based on the action type. We will be able to pass the slider’s value and any other data as property in the action object. We can head to our onChange prop and get this done right away.
<Slide
  min={1}
  max={100}
  onchange={(value) =>
    dispatch({
      type: "stepUpdate",
      step: value,
    })
  }
/>;
There are three changes we need to make to our Reducer:
- We need to update increment and decrement to adjust the count based on the step property and not just by 1. We do this by updating it with whatever
moveis. - We need to account for our new action type
moveUpdateby adding a case for it in our reducer - We need to change
actionto be an object instead of a string by passing the type property to our new case only.
Let’s make those quick fixes.
//Reducer.js
const reducer = (state, action) => {
if (action === "increment") {
return {
count: state.count + state.move,
move: state.move,
};
} else if (action === "decrement") {
return {
count: state.count - state.move,
move: state.move,
};
} else if (action === "reset") {
return {
count: 0,
move: state.move,
};
} else if (action.type === "moveUpdate") {
return {
count: state.count,
move: action.move,
};
} else {
throw new Error();
}
};
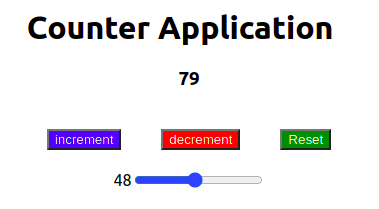
export default reducer;We can now update the count value using the slider — for instance, increment from zero first by 31, and then by 48.

Conclusion
We have come to the end of the article, but I need to elucidate something explicitly important. We have seen an incredible and powerful benefit of useReducer you may have missed: the reducer function passed the current state as the first argument. Because of this, it’s simple to update one piece of state depending on the value of another piece of the state. For this, you will need to use the useReducer hook instead of useState. In our example, we could see this when updating count based on the value of `move ”.