
In web design, efficiency and flexibility are key. CSS Stylus is a preprocessor that offers both by extending CSS’s capabilities with powerful features like variables, mixins, functions, etc. This article will walk you through the process of integrating it into your project, providing step-by-step instructions and clear explanations for each code snippet while avoiding technical jargon.

Discover how at OpenReplay.com.
To begin, your system will need Node.js installed. Once you have Node.js, you can install Stylus using npm (Node Package Manager) with the following command:
npm install -g stylusThis command installs Stylus globally on your system, allowing you to use it in any project.
After installing Node.js, you will create a new directory for your project and navigate into it:
mkdir my-stylus-project
cd my-stylus-project
The first command, mkdir my-stylus-project, creates a new directory named my-stylus-project. The second command, cd my-stylus-project, navigates into the newly created directory, allowing you to work within it.
Alternatively, you can follow these steps:
- Create a new folder.
- Open the folder in your text editor, preferably VS Code.
- Open the integrated terminal in VS Code, and you’re ready.
Next, you will initialize a new npm project:
npm init -yThis creates a package.json file, which will track your project’s dependencies.
You can manually compile Stylus files to CSS or use a task runner like Gulp. We will use a script in our package.json for simplicity.
Add the following line to the scripts section of your package.json:
"compile-stylus": "stylus -w style.styl -o style.css"After adding the scripts, you can run npm run compile-stylus to watch your Stylus file and compile it to CSS whenever changes are detected.
Basic usage and syntax
Now that we have Stylus set up and running, let’s dive into the basics of using it and explore its syntax.
Stylus supports two syntax options: indented and bracketed. The indented syntax resembles a more streamlined and readable format, while the bracketed syntax aligns with traditional CSS syntax.
Here’s an example of Stylus code using indented syntax:
body
  font 14px Helvetica, Arial, sans-serif
In Stylus, you can set multiple properties within a single line using the property value syntax. Therefore, in the above code, font is the property, and 14px Helvetica, Arial, sans-serif is the value. The font size is set to 14px, and the font family fallback list is specified as Helvetica, Arial, and sans-serif.
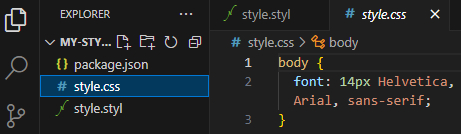
And the same code using bracketed syntax:
body {
  font: 14px Helvetica, Arial, sans-serif;
}
Here, the font shorthand property sets the font size to 14px and the font family to Helvetica, Arial, and sans-serif. The browser will attempt to use the first font in the list (Helvetica), and if it’s unavailable, it will fall back to Arial. Similarly, if Arial is unavailable, it will fall back to a generic sans-serif font.
This is what the compiled CSS will look like:
Now that we know how Stylus works, let’s move on to the use cases.👇
Using variables and operators
In Stylus, variables store and reuse values throughout your stylesheets. They allow you to assign a value to a variable name and use that name wherever the value is needed.
Here’s how to use them:
font-stack = Helvetica, Arial, sans-serif
font-size = 14px

body
  font: font-size font-stack
In the above code, we define the font-stack variable to hold the value Helvetica, Arial, sans-serif and the font-size variable to hold the value 14px. Then, within the body selector, we use the font property to apply the font-size variable followed by the font-stack variable, resulting in the desired font styling for the body element.
Operators
Operators, on the other hand, are symbols or keywords used to perform various operations on values, such as arithmetic calculations, comparisons, logical operations, etc.
Let’s take this example:
padding = 10px
body
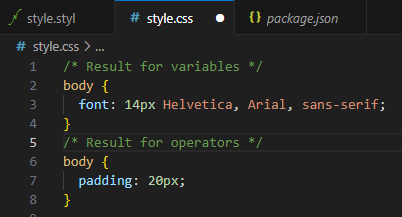
padding: padding * 2This is a simple code that uses the operator keyword. In the code, we define the padding variable with a value of 10px. Then, within the body selector, we use the padding property and apply the padding variable multiplied by 2, resulting in the padding value of 20px for the body element.
Here’s what the output for the variable and operator code will look like:
Advanced features and functions
As you progress with Stylus, you can explore advanced features like mixins for reusable CSS declarations, functions and conditionals for adding logic and dynamic behavior to your styles, and utilize loops, lists, and hashes to write efficient and scalable code.
Mixins
Mixins are reusable blocks of code in Stylus that enable you to define a set of CSS declarations once and apply them to multiple selectors or elements. By encapsulating a group of styles into a mixin, you can conveniently reuse and share that code throughout your stylesheets, reducing code duplication and promoting a modular approach to styling.
Here’s a simple mixin for a border-radius:
border-radius(radius)
-webkit-border-radius: radius
border-radius: radius
.box
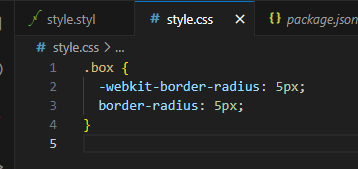
border-radius(5px)In the code above, we define a mixin called border-radius that takes a parameter named radius. Within the mixin, we set the -webkit-border-radius property and the border-radius property to the radius value.
Then, we apply the border-radius mixin to the .box class with a parameter value of 5px, which will set the border radius of the .box class to 5px.
Here’s what the compiled CSS will look like:
Functions
Functions, on the other hand, are similar to mixins in that they are reusable blocks of code, but with the added capability of returning a value.
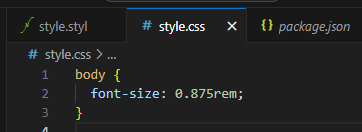
Here’s a function to convert pixels to rems:
px-to-rem(px)
  return px / 16rem

body
  font-size: px-to-rem(14)
In the code above, we define a function called px-to-rem that takes a parameter named px. Within the function, we divide the given pixel value by 16rem to convert it to rem units. The function then returns the calculated value.
Next, we apply the px-to-rem function to set the font size property of the body selector. We pass 14 as the parameter to px-to-rem, which converts 14px to its equivalent value in rem units and sets it as the font size of the body element.
The output will look like this:
Loops
Loops in Stylus provides a mechanism for repeating code blocks multiple times, allowing you to iterate over lists, perform operations on each element, and perform repetitive tasks efficiently.
Here’s an example of loops in Stylus:
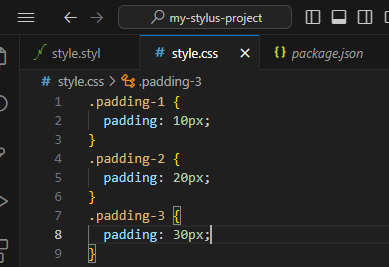
for num in (1..3)
  .padding-{num}
    padding: 10px * num
In the code above, we use a for loop to iterate over the range of numbers from 1 to 3. Within each iteration, we generate a CSS class name using the format .padding-{num}, where {num} is the current number from the loop.
Inside the loop, we define the CSS rules for each generated class. In this case, we set the padding property to 10px multiplied by the current number from the loop (num). This will result in three CSS classes: .padding-1, .padding-2, and .padding-3, each with a different padding value based on the loop iteration.
Here’s what the compiled CSS will look like:
Lists
Lists refer to an ordered collection of values that can be accessed, iterated over, and manipulated, providing flexibility and convenience for handling groups of data.
Here’s an example of lists in Stylus:
colors = #ff0000 #00ff00 #0000ff

for color in colors
  .box-{color}
    background-color: color
Here, we define a list called colors that contains three color values in hexadecimal format. We then use a for loop to iterate over the colors list. We create a CSS class selector for each color in the list using the format .box-{color}.
This will generate three CSS classes: .box-#ff0000, .box-#00ff00, and .box-#0000ff.
Here’s what the compiled CSS will look like:
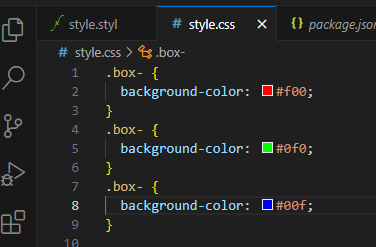
As you can see, inside each generated CSS class, the background-color property is set to the corresponding color value using the colors variable.
Hashes
Hashes refer to a data structure that stores key-value pairs, allowing you to associate values with specific keys for convenient and efficient data manipulation.
Let’s take this example:
fontSizes = {
  small: 12px,
  medium: 16px,
  large: 20px
}

for key, value in fontSizes
  .text-{key}
    font-size: value
In this code, we define a hash called fontSizes that associates different font sizes with corresponding keys (small, medium, and large). Next, we use a for loop to iterate over the fontSizes hash. We create a CSS class selector for each key-value pair in the hash using the format .text-{key}, which will generate three CSS classes: .text-small, .text-medium, and .text-large.
Here’s what the compiled CSS will look like:
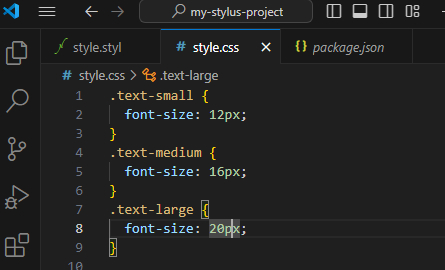
Note: Inside each generated CSS class, the font-size property is set to the corresponding value using the value variable.
Now, to use Stylus in your project, create an HTML file and link it to the compiled style.css file:
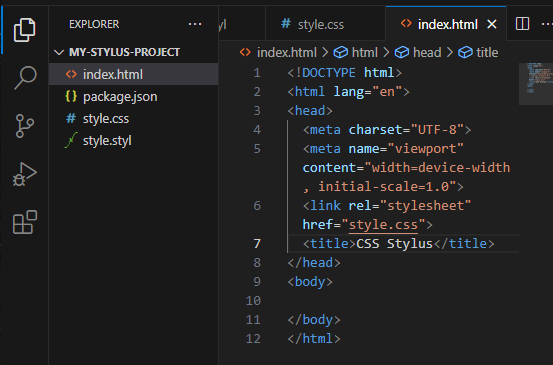
As you can see, the style.css is successfully linked to the HTML file.
After you have successfully linked your HTML file, you can start building your project.
Conclusion
Stylus is a robust CSS preprocessor that can significantly enhance your web development workflow. By understanding its syntax and features, you can write more maintainable and scalable CSS.
For further learning, check out:
These guides provide a foundational understanding of Stylus, aiming to be clear and free of technical jargon.
Gain Debugging Superpowers
Unleash the power of session replay to reproduce bugs, track slowdowns and uncover frustrations in your app. Get complete visibility into your frontend with OpenReplay — the most advanced open-source session replay tool for developers.
Star on GitHub12k