Using In-App Browsers in React Native for a better User Experience
Get extra performance with in-app browsers


In mobile applications, users sometimes need to access web browser features to perform specific actions, such as browsing links, making payments, or using web-based authentication features. Users are often redirected to external browsers to access these web features, which provides a poor user experience in mobile applications. In this article, you will learn how to use in-app browsers in React Native applications to provide a better user experience (UX) when accessing web content within your application.

Discover how at OpenReplay.com.
Imagine redirecting users from your application to an external browser to read content from a website. In the process, users may get distracted and visit another link in the browser, forgetting to return to the application. With Inappbrowser-reborn, we can avoid this issue.
Inappbrowser-reborn is a robust JavaScript library that seamlessly integrates In-App Browsing capabilities into your mobile applications. This library is a powerful tool for enhancing the user experience by allowing users to access external web content without leaving the application.
Why Use Inappbrowser-Reborn
There are several reasons and benefits of using this library in your application, including the following.
- Improved User Experience: It enables you to seamlessly integrate In-App Browsing capabilities within your mobile applications. Users can access web content, such as articles, websites, payment gateways, or authentication features, without ever leaving your app.
- Consistency in User Interface: When you use this package, the In-App Browser’s appearance and behavior can be customized to match your app’s design and style, ensuring a unified and branded experience for your users.
- Cross-Platform Compatibility: The library is designed to work seamlessly on both iOS and Android, making it an ideal choice for cross-platform development, ensuring a consistent user experience across various devices.
- Customization: You have the flexibility to customize the In-App Browser to meet your specific requirements, which includes controlling its appearance, behavior, and functionality, ensuring it aligns perfectly with your app’s needs.
Creating a New React Native Project
Before starting, you must create a new React Native project without using Expo. To create a new project, run the command below in your terminal.
npx react-native@latest init AwesomeProject
cd AwesomeProject
npx expo start
After successfully creating the project, you can install and utilize its features in your application.
Installation
To use the library features, you need to install the package in your project. Ensure you are in the project folder(AwesomeProject) in the terminal, then run the command below to install the dependency to your project.
npm install react-native-inappbrowser-reborn --saveConfiguration
Next, you need to configure the package to work in your application. To ensure this package works on iOS and Android devices, open the project folder in your code editor and follow the configurations below.
iOS
For iOS devices, you will need to add the package module to the Podfile. To do this, navigate to the ios folder, open the Podfile, and add the following:
#...
target 'AwesomeProjectTests' do
  inherit! :complete
  # Pods for testing
  pod 'RNInAppBrowser', :path => '../node_modules/react-native-inappbrowser-reborn'
end
#...
After saving the settings above, you must navigate to the ios folder in your terminal and run the following commands to install all the necessary packages for iOS devices.
cd ios && pod install && cd ..Android
For it to work on Android devices, you must make changes to the build.gradle file. To do this, navigate to the android folder, open the build.gradle file, and add the following:
// ...
buildscript {
  ext {
    androidXBrowser = "1.3.0"
// ...Using In-App-Browser (Use Cases)
Now that you have configured the package to support both iOS and Android devices let’s explore how you can use its features to provide a better user experience when interacting with web-based content in your application.
The first step is to import the library into your components, giving you access to all its features.
In-App Browsing
The most common use case for an in-app browser is seamlessly displaying web content within a native mobile app, allowing users to access external websites without leaving the app.
You can add a button to the application so that when users click on it, the in-app browser pops up, and the user can easily browse through Open ReplayBlog. To open an in-app browser, open the app.tsx file and replace it with the following code.
import React from "react";
import { SafeAreaView, Text, TouchableOpacity } from "react-native";
import InAppBrowser from "react-native-inappbrowser-reborn";
function App() {
  const handleOpenInAppBrowser = async () => {
    if (InAppBrowser) {
      const url = "https://blog.openreplay.com"; // Replace with the URL you want to open
      const result = await InAppBrowser.open(url, {});
    }
  };
  return (
    <SafeAreaView>
      <TouchableOpacity onPress={handleOpenInAppBrowser}>
        <Text>Open openreplayIn-App Browser</Text>
      </TouchableOpacity>
    </SafeAreaView>
  );
}
export default App;
The handleOpenInAppBrowser asynchronous function encapsulates the InAppBrowser.open function. This function takes the link URL to open as the first parameter and the browser customization options as the second parameter. The function is triggered using the onPress attribute.
Save your work and start the application on your emulator; you should have the following output.
In-App-Browser Authentication
It can also be used to implement social media log-in, providing a seamless user authentication process without leaving the application. Let’s demonstrate how to integrate this library into the application by creating a Login with GitHub button.
First, create and set up a GitHub App. To do that, navigate from your GitHub dashboard to Settings → Developer settings → GitHub Apps and create a new app, as shown below.
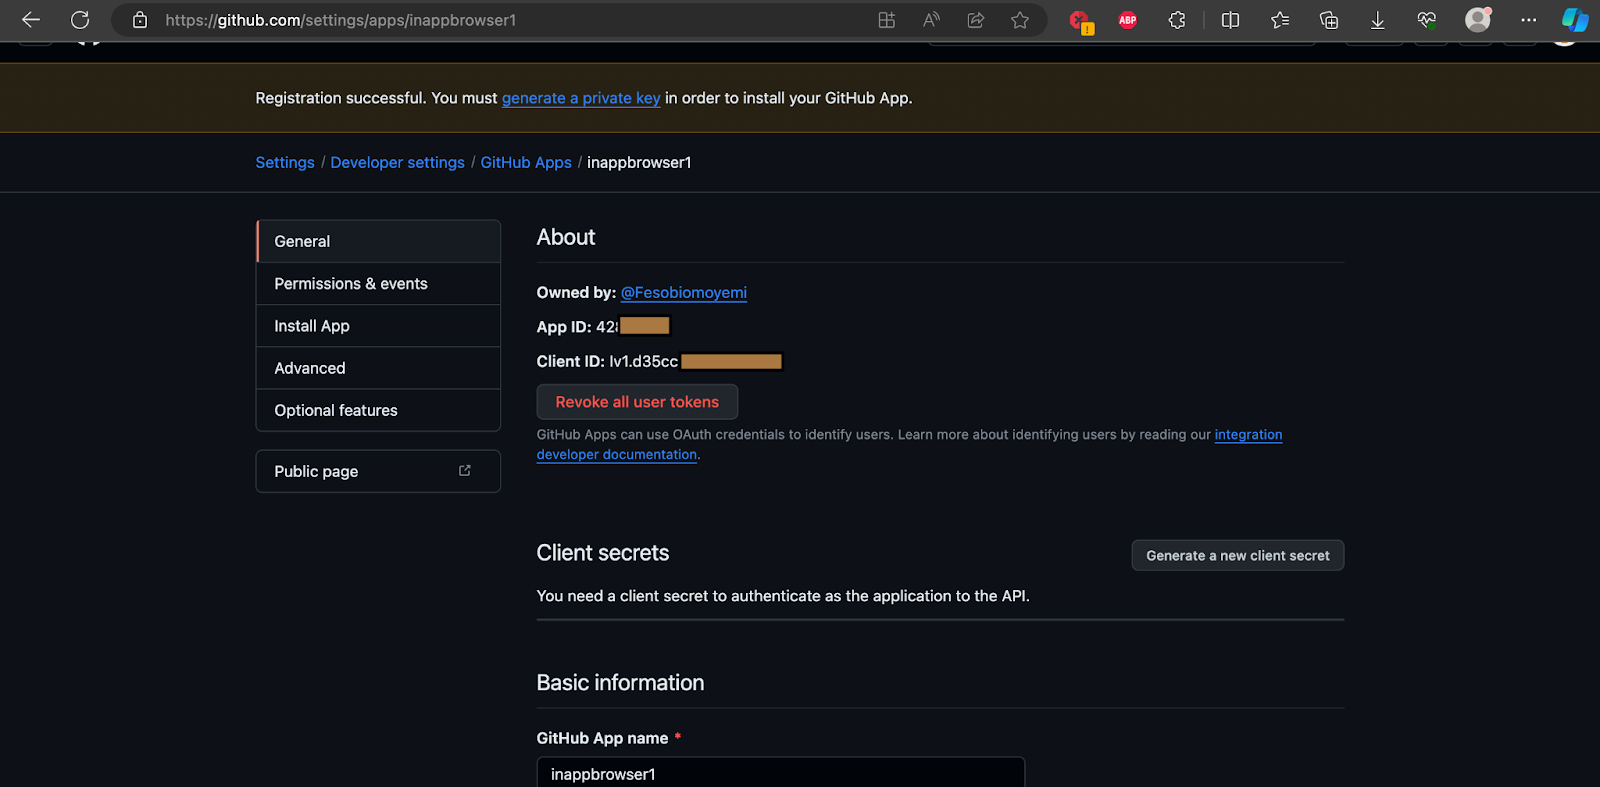
Set the Callback URL to url-scheme://Verify, save it, and copy the Client ID.
Next, let’s add the Login with GitHub button to the application by replacing the app.js code with the following:
import React from "react";
import { SafeAreaView, Text, TouchableOpacity } from "react-native";
import InAppBrowser from "react-native-inappbrowser-reborn";
function App() {
  const handleOpenInAppBrowser = async () => {
    const redirectUri = "url-scheme://Verify"; // Replace with your redirect URI
    const clientID = "Iv1.d35cc29b99944595"; // Replace with your GitHub client ID
    const clientSecret = "20fb1cc51b7d5597f431555aa76e4012c3000e0d";
    const authUrl = `https://github.com/login/oauth/authorize?client_id=${clientID}`;

    if (InAppBrowser) {
      try {
        const response = await InAppBrowser.openAuth(authUrl, redirectUri, {});
        if (response.type === "success" && response.url) {
          const matchCode = response.url.match(/code=([^&]*)/);
          if (matchCode) {
            const authorizationCode = matchCode[1];
            // Alert the authorization code
            alert(`Authorization Code: ${authorizationCode}`);
          } else {
            alert(
              "Unable to extract authorization code from the response URL.",
            );
          }
        }
      } catch (error) {
        console.error("Error opening in-app browser:", error);
      }
    }
  };
  return (
    <SafeAreaView>
      <TouchableOpacity onPress={handleOpenInAppBrowser}>
        <Text>Login With Github</Text>
      </TouchableOpacity>
    </SafeAreaView>
  );
}
export default App;
In the code above, replace clientID with the GitHub app client ID you obtained earlier. Pass the authUrl and the redirectUri as parameters to the openAuth function to handle the authentication.
Save your work; the GitHub in-app browser authentication should work, as shown in the image below.
After the user has been authenticated, GitHub returns a code that can be used to retrieve details about the user.
Let’s display the GitHub username of the authenticated user by making a POST request to the GitHub endpoint, https://api.github.com/user, using the generated code.
In the app.tsx, replace the code alert(Authorization Code: ${authorizationCode}); with the following code.
fetch("https://api.github.com/user", {
method: "POST",
headers: {
"Content-Type": "application/json",
},
body: JSON.stringify({
code: authorizationCode,
client_id: clientID,
client_secret: clientSecret,
}),
})
.then((serverResponse) => {
// Log the raw response data before attempting to parse
console.log("Raw Server Response:", serverResponse);
return serverResponse.json();
})
.then((data) => {
// Handle the server response if needed
alert(`Github username is : ${data.username}`)
})
.catch((error) => {
console.error("Error handling in-app browser response:", error);
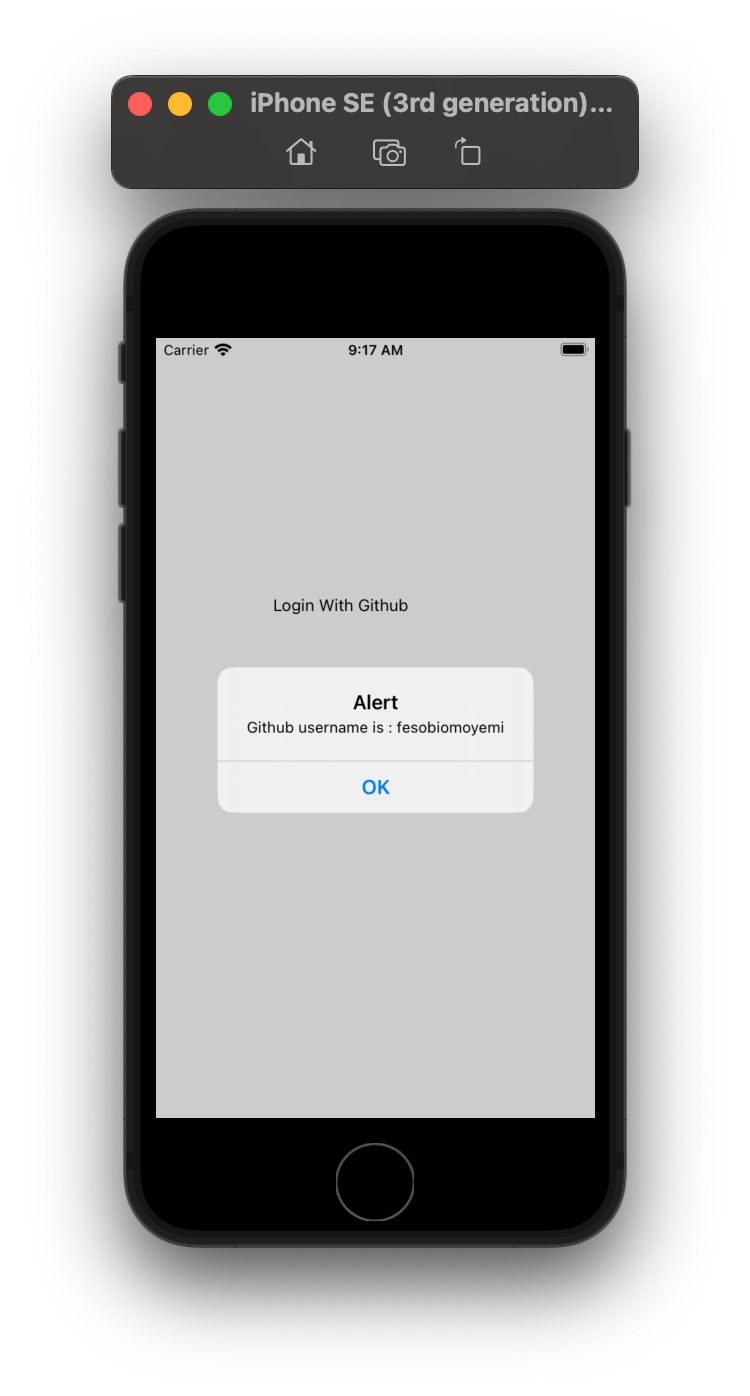
});Save your work, and you should have the username displayed, as shown in the image below, once the user is authenticated successfully.
Conclusion
In this tutorial, you learned how to integrate the in-app browser feature in React Native to improve the user experience of your application.
Leveraging the in-app browser functionality in React Native significantly enhances the user experience in mobile applications. The traditional approach of redirecting users to external browsers for specific actions, such as accessing web content or social media authentication, often results in a disjointed and less user-friendly experience.
The [inappbrowser-reborn] library (https://github.com/proyecto26/react-native-inappbrowser) addresses these issues by seamlessly integrating in-app browsing capabilities. This powerful library offers numerous benefits, including an improved user experience, consistency in the user interface, cross-platform compatibility, and customization options.