Web Scraping With Node.js and Cheerio
Easy techniques for scraping with the flexible Cheerio library.


In the modern digital era, data is incredibly valuable. Web scraping has become essential for businesses, researchers, and individuals to extract insights from the vast amounts of data on the web. Web scraping is a technique used to extract data from websites, which can then be used for research, data analysis, building web applications, and more. Node.js offers several libraries and modules that simplify web scraping, including the fast, flexible, lightweight Cheerio library. This article will teach you how to scrape websites with Node.js and Cheerio, so you can use the technique.
Let’s start with a warning! It’s important to note that there are legal and ethical issues to consider before scraping a website. You must ensure that scraping a website is permissible before doing so. In this article, we will use websites that permit scraping, so you can follow along without any worries.
- To begin with web scraping, your system must have Node.js installed. If you don’t have it, you can download it from the official Node.js download page.
- Additionally, you should have a text editor such as Visual Studio Code or Atom installed on your machine to write and run your code.
- It’s also important to understand JavaScript, Node.js, and the Document Object Model (DOM) to get started with web scraping.
What will we work with? Cheerio is a fast, flexible, and elegant library for parsing and manipulating HTML and XML. Cheerio has over 26k stars on GitHub. As stated in its documentation, it:
- implements a subset of the core jQuery library.
- removes any DOM inconsistencies and browser cruft from the jQuery library, revealing its elegant API.
- utilizes a simple and consistent DOM model, resulting in efficient parsing, manipulation, and rendering.
- can parse almost any HTML or XML document.
- is compatible with both browser and server environments.
Basics of Cheerio
Before jumping into scraping a website, let’s first understand the basics of Cheerio, such as how to load markup and manipulate it, loop through a list of elements, append and prepend elements, etc.
To run the below code snippets, first install all the required dependencies for the project. This involves creating a directory, initializing a project, installing libraries, etc. These steps are outlined below, so follow them before running these code snippets.
Load & Manipulate
In Cheerio, you can easily load an HTML or XML document using the cheerio.load() method. This method returns a function that can be used to manipulate the loaded document.
const cheerio = require("cheerio");
const markup = `<html>
<head>
<title>Cheerio Demo</title>
</head>
<body>
<p>Hello, coders!</p>
</body>
</html >`;
// Load the markup into Cheerio
const $ = cheerio.load(markup);
console.log($.html());
// Manipulate the markup
$("title").text("Title Changed");
$("p").text("How are you, coders?");
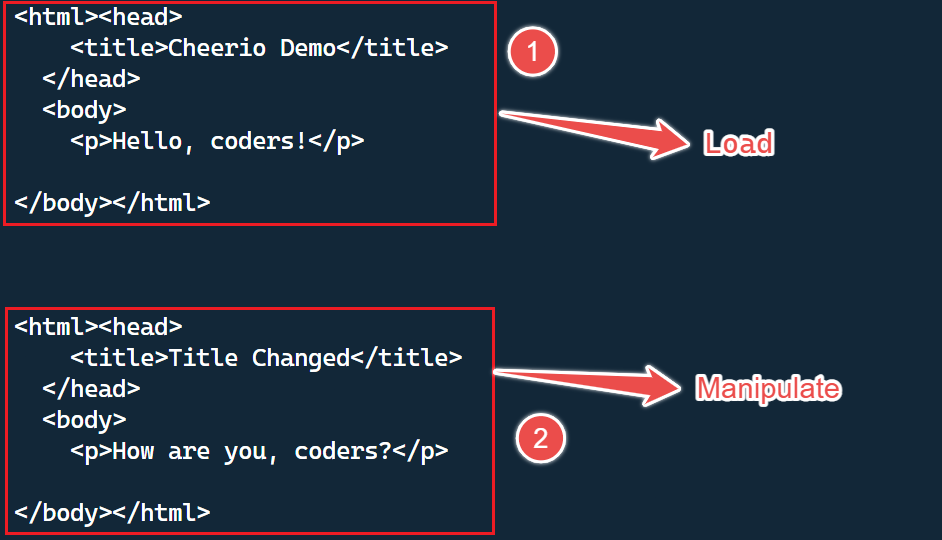
console.log($.html());In the example above, we load an HTML document stored in the variable markup into Cheerio by using the cheerio.load() method. Then, we use Cheerio’s jQuery-style syntax to select elements from the document and modify their properties.
Finally, we can easily see the results of our changes by outputting the modified document using the $.html() method.
To see the markup on your terminal, execute the above code. Here’s an example of what you should see on your terminal:
Select an Element
In this example, we load an HTML string into Cheerio. Then select the element with class=“audi_car” using the $ function and log the selected element’s text using the text() function.
// Load Cheerio
const cheerio = require("cheerio");

// HTML string to be parsed
const markup = `
<ul class="cars">
  <li class="audi_car">Audi</li>
  <li class="bmw_car">BMW</li>
</ul>
`;

// Load the HTML string into Cheerio
const $ = cheerio.load(markup);

// Select the element with class="audi_car"
const myDiv = $(".audi_car");

// Log the text of the selected element
console.log(myDiv.text()); // Output: Audi
It’s important to note that we can use other jQuery selectors to choose elements based on their tag name, class, or other attributes. This makes Cheerio a powerful tool for selecting and manipulating specific elements within an HTML document.
Looping Through a List of Elements
We will use the cheerio.load() method to load an HTML document. Then, we will apply a jQuery-style selector to obtain a list of elements.
Then, we will use the .each() function to iterate through each item in the list. While iterating, we can extract information regarding the current element using the $(this) selector.
We can obtain the value of the href attribute of the current element by using $(this).attr('href').
const cheerio = require("cheerio");
const html = `
<ul>
  <li>
    <a href="https://openreplay.com/">Openreplay</a>
  </li>
  <li>
    <a href="https://cheerio.js.org/">Cheerio</a>
  </li>
</ul>;`;

const $ = cheerio.load(html);

$("li a").each(function () {
  const href = $(this).attr("href");
  const text = $(this).text();
  console.log(`${text} (${href})`);
});

// Output:
// Openreplay (https://openreplay.com/)
// Cheerio (https://cheerio.js.org/)
Append or Prepend an Element
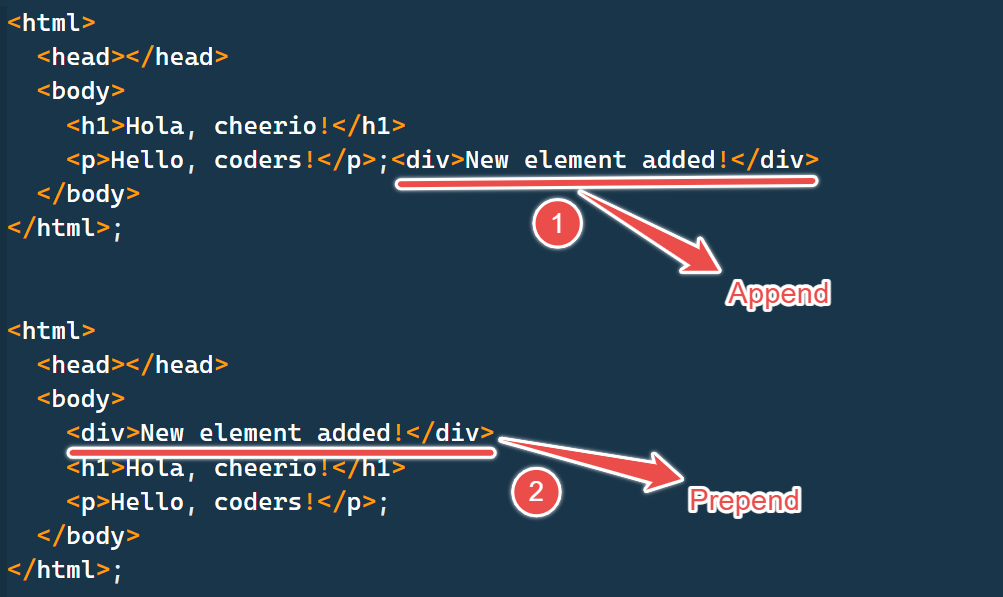
To add an element to the beginning or end of markup in Cheerio, you can use the .append() or .prepend() functions, respectively.
Here’s an example of appending a new element <div> to the end of an existing markup:
const cheerio = require("cheerio");

const markup = `
<html>
  <head></head>
  <body>
  <h1>Hola, cheerio!</h1>
    <p>Hello, coders!</p>
  </body>
</html>;`;

const $ = cheerio.load(markup);

$("body").append("<div>New element added!</div>");
console.log($.html());
Here’s an example of prepending a new <div> element to the end of an existing markup:
const cheerio = require("cheerio");

const markup = `
<html>
  <head></head>
  <body>
  <h1>Hola, cheerio!</h1>
    <p>Hello, coders!</p>
  </body>
</html>;`;

const $ = cheerio.load(markup);

$("body").prepend("<div>New element added!</div>");
console.log($.html());
Here’s the output from both functions in action:
Session Replay for Developers
Uncover frustrations, understand bugs and fix slowdowns like never before with OpenReplay — an open-source session replay tool for developers. Self-host it in minutes, and have complete control over your customer data. Check our GitHub repo and join the thousands of developers in our community.
Scrape a Web Page
In this section, we will see how to scrape a web page using Cheerio. Before scraping any website, it’s important to ensure that you have permission to do so.
We will extract the ISO 3166-1 alpha-3 codes for all countries as listed on this Wikipedia page.

Step 1: Create a Directory
This step involves creating a project directory by executing the below command in your terminal. The command will create a folder named “cheerio_scraping”.
mkdir cheerio_scrapingIn the next step, you can open the newly created directory in your preferred text editor and initialize the project.
Step 2: Initialize the Project
In this step, navigate to the project directory and initialize the project. First, open the directory created in the previous step using your preferred text editor. Then, run the command below to initialize the project:
npm init -yUpon successful execution of the above command, a package.json file will be generated at the root of your project directory.
Step 3: Installing Required Dependencies
Install project dependencies by running the command below.
npm i axios cheerio prettyWhen you run the above command, it will successfully register three dependencies in the package.json file under the dependencies field.
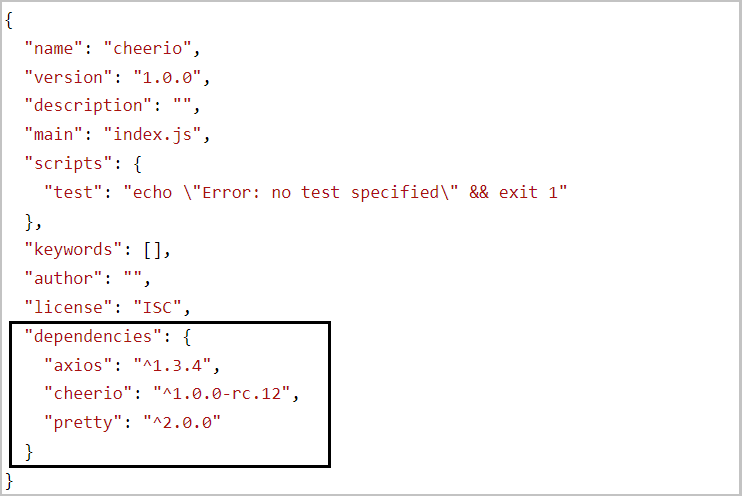
The first dependency is axios, a popular HTTP client that works seamlessly in both node and browser.
To parse the markup and extract the desired data using Cheerio, we need to use Axios to fetch the markup from the website. However, if you prefer, you can also use another HTTP client to fetch the markup instead of Axios.
Lastly, Pretty is an npm package that helps in beautifying the markup. This makes it easier to read the markup when printed on the terminal.
Step 4: Inspect the Web Page
To extract data from a web page, it is important to understand its HTML structure.
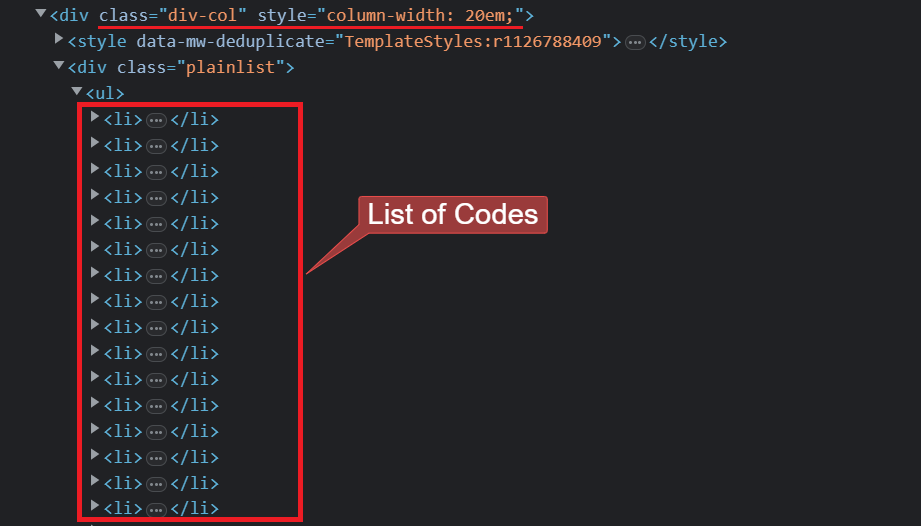
Let’s say you want to extract information on ISO 3166-1 alpha-3, located under the Current codes section on the Wikipedia page.
Open the DevTools in your browser, allowing you to view and analyze the page’s HTML structure. Go to the current codes section, and you will see the HTML structure, something like this:
Step 5: Finally, Scrape the Web Page
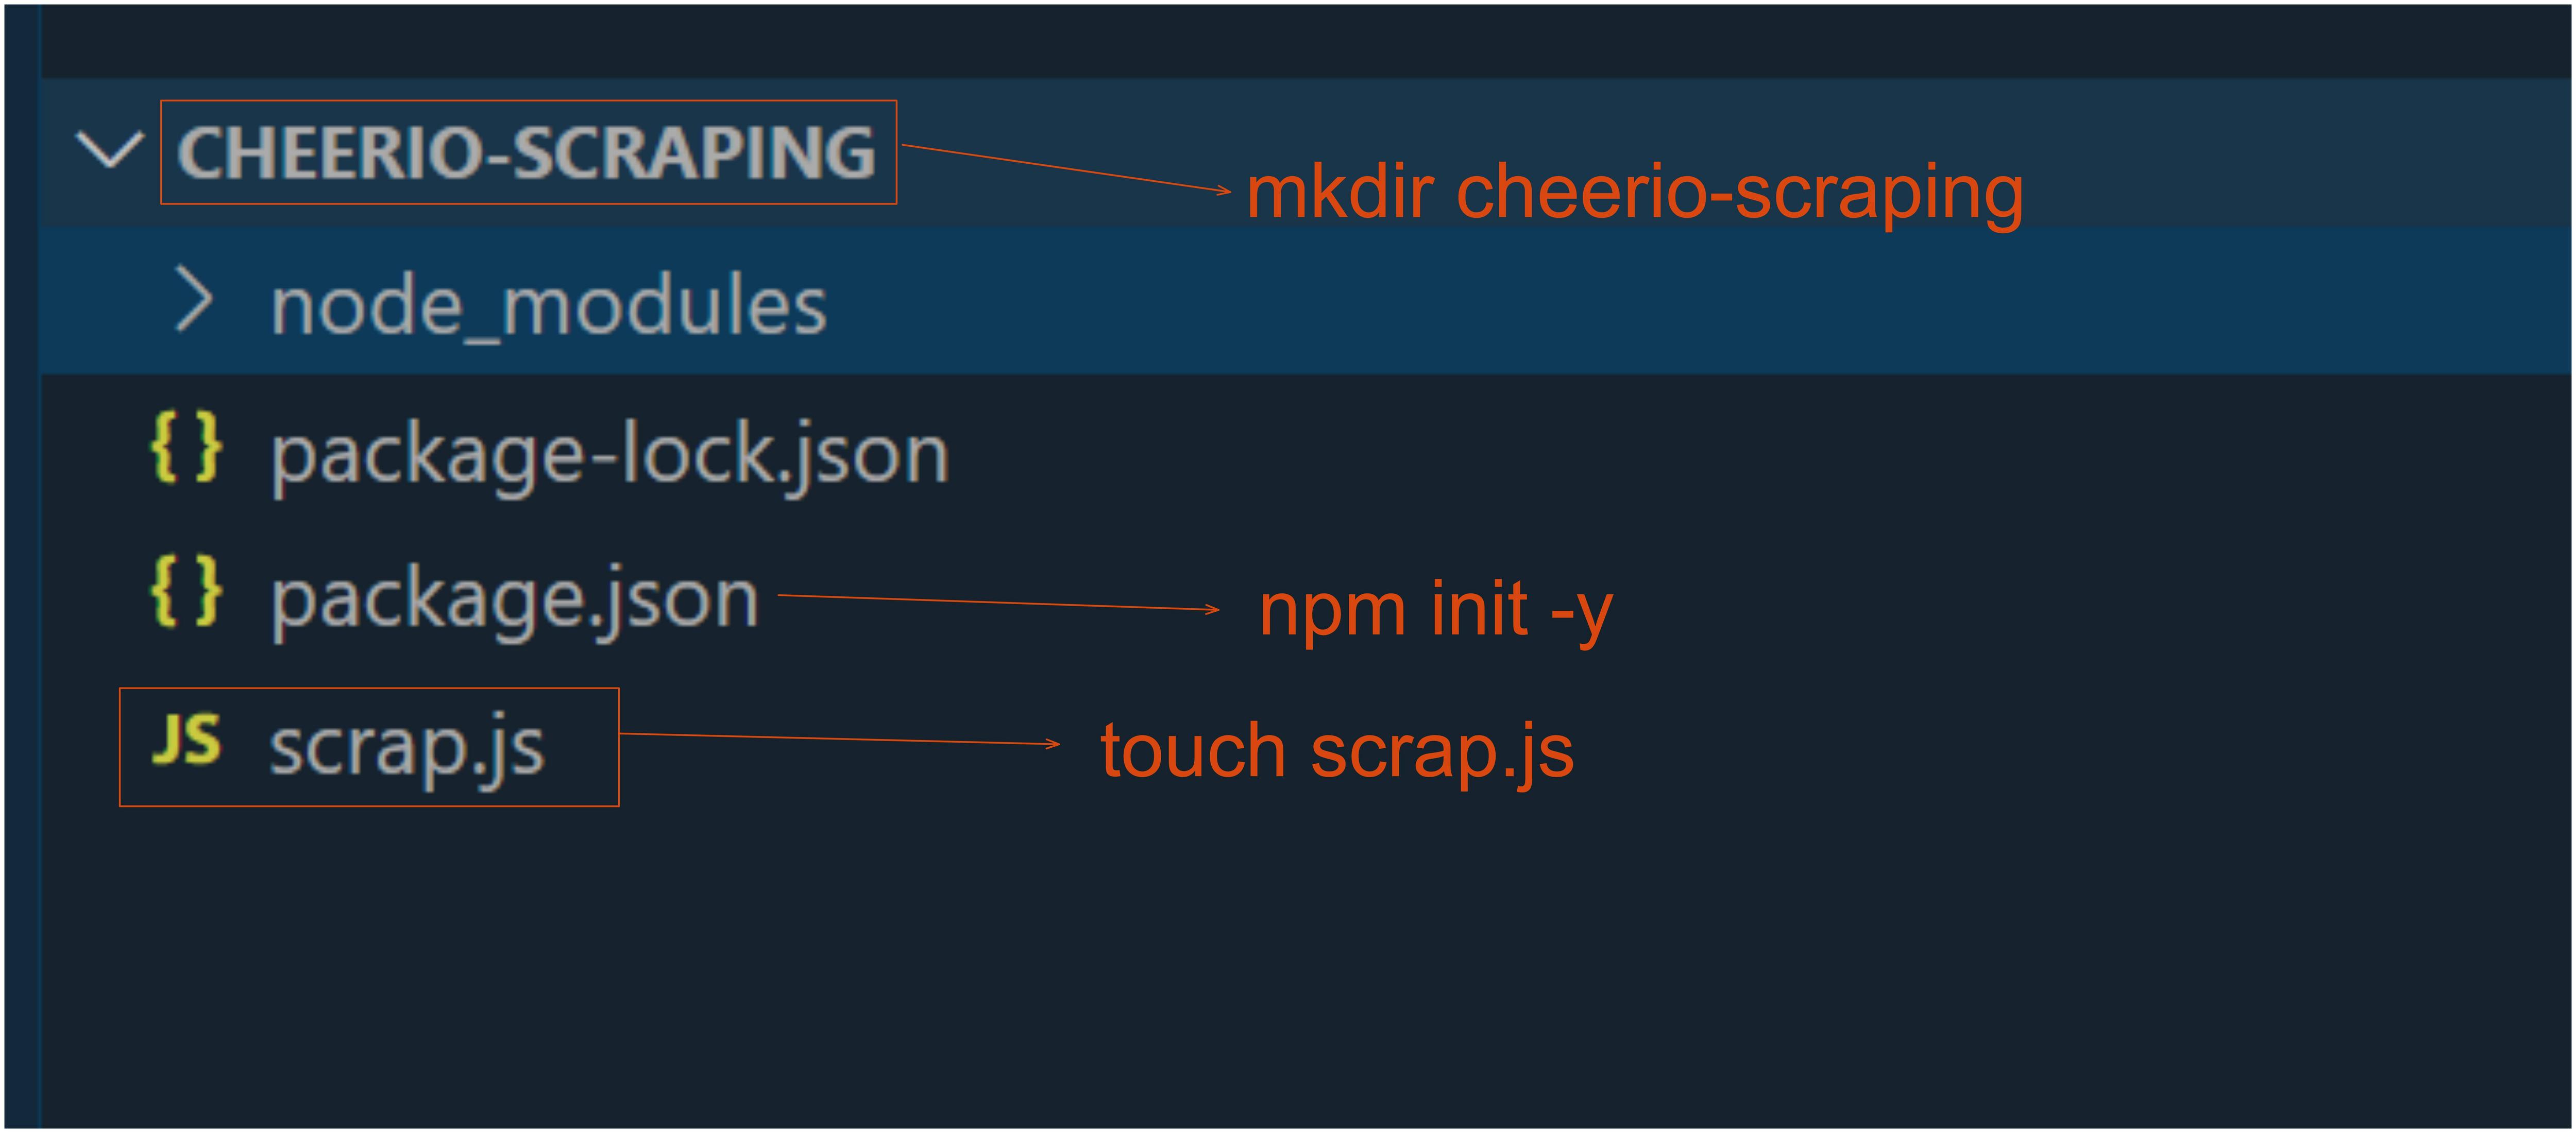
Create a new JavaScript file (scrap.js in my case) by using the below command in your terminal of the code editor or create it manually in the root directory.
touch scrap.jsThis is what my folder looks like in my code editor. Make sure you create the JavaScript file in the root directory.
scrap.js:
// Loading the dependencies, but we don't need 'pretty'
// since we won't be logging HTML to the terminal.
const axios = require("axios");
const cheerio = require("cheerio");
const fs = require("fs");

// URL of the page we want to scrape
const url = "https://en.wikipedia.org/wiki/ISO_3166-1_alpha-3";

// Async function that performs the actual scraping
async function scrapeData() {
  try {
    // Fetch HTML content of the page
    const { data } = await axios.get(url);

    // Load the HTML content that we previously fetched
    const $ = cheerio.load(data);

    // Select all of the list items in the 'plainlist' class
    const listItems = $(".plainlist ul li");

    // Create an array to store the final result
    const countries = [];

    // Use the .each method to iterate through the 'li' elements
    listItems.each((idx, el) => {
      // Object to store the names of countries and their ISO codes
      const country = { name: "", iso3: "" };

      // Fetch the text from 'a' and 'span' elements, and save it to the above object
      country.name = $(el).children("a").text();
      country.iso3 = $(el).children("span").text();

      countries.push(country);
    });

    // Display countries array to the console
    console.dir(countries);

    // Save the data in the 'countries' array to a file 'countries.json'
    fs.writeFile("countries.json", JSON.stringify(countries, null, 2), (err) => {
      if (err) {
        console.error(err);
        return;
      }
      console.log("Successfully data written to the file!");
    });
  } catch (err) {
    console.error(err);
  }
}

scrapeData();
Let’s take a closer look at the code:
- The
scrapeData()function is defined as an async function that performs the actual scraping. It includes asynchronous code that waits for a response from the server before proceeding to the next step. - Inside the
scrapeData()function, the Axios library is used to fetch the HTML content of the webpage, and Cheerio is used to load that content. - The
$(".plainlist ul li")statement selects all of the list items in the plainlist class. - The
$(el).children("a").text()statement fetches the text from the ‘a’ element inside the current list item, and the$(el).children("span").text()statement fetches the text from the ‘span’ element. - The
fs.writeFile()method saves the data in the countries array to a file named countries.json. - If an error occurs during the write operation, it is logged to the console. If the write operation is successful, a success message is logged to the console.
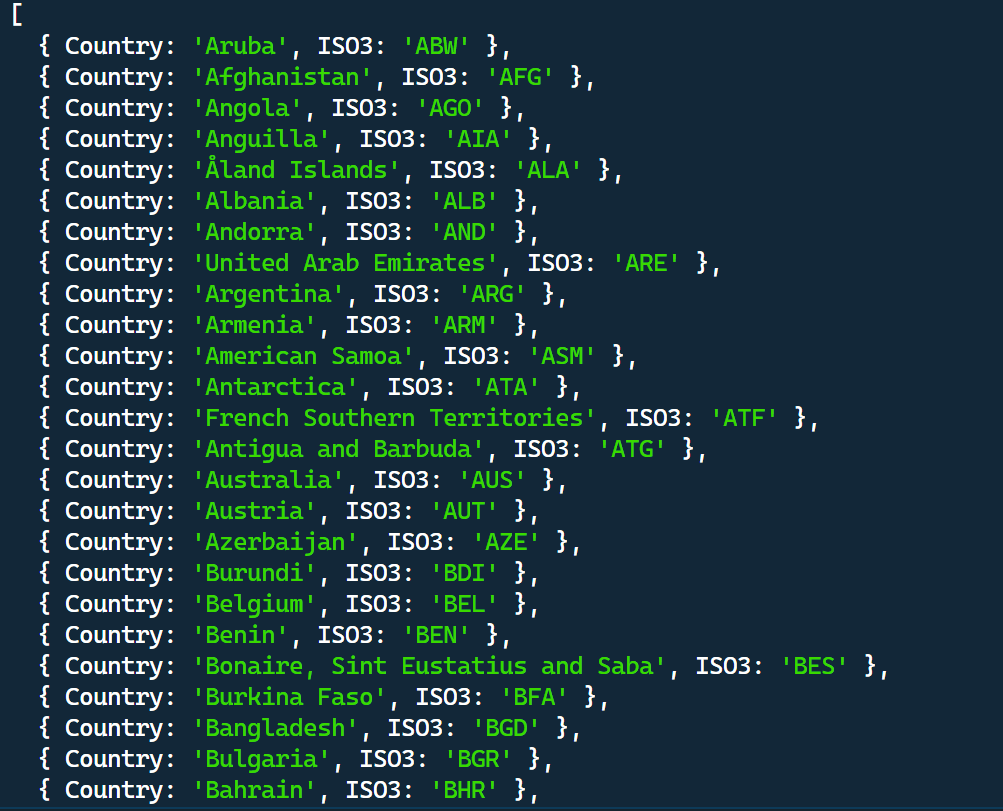
Output in the terminal:
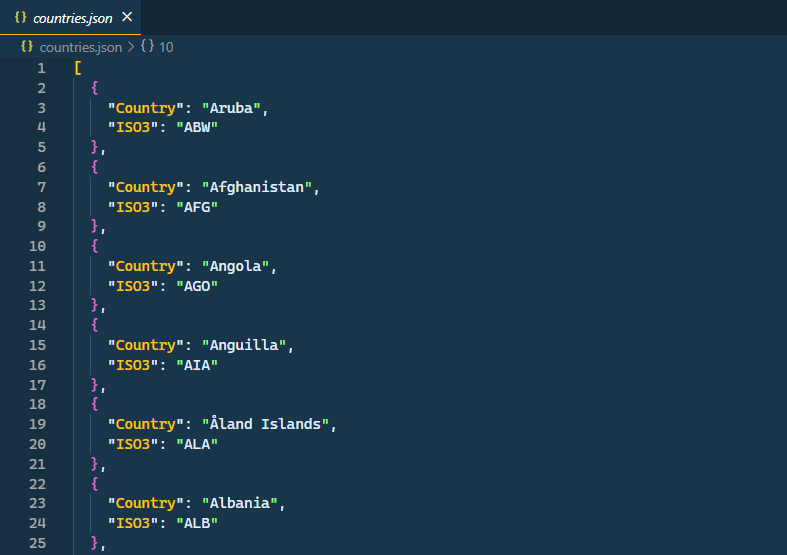
countries.json:
Conclusion
In this article, we learned how to scrape a webpage using Cheerio, a fast, flexible, and elegant library for parsing and manipulating HTML and XML. Additionally, we covered the importance of using Axios and Pretty when scraping data from web pages. Overall, this approach offers a reliable and efficient way to extract valuable information from websites.
Gain Debugging Superpowers
Unleash the power of session replay to reproduce bugs and track user frustrations. Get complete visibility into your frontend with OpenReplay, the most advanced open-source session replay tool for developers.