

For capturing short text segments, like a login, address, or city, developers often utilize plaintext inputs or textarea components. In certain circumstances, users must be able to submit stylish, formatted text along with multimedia components in web applications. However, plaintext inputs cannot meet these needs; thus, developers typically employ the idea of rich text editors.
When it comes to content creation, rich text editors have become a crucial part of how we interact with web apps. WYSIWYG HTML editors, which provide a live preview of the styled and formatted text segments, are the most common type of web-based rich text editors. Rich text editors offer a powerful solution for content creators to develop and publish HTML everywhere while allowing you to manage the text’s appearance.
Intro to Draft.js
Immutable-js is used to build the Draft.js paradigm, which offers an API with functional state changes and heavily relies on data persistence for scalable memory consumption. It was introduced as a rich text editor tool for React at the React.js Conference 2016.
Draft.js offers rich text editor APIs for programmers to create their very own text editor. To create and exhibit rich text, it provides a pre-built React component. By providing a declarative API that supports capabilities ranging from basic text formatting to embedding media elements such as hyperlinks, photos, mentions, and more, whether you want to support a few inline text styles or develop a sophisticated text editor for long-form articles, Draft.js enables you to design any sort of rich text input.
React-Draft-Wysiwyg
React and the Draft.js libraries were used to create the react-draft-wysiwyg library, a WYSIWYG (What You See Is What You Get) editor. It has a ton of customizable built-in features, including text styling buttons, keyboard shortcut support, the ability to embed media files, support for emojis, and more that you would expect from a contemporary HTML editor component.
Features of React-Draft-Wysiwyg
The react-draft-wysiwyg library offers a rich text editor component with all the general WYSIWYG features listed below.
- Support for inline styles: Bold, Italic, Underline, StrikeThrough, Code, Subscript, and Superscript.
- Option to change the order of the controls in the toolbar.
- Support for block types: Paragraph, H1 - H6, Blockquote, Code.
- Option to change styles and icons in the toolbar.
- Option to show toolbar only when the editor is focused.
- Option to add custom controls to the toolbar.
- Support for text-alignment.
- Support for setting font-size and font-family.
- Support for ordered/unordered lists and indenting.
- Configurable toolbar with the option to add/remove controls.
Advantages of React-Draft-Wysiwyg
-
Simple setup and integration options: The
react-draft-wysiwyglibrary has a straightforward API, self-explanatory component props, and well-written documentation. This makes setting up a rich text editor for your React project quick and easy. Additionally, the rich text editor component supports both specific well-known Draft.js community libraries and core APIs. -
Flexibility and ability to customize: As well as providing a flexible feature set, this library does not restrict the feature scopes of developers. Through a variety of component props, it enables developers to personalize the toolbar and functionalities. Even adding custom toolbar elements is simple!
Getting started with React-Draft-Wysiwyg.
Let’s start by creating a new project in the directory of your choice. To start your project, type any of the commands in the list below in the command line.
    npx create-react-app text-editor-example
    --or--
    yarn create react-app text-editor-example
    --or--
    pnpm create react-app text-editor-example
Once created, run it by going to the project folder’s root and typing the command below:
    npm start
    --or--
    yarn start
    --or--
    pnpm start
The commands shown below will add the react-draft-wysiwyg and draft.js packages to your React project:
npm install --save react-draft-wysiwyg draft-jsPreparing the Editor
We’ll need to make some changes to the src/App.js file before we can start. We will import EditorState from draft-js along with the editor component and styles from react-draft-wysiwyg.
Add some code to make a rich text editor visible. Your App.js file should now include the following code:
    import React, { useState } from 'react';
    import { EditorState } from 'draft-js';
    import { Editor } from 'react-draft-wysiwyg';
    import 'react-draft-wysiwyg/dist/react-draft-wysiwyg.css';
    import './App.css';
    function App() {
      const [editorState, setEditorState] = useState(
        () => EditorState.createEmpty(),
      );
      return (
        <div className="App">
          <h1>Text Editor</h1>
          <Editor
            editorState={editorState}
            onEditorStateChange={setEditorState}
            placeholder="The message goes here..."
          />
        </div>
      )
    }
    export default App;
The createEmpty function of EditorState will create an empty state as our starting point. EditorState is used by the editor as a prop. The view doesn’t look fantastic after storing the modifications and updates, as you will see:
Session Replay for Developers
Uncover frustrations, understand bugs and fix slowdowns like never before with OpenReplay — an open-source session replay tool for developers. Self-host it in minutes, and have complete control over your customer data. Check our GitHub repo and join the thousands of developers in our community.
Editor styling
In editor styling, style props can help the editor’s various sections stand out more clearly. The class used for a certain area or an object with the styles can be the props:
- toolbarClassName=”toolbarClassName”
- wrapperClassName=”wrapperClassName”
- editorClassName=”editorClassName”
To style the editor, add the following className properties to the Editor component and the appropriate styles to App.css:
<Editor
editorState={editorState}
toolbarClassName="toolbarClassName"
wrapperClassName="wrapperClassName"
editorClassName="editorClassName"
onEditorStateChange={this.onEditorStateChange}
/>;
.toolbarClassName {
border-radius: 10px;
}
.wrapperClassName {
border: 1px solid rgb(231, 221, 221);
padding: 1rem;
}
.editorClassName {
background-color:rgb(239, 222, 222);
border-radius: 10px;
padding: 1rem;
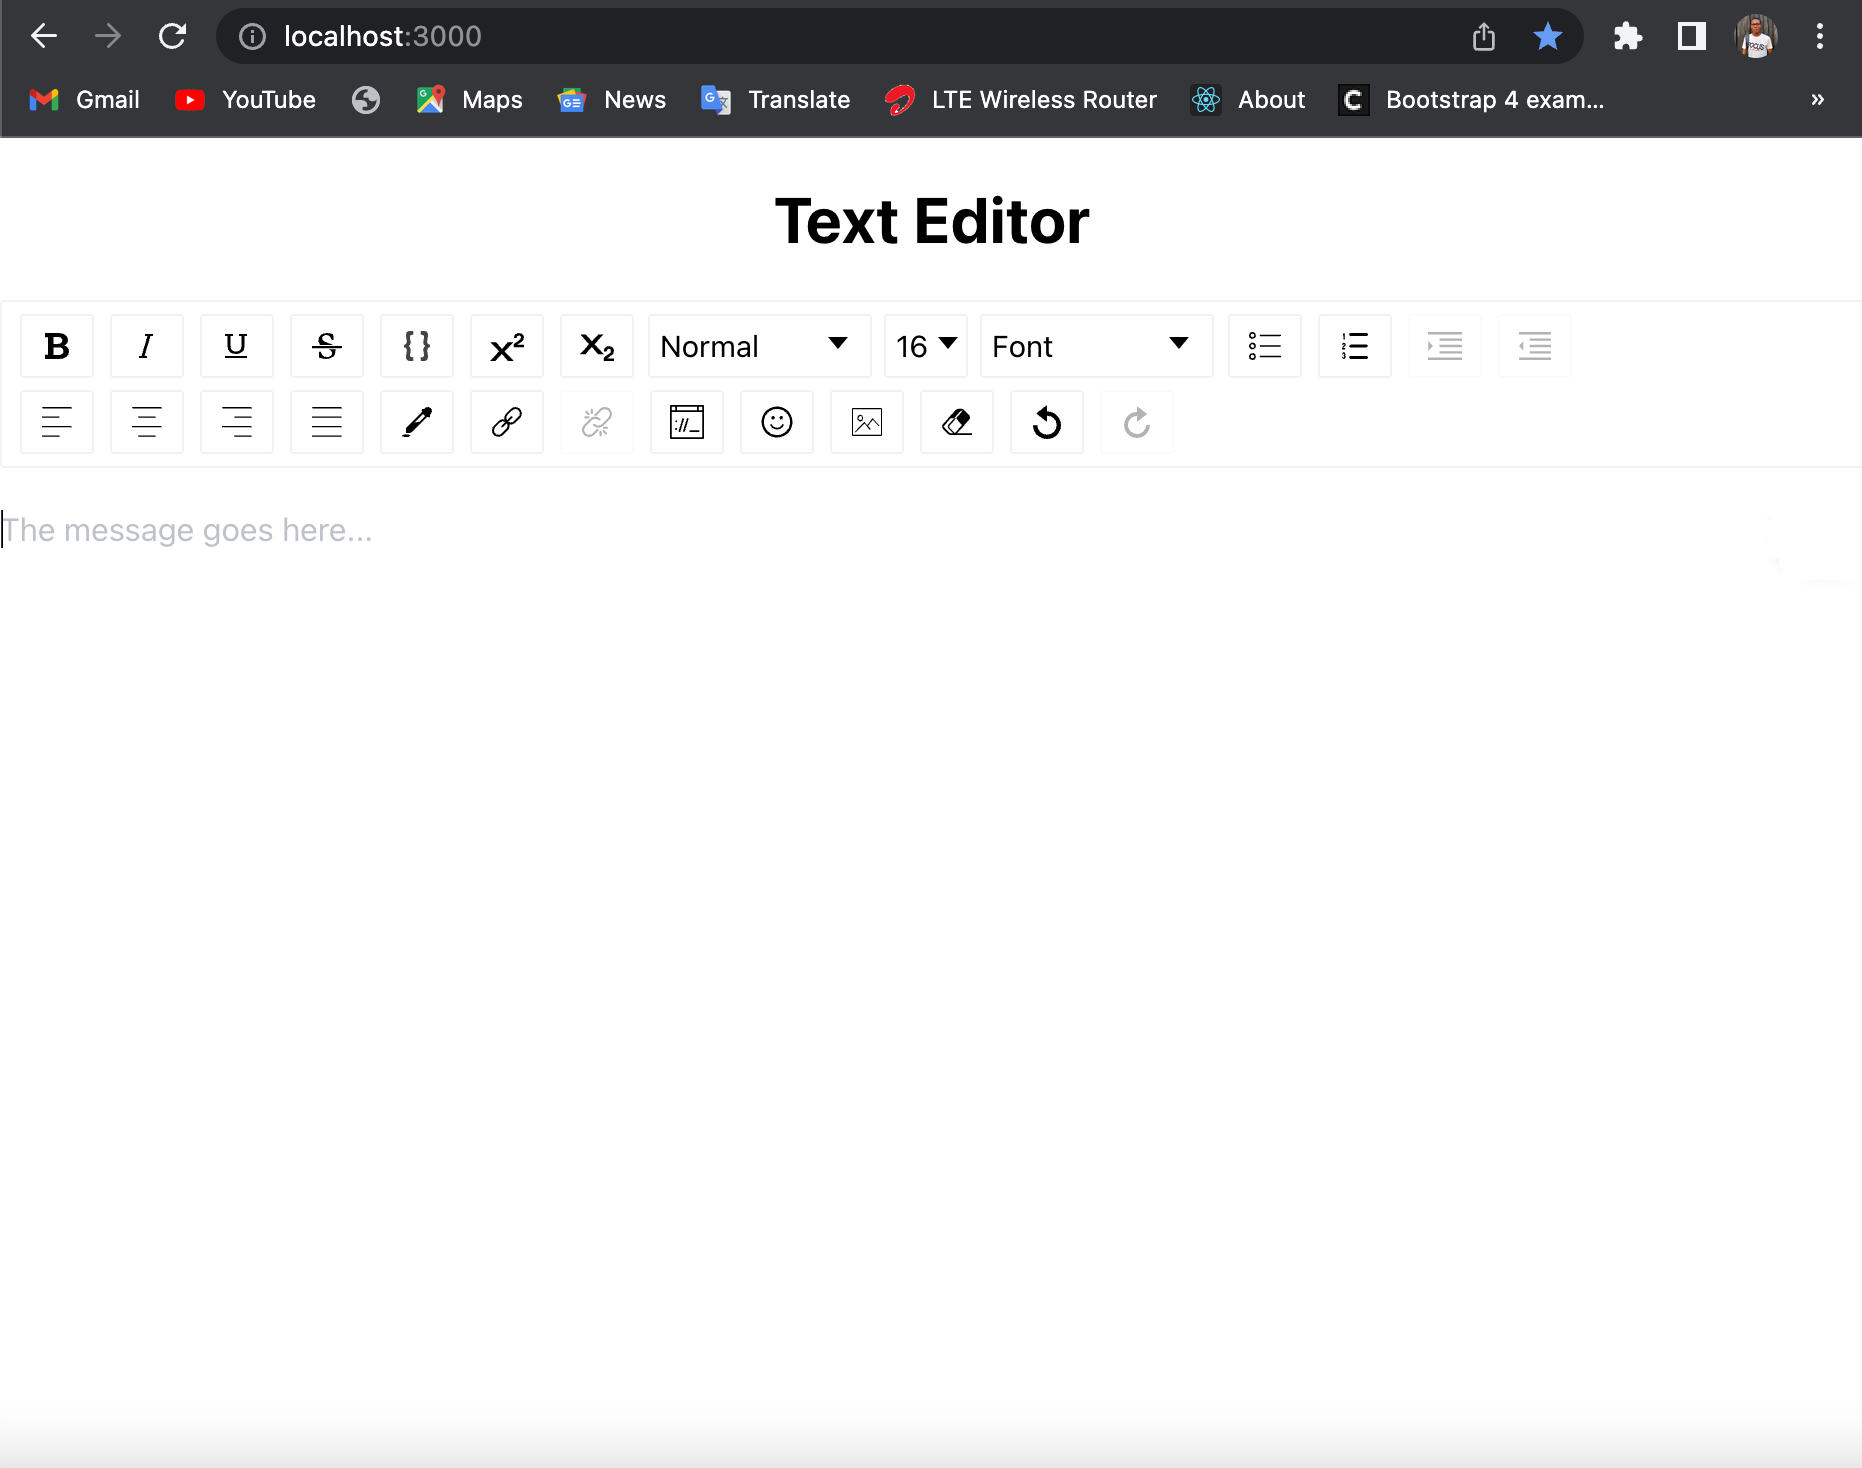
}Now, the rich text editor should resemble the following:
N/B: In the development mode, you can see a warning that reads, “Can’t call setState on a component.” React displays this warning message due to a problem with react-draft-wysiwyg. Hopefully, library administrators will patch this problem as soon as possible. You may temporarily turn off React Strict Mode for this lesson by doing the following:
    import ReactDOM from 'react-dom/client';
    import './index.css';
    import App from './App';
    const root = ReactDOM.createRoot(document.getElementById('root'));
    root.render(
      // <React.StrictMode>
        <App />
      // </React.StrictMode>
    );
EditorState Props
An uncontrolled or regulated component can both exist in the editor. EditorState, the editor’s top-level state object, is used to create a controlled editor. While a flow type that indicates the anticipated structure of the raw format of the contents can be used to create an uncontrolled editor, such as EditorState or RawDraftContentState. The following props will be passed to the controlled editor if we want to construct one:
editorState: A prop to manage updating the editor’s stateonEditorStateChange: a function that receives an object parameter of typeEditorStateand is called whenever the editor state changes
These will be added to our editor component, and it will then appear as follows:
    <Editor
      editorState={editorState}
      onEditorStateChange={setEditorState}
      toolbarClassName="toolbarClassName"
      wrapperClassName="wrapperClassName"
      editorClassName="editorClassName"
    />
By passing initialEditorState, EditorState can also be used to create an uncontrolled editor. Once the editor state has been constructed, initialize it with this object of type EditorState:
    <Editor
      initialEditorState={editorState}
      onEditorStateChange={setEditorState}
      toolbarClassName="toolbarClassName"
      wrapperClassName="wrapperClassName"
      editorClassName="editorClassName"
      placeholder="The message goes here..."
    />
The use of RawDraftContentState is the alternative method for achieving an uncontrolled editor. The unchecked editor accepts the following props: initialEditorState and onContentStateChange.
    <Editor
      initialContentState={contentState}
      onContentStateChange={this.onContentStateChange}
      toolbarClassName="toolbarClassName"
      wrapperClassName="wrapperClassName"
      editorClassName="editorClassName"
    />
Using RawDraftContentState to achieve editor-controlled behavior is not advised. Performance is affected when contentState is converted to an instance of editorState.
Conclusion
This post focused on building a rich text editor with a toolbar that already has a number of options for entering and displaying text. You can add features that allow you to store the text in a database, retrieve it, and make changes to it if you want to push yourself even further.
Gain Debugging Superpowers
Unleash the power of session replay to reproduce bugs and track user frustrations. Get complete visibility into your frontend with OpenReplay, the most advanced open-source session replay tool for developers.