An Alternative to Next.JS? - Everything You Need to Know About RemixJS
RemixJS is a new full-stack framework meant to replace Next.JS, learn everything you need to know about it in this intro tutorial


Remix is a new full-stack JavaScript framework that does away with static site generation and performs a few things differently than current frameworks. It uses React to render the user interface, and it shares quite a number of similarities with NextJS. There are, nevertheless, clear distinctions, such as nested routes, data fetching, saving management, and error handling. Let’s take a look at those ideas and see how they stack up against other strategies that are already being employed in popular frameworks.
One of the superpowers of Remix is Nested Routing
Nested Routing
A very neat mechanism in Remix is the ability to render parts of a page based on the route we’re on. This React Router functionality allows Remix to predict what you’re going to render before you do. This allows Remix to retrieve data, stylesheets, and modules for the next page, or only the altered portion of the current page.
In other frameworks, this would imply either a new route with its own index file or a route that is specially matched to one or more components. We’re used to tying different sections of our URL to distinct routes or components — Remix’s approach is best described as nested layouts, with each part of the URL connected to a route file by definition.
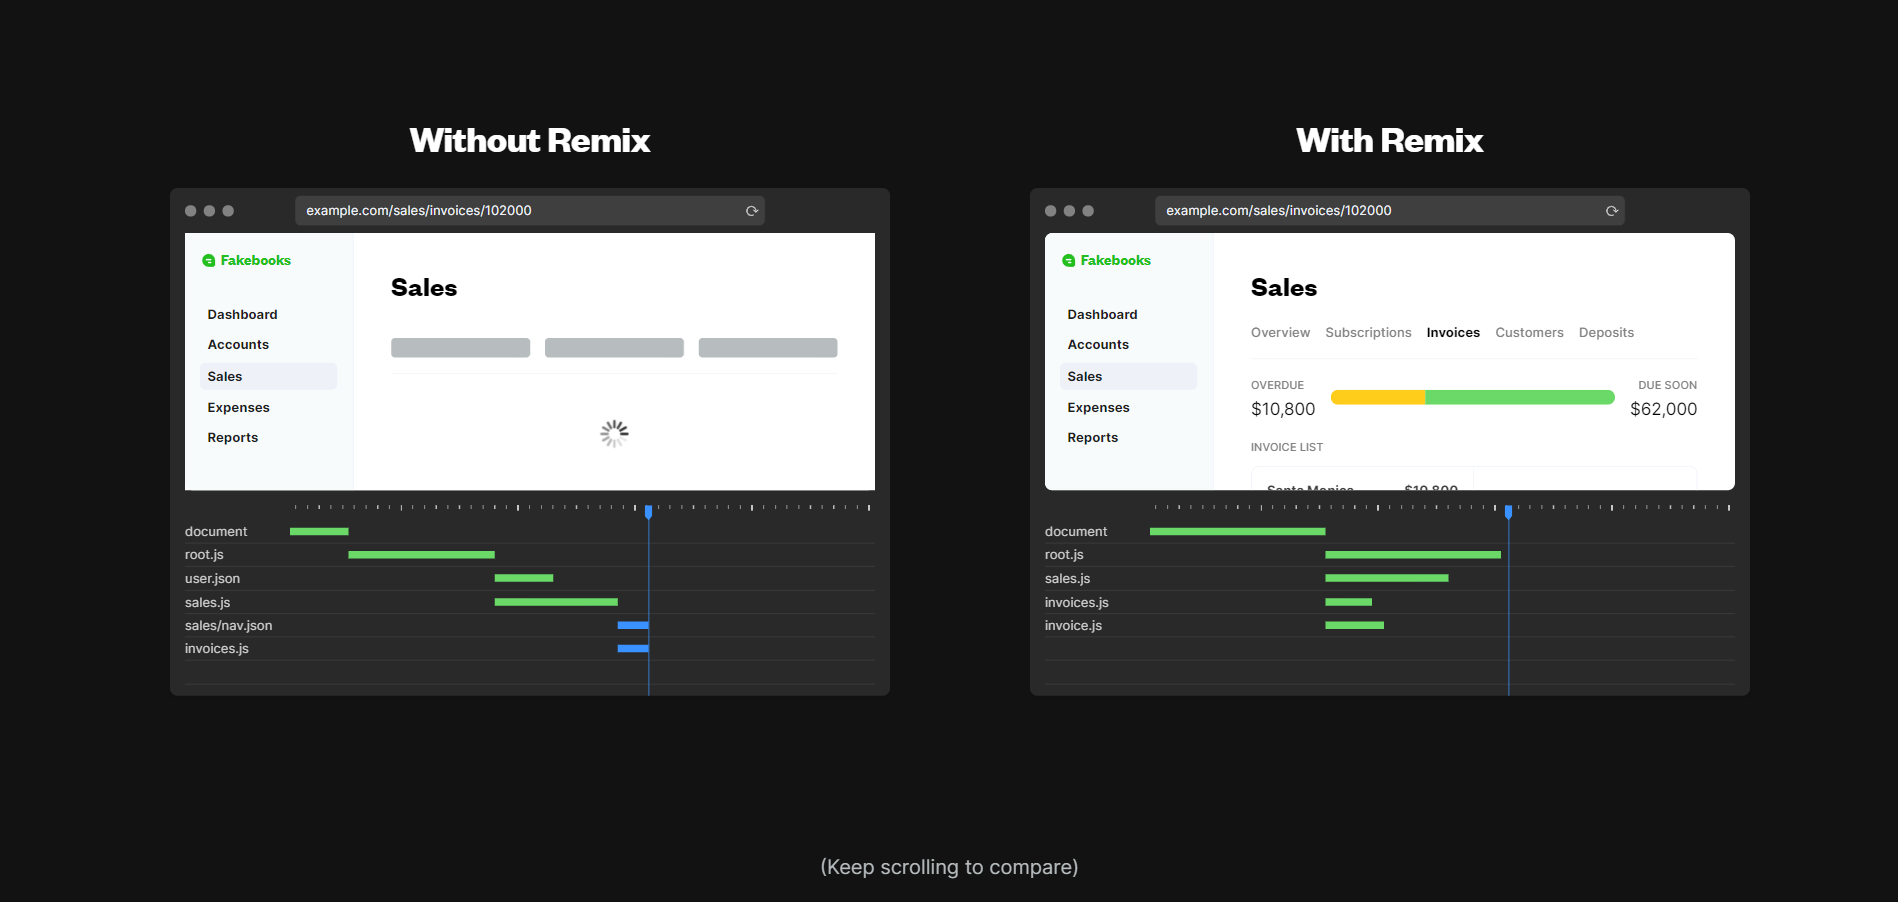
Under the hood, this allows Remix to preload the various sections of a page, making it extremely quick and allowing us to minimise as many loading states as possible.
Error Handling
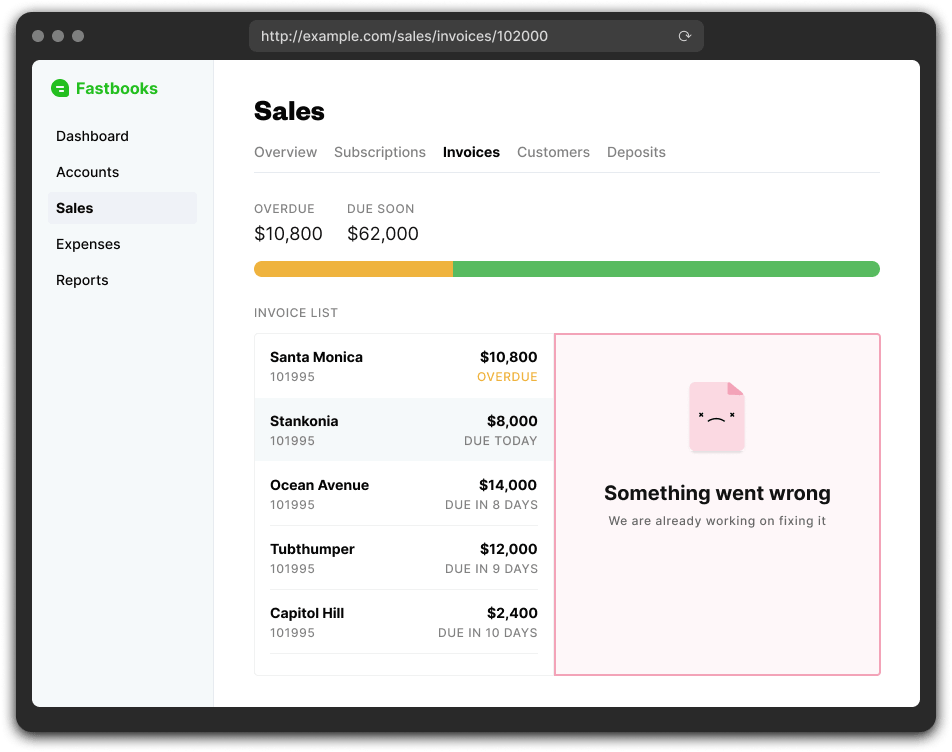
Error handling is inbuilt in Remix. It’s error handling is unusual in that it allows us to define ErrorBoundaries that will be displayed if something with our route components doesn’t perform as planned and an error is produced. That way, if we use Remix’s nested routes, we may only notice a single throwing fault, rather than the entire page. Error borders are clever in that they bubble up (the routes) to the nearest error boundary. As a result, the simplest case would be to have a single error border at the root level, similar to a full 404.
When your websites run into problems, they don’t need to be refreshed. Remix handles errors while Server Rendering. Errors while Cliend Rendering. Even errors in your server side data handling.
If we’re using Remix’s nested routes, we might see a single throwing and error, but not necessarily the whole page. Implementing an error boundary is as simple as adding an ErrorBoundary function to our route components as shown below.
/*Code from Remix Docs*/

export function ErrorBoundary({ error }) {
  console.error(error);
  return (
    <html>
      <head>
        <title>Something went wrong</title>
        <Meta />
        <Links />
      </head>
      <body>
        We are already working on it
        <Scripts />
      </body>
    </html>
  );
}

/*Make sure to still render the Scripts, Meta, and Links components because the whole document will mount and unmount when the root error boundary is rendered.*/
The following image demonstrates how having multiple small error boundaries can leave the rest of an application intact.
Open Source Session Replay
OpenReplay is an open-source, session replay suite that lets you see what users do on your web app, helping you troubleshoot issues faster. OpenReplay is self-hosted for full control over your data.

Start enjoying your debugging experience - start using OpenReplay for free.
Now let us install Remix
First, fire up your terminal and run the following command
npx create-remix@latest
After the installation is complete, you can see the following message
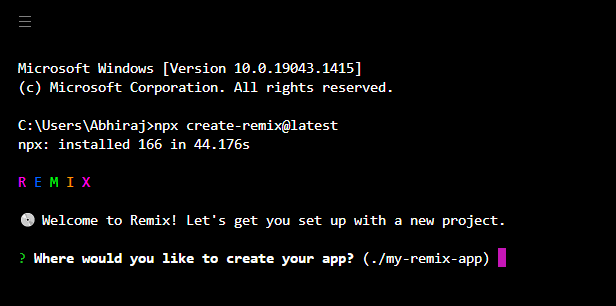
Type the name of the folder you want and also its position and press ENTER
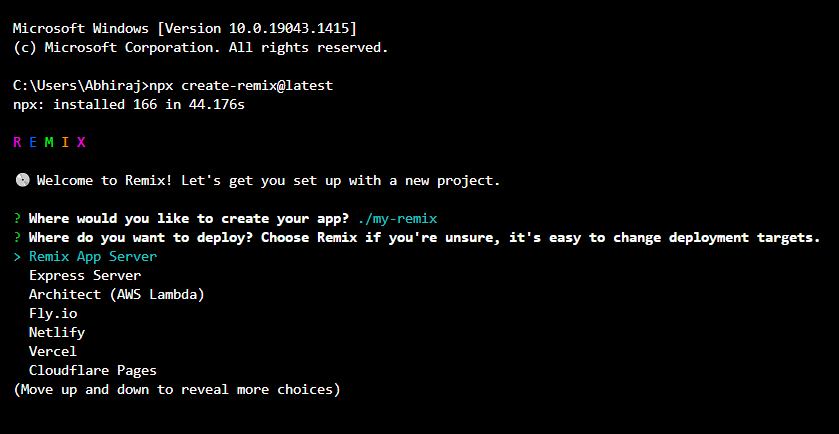
Choose the Remix App Server option (can be changed later)
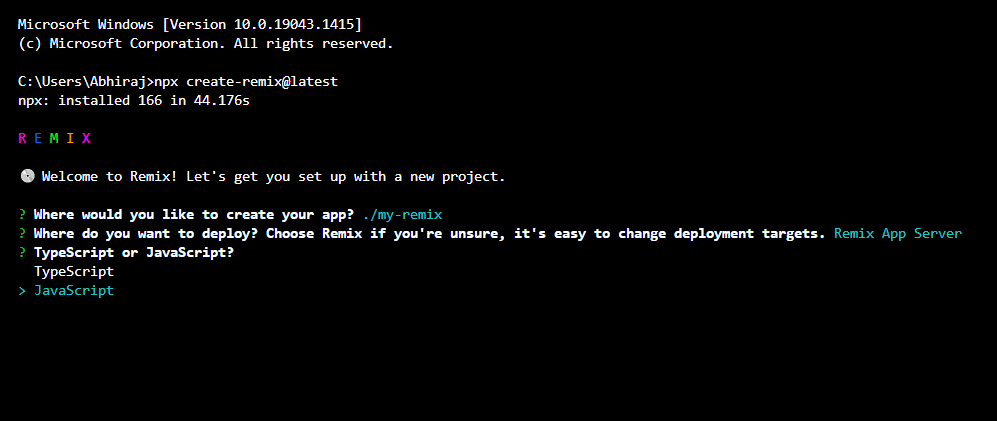
Choose the language you wish to choose, I’ll be choosing Javascript as of now.
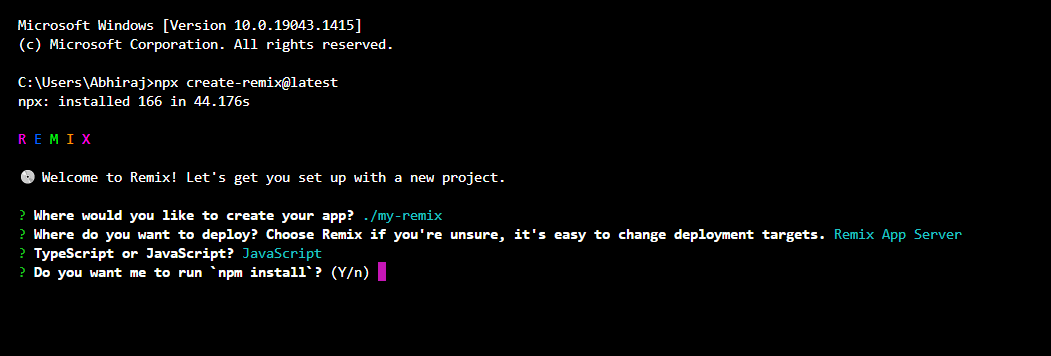
Choose yes and let it run npm install
After the installation is complete, you can see this message. Now use cd <your folder name>
and then run the following command to go into development mode
npm run dev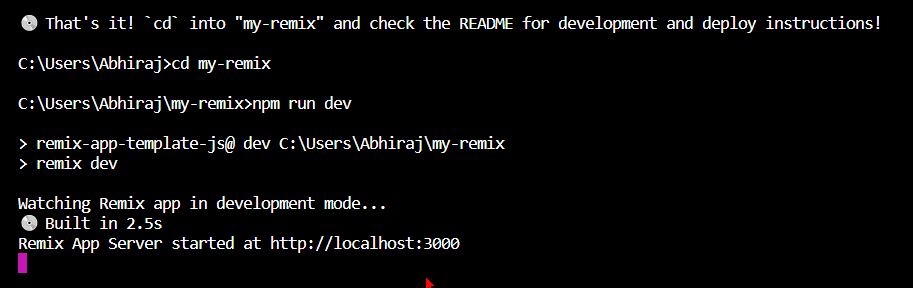
Click on the localhost link to open the server in the default browser
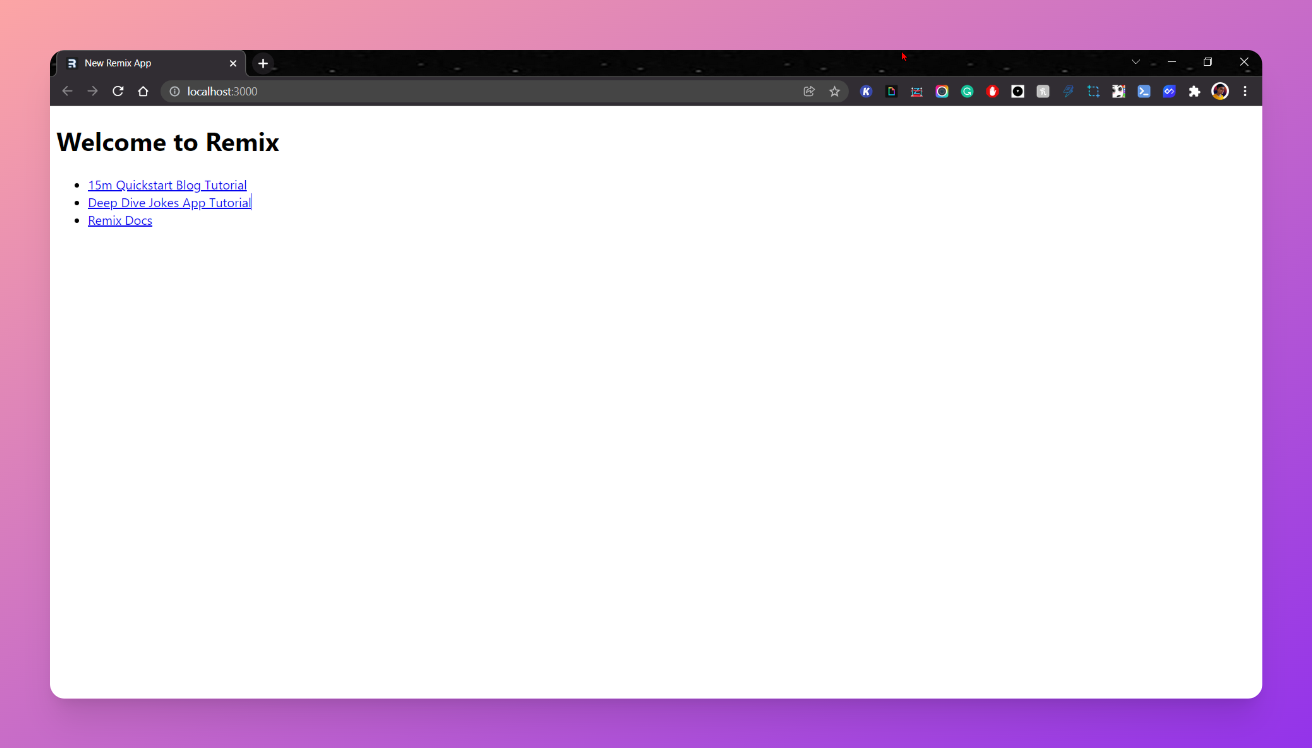
And that’s it!
You have successfully installed Remix now. The code structure for the file above is:

Useful resources
Remix Website Docs Github RemixJS
Conclusion
Remix is comparitively a new framework in the programming world. It has many more features to come and more community support too. We are yet to witness mainstream usage of Remix. In this article we learned about the main features of Remix:
- Nested routing. A very neat mechanism the allows us to render parts of a page based on the route we’re on.
- Error handling using Error boundaries. The neat part of this feature is that we can define our boundaries with a simple function definition.
We also covered the basics to get started with Remix for your project, so you have no excuse now, you have to try it!
Thank you for reading and see you in the next one!