An animated parallax carousel effect for React Native
An advanced carousel with special effects.


A carousel is a popular design element that allows users to scroll through a series of items horizontally. It’s commonly used to display a set of images, products, or testimonials in a visually appealing way. In this tutorial, we will guide you through building a carousel component that smoothly animates multiple components while providing a 3D parallax effect.
The parallax effect is a technique that creates the illusion of depth by making objects in the foreground appear to move faster than those in the background. This can add an extra layer of interactivity and immersion to your carousel, making it more engaging for your users. By the end of this tutorial, you will have learned how to create a carousel with a parallax effect in React Native. The complete source code for the tutorial can be found here on GitHub.
Prerequisite
To follow this tutorial, basic knowledge of React Native is essential. You should have completed the React Native Environment setup, and for testing the applications, you should have an Android and an iOS simulator running on your computer. If you haven’t done these yet, you should find instructions for the React Native Environment setup here.
Setting up the Project
The first step for this tutorial is to initialize a React Native project. In this tutorial, I will name this project RNParallaxEffect. To initialize a React Native project, you need to open up your terminal and, in your desired folder, run the commands below:
npx react-native init RNParallaxEffectAfter running the command above, your project will be created. The next thing to do is to run the command to install the necessary iOS dependencies for this project. The command is below:
cd ios && pod installThe command above will navigate to the ios folder and execute. To return to the root directory, run cd .., and it’ll take you back to the root directory, which should be after pod install has run successfully.
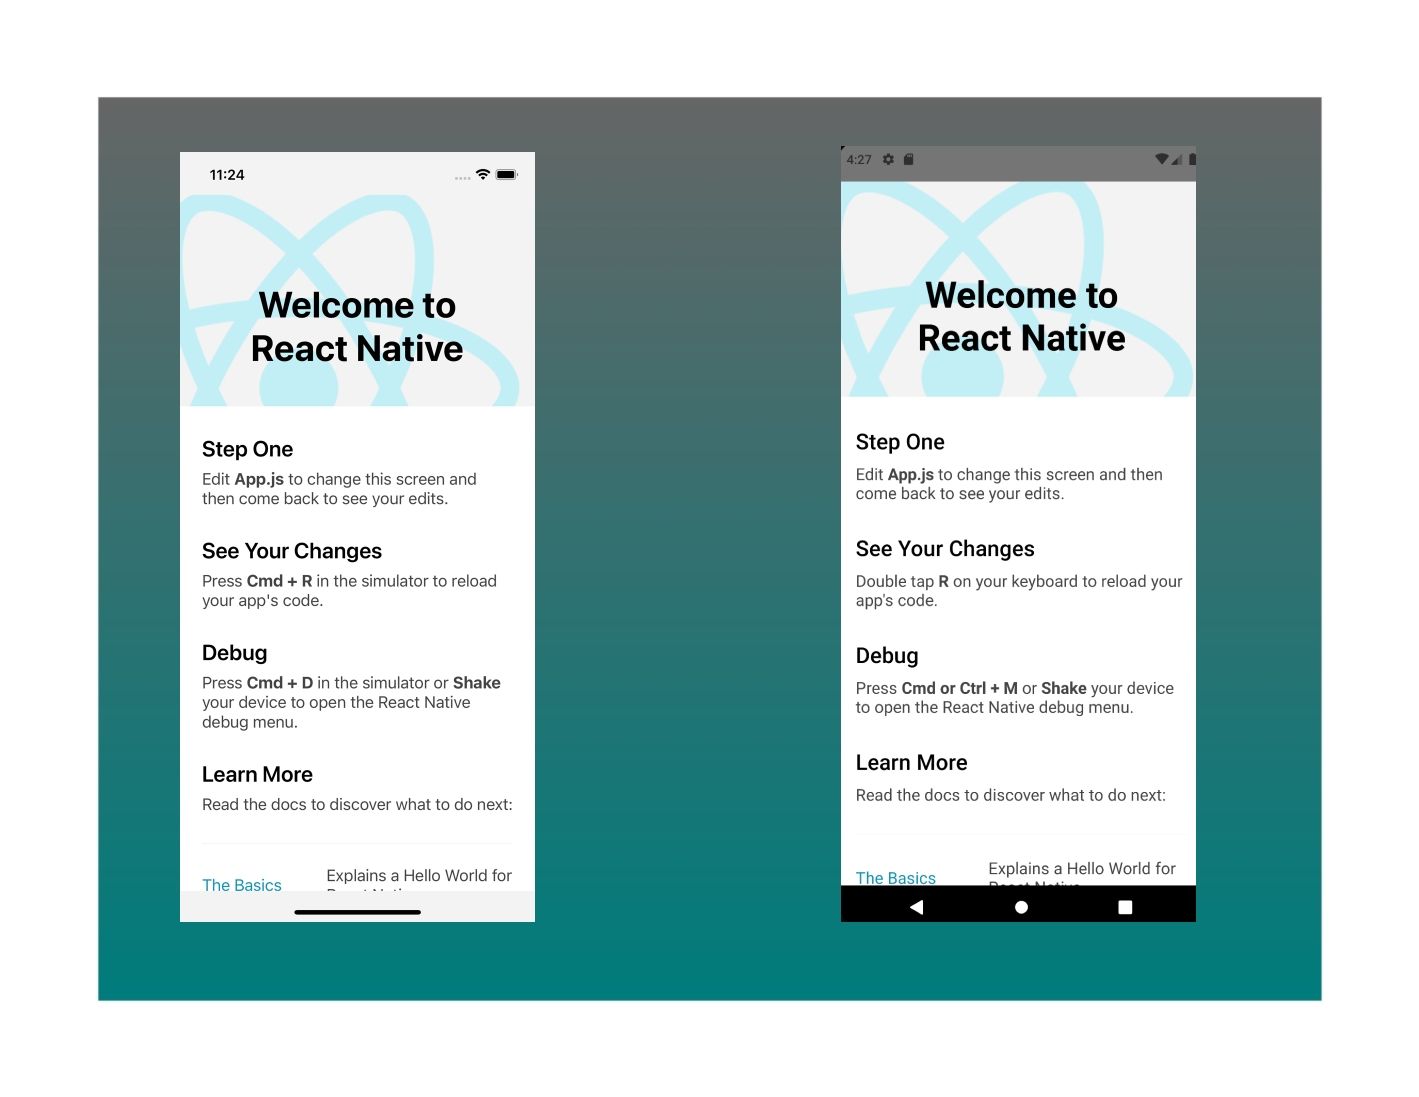
Lastly, for this section, you must run the application on your Android and iOS emulators. To do this, run the commands below from your project root folder.
#Run Project on Android Emulator
npx react-native run-android

#Run Project on iOS Simulator
npx react-native run-ios
After setting up all this, you should have your project running on your Android and iOS emulators like this:
Rendering Carousel Items
Now, in your app.js file, clear the demo state from within the app component and the import statements at the top and update the imports as shown below:
import React from 'react';
import {
  SafeAreaView,
  StyleSheet,
  Dimensions,
  Image,
  FlatList,
  Text,
  View,
} from 'react-native';
For the carousel, I will use FlatList, a React Native component designed to render a list of items efficiently. One of the key benefits of using FlatList is that it only renders the currently visible items on the screen rather than rendering the entire list of items at once.
Next, I will get the device screen’s width and height by using the Dimensions object, and then I will use it to calculate the width and height of the carousel. The code is below:
#This can be inserted just below the import statements
const { width, height } = Dimensions.get('screen');
const IMG_WIDTH = width * 0.75;
const IMG_HEIGHT = IMG_WIDTH * 1.45;
Next, you will notice the Dimensions object is imported. Since it provides information about the screen dimensions of the device the app is running on, I will use it to get the width and height of the device and relate it to the width and height of the image.
After this, I will declare an array of images. I sourced the images I will use for this demonstration from pexels, and I will use their absolute URLs.
const img = [
  'https://images.pexels.com/photos/6346639/pexels-photo-6346639.jpeg?auto=compress&cs=tinysrgb&w=1260&h=750&dpr=2',
  'https://images.pexels.com/photos/14519806/pexels-photo-14519806.jpeg?auto=compress&cs=tinysrgb&w=1260&h=750&dpr=2',
  'https://images.pexels.com/photos/3257803/pexels-photo-3257803.jpeg?auto=compress&cs=tinysrgb&w=1260&h=750&dpr=2',
  'https://images.pexels.com/photos/3352860/pexels-photo-3352860.jpeg?auto=compress&cs=tinysrgb&w=1260&h=750&dpr=2',
  'https://images.pexels.com/photos/6445669/pexels-photo-6445669.jpeg?auto=compress&cs=tinysrgb&w=1260&h=750&dpr=2',
  'https://images.pexels.com/photos/5760479/pexels-photo-5760479.jpeg?auto=compress&cs=tinysrgb&w=1260&h=750&dpr=2',
  'https://images.pexels.com/photos/12905016/pexels-photo-12905016.jpeg?auto=compress&cs=tinysrgb&w=1260&h=750&dpr=2',
  'https://images.pexels.com/photos/4214998/pexels-photo-4214998.jpeg?auto=compress&cs=tinysrgb&w=1260&h=750&dpr=2',
  'https://images.pexels.com/photos/9203428/pexels-photo-9203428.jpeg?auto=compress&cs=tinysrgb&w=1260&h=750&dpr=2',
  'https://images.pexels.com/photos/1879864/pexels-photo-1879864.jpeg?auto=compress&cs=tinysrgb&w=1260&h=750&dpr=2',
];
Here, I will declare a constant called resources, an array of objects. Each object in the array will have two properties: key and photo. The map function will now be used to iterate over the img array and create a new array of objects based on the elements in the img array. For each element in the img array, the function creates an object with the properties key and photo, and adds that object to the new resources array. The code is below:
const resources = img.map((image, index)=> ({
key: String(index),
photo: image
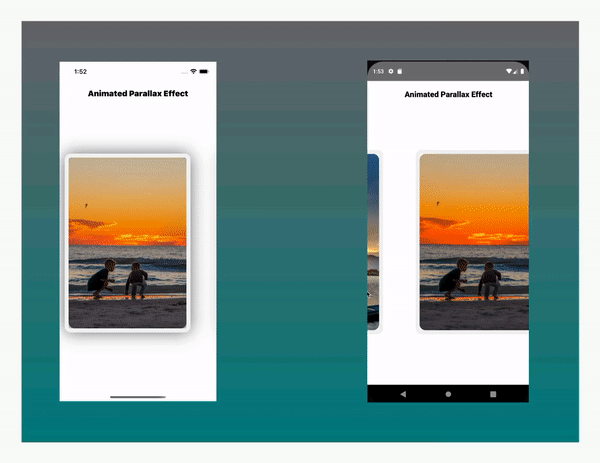
}))Now, let’s render the FlatList. The FlatList will take in the objects we have declared as resources. Here’s the code below.
const App = () => {

return (
<SafeAreaView style={styles.container}>
    <View >
    <Text style={styles.Text}>Animated Parallax Effect</Text>
      <FlatList
      data={resources}
      horizontal
      showsHorizontalScrollIndicator={false}
      pagingEnabled
      keyExtractor={(item) => item.key}
      renderItem={({item, index}) => {
        return (
          <View style={{width, justifyContent: "center", alignItems: "center"}}>
          <Image
          source={{uri: item.photo}}
          style={{width: IMG_WIDTH, height: IMG_HEIGHT, resizeMode: "cover", }}
          />
          </View>
        )
      }}
      />
    </View>
  </SafeAreaView>
    );
};
You should also add the styles below:
const styles = StyleSheet.create({
  container: {
    flex: 1,
    backgroundColor: '#fff',
    alignItems: 'center',
    justifyContent: 'center',
  },
  Text: {
    color: "#000",
    fontSize: 20,
    paddingTop: 20,
    fontWeight: "900",
    textAlign: "center",
  }
});
Once this is added, you should have your Android and iOS emulators show up like this:

Session Replay for Developers
Uncover frustrations, understand bugs and fix slowdowns like never before with OpenReplay — an open-source session replay tool for developers. Self-host it in minutes, and have complete control over your customer data. Check our GitHub repo and join the thousands of developers in our community.
Implementing the Parallax Effect
To implement the parallax effect, I will have to animate the component that’s housing the carousel image and then animate the image such that when it’s pulled, say in the right direction, the image translates to the reverse direction which will give a kind of feel that the component is a multi-layered environment.
Now, let us wrap the image in a view so that we can increase the size of the image, but the view will make only a part visible and hide the other part so that when animated, it can give the parallax effect.
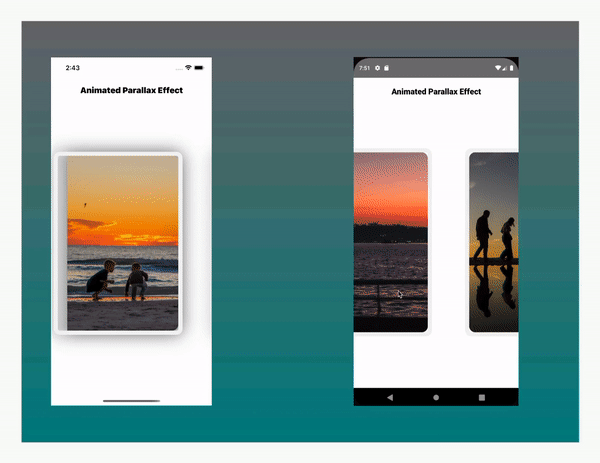
Also, to have a border around the image and give it a multi-layer feel, I will create another view and apply border styles and shadow effects. Update the FlatList component with the code below:
<FlatList
...
renderItem = {({item, index}) => {
return (
<View style={{width, justifyContent: "center", alignItems: "center"}}>
<View style={{borderRadius: 15 , borderWidth: 10, borderColor: '#f2f2f2', shadowColor: '#000', shadowOpacity: 0.6, shadowRadius: 20, shadowOffset: {width: 0, height: 0},}}>
<View style={{width: IMG_WIDTH, borderRadius: 15, height: IMG_HEIGHT, overflow: "hidden", alignItems: "center", }}>
            <Image
            source={{uri: item.photo}}
            style={{width: IMG_WIDTH, height: IMG_HEIGHT, resizeMode: "cover", transform: [ {translateX}]}}
            />
            </View>
            </View>
            </View>
        )
      }
  />
After implementing this, your Android and iOS emulators should show up as shown below. Notice that it’s a standard slider.
Now, to apply animation on the component, the first thing to do is to import Animated from React Native and useRef from React. The code is below:
import React, {useRef} from 'react';
import {
  Animated,
  ...
} from 'react-native';
Next, update the FlatList and Image components to Animated.FlatList and Animated.Image components so that the FlatList component supports the animation of the list items while the Image component supports the animation of the image’s properties.
Now, within the app component, I will declare a constant that will use the useRef hook in combination with the Animated.Value constructor to create a new animated value that represents the scroll position of the carousel and using the useRef hook, the created value will be preserved even after a re-render.
const scrollX = useRef(new Animated.Value(0)).currentAfter this, I will add the onScroll prop to the FlatList component and declare an event handler for it. The event handler uses the Animated.event method to create an animated value that represents the scroll position of the ScrollView, using the useNativeDriver option to improve the performance of the animation.
<FlatList
onScroll={Animated.event(
        [{nativeEvent: {contentOffset: {x: scrollX}}}],
        {useNativeDriver: true},
      )}

  ...
  />
Next, within the renderItem function, before the return keyword, I will declare an inputRange array, an array of values used to define the input range of an interpolation function.
Note that Interpolation is a way of taking a starting value and an ending value and creating a smooth transition between them, so in this case, the inputRange array is being used to define the range of scroll positions that should trigger the interpolation. The array has three values: The position of the previous item in the list The position of the current item in the list The position of the next item in the list
...
  renderItem={({item, index}) => {
          const inputRange = [
            (index - 1) * width,
            index * width,
            (index + 1) * width
          ];
          return (
          ...
          )
...
After inputting this, I will declare a constant that will use the interpolate method of an Animated.Value from scrollX to create an interpolated value representing the position of the image component within the FlatList.
const translateX = scrollX.interpolate({
    inputRange,
    outputRange: [-width * .7, 0, width * .7]
  })
The interpolate method takes an object as an argument that defines the interpolation function. The object should have an inputRange property that specifies the range of input values that trigger the interpolation and an outputRange property that specifies the range of output values that result from the interpolation.
The resulting interpolated value, translateX, will then be used to animate the position of the image component. Thus I will update the styles in the Animated.Image component with translateX as shown:
...
  <Animated.Image
          source={{uri: item.photo}}
          style={{transform: [ {translateX}], width: IMG_WIDTH, height: IMG_HEIGHT, resizeMode: "cover",}}
          />
...
Once this is done, the parallax effect should be implemented and visible in your Android and iOS emulators. Notice how the background and foreground elements move at different speeds and create an illusion of depth by the different layers moving at different speeds.
Conclusion
Overall, the animated parallax effect is a useful technique for adding visual interest and engagement to your app, and it is relatively straightforward to implement in React Native, as this tutorial exemplifies. By following the steps outlined in this tutorial, you should be able to create this animated parallax effect in your React Native project. If, in any case, you need some assistance while working on this, do well to reach out. I will be happy to help. Also, note that the complete source code for this tutorial can be found on this GitHub repo.
Gain Debugging Superpowers
Unleash the power of session replay to reproduce bugs and track user frustrations. Get complete visibility into your frontend with OpenReplay, the most advanced open-source session replay tool for developers.