Authentication in React with Microsoft's MSAL library
Use MSAL for authentication in your React apps


Authentication is mandatory in today’s apps, and Microsoft’s Authentication Library (MSAL) is a strong solution to this problem. This article will show you all the details about implementing MSAL in your own React code.

Spot abnormal user behaviors and iron out the bugs early with OpenReplay. Dive into session replays and reinforce your front-end against vulnerabilities that hackers search for.
Discover how at OpenReplay.com.
In today’s digital landscape, ensuring the security and privacy of user data is paramount. Whether you’re building a web application, a mobile app, or any other software that requires user authentication, Microsoft’s Authentication Library for React (MSAL-React) offers a robust solution to streamline the process. With MSAL-React, developers can integrate secure authentication seamlessly into their applications, providing users a safe and user-friendly experience. In this comprehensive guide, we’ll take you step by step through the process of implementing authentication with MSAL-React, helping you leverage the power of Microsoft’s identity platform to safeguard your users’ data and enhance the trustworthiness of your application. Whether you’re a seasoned developer or just starting your journey, this article will equip you with the knowledge and tools to incorporate robust authentication in your React applications.
Setting Up the Development Environment
The necessary software and tools required to build the app are:
- Node.js and npm: Install
Node.js, which includesnpmfrom the official website.npmwould be used to manage dependencies and run scripts. - Duplicating a template: This template already has the single page front end built. Here’s how to duplicate it:
- First, fork the repository.
- Open your terminal and clone the repository by running this command in your terminal.
git clone <your_repository_url>Navigate to the project directory using this command in the terminal.
cd msal-react-demo-templateAfter navigating to the app directory, install the dependencies.
npm installStart the app.
npm startHere’s a first look at the app’s user interface.

- Installing necessary dependencies: Install msal-react and msal-browser by using the following command on the terminal.
npm install --save @azure/msal-browser @azure/msal-reactBelow is the project structure:
msal-react-demo-template/
|-- node_modules/
|-- public/
|-- src/
|   |-- components/
       |-- NavBar.jsx
       |-- PageLayout.jsx
       |-- ProfileData.jsx
       |-- SignInButton.jsx
       |-- SignOutButton.jsx
       |-- WelcomeName.jsx
|   |-- pages/
       |-- Home.jsx
       |-- Profile.jsx
|   |-- styles/
       |-- theme.js
|   |-- App.js
|   |-- index.js
|-- .gitignore
|-- LICENSE
|-- package-lock.json
|-- package.json
|-- README.md
Azure AD App Registration
Azure Active Directory (Azure AD) is Microsoft’s cloud-based identity and access management service. It provides a comprehensive solution for managing user identities and securing access to applications and resources in the cloud and on-premises. In the context of this guide, Azure AD is crucial for adding authentication and authorization to your application, ensuring that only authorized users can access your resources.
Creating an Azure AD App Registration and Obtaining Client ID
- Go to https://portal.azure.com/.
- Sign in using your Microsoft account or create one.
- In the search bar, search for “App Registration”.
- Click on “New Registration”.
- Fill in the name you want to use for the app.
- Choose the supported account type. For this article, we will be using Personal Microsoft Accounts only.
- For the Redirect URI, select “Single-page application (SPA)” and set the URI to
http://localhost:3000/. - Click on “Register”.
- On the Overview menu, you can copy the client ID.
MSAL-React Integration
Configuring MSAL-React within your application to enable secure and user-friendly Azure AD-based authentication and authorization.
Setting up the configuration for MSAL
In the index.js file, you’ll configure the integration of MSAL-React into the React application by following these steps.
- Import the necessary library:
First, import the
PublicClientApplicationfrommsal-browser.MSAL(Microsoft Authentication Library) is a library that facilitates Azure AD authentication and authorization.
import { PublicClientApplication } from '@azure/msal-browser';- Instantiate the
pubClientAppobject and provide configuration options: Create apubClientAppobject by configuring it with essential options. These options define how your application interacts with Azure AD. Here’s an explanation of each option:
clientId: This is your application’s client ID obtained from the Azure AD application registration.authority: The authority URL specifies where the authentication and authorization should occur. For Azure AD consumer accounts, use ‘https://login.microsoftonline.com/consumers’.redirectURI: This is the URI to which the user will be redirected after successful authentication. You should configure it to match your application’s settings.
const pubClientApp = new PublicClientApplication({
  auth: {
    clientId: "Paste your client ID",
    authority: "https://login.microsoftonline.com/consumers",
    redirectUri: "/",
  },
});
Note: To ensure optimal performance, it’s crucial to instantiate the pubClientApp object outside the component tree. This prevents it from being recreated whenever a component re-renders, which can be inefficient. By placing it outside, you guarantee it’s created only once and reused as needed.
- Pass the
pubClientAppobject as apropto your application component: Now, make thepubClientAppobject available to the application component. This is typically done by passing it as apropto the component, which allows the application to manage authentication and authorization seamlessly.
<App msalInstance={pubClientApp}/>Initializing MSAL Provider
To enable components within your application to access the authentication state, you should wrap them in the MsalProvider component. Follow these steps to set it up in the App.js file:
- First, import the
MsalProvidercomponent from themsal-reactlibrary.
import { MsalProvider } from "@azure/msal-react";- Wrap the App components with
MsalProvider. Provide themsalInstanceprop and pass the applicationinstancethat was configured toMsalProvider.
function App({ msalInstance }) {
  return (
    <MsalProvider instance={msalInstance}>
      <PageLayout>
        <Grid container justifyContent="center">
          <Pages />
        </Grid>
      </PageLayout>
    </MsalProvider>
  );
}
By wrapping the components with MsalProvider, the application can access the msal-react context. This context provides access to authentication-related functionality, making implementing secure authentication and authorization within your React application easier.
Creating a Sign-In Component
To create a Sign-In component for the application, follow these steps in the SignInButton.jsx file:
- Begin by importing the
useMsalhook to access theMSAL instance.
import { useMsal } from '@azure/msal-react';- Utilize the
useMsalhook to access theMSAL instance.Create a variable namedinstanceusing the hook, enabling access to the previously configuredMSAL instance.
const { instance } = useMsal();- Define a’ handleLogin’ function with the
instance.loginPopup()method. This function prompts users with a pop-up to sign in using their username and password
const handleLogin = () => {
  instance.loginPopup();
};- Customize the sign-in experience by specifying options like
scopesto request permissions when users sign in for the first time.
const handleLogin = () => {
  instance.loginPopup({
    scopes: ["user.read"],
  });
};- Add the
onClickattribute that invokes thehandleLoginfunction to the button in the component.
<Button color="inherit" onClick={handleLogin}>
      Sign in
</Button>
Here’s the SignInButton.jsx file for reference:
import Button from "@mui/material/Button"; // Importing a button component from the Material-UI library.
import { useMsal } from "@azure/msal-react"; // Importing the useMsal hook from Azure MSAL for handling authentication.

export const SignInButton = () => {
  const { instance } = useMsal(); // Access the instance object from the useMsal hook.

  const handleLogin = () => {
    instance.loginPopup({
      scopes: ["user.read"], // Configuring the loginPopup with the "user.read" scope.
    });
  };

  return (
    <Button color="inherit" onClick={handleLogin}>
      Sign in {/* Render a button with the label "Sign in" and bind the handleLogin function to the click event. */}
    </Button>
  );
};
Creating a Sign-Out Component
Creating a Sign-out component is similar to creating a Sign-in component as outlined above. Follow these steps in your SignOutButton.jsx file to create the Sign-out component:
- Import the
useMsalhook frommsal-reactto access theMSAL instancefor handling sign-out.
import { useMsal } from '@azure/msal-react';- Utilize the
useMsalhook to access theMSAL instance.Create a variable calledinstanceby using theuseMsalhook. This allows access to theMSAL instanceconfigured for your application.
const { instance } = useMsal();- Define the
handleLogoutfunction, which uses theinstance.logoutPopup()method. This function triggers a pop-up for signing out the user and redirects them to the home page after signing out.
const handleLogout = () => {
  instance.logoutPopup();
};- Incorporate the
handleLogoutfunction into theonClickattribute of the button within the component.
<Button color="inherit" onClick={handleLogout}>
  Sign out
</Button>;
Here’s the SignOutButton.jsx file for reference:
import Button from "@mui/material/Button"; // Importing a button component from the Material-UI library.
import { useMsal } from "@azure/msal-react"; // Importing the useMsal hook from Azure MSAL for handling authentication.

export const SignOutButton = () => {
  const { instance } = useMsal(); // Access the instance object from the useMsal hook.

  const handleLogout = () => {
    instance.logoutPopup(); // Call the logoutPopup method from the instance object to initiate the sign-out process.
  };

  return (
    <Button color="inherit" onClick={handleLogout}>
      Sign out {/* Render a button with the label "Sign out" and bind the handleLogout function to the click event. */}
    </Button>
  );
};
Conditionally Rendering UI Elements Based on Authentication Status
To conditionally render UI elements in the application based on the user’s authentication status, follow these steps in the NavBar.jsx and Home.jsx files.
- In the
NavBar.jsxfile:
Import useIsAuthenticated hook from msal-react. This hook allows for conditional elements rendering based on the user’s authentication status.
import { useIsAuthenticated } from "@azure/msal-react";Conditionally render the WelcomeName element within the component based on the user’s authentication status.
// Conditional rendering: Display the WelcomeName component only if isAuthenticated is true.
{
  isAuthenticated ? <WelcomeName /> : null;
}
Conditionally render SignInButton and SignOutButton elements based on the user’s authentication status. Render the SignOutButton if authenticated and the SignInButton if not authenticated.
// Display the SignOutButton if isAuthenticated is true, otherwise display the SignInButton.
{
  isAuthenticated ? <SignOutButton /> : <SignInButton />;
}- In the
Home.jsxfile:
Implement conditional text rendering by leveraging AuthenticatedTemplate and UnauthenticatedTemplate components provided by msal-react.
Import AuthenticatedTemplate and UnauthenticatedTemplate from msal-react.
import { AuthenticatedTemplate, UnauthenticatedTemplate } from "@azure/msal-react"Enclose the Typography elements containing text intended for visibility when the user is signed in within AuthenticatedTemplate.
<AuthenticatedTemplate>
  <Typography variant="h6">
    You are signed-in. Select profile to call Microsoft Graph.
  </Typography>
</AuthenticatedTemplate>;
Wrap the Typography elements that should be visible when the user is signed out within UnauthenticatedTemplate.
<UnauthenticatedTemplate>
  <Typography variant="h6">
    Please sign in to see your profile information.
  </Typography>
</UnauthenticatedTemplate>;
Here’s a preview of the app that selectively presents specific information based on your sign-in status.
Using Tokens
We’ll dive into the practical steps for acquiring access tokens and making authenticated API requests. Access tokens are the key to securely accessing external resources, and we’ll explore how to use them effectively in your application.
Acquiring access tokens
To acquire access tokens for making authenticated API requests, follow these steps in the Profile.jsx file:
- Import the necessary dependencies at the beginning of the
Profile.jsxfile. These dependencies are required for handling authentication and acquiring access tokens.
import { useMsalAuthentication } from "@azure/msal-react";
import { InteractionType } from "@azure/msal-browser";
import { useEffect, useState } from "react";- Create a state variable called
displayDatausing theuseStatehook. This state variable will store the retrieved data from the authenticated API
const [displayData, setDisplayData] = useState(null);- Utilize the
useMsalAuthenticationhook to acquire access tokens. This hook takes two parameters: theinteraction typeand an object specifying the requestedscopes.
const { result, error } = useMsalAuthentication(InteractionType.Redirect, {
  scopes: ["user.read"],
});
To handle the access token and perform related actions, use the useEffect hook. This should run this effect when the component mounts. Inside this effect, you can run a series of checks:
- Check if
displayDataexists to prevent unnecessary re-execution of the effect when data is already available. - Check for any authentication error and log it to the console for error handling.
- Check if
resultexists, then extract the access token.
useEffect(() => {
  if (!displayData) {
    return;
  }
  if (error) {
    console.log(error);
    return;
  }
  if (result) {
    const accessToken = result.accessToken;
  }
}, [displayData, error, result]);
Making authenticated API requests
To make authenticated API requests and handle the response in the React application, follow these steps:
Create a new file named Fetch.js in the src folder to encapsulate the functions for making API requests.
- In
Fetch.jsfile:
Define a function called retrieveData that takes an endpoint and access token as parameters. This function will handle the API request.
export const retrieveData = (endpoint, accessToken) => {};Inside the retrieveData function, create the Headers object and set the authorization header with the access token (bearer token).
const headers = new Headers();
const bearer = `Bearer ${accessToken}`;
headers.append("Authorization", bearer);
Create an options object with the HTTP method and headers.
const options = {
  method: "GET",
  headers: headers,
};
Use the fetch function to make the API request. Handle the response with .then() and catch any errors with .catch().
return fetch(endpoint, options)
  .then((response) => response.json())
  .catch((error) => console.log(error));
Here’s the Fetch.js file for reference:
export const retrieveData = (endpoint, accessToken) => {
  const headers = new Headers();
  const bearer = `Bearer ${accessToken}`;
  headers.append("Authorization", bearer);

  const options = {
    method: "GET",
    headers: headers,
  };

  return fetch(endpoint, options)
    .then((response) => response.json())
    .catch((error) => console.log(error));
};- In
Profile.jsx:
Import the retrieveData function from Fetch.js. This prepares your profile component to utilize the functionality for making authenticated API requests.
import { retrieveData } from "../Fetch";Use the retrieveData method to make an authenticated API request. For example, you can set the endpoint to “https://graph.microsoft.com/v1.0/me”.
if (result) {
  const accessToken = result.accessToken;
  retrieveData("https://graph.microsoft.com/v1.0/me", accessToken)
    .then((response) => setDisplayData(response))
    .catch((error) => console.log(error));
}
In the component’s return statement, render the data (displayData) if it exists; otherwise, display nothing.
return <>{displayData ? <ProfileData displayData={displayData} /> : null}</>;Here’s the Profile.jsx file for reference:
import { ProfileData } from "../components/ProfileData"; // Importing the ProfileData component
import { useMsalAuthentication } from "@azure/msal-react"; // Importing the useMsalAuthentication hook from Azure MSAL
import { InteractionType } from "@azure/msal-browser"; // Importing the InteractionType from Azure MSAL
import { useEffect, useState } from "react"; // Importing the useEffect and useState hooks from React
import { retrieveData } from "../Fetch"; // Importing the retrieveData function from a custom module

export const Profile = () => {
  const [displayData, setDisplayData] = useState(null); // Initializing a state variable displayData using useState

  const { result, error } = useMsalAuthentication(InteractionType.Redirect, {
    scopes: ["user.read"], // Configuring the useMsalAuthentication hook with a specified scope
  });

  useEffect(() => {
    if (!displayData) {
      return; // If displayData is already populated, do nothing
    }
    if (error) {
      console.log(error); // If there's an error, log it to the console
      return;
    }
    if (result) {
      const accessToken = result.accessToken; // Access the accessToken property from the result object
      retrieveData("https://graph.microsoft.com/v1.0/me", accessToken) // Call the retrieveData function with the access token
        .then((response) => setDisplayData(response)) // Set the displayData state with the response data
        .catch((error) => console.log(error)); // Handle and log any errors
    }
  }, [displayData, error, result]); // Run this effect when displayData, error, or result changes

  return <>{displayData ? <ProfileData displayData={displayData} /> : null}</>; // Conditional rendering of the ProfileData component based on the displayData state
};
Here’s a sneak peek of the app showcasing user-specific details when signed in.
Displaying the Name of the Signed-In User
To enhance the user experience by displaying the name of the signed-in user in the UI, follow these steps:
- In
index.jsFile:
Import the necessary dependencies and set up an MSAL event callback to handle successful login events.
import { PublicClientApplication, EventType } from "@azure/msal-browser";

// Add an MSAL event callback to set the active account
pubClientApp.addEventCallback((event) => {
  if (event.eventType === EventType.LOGIN_SUCCESS) {
    console.log(event);
    pubClientApp.setActiveAccount(event.payload.account);
  }
});- In
WelcomeName.jsxComponent:
Import the necessary dependencies for accessing the application instance and managing the component state.
import { useMsal } from "@azure/msal-react";
import { useState, useEffect } from "react";
Define a state variable, username, to store the username of the signed-in user.
const [username, setUsername] = useState('');Use the useMsal hook to access the application instance (instance) created earlier.
const { instance } = useMsal();Inside a useEffect hook, set the currentAccount to the active account and update the username state variable. Ensure you include instance in the dependency array to watch for changes.
useEffect(() => {
  const currentAccount = instance.getActiveAccount();
  if (currentAccount) {
    setUsername(currentAccount.username);
  }
}, [instance]);
In the component’s return statement, display the username in the UI using the Typography component.
return <Typography variant="h6">Welcome, {username}</Typography>;A snapshot of the app revealing the username while signed in:

Error Handling
To enable error handling and logging with MSAL in your application, follow these steps:
Open index.js File:
- Within the
pubClientAppobject, include acacheobject with options such ascacheLocationandstoreAuthStateInCookie.These options help control how authentication artifacts are cached and managed.
cache: {
  cacheLocation: 'localStorage',
  storeAuthStateInCookie: false,
}- Include a
systemobject within thepubClientAppobject, and defineloggerOptionsfor logging configuration. This allows you to specify howMSALshould handle logs.
system: {
loggerOptions: {
loggerCallback: (level, message, containsPII) => {
console.log(message); // Define a callback function to handle log messages (in this case, logging to the console).
},
logLevel: 'Verbose' // Set the log level to 'Verbose' (providing detailed logs including debug information).
}
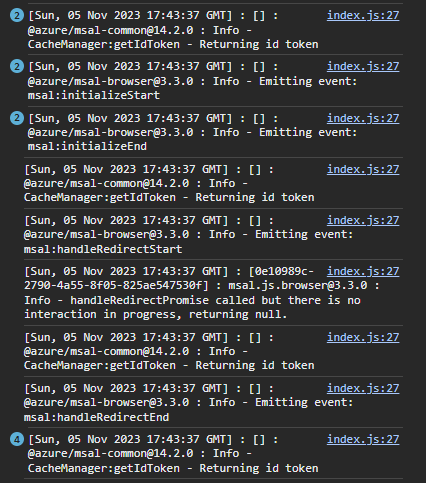
}With these configurations in place, MSAL will log interactions, errors, and other information in the console. You can use this information for debugging and monitoring the authentication process.
Please note that this setup helps you debug and monitor authentication-related activities and troubleshoot any issues that may arise during user interactions with Azure AD.
A preview of the browser console logging the interactions.
Handling authentication errors
To handle authentication errors and claims challenges in the MSAL app, follow these steps:
- In
index.jsFile:
Add the clientCapabilities option to the auth object. This option declares that the app is capable of handling claims challenges.
auth: {
  clientId: "5d804fed-8b0e-4c9b-b949-6020d4945ead",
  authority: "https://login.microsoftonline.com/consumers",
  redirectUri: "http://localhost:3000/",
  clientCapabilities: ['CP1']
},-
In
Fetch.jsFile: Add a function calledhandleClaimsthat checks the response for status codes.- If the status is 200 (indicating success), it returns the response as JSON.
- If the status is 401, it checks if the response header includes “authenticated.” If it does, it extracts the claimsChallenge from the header and stores it in sessionStorage.
const handleClaims = (response) => {
  if (response.status === 200) {
    return response.json(); // If the response status is 200 (OK), parse it as JSON and return the result.
  } else if (response.status === 401) {
    if (response.headers.get("www-authenticate")) {
      const authenticateHeader = response.headers.get("www-authenticate");
      const claimsChallenge = authenticateHeader
        .split(" ")
        .find((entry) => entry.includes("claims=")) // Find the entry in the authenticateHeader that contains "claims=".
        .split('claims="')[1] // Extract the part of the entry after 'claims="'.
        .split('",')[0]; // Extract the part before the next '"'.
      sessionStorage.setItem("claimsChallenge", claimsChallenge); // Store the claims challenge in session storage.
      return; // Return without further processing.
    }
    throw new Error(`Error $(response.status)`); // If there's no 'www-authenticate' header, throw an error.
  } else {
    throw new Error(`Error $(response.status)`); // If the response status is neither 200 nor 401, throw an error.
  }
};
Modify the fetch call to pass the response through the handleClaims function. This ensures that the response is processed to handle claims challenges or other errors.
return fetch(endpoint, options)
  .then((response) => handleClaims(response))
.catch((error) => console.log(error));- In
Profile.jsxComponent:
Add a parameter claims to the useMsalAuthentication configuration. This parameter is set to claimsChallenge stored in sessionStorage.
const { result, error } = useMsalAuthentication(InteractionType.Redirect, {
  scopes: ["user.read"],
  claims: sessionStorage.getItem("claimsChallenge")
    ? window.atob(sessionStorage.getItem("claimsChallenge"))
    : undefined,
});
These steps allow you to handle authentication errors and claims challenges in your MSAL app, making it more robust and capable of managing custom claims challenges during the authentication process.
Here’s a troubleshooting guide for addressing Microsoft Entra ID issues.
Conclusion
This comprehensive guide offers a step-by-step walkthrough of implementing authentication with MSAL-React. It equips readers to set up the development environment, configure MSAL-React, create sign-in and sign-out components, make authenticated API requests, and effectively handle authentication errors.
Detect, Fix, and Fortify
Spot abnormal user behaviors and iron out the bugs early with OpenReplay. Dive into session replays and reinforce your front-end against vulnerabilities that hackers search for.
Explore DevTools